Smiths Heater Refurbishment & Trial Fitting

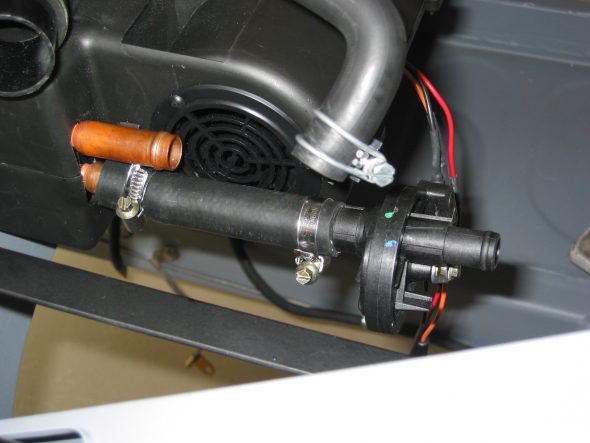
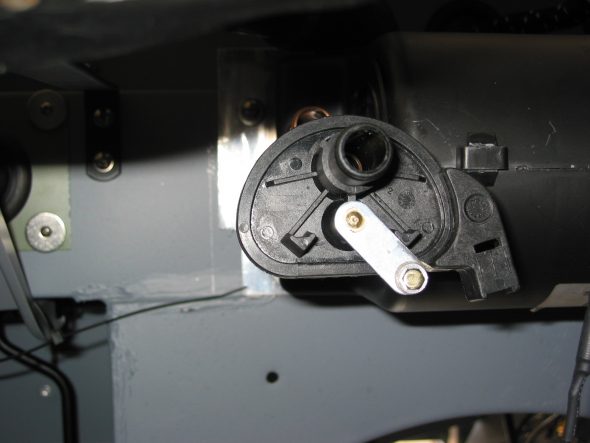
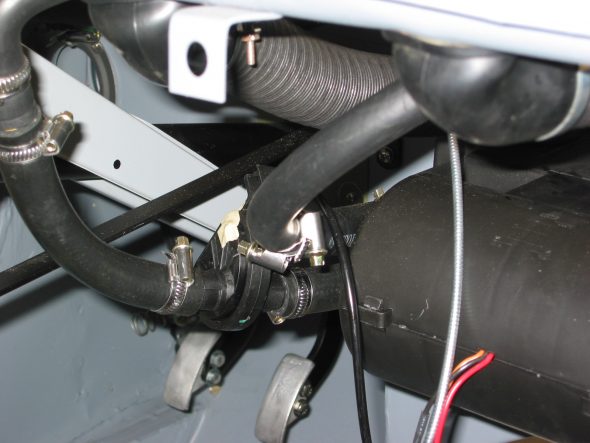
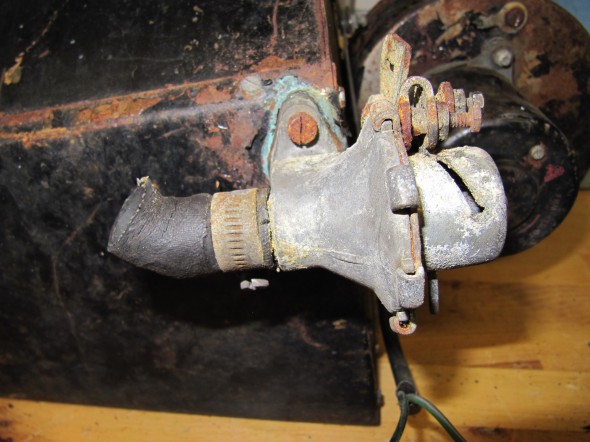
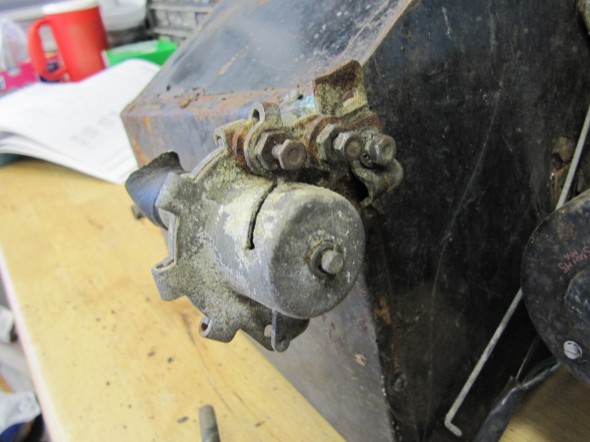
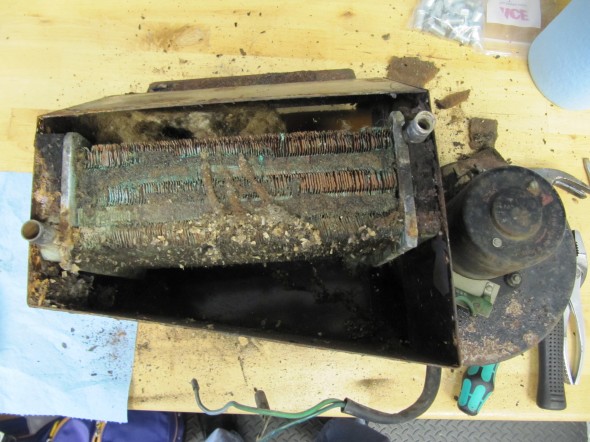
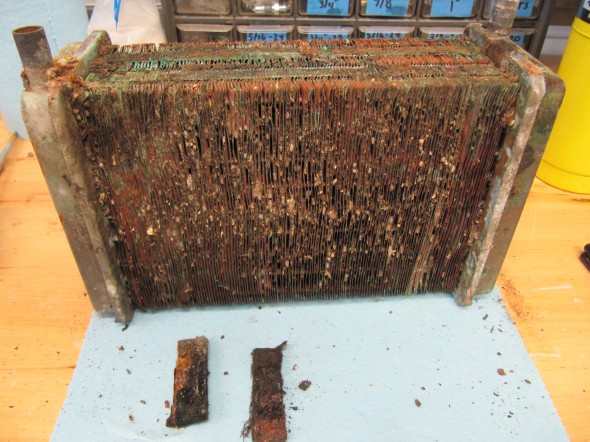
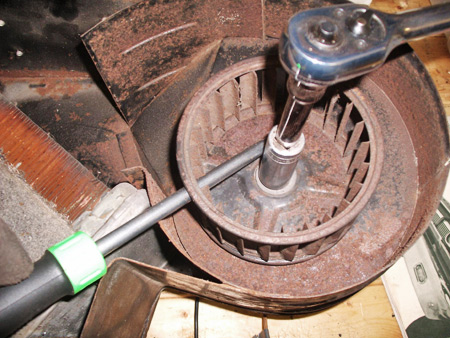
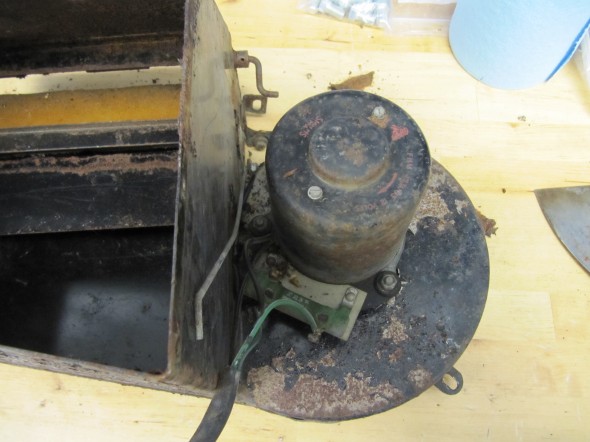
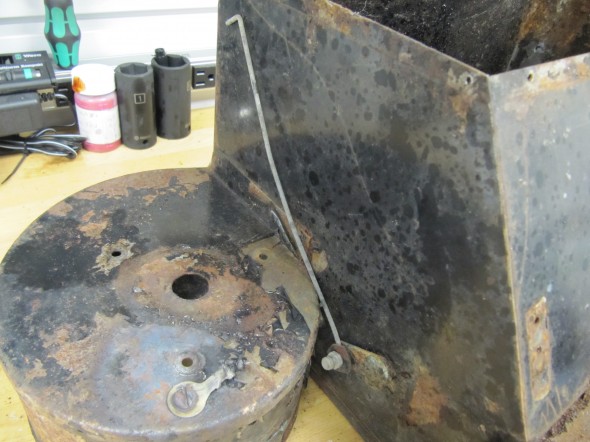
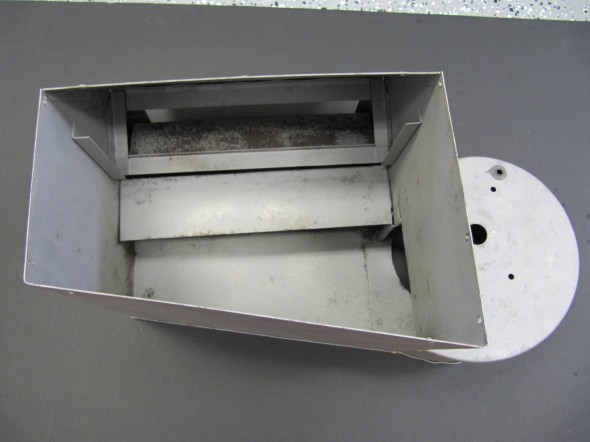
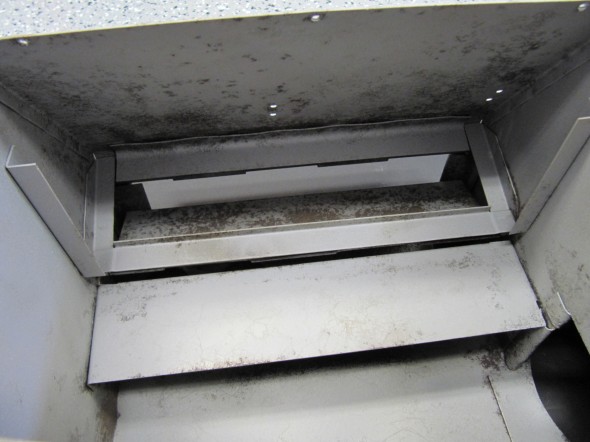
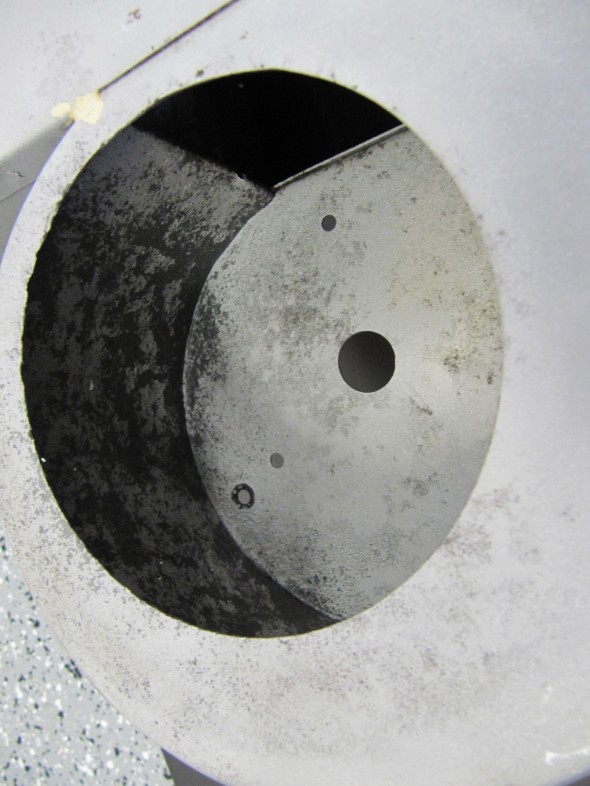
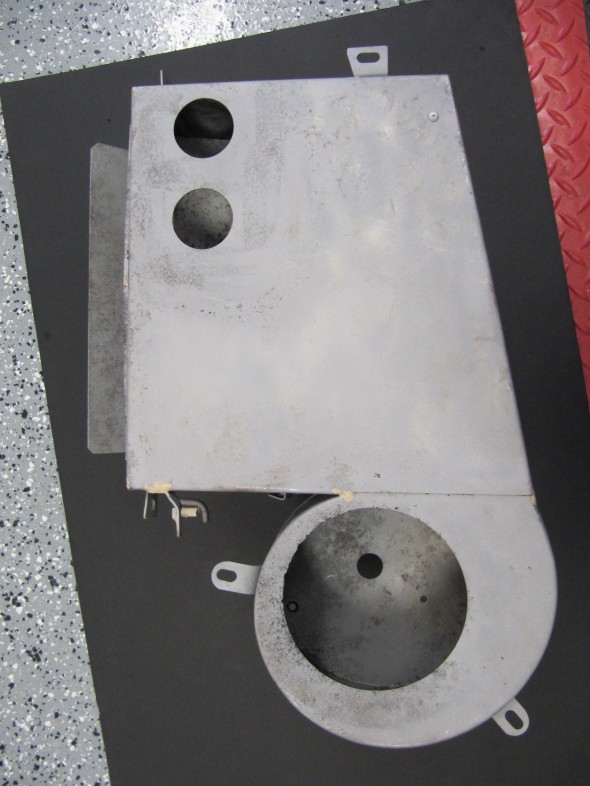
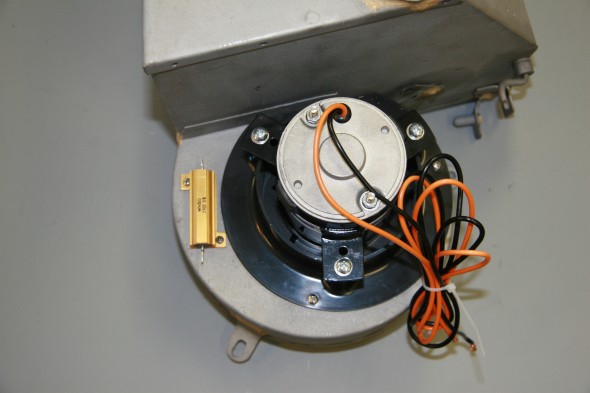
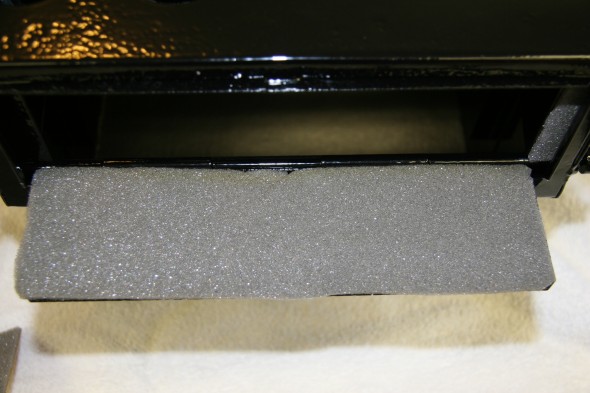
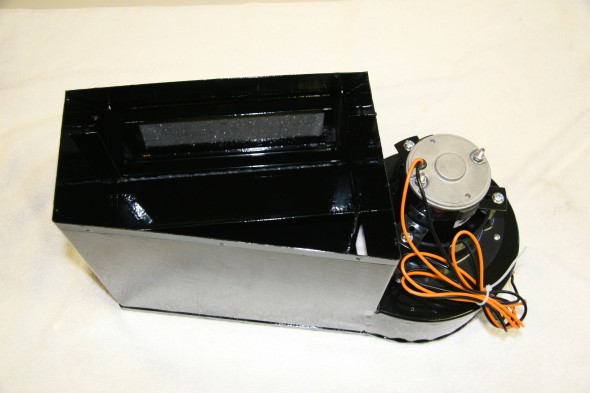
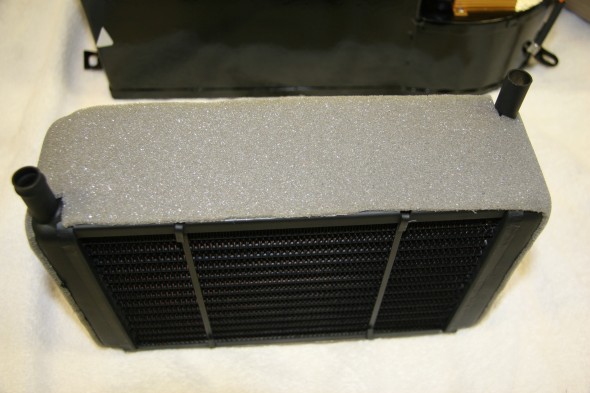
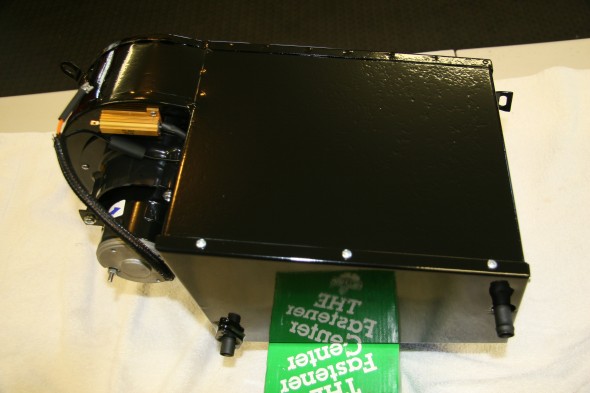
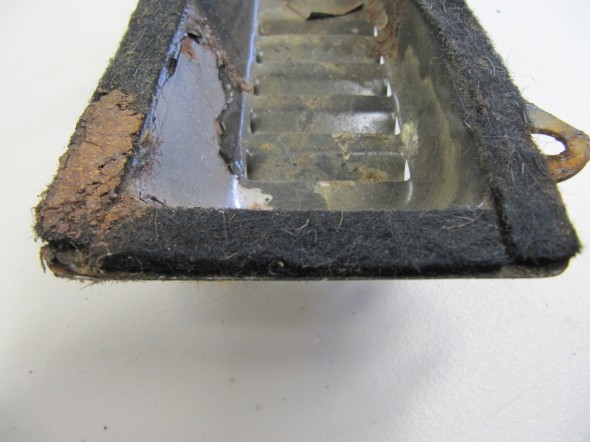
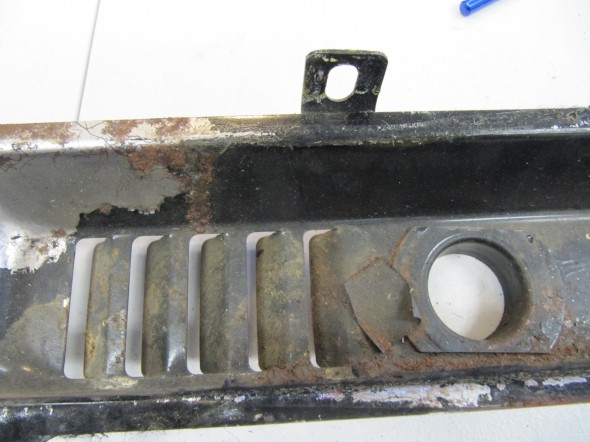
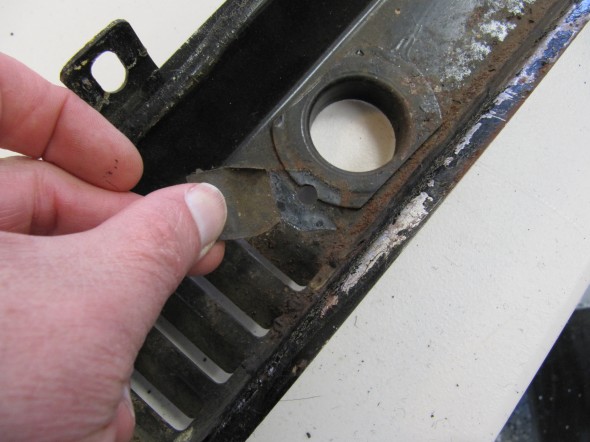
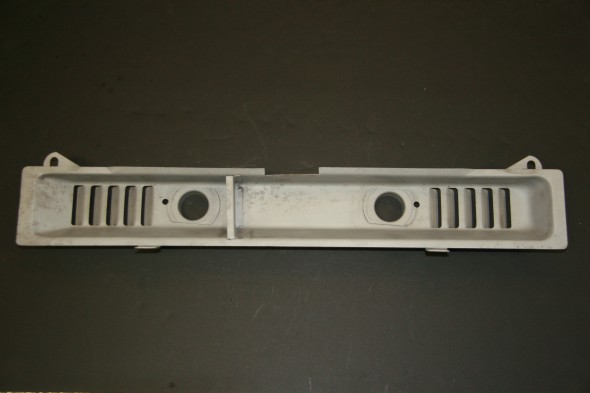
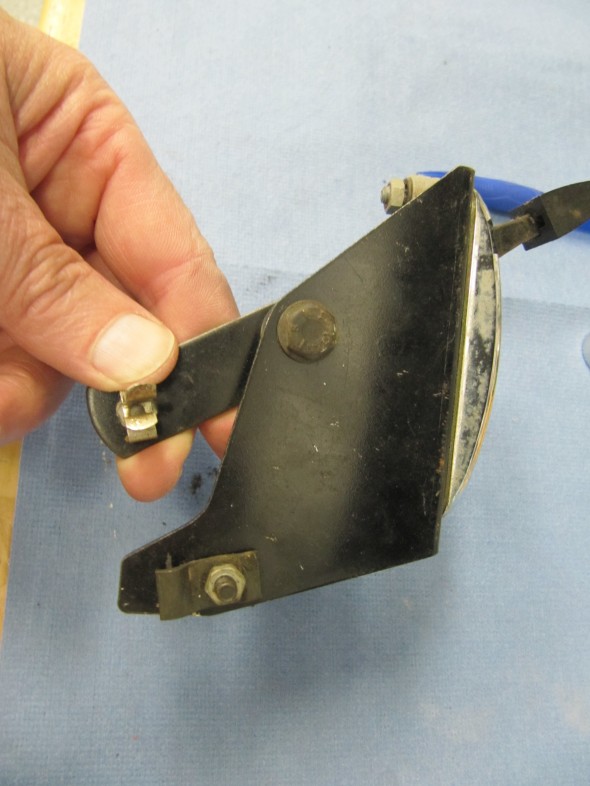
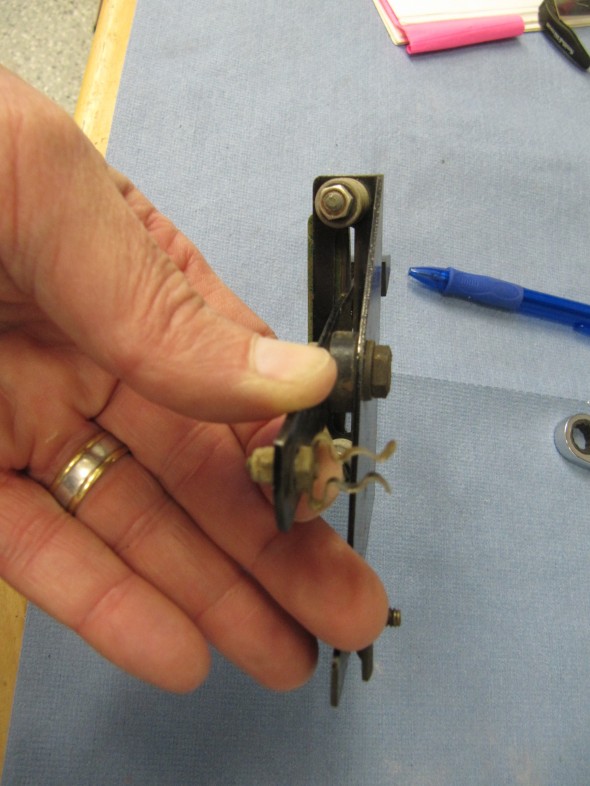
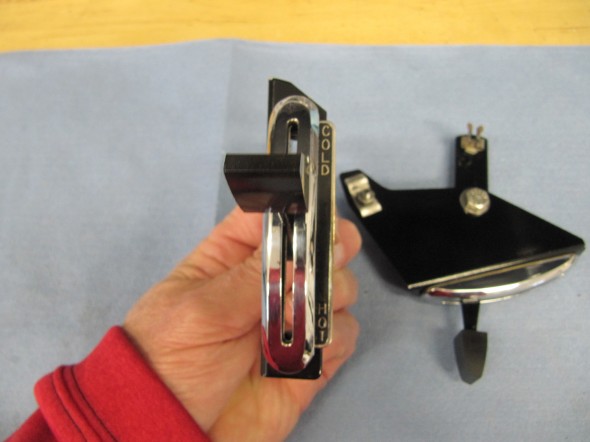
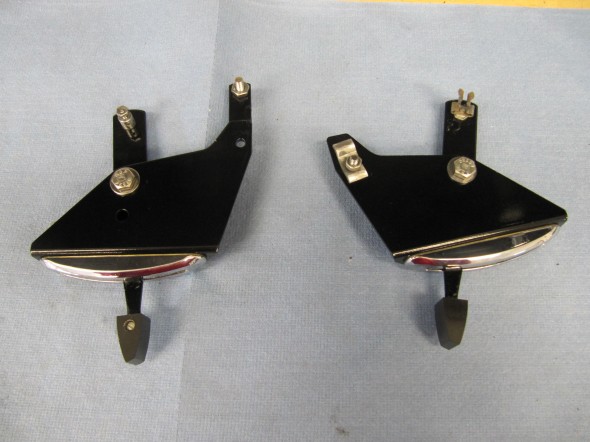
In a Bugeye engine bay, the Smiths heater box and blower are quite prominent so it is important that in addition to functioning well, they also look good! This Episode Forty-five video of the Bugeye Restoration shows the refurbishment process. The original plan was to use the heater box that was in the car, but in the end we decided to replace the box with a unit manufactured by Ashley Hinton in the UK. 

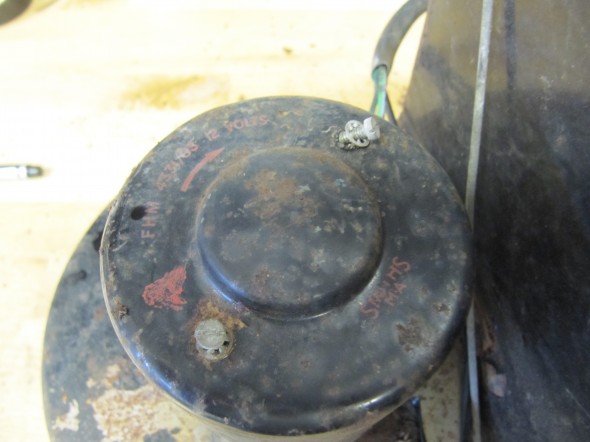
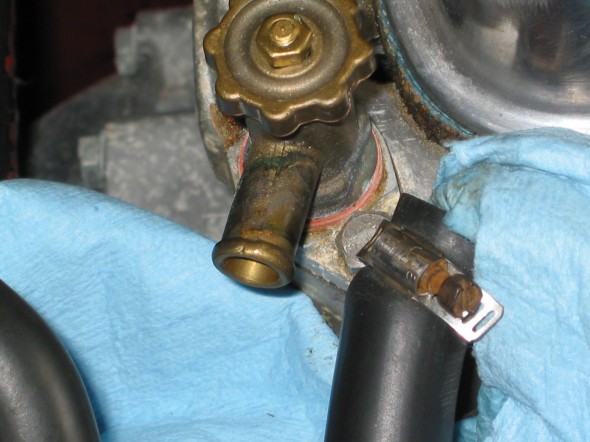
The matrix was flushed and checked for leaks and the blower motor was tested. The unit is now ready for installation in the car.

Bugeye Restoration Video Episode Forty-five: https://vimeo.com/860319039/8d4bcf8c4c?share=copy

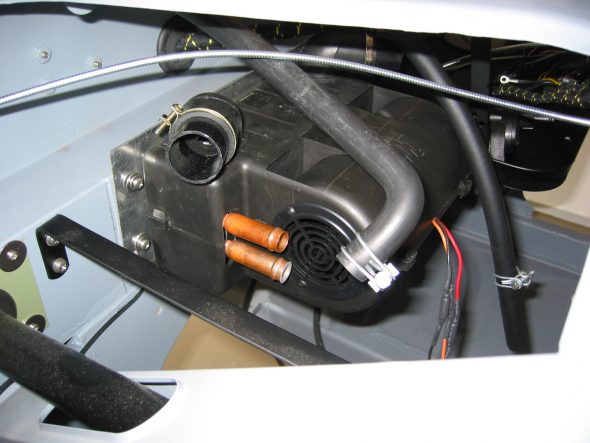
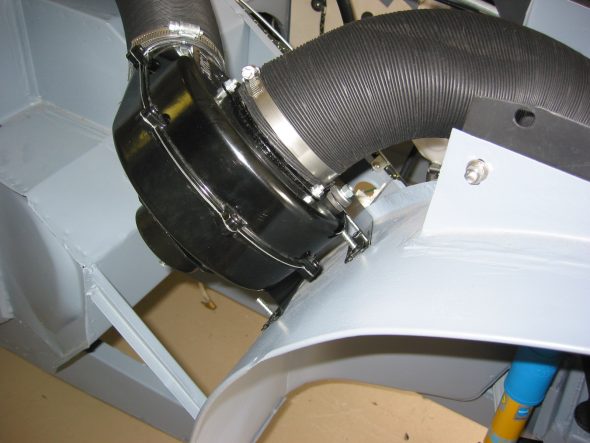
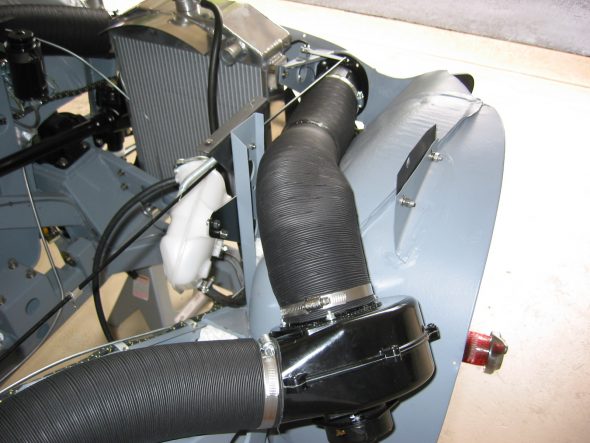
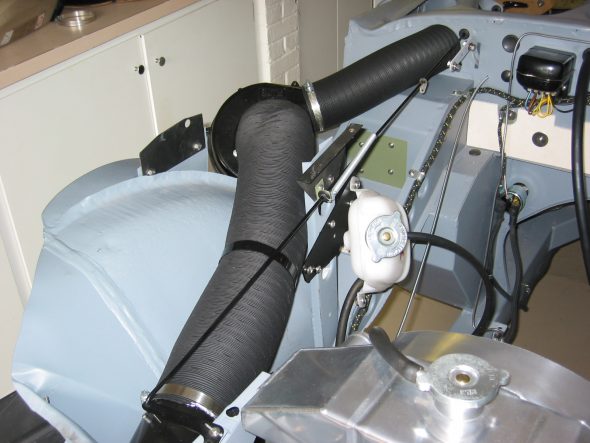
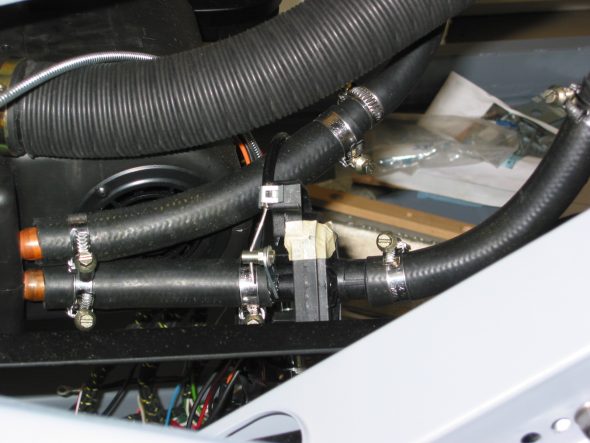
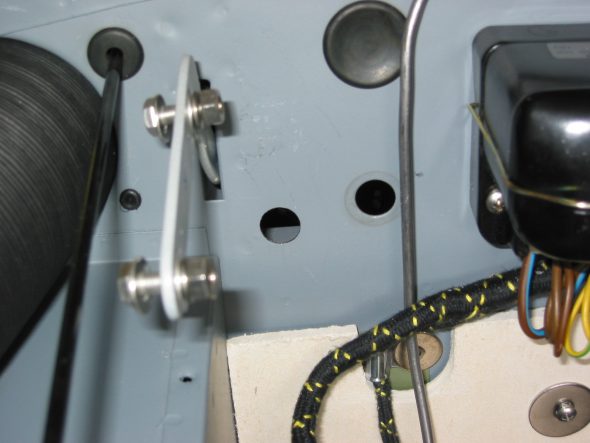
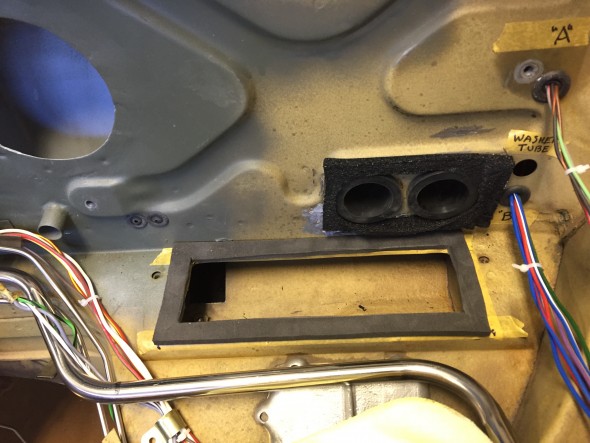
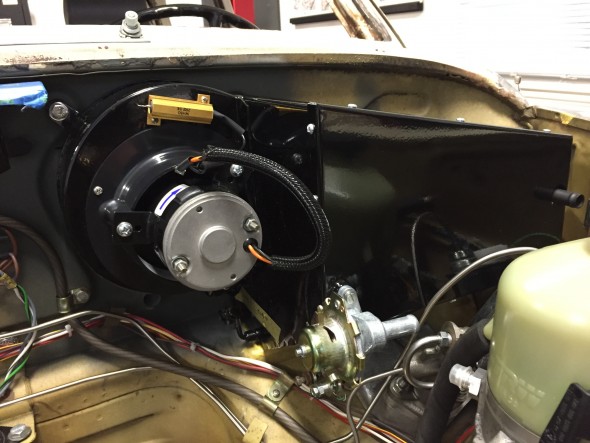
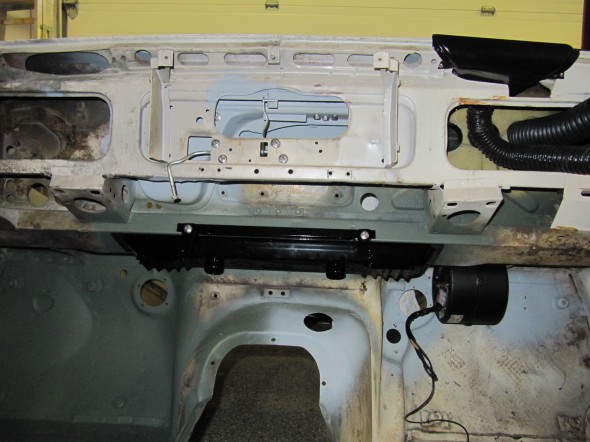
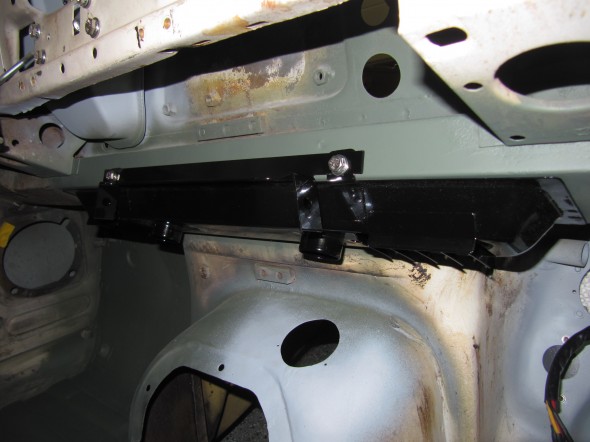
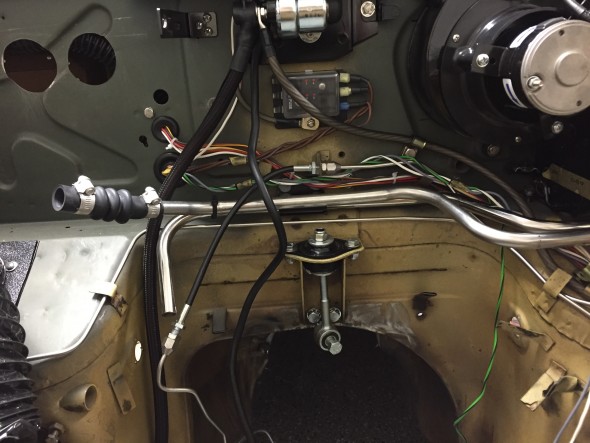
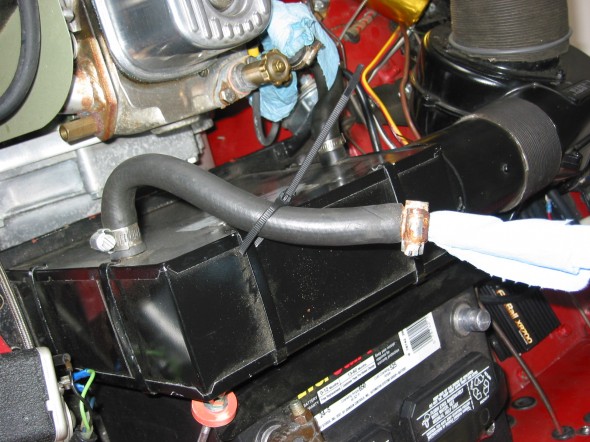
Upon initial fitting of the heater box it was quickly evident that the heater box was sitting too low relative to the blower fan unit. In our case we are using a blower unit that was originally in a big Healey, the heater box as previously stated is a new reproduction made by Ashley Hinton and the previous owner installed a new battery shelf so it is difficult to say where the misalignment may have originated. Perhaps a combination of all three!

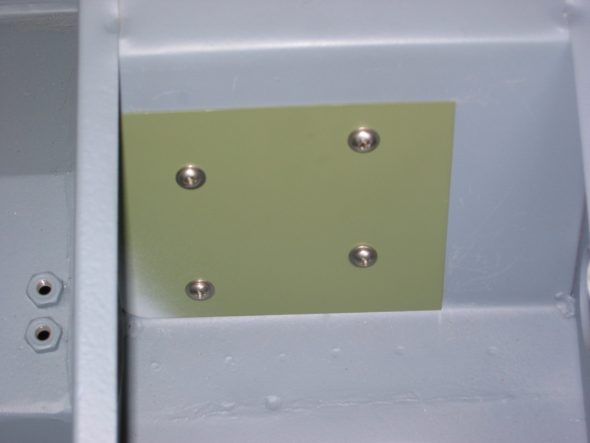
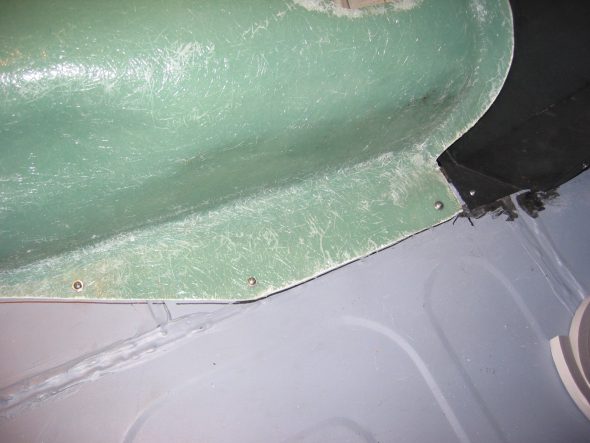
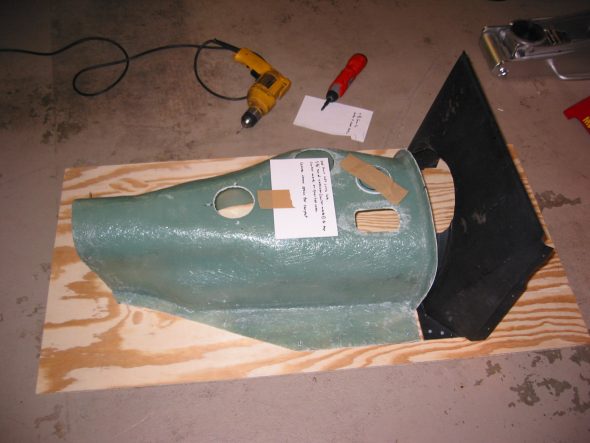
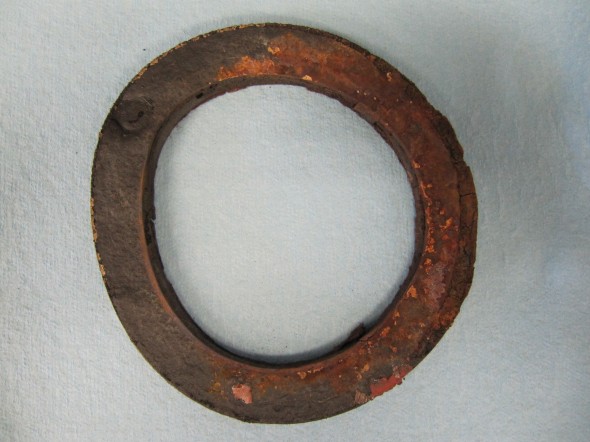
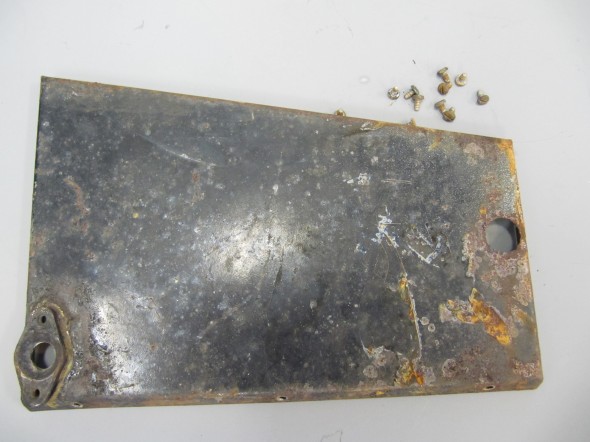
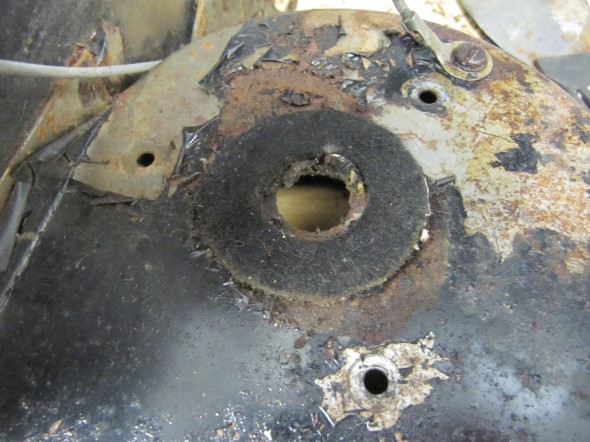
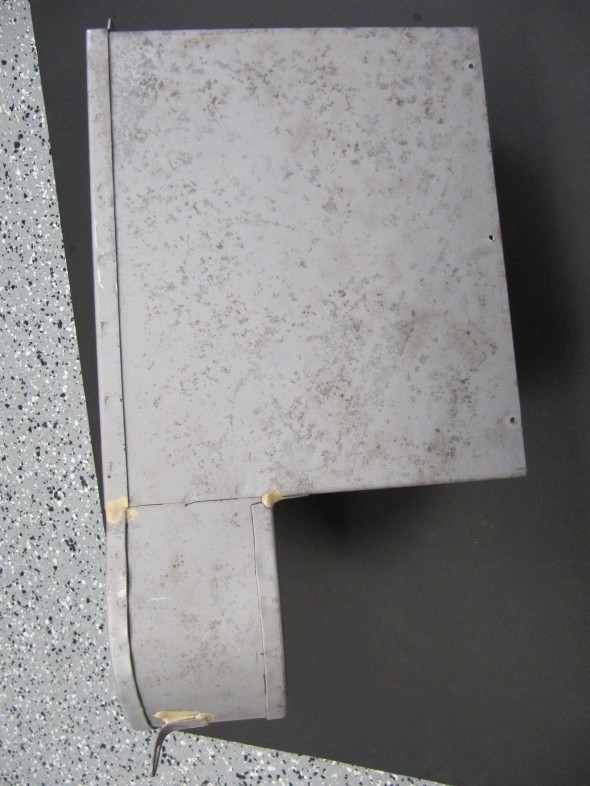
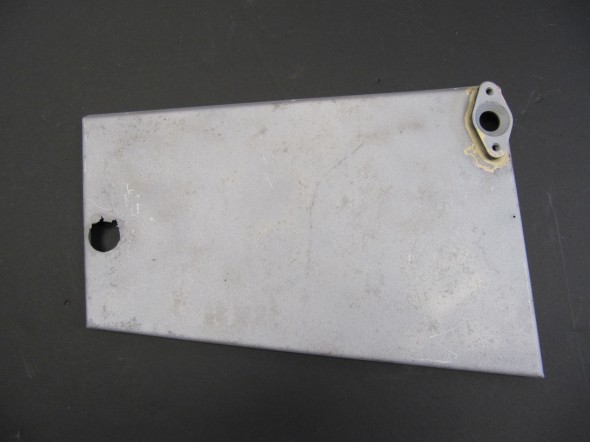
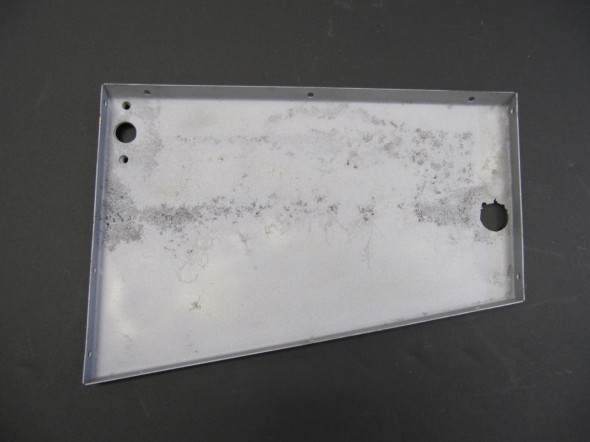
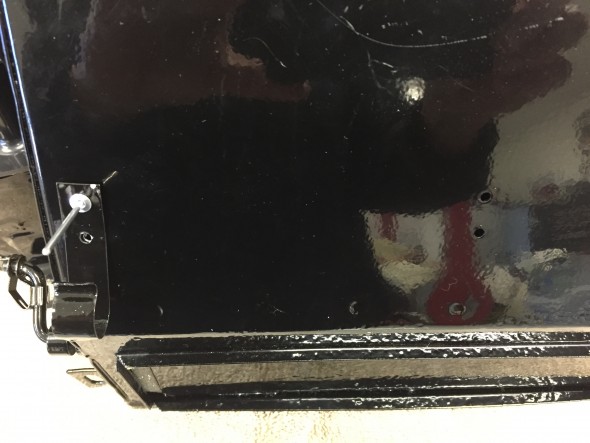
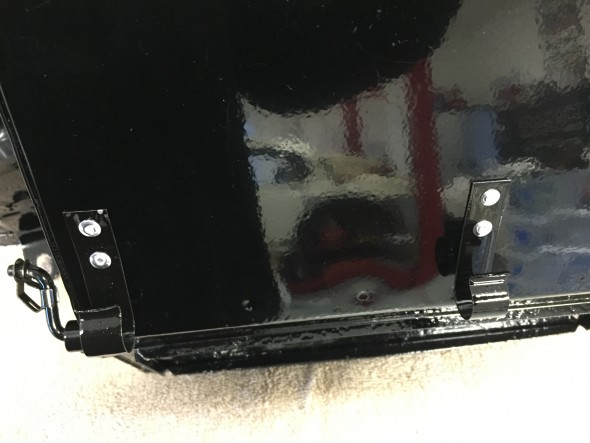
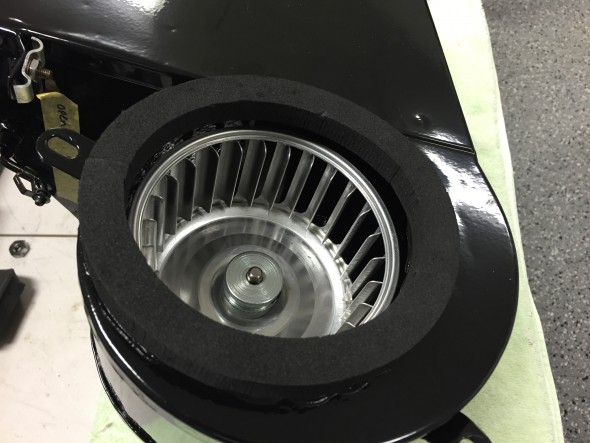
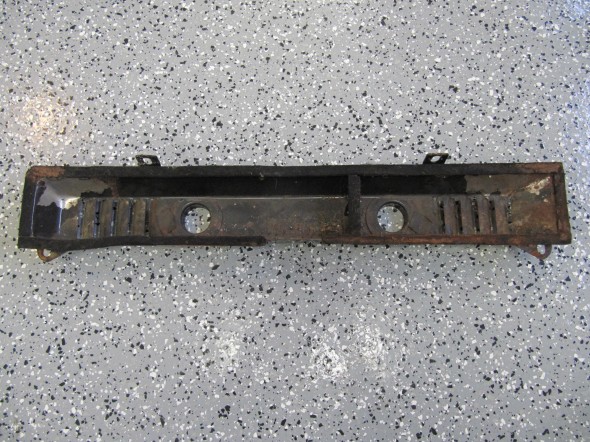
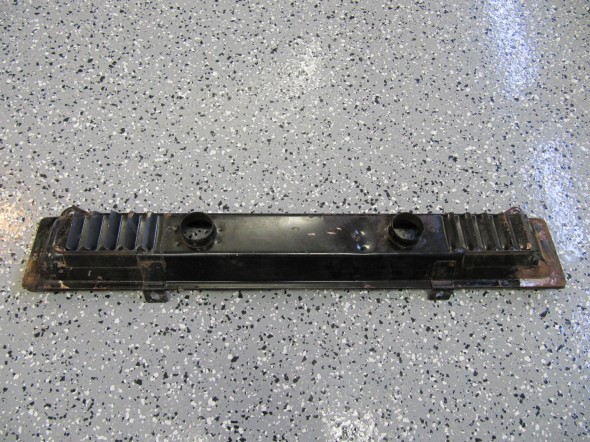
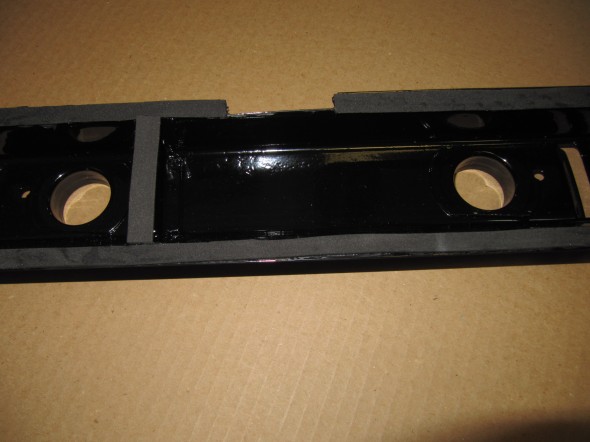
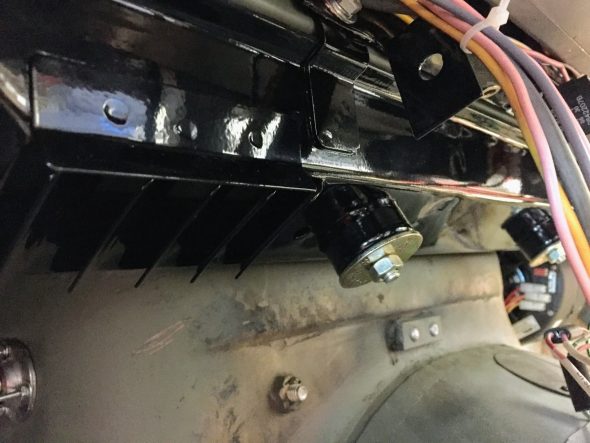
At any rate, we had some 1/8″ black ABS plastic sheet laying around the garage so we cut three pieces to size and then glued them together with ABS glue. We then used a 1 5/8″ drill hole saw and a saber saw to cut the air circulation hole in the center of the new shim plate. To this we attached 1/2″ closed-cell rubber adhesive-backed insulation and screwed the shim to the bottom of the heater box. We were then able to bring the components into alignment when mounted on the car.

ABS plastic shim

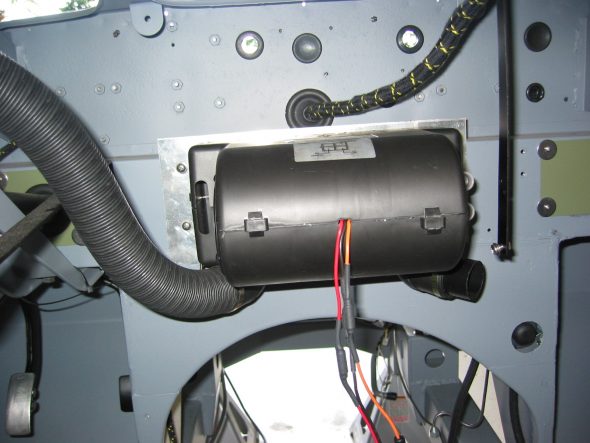
The dashboard heater switch was installed in the dash and connected to the blower fan. once connected to a 12 volt power source we were able to successfully test the switch and blower motor. 

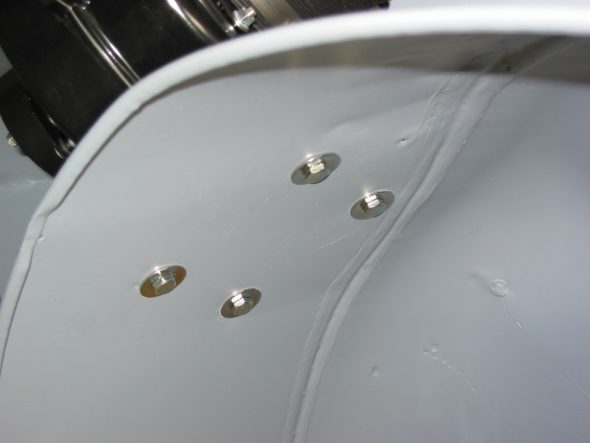
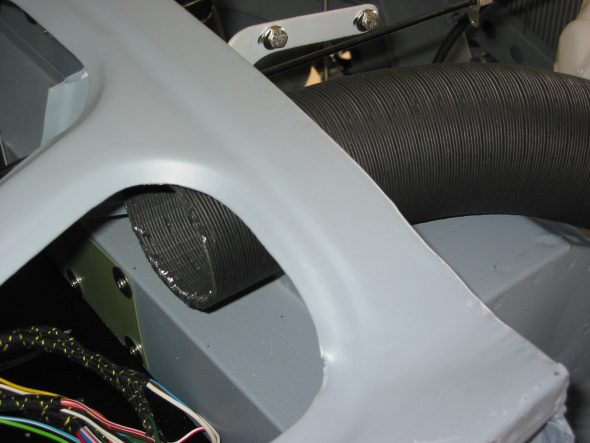
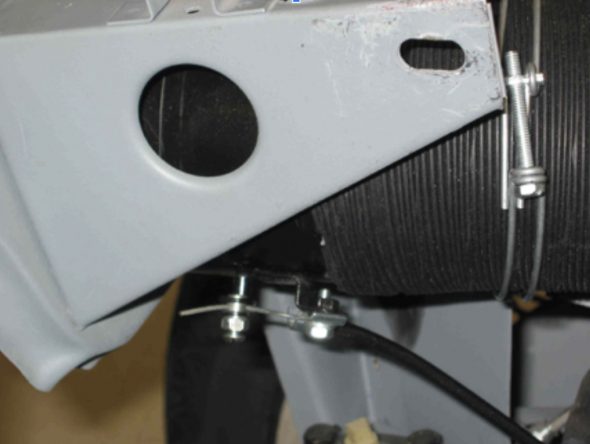
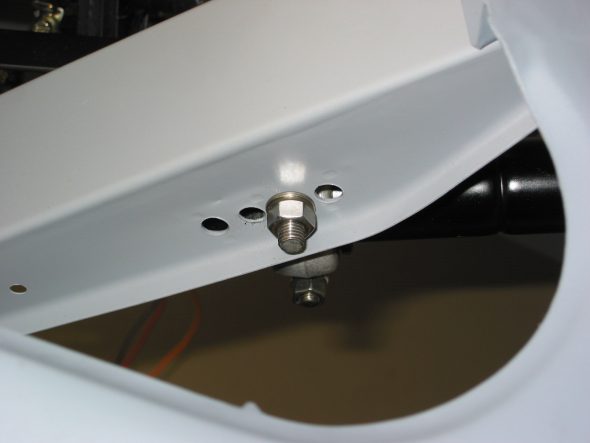
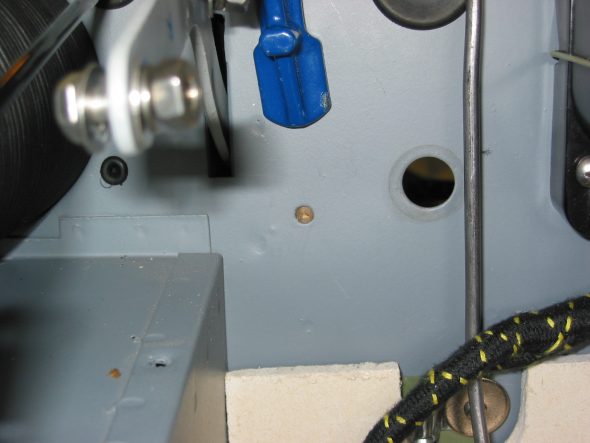
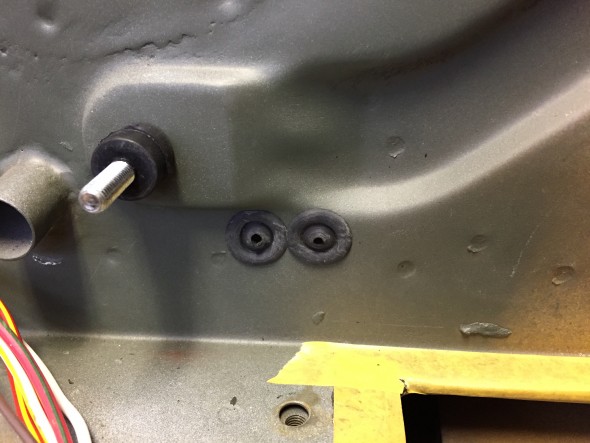
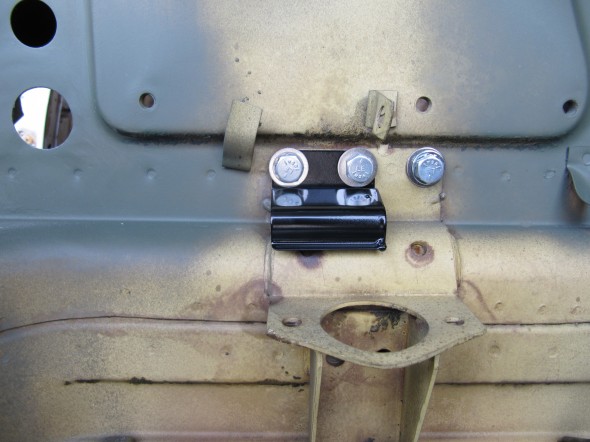
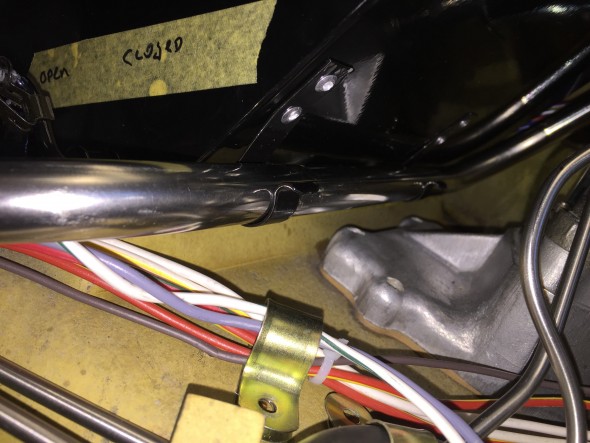
Finally, we installed a 10-32 nut sert into the RH engine bay valance to locate the large “P” clip for the heater/fresh air trunking. 

Bugeye Restoration Video Fifty-two shows the installation of the heater components in the car: https://vimeo.com/884518618/83d80549a4?ts=0&share=copy


Cooling/Heater

Managing the heat generated by the operating engine, whether in the engine itself, in the engine bay, or in the interior is an issue in the Big Healey. What may not have been an issue in more temperate Great Britain, is a different story in the U.S. Over the years Healey owners have gotten progressively better at managing the heat issues. I made a number of enhancements to The Bloody Beast to help with cooling or at least improved insulation from the heat.

 The Original Cooling System

The capacity of the cooling system, excluding the heater, is 21.6 U.S. pints. The original thermostat was 158 degrees.

Cooling System Modifications

Aluminum Radiator

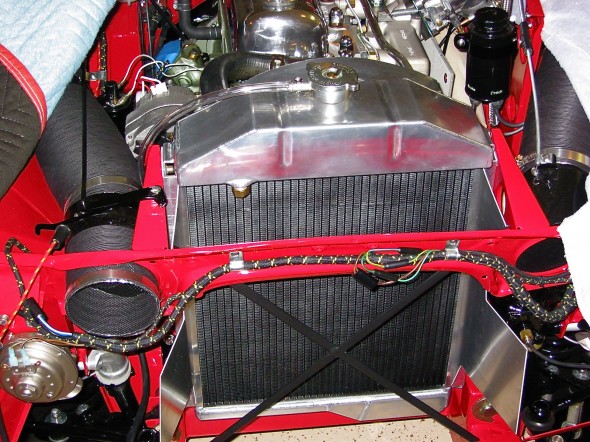
Recoring the original radiator with a more efficient tubing system is one option pursued by many enthusiasts, another is replacement of the original radiator with an aluminum alternative.  I chose the replacement route with an alloy radiator sourced from Cape International. In addition to the benefit of improved cooling, the polished aluminum header tank looks great in the engine bay! I painted the core with black radiator paint so that the “X” brace in the front of the car would “disappear” when looking through the grille.

Aluminum Radiator

Aluminum Radiator

Air-Intake Deflectors

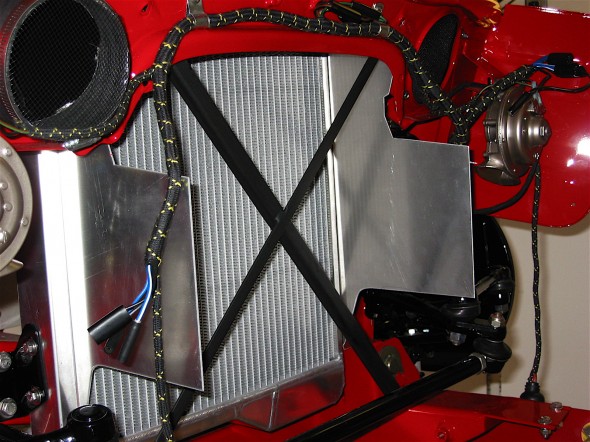
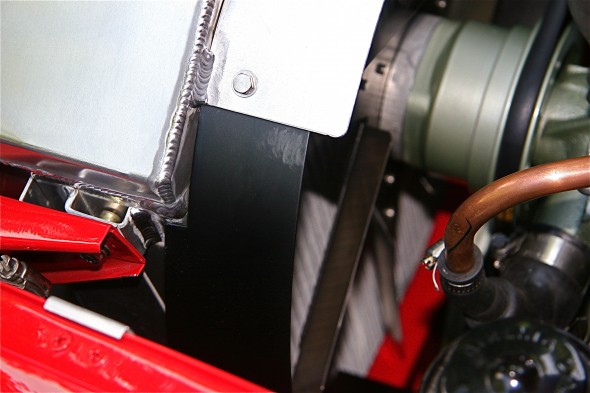
The Healey has a multi-piece air-intake deflector assembly as original equipment; however, I was not happy with the gap that exists between the assembly shrouds and the radiator. This permitted air to escape around the radiator into the engine bay. The original deflectors are also a bit of a pain to install. I decided to fabricate some deflectors from aluminum stock. After constructing cardboard patterns I had the aluminum bent at a metal working shop. The deflectors are slotted to fit alongside the radiator in the standard radiator mounts to the frame. The image below shows the fitting of the deflectors before the radiator core was painted. As you can see this produced a tight fit around the radiator sides – no air escapes now!

Radiator Baffles

Radiator Baffles

Upper Radiator Shroud

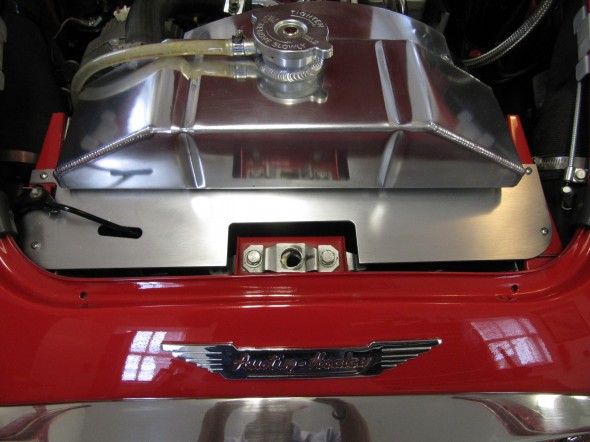
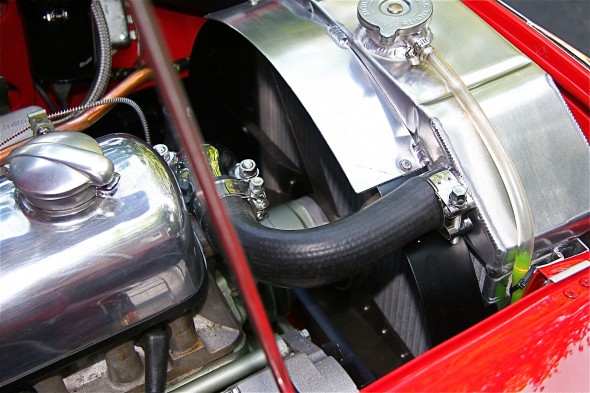
My friend, Mick Nordquist, had an upper shroud made for his Healey radiator to keep the air coming through the grill directed to the radiator rather than escaping over the radiator. He supplied the pattern for me and I had one cut with a plasma cutter from 2mm aluminum plate and installed it with four stainless steel #8 self-tapping screws. In addition to improving cooling, I think it also offers a nice cosmetic improvement.

Radiator Top Shroud

Radiator Top Shroud

Coolant Recovery System

The original cooling system design provided for no ability to capture coolant whether just an expansion tank or a true pressurized recovery system. Healay owners, particularly if they have filled their radiators to maximum capacity are use to their car’s “burping” in the parking lot after being driven. I purchased my coolant recovery system components from Cape International.

Coolant Recovery System

Coolant Recovery System

Six Blade Stainless Steel Fan with Spacer

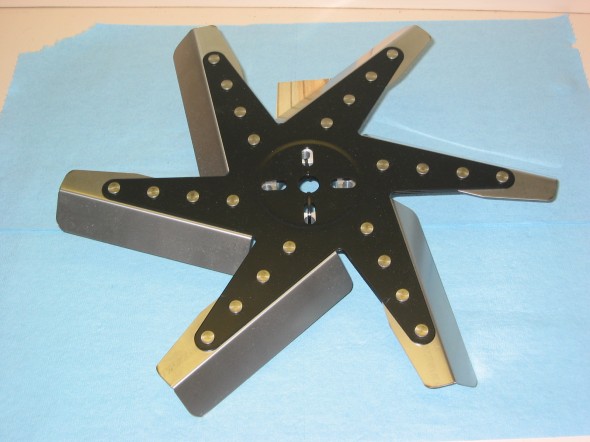
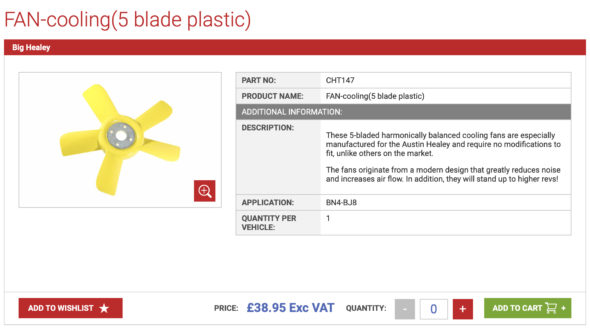
A number of alternatives to the original fan are available to the Healey owner today. The “Texas Cooler” and the variable pitch stainless steel fans are probably the most popular. I initially decided to go with the stainless fan available from British Car Specialists. However, the fan is pretty noisy so I switched the fan in 2020 for a nylon/plastic asymmetric fan similar to the “Texas Cooler” fan. The new fan was sourced from AH Spares. Time will tell but the new fan seems to keep the engine temperature under control and it is quite a bit quieter than the stainless steel fan.

Stainless Fan

Stainless Fan

AH Spares Fan

Fan Shroud

The custom air deflectors improved air control on the intake side of the radiator. To help channel the air on the fan side of the radiator and to add a safety component (those stainless fan blades are very sharp!!) I added a two piece shroud also available from British Car Specialists. It did not fit exactly as it would to the stock radiator, but a little tinkering and it fit beautifully. Since it was added after the restoration of the Bloody Beast was completed, I can say that the shroud was definitely responsible for some additional temperature reduction.

Radiator Shroud

Radiator Shroud

Radiator shroud

Radiator shroud

The Original Heater/Interior Cooling

The original heater was a Smith’s hot water circulating unit, part # 8G9048. It was assisted by a fan blower secured to the right front wheel arch assembly. Fresh air was supplied to the driver’s side of the interior by a 4” paper/metal hose controlled by a fresh air assembly mounted at the front of the car.

Heater/Interior Cooling Modifications

Sealing all of the holes in the firewall is the first thing to be done if one is to keep the heat and fumes out of the interior. A helpful tip someone shared with me was to wait until dark and put a light in the engine bay. This way any holes or leaks can be easily spotted from the interior.

Dynamat Extreme and Aluminum Duct Insualtion

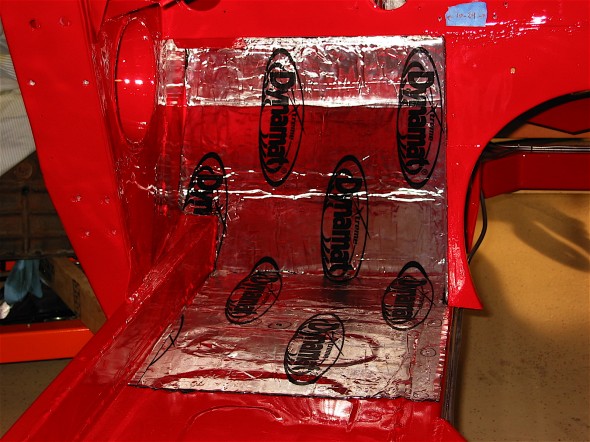
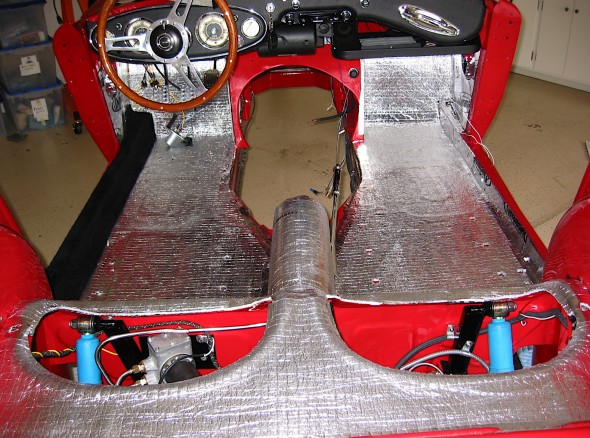
A number of products are on the market to help reflect heat and offer both heat and sound insulation. Dynamat Extreme is certainly on of the most popular. I applied Dynamat Extreme heat reflective and sound insulation material to my interior first. I then applied aluminum duct insulation on top of the Dynamat and under the carpet. All seams were sealed with aluminum tape. These two together have proven to be very effective in keeping the heat out!

Dynamat Extreme

Dynamat Extreme

Aluminum Duct Insulation

Aluminum Duct Insulation

Modern Heater

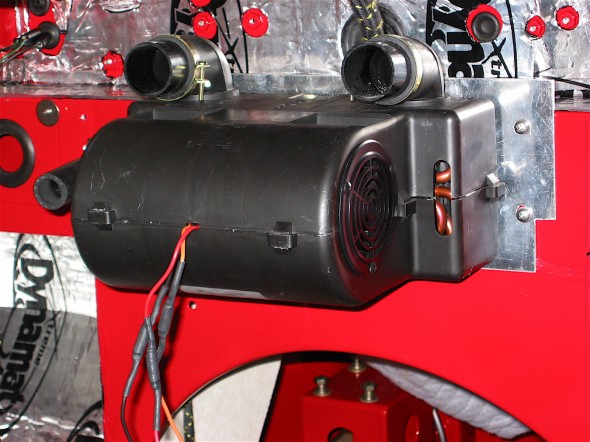
For those (rare) occasions when I would choose to have more heat in the interior spaces, I chose to replace the Smith’s Heating unit with a contemporary unit supplied by Cape International. This unit has an internal two speed fan.

Cape International Heater

Cape International Heater

Fresh Air Supply

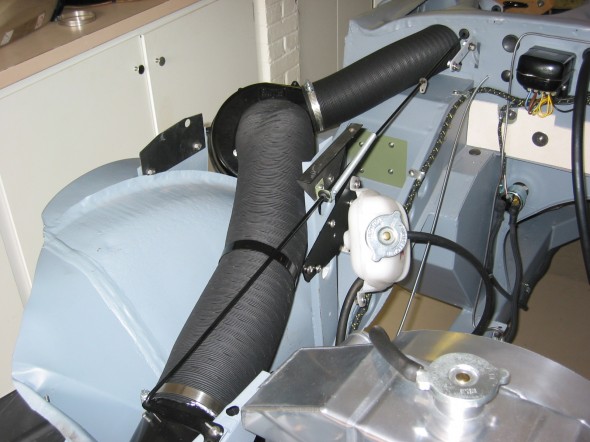
The original design of the car provided for some fresh air being delivered to the LH driver’s side of the car. Given that the Cape International Heater has its own fan, that left the original Smith’s blower to be used to blow fresh air into the passenger side of the car. I installed an air intake valve (upside down) just like the one on the LH side of the car, on the RH side, and then wired the blower to provide fresh air on the passenger side when desired. To be honest, I have found this to be useful for some ventilation when one has the hardtop in place, otherwise I am not sure that it was worth the effort! There are more details about this project in the restoration blog.

Ventilation Hose Assembly

Ventilation Hose Assembly

zz

Chapter 42 Restoration Assembly, Week Nine 2/12/2007

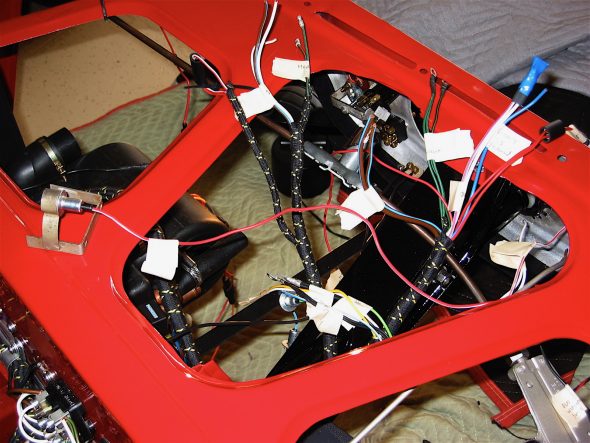
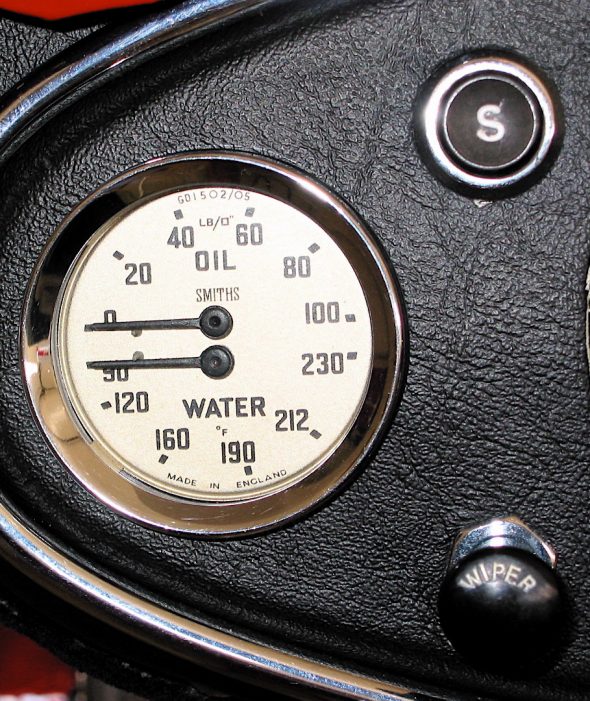
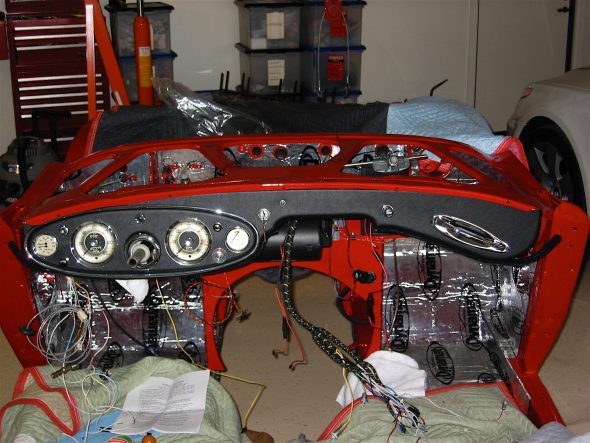
I began the wiring of the dash instruments, gauges and switches with the water temperature and oil pressure gauge and moved across the face of the dash from left to right with the exception of the speedometer and tachometer which were left until the end. The openings for these two instruments provide access to the back of the dash.

Spaghetti

The gauges/instruments were all rebuilt by MOMA and they did a beautiful job.

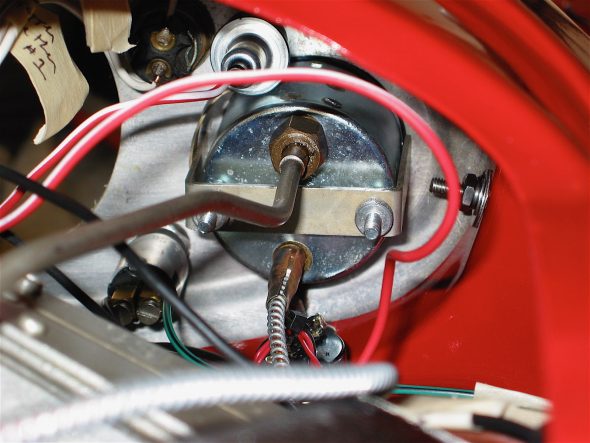
Before connecting the oil pressure gauge I inserted a new small leather washer that prevents oil from dripping on the driver’s leg! The washer was available from British Car Specialists. 

The following is a summary of the wiring connections I made. Although this worked successfully for me, in no way do I suggest that this listing is a substitute for the diagram in the workshop manual. Anyone wiring their own vehicle should consult the manual for proper direction.

Ignition Switch #22 – Brown/Blue wire to right terminal #1; two white wires to the left terminal #2, twist together.

Ignition wiring

Tachometer – Yellow and White wires to the tach light bulb; black double wire is the ground for the tach.

Fuel Gauge  #32 – Two solid green wires to terminal B; one green/black wire to the T terminal; red/white wire to fuel gauge light bulb.

Light Switch #25 – Blue wire to the S2 terminal; two brown/blue wires to the A terminal twisted together. The wiring to this switch was modified to permit the intermittent wiper control module to also turn on the lights when the wipers are activated. This simply required running a blue wire from the module’s relay to the S2 terminal, and running an additional brown/blue wire from the relay to the A terminal on the light switch. Details on this assembly were provided in the week eight blog installment. I also installed an in-line fuse into the red wire leaving the S1 terminal.

Overdrive Switch #39 – See the details in Heater switch below.

Flasher Warning Light #24 – Light green wire bulb

Speedometer #30 – Light blue/white wire light bulb. Two black wires to ground.

Wiper Switch #27 – These connections are modified to accommodate the intermittent wiper control. The white/yellow wire from the wiper control module is connected to terminal #1 on the dash wiper switch (replacing the black/green wire.)

The black wire from the wiper control module is twisted together with the black wire from the wiring harness and connected to terminal E of the wiper switch.

Starter Button #23 – two white wires twisted together to terminal #1; one white/red wire to terminal #2.

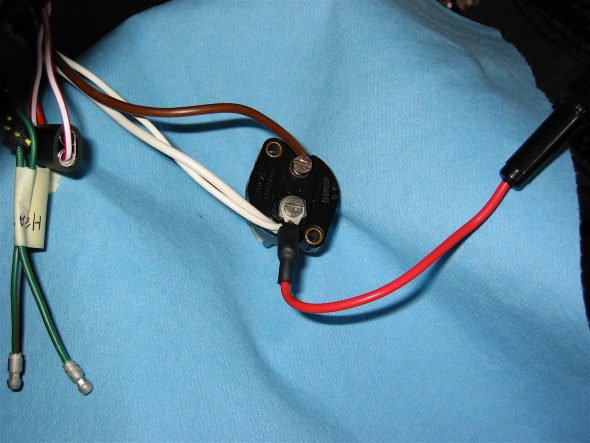
Water/Oil Pressure Gauge – red/white wire light bulb

temp & oil pressure gauge

temp and pressure gauge

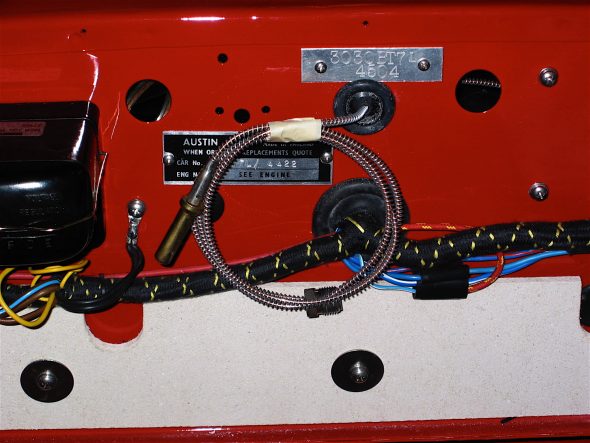
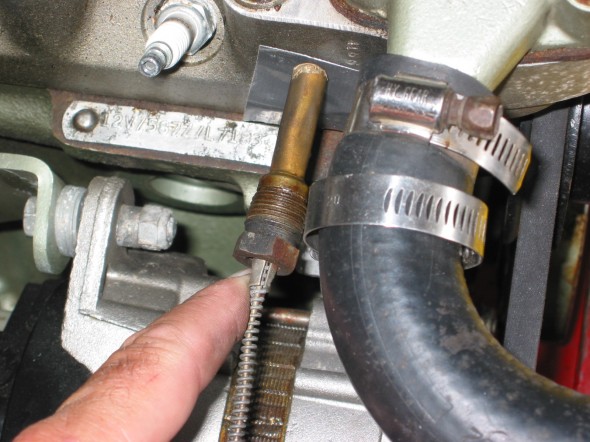
capillary tube for water temperature

Panel Lamp Switch #34 – I decide to leave the panel lights on all the time which made the panel light switch available to be used to control the auxiliary driving lights.

Panel Switch 2

The single red and double red/white wires originally screwed to the panel light switch were connected together with bullet connectors and a double rubber connector sleeve.

panel lights linked

The ground is used in the auxiliary light wiring system to complete or break the circuit. A black wire from the relay is connected to the panel lamp switch and then a black wire is connected from the other terminal on the panel lamp switch to a ground connection on the firewall.

Heater – I am using a “modern” heater to replace the Smith’s unit under the dash. The new unit was available from Cape International. It uses a two speed fan that is internal to the unit. The Overdrive Switch is not used for that purpose on my car since I am using a Smitty conversion Toyota 5-speed gearbox. Therefore, I replaced the switch with a DPDT switch and used it for the heater control. The red wire (high speed) was fastened to one terminal of the switch, the orange wire (low speed) was fastened to the terminal on the other side of the switch, and the yellow wire from the supplementary fuse panel was connected to the central terminal on the switch to provide power to the unit. So I ended up with a convenient heater control without having a change in appearance of the dash or locate a switch in some hidden place.

Smith’s Heater Blower Fan – Since the new heater contained its own fan, the Smith’s Blower was available to be used as a blower for fresh air to the passenger (right side) compartment. I will discuss it further when I come to the installation of the new fresh air supply components.

Heater Switch #26 – The green/brown wire to the black bullet wire connector on the switch. The green wire to the black bullet wire connector on the switch.

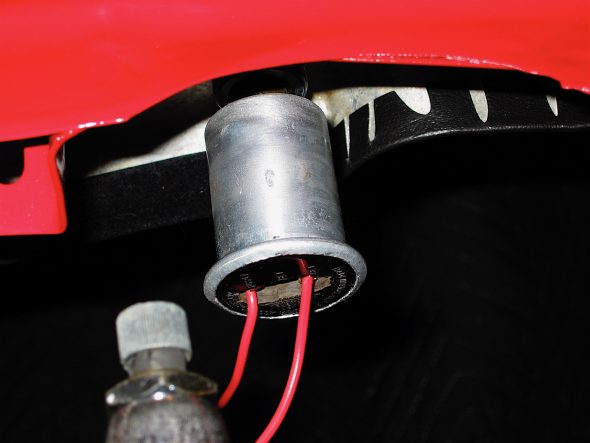
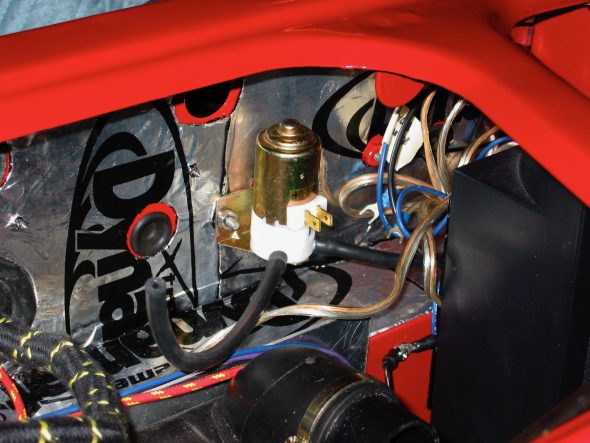
Windscreen Washer Pump – I read a technical article by Stu Brennan, an owner of a Sunbeam Tiger, who had converted his hand activated pump windscreen washer to an electric washer. I like the idea because he put the electric switch in the aluminum canister thereby eliminating the need to install an additional switch somewhere. Since the washer in the Tiger is the same as the one in the Healey, I decided to give it a try. These links provide Stu’s instructions for his car and my interpretation for the Healey. The fused red wire is connected to the purple switched wire from the supplementary fuse panel. The other red wire from the washer canister connects to the washer pump. Elect Washer Pump Comp and Rose Elect. Washer Pump Comp.

electric windscreen washer 2

Washer Pump


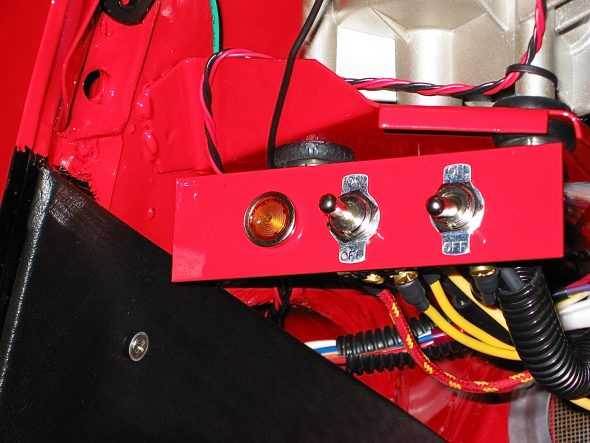
Toggle Switch Panel – Try as I did, I could not find enough places to provide switch controls in original mountings (overdrive switch and panel lamp switch as examples) for every accessory or modification that I wanted to add, so I made a small panel out of aluminum stock  (1 1/4″ L stock) to house two toggle switches and an indicator light for the auxiliary lights.

Toggle switch plate

I mounted the switch panel to the front two screw posts for the wiper motor. I will still successful in mounting the switches without drilling any new holes in the car! The bracket is painted red to make it less obvious, although it is concealed pretty well anyway.

One of the toggle switches will be used to override the remote control for the interior/boot courtesy lamps. Using the remote “clicker” the lights stay illuminated for only 40 seconds, but the toggle switch can be flipped “on” to leave the interior lights on until flipped “off.” The second toggle switch will be used to activate the redundant fuel pump when needed. In the “up” position the original-type SU pump is activated. In the “low” position the second Carter pump is activated. In the center position neither pump is activated – a good ani-theft device!

Finally, an alert lamp is include in the panel that notifies the driver that the auxiliary driving lights are on.

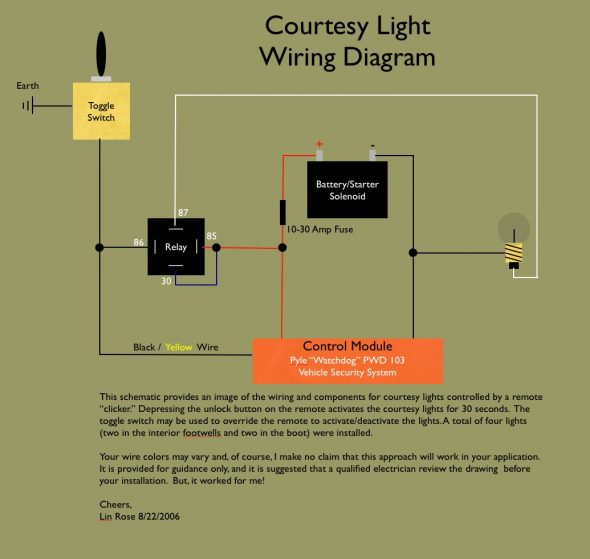
Interior Courtesy Lamps – Purists will get another chuckle out of my addition of remote control courtesy lamps in the footwells of the interior and in the boot. Again, I did not want to drill any holes in the car for door jam switches so I thought, “why not use electronic remotes used in modern cars to unlock doors, open boots, and set off alarms to activate the lamps?”

Courtesy light right

The remote control system I acquired from Pyle was about $40.00. It included two remote “clickers,” the control module, and the wiring. I grossly underutilized all that the Pyle system makes possible, but I was after simplicity. I just cut off all the extra wires, but I can imagine a few other very practical uses. The button on the remote typically used to unlock the car (obviously not needed on a BT7 roadster) is now pushed to activate the interior/boot lamps. As I approach the car at night, I can click the remote and my interior lamps will come on for 40 seconds and they extinguish on their own with not other action required. As noted above, a toggle with is also wired-in to control the lamps.

Courtesy Light Install

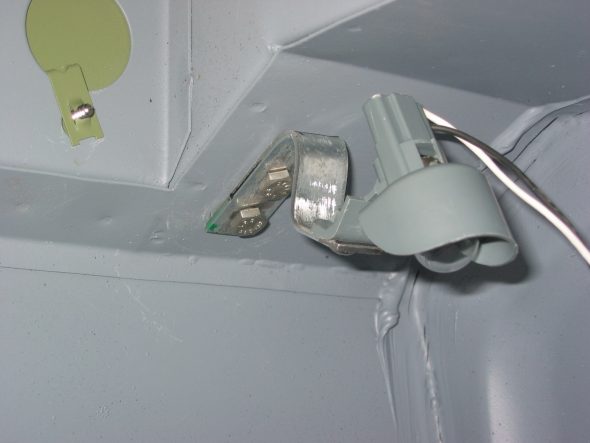
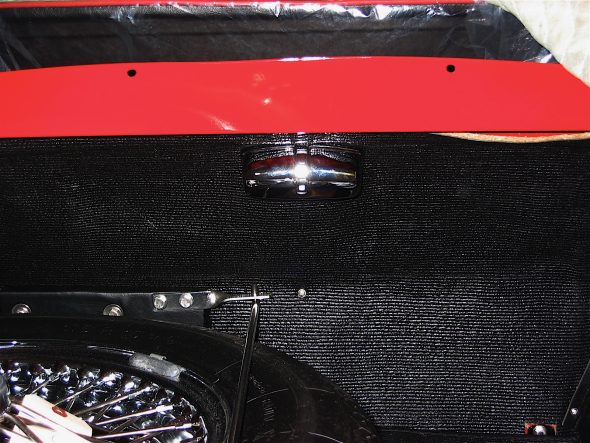
The lamps are some fairly primitive incandescent fixture purchased from Victoria British, part #15-642, but sine they are not easily seen I was not too concerned about their physical appearance. I made some simple brackets and mounted them in the footwells on each side of the car, along with the control module and its relay. Again, placement of the lights was determined by available mounting points so additional holes in the car were not required. A boot light adapted from a period license plate illumination lamp was also installed.

Boot light

dash fascia


Chapter 20 – Cleaning and Trial Fitting

July 3, 2004

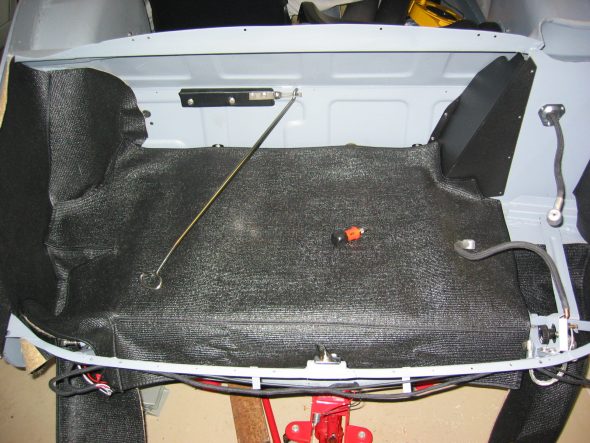
Boot Armacord Liner 

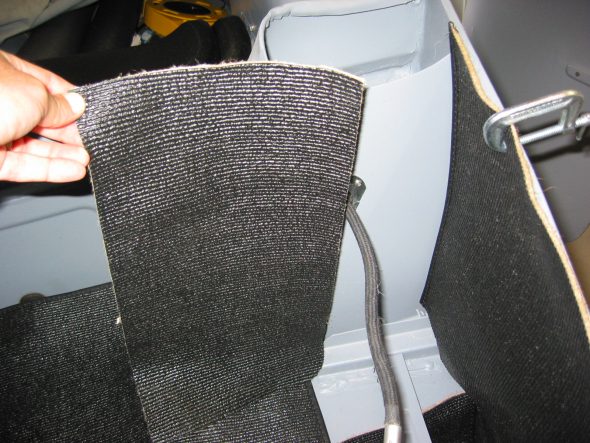
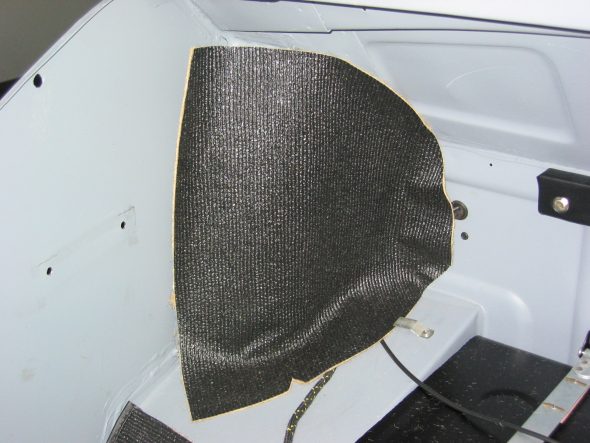
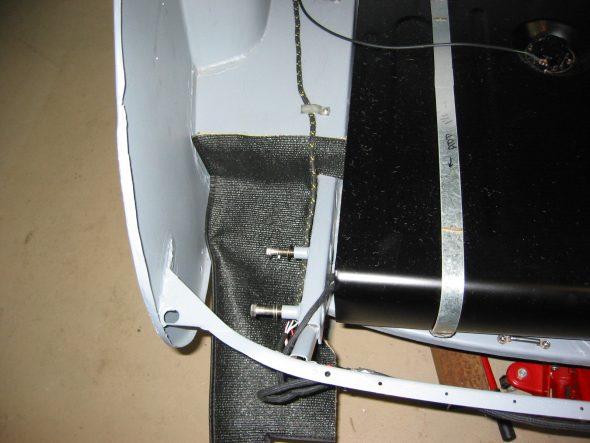
Test installed the boot liner material from Heritage. Won’t be gluing it in until after the car is painted. Everything seemed to fit fine and the material looked great. 

3M spray adhesive is claimed to work well. Install before fuel tank, but after the fuel tank strap brackets are affixed, and before the battery cable fixture is added and before all wood blocks are secured. Be sure to put holes or cuts in fabric.

Install the cardboard fuel neck cover after the tank and filler pipe – will need to drill three holes after material is glued in.

I reboxed everything and stored it in the coat closet downstairs.

The panel install order is below:

1 Battery cable vertical panel – glue

2 Left wheel well curved panel – glue

3 Left vertical wall panel – glue

4 Right vertical wall panel – glue

5 Left floor well – glue

6 Right floor well – glue

7 Back vertical wal -l glue

8 Rear shroud panel ?

9 Floor Panel – not glued

Boot Liner 1

Left Wheel Arch Panel

Left Floor Well Panel

Right Floor Well Panel

Fuel Pipe cover

Floor liner Panel

I didn’t think about getting the hylomar sealant in the fuel tank when I sealed the sender unit gasket. I will need to replace, clean, and reseal more carefully.

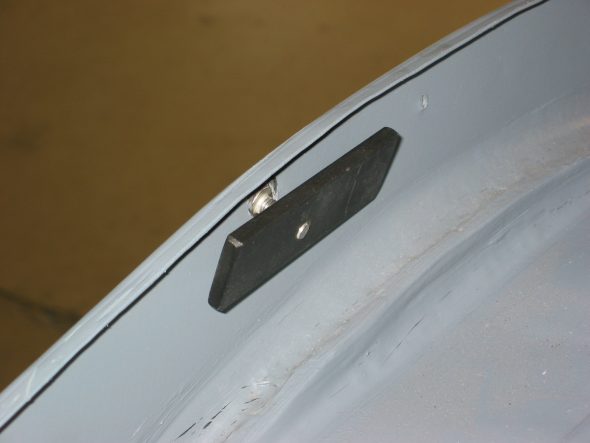
Fastened both tapped plates that secure the rear wings to the superstructure to the body temporarily. They may not be in the right location.

Wing tapped bracket

Air Control Assembly – Installed the front left air control assembly. It did not fit real well due to some bending done by Martin but after some convincing the job was accomplished.

Fresh Air Assembly 1

Fresh Air Assembly 2

Fresh Air Assembly 3

July 11, 2004

Heater Installation 

I purchased a modern replacement for the original Smiths Heater from Cape International. The heater is basically the same footprint, but it incorporates the fan blower making the original fan blower extraneous or irrelevant. The provided mounting plate to the cold air box was installed upside down and backwards which threw me for a minute. After reversing the plated the heater installed nicely using the four #10 x 1/2” original mounting locating screws.

New heater 1

Heater Cape Int 1

Heater Valve 4

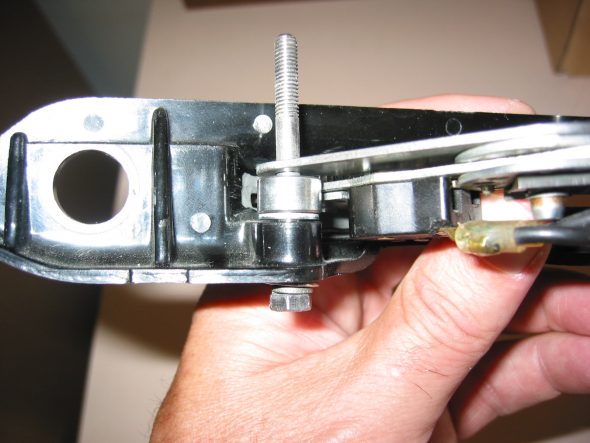
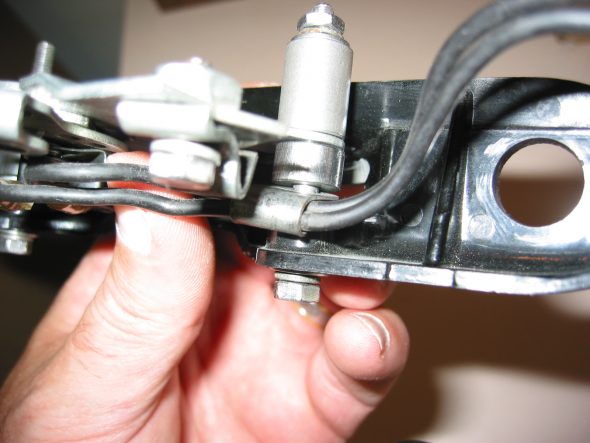
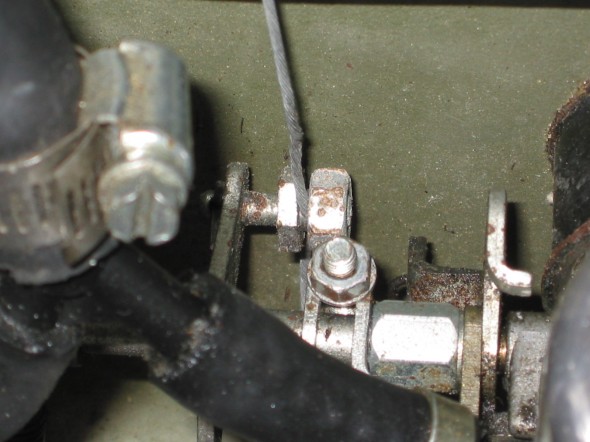
I drilled a slightly larger hole in the included water control valve control arm to permit the installation of a cable connector with tightening screw to secure the wire and cable sheath.

I could not figure out how to connect the water control valve in a way that would permit using the dash control slide knob as originally intended. Instead it works exactly in reverse. Oh well, small price to pay! 

Replaced the original cable sheath and wire with a bicycle brake cable for smoother operation of the slide control to the water control valve. Worked nicely. 

Heater Valve 3

Heater Valve 5

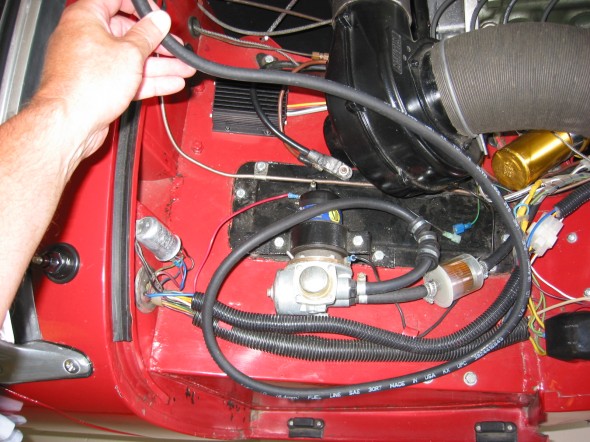
I received a new Smiths heater blower from Hemphills that proved to be a very nice replica of the old one. I installed a the new blower on the fender superstructure. 

Blower and hose

Heater Blower Mounting

Heater Blower Hose 3 inch

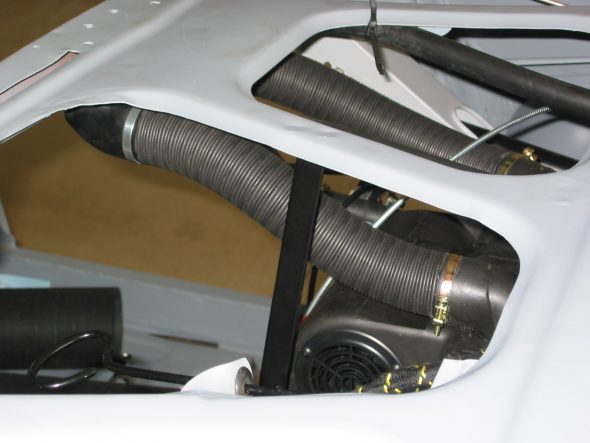
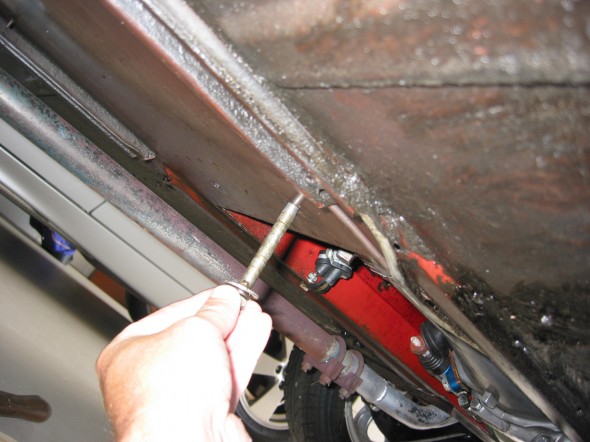
The new blower will now be used to “push” cold air into the passenger side of the interior. I purchased a new air control assembly typically used on the left side of the car. I cut off the mounting flange and inserted it into the ait tube.The right hand knob on the heater panel that used to control the heater can now be used to control fresh air into the cockpit on the passenger side.The cable clamp must be located just as in the photo accessible below the car to get the maximum movement on the air control valve. I need to get some nylon mesh to screen the front air intake. This will give a very “neat” and elegant installation. The cold air will empty just above the parcel shelf in the interior. 

Heater Hoses

Heater Hose Assembly

Inverted Control Cable connections

I used band hose clamps which cut into the duct hose so when I install the final time I will switch to the wire clamps as used on the car originally. The 4” hose could be approximately 1” longer on final install and the 3” hose could be slightly shorter. I discovered that one needs to clamp the 3” hose to the blower before tightening the blower to the inner fender. 

The wiring connections are used as originally fitted. Green and a green/brown wire connect to the two black wires on the dash slide control. The single green wire from the harness connects to the blower on the wheel arch. New wiring and a switch will be added to control the new two speed heater.

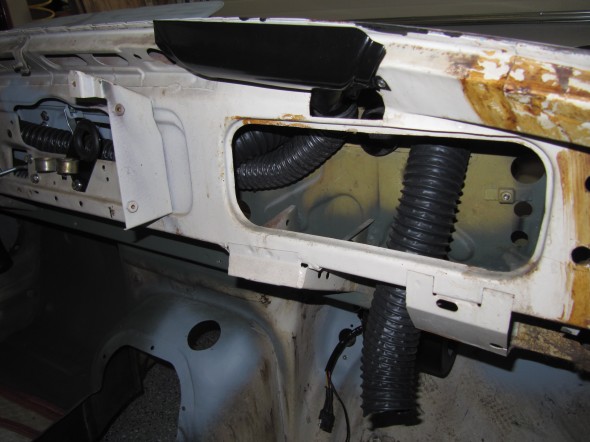
Cut the two demister hoses to length and installed them from the top of the heater to the dash superstructure. 

Heater demister hoses

Heater demister hoses 2

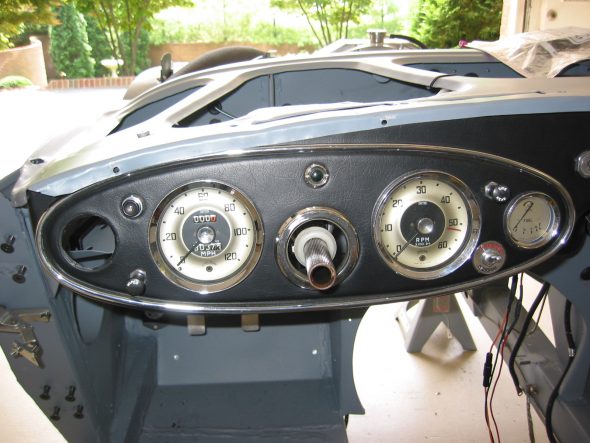
Fascia Installation  Fit the fascia to the body. Mounts with four chrome screws and nuts at the corners. One additional screw mounts on the face of the fascia through to the body in the top center. Another locates the brace from the firewall. Upon installation I discovered that the steering column contacted the bottom of the chrome ring surround in the fascia so I moved the column mounting bracket to a higher securing hole on the column brace. 

Steering wheel new setting

Fascia Instruments

Heater Control Panel

Filed the edges of the control panel very carefully and improved the fit to the fascia considerably.

Heater control 1

Heater control 2

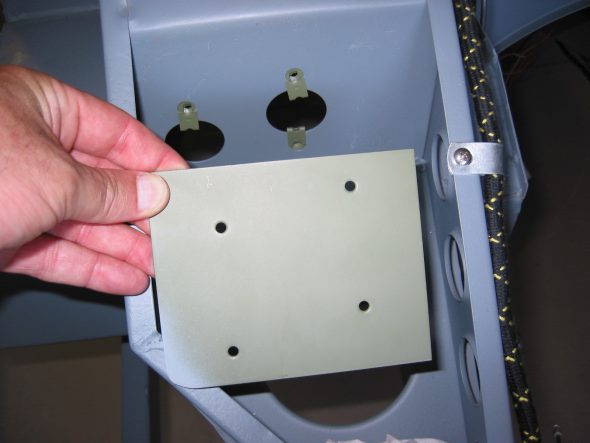
Blanking Plate – Installed the blanking plate on the right side of the car to cover the master cylinder mounting holes for a RHD car. Used #8 1/2” sheet metal screws into four J nut fasteners. The original plate had tar paper on the back side to seal and insulate, so I will need to do something similar on final install, after the final paint is applied.

Blanking plate install 2

Blanking Plate install 3

Fresh Air Contol Cable – Passenger Side

Drilled the small hole in the firewall next to the tach cable grommet to 5/8” and added a rubber grommet to run the new cool air cable through the firewall. 

Hole for cold air cable

Hole for cold air cable 2

October 15, 2004

Gearbox Cover and Extension Installation 

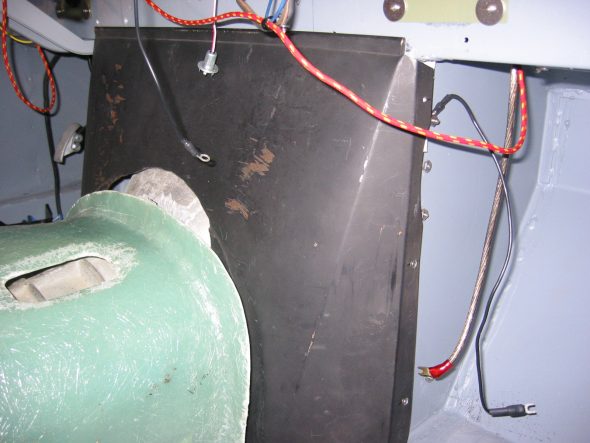
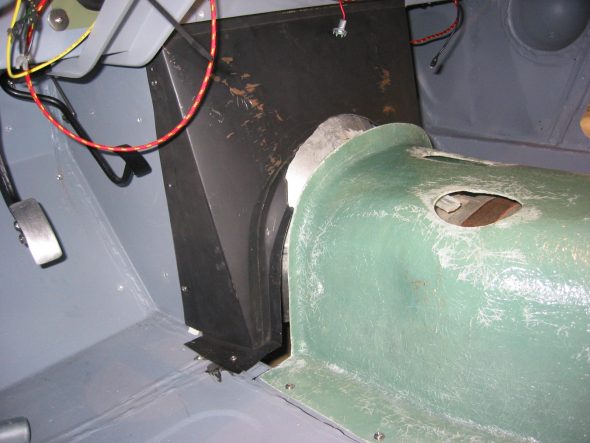
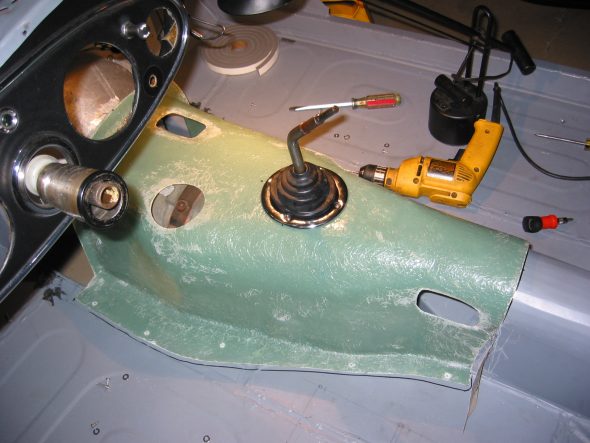
The original gearbox cover and extension were unusable due to rust. I ordered a new extension panel from Kilmartin and a fiberglass gearbox cover from British Car Specialists. While the cover seemed to be a good fit and will certainly be cooler than the original metal cover, the extension panel did not fit over the Smitty bell housing for the Toyota transmission conversion.

Gearbox cover 1

Gearbox cover extension 1

I trimmed the extension panel and then fitted it to the firewall bulkhead. I first placed 1/2” weatherstripping on the bulkhead and then drilled the mounting holes needed – three per side – to secure the panel to the bulkhead. I then drilled two holes in the cover footing to screw it into the frame.

Gearbox cover extension 3

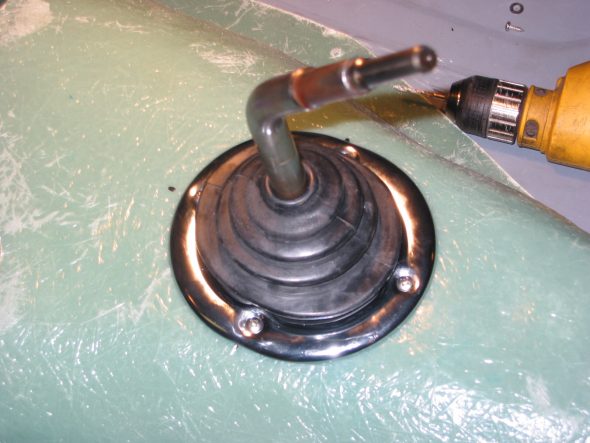
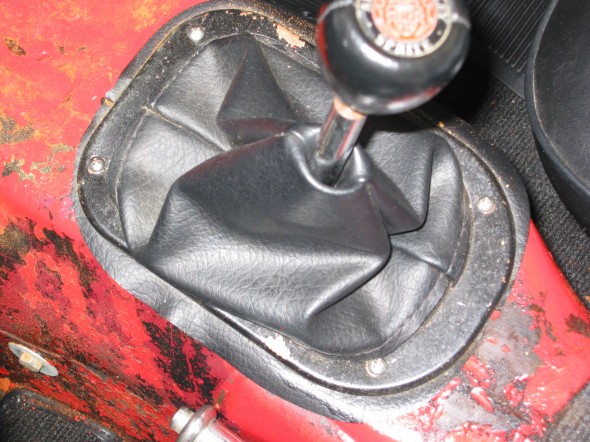
I measured the distance from the metal driveshaft tunnel to the center of the shifter – 13.” Then I installed the cover and measured the same 13” distance and marked it on the cover. I drilled a small hole in the cover just to check the proper location with the shifter. I then drilled a 3 1/4” hole in the center of the gearbox cover for the center shifter. Location was perfect! I used a rubber boot and mounting ring from an MGB as suggested by Smitty. This required drilling 4 small holes for #8 stainless screws.

Toyota shifter installed 2

Toyota shifter installed 1

Now that the gearbox cover was properly located I drilled 4 holes into the frame or floorboard on the right side of the cover and 5 on the left side and fastened the cover to the floor. 

Gearbox cover 3

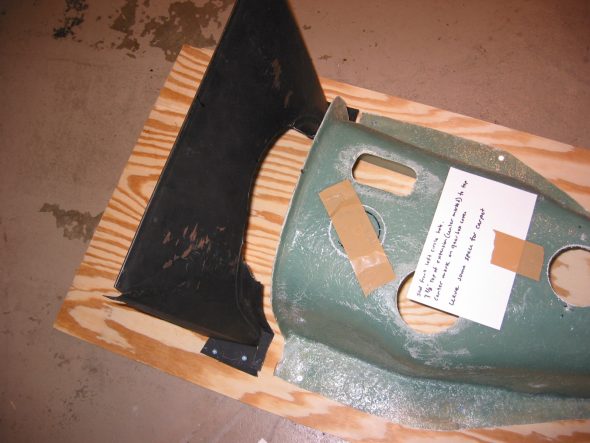
I was then able to establish what would become the permanent relationship between the gearbox cover and the extension panel. I measured and drew a template for the floor and measured the distance from the top of the cover to the top of the extension panel – 7 3/8.”

Finally, I recreated the assembly on a piece of 1/2” plywood and secured the panels to the plywood. I added an extra mounting screw on the floor tab of the extension panel to help steady the panel.

Gearbox cover assembly 1

Gearbox assembly Cover 2


Heater

Heater

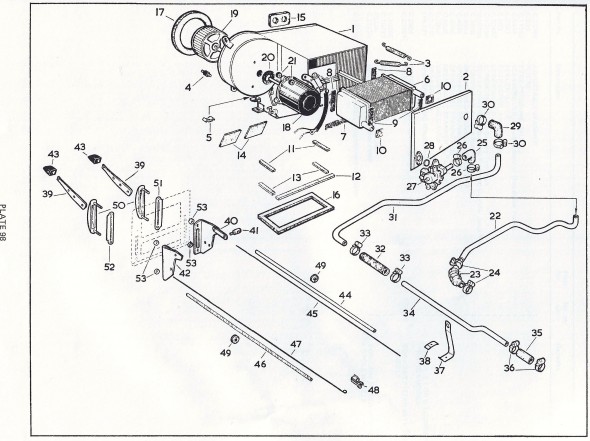
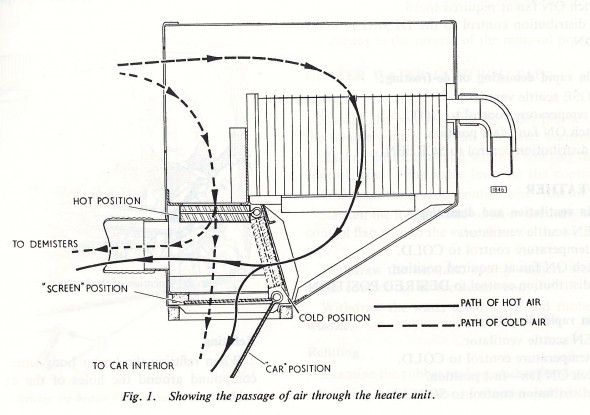
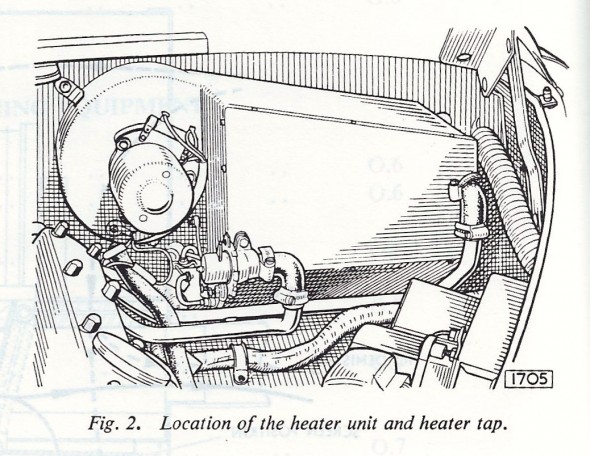
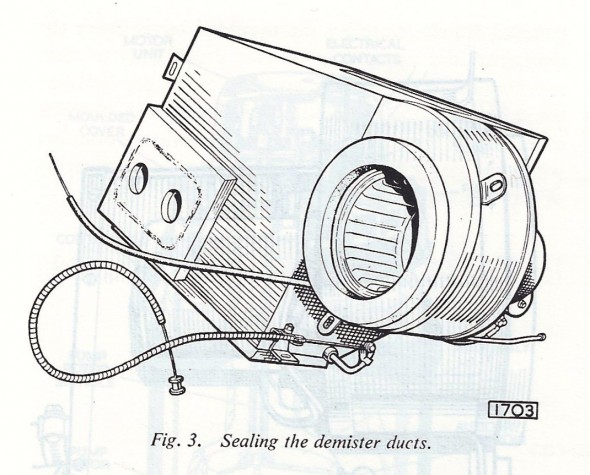
The heating and ventilating equipment consists of a heating element and an electrically driven fan mounted on the engine side of the scuttle. Air from the heater unit is conducted to a built-in duct situated under the instrument panel, to the rear compartment via twin pipes, and to vents at the bottom of the windscreen to provide demisting and defrosting. Either fresh air or air from the interior of the car can be introduced into the system at the will of the driver. FRESH AIR is introduced into the system by opening the scuttle ventilator and switching on the fan. Air from the interior of the car can be RE-CIRCULATED by closing the scuttle ventilator and switching on the fan.

Heater Schematic

Heater Schematic

Heater Operation

Heater Operation

Heater in Engine Bay

Heater in Engine Bay

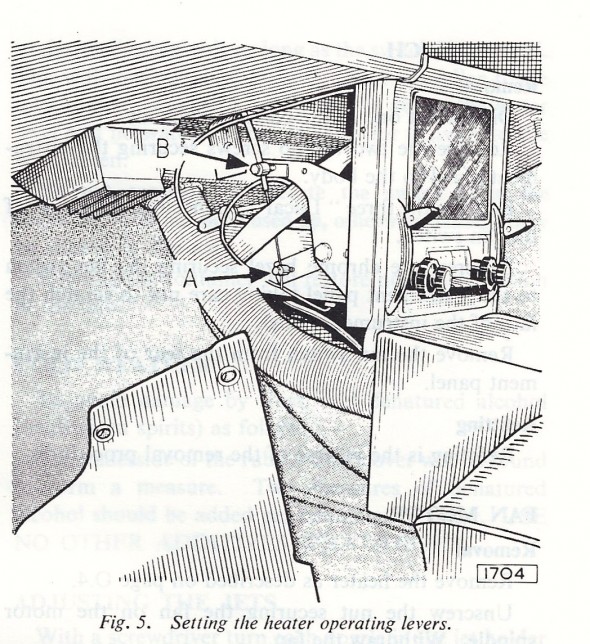
Heater Control Levers

Heater Control Levers

Heater Box

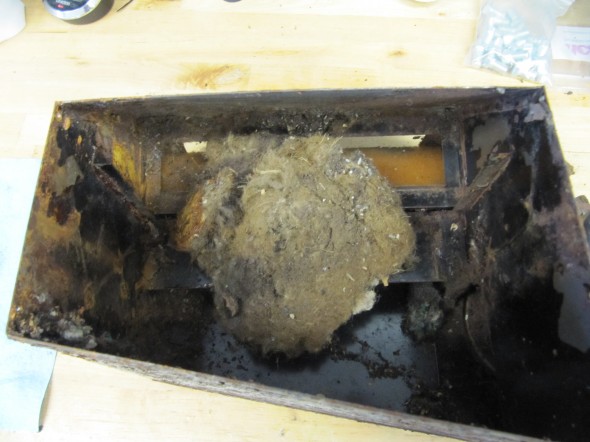
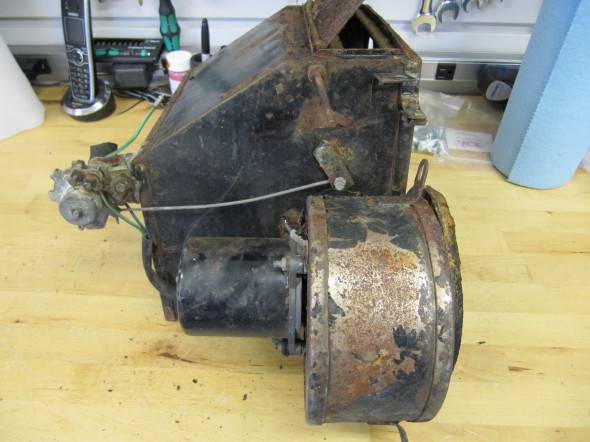
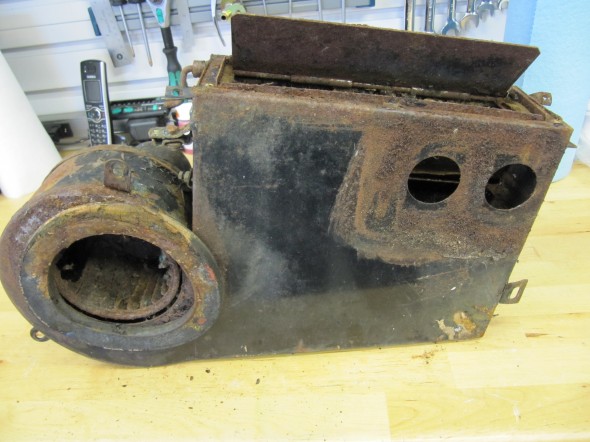
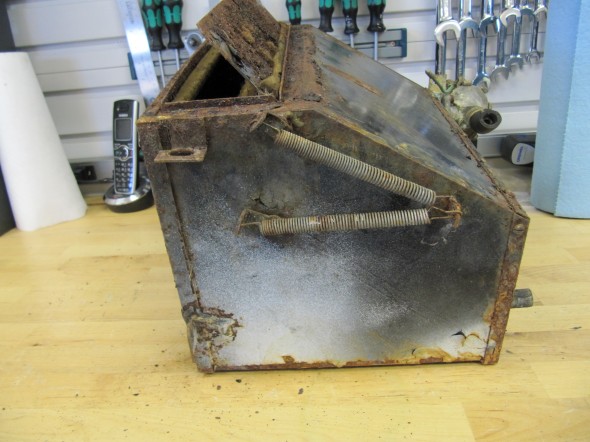
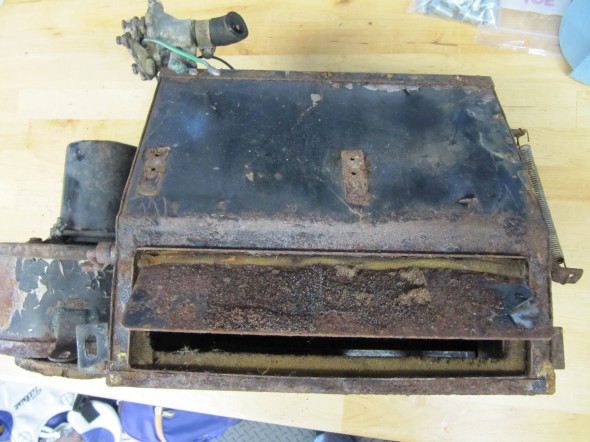
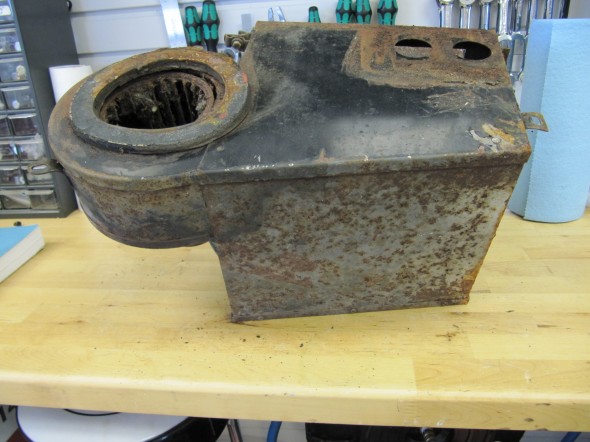
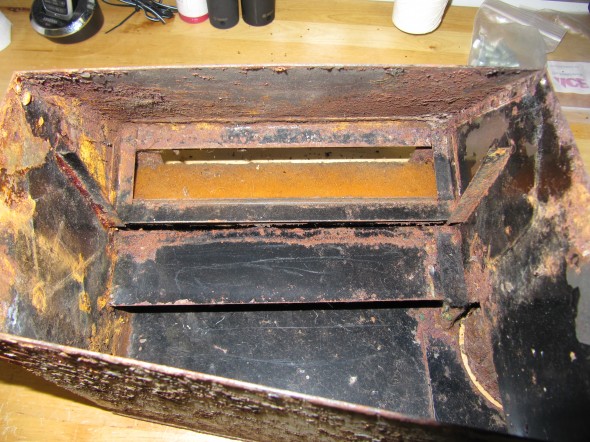
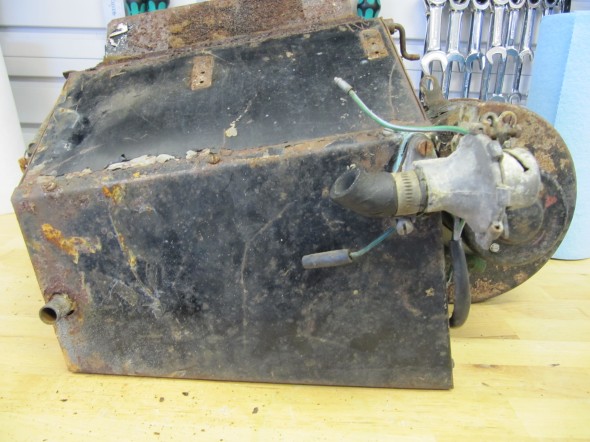
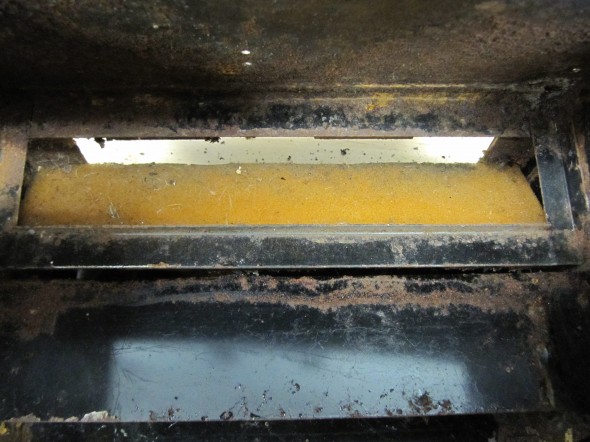
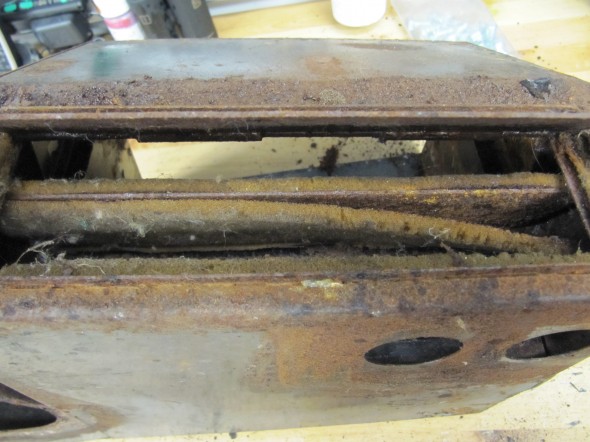
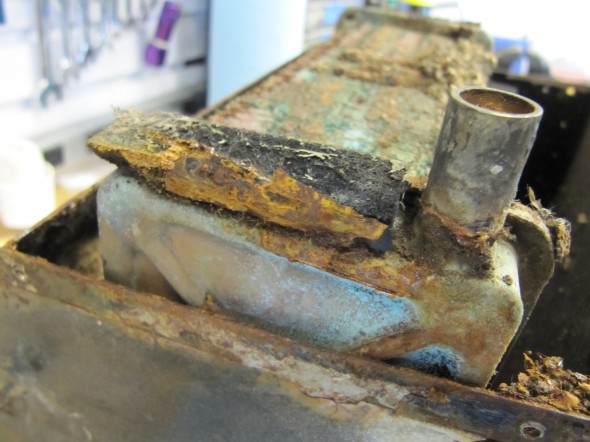
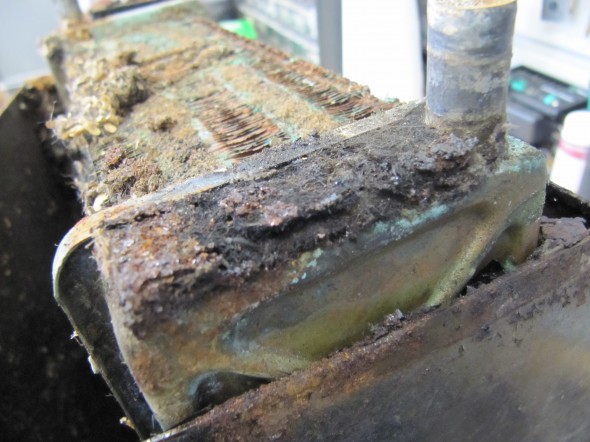
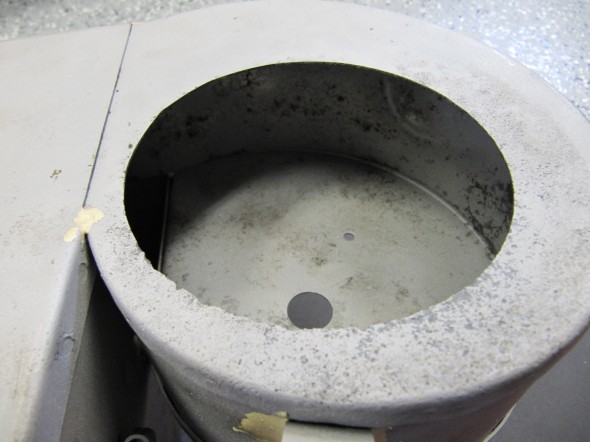
Unfortunately, my heater box assembly seemed to be in a poor state. The drain tube from the plenum must have been clogged which resulted in the system holding moisture combined with the fact that the mice set up home inside the heater casing. The case was pretty rusty, the squirrel cage (fan blower) was completely deteriorated and worst of all the air control flaps were “frozen” in place.

Bonus Mice Nest

Bonus Mice Nest

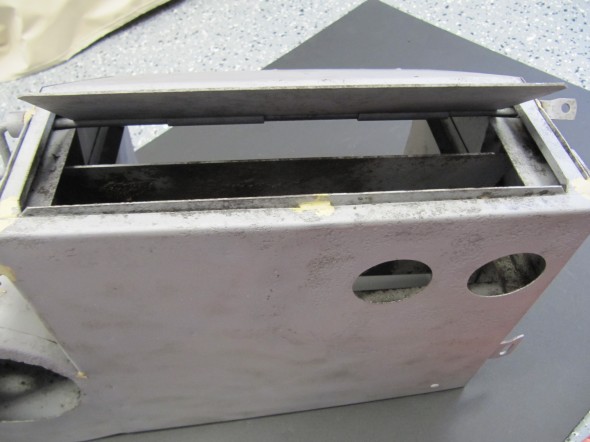
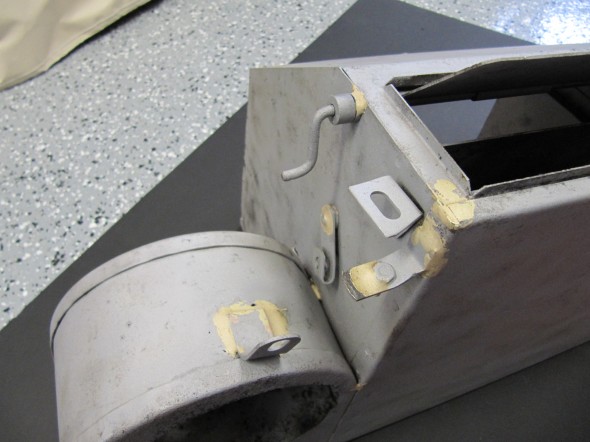
I decided to try to restore the box and get the frozen flaps working, so I disassembled the heater and media blast the box to so that I could see just how bad it was.

These are some images of the heater before I began disassembly:

Heater Box 1

Heater Box 1

Heater Box

Heater Box

Heater Box 1

Heater Box 1

Heater Box

Heater Box

Heater Box

Heater Box

Heater Box

Heater Box

Heater Box

Heater Box


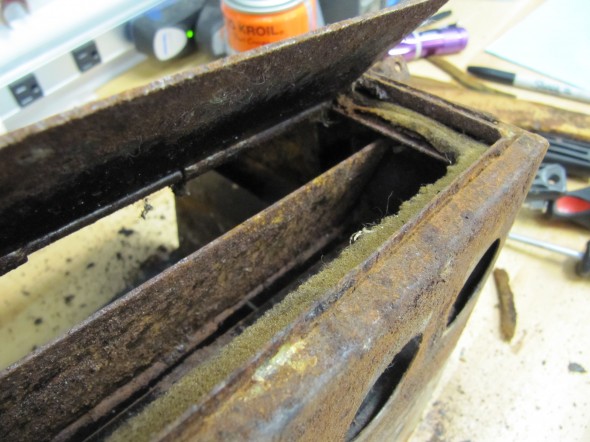
These images show the foam rubber seals around the flaps:

Flap Seal

Flap Seal

Flap Seal

Flap Seal

Flap Seal

Flap Seal

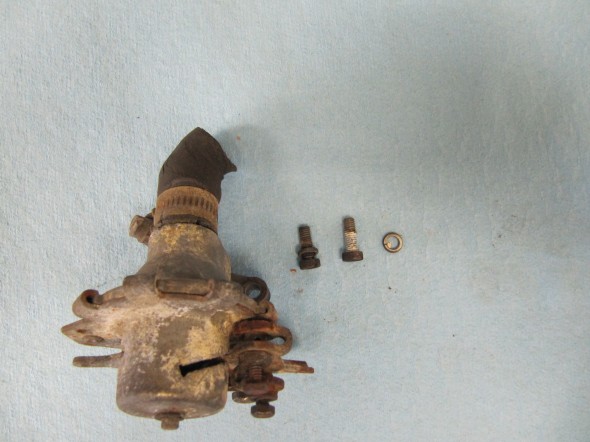
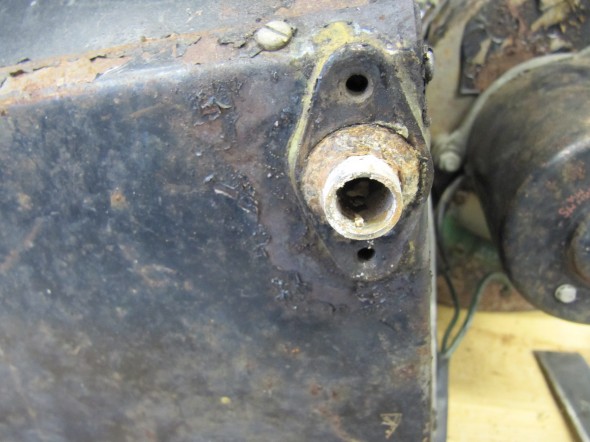
There was a rather thick foam rubber seal between the Heater and the Dash at Volute. This was removed and will be replaced with a new seal. I then removed the Water valve Assembly form the box by removing two cheese head slotted screws #10-32 x 1/2″ with split washers, and the rubber seal that seated the valve to the radiator pipe.

Foam Seal to Body

Foam Seal to Body

Water Valve Assembly

Water Valve Assembly

Water Valve Assembly

Water Valve Assembly

Water Valve Assembly

Water Valve Assembly

Water Valve Mount

Water Valve Mount


Heater Seals to Firewall

Heater Seals to Firewall

There were 11 slotted #5 x 1/4″ self-tapping screws that held the Lid for the Heater Case to the body of the casing. I removed these to then gain access to the radiator.

Lid for Heater Case

Lid for Heater Case

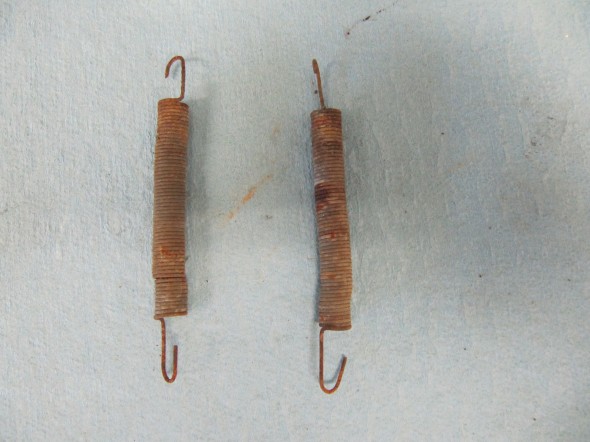
There were two Springs on the outside of the Case identified as Spring, Steadying Air Control Flaps. These were removed and set aside. There were also pieces of felt that provided a cushion between the casing and the radiator. These were removed.

Springs

Springs

Felt Seal

Felt Seal

Felt Seal

Felt Seal

I then lifted out the radiator:

Water Radiator For Heater

Water Radiator For Heater

Water Radiator For Heater

Water Radiator For Heater

The motor removal was the next step in the disassembly. To get at the three mounting screws for the motor, one must first remove the fan “squirrel cage.” This might normally be done as shown in the image below that was borrowed from another web site. Because more than half of the “fins” in my fan were rusted away, I couldn’t do this. So, I used an air impact wrench which worked like a charm. When the cage or basket is removed, three slotted #10-32 x 1″ machine screws are visible. These can then be held while removing the nuts, rubber and locking washers from the motor side of the case.

Squirrel Cage Removal

Squirrel Cage Removal

This image shows the mounting nuts and the wiring for the motor. After the three nuts were removed the motor could be lifted away from the case.

Heater Motor

Heater Motor

Felt Washer

Felt Washer

Motor Casing

Motor Casing

Motor Removed

Motor Removed

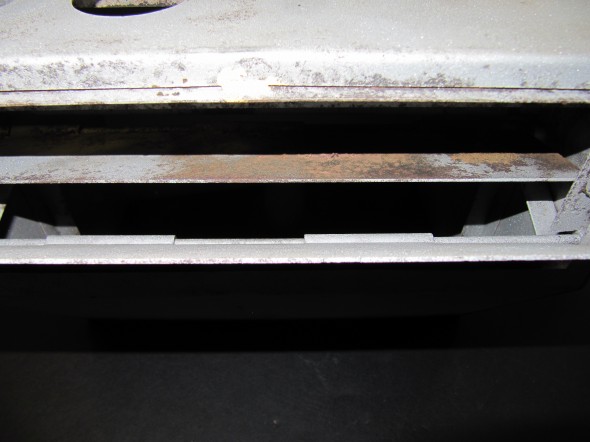
After stripping out the components it was then time to blast the case with aluminum oxide. This process did reveal several rust pinholes. However, the bad news is that the two movable flaps are both “frozen” in place. I have soaked the hinge rods in Kroil to hopefully release the hinges over time.

These are a collection of images of the box after blasting. The brown in the images on the flaps is not rust. It is adhesive used to secure the foam pads to the flaps:

Inside View

Inside View

Air Flaps

Air Flaps

Assembly Case

Assembly Case

Blower Box

Blower Box

Assembly Case

Assembly Case

Blower Box

Blower Box

Air Flap

Air Flap

Air Flap

Air Flap

Air Flap Rod

Air Flap Rod

Heater Lid

Heater Lid

Heater Lid

Heater Lid

The Kroil did not work so I queried the various email lists and forums. One person suggested heat which I unsuceesfullt tried with a torch. another person suggested a water/molasses solution, but that takes a long time -at least a week. Another suggested electrolysis.

I watched a few YouTube videos on using electrolysis for rust removal, and thought I would give it a try. I emulated this particular video: http://youtu.be/54ADeB6V1rQ

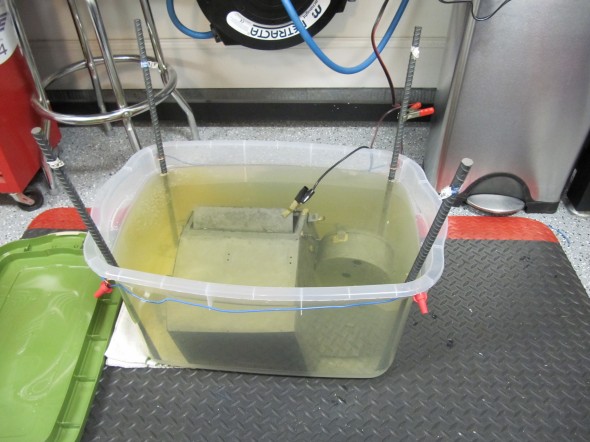
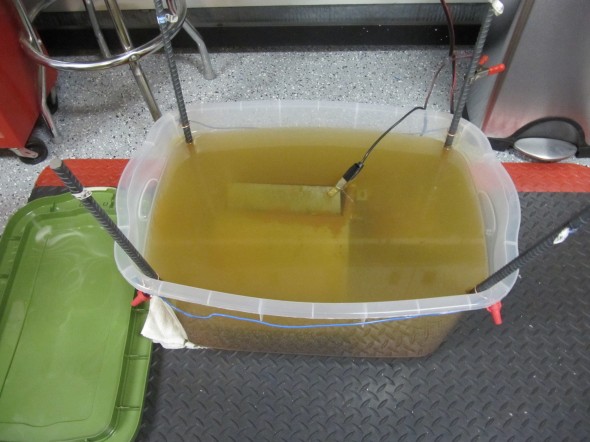
I put the heater box into 14 gallons of water with 14 tablespoons of sodium carbonate. The videos recommend using Arm and Hammer Super Washing Soda, but good luck finding it in a store! I ended up “cooking” baking soda at 200 degrees for an hour to release the carbon dioxide, and thereby turning the sodium bicarbonate into sodium carbonate. Worked like a charm.

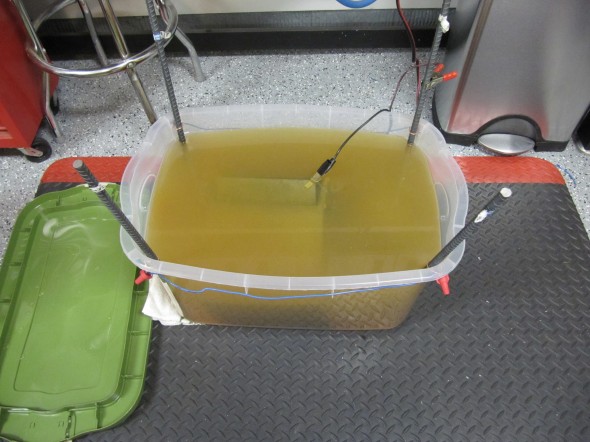
I then attached my battery charger and let the magic begin. I put the box in the solution at 9:15 PM and after two hours I was surprised at how much the water color had changed from clear to rust given how clean the box already was from blasting. The solution just gets into places the aluminum oxide blast abrasive cannot. I then let it all sit until about 8:00 AM this morning.

I cleaned up my mess and put the box on the work table expecting to be disappointed, but I was not. One flap started working immediately, needing little coercion. The second required some pushing and pulling and a little lubrication but it now functions properly as well!

I would use this process again in a minute. Very inexpensive and easy. One more original Jaguar part saved. I have a little pitting to fill with body filler, but otherwise should be a very serviceable unit.

Try it – you will like it.

In the images below the light colored water image was at 9:00 PM almost exactly when the Box went in the solution. The darker colored water image was taken at 8:00 AM the next morning when the Box was removed from the solution.

9PM Start Bath

9PM Start Bath

11PM Bath

11PM Bath

8AM Finish Bath

8AM Finish Bath

The Clayton Classics Upgrade

I ordered the upgrade kit for the MK2 heater from Clayton Classics in the UK.

Phil Beveridge.
Manager.
Clayton Classics.
Hunter Terrace,
Fletchworth Gate,
Burnsall Road,
Coventry.
CV5 6SP
Tel: +44 (0)24 7669 1916
Fax: +44(0)2476691969
E-mail:[email protected]

-OR-

Liz Chandler
Sales Adminstrator
Clayton VS Limited
Phone: 02476 691916
email: [email protected]

While awaiting delivery, I had the bottom of the heater box braised to take care of the worst of the pin holes in the bottom of the blower body. The kit arrived with everything necessary to enhance the performance of the original box.

Clayton provided pdf versions of two articles from Jaguar World Monthly that detailed, through photographs and narrative, the removal and dismantling of the original heater box assembly as well as the modifications required. The article was begun and completed over two month’s publication of the magazine. They also included a pdf of their own assembly directions. These are referenced below:

Jaguar Mk2 Heater upgrade installation instructions

classic workshop XK120 Heater Mk2 Heater dec09

Mk2 Heater Upgrade classic workshop jan10

Four modifications to the original box are required.

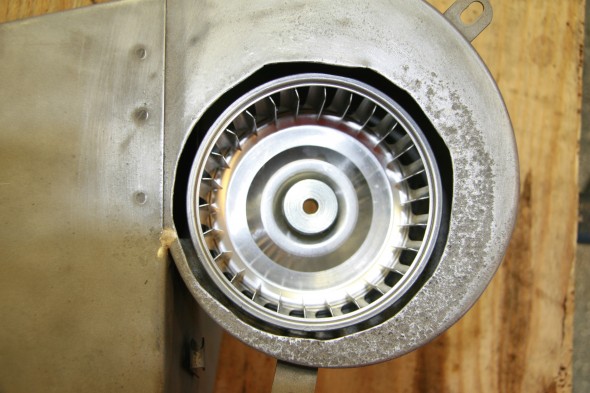
  1. The air inlet opening in the blower casing must be increased in diameter to 120mm to permit the introduction of the larger fan supplied by Clayton. A perfect cut is not required as the surface will be covered by the seal between the heater and the dash at volute.
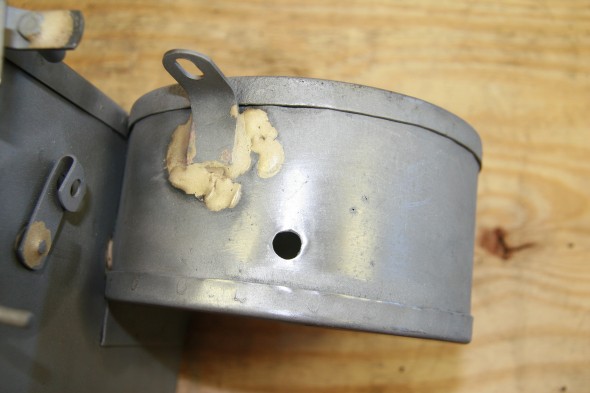
  2. A 10mm hole was drilled into the blower casing to permit allen wrench access to the motor shaft to tighten the fan to the shaft. A rubber plug covers the hole after the fan is installed.
  3. Three small holes for self-tapping screws to secure the motor mounting bracket needed to be drilled in the blower casing.
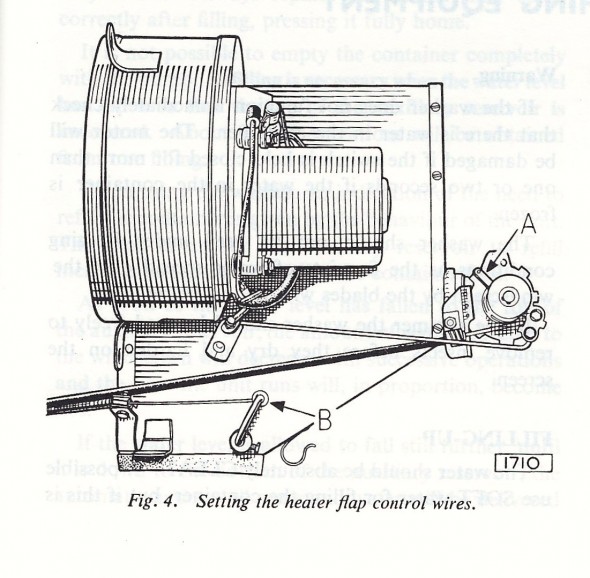
  4. Clayton suggests the original design that incorporated the inner flap was simply a bad design that permitted the dilution of hot air with cold before entering the cabin. Their recommendation is to seal the flap with silicone and to disconnect the flap controls so that the flap remains permanently closed.
    Heater Flap Control Cables

    Heater Flap Control Cables

    120mm Diameter Heater Box Modification to Allow Larger Fan

    120mm Diameter Heater Box Modification to Allow Larger Fan

    Access Hole for Fan Shaft Allen Screw

    Access Hole for Fan Shaft Allen Screw

    Clayton Motor Upgrade Installed

    Clayton Motor Upgrade Installed

I completed the first three modifications before powder coating the entire box.

I test fit all of the components and then tested the electrical wiring and connections. The new motor was wired for a positive ground car. To have the fan move in the proper counter clock-wise direction, these wires must be reversed in a negative ground car.

[NOTE]: My wire colors are different than the original wiring scheme.

The orange wire from the motor is connected to ground. The black wire to the “inside” post (closest to the heater box) of the resistor. The slate wire from terminal #6 on the switch is connected to the “outside” post (closest to the blower fan) of the resistor. The white/green wire from terminal #8 on the switch connects to the “inside” post on the resistor. The green/yellow wire from the #4 terminal of the switch is connected to the fuse position #11 for power. With this wiring in place, the lower position of the switch is “off,” the middle position is “Low Speed” and the upper position is “High Speed.”

I created a pigtail (seen blow) from the resistor for the heater fan wiring. Two wires in the pigtail are connected through two-way snap connectors to wires of the same color which route through the firewall and ultimately back to the Fan Switch. The black wire goes directly to the fan motor.

Heater Fan Wiring

Heater Fan Wiring

I contacted Clayton to determine the amperage draw for the upgraded motor and received this response from Phil Beveridge:

Dear Mr.Rose,

At 13.5 volts, running at full speed, the motor will be drawing 10.8amps.

Kind regards,

Phil Beveridge.

Per the Clayton instructions, I used silicone to seal the inner flap in the closed position.

Silicone Sealed Flap Shut

Silicone Sealed Flap Shut

And, added foam to the inside of the bottom flap:

Foam Padding on Flap

Foam Padding on Flap

I then installed the motor and the heater matrix after wrapping it with foam:

Renewed Heater Box

Renewed Heater Box

Clayton Heater Matrix with Padding

Clayton Heater Matrix with Padding

The next step was to install the heater box front lid:

Heater Box Lid Installed

Heater Box Lid Installed

Water Valve

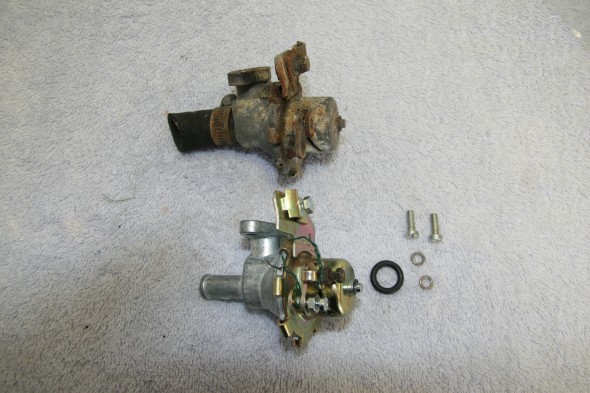
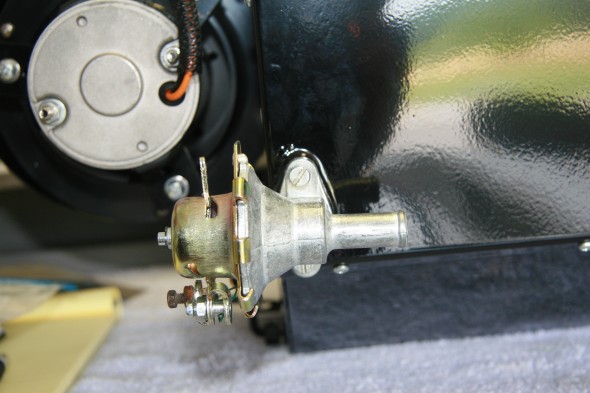
I ordered and installed a new water valve and rubber “O” ring seal.

Original and New

Original and New

"O" Ring Seal

“O” Ring Seal

Valve Installed

Valve Installed

Heater Pipe Mounting Clips

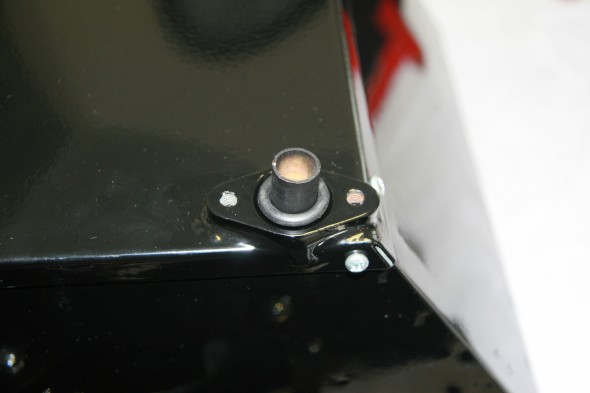
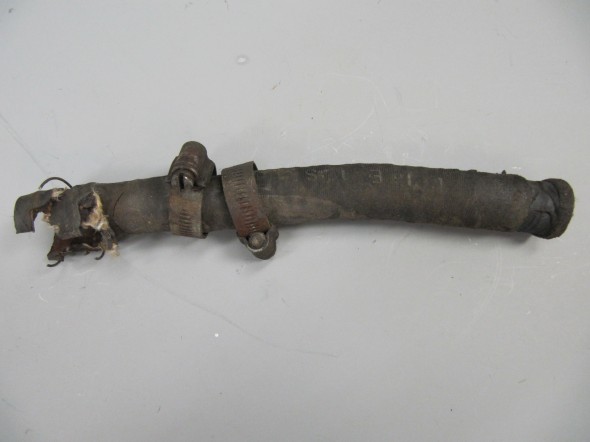
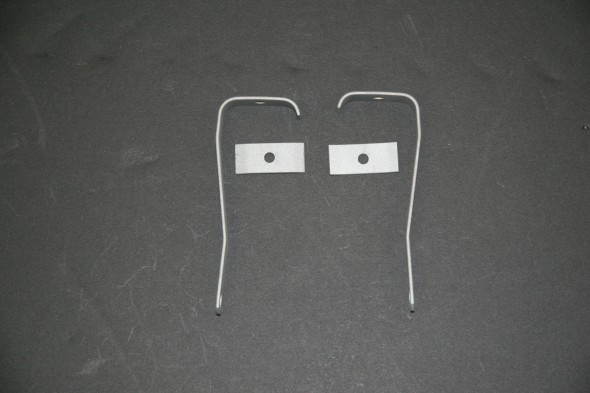
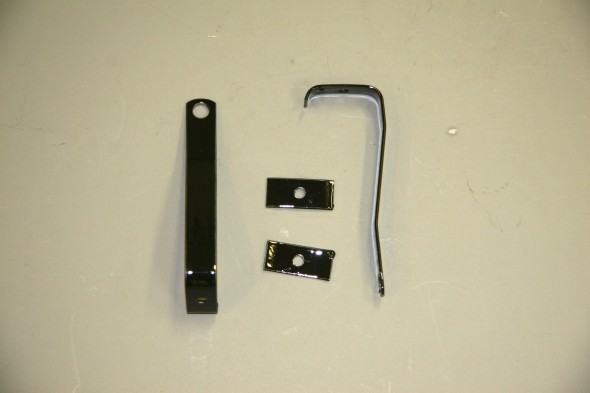
Two spring clips are pop riveted (1/8″) to the angled face of the heater box. These are used to secure one of the water circulation pipes to the box. The Clips were originally painted black so they were media blasted and then painted with POR 15.

Holes in Heater Box for Pipe Clips

Holes in Heater Box for Pipe Clips

Heater Pipe Clips Riveted to Heater Box

Heater Pipe Clips Riveted to Heater Box

Trial Fitting of the Heater Box

I need to install the heater box for completion of the wiring harness and to see how the box would fit with other “non-original” items in the engine bay. I was particularly curious about any conflicts that might arise from the addition of the power steering pump.

There are several foam insulation seals that need to be installed between the scuttle, firewall and base of the heater. These were sourced from Clayton, XK’s Unlimited and McMaster Carr and installed temporarily.

Heater Blower Firewall Seal Installed

Heater Blower Firewall Seal Installed

Closed Cell Seals at Heater Flap & Hose Openings

Closed Cell Seals at Heater Flap & Hose Openings

Three rubber “bobbins” serve as cushions and mounting posts for the heater box to the firewall.

Heater Mounting Stud and Heater Cable Firewall Grommets

Heater Mounting Stud and Heater Cable Firewall Grommets

These are actually two 1/4″-28 hex head cap screws molded into each of the three rubber cushions. I used a 1/4″ – 28 x 1″ machine hex head screw on the lower right mount at the heater’s base and a 1/4′ – 28 x 1 1/4″ machine hex head screw on the lower left mount. Before placing the heater box in position I also installed the two firewall grommets for the heater control cables. These are visible in the image above. In the final assembly only one of these will be used due to the permanent closure of one of the circulation flaps as recommended by Clayton in their upgrade kit. Both heater hose rubber elbows were installed in the bulkhead.

Heater Box Installed

Heater Box Installed

Air Distributor Box  

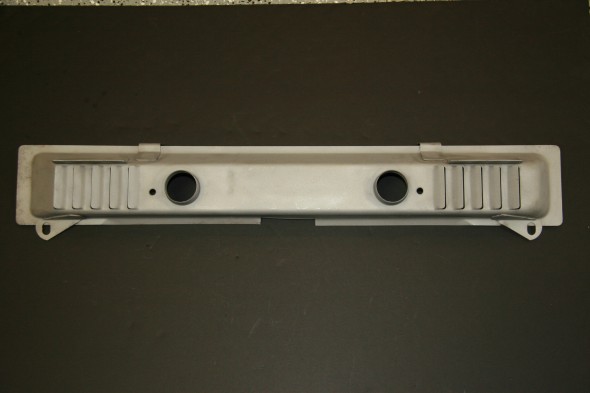
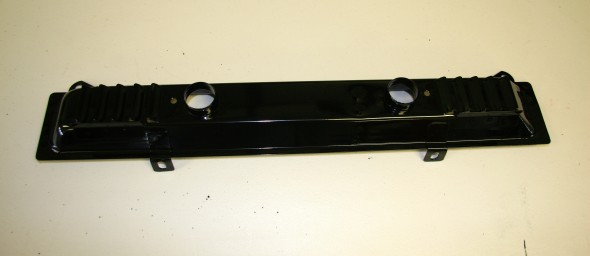
My next task was to clean up the air distributor box that is mounted in the center and below the dash with two 1/4″ – 28 x 1″ hex head bolts and two 1/4″ – 28 x 1/2″ hex head bolts with flat and shakeproof washers. As the images show, a felt gasket is glued to the edges of the box. A small piece of black electrician’s tape was found placed over two holes in the box. The box was blasted with aluminum oxide and powder coated gloss black.

Air Distributor Box

Air Distributor Box

Air Distributor Box

Air Distributor Box

Felt Gasket

Felt Gasket

Tape Blocking Holes

Tape Blocking Holes

Tape Blocking Holes

Tape Blocking Holes

I media blasted the box to prepare it for powder coating:

Clean Air Box

Clean Air Box

Clean Air Box

Clean Air Box

Powder Coated Air Distributor Box

Powder Coated Air Distributor Box

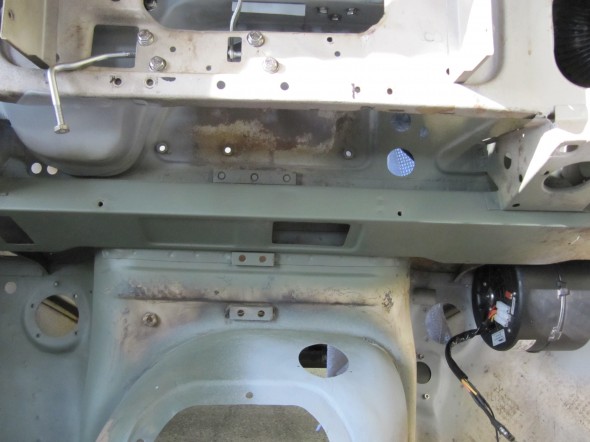
To prepare for the trial installation of the Air distributor Box, I cleaned the mounting surfaces and applied some self-etching primer. This will, of course be removed when the car is blasted.

Mounting Location for the Air Distributor Box

Mounting Location for the Air Distributor Box

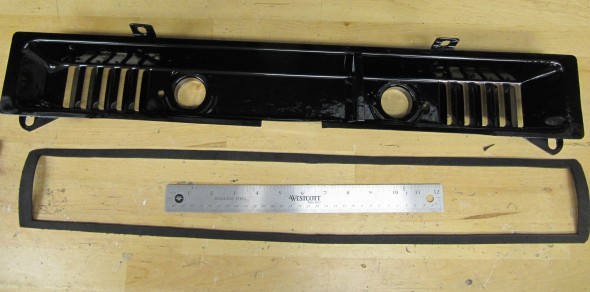
The Air Distributor Box had a felt gasket around its perimeter when I removed it from the car. I made and glued a closed cell foam gasket to the Box before mounting.

Foam gasket for the air distributor box

Foam gasket for the air distributor box

Air Distributor Box Foam Gasket

Air Distributor Box Foam Gasket

Air Distributor Box Installed

Air Distributor Box Installed

Air Distributor Box Installed

Air Distributor Box Installed

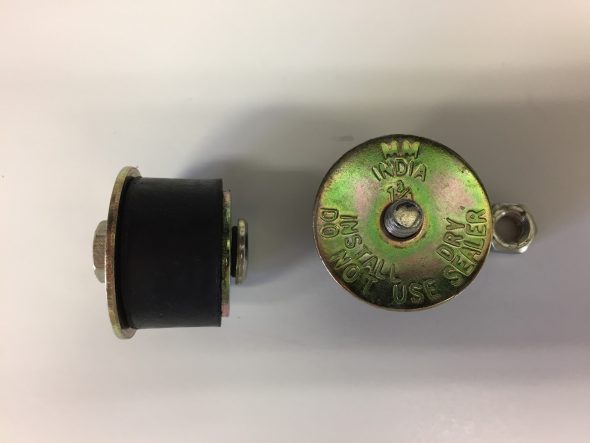
At the suggestion of Eric Kriss, I also concluded that given the somewhat poor performance of the MK2 heating system, it made little sense to send heat to the rear of  the car. What heat was produced would be best restricted to the front seats! He closed the two vent outlets in the air distributor box with expandable rubber plugs, and I followed his lead. I picked up two 1-3/8″ plugs from my local ACE Hardware and they work perfectly.

Expandable Plugs for Air Distributor Box

Expandable Plugs Installed in Air Distributor Box

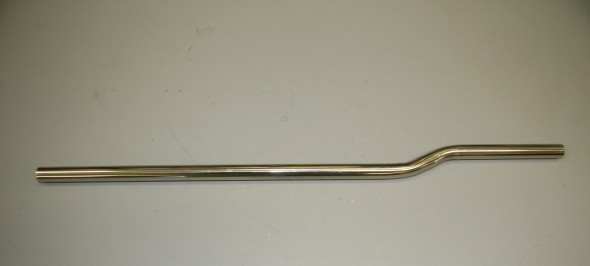
Front Heater Return Pipe

Hot Water Circulation

The hot water circulates through the heater via steel pipes and rubber hoses. Though not as original, I used stainless steel pipes available as a kit form SNG Barratt or XKs Unlimited. They should be painted black but I am going to just leave them unpainted since they would probably just get scratched anyway.The Rear Return Pipe, on Scuttle, At Rear of Cylinder Block connects to the Front Return Pipe and then to an adaptor at the Water Pump. The pipe is secured by a clip bracket on the firewall and by two clips on the heater box:

Heater Pipe Clip

Heater Pipe Clip

Heater Pipe Clipped to Heater Box

Heater Pipe Clipped to Heater Box

The feed pipe via a rubber elbow connects to the heater radiator inlet pipe, and to the water outlet on the intake manifold. The image below shows two of the pipes installed in the engine bay and connected to the heater:

Rear Heater Pipes Installed

Rear Heater Pipes Installed

The Front Return Pipe is secured parallel to the RH side of the engine block with brackets mounted to inlet manifold studs ( the third stud from the front of the engine and the third stud from the rear). The Brake Servo Vacuum Pipe is paired with the Front Return Pipe held by the same brackets.

Two identical elbow hoses part C16655 are used to connect the pipes to the heater matrix and water valve assembly.  An accordion type hose, part C21961, connects the feed pipe to the adapter at the rear of the inlet manifold. This hose can be seen in the image above.

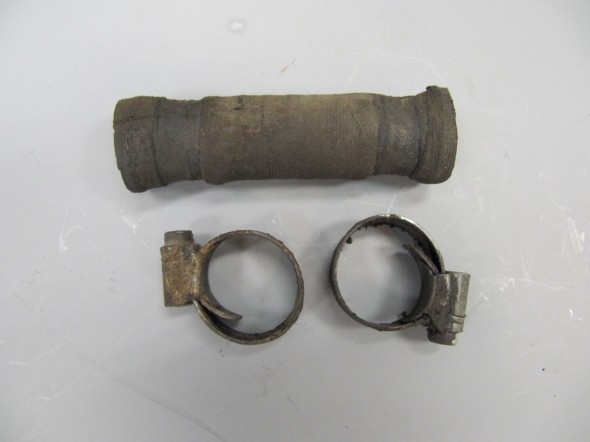
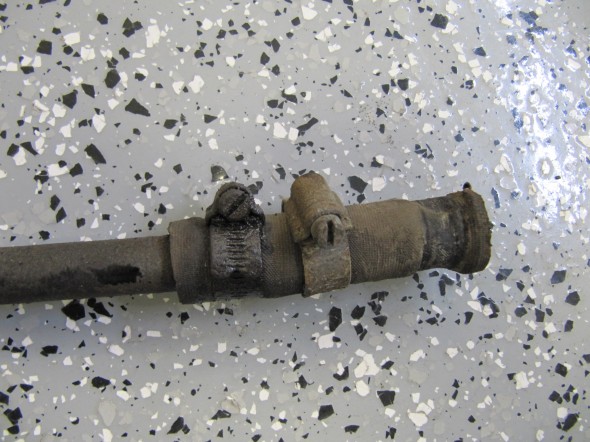
The front return pipe and the rear return pipe are connected with a straight piece of hose, part C14999/3. A shorter straight piece of hose connects the front the front return pipe to the adaptor on the water pump. All of the hoses are secure to the hard pipes with Cheney clamps that were sourced from XKs Unlimited.

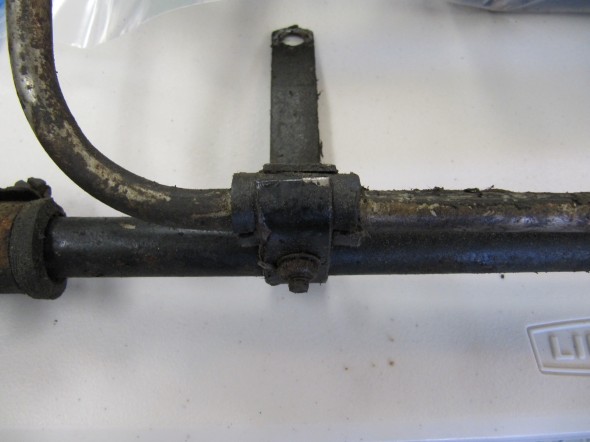
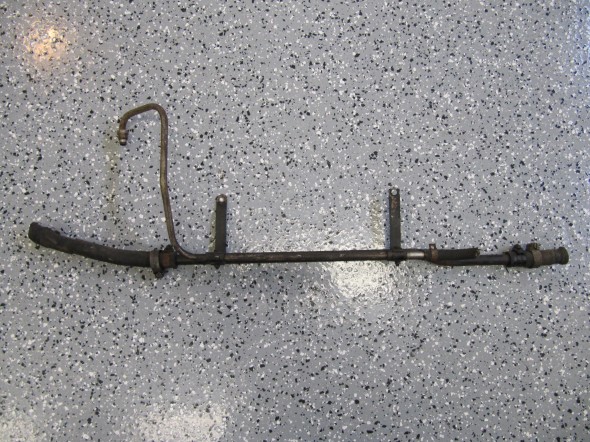
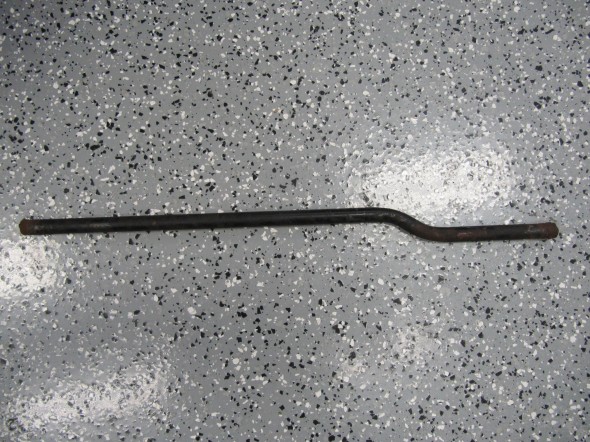
The offset in the Front Return Pipe is to the front of the car.  I removed the two Brackets On Studs of Inlet Manifold by loosening the two 3/8″ – 24 stud nuts. At the front of the pipe I disconnected the hose 9/16″ hose clamp and pulled the pipe away with the 3 1/2″ Hose, From Front Return Pipe to Adaptor on Water Pump. The hose uses two 9/16″ clamps to connect the hose to the pipe and to the adaptor. The Hose From Rear Return Pipe to Front Return Pipe is 8 1/2″ long also secured with two 9/16″ clamps. For ease of removal, I disconnected the Vacuum Pipe Assembly from the top of the Inlet Manifold, and could then lift away both pipes and brackets from the engine block.

The Front Return Pipe and the Vacuum Pipe were then separated by loosening each of the mounting brackets components held together with a hex head #10 – 32 x 1″ machine screws, nuts and shakeproof washers. Two  1″ long pieces of rubber hose (slit length wise) wrapped around the vacuum hose to keep the two pipes from rattling against each other.

Front Return Pipe at Side Of Cylinder Block - Rear Hose

Front Return Pipe at Side Of Cylinder Block – Rear Hose

Front Pipe Hose

Front Pipe Hose

Front Pipe Hose

Front Pipe Hose

Front Return Pipe

Front Return Pipe

Pipe Brackets

Pipe Brackets

Front Return Pipe

Front Return Pipe

Front Heater Return

Front Heater Return

Hose from Front

Hose from Front

Hose from Rear

Hose from Rear

Hose from front return pipe to adaptor on Water Pump 1

Front Return Pipe Hoses

Brackets prepared for painting:

Brackets-on-Studs-of-Inlet-Manifold-for-Fixing-of-Heater-and-Servo-Pipes Ready to Paint

Brackets-on-Studs-of-Inlet-Manifold-for-Fixing-of-Heater-and-Servo-Pipes Ready to Paint

Cover Plate Over Pedal Mounting Cut-out on Centre Dash

Cover Plate Over Pedal Mounting Cut-out on Centre Dash

I am replacing the Front Heater water return pipe with a new stainless pipe:Stainless heater Front Return Pipe

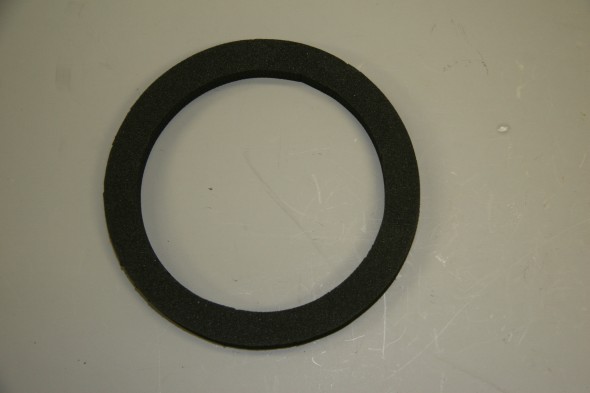
I also purchased a new foam rubber seal from the the heater to the dash volute.

Rubber Seal from heater to Dash Volute

Rubber Seal from heater to Dash Volute

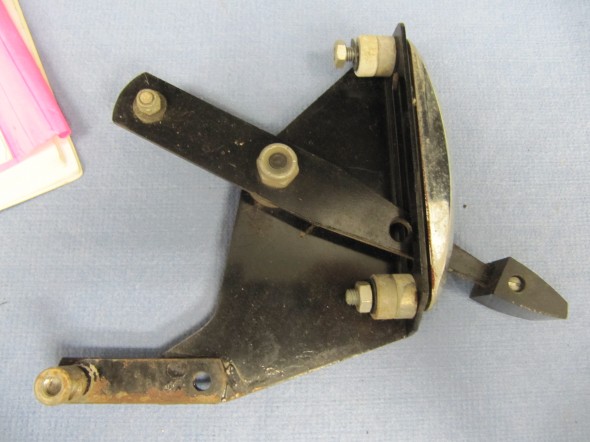
Heater Control Lever Assemblies

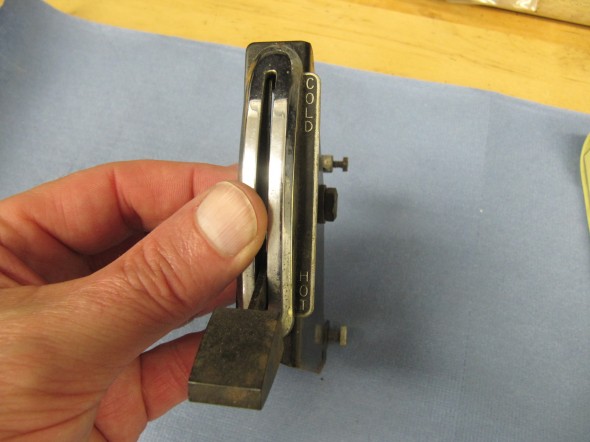
Two levers mounted in the central control panel in the console control the temperature and distribution of air into the cockpit. The temperature control – marked “Hot” and “Cold”situated below the instrument panel operates a valve which controls the flow of air through the heater. When the control is placed in the “Cold” position the supply of air from the heating element is completely cut off so that cold air can be admitted for ventilating the car in hot weather. Placed in the “Hot” position the maximum amount of air passes through the heating element. By placing the control in intermediate positions varying degrees of heat can be obtained.

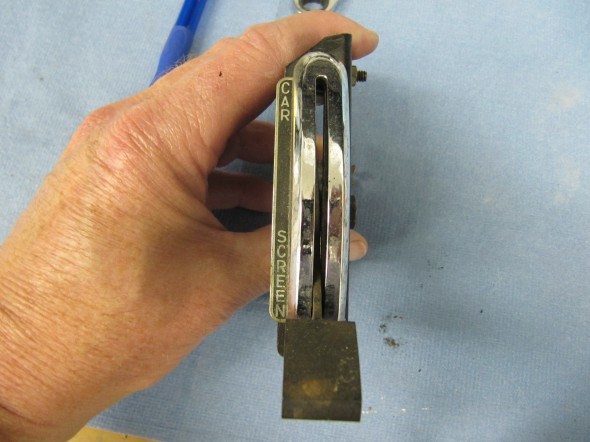
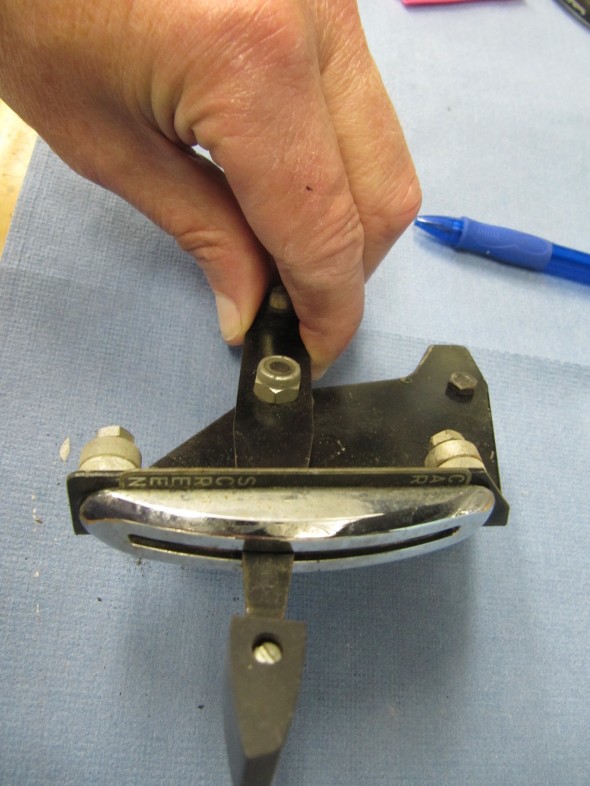
The distribution control –  marked “Car-Screen” controls the proportion of air directed to the windscreen or the interior of the car. Placed in the fully upward position the maximum amount of air will be admitted into the car interior. Placed in the fully downward position the maximum amount of air is directed to the windscreen for rapid demisting or defrosting. By placing the contra in intermediate positions varying proportions of air can be directed into the car interior and to the windscreen.

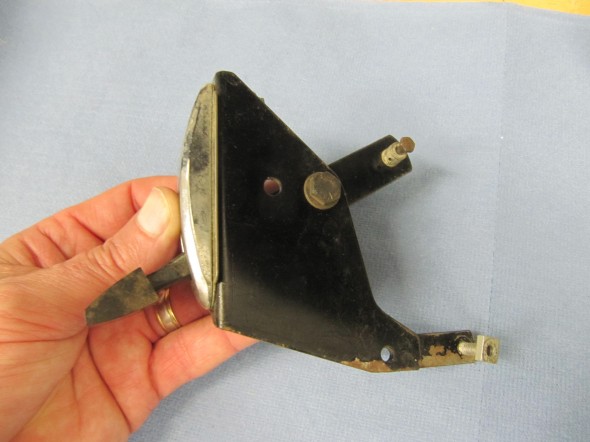
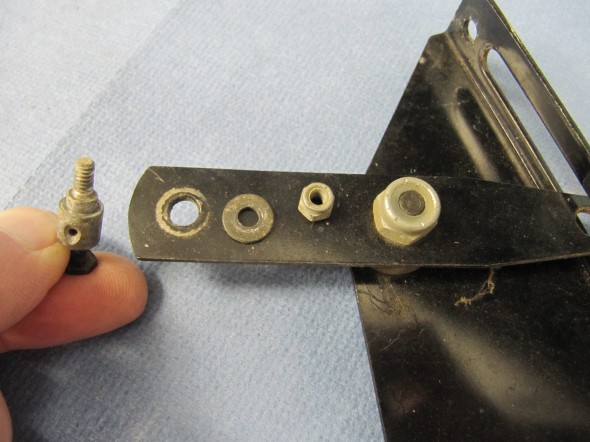
The lever controls consist of the mounting brackets and control arms with chrome bezels and inscribed instructional plates. A plastic knob is screwed into each control arm. Cable attachment hardware and two distance pieces for each chrome bezel mounting post is located on each control arm and bracket. Both assemblies wherein reasonably good condition. I will try to replace the inscribed plates if I can locate a source. I cleaned both assemblies, polished the chrome, lever knob and instructional plates and primed and painted each.

Temperature Control Lever

Temp Control Lever

Temp Control Lever

Temp Control Lever

Temp Control Lever

Temp Control Lever

Temp Control Lever

Temp Control Lever

Temp Control Lever

Distribution Control Lever

Distribution Control Lever

Distribution Control Lever

Distribution Lever

Distribution Lever

Distribution Lever

Distribution Lever

Distribution Lever

Distribution Lever

Temperature and Air Distribution Levers after Renewal

Temperature and Air Distribution Levers

Temperature and Air Distribution Levers

Temperature and Air Distribution Levers

Temperature and Air Distribution Levers

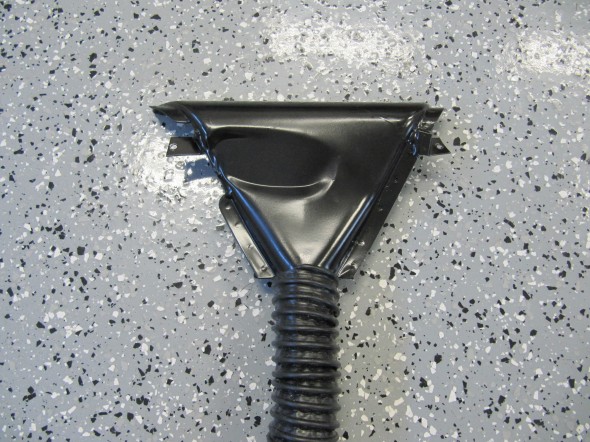
Windscreen Demister Nozzles

Each of the demister nozzles is attached to the scuttle with two #6 x 1/2″ pan head screws. Flexible hose connects each nozzle to rubber elbows in the firewall that access the heater aperture in the scuttle. Each nozzle was primed and painted gloss black.

RH Demister Nozzle with Hose

RH Demister Nozzle with Hose

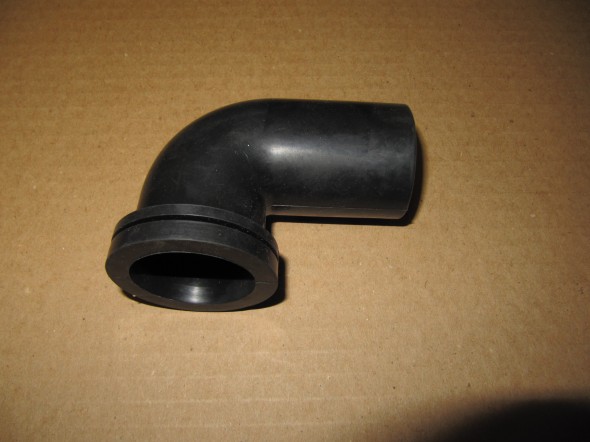
Rubber Elbow

Rubber Elbow

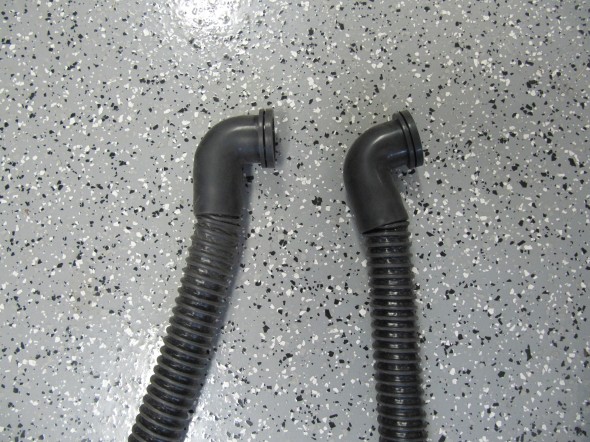
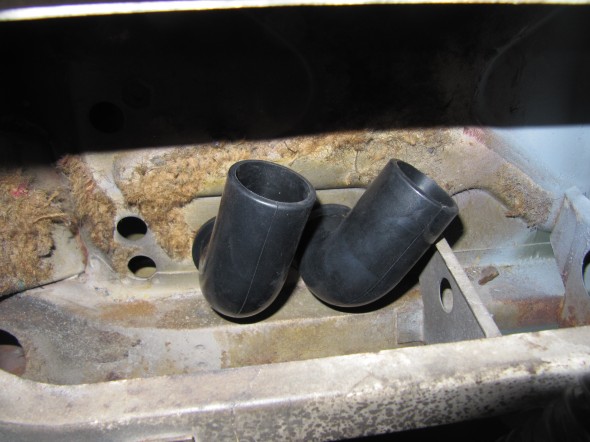
The hose fits inside the rubber elbow. It is a very tight fit. I boiled the elbows in water to make them more pliable and then forced the hose inside. To open the passage and remove any hose restriction I pushed a broomstick up the hose to the elbow.

Hoses Installed in Elbows

Hoses Installed in Elbows

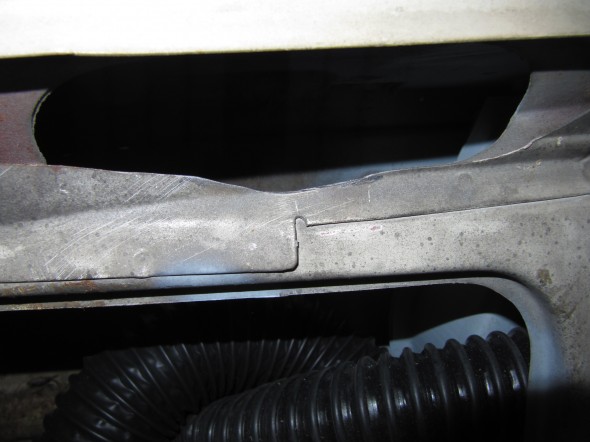
While the RH Demister Nozzle fit into the bodywork quite easily the LH side was very tight so I opened up the sheet metal with a dremel to improve access.

Tight Fit Modification

Tight Fit Modification

Rubber Elbows in Firewall

Rubber Elbows in Firewall

RH Demister Installed

RH Demister Installed

New Wiring Harness Circuits

Power Inputs to the Classic Technologies’ Relay/Fuse Panel

The Classic Technologies Panel has four primary connections.
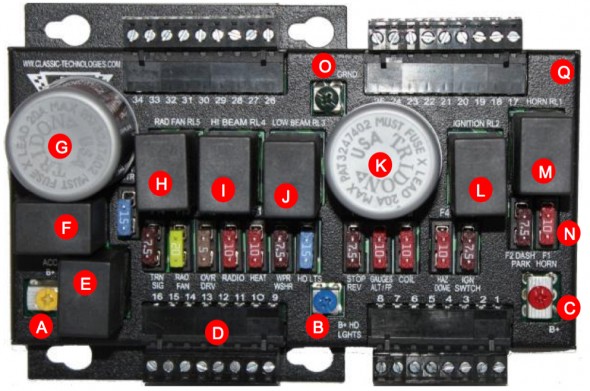
Classic Technology's Relay Fuse Panel

Classic Technologies’ Relay Fuse Panel

A – 12V power input from the small fuse box (battery B+) to power the accessories circuits. A brown 12 AWG wire is used to the Yellow screw terminal spade lug connection.

B – 12V power input from the small fuse box (battery B+) to power the high and low beam headlight relays. A brown/blue 14 AWG wire is used to the Blue screw terminal spade lug connection.

C – 12V power input from the small fuse box (battery B+) to power the constant power circuits in the vehicle. A brown 12 AWG wire is used to the Red screw terminal for a spade lug termination.

O – ground or earth to the car’s chassis.

In my case, 12V power is routed from the battery in the trunk to the starter solenoid mounted centrally on the firewall in the engine bay. The negative terminal of the battery is wired to the car’s chassis. A ground strap is used to connect the grounded chassis to the engine/gearbox.
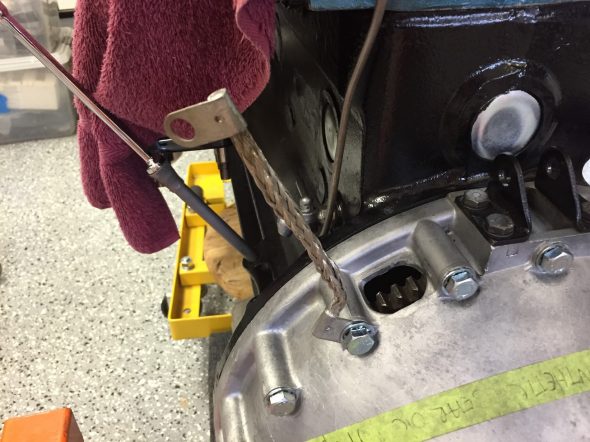
Ground Strap Mounted

Ground Strap Mounted

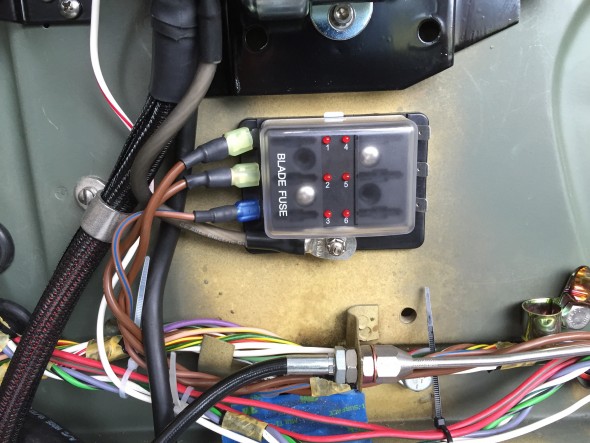
The battery relocation to the boot was addressed in a previous post.From the solenoid, a brown 8 AWG wire delivers power to a small fuse box with six circuits mounted on the firewall directly below the starter solenoid. I used two nutserts for the mounting to the firewall.  Three of the six fused circuits are then used to provide power to three input terminals on the Classic Technologies’ relay/fuse panel. The additional three are spares for the moment.
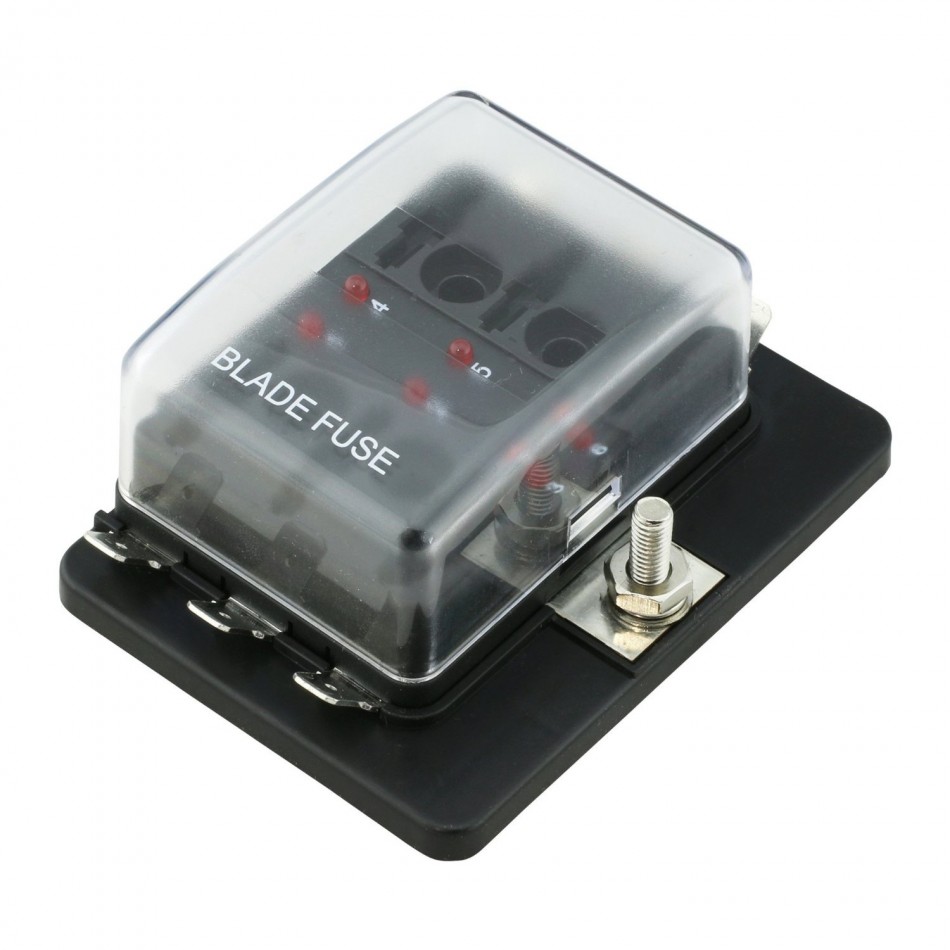
OnLine-LED-Store Six-Way Fuse Box

OnLine-LED-Store Six-Way Fuse Box

This is a diagram of the wiring to the Relay/Fuse Panel:
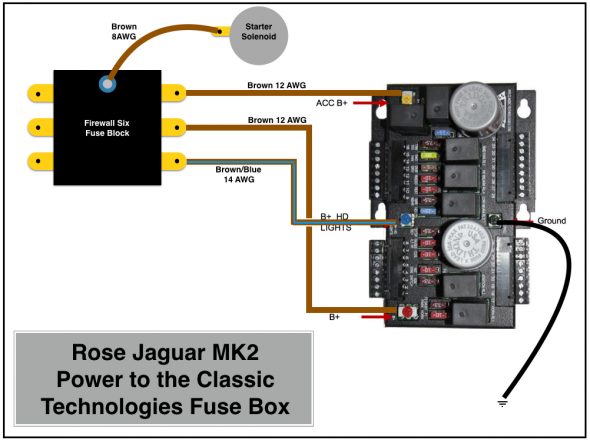
Rose Jaguar MK2 Power to the Classic Technologies Fuse Box
Rose Jaguar MK2 Power to the Classic Technologies Fuse Box

Six Way Firewall Fuse Box Delivering Power to Classic Tech Relay:Fuse Panel

Six Way Firewall Fuse Box Delivering Power to Classic Tech Relay:Fuse Panel

The three wires from the small firewall fuse box, the white/red wire from the solenoid to the fuse panel and the heavy 4 AWG cable from the solenoid to the alternator will be “packaged” together in one TechFlex sleeve/cover.

Before getting into the allocation of the thirty-four fuse positions available to use in the Classic Technologies Relay/Fuse panel, it might be helpful to once again point point out that as indicated in the post on new wiring harness connectors I developed a spreadsheet to be used in conjunction with wiring diagrams. The spreadsheet lists all connection points of the electrical wiring system. Links are provided below:

Again, a disclaimer is appropriate: The spreadsheet is provided as guidance for those who might wish to do something similar, but it should not be duplicated or utilized without careful inspection and  approval by a certified automotive electrician.

This alphabetical listing of components is provided to help quickly identify items in the electrical system. A spreadsheet line number(s) associated with the component is indicated.

Rose Jaguar MK2 Electrical Connections Alpha listing

This is the spreadsheet showing all connections:

Rose Jaguar MK2 Electrical Connections Spreadsheet

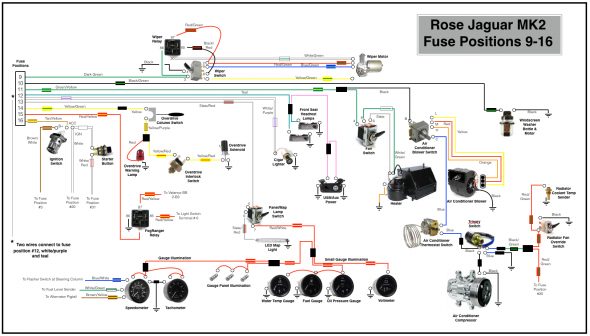
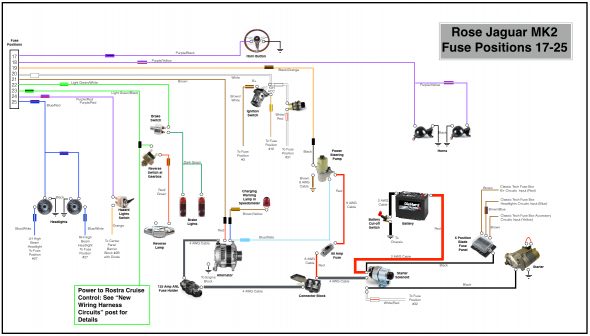
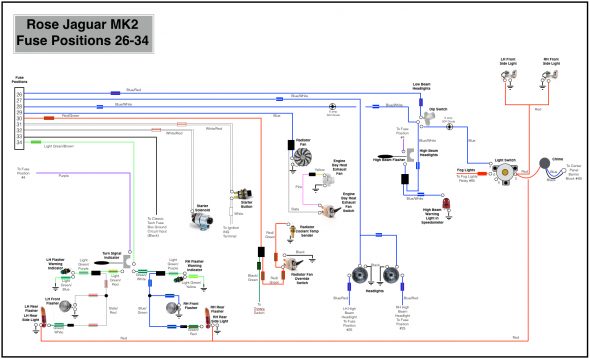
The following four diagrams illustrate the wiring sourced from the thirty-four fused positions in the system. Please let me know if as a reader you note an error or an omission. I apologize for the somewhat primitive diagrams as I did not have proper software available to do the job. I resorted to “Keynote” a presentation software to complete the task.
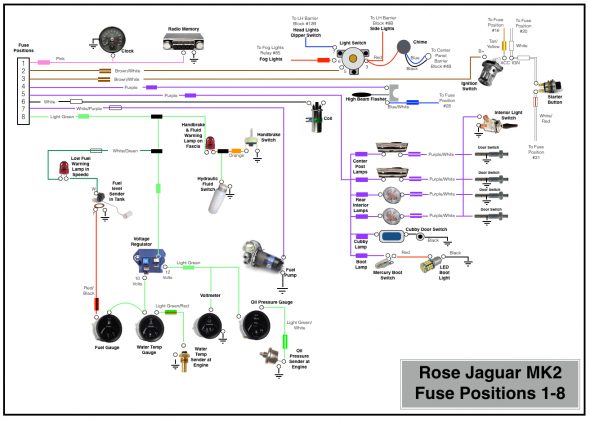
Rose Jaguar MK2 Fuse Positions 1-8
Rose Jaguar MK2 Fuse Positions 1-8

Rose Jaguar MK2 Fuse Positions 9-16
Rose Jaguar MK2 Fuse Positions 9-16

Rose Jaguar MK2 Fuse Positions 17-25
Rose Jaguar MK2 Fuse Positions 17-25

Rose Jaguar MK2 Fuse Positions 26-34

Rose Jaguar MK2 Fuse Positions 26-34


Circuit Modifications & Additions

Several of the modifications I am making to my MK2 require either modified or new electrical circuits. I highlight below the details of some of these wiring changes.

Starter Solenoid

I replaced the original starter solenoid with a new one sourced from SNG Barratt. The large post closest to the firewall provides the mounting for the 4 AWG cable to the starter. The large post closest to the engine mounts three cables: the 2AWG cable from the battery, the 4AWG cable to the block connector on the electrical panel on the LH engine bay valance (ultimately to the alternator), and a 8AWG wire to the 6-way firewall fuse panel. On the upper small post on the solenoid a single wire from the starter button is attached.

Alternator

I have considerably more power requirements in my car than could be addressed by the original dynamo/generator.

The specifics of the Hitachi 120 amp alternator I am using may be found under the “electrical components” posting. However, I will detail the wiring to support the alternator here.

I decided to go with 4AWG cable and also decided to install a fuse in the line between the alternator and the wiring system to avoid any possibility of a problem with a power surge created by a bad regulator in the alternator.

I sourced the cable and fuse from CE Auto Electric Supply. The folks at CE Auto Electric Supply are very helpful and they sell high quality products. Both products are typically used in high-end sound system applications. This particular cable has 1,862 strands. The cable was terminated with 3/8″ terminals, properly crimped and covered with adhesive shrink tubing.
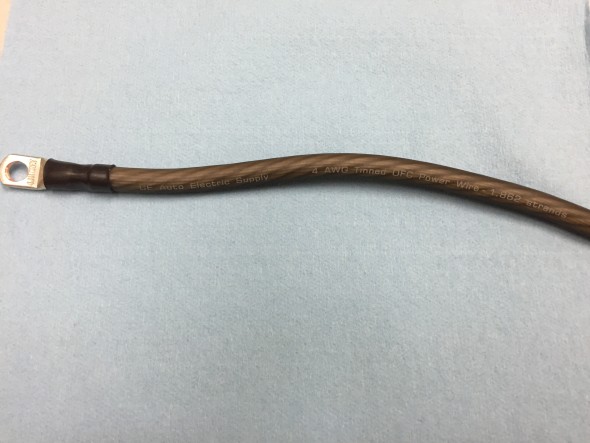
Alternator Cable CE Supply 4AWG 1862 Strands

Alternator Cable CE Supply 4AWG 1862 Strands

I installed a JL audio premium series master ANL fuse block with a 125 amp “Stinger” ANL style fuse, part number SPF52125 on the lower right portion of the original fuse panel.
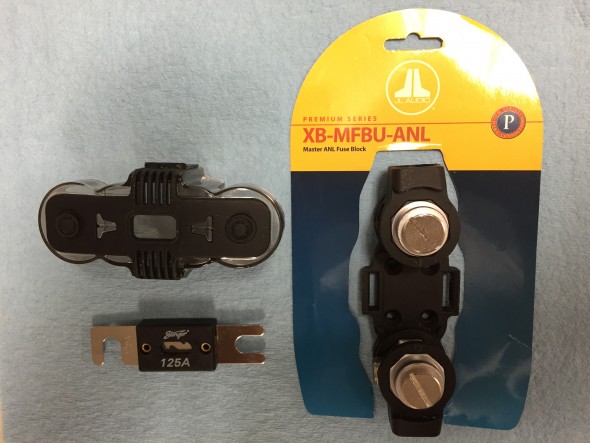
ANL 125 Amp Fuse with J&L Holder

ANL 125 Amp Fuse with J&L Holder

Two three-quarter inch long machine screws were used to secure the fuse block to the panel. On one I was able to take advantage of the 10–32 captured nut that was already on the fuse panel, and on the other I used a nutsert with the 10-24 screw.

One of the nice features of this particular fuse block is that the ProStar hexagonal posts can be rotated so that the cable can approach from almost any angle. As you can see in the photo, I took advantage of this feature. After the engine is installed, the alternator cable will be cut to proper length.

As can be seen in the image, the cable from the ANL fuse connects to a connector block also used for the power steering.
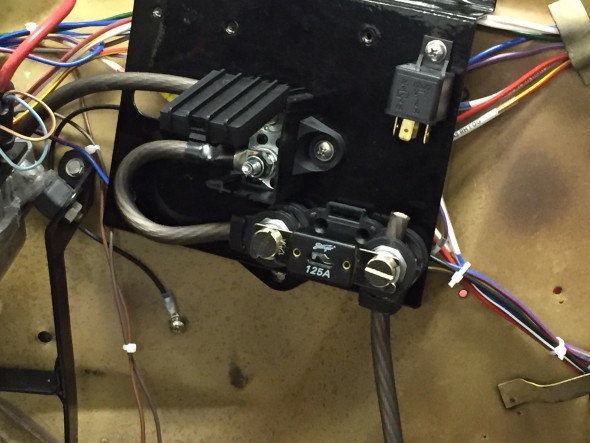
Alternator Fuse Mounted

Alternator Fuse Mounted

The cable is then routed from the connector block along the LH valance and the firewall to the starter solenoid. It is difficult to track because of all of the in-process wiring, but the path of the alternator cable is visible in the image below:
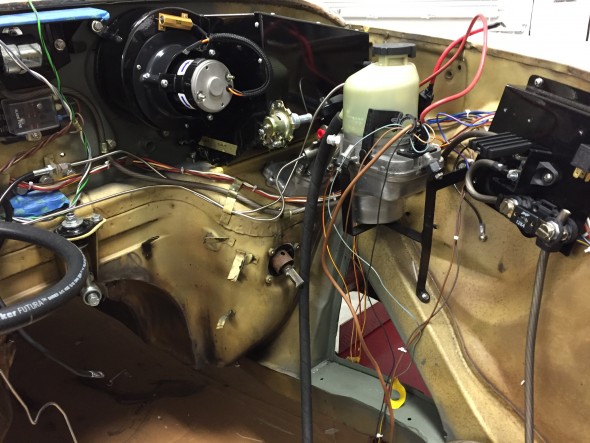
Alternator Cable Wiring

Alternator Cable Wiring

Power Steering Pump

The installation of the power-assisted rack and pinion steering requires the conversion to negative earth and the installation of an alternator replacing the original dynamo/generator. The kit, as supplied, provided a Lucas 80 amp LMA 604 alternator. However, due to other electrical requirements I chose to upgrade to a 120 amp Hitachi alternator. Details about the alternator are found at this link: https://valvechatter.com/?p=4113.

M&C Wilkinson provided wiring instructions, but my configuration is slightly different than in the application they referenced. The wiring diagram below is my interpretation of the wiring required for the pump in my car.

Five wires emanate from the pump. The heavy brown wire connects to ground. The heavy red cable connects to the supplied 80 amp fuse. The 22 gauge black wire connects to the fuse panel at location #19 or #23. The 22 gauge blue/slate wire connects to the alternator at the indicator lamp post.
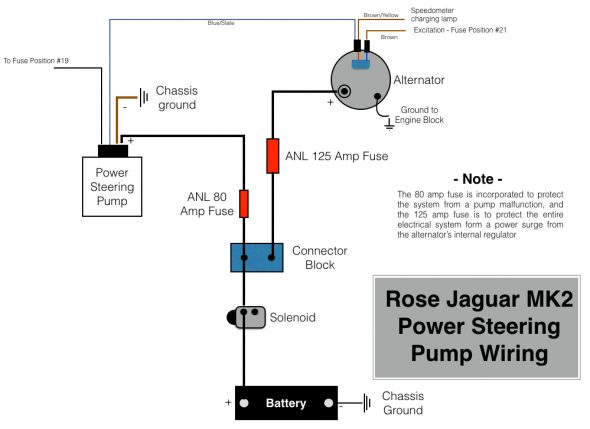
Rose Jaguar MK2 Wiring Diagram for Electric Power Steering Pump

Rose Jaguar MK2 Wiring Diagram for Electric Power Steering Pump

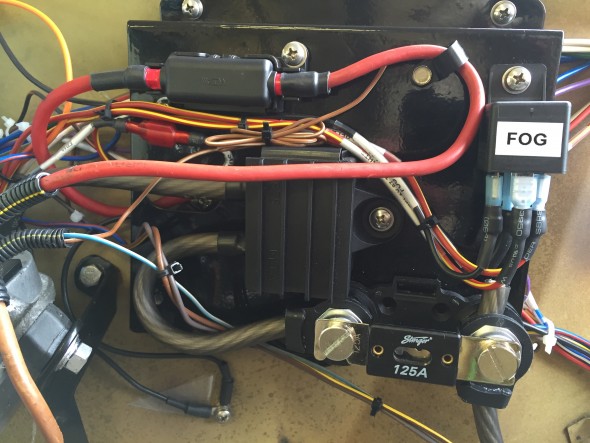
In this image I have installed the 80 amp fuse for the power steering pump. The Bosch relay will be used for the Fogranger fog lamps. All of this will be out of view once the black sheet metal cover his made for the panel.
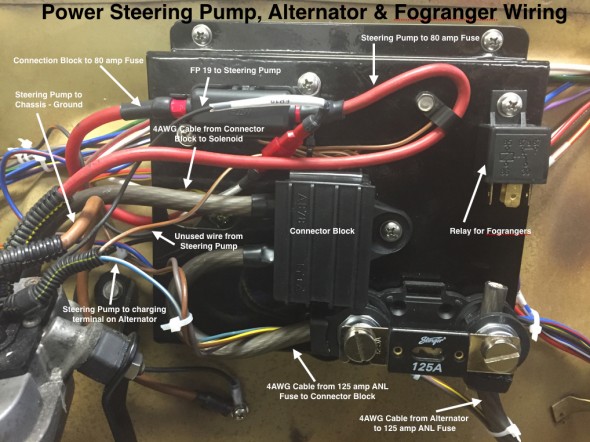
Power Steering Pump, Alternator & Fogranger Wiring on Electrical Panel

Power Steering Pump, Alternator & Fogranger Wiring on Electrical Panel

Heater Fan Wiring

A full description of the restoration and modification of the heater box and fan may be found at the Heater Post on this Valvechatter website. The following information addresses the wiring of the heater fan.

The orange wire from the motor is connected to ground. The black wire to the “inside” post (closest to the heater box) of the resistor. The slate wire from terminal #6 on the switch is connected to the “outside” post (closest to the blower fan) of the resistor. The white/green wire from terminal #8 on the switch connects to the “inside” post on the resistor. The green/yellow wire from the #4 terminal of the switch is connected to the fuse position #11 for power. With this wiring in place, the lower position of the switch is “off,” the middle position is “Low Speed” and the upper position is “High Speed.”

I created a pigtail (seen below) from the resistor for the heater fan wiring. Two wires in the pigtail are connected through two-way snap connectors to wires of the same color which route through the firewall and ultimately back to the Fan Switch. The black wire in the pigtail goes directly to the fan motor. The orange wire from the motor is the ground and it is connected to the LH valance grounding terminal strip.
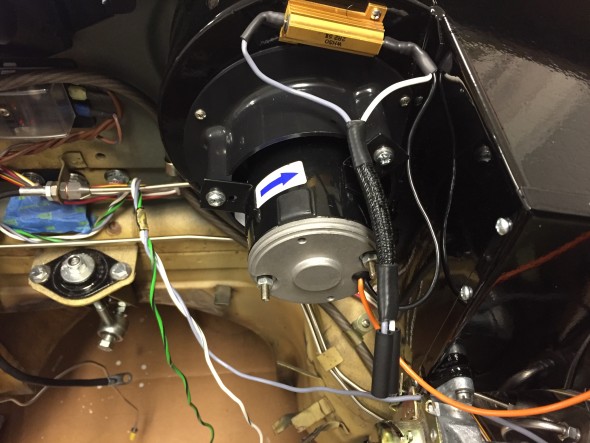
Heater Fan Wiring

Heater Fan Wiring

Heater Fan Wiring

Heater Fan Wiring

Wiper Motor Wiring

As documented in my post entitled Wiper System Upgrade, I installed a Lucas 29W wiper motor kit from Classic Motor Cars in the UK. The upgrade includes a relay mounted behind the central instrument panel assembly. The wiring for the wiper switch is referenced above under the section “Instrument Panel Assembly Switch Wiring.” This is a diagram of the wiring:
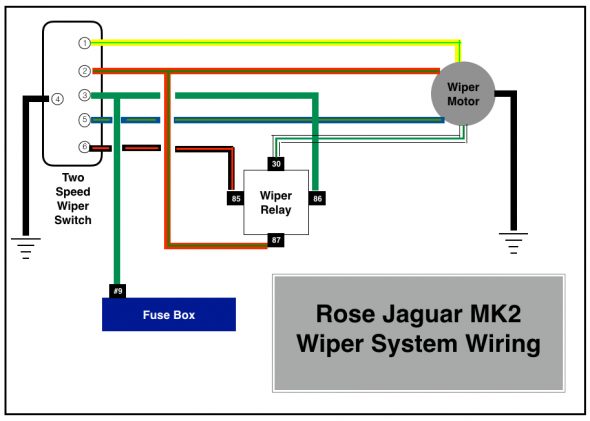
Rose Jaguar MK2 Wiper System Wiring

Rose Jaguar MK2 Wiper System Wiring

This is an image of the wiper motor mounting. I used eight of the ten connection points in a ten-way rubber snap connector and fastened it to engine bay RH valance with an original type retaining clasp. note the wiper motor ground connection to the upper left.
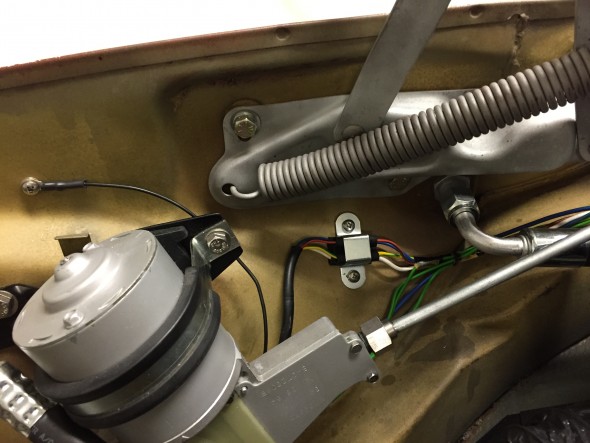
Wiper Motor Mount and Wiring

Wiper Motor Mount and Wiring

Cruise Control Wiringcruise-control-installation-disclaimer-001

A full description of the installation of the Rostra Cruise Control System in my MK2 is provided in the MK2 Cruise Control Post. My wiring diagram, tailored for my 1964 Jaguar MK2 application, is provided below. As the disclaimer above indicates, the wiring description in this post journals what I did for my car. It is not my intention to describe what you should do for your car!

This is a link to a pdf of the wiring diagram and it is also shown in the image below:

rostra-cruise-control-wiring-for-jag-mk2
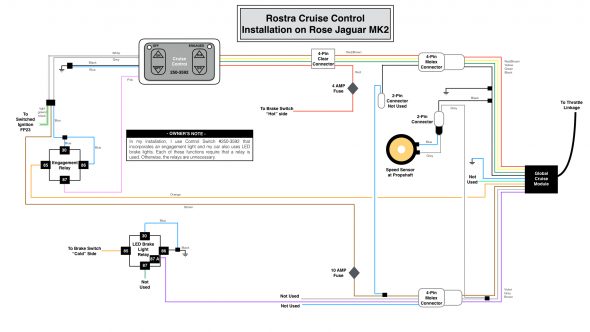
Rostar Cruise Control Wiring for the Rose MK2

Rostar Cruise Control Wiring for the Rose MK2

Central Locking and Keyless Entry Wiring

A full description of the locking system may be found at the “Remote Control Door Locks web site entry: https://valvechatter.com/?p=9205. The wiring for the system is comprised of two components. The MES Central Locking Control Module operates the door lock actuators. Once that system in properly installed and operating as it should, the AVITAL keyless entry module is added to permit use of a key fob to wirelessly lock and unlock all doors. An added feature of the system is that about fifteen seconds after ignition all doors are locked automatically. 

The following wiring diagram is unfortunately a bit busy. This is a link to a pdf file of the diagram: Keyless Entry Power Locks for Rose Jag MK2 and a jpeg file is depicted below:
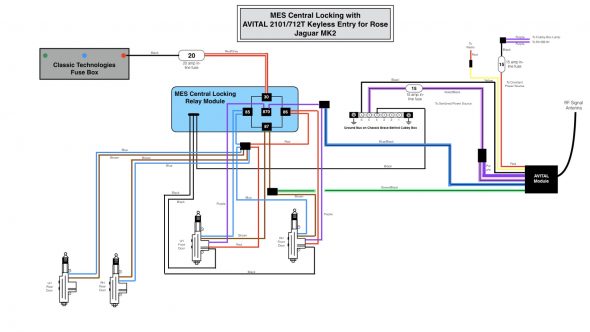
Keyless Entry Power Locks for Rose Jag MK2


Air Conditioner Operating Controls Wiring

A full description of the installation of the RetroAir air conditioning system in my MK2 is provided in the “Air Conditioning” Post. The wiring of the controls and devices for the air conditioning system is depicted in the following diagram:
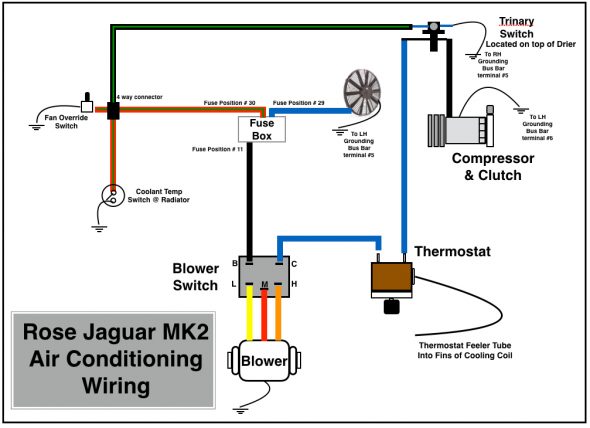
Rose Jaguar MK2 Air Conditioning Wiring

Rose Jaguar MK2 Air Conditioning Wiring

This is a photograph of the wiring harness provided in the RetroAir kit. In my application I did not use the circuit breaker shown in the image because I wired the blower switch directly to the fuse panel and protected the system at that point with a 40 amp fuse.
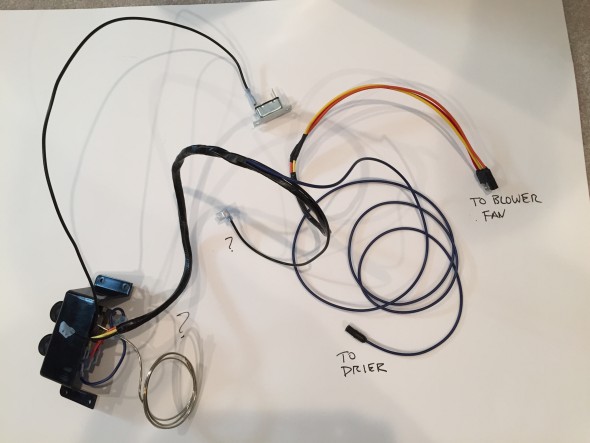
RetroAir Wiring Harness Kit

RetroAir Wiring Harness Kit

As the diagram above illustrates, I chose to install a trinary pressure safety switch in the air conditioning electrical circuit. The trinity switch is also discussed in the “Air Conditioning Post.”
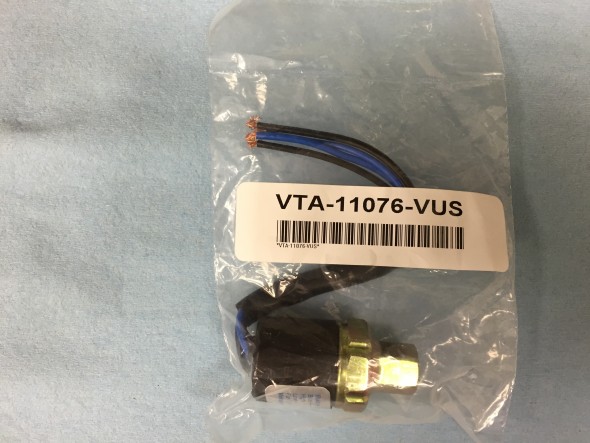
Vintage Air Trinary Switch

Vintage Air Trinary Switch

The Vintage Air trinary switch kits combine low and high pressure compressor clutch cut-off functions plus an electric fan engagement signal at 254 psi. The low pressure cut-off of these trinary switches is 30 psi and the high pressure cut-off is 406 psi.

http://www.vintageair.com/Instructions2013/904678.pdf

The switch as supplied has two blue wires and two black wires. Because the switch is located in a right from wheel well and exposed to the elements, I connected the four wires to a waterproof connector purchased from British Wiring, and then routed the wires to their termination points. One blue wire is for ground and the other for fused power. One black wire connects to the compressor and the other to the thermostat controller for the air conditioner.

Turn Indicator and Headlamp Flasher Switch at the Steering Column  and the Laycock De Normanville Overdrive Switch and Wiring

The electric overdrive is activated by a lever switch on the right side of the steering column. Power is derived from fuse position #14 of the CT fuse box. With lever activation a signal is sent to the overdrive interlock, or top gear switch located on the top of the gearbox and then to the overdrive solenoid. A warning indicator bulb is illuminated when the overdrive is engaged. More information about the switch and lever mechanism may be found in the “electrical components” post.
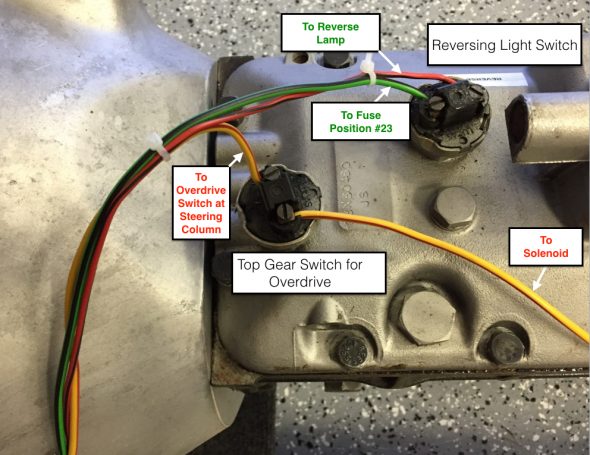
Overdrive Interlock or Top Gear Switch at gearbox

Overdrive Interlock or Top Gear Switch at gearbox

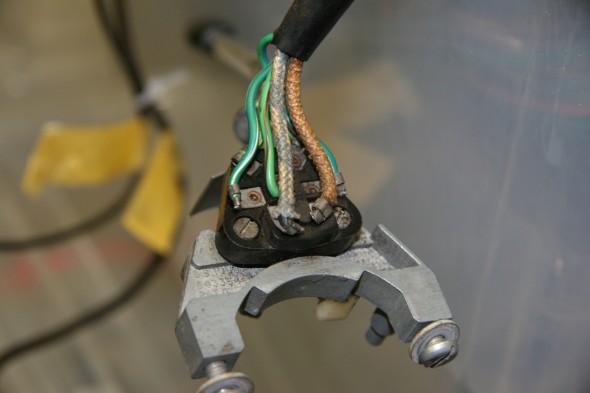
The lever on the left side of the steering column is used in an upward and downward motion to activate the LH and RH turn indicator flashers at the front and rear of the vehicle. When the flashers are functioning an indicator bulb located in a centralized position behind the steering wheel is illuminated in a flashing pattern. The headlamp flasher is activated by the driver pulling the same lever toward himself. This action will trigger the high beam warning light in the speedometer.
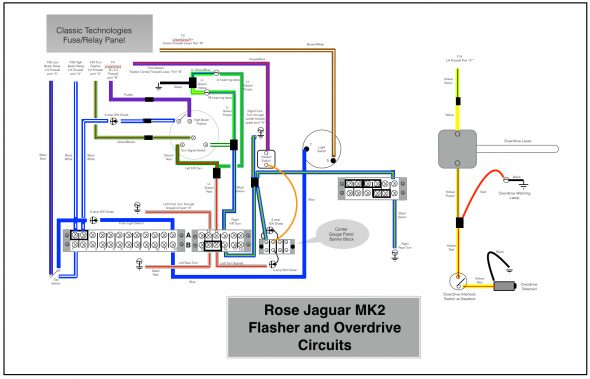
Rose Jaguar MK2 Flasher Circuit & Overdrive
Rose Jaguar MK2 Flasher Circuit & Overdrive

Turn Signal Switch Wiring
Turn Signal Switch Wiring

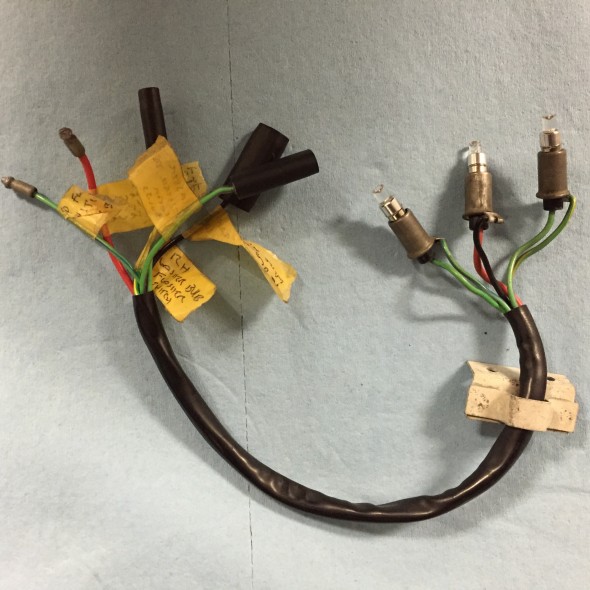
Turn Signal and overdrive indicator bulbs, holders, and pigtail

Turn Signal and overdrive indicator bulbs, holders, and pigtail

Auxiliary Power/USB Ports

I intend to install an arm rest/console between the front seats in my MK2. The console will include an auxiliary power/USB port unit. Power is sourced from the fuse box, position #12.
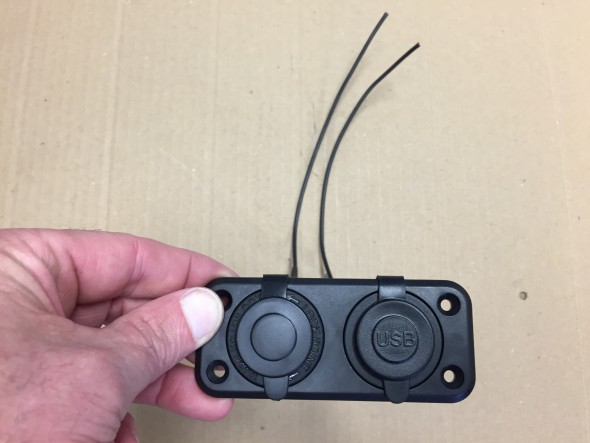
Auxiliary Power and USB unit
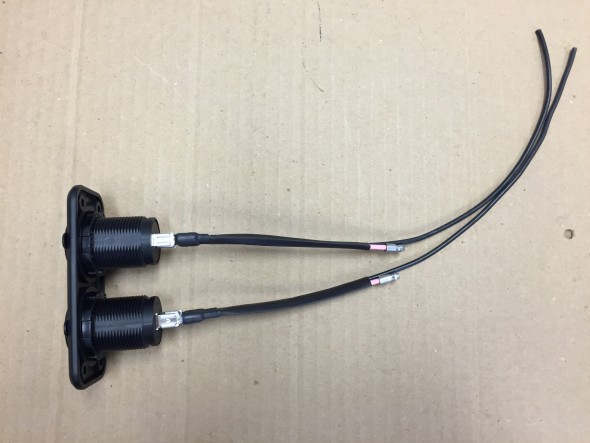
Auxiliary Power and USB unit

Auxiliary Power and USB unit

Auxiliary Power and USB unit

Powered Front Seats

The front seats I am using are from a Jaguar XJ40. More information about the seats is available at the “Seating” post. They have more features than I plan to use.
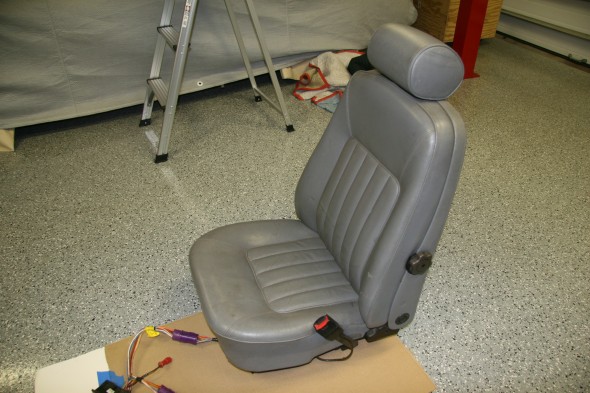
1990 Daimler Front Seats

1990 Daimler Front Seats

Although the wiring harnesses were complete, there were a number of electrical connectors on the harnesses with no explanation as to what needed to be connected where to get the seats functioning.
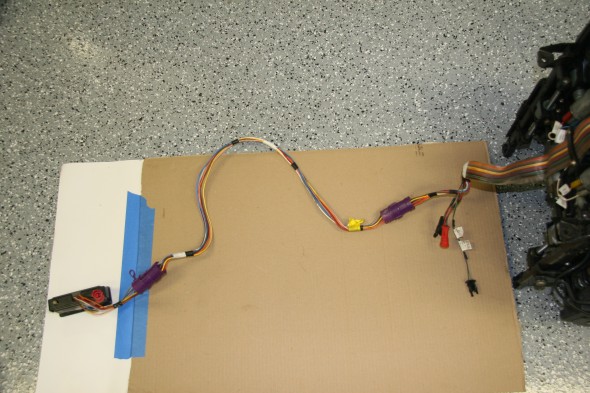
Seat Wiring Harness and Switches

Seat Wiring Harness and Switches

The seats have seat heaters (upper and lower cushions), a memory feature for the driver’s seat, seat belt alarms, and wiring to permit automatic movement of the driver’s seat to the aft position when the driver’s door is opened.

After some enquiries on the Forums, Bryan Neish came to my aid. He was of great help figuring out what the wiring at each of the connectors did. I know he spent quite a lot of time reviewing wiring diagrams to find what I needed. George Leicht was also helpful. He sent along the wiring diagram that accurately reflected my seat wiring.

I wired the seats to unswitched power at the fuse box to facilitate seat operation before entry or before starting the ignition. I was able to use the original seat wiring harness and bank of switches to control the four motors adjusting the lower and upper seat cushions for each chair. The wiring runs under the center console to each seat. A pdf file of the seat wiring schematic for 1990 may be found here: 1990 Jaguar XJ40 Seat Electrical Schematic

I have yet to decide where I will mount the switches. The image below shows the approximate location of the switches as Ton Tulleken installed them on his car:
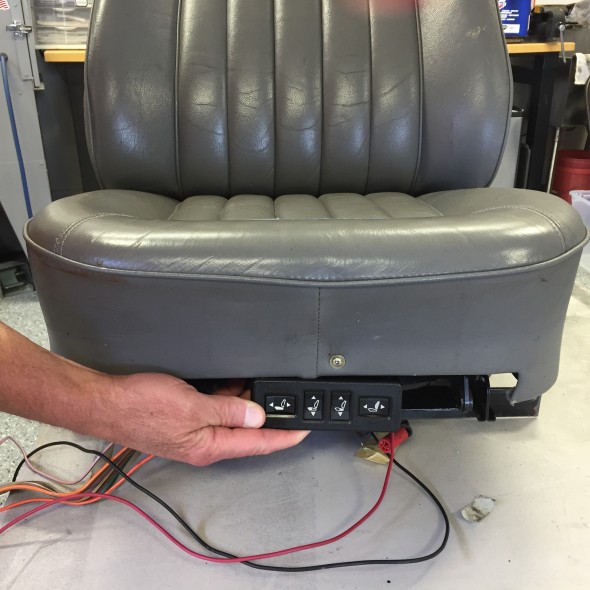
Possible Placement of Seat Switches
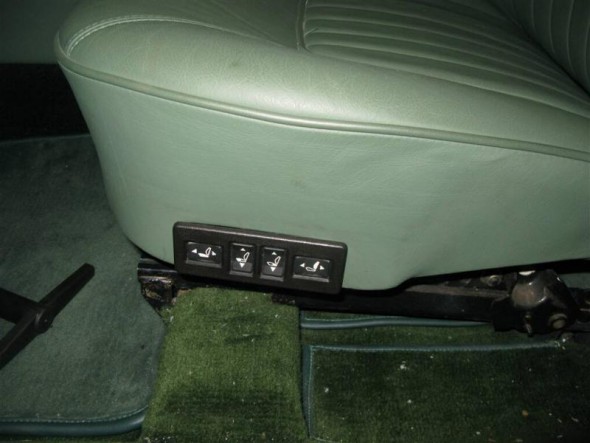
Possible Placement of Seat Switches

Kevin Moore's MK2 power seat switches

Kevin Moore’s MK2 power seat switches

The image above shows the location of the switches in Kevin Moore’s car.

Lighting

SideLights

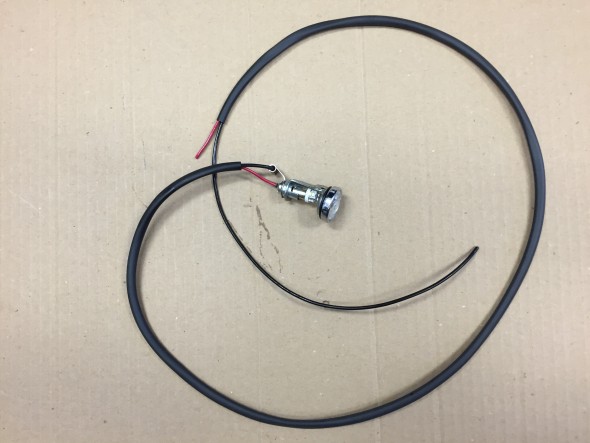
Additional detail about the sidelamps may be seen in the exterior lighting post. I rewired the original side lamp fixtures and trial fitted them to the body. The rubber “O” rings supplied by SNG Barratt are to thick to fit properly so I replaced them with metric 24mm – 2mm “O”rings ordered from McMaster Carr. New LED bulbs were also fitted in the fixtures. The red 18 AWG wire from the bulb is combined with a black 14 AWG ground wire from the fixture in a vinyl sleeve that goes through the LH and RH valance lighting grommet.
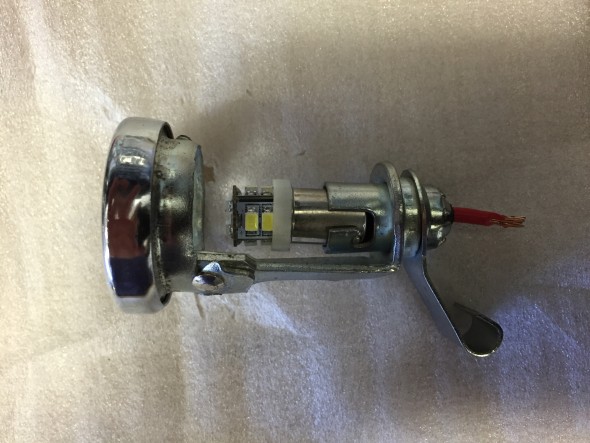
SideLamps
SideLamps

RH Side Lamp Wiring & Sleeving
RH Side Lamp Wiring & Sleeving

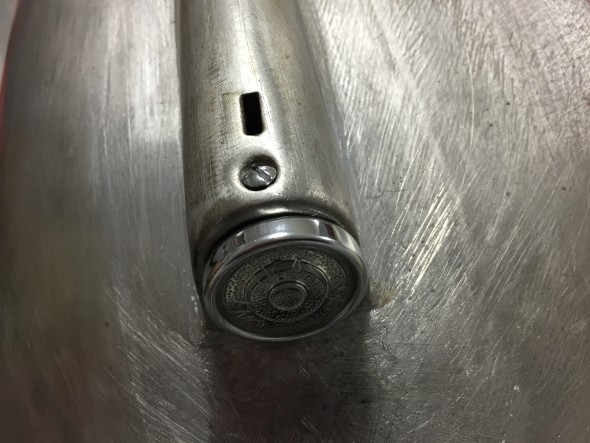
Refurbished side lights installed

Refurbished side lights installed

Turn Signal Flasher Lamps

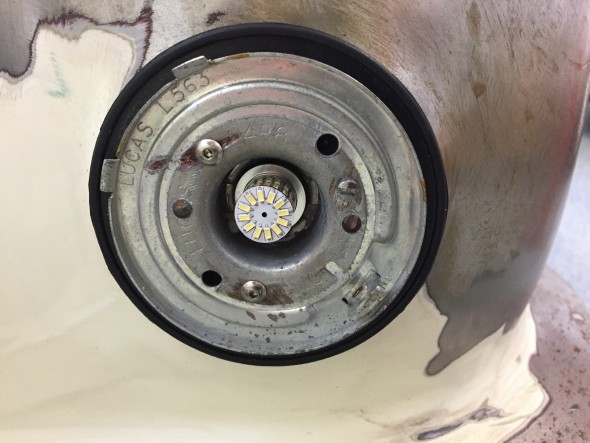
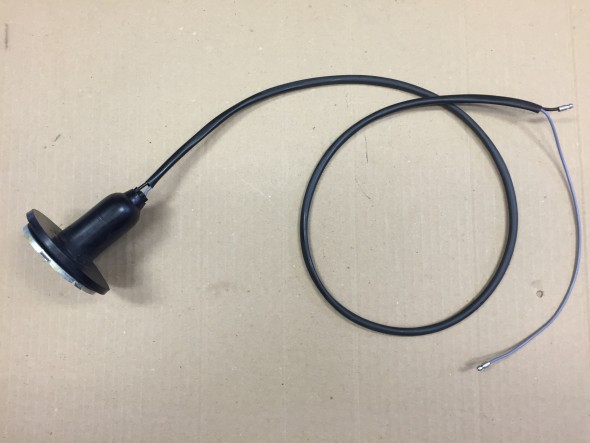
After installing the side lamps I moved to the turn signal flashers. Information about the lamps is contained in the exterior lights post. I re-used the original fixture wire terminals but replaced the power and ground wiring with new. The power wire is blue/green 18 AWG and the ground wire is black 14AWG. The wiring is pushed through holes on the back end of the fixture’s new rubber boot. New vinyl sleeving was also used for the flasher lamps.
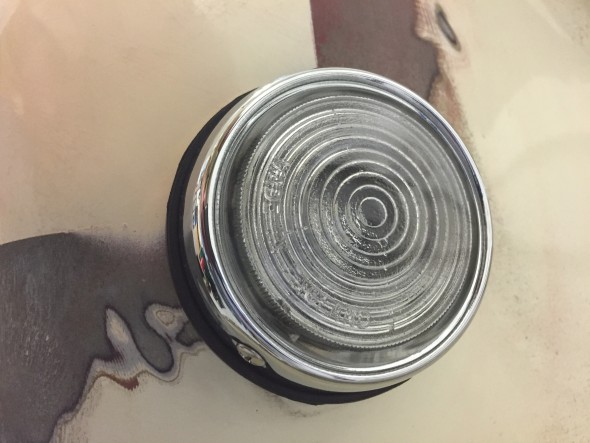
Front Flasher Turn signal
Front Flasher Turn signal

Turn Signal Flasher with LED Installed
Turn Signal Flasher with LED Installed

Turn Signal Flasher Wiring

Turn Signal Flasher Wiring

Fograngers

More information about the fog rangers may be found in the exterior lights post. The Classic Technologies Fuse box did not have a relay designed into the product for fog or driving lights, so I added a Bosch relay for this function. It is mounted on the original fuse panel in the engine bay on the LH valance. The foglights are controlled by the primary light switch.
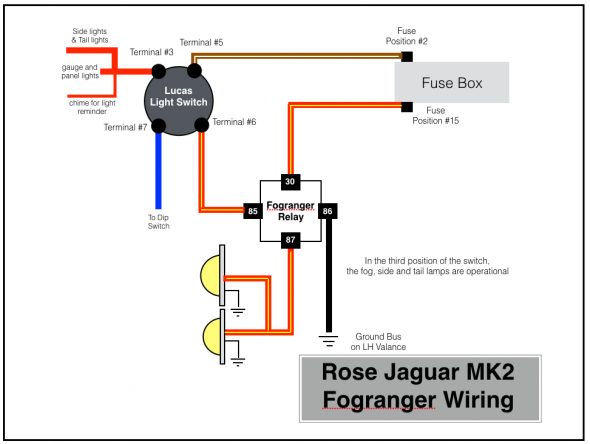
Rose Jaguar MK2 Fogranger Wiring
Rose Jaguar MK2 Fogranger Wiring

Fogranger Relay
Fogranger Relay

RH Fogranger Installed

RH Fogranger Installed

Headlights

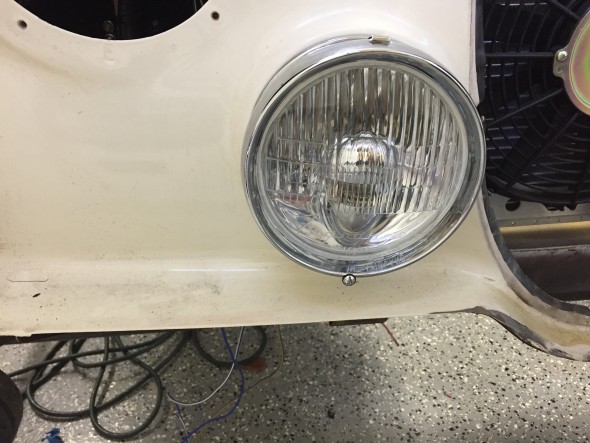
More information about the headlights may be found in the exterior lights post. I installed new 3 wire (high beam, low beam, and ground) plugs, wiring and sleeving for the headlights.
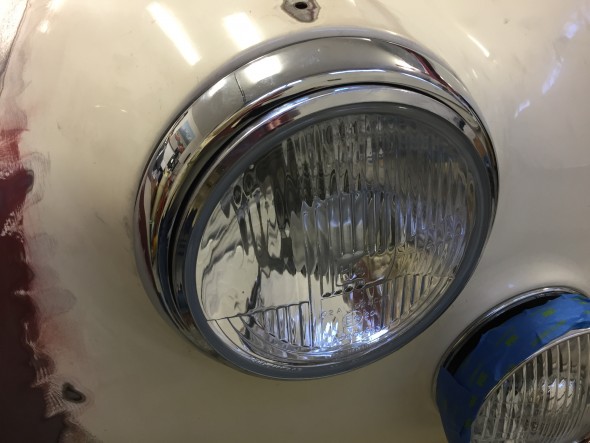
Headlight Installed with Newly Chromed Trim Ring

Headlight Installed with Newly Chromed Trim Ring

Although not too pretty yet, this image shows the temporary installation of all of the front exterior lights. The blue painter’s tape is to protect the chrome. The installation was done to make sure that I had all the parts needed for a particular light and to test the electric circuitry and switches.
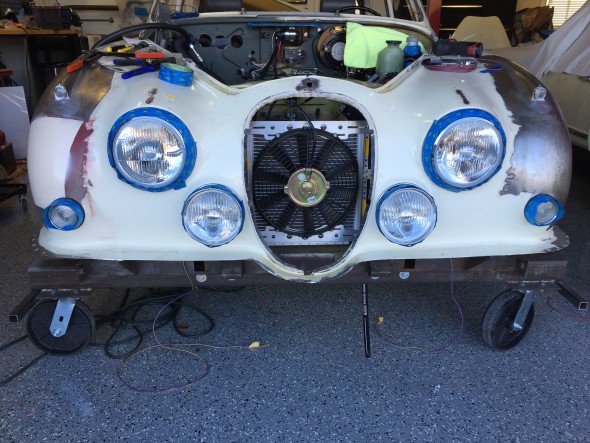
Temporary Installation of front Exterior Lights

Temporary Installation of front Exterior Lights

These images show the exterior lights wiring in new sleeving as it is routed from the individual fixture through the large wiring grommet located on each valance.
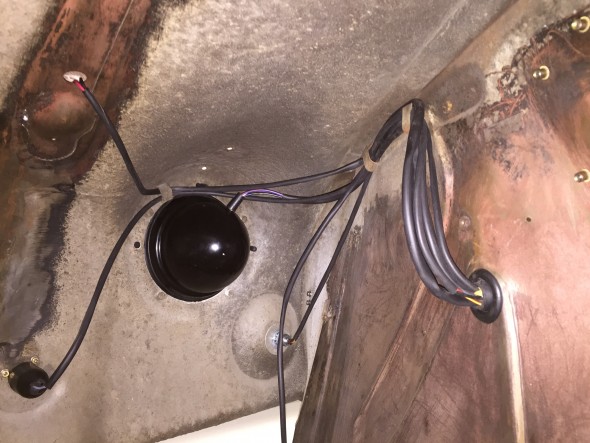
LH Front Exterior Lights Wire Sleeving and Routing
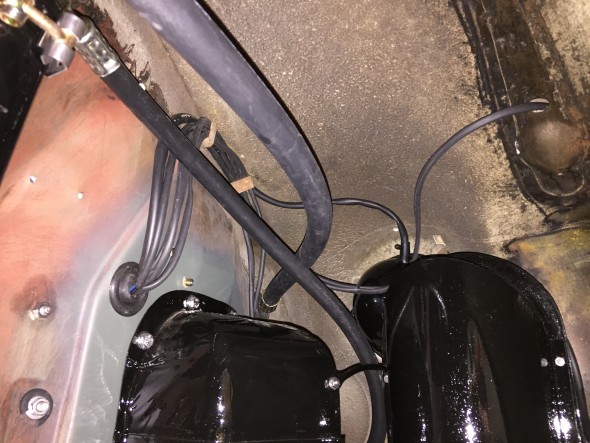
LH Front Exterior Lights Wire Sleeving and Routing

RH Front Exterior Lights Wire Sleeving and Routing

Tail Lights

More information about the tail lights may be found in the exterior lights post. I substituted LED bulbs for the original incandescent type; however, the wiring remains the same. In fact, I was able to reuse the original wire leads from each of the bulb holders. The upper bulb is for the flasher with a single wire lead. The lower bulb is for the regular lights plus an additional light for the brakes with a double wire lead.
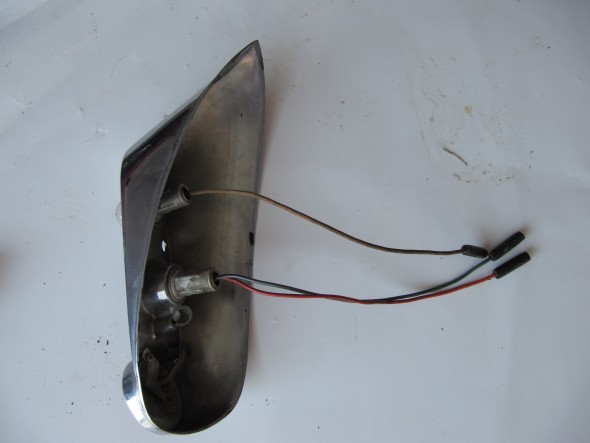
Tail Light Wire Leads
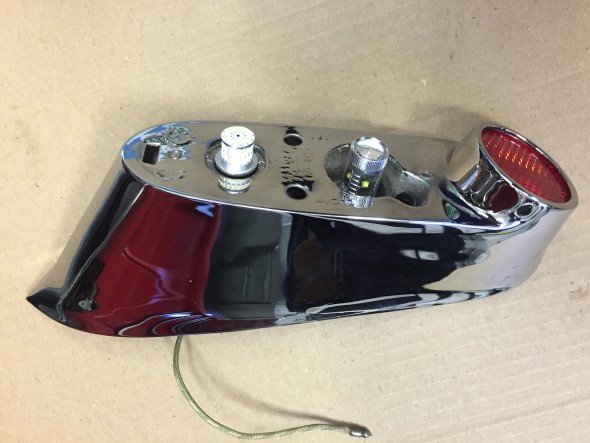
Tail Light Wire Leads

Tail Light LED Bulbs

Tail Light LED Bulbs

Number plate illumination and reverse lamp

More information about the lamp may be found in the exterior lights post. The lamp includes one light for the luggage compartment, two bulbs for the license plate illumination, and one bulb for reversing. All original incandescent bulbs were replaced with LEDs. The original wiring harness for the lamp was in pretty good shape, but I constructed a new one with all fresh wiring.
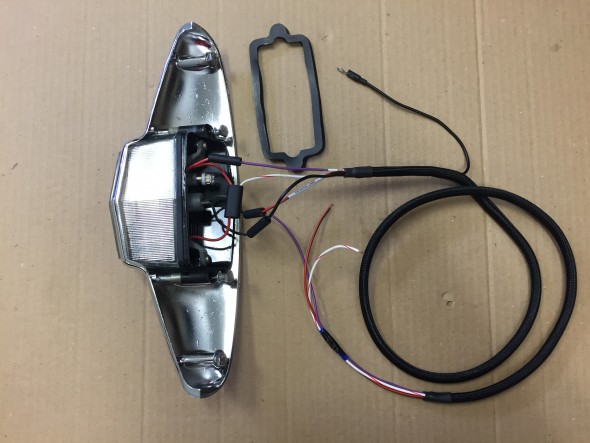
Boot Lamp with new wiring harness

Boot Lamp with new wiring harness

Luggage compartment lamp

As my friend Eric Kriss points out in his MK2 restoration blog, the luggage lamp seemed to be an afterthought to Jaguar engineers. To function the light switch on the gauge panel had to be turned on, but it is often the case that one would want to access the luggage area after the car’s ignition, much less its lights were turned off! Instead of wiring the luggage compartment lamp in series with the front marker and rear tail lights, Eric revised the wiring to move the luggage compartment lamp to its own circuit. To make the lamp illuminate when the boot lid is opened a position sensitive mercury tilt switch is used. As Eric describes, when upright a ground connection is established permitting current to flow to the bulb. When the boot lid is shut, the ground connection is broken so the light goes off.Mercury Tilt Switch
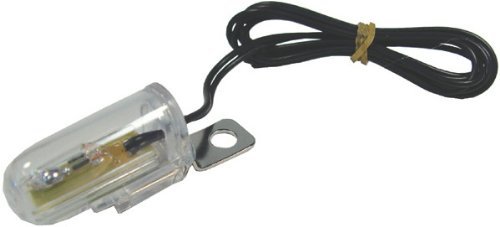
 

Interior Lights

The MK2 as original had six interior lamps: the map light at the central gauge panel, a lamp at the top of each center or “B/C” pillar, a lamp in the cubby box and a lamp on each side of the rear of the car above the passenger seat. These latter lamps referred to as rear quarter interior lamps. My Mk2 will also have two courtesy lamps in the back of the front seat headrests. More information concerning these lamps may be found at the “Interior Lights” post.

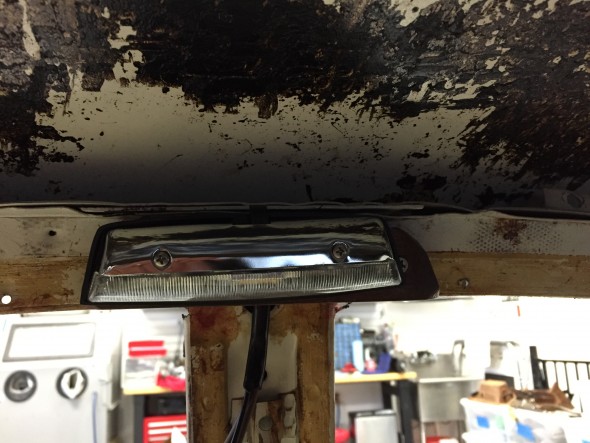
As pointed out in the “Interior Lights” post, the replacement center pillar lamps are not exact replacements for the originals. They are operationally superior in that they provide an “on-off” switch at the lamp, and also because they screw, rather than snap, together. They just don’t look quite as nice being plastic rather than chrome metal. Just to check fit and to test the electrical system I did install the new center pillar lamps mounted on their wood bases. An additional grounding wire is used with the new lamp for its switch so there are three wires rather than the original two. For purposes of testing the electric system I temporarily fixed the third ground wire to the pillar as shown in the third photo below.

36 mm festoon bulbs in warm white were substituted for the original incandescent bulbs.The lamps are wired to the interior lighting circuit that includes the interior lamps toggle switch on the central gauge panel as well as the four door switches. The black ground wire is simply attached to the metal center pillar.
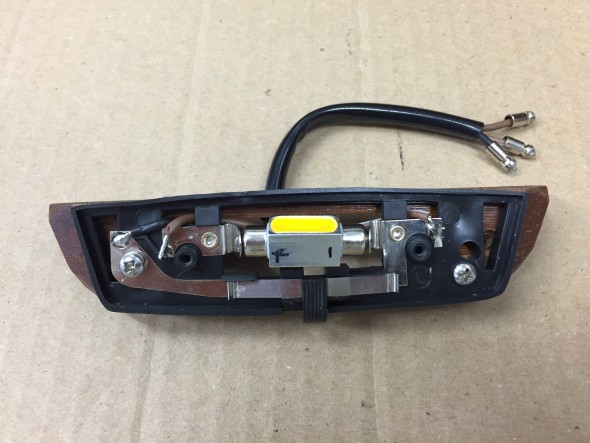
New three-wire center pillar lamp with switch
New three-wire center pillar lamp with switch

New center pillar lamp loosely mounted on wood base
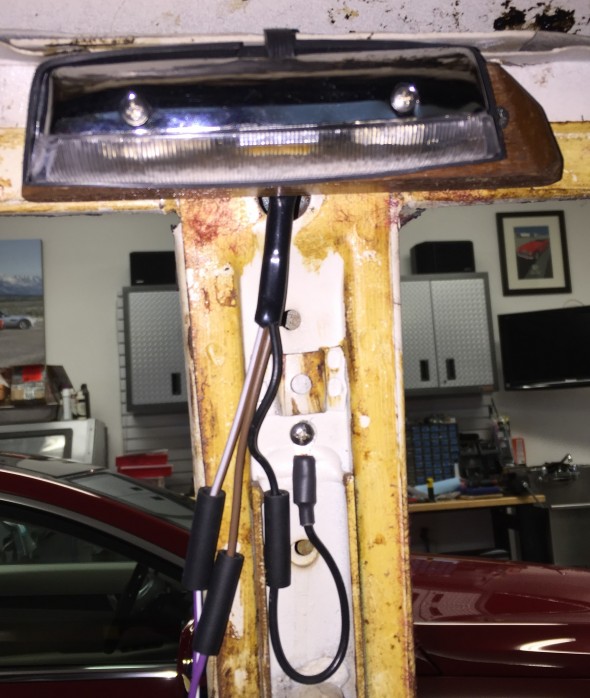
New center pillar lamp loosely mounted on wood base

Temporary ground connection for center pillar lamp switch

Temporary ground connection for center pillar lamp switch

I trial fit the new, but as original, rear quarter lamps which required making new plywood mounting frames. Wiring for the rear quarter interior lamps initiates at fuse box to the interior lamp switch on the gauge panel and then proceeds through the LH and RH sills to the lamps. There is also a switch in each door that activates the interior lamps should any of the four doors be opened. I did not use wiring pigtails for these lamps. 36 mm festoon bulbs in warm white were substituted for the original incandescent bulbs.
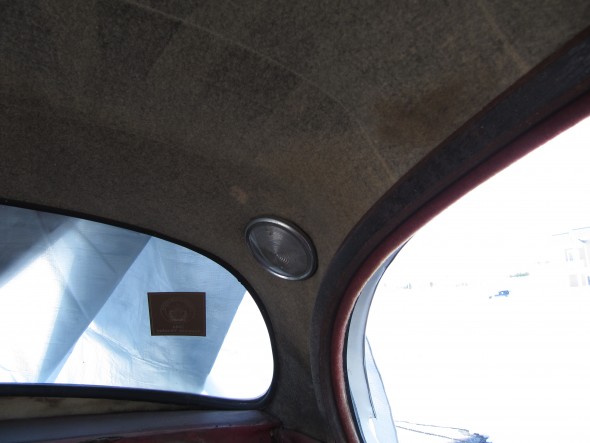
Rear Quarter Interior Lamp
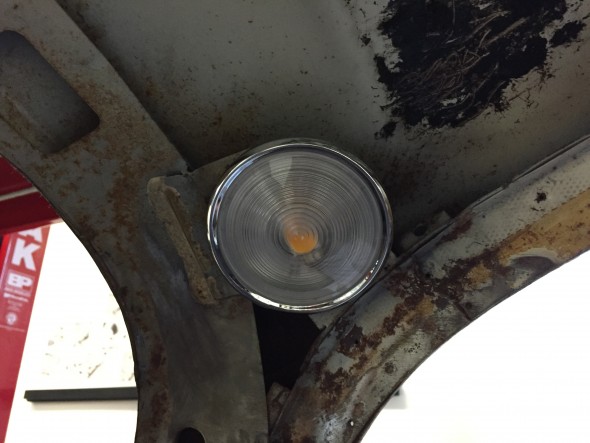
Rear Quarter Interior Lamp

LH rear quarter interior lamp

LH rear quarter interior lamp

I am using XJ40 powered seats in my MK2. The seat headrest lights were originally wired in such a way that they too illuminated when the car’s doors were opened. These lights also have an integral on/off rotary or dial switch. Without the central processor of a more modern car it would be all too easy to leave these lights on and eventually drain the battery. Therefore, I elected to wire these lamps to a switched power source rather than a constant power source like the other lamps. I did not use the terminal on the headrest light that would normally have a red/green wire to the door switches.
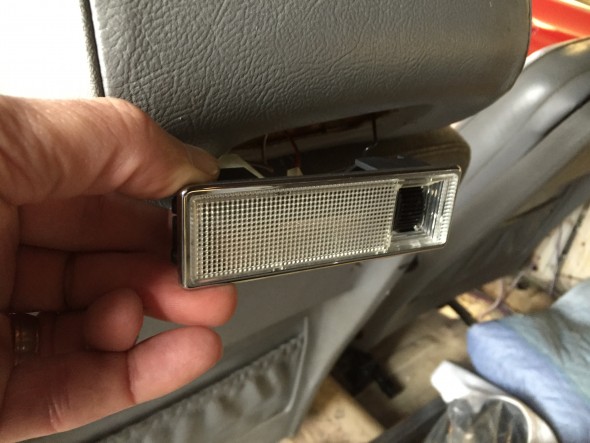
XJ40 Hedrest Lamp Installation
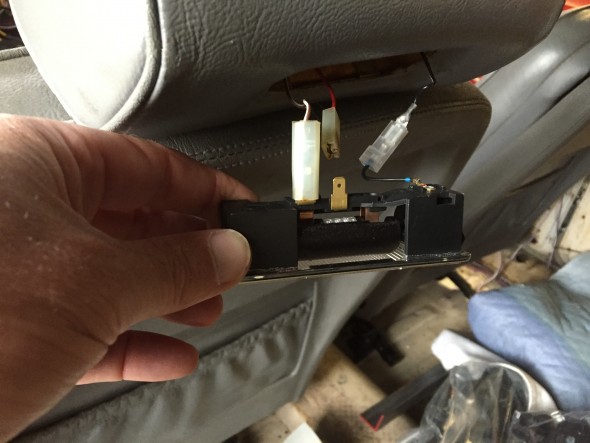
XJ40 Hedrest Lamp Installation

XJ40 Headrest Lamp Wiring

I was able to use the original door switches in my rebuild. I just rewired each of them with new wire.
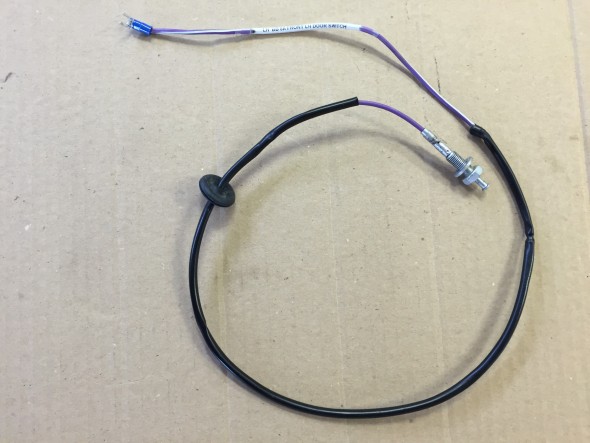
Front Door Interior Light Switch and Wiring

Front Door Interior Light Switch and Wiring

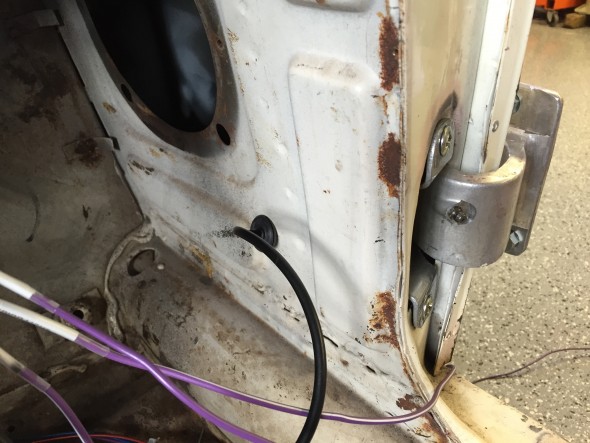
The front door switch is mounted in the lower door hinge and travels through the kick panel to the switch.
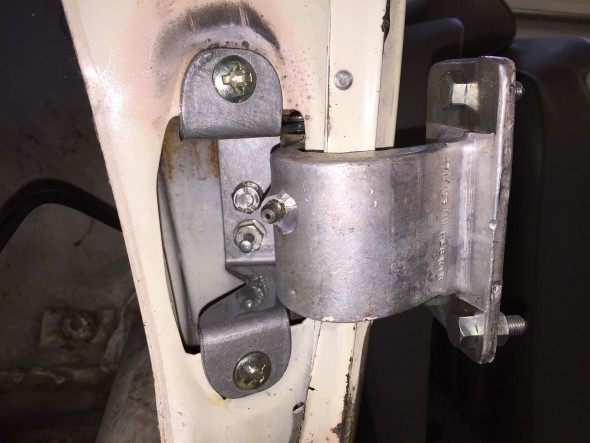
Front Door Interior Light Switch in Lower Door hinge
Front Door Interior Light Switch in Lower Door hinge

Front Door Interior Light Switch Wiring through Lower Kick Panel

Front Door Interior Light Switch Wiring through Lower Kick Panel

The rear door switch is mounted in the rear side of the B/C post or center pillar. The wiring for the switch travels from under the front dash, through the sill and up the center pillar.
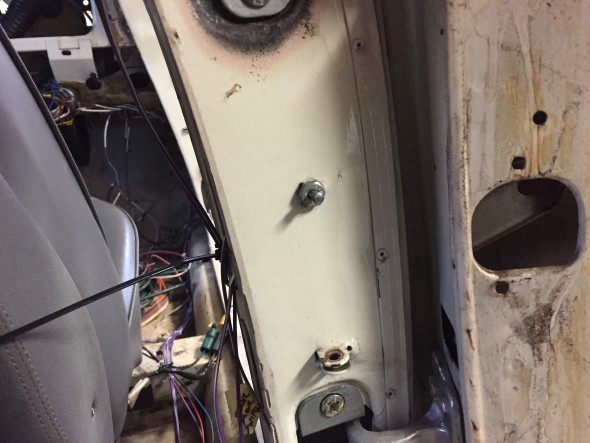
Rear Door Interior Light Switch in Center Pillar

Rear Door Interior Light Switch in Center Pillar

The Cubby Box lamp assembly wiring for Lamp/Switch consists of a metal base fixture, bulb, blue plastic cover and a switch controlled by opening the Cubby Box door. More images and information regarding the lamp may be found at the “Interior Lights” post. As with the other interior lamps, the original incandescent bulb was replaced with a 36 mm festoon bulb in warm white. Terminals on the back side of the metal lamp base connect to the fused power source and to the Cubby Box door switch. The image below illustrates the wiring sources and terminations for the Cubby Box.
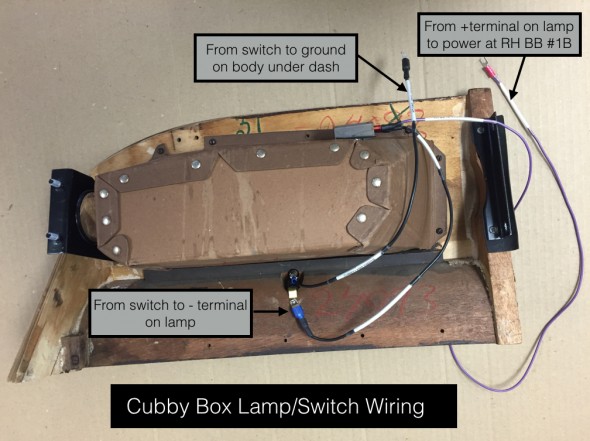
Cubby Box Wiring for Lamp:Switch

Cubby Box Wiring for Lamp/Switch

Some Details on a Few Other Assemblies

The LH and RH Fascia Board Assemblies were installed in the car so as to test the wiring for the speedometer and its warning lights, the tachometer with the internal clock, the “Handbrake “ON” position and brake fluid container level” warning lamp, and the “Cubby” glove box lamp. More information on these fascia boards may be found at the “Dash” post. All gauge/instrument illumination incandescent bulbs were replaced with LEDs.

I first connected the left turn signal flashing indicator, the right turn signal flashing indicator, and the overdrive engagement indicator from the indicators wiring pigtail to the direction indicator/headlamp flasher switch. A ground wire for the indicators was mounted to the body below the dash.
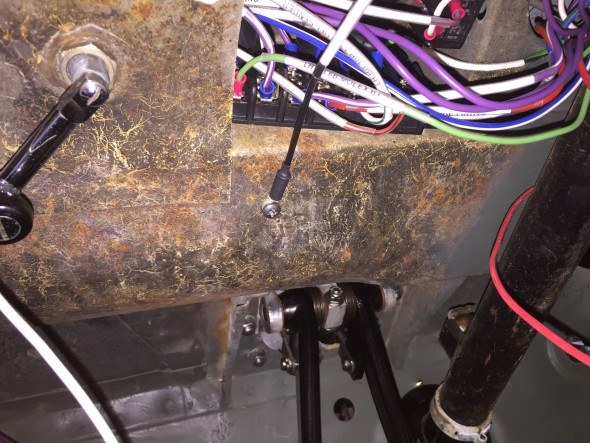
Ground connection under dash for indicator lights
Ground connection under dash for indicator lights

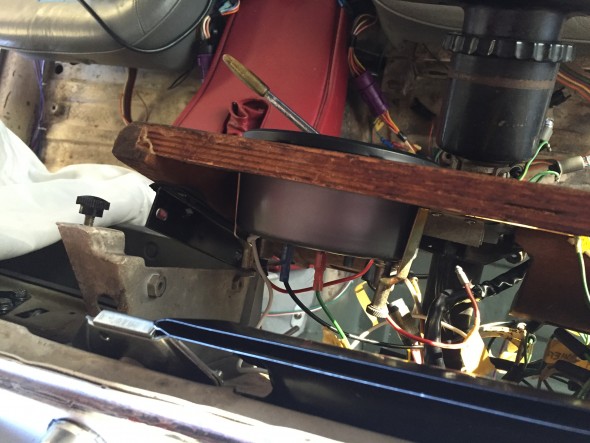
Loose fitting of fascia board for tach install

Loose fitting of fascia board for tach install

I found it easiest to loosely position the driver’s side fascia board and I then installed the tachometer with its two mounting clamps, a ground wire, the 12 volt power wire, the wire connecting the tach to the coil and the two instrument lights. Leaving the speedometer position open facilitates accessing the LH fascia board outside mounting studs/nuts.
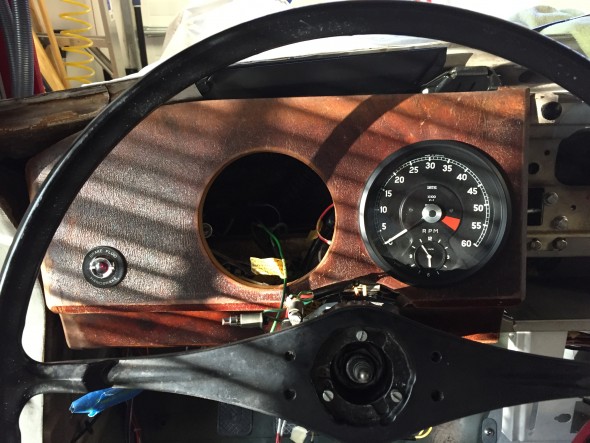
LH fascia board temporary install with tach in place

LH fascia board temporary install with tach in place

I then secured the LH fascia board to its mounts, followed by connecting the wiring for the handbrake/brake fluid level warning lamp.

I then connected the two speedometer illumination lights, the lights for the headlamp, ignition, and fuel warning lights, and the speedometer drive cable.

Installing the passenger side (RH) fascia board is much the same as the driver’s (LH) side. A sliding panel in the cubby box may be removed to provide access to the studs/nuts of the outside mounting bracket. The wiring for the “Cubby” lamp as shown in the write-up and image above is connected to ground and power.

Fuel Sender

The fuel sender has its own short wiring harness consisting of three wires in a protective sleeving. One wire for ground, one for the fuel gauge (the “T” terminal on the sender for 10 volts) and one for the fuel level warning lamp in the speedometer (the “W” terminal on the sender). The embossed terminal markings are evident on the image below. My sender has an “E” marking for earth, although my grounding wire was fixed to one of the screws used to mount the sender to the tank. While the original harness was in good shape, I made a new one for installation in the Jag when the fuel tank is fitted.
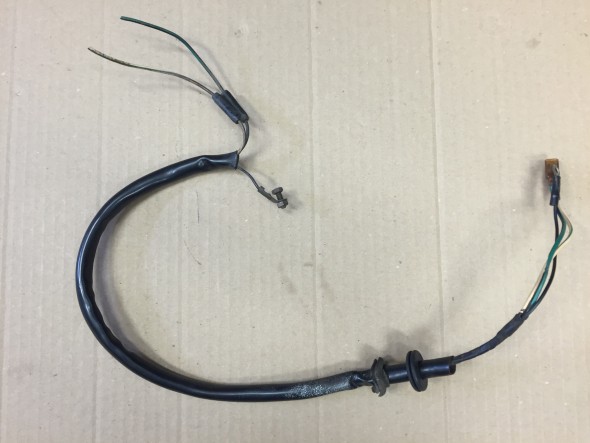
Original Fuel Sender Wiring Harness
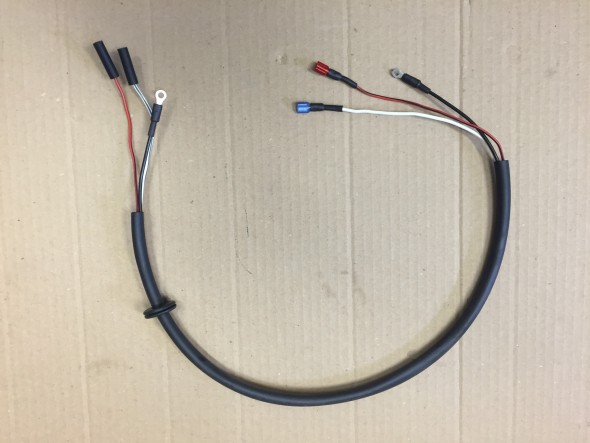
Original Fuel Sender Wiring Harness

New Fuel Sender Wiring Harness
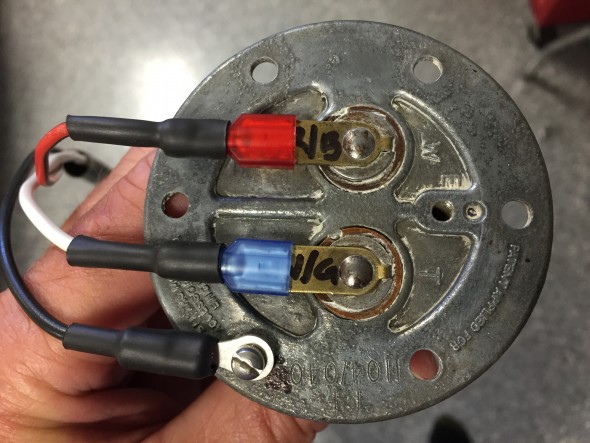
New Fuel Sender Wiring Harness

Fuel Sender Terminals

Fuel Sender Terminals

Warning Light for Handbrake and Fluid Level
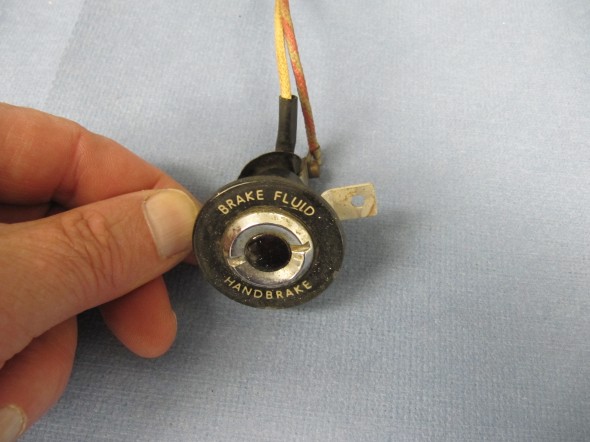
Handbrake and Fluid Warning lamp Escutcheon

Handbrake and Fluid Warning lamp Escutcheon

The lamp is activated by a switch at the base of the handbrake, mounted to a bracket located on the interior floor. See: https://valvechatter.com/?p=3913 under the handbrake post, or by a level indicator switch in the brake fluid reservoir is shown earlier in this post.
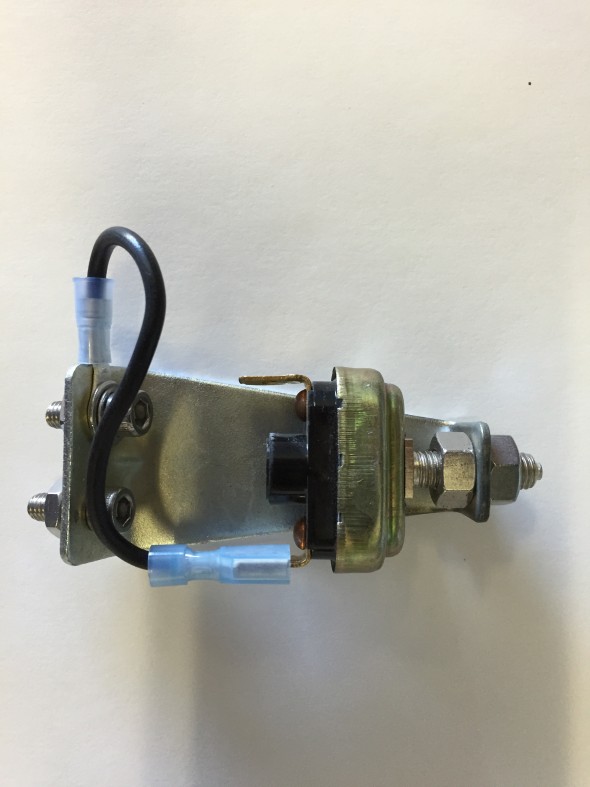
Handbrake Warning Switch

Handbrake Warning Switch

The “Warning Lamp Indicating Handbrake ‘ON’ Position and Level in Brake Fluid Container” is comprised of the cover and window assembly, a spring washer on the central terminal post, with nuts and washers. Rubber sleeves are slipped over the white wire at the terminal and the white and red/green wires are contained together in a rubber sleeve of about 4.” The warning light was cleaned and reassembled and a new face plate was installed.
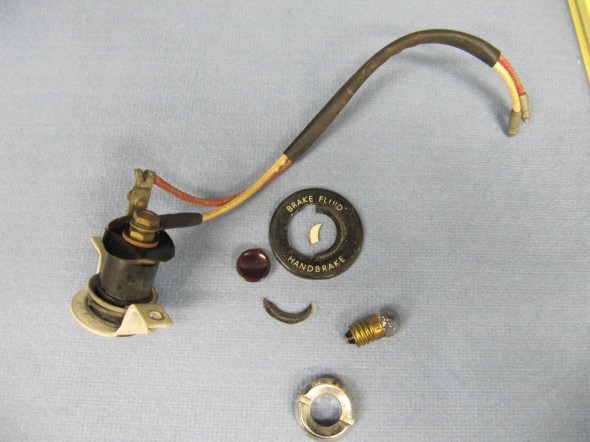
Warning Lamp

Warning Lamp

Hydraulic Fluid Reservoir, Low Fluid Warning Switch

The fluid canister contains a float activated level indicator switch in its screw cap.
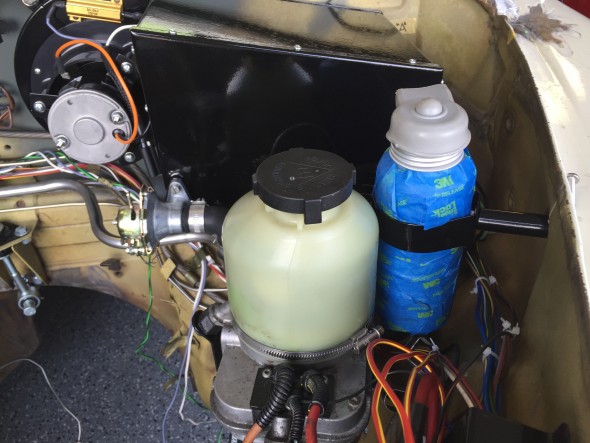
Hydraulic Fluid Container Location

Hydraulic Fluid Container Location

Two wires attach the switch with spade connectors and are protected by a rubber cap over the indicator plunger. I sourced a new canister and indicator switch (cap) from SNG Barratt. The canister is covered in blue painter’s tape just to keep it clean during the restoration build. I was able to reuse the original rubber protective cap. An 18AWG light green wire is connected to one terminal. This wire joins via a 4 way snap connector with an orange 18 AWG wire from the handbrake switch. A single orange 18 AWG wire then connects to the LH Barrier Block Terminal #5B. A dark green wire from LH Barrier Block #5A connects to a 2 way snap connector with a red/green wire on the dash warning light pigtail.

A black 14 AWG wire connects to the other level indicator switch terminal and provides a ground connection to the chassis.
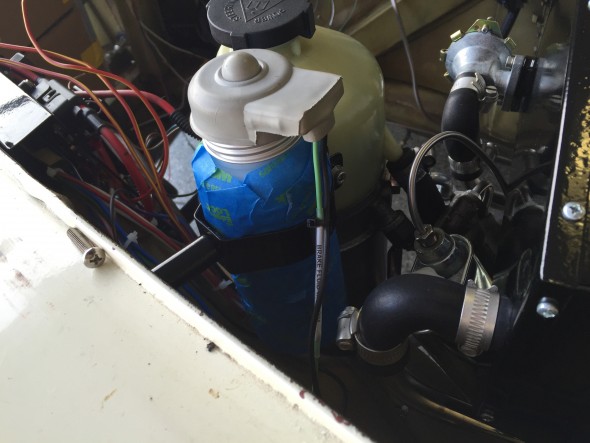
Hydraulic Fluid Container Wiring

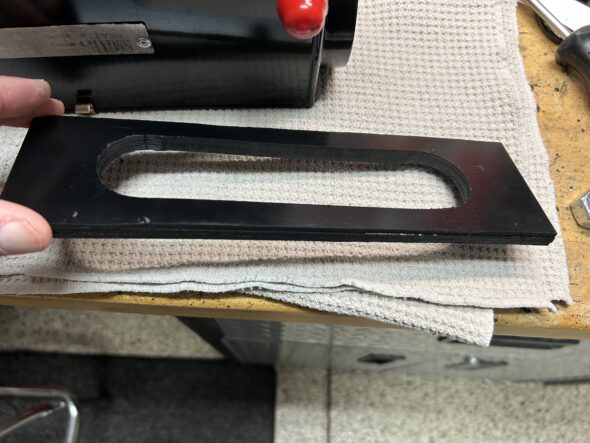
Hydraulic Fluid Container Wiring
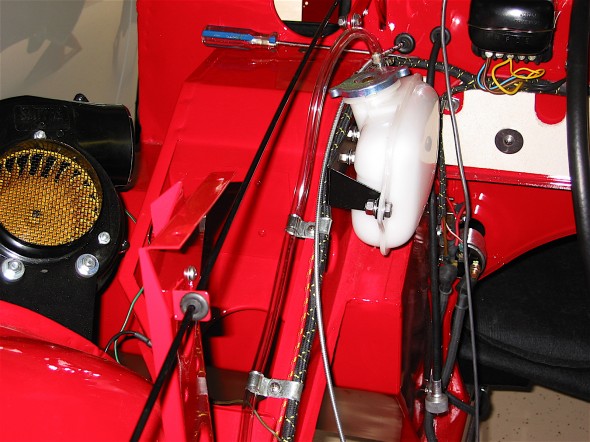
Body Metal work

Body Metal Work

I knew when I purchased my MK2 that it had a few areas that would require rust repair, although for a fifty year old British car it was remarkably free of serious rust problems. Immediately recognizable was battery acid/rust damage to the firewall, and the plenum was swiss cheese. I expect that the plenum rust problem was caused by a clogged drain due to mice nests in the plenum and the heater!

Fortunately, a Jaguar MK2 acquaintance, Robert Seligman, recommended that I contact John Stefanik about making the metal work repairs. Bob was very pleased with work John had done for him and I felt fortunate to have come upon such a skilled artisan. Not only did John perform brilliant work, he did everything I asked within two and one-half weeks from the time that I delivered my MK2 to him.

In addition to making the needed repairs, John also worked on fitting the metal Coombs wheel covers that I had purchased to replace the original spats. This was no easy task requiring significant heating/cooling, bending and shaping.

I was fortunate to find a used (and rust free) replacement plenum and a patch panel for the firewall that John expertly installed in my car.


zz

Pulling the Engine for Minor Repairs

July 2006 Bugeye It is time to fix some of the problems we have lived with for a while and to make a few improvements. The oil leak we caused when we failed to seal the oil sump properly, the gear grinding in 2nd and 3rdin the gearbox, jet coating the headers among other things will improve the car for the future. These improvements require pulling the engine. We bought a cherry picker and an Oberg tilt lift rather than continuing to rent at $45 a pop. The following details the process to get ready to lift out the engine: Disconnected the battery positive lead from the terminal. Drained the engine oil, tried the gearbox, but couldn’t get the plug out so will return to that. Disconnected the ground strap and removed the two gearbox mounting bolts from the bottom of the car.

ground strap

Ground Strap

Gearbox Mount Bolts

Gearbox Mount Bolts

Disconnected the fuel line at the carbs and pulled out of the way, and disconnected the temperature sensor from the head.

Fuel Line

Fuel Line

Temperature Sensor

Temperature Sensor

Disconnected the oil pressure gauge line and the oil feed line from the engine block, and disconnected the cable from the starter solenoid to the starter.

Solenoid Connection

Solenoid Connection

Oil Temp Connection

Oil Temp Connection

Unsnapped the plastic connector for the white/black line to the distributor from the electronic ignition device, and disconnected the plastic terminal (3 wires) to the alternator.

Ignition Wiring

Ignition Wiring

Alternator Wiring
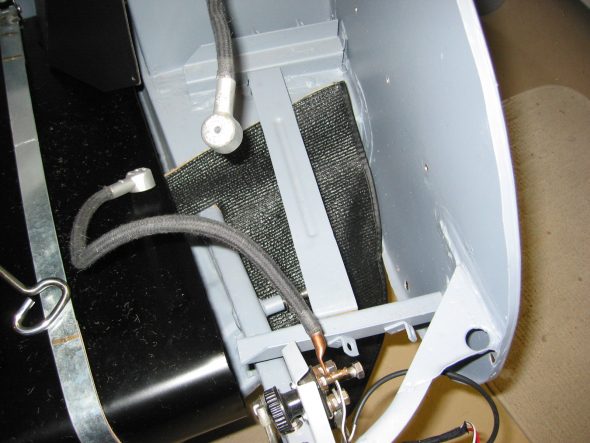
Alternator Wiring
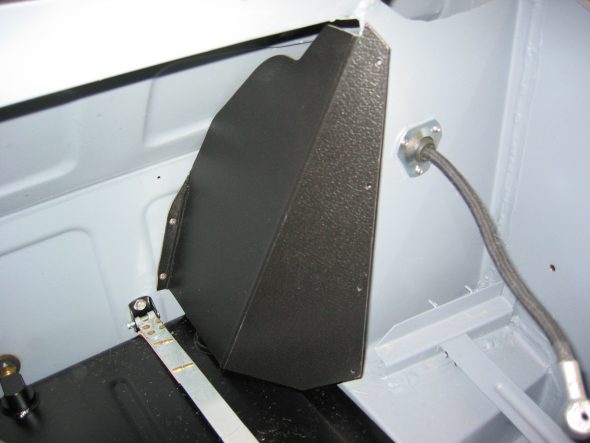
Disconnected the high tension line from the distributor to the coil. Disconnected the short hot water hose from the hot water valve control on the head and then the longer line on the other side of the engine to the copper tube. It is easier to put the clamp on the hose/copper pipe when the copper pipe clips are loose from the manifold.

Water Valve

Water Valve

Heater Hose

Heater Hose

Disconnected the throttle cable at the carb linkage and pulled it out of the way, and then also disconnected the choke cable at the carb.

Throttle Cable

Throttle Cable

Choke Connection

Choke Connection

Disconnected the fitting at the slave cylinder (and got brake fluid everywhere).

Fuel Drain Line

Fuel Drain Line


Intake Manifold

Intake Manifold


Very Ugly Header

Very Ugly Header

Removed the manifold brass nuts from the head and lifted the intake manifold and carbs free of the engine. The carb drain lines tied together with plastic straps will need to be rerouted to the retainer clips upon installation again. The headers will not come out of the engine bay until the engine is pulled or the heater is removed. Need to set the headers in place prior to the engine install.

Exhaust Clamps

Exhaust Clamps

Exhaust Mount

Exhaust Mount


Exhaust Clamp

Exhaust Clamp

Removed four Phillips screws attaching the shift boot to the gearbox tunnel, the shifter knob, and removed two bolts on each side of the tunnel securing the gearbox bracket to the car. Use of the offset wrench made this an easier job.
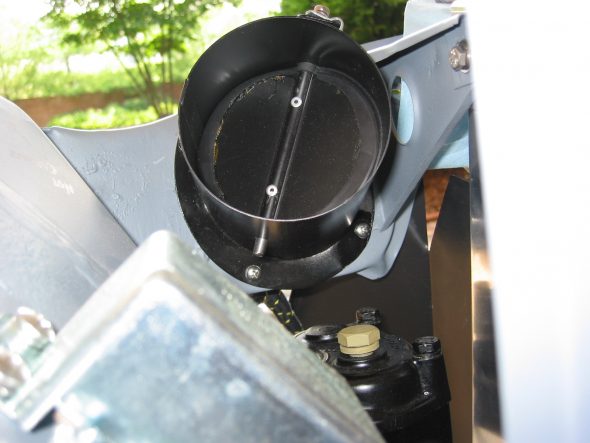
Shifter Trim Ring
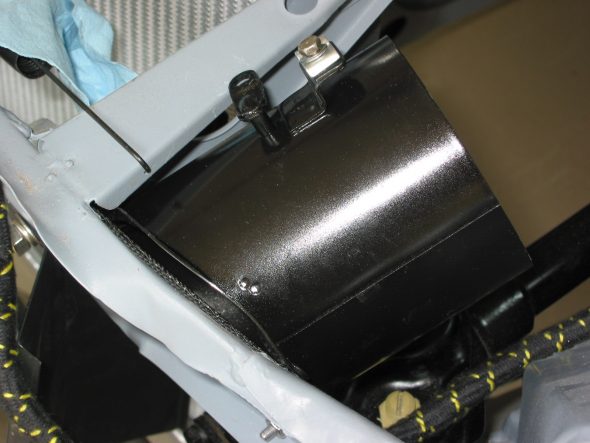
Shifter Trim Ring
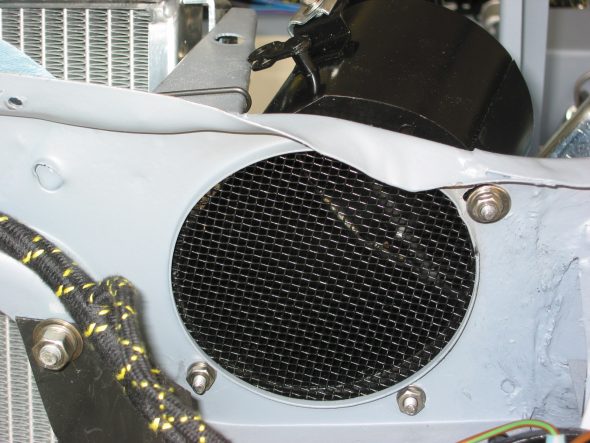
Gearbox Rear Mount

Gearbox Rear Mount


Shifter Connection

Shifter Connection

Loosened the right hand motor mount from the car so that it will lift free with the engine, but will not completely disconnect until the engine lift has the pressure off of the mounts. Loosened the screws to the engine at the mount on the left side of the car. The left mount will stay in the car.

Removed the cardboard heater hose to have it out of the way from the engine when it is lifted.

Connected the Lift Chain to the Rocker Shaft mounting studs and lifted the engine from the car.