
All of my electrical modifications are taking longer to sort out than I expected, but I am no electrician so I am extra careful and take my time with these matters. Next up was the inclusion of an Accessory Power Supply (Cigar Lighter). I want the car to be equipped to handle the electrical needs of a number of electronic accessories such as an iPhone, navigation system, and etc.
I ran a light blue wire from the cigar lighter to the switched side of the ignition. An in-line fuse was incorporated into the power connection. The other terminal on the cigar lighter was connected to a black ground wire fastened to the firewall.
While I always planned to use an SU fuel pump, I decided to upgrade to a solid-state unit with negative ground. Additionally, I thought that now was time to build some redundancy into the fuel delivery system so I included a secondary Master fuel pump (get specs at web site) into the flow in case of a problem with the SU. Both pumps are of the flow-through variety.
I installed the Master fuel pump on the vertical wall of the boot, taking advantage of one of the mounting bolts for the fuel tank mounting straps in the boot. I inserted a piece of rubber between the pump mounting bracket and the boot wall to help with vibration damping. I then cut the steel pipe as it exits the fuel tank and installed a new rubber fuel line from the back of the fuel tank to a fuel filter that feeds the Master pump. A rubber fuel line was then run from the outlet of the Master pump to the shortened steel fuel line entering the SU pump. Exit from the SU pump is as original. I mounted the pump on the right side of the car to avoid the heat of the exhaust pipes on the left side.
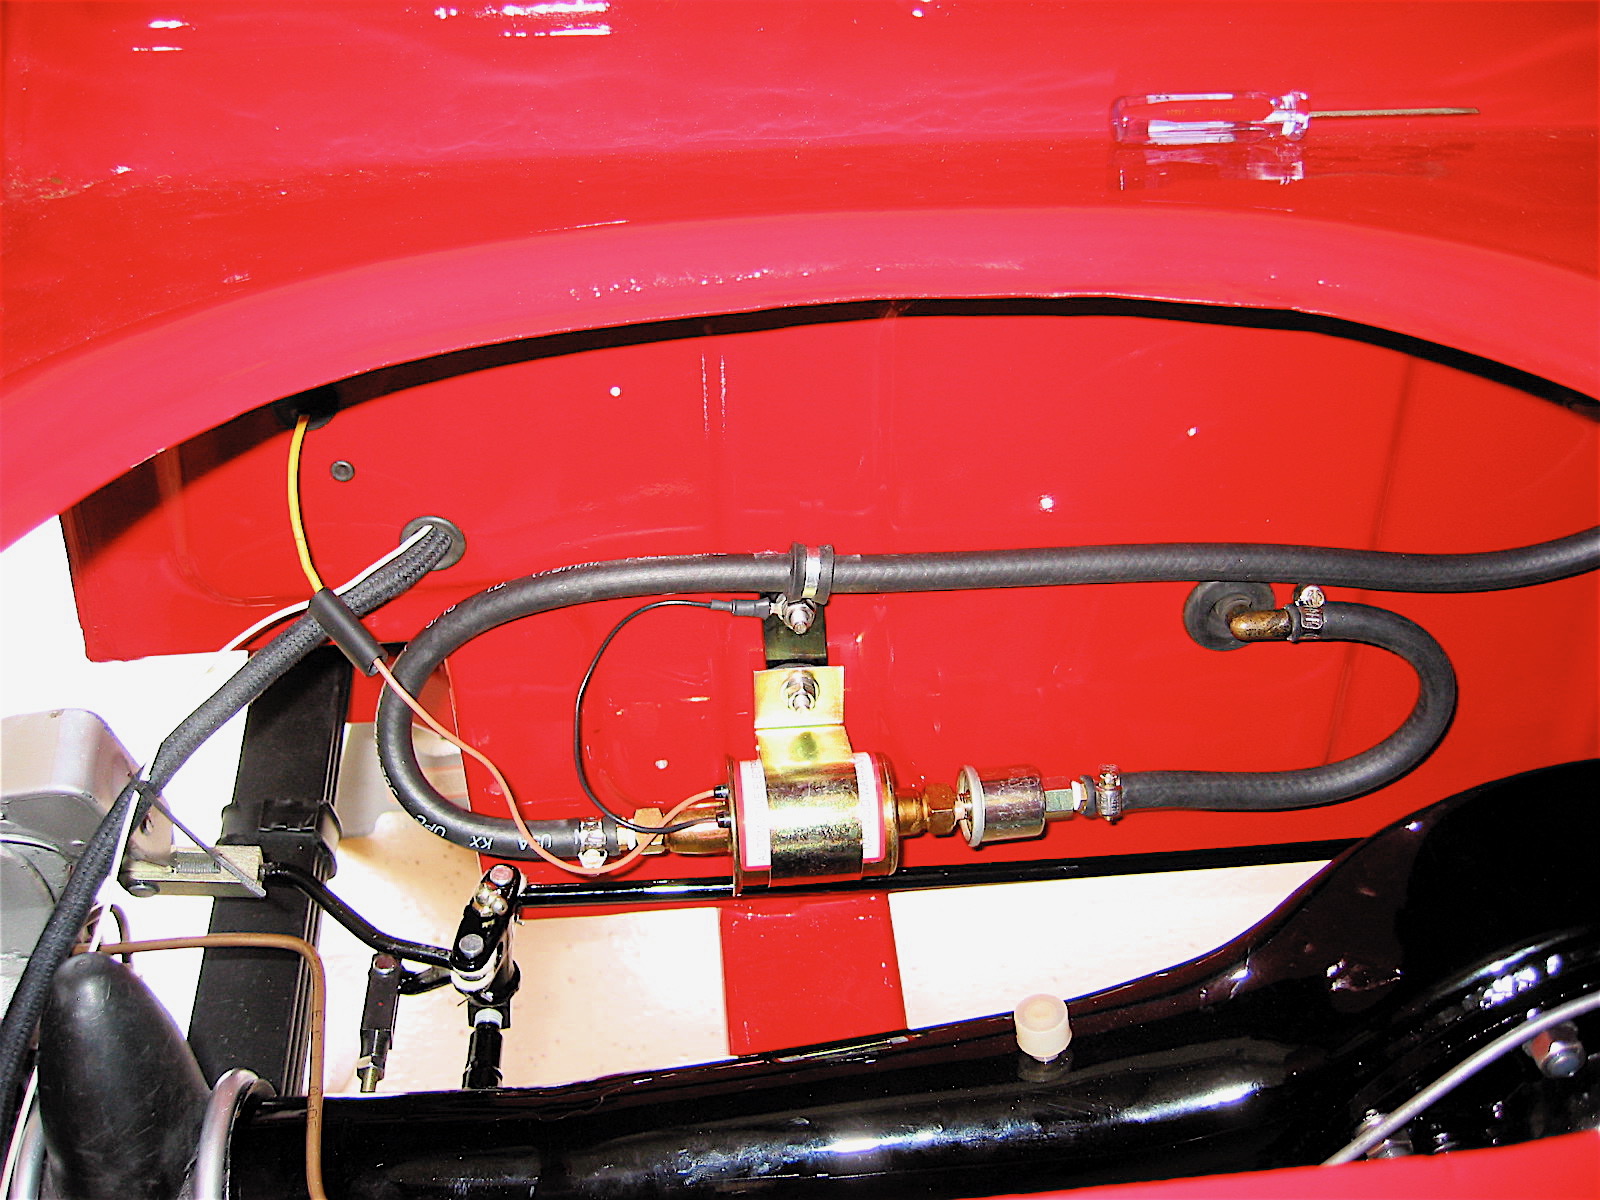
Aux fuel pump 1
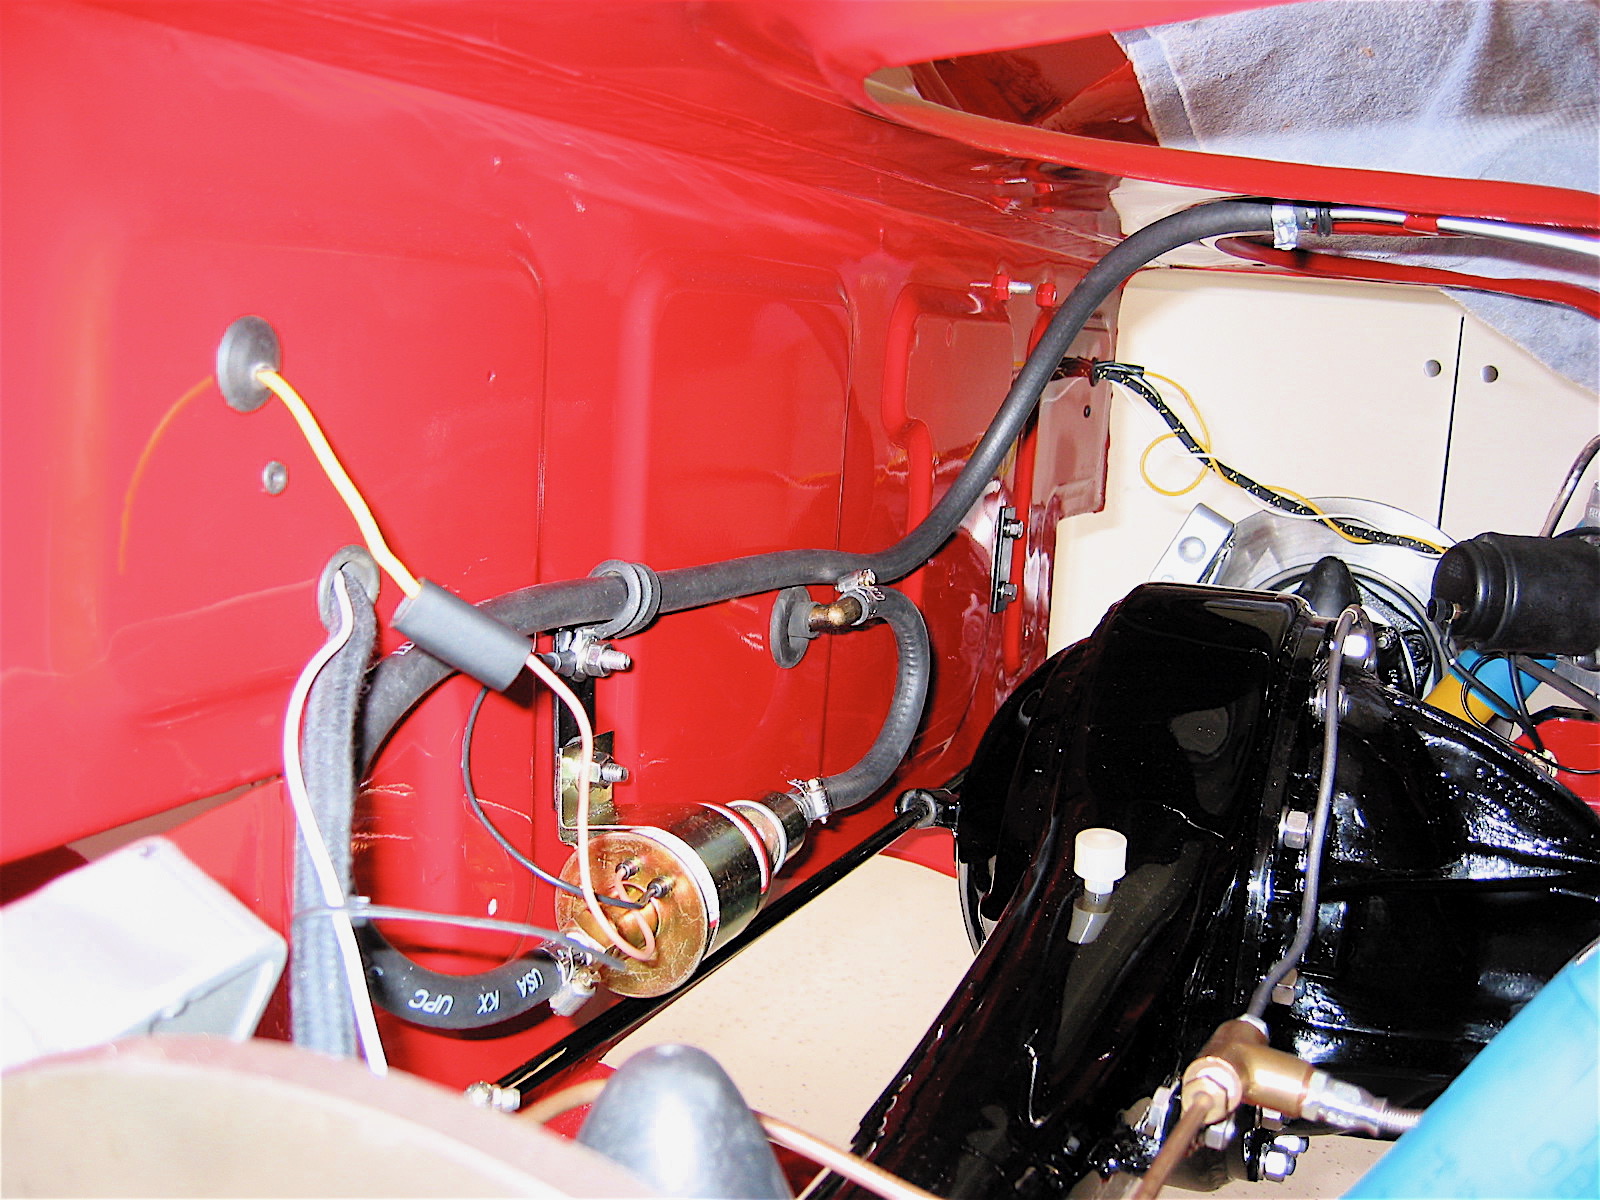
Aux fuel pump 2
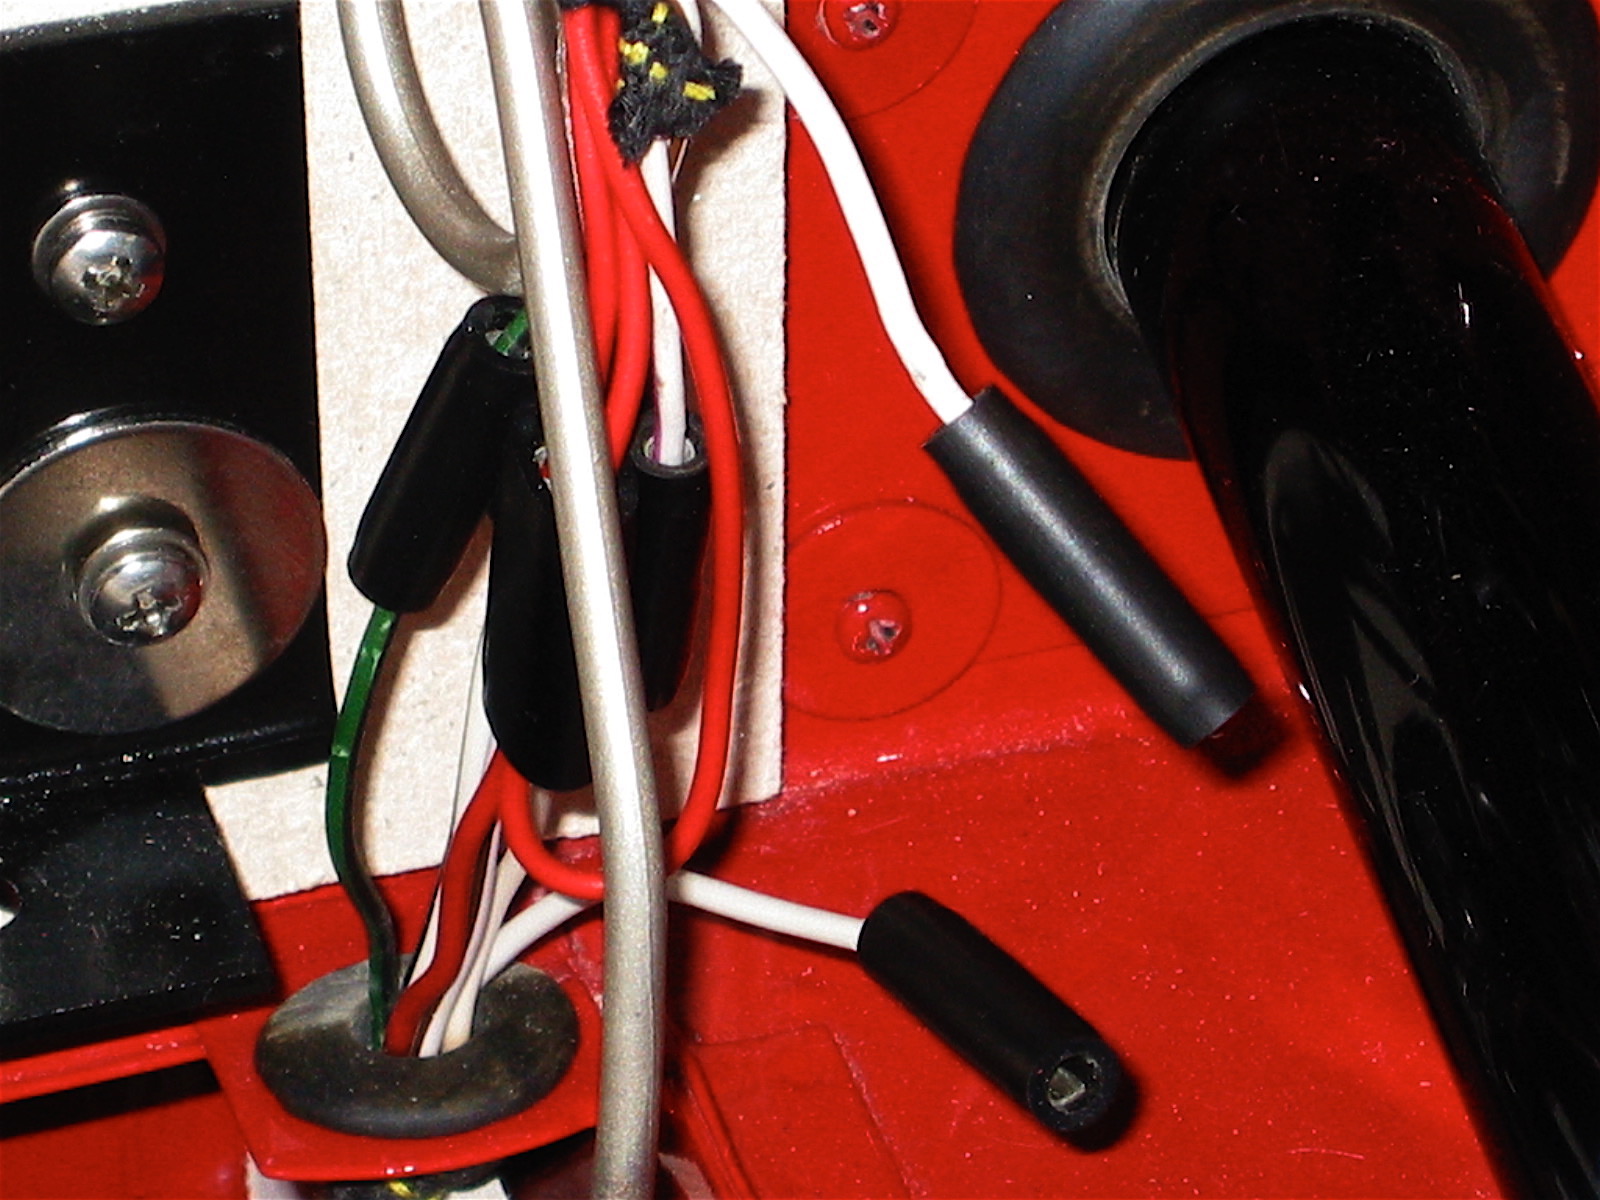
As mentioned previously, I installed a toggle switch on a fabricated panel just below the wiper motor to control the selection of the pumps. With a flick of the switch I can move from one pump to the other. I connected the center terminal, terminal #2, of the toggle switch to the white wire from the fuse block that originally connected through a rubber bullet connector coupler to the white wire in the harness running under the car to the fuel pump.
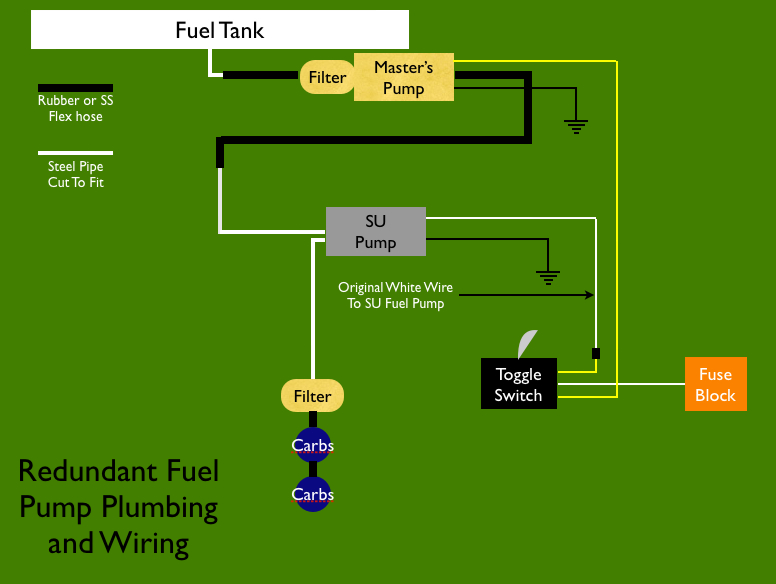
Redundant Fuel Pump Wiring
Fuel pump Wiring
Terminal #1 on the toggle switch was connected to the original white wire running under the car to the SU pump. Terminal #3 was connected with a new yellow wire to the + terminal on the Master fuel pump. Black wires on each pump were connected to ground locations to the superstructure of the car.
The hydraulic brake switch available today to replace the original Lucas unit has, according to many Healey owners, failed after only short periods of time. An alternative is to use a mechanical brake switch located by/on the brake pedal. I chose to use a switch available from Watson’s Street Works and followed installation guidance from Steve Gerow and Dave Carpenter.
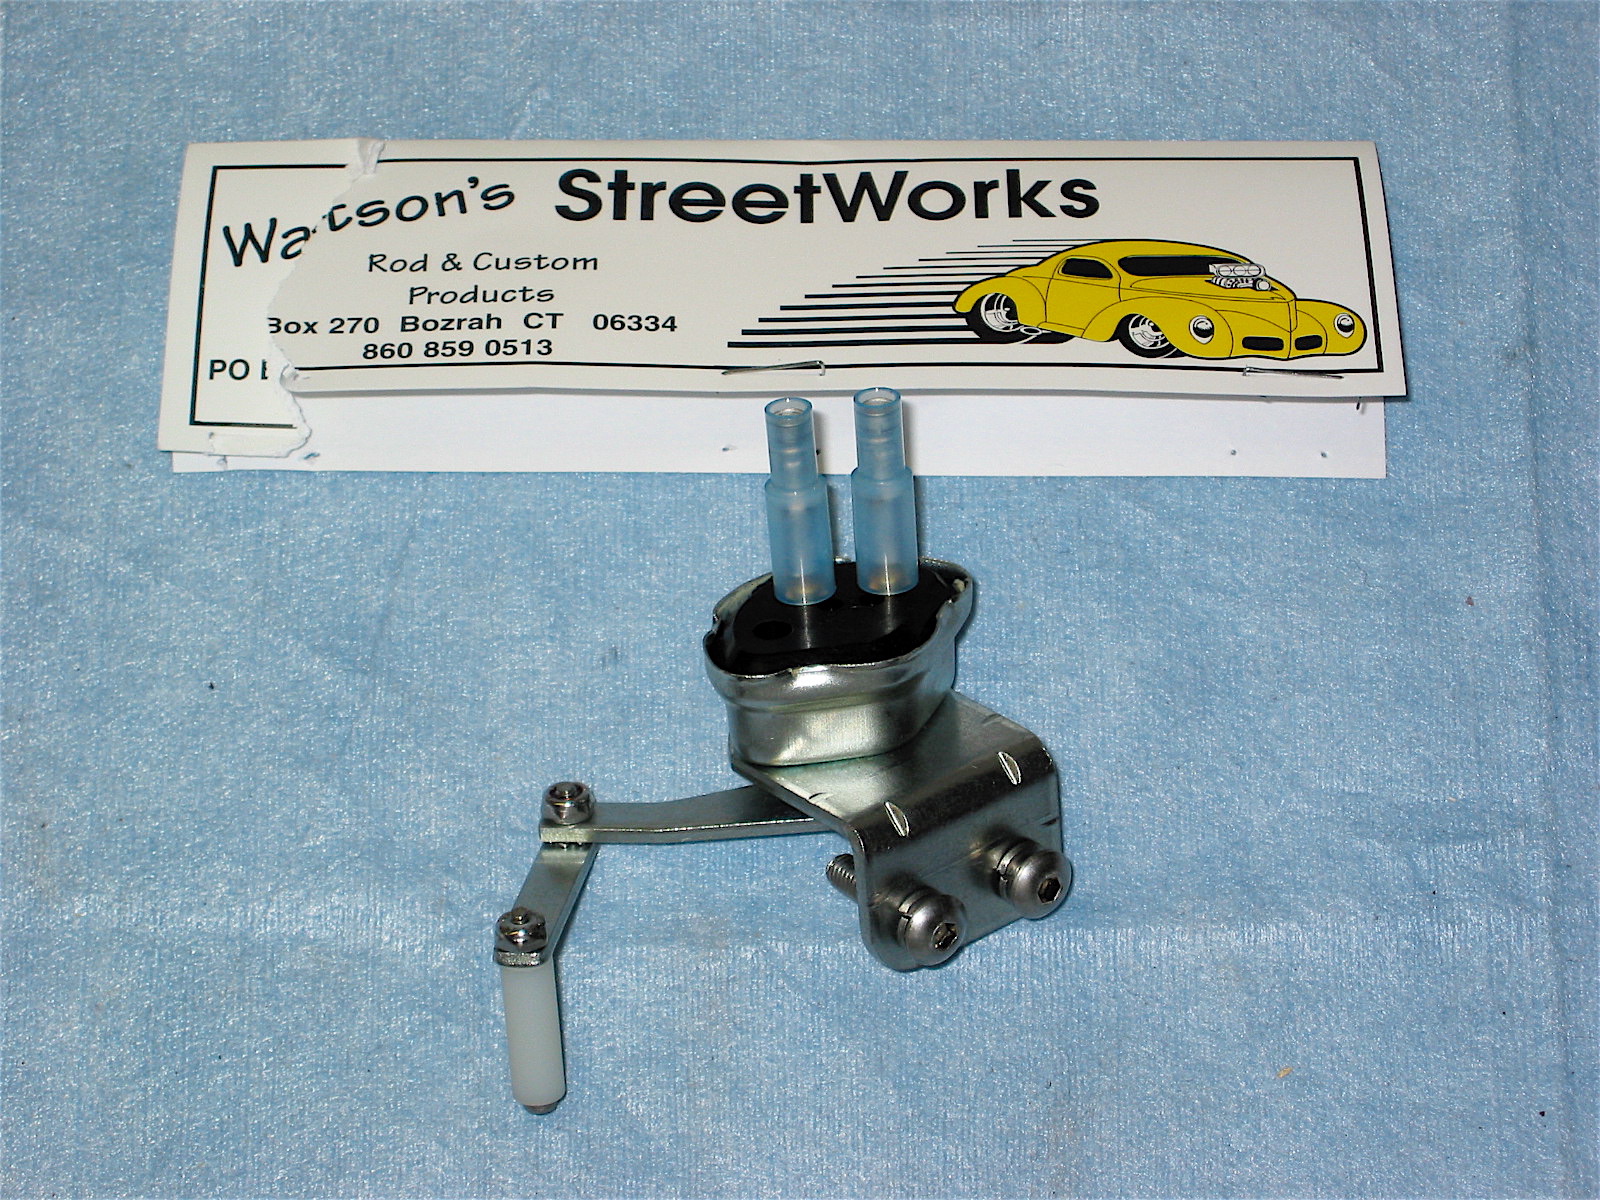
Watson’s Brake Switch
I first made a small mounting bracket, mounted the switch to the bracket and then mounted the assembly to the bottom of the sheet metal below the fresh air heater box. The contact arm on the switch is easily adjusted to register against the brake pedal per the instructions provided from Watson’s.
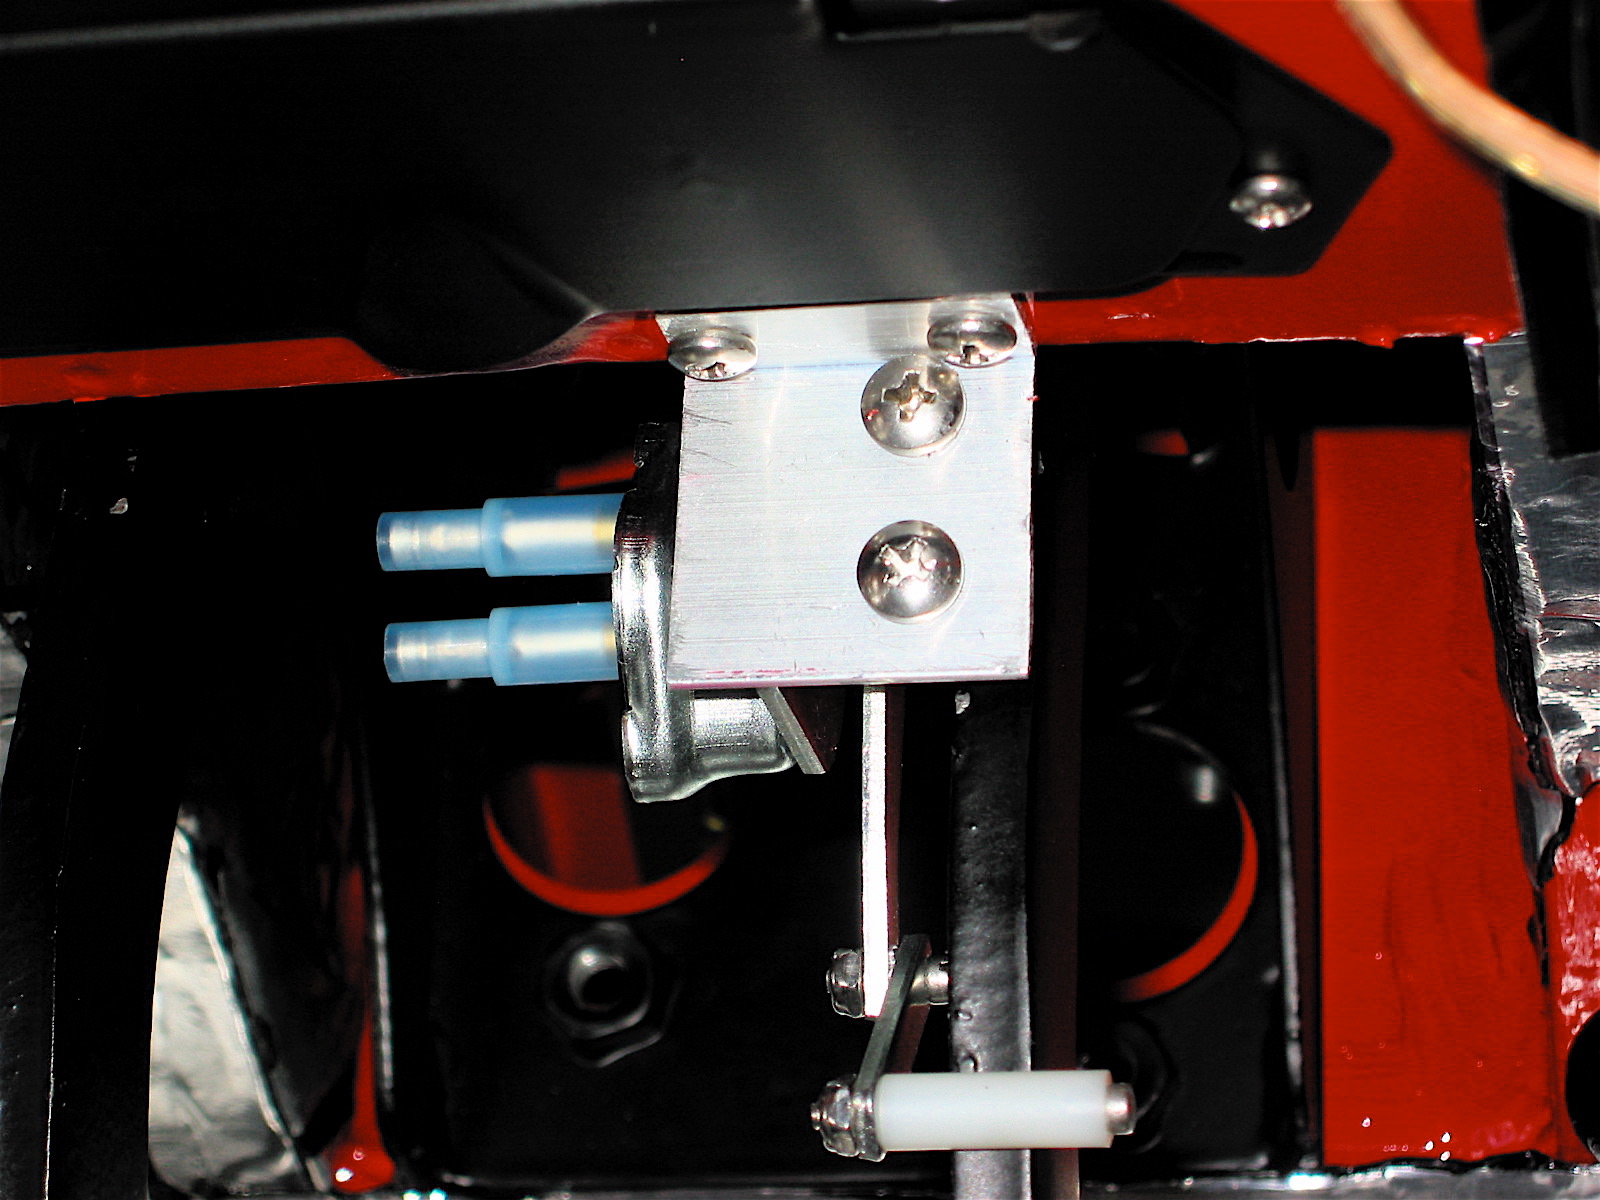
Watson’s Brake Switch 3
I did not want to route wiring for the switch parallel to the harness through the engine bay to the original hydraulic switch, so I isolated the green wire at the fuse panel that provides power to the switch, disconnected it and connected one terminal on the new brake switch to it. I added bullet connectors to the ends of the green and the green/purple wires at the hydraulic switch and joined them together with a rubber coupler. Finally, I ran a new wire from the other terminal on the Watson’s switch to the fuse block as a power source.

Watson’s Brake Switch Wiring Schematic
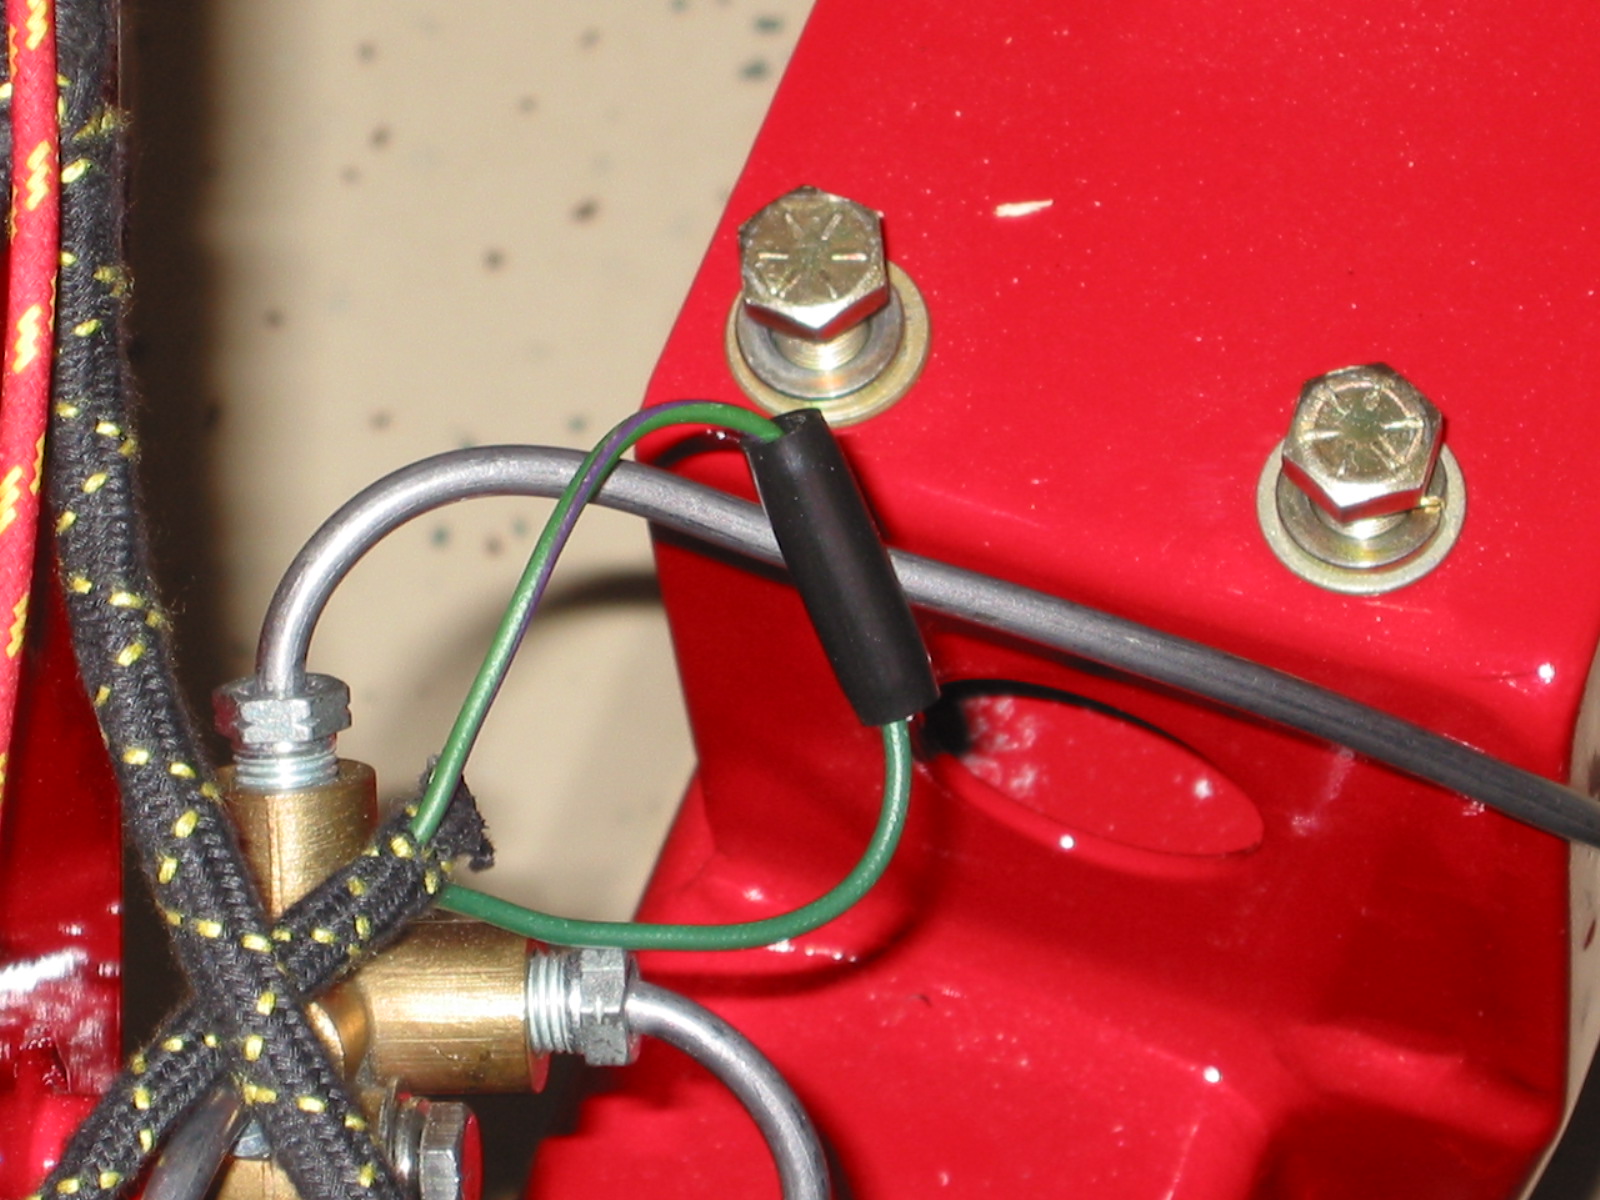
New brake switch wiring
With the wiring behind me, I decided to center the steering wheel shaft in the dash fascia and proceeded to tighten those components that are affected by the wheel position: The steering bracket, the two plates with rubber seals around the steering shaft – one inside the interior and one in the engine compartment, and the three fixing bolts on the steering box.