
Conversion to LED lights
The Jaguar Mk2 and all other cars of the period used incandescent bulbs in the interior fixtures and gauges. In my restoration I intend to replace most if not all incandescent lights with light emitting diodes or as they are more commonly referred to: LEDs. LEDs live longer, use considerably less power, and are brighter than the incandescent bulbs they replace. Specific light model numbers and quantities are listed with the various installations below. The LED lights were sourced from 4 Sight Automotive, www.bettercarlighting.co.uk
Interior Courtesy Lights
I will collectively refer to the interior lamp in rear quarters, the interior lamp at top of center pillars, and the headrest lamps as courtesy lamps. The MK2 did not have seat headrests, much less headrest lights, but I am using front seats from what I believe was a 1990 jaguar XJ 40. In 1990 the headrest lamps were connected to a central computer, but obviously, there is no computer in a 1964 Jaguar.
The rear quarter and the center pillar lights were designed to be activated by opening any one of the four doors in which case a door switch would illuminate the lights and extinguish them when the door was closed. Alternatively, flipping the “INTERIOR” toggle switch on the central gauge panel to the “on” position also illuminates the lights. In my wiring methodology this pattern is retained.
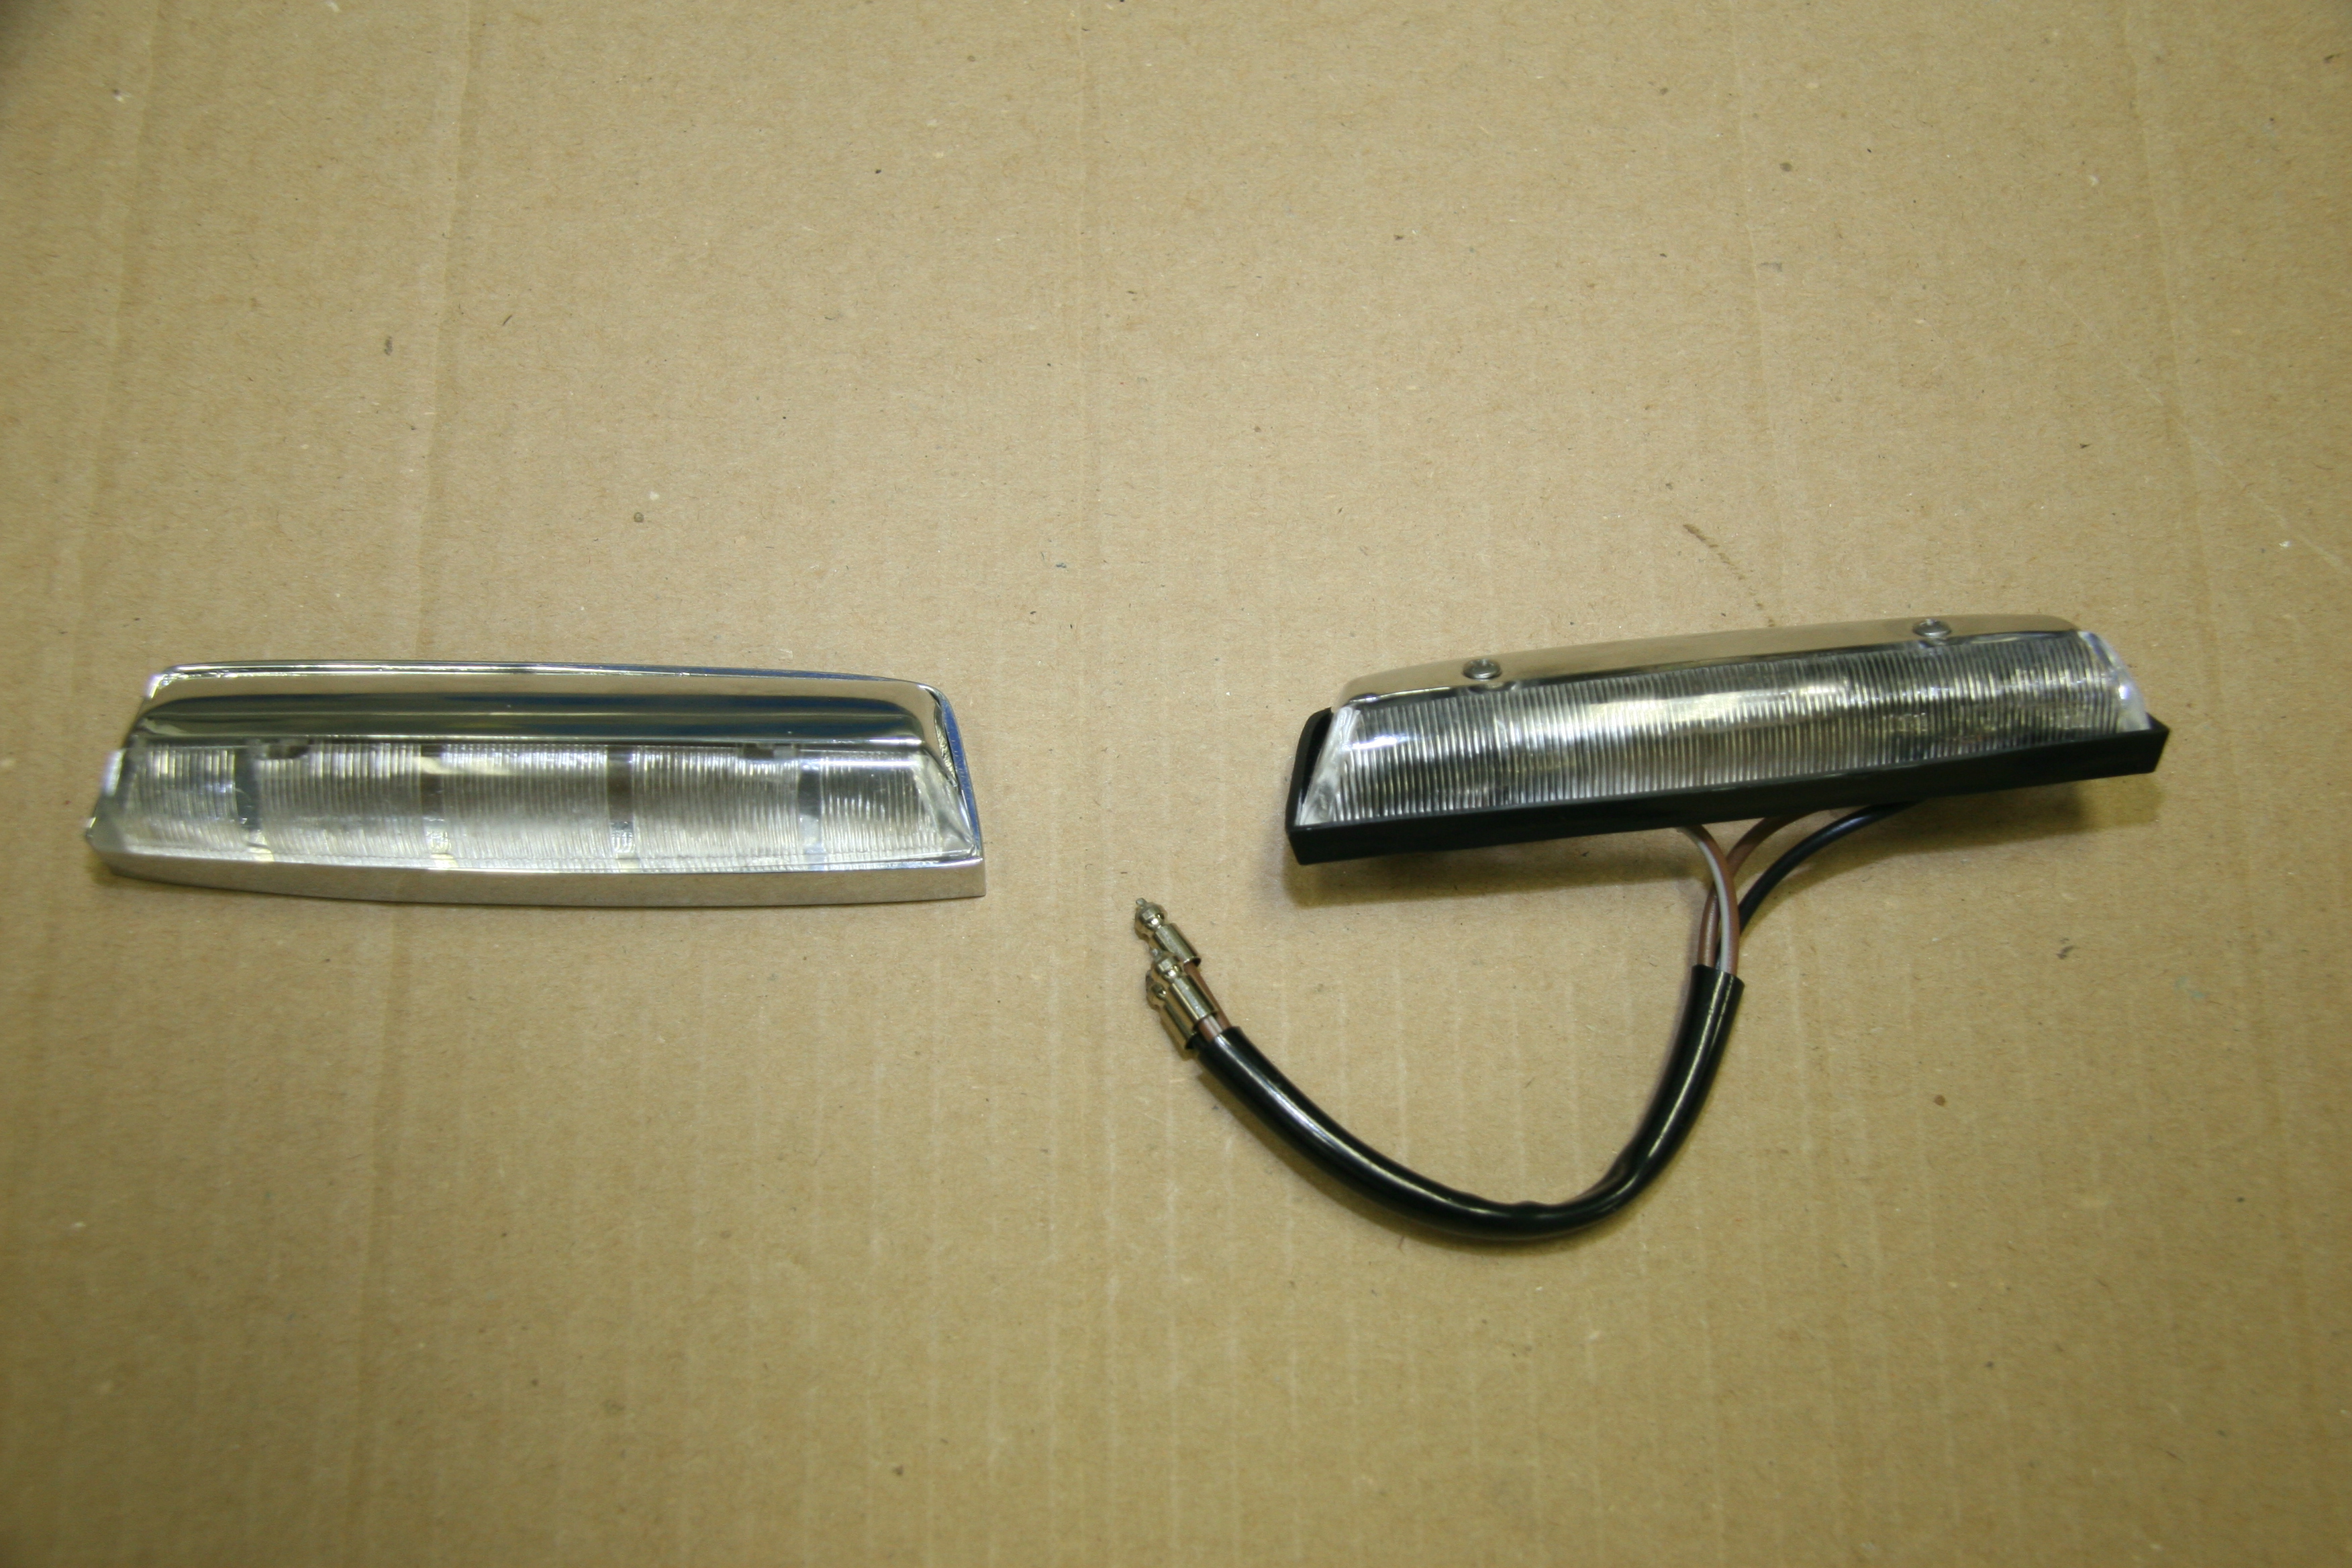
Both of my center pillar lights were broken. They are held together by two metal pins with balls on the ends that snap into the plastic lens. After fifty years the plastic is fragile and very susceptible to breaking. The chrome “shields” are secured to the assembly with two folding tabs that are also fragile and easily broken.
A modern replacement is available and I sourced them from SNG Barratt. The new units solve the design problems of the earlier model but unfortunately have visible screws through the shields and the backplate is black plastic rather than chrome metal. All disappointing!
The new units do have an on/off switch on the bezel of the lamp.The on/off switch on the lamp acts exactly like the toggle switch on the central gauge panel. That is, when the on/off switch is turned on, all four lights illuminate.
B/C Pillar Interior Lights
Unlike the Center Pillar lights, the new stock replacements for the rear lights appear identical to the originals. I substituted 36MM LED festoon bulbs in warm white from 4Sight Automotive for the original incandescent bulbs. Each of these lamps mount to a plywood frame and then to the body of the car. My original plywood pieces simply fell apart when I disassembled the car. New wood frames were made per the pattern supplied by Eric Kriss on his web site. I then trial fit the plywood frame and lamp fixture. The plywood is held to the metal body with two #4 X 1/2″ flat head self tapping screws, and then the lamp body is secured through the plywood to the metal body with two #4 x 3/4″ self tapping screws.
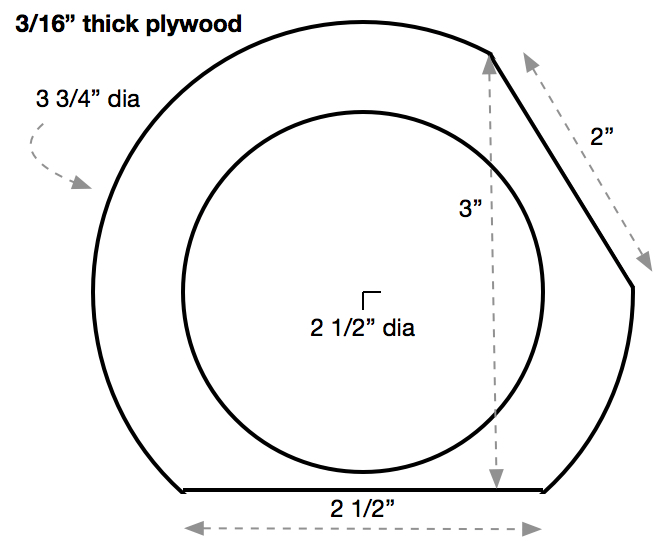
Rear Quarter Interior Lamps Plywood Mounting Frame
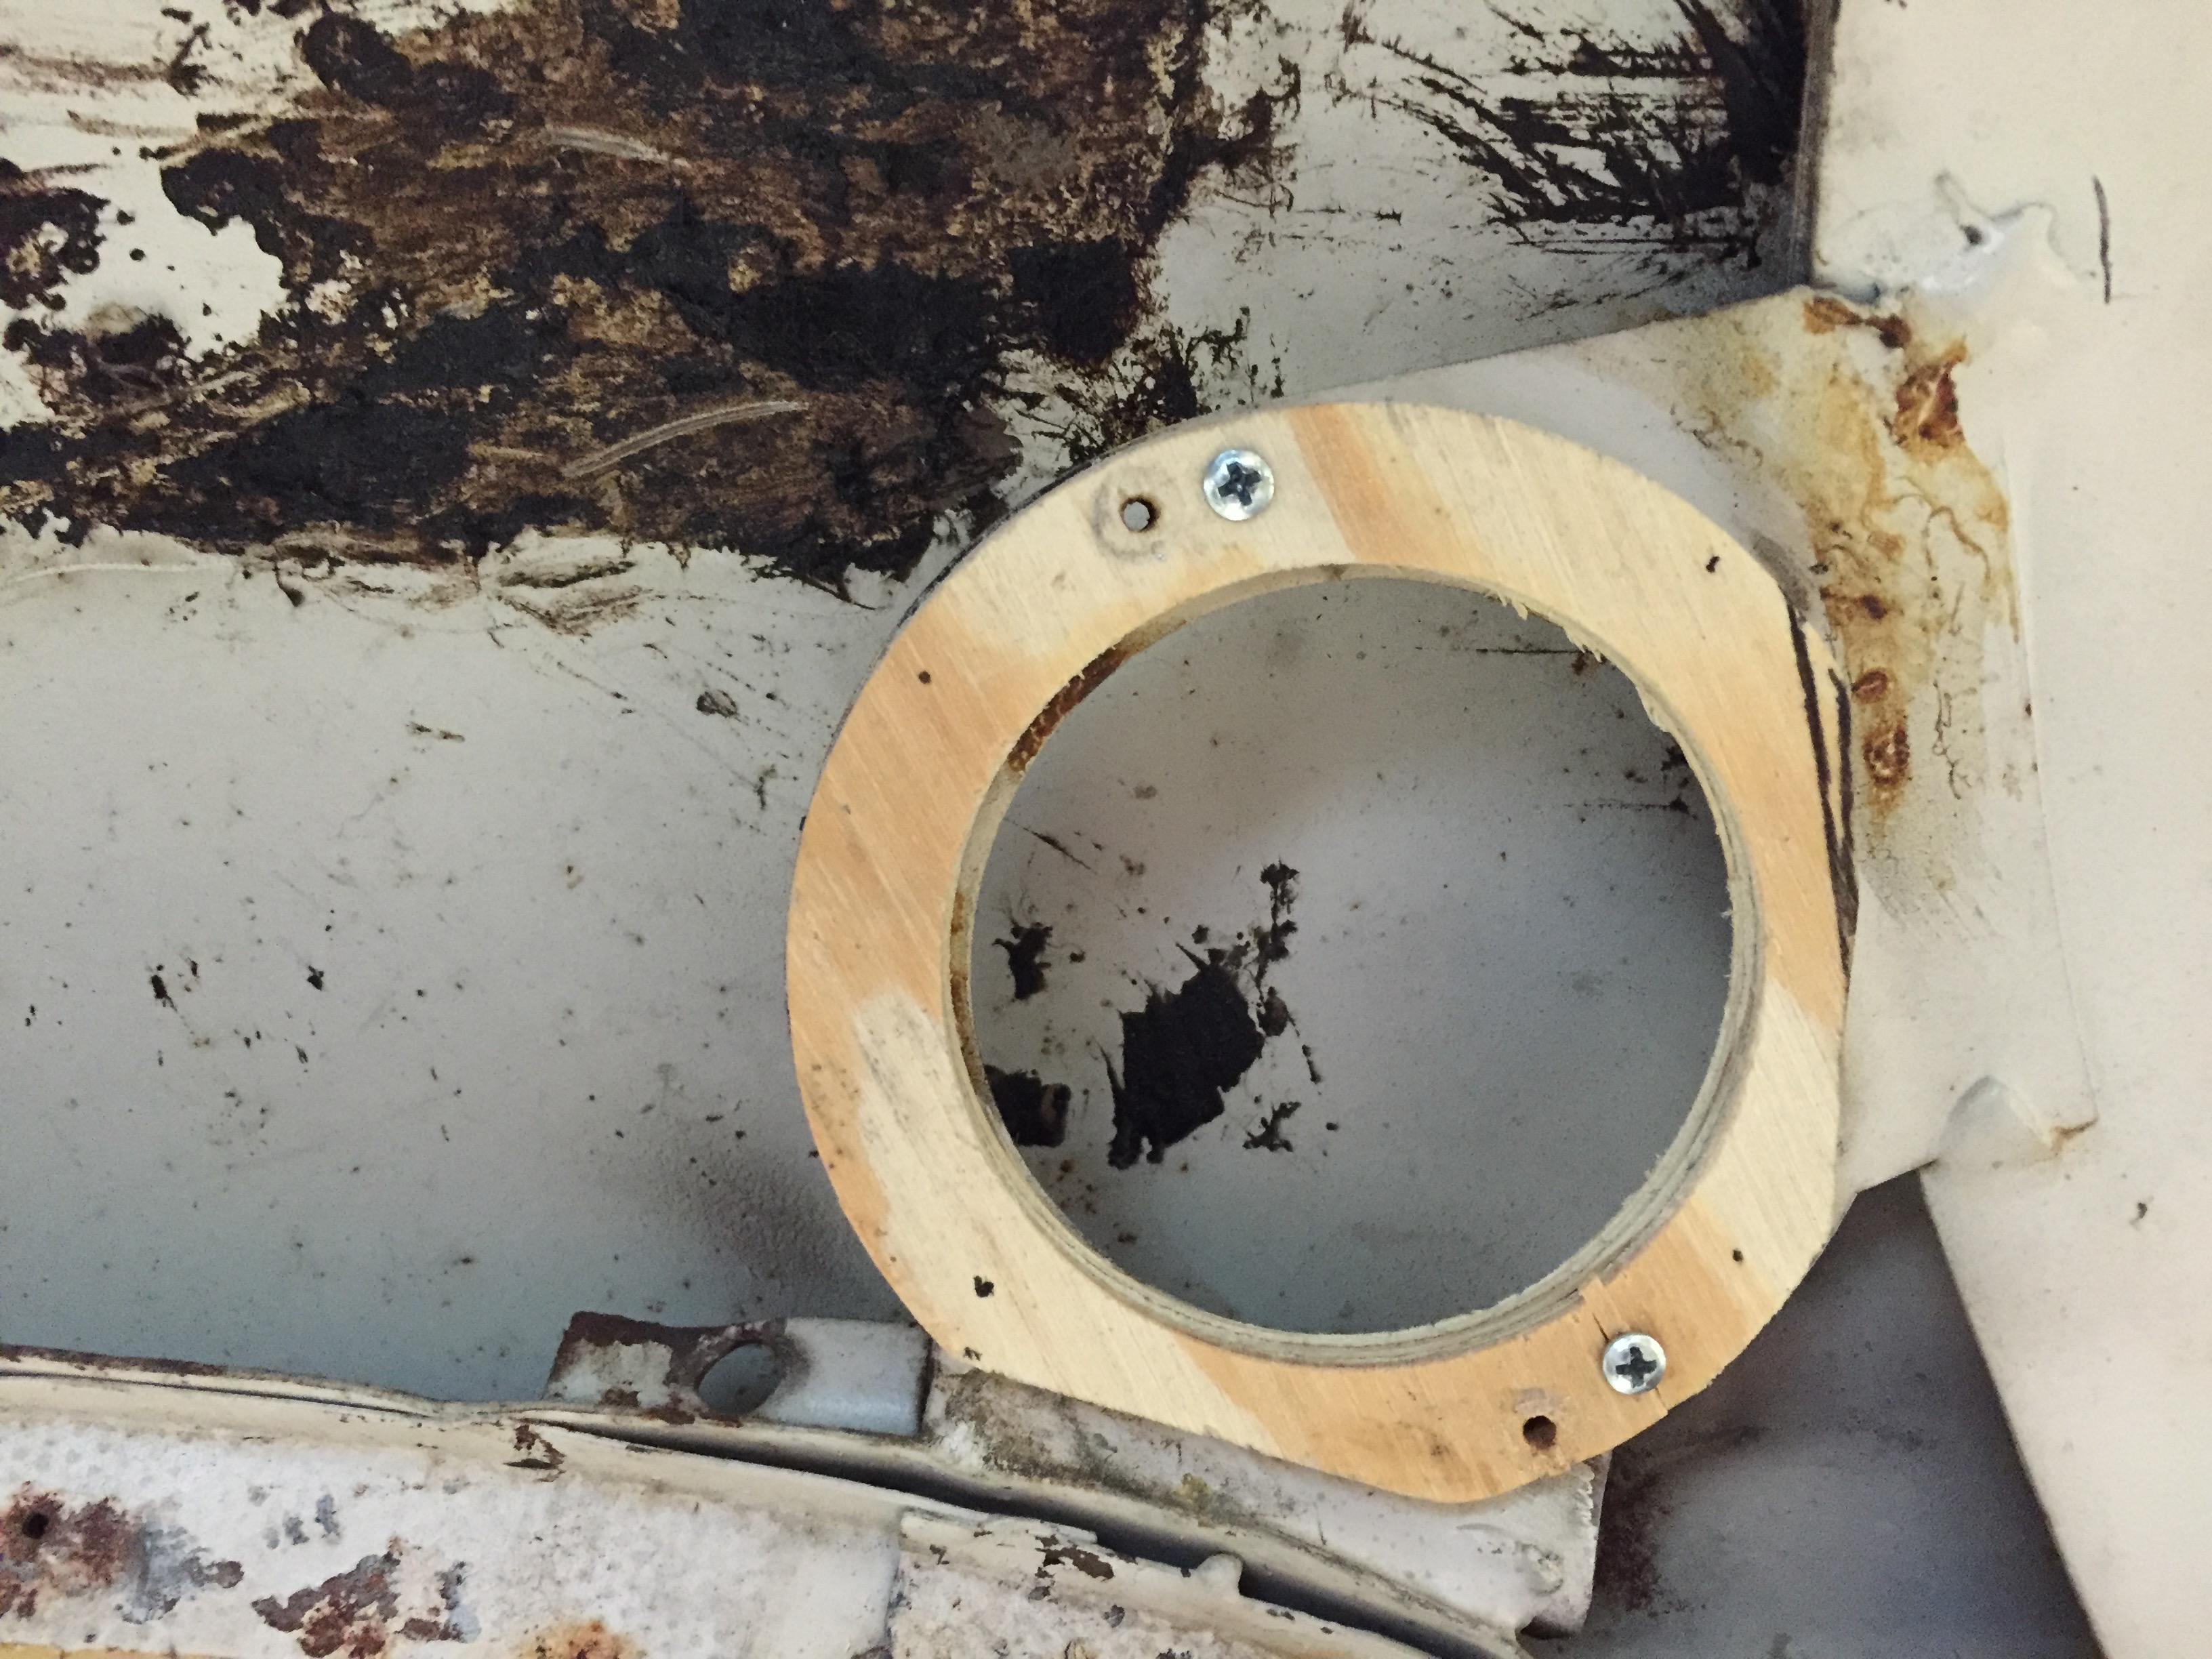
New Plywood Frame for rear quarter interior lamp
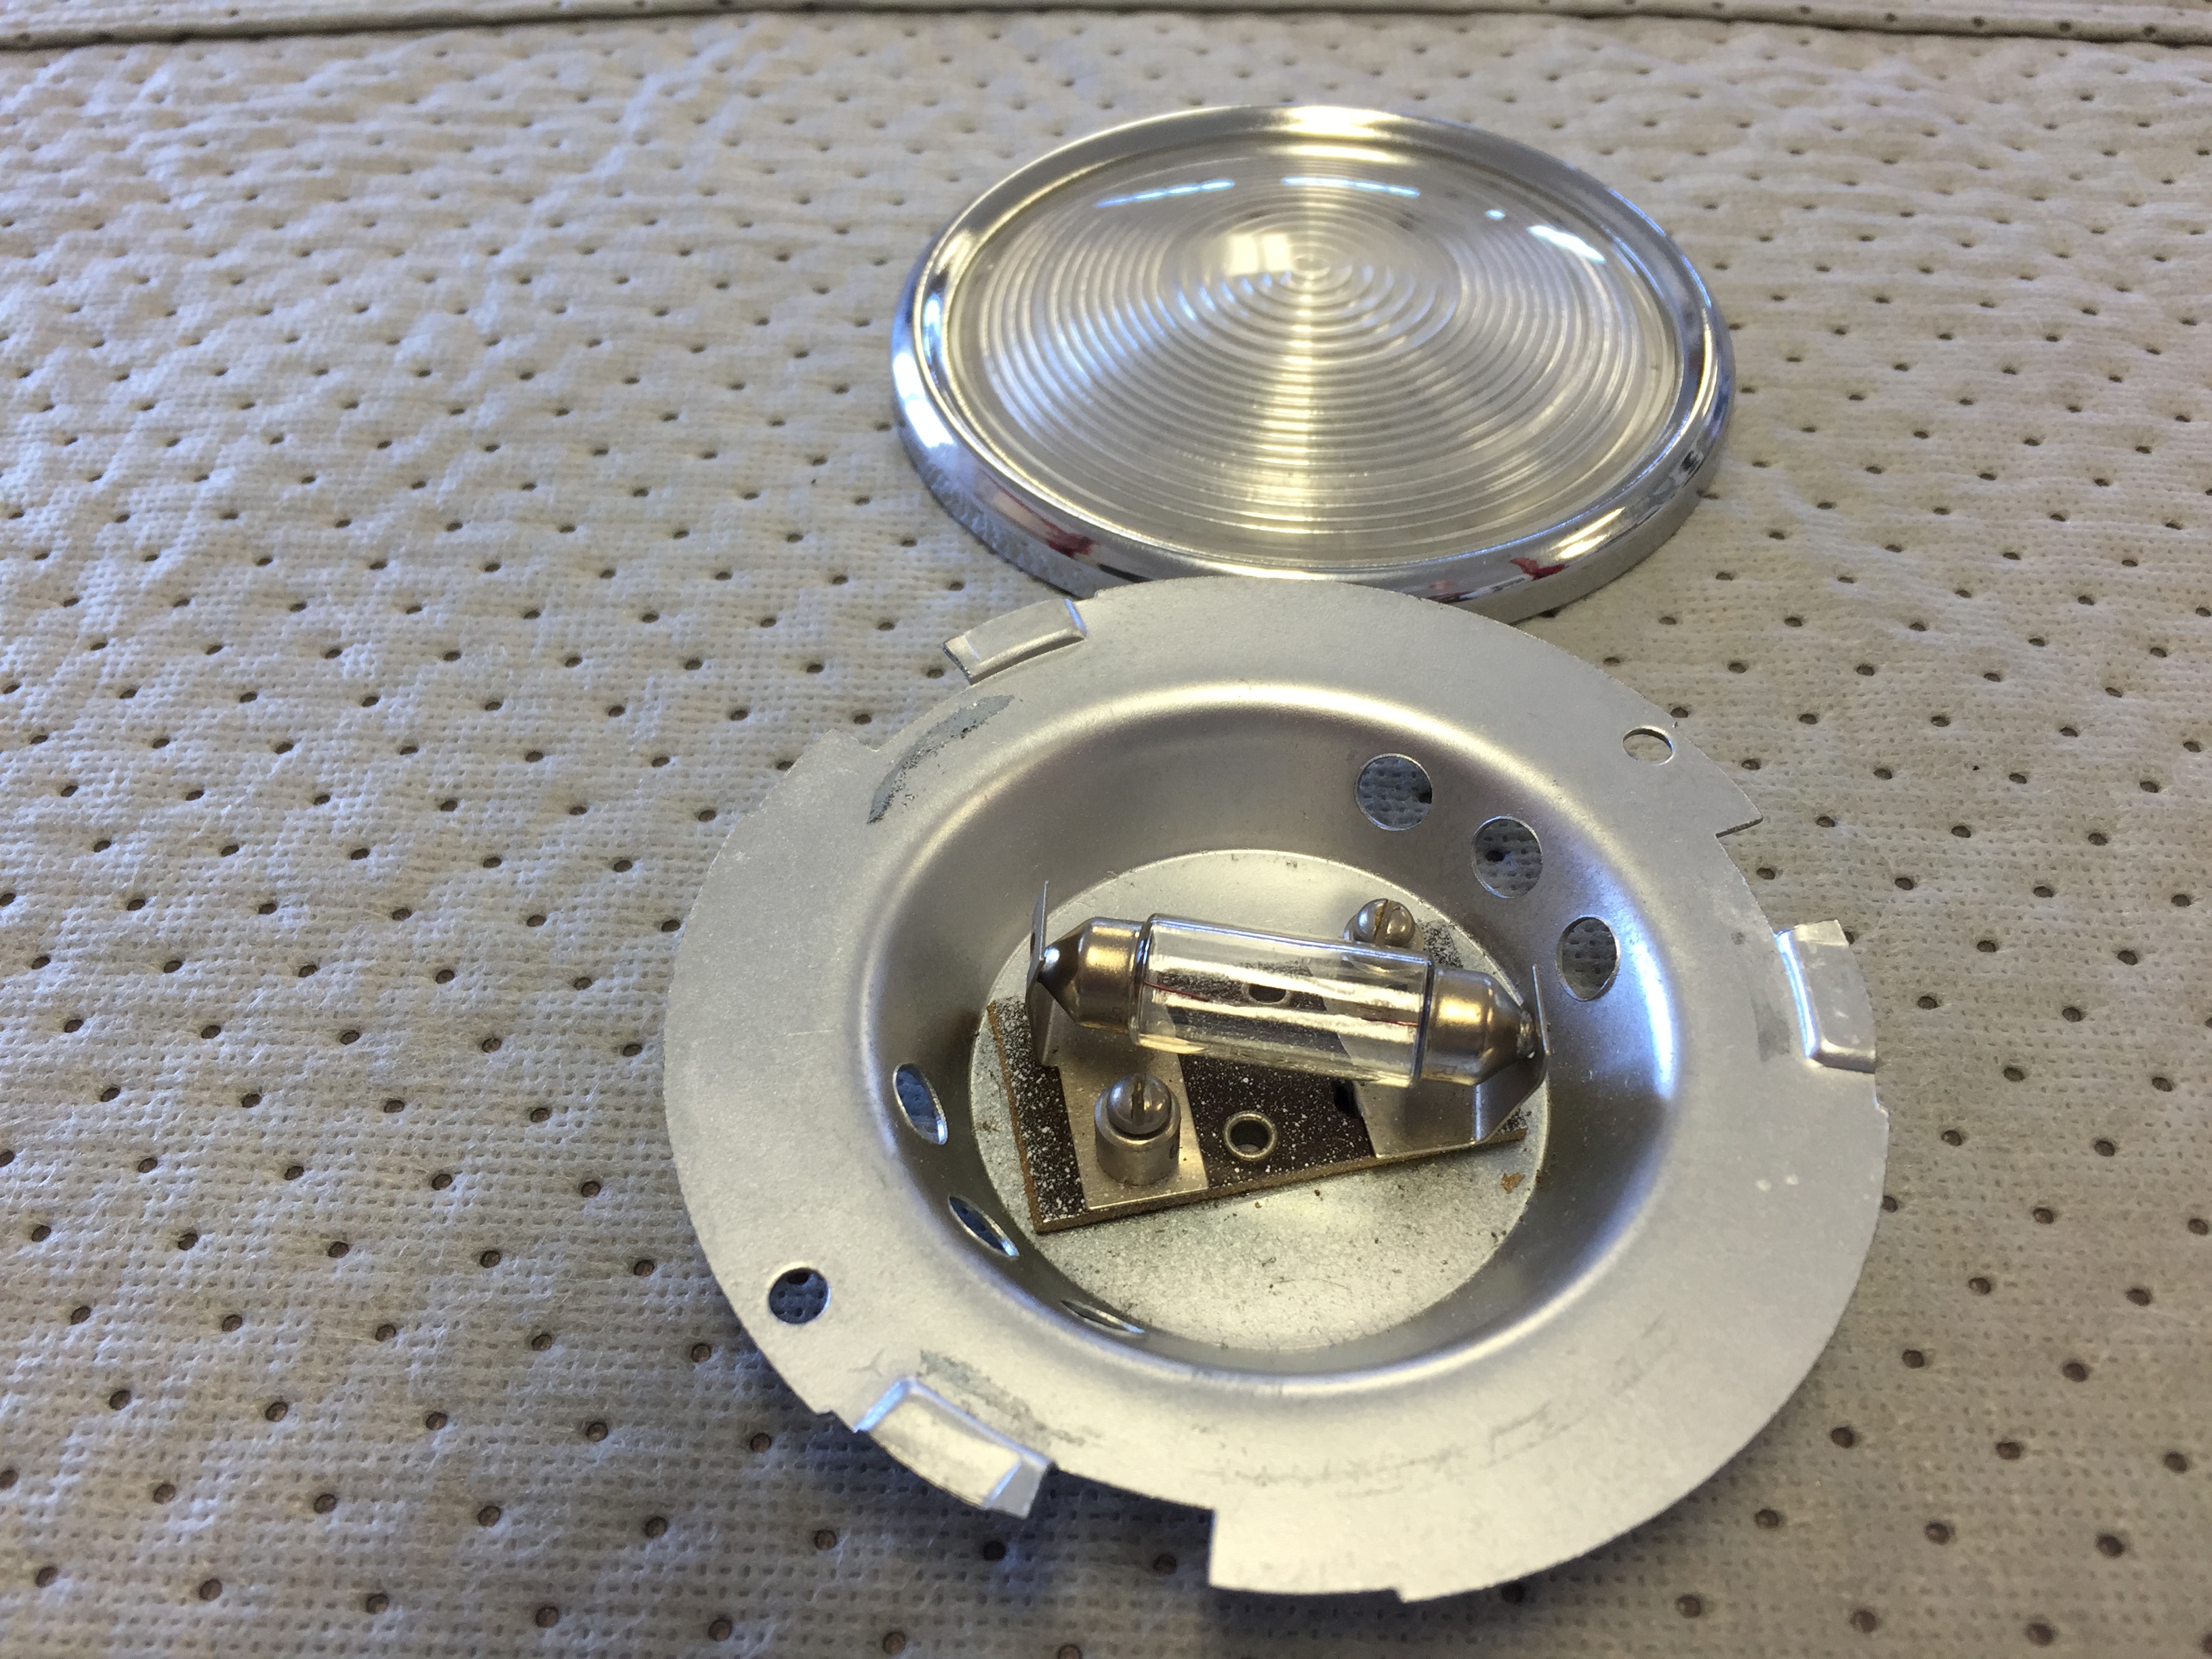
New Rear Interior Lights
New Rear Interior Lights
rear quarter interior lamp with LED inserted

The seat headrest lights were originally wired in such a way that they too illuminated when the car’s doors were opened. These lights also have an integral on/off rotary or dial switch. Without the central processor of a more modern car it would be all too easy to leave these lights on and eventually drain the battery. Therefore, I elected to wire these lamps to a switched power source rather than a constant power source like the other lamps. I did not use the terminal on the headrest light that would normally have a red/green wire to the door switches.
XJ40 Headrest Lamp

Once the ignition is turned on the front seat headrest lights behave like the other courtesy lamps, but if the ignition is off, unlike the other lights, the headrest lights cannot illuminate. Consequently no drain on the battery.
While not the same as the original Jaguar MK2, nor the Jaguar XJ40, I believe this wiring approach produces a very satisfactory result.
Instrument/Gauge Panel Lights
The lights on the gauges and the illumination of the switch markings is controlled by the switch lever marked”Panel” on the gauge panel. The switch has two positions “DIM” and “BRIGHT” to suit the driver’s requirements. The panel lights will only operate when the sidelights are switched “ON.”
All of the original 987 incandescent bulbs in the eight panel lights will be replaced with BA9 ES Neg. (screw base) LEDs (The image below shows a blue bulb, but I actually used white). Two each in the speedometer and tachometer, and one each in the fuel, water temperature, oil pressure, and voltmeter gauges.
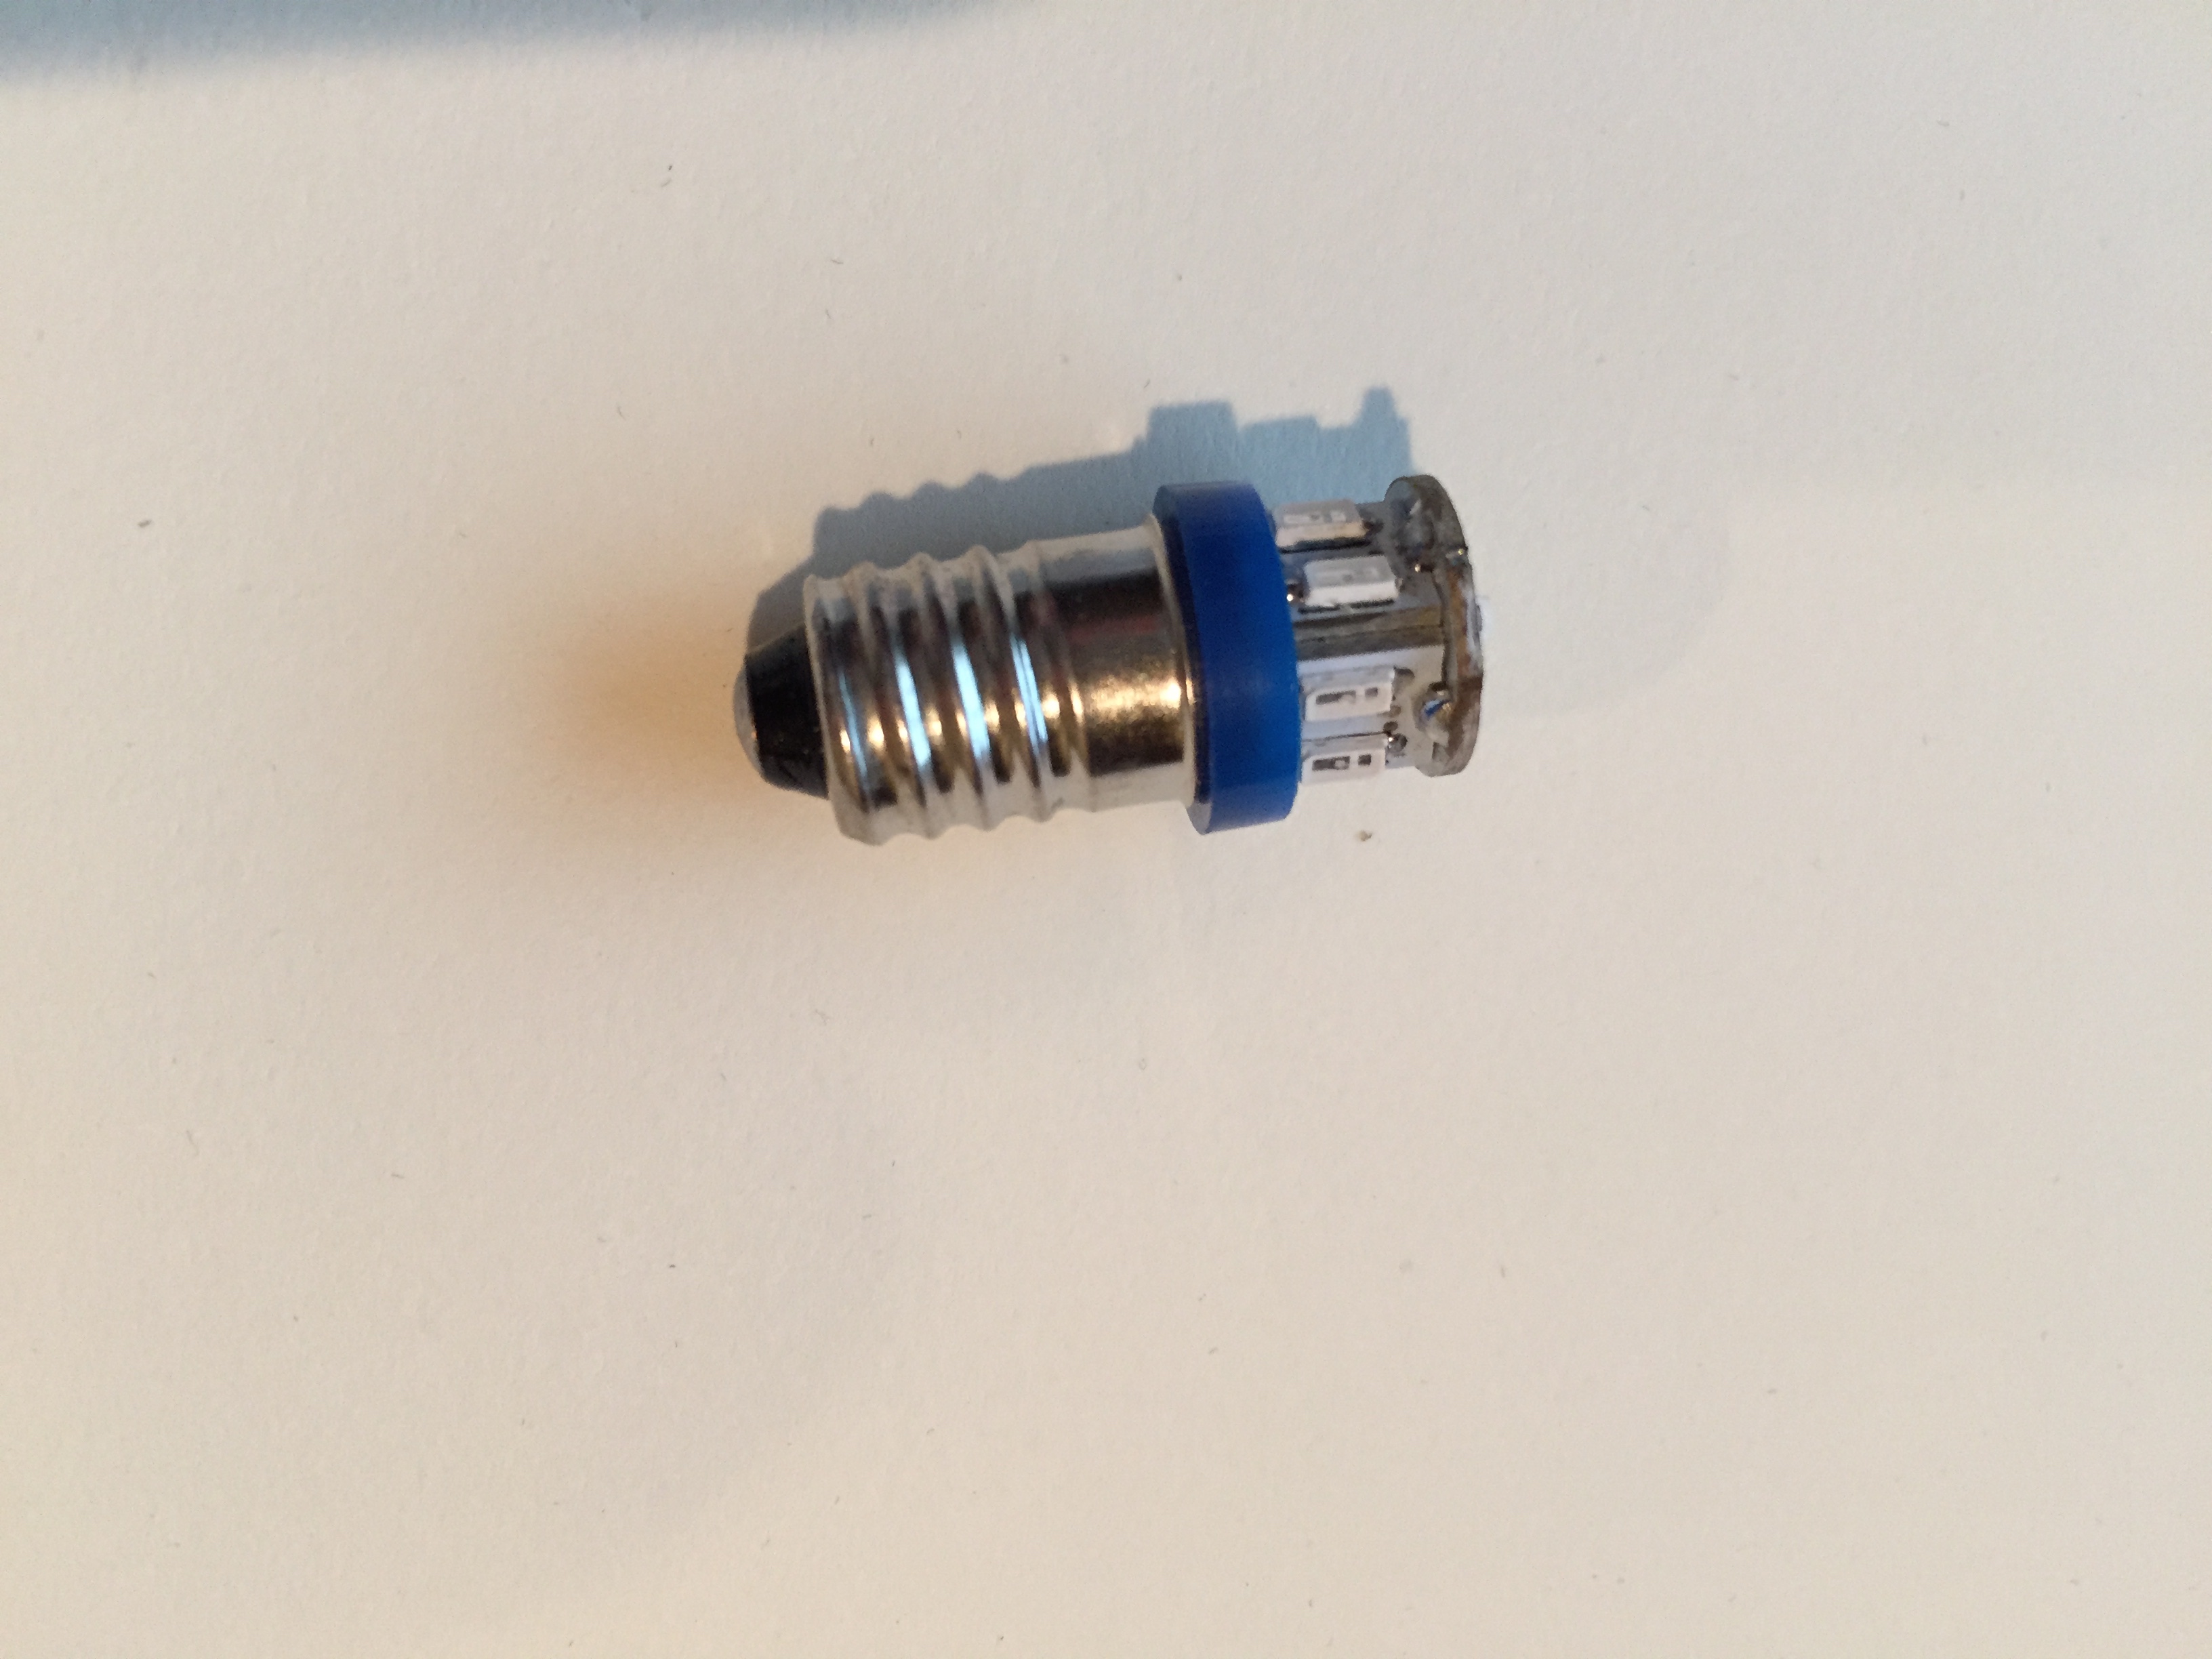
BA9ES Blue Neg LED
Warning Lights
There are four warning lights on my MK2. Three are located in the speedometer for fuel level, ignition, and high beam headlights. An additional light on the dash warns for low brake fluid or the handbrake application. These incandescent lights are replaced with BA9ES white Neg LEDS.
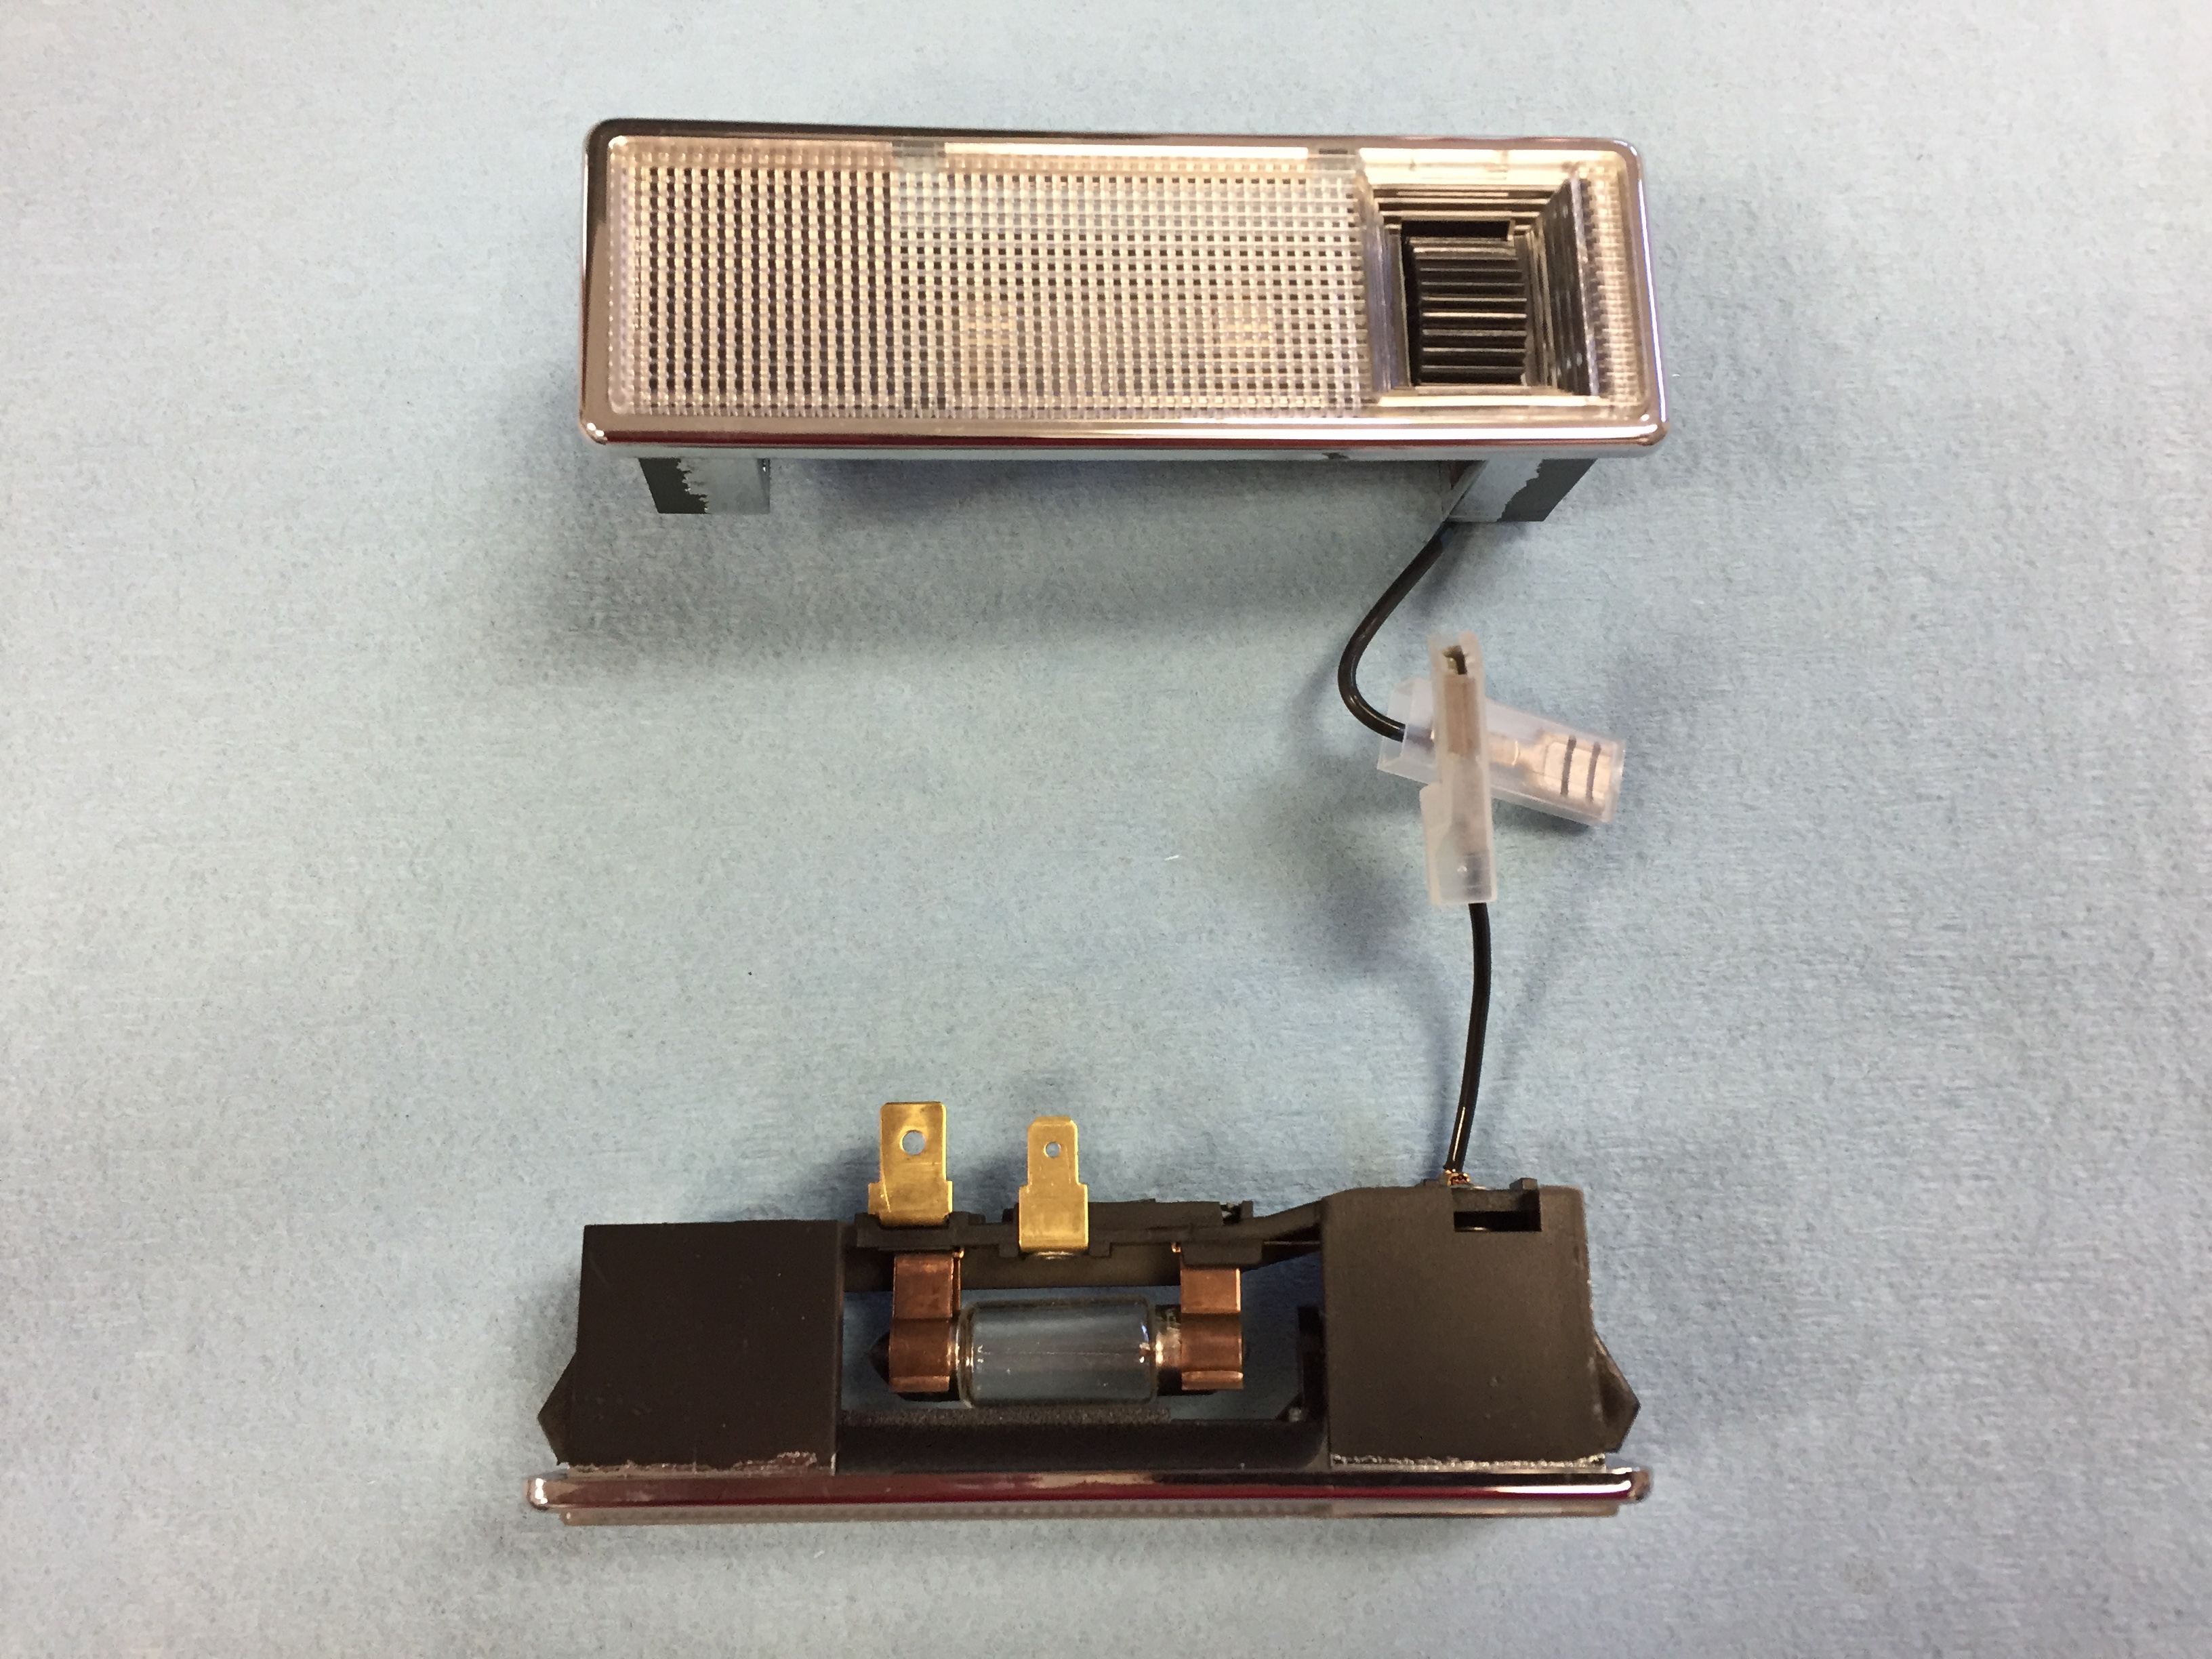
Map Light
There is a lamp located above the instrument panel, mounted to the wood screen rail capping. As designed, to illuminate the lamp, the switch marked “MAP” is lifted. The light will only operate when the sidelights are switched “ON.” However, following the lead of Eric Kriss I have repurposed the map light toggle switch to control the hazard light function. The map light in my wiring scheme is controlled by the panel lamp switch. I also substituted an LED strip in place of the original incandescent bulb. Details about the wiring are available at the “building a new wiring harness” post and at the “Gauges, Instruments and Switches” post.
Map Light – Original and New Replacement
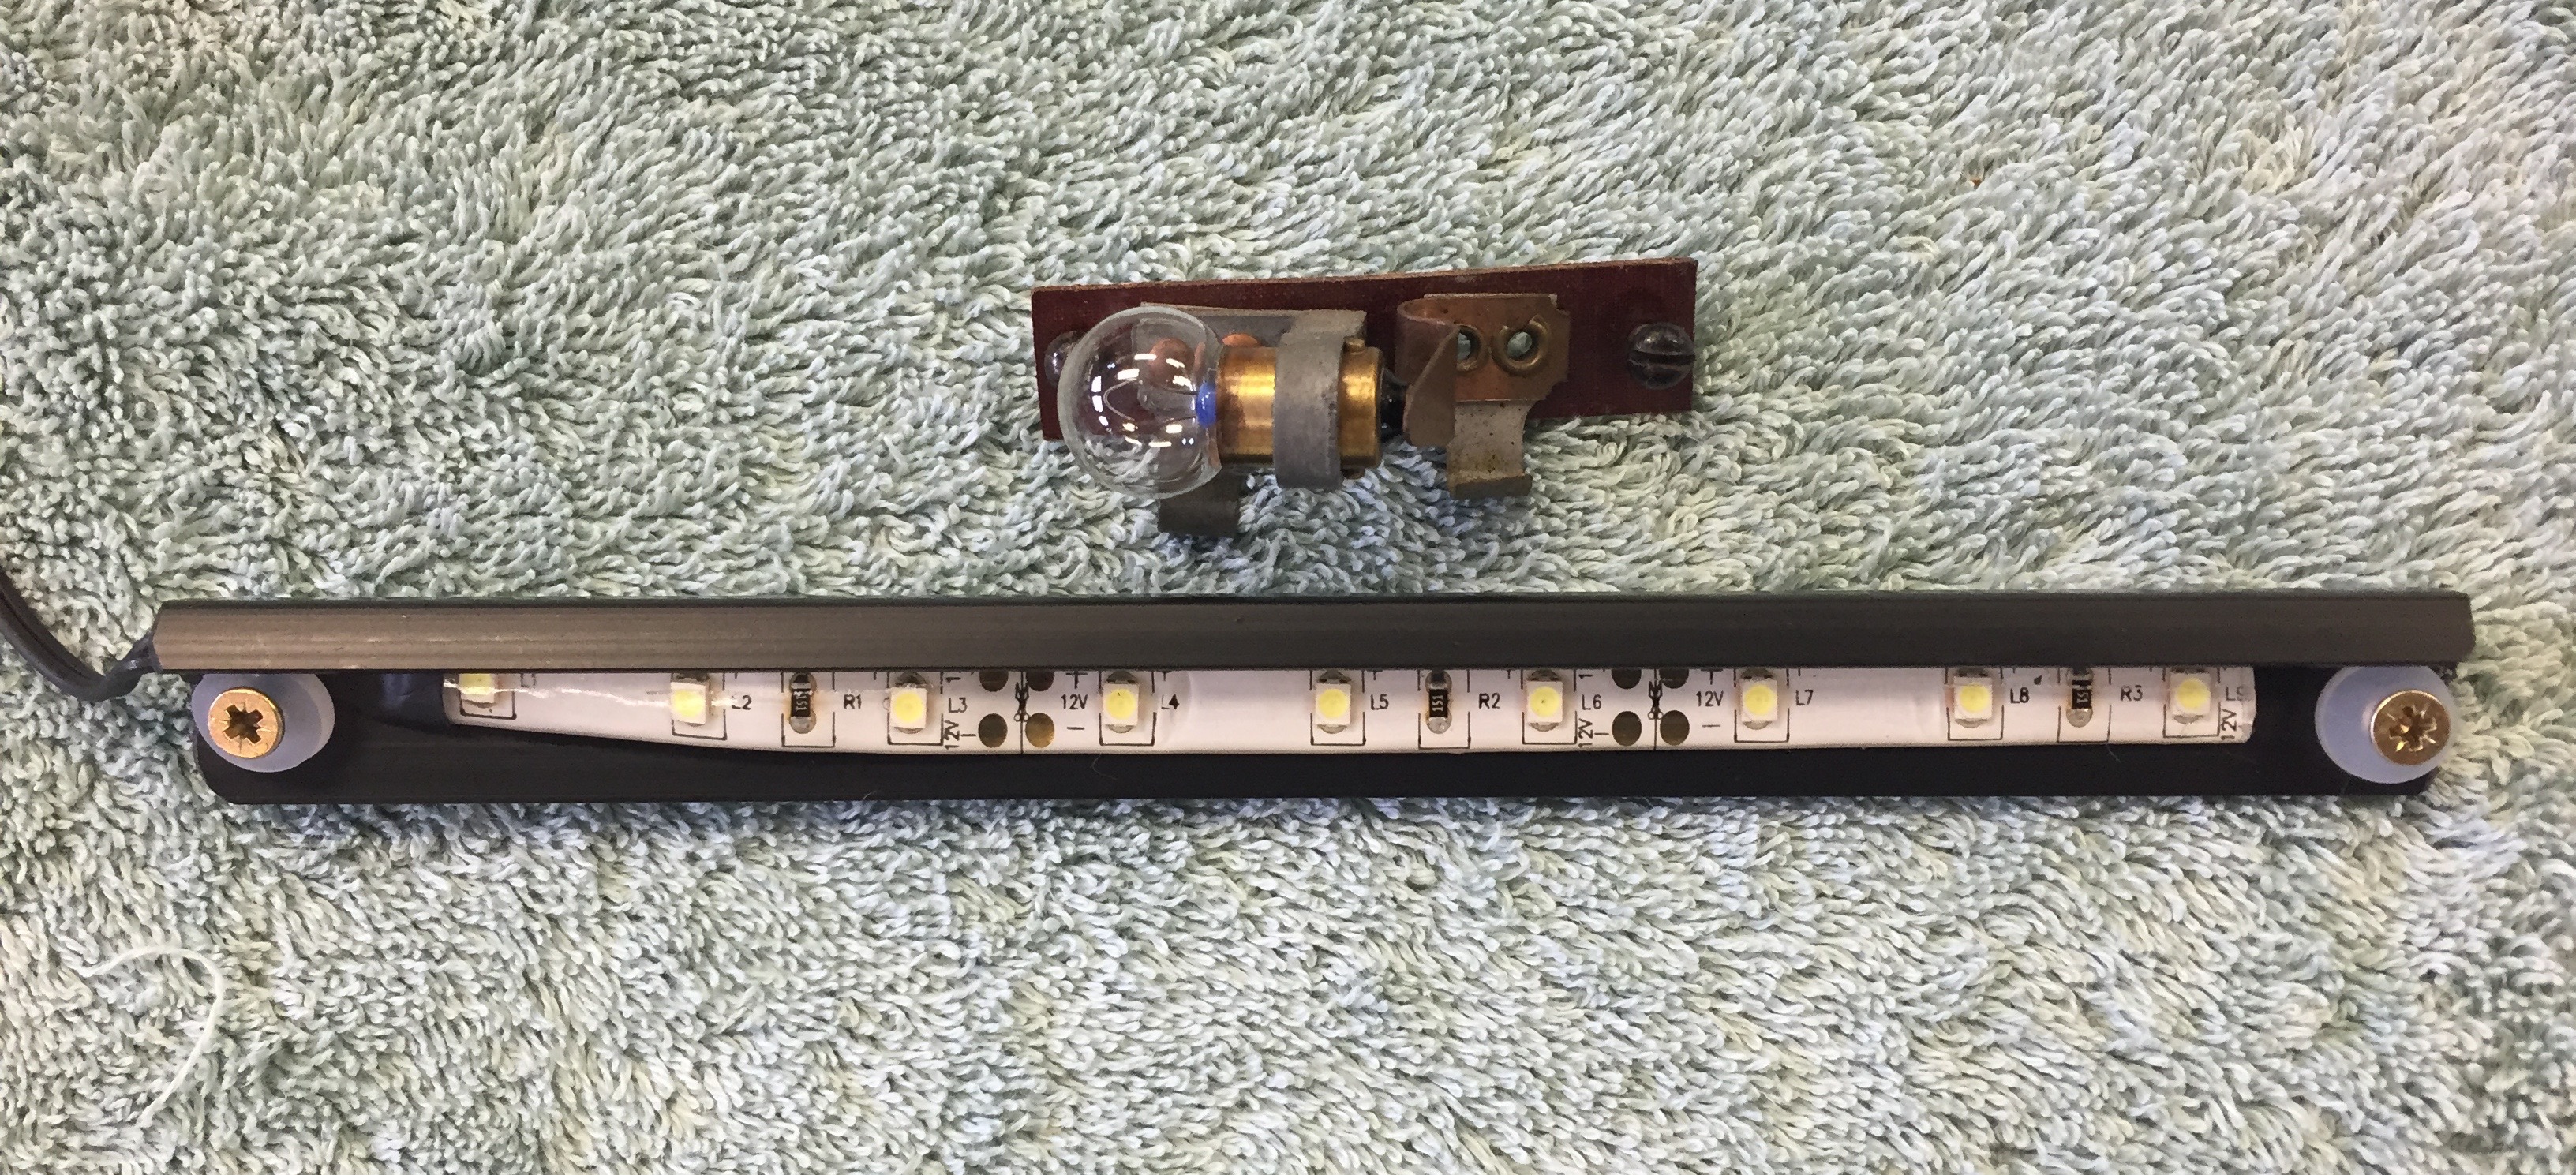
Original Incandescent map light and LED Map Light
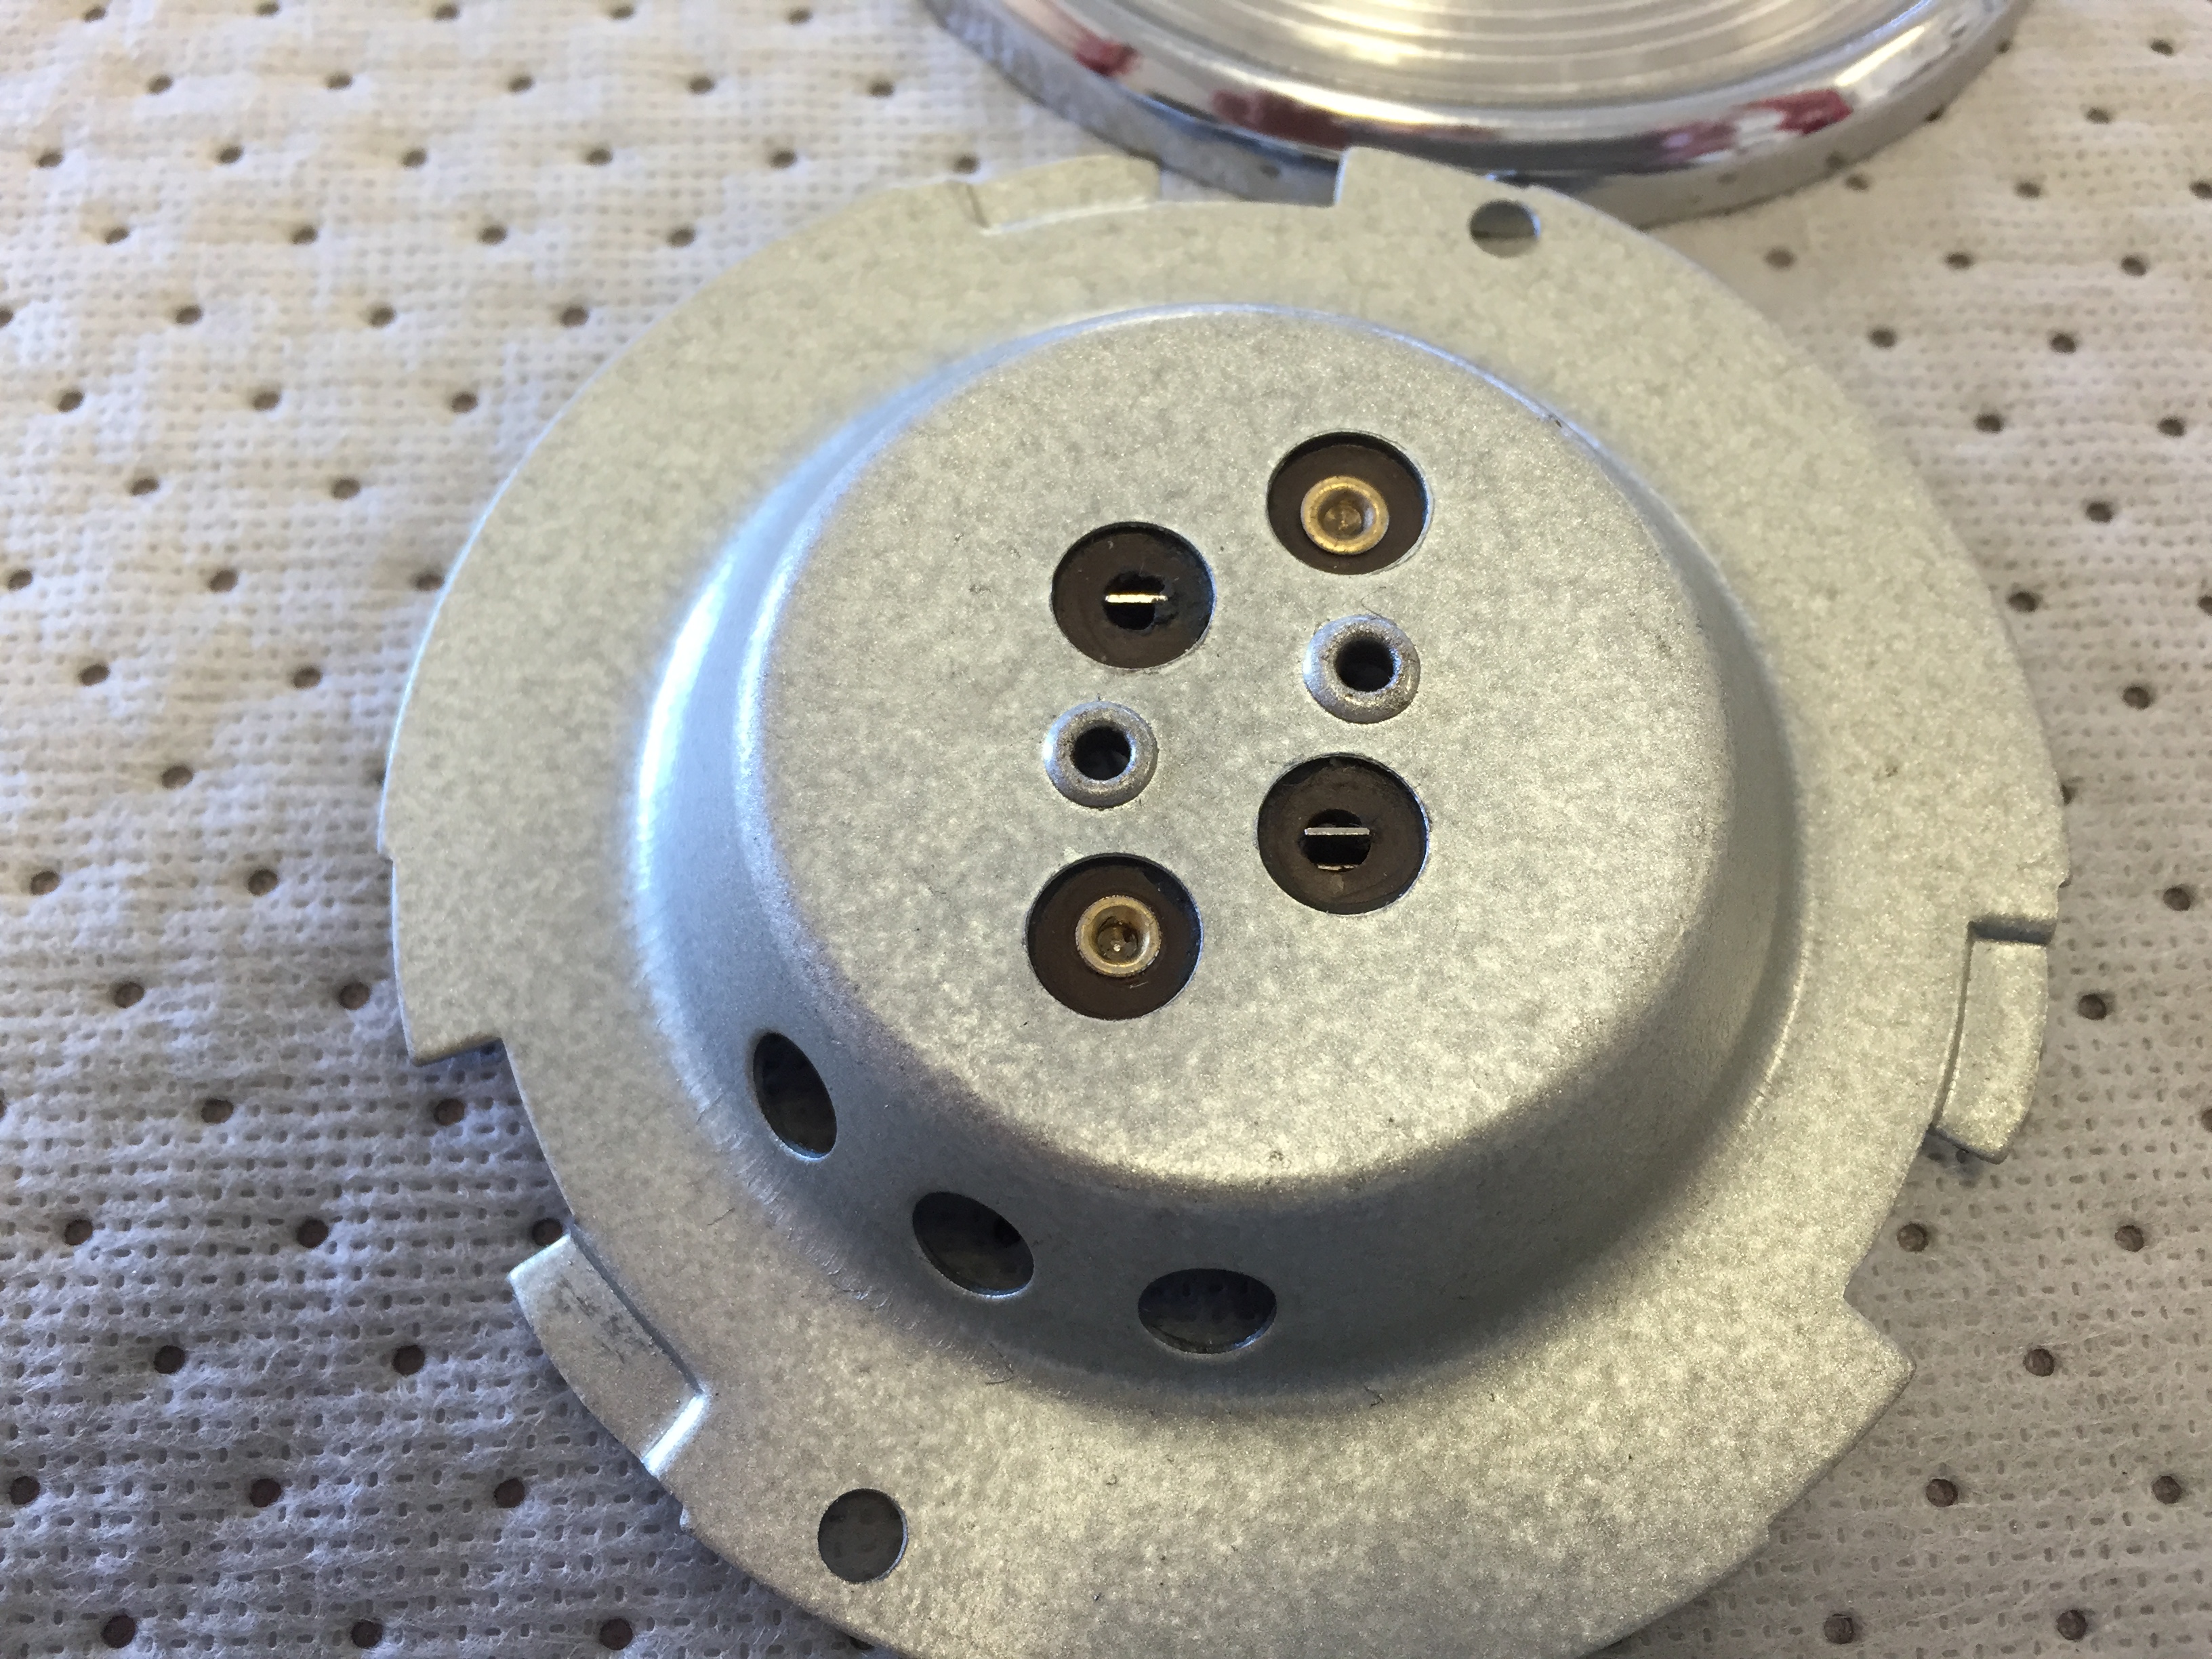
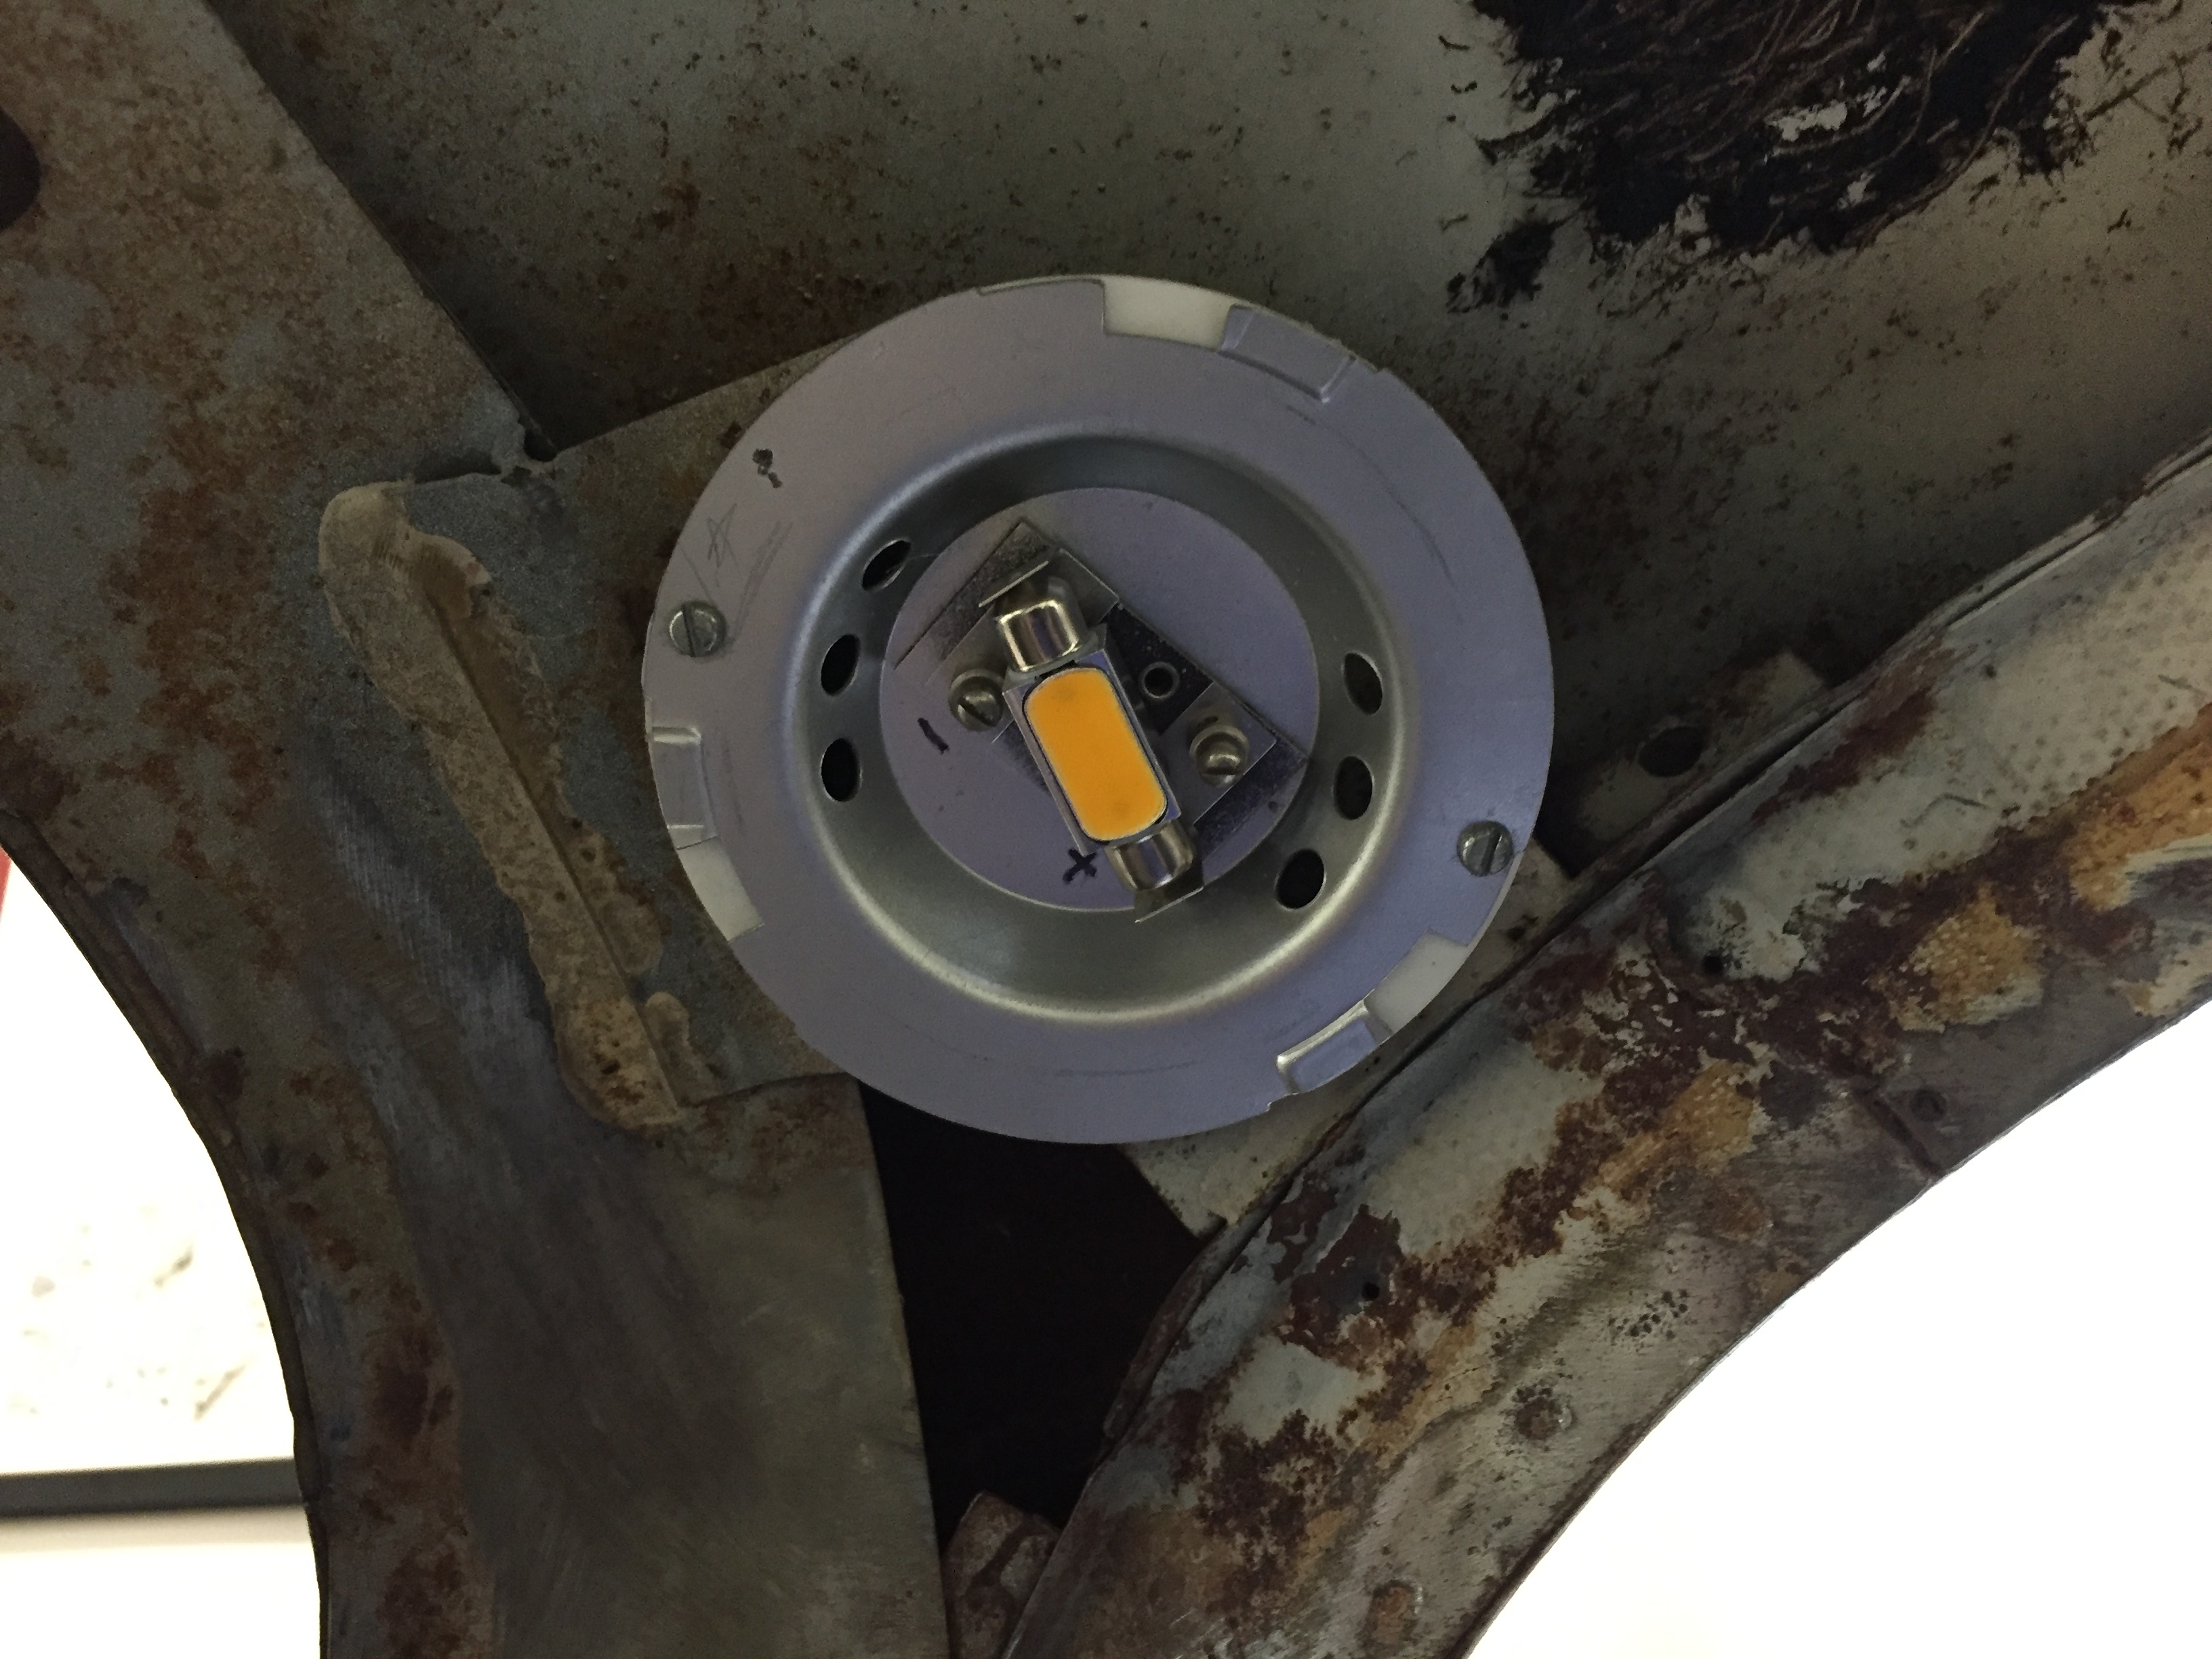
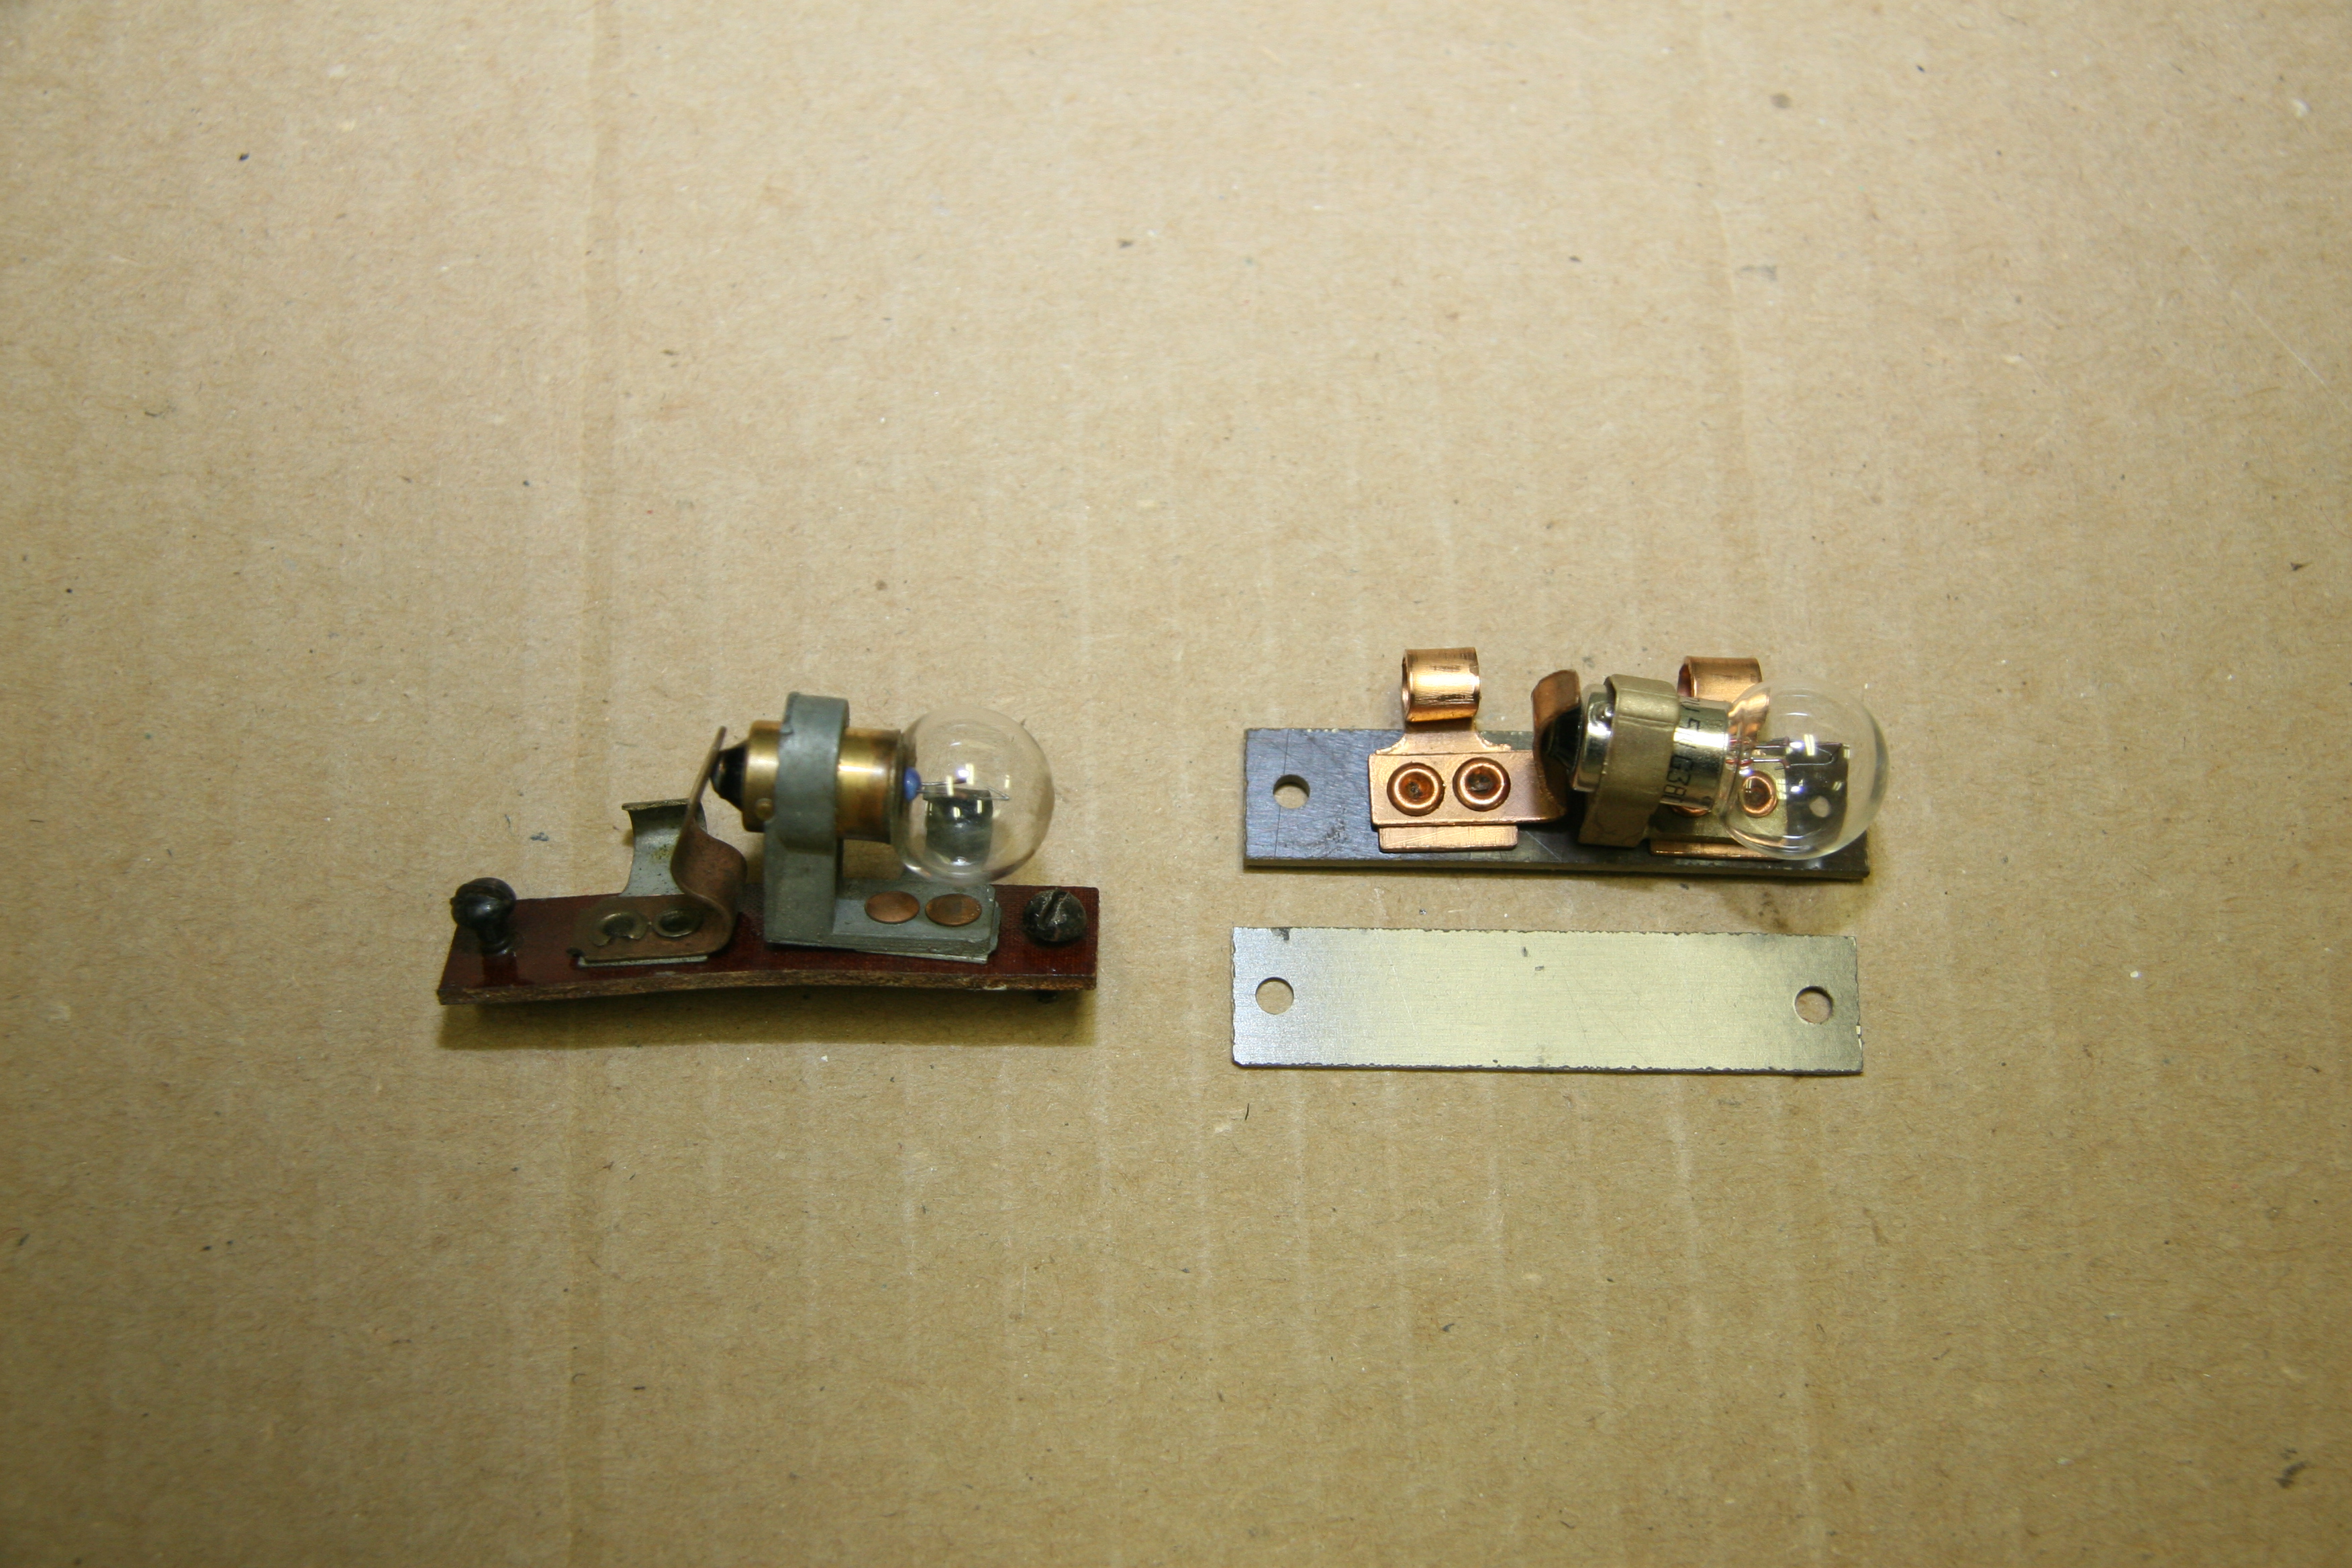
“Cubby” Glove Box Light
As designed, the lamp in the glove box is automatically illuminated when the door is open and the side lights are “ON.” However, following the lead of Eric Kriss, I have wired the cubby lamp and the luggage lamp in the boot so they will illuminate when the cubby door is opened or the boot lid is opened without the necessity of turning on the lights at the light switch first. As with the other lamps the incandescent bulb has been replaced by an LED lamp. the following image shows the components of the lamp.

Cubby Box Lamp

Cubby Box Lamp installed in Box
The following image shows the components of the cubby lamp switch.
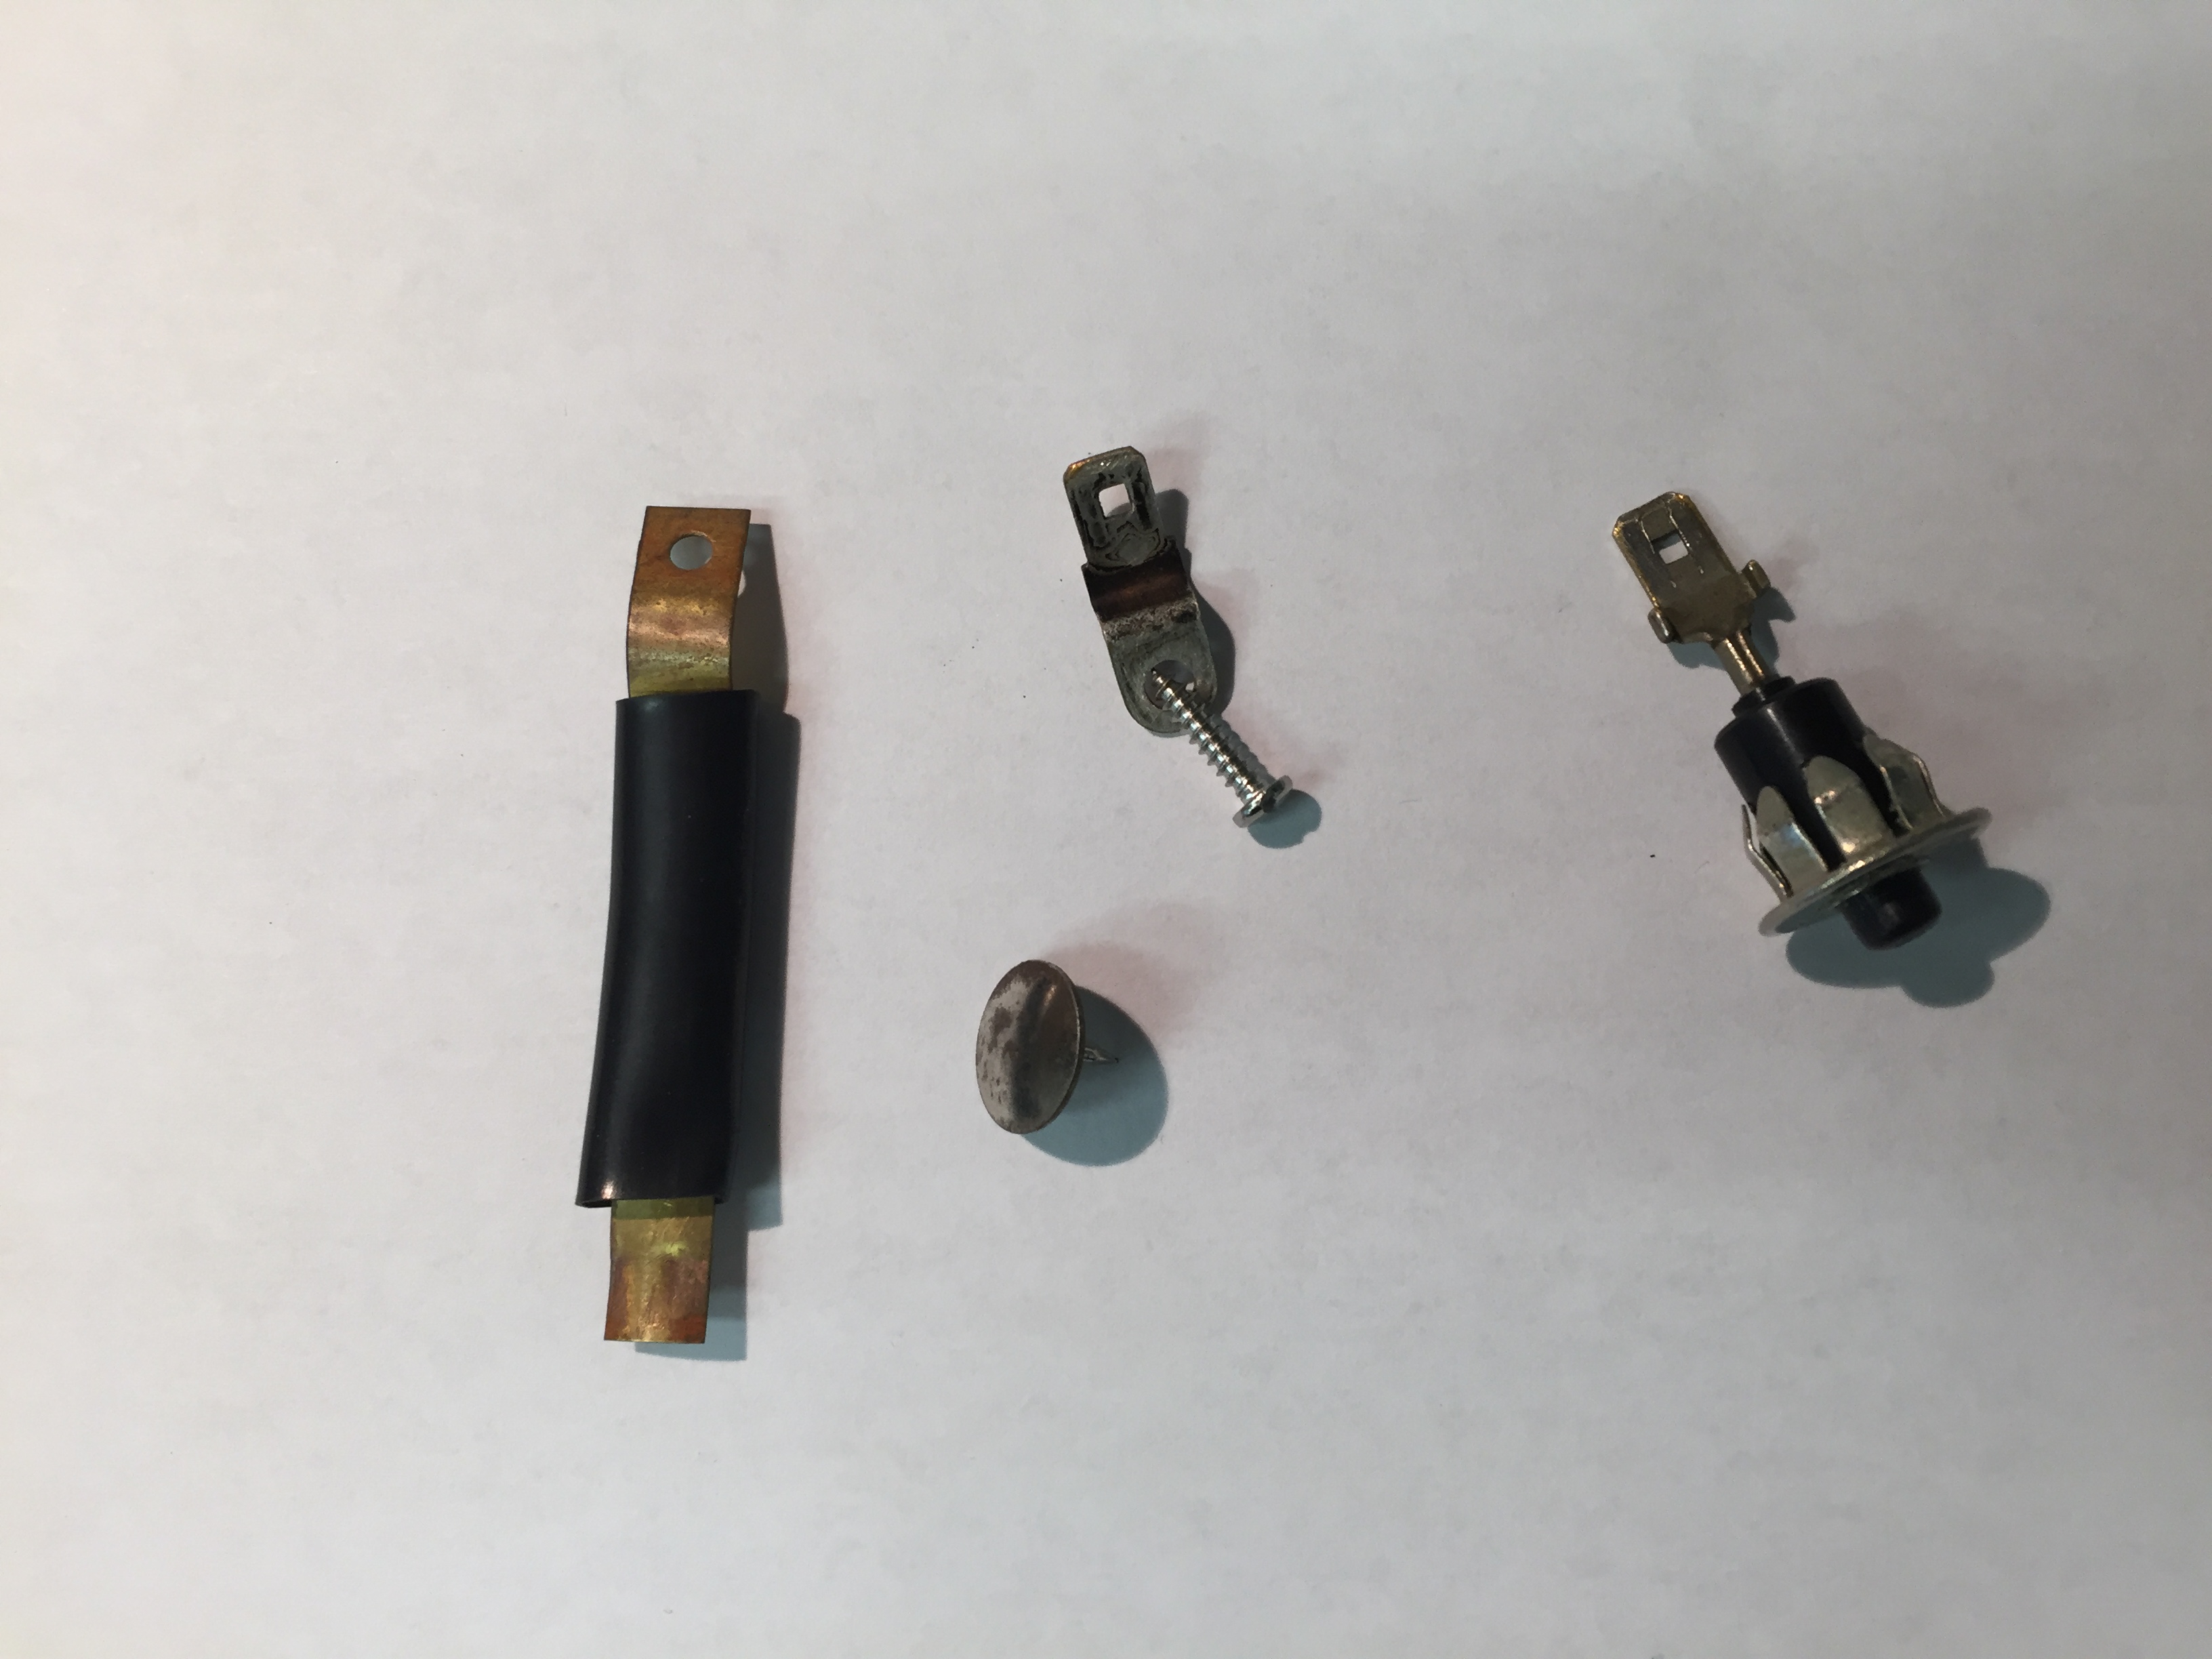
Cubby Box Switch
Luggage Compartment Light
The Boot is illuminated when the lid is opened. The lamp only operates when the side lights are switched “ON.”
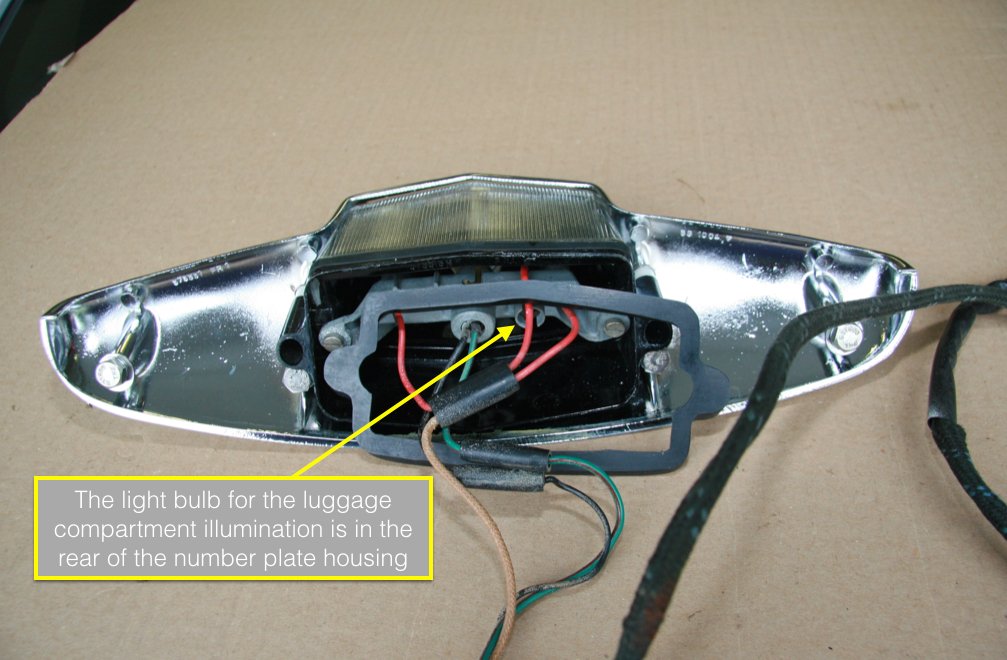
Luggage Compartment Illumination