
The Front and Rear Brakes
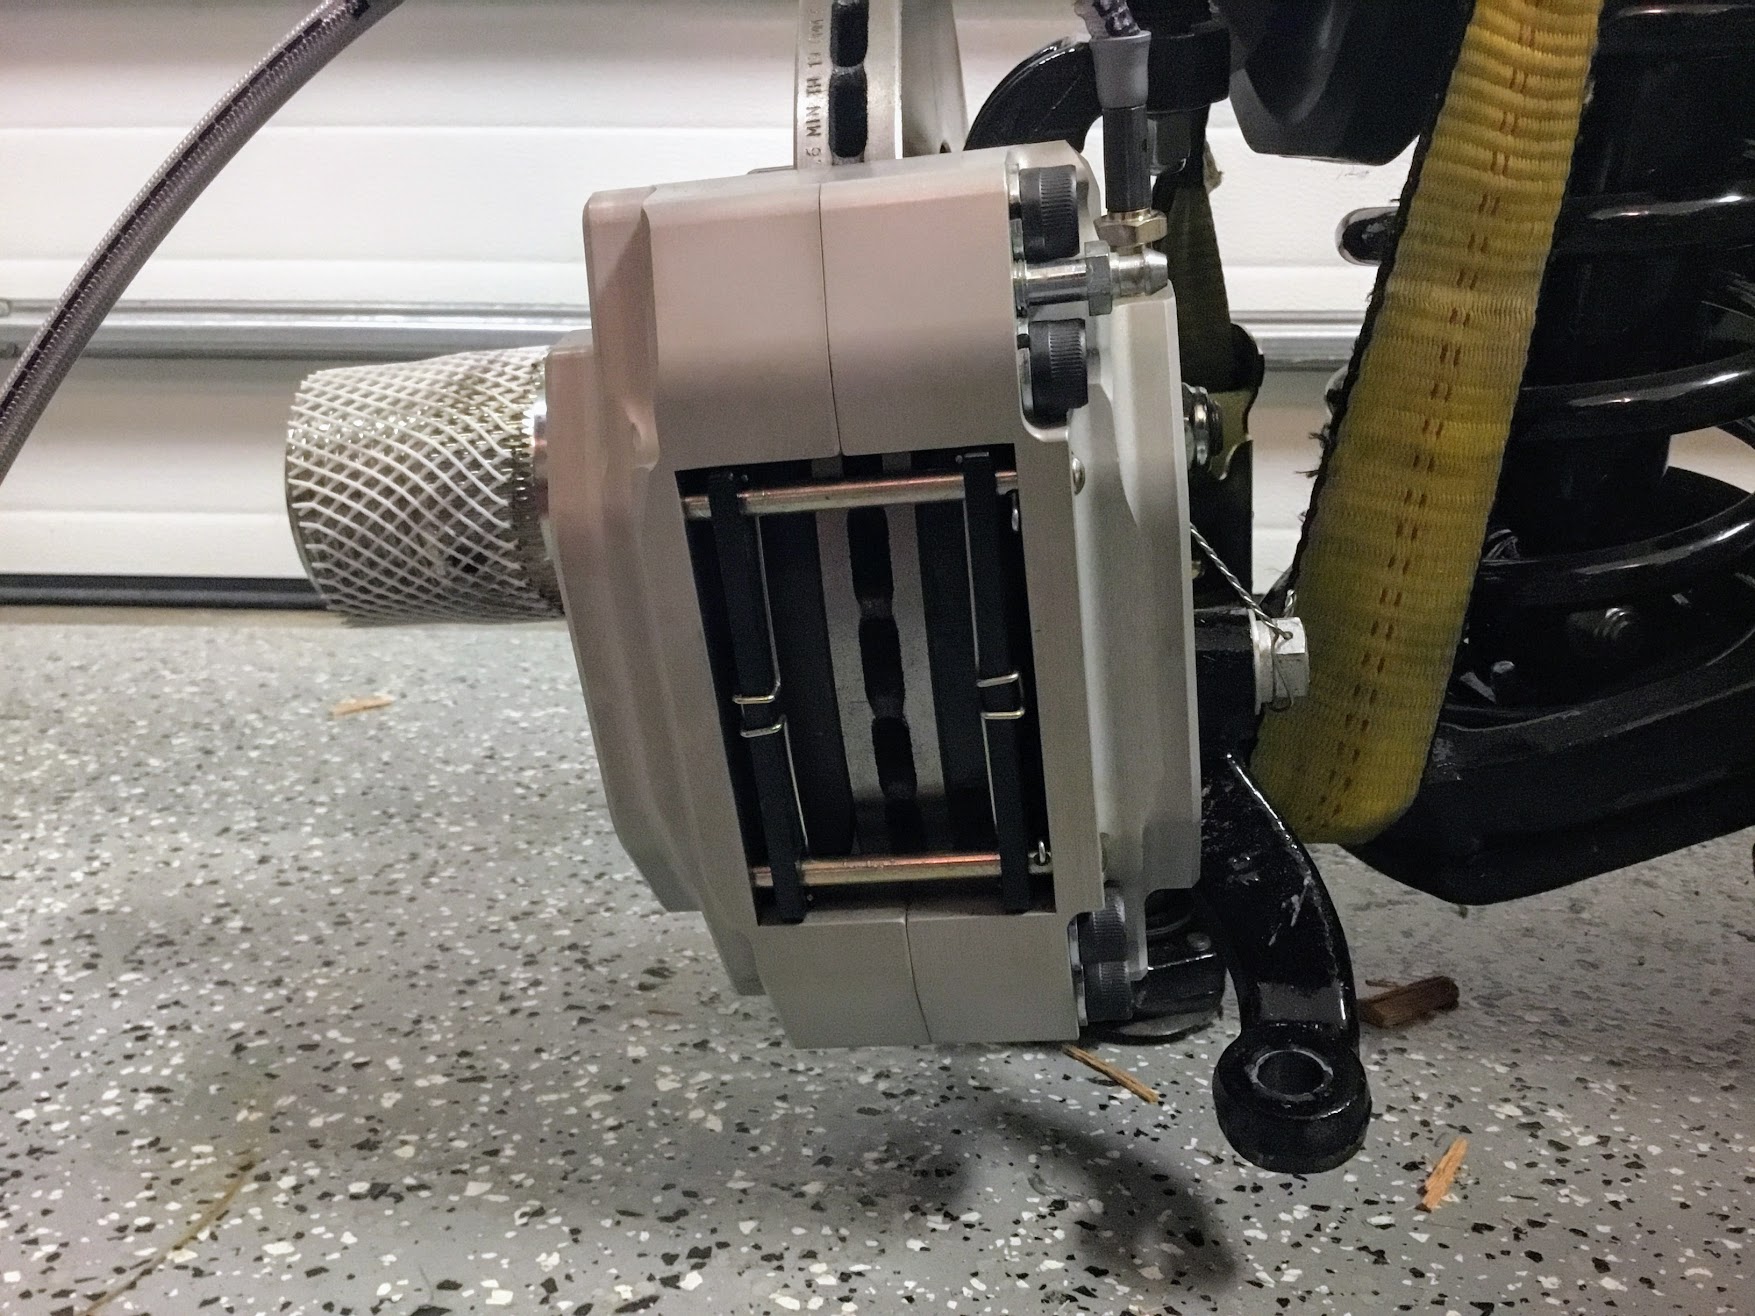
The Jaguar MK2 uses a single line hydraulic system actuating disc brakes in both the front and rear of the car. While the four wheel disc brakes were “cutting edge” at the time of production for a four-door sedan, today, the braking action can be upgraded with vendor supplied modification kits. Front Brake Upgrade I decided to go with the Coopercraftbrake upgrade kit for the front and rear of the car. Up front, their four pot brake caliper range has been updated to include stainless steel pistons, a refined and improved caliper design for strength and efficiency. To gain some weight savings I installed the optional aluminum calipers. The system employs ventilated disc rotors that should help with cooling. No modifications were required for mounting. Every thing was a “bolt-on” application. Coopercraft provided fitting instructions with their kit:

Coopercraft Front Braking Installation Instructions
Calipers and Pads
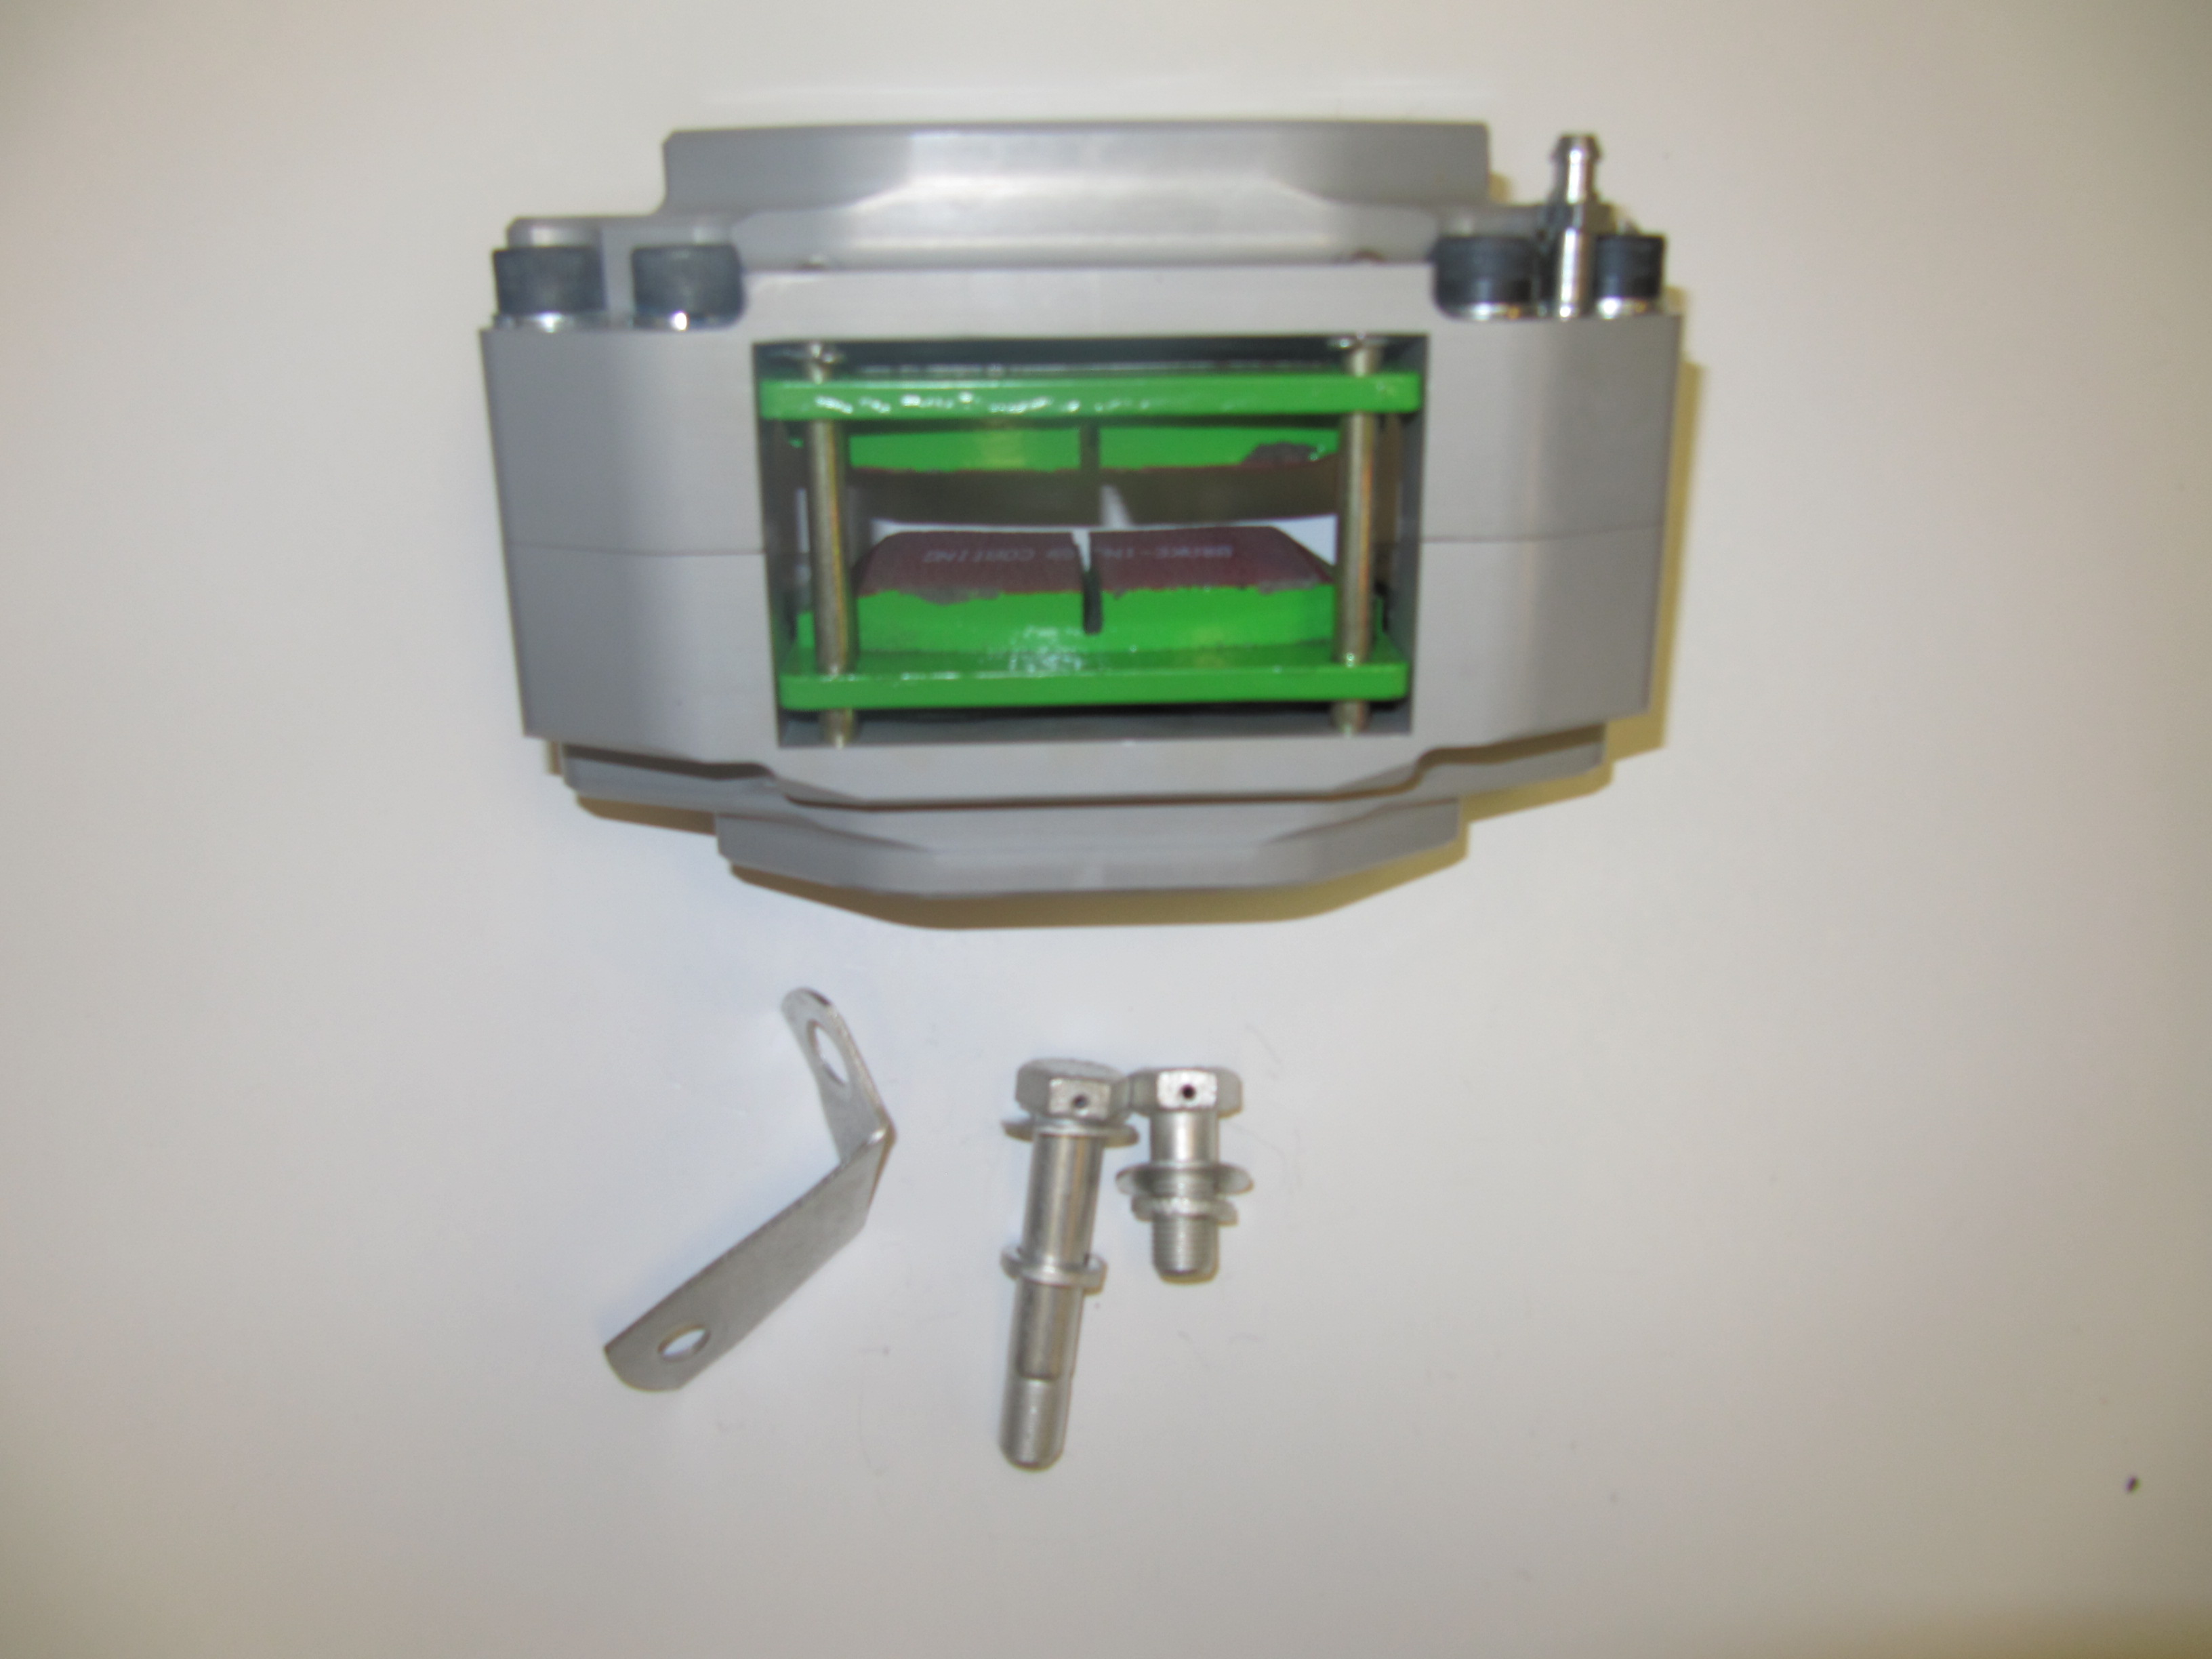
Coopercraft Calipers
The photos above show the upgraded EBC “Green Stuff” brake pads. After installing the vented rotors on the front suspension crossmember assembly I installed the calipers finding that it appeared that no shims would be needed for proper fit. Two bolts secure each caliper to the stub axle housing lugs: The shorter 1/2″ x 1 1/8″ – 20 is at the upper mount and the longer 1/2″ x 2 5/8″ – 20 is at the lower mount. Each bolt is accompanied by a flat washer and a split washer. The cad plated brackets were used on the original brakes to support the union of the rubber brake hose to the metal caliper pipe. With the Coopercraft upgrade these are not used, as the hose links directly to the caliper.
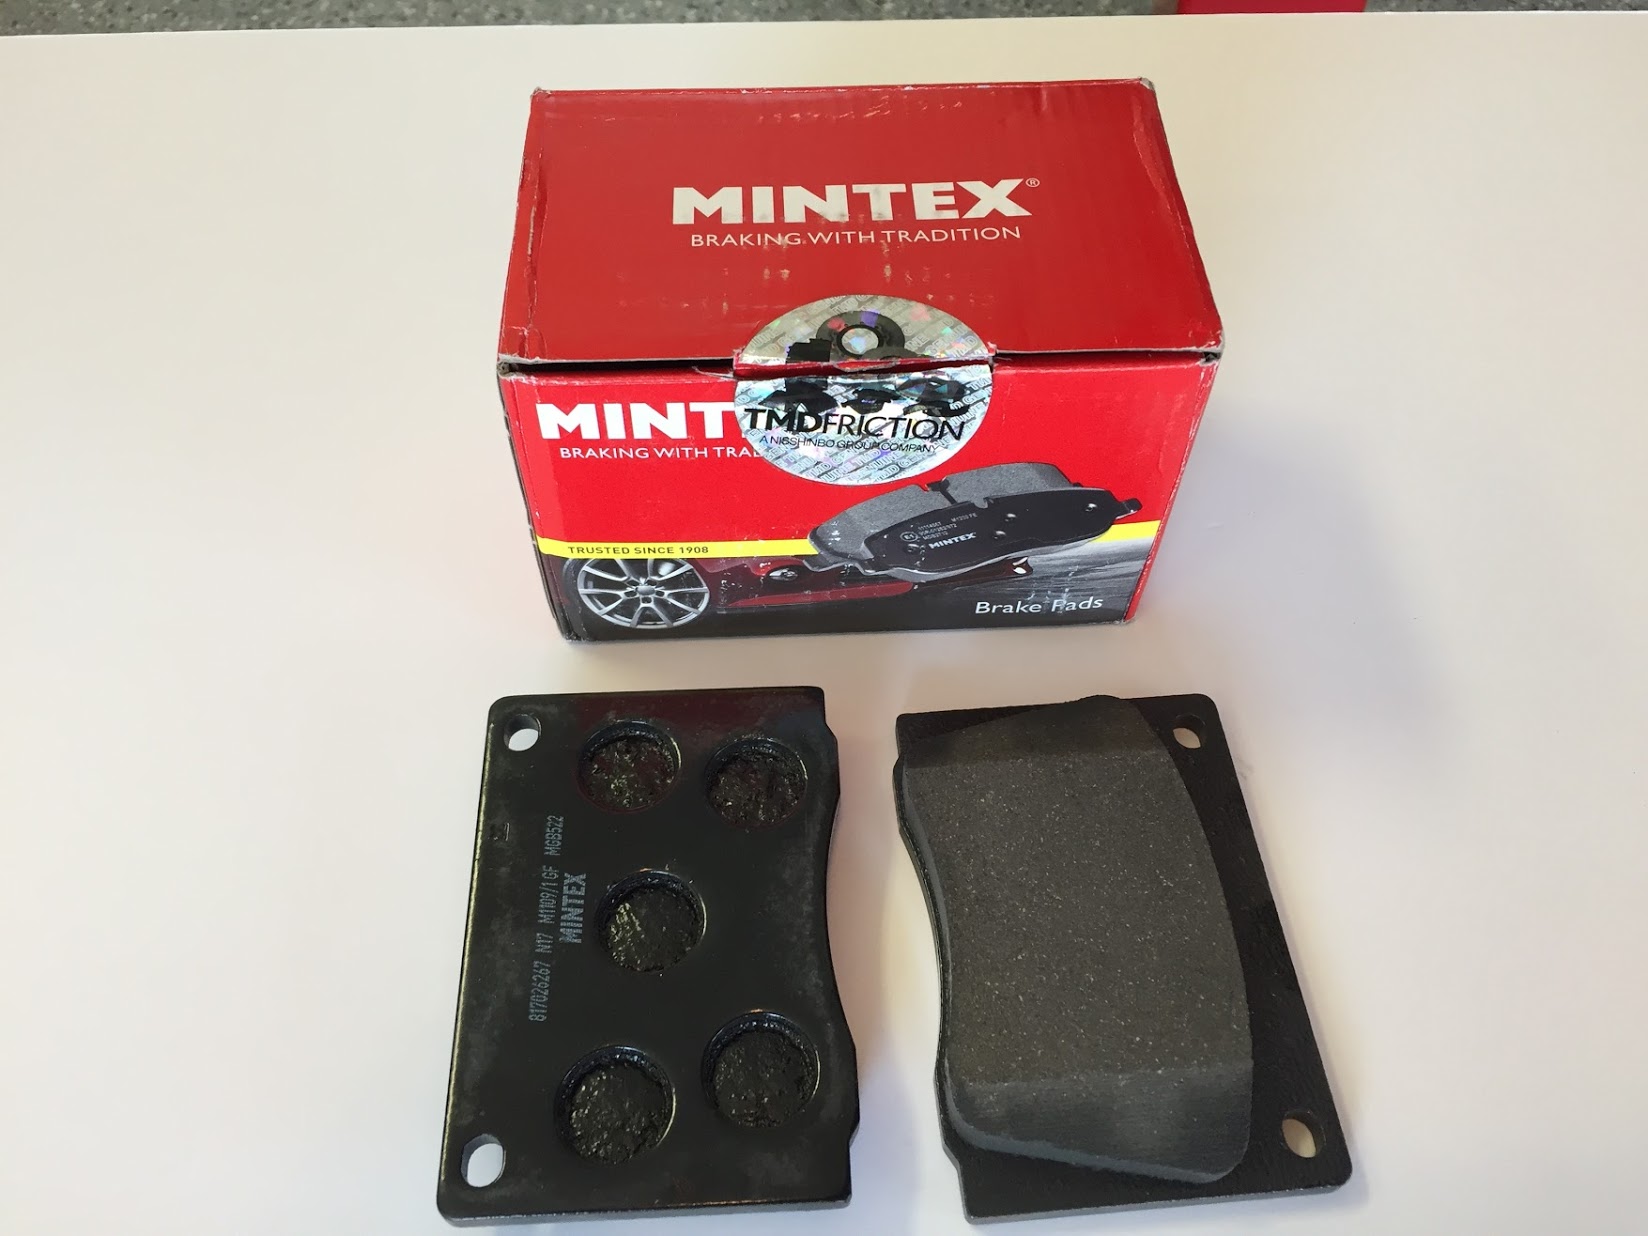
However, I found that sliding the EBC pads into the caliper, on either side of the rotor, was difficult and the concluding fit was much tighter than I liked. After checking with Coopercraft, they advised that the EBC pads are about 2mm wider than the standard pads. I volunteered that while I was looking for an “upgraded” braking experience, I was not going to be racing the car. They suggested that I might want to go with standard pads rather than the EBC pads. They also recommended that if I was going with standard pads in the front brakes that I should do the same with the rear brakes. Oh well, just wasted money once again!
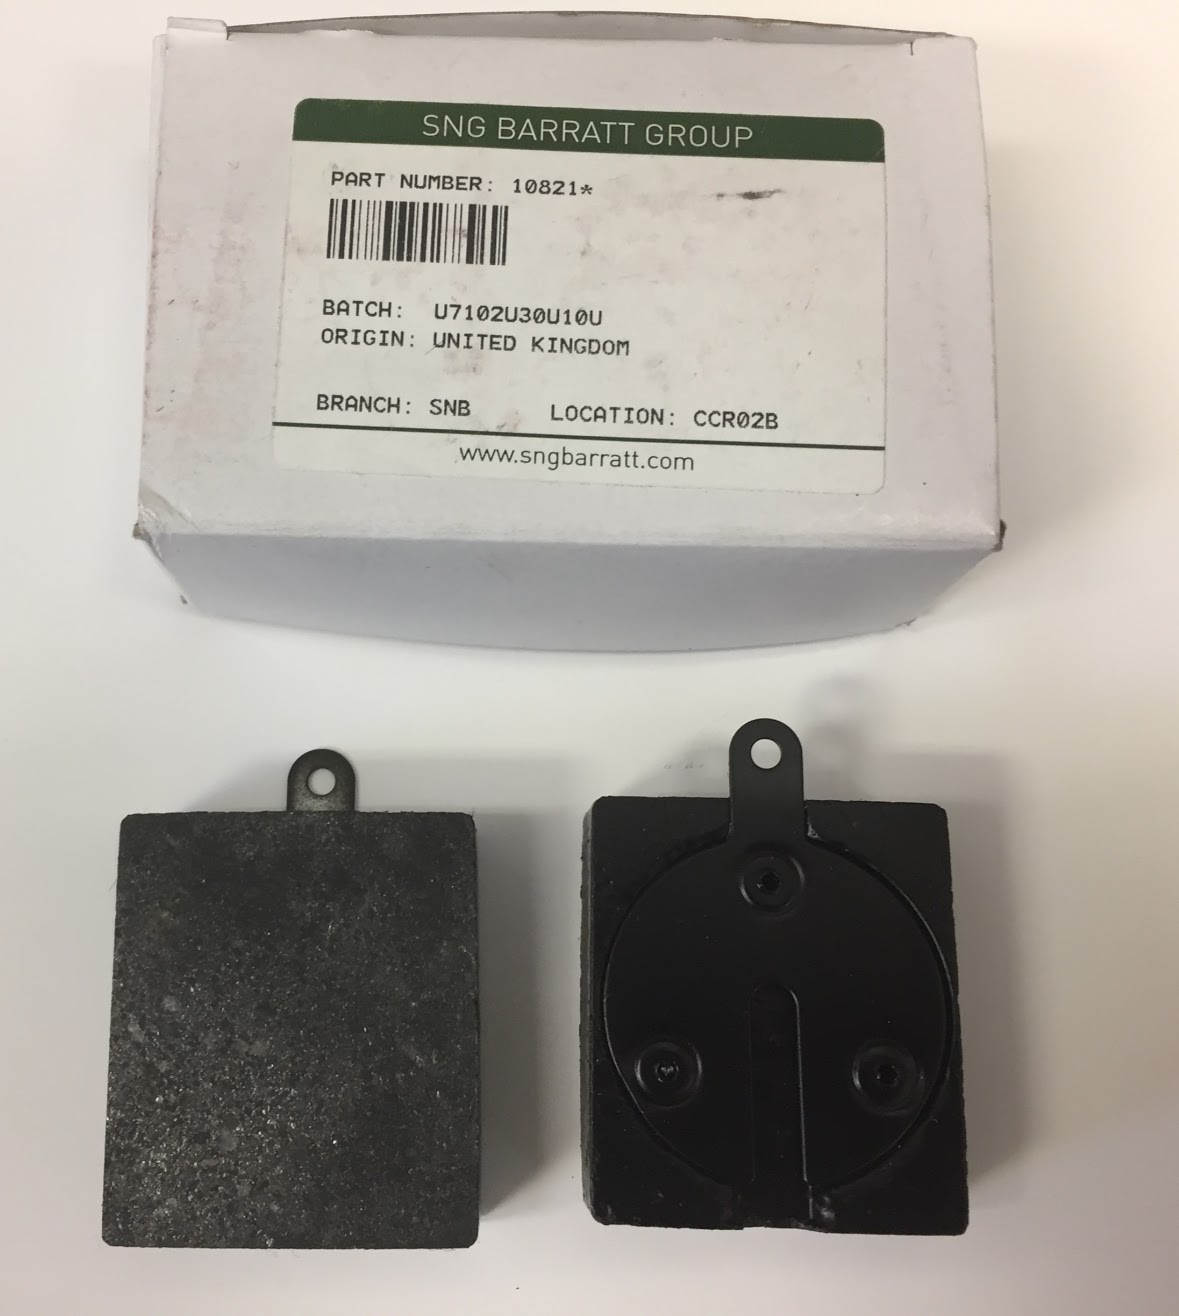
I ordered standard front pads to fit a Series II/III E-Type (the proper pad to fit the upgraded alloy calipers) JLM 9515 as well as standard pads for the rear 10821* from SNG Barratt and they fit just as they should. Wish that I had ordered the Mintex pads to begin with!
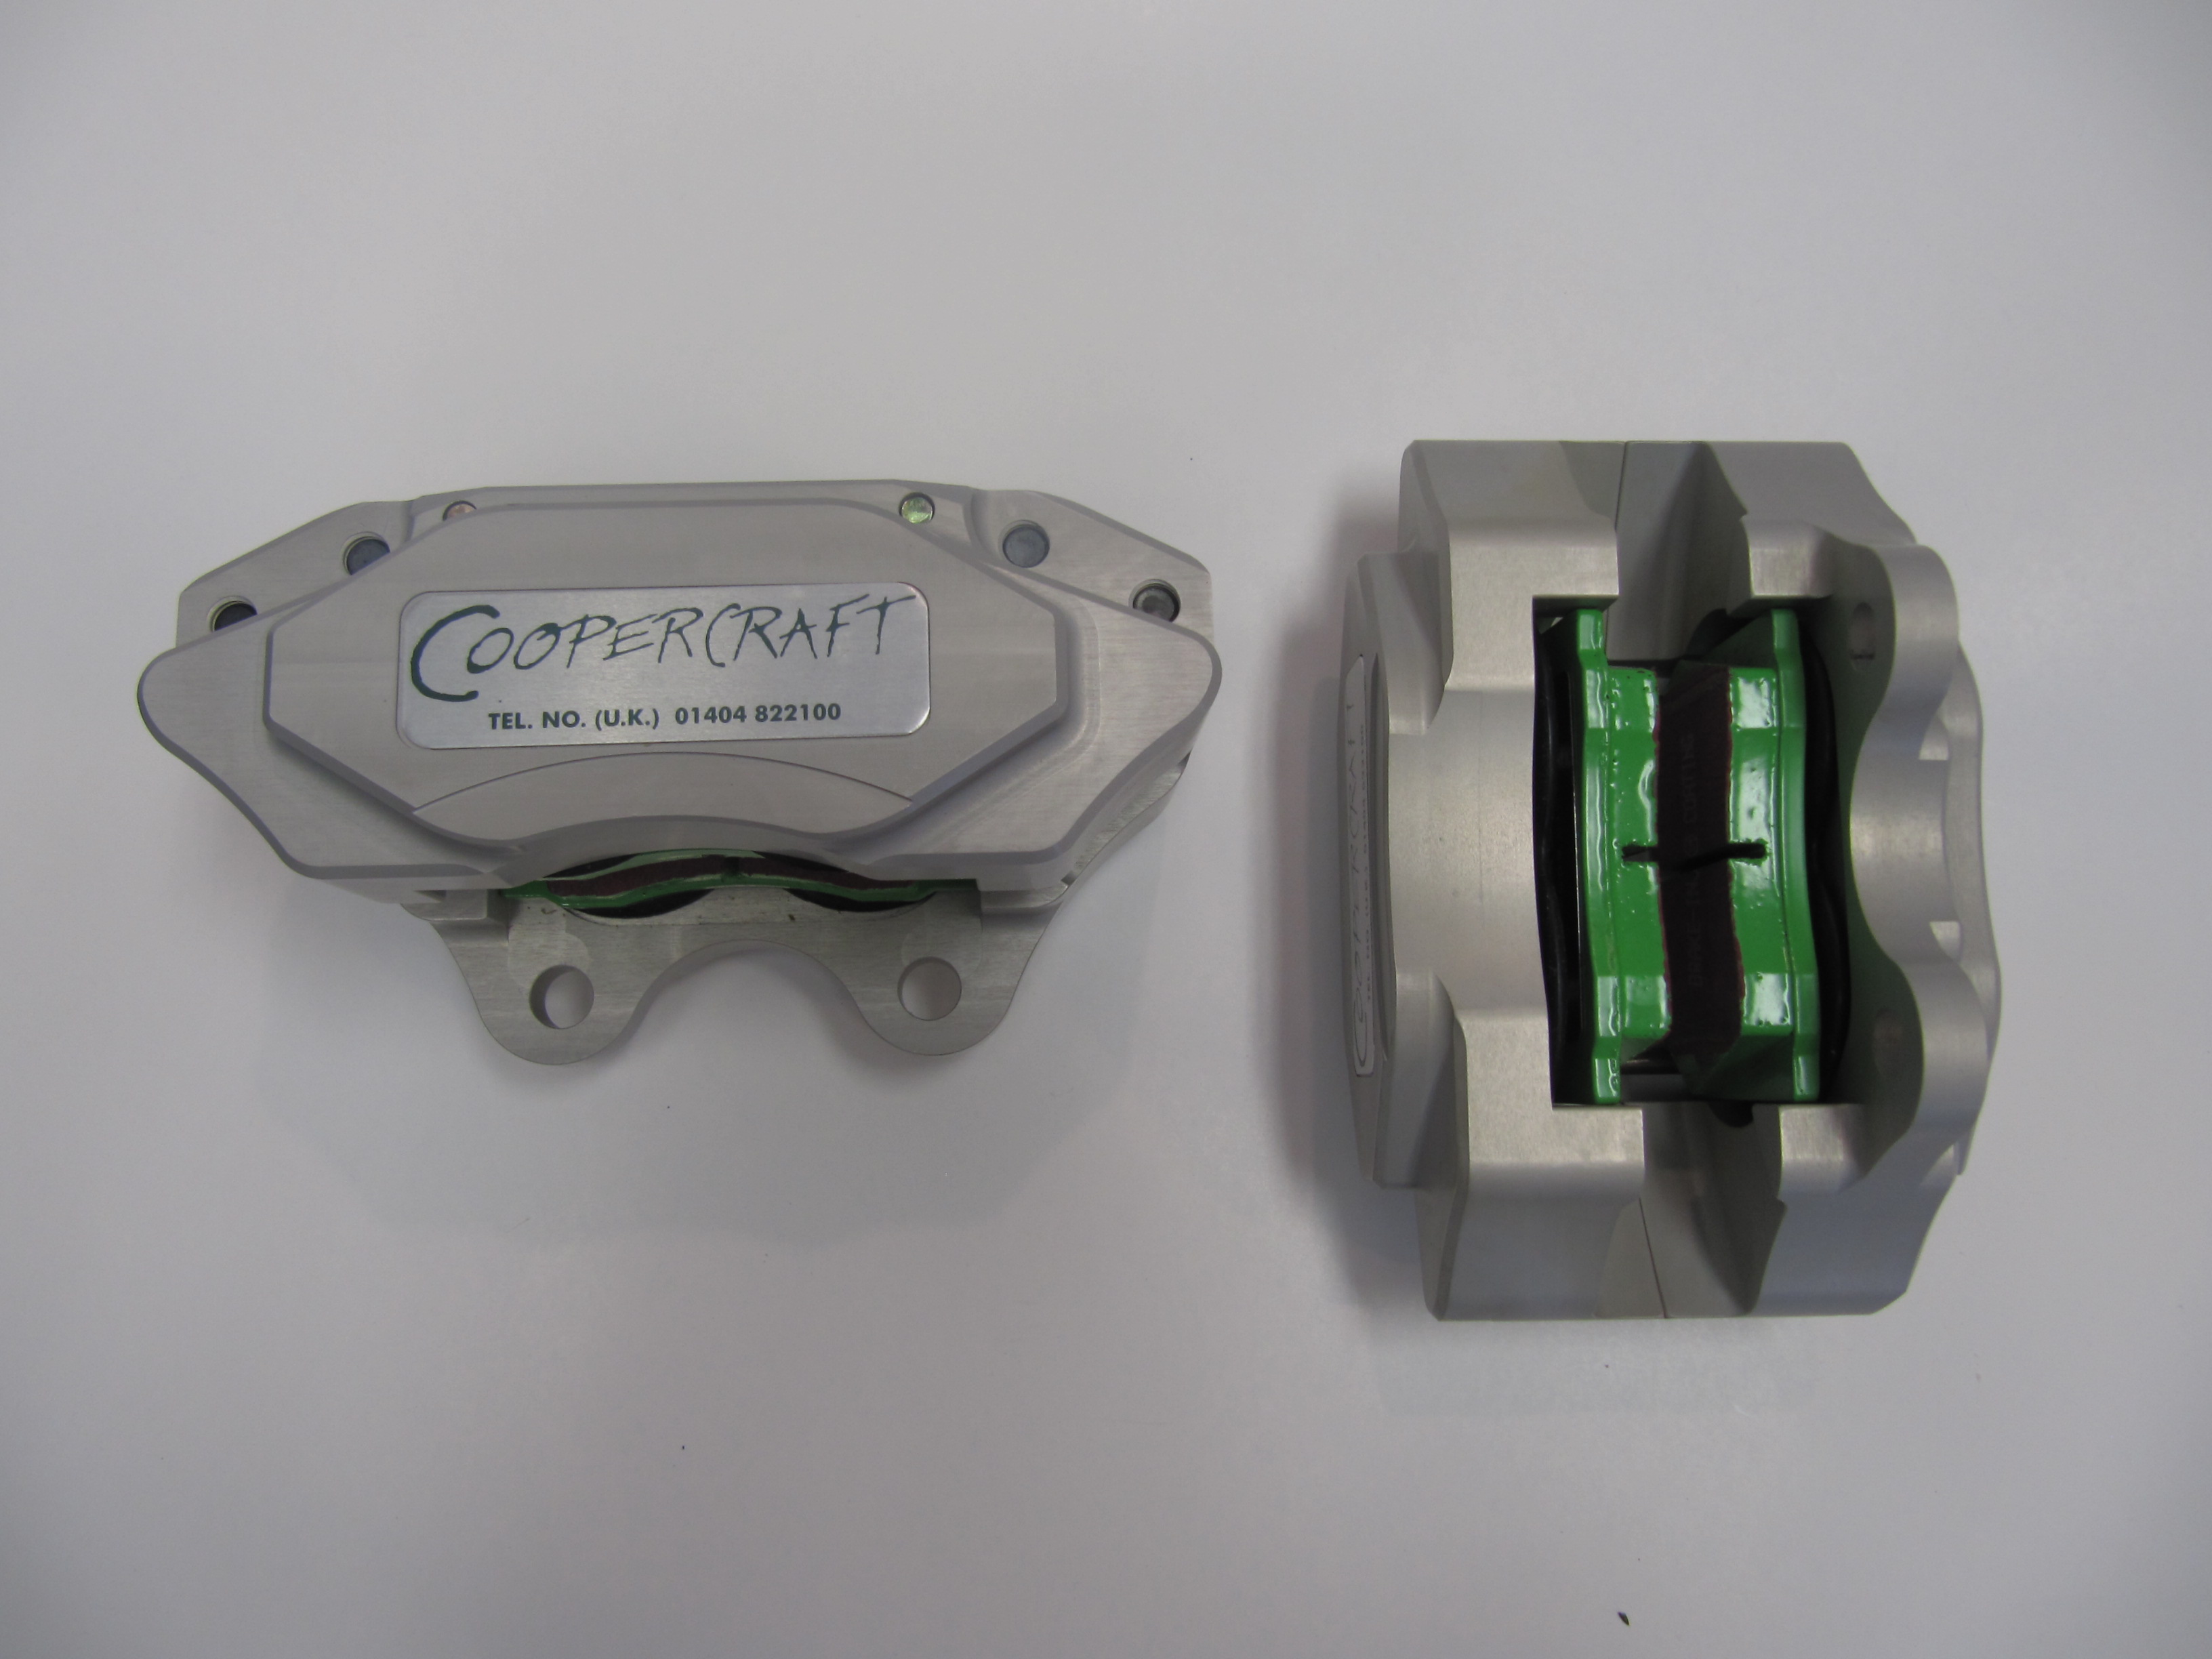
Coopercraft Vented Rotors, Alloy Calipers fitted with Goodridge Stainless Brake Hose and Hubs installed
Coopercraft Vented Rotors and Alloy Calipers with Standard Mintex Pads and Hubs Installed
Anti-rattle clips are added after the pads and pins are installed. These spring clips are part number 12292 and a total of four are required.
Anti-Rattle Spring Clips for Brake Pads Installed
Mintex Front Caliper Brake Pads
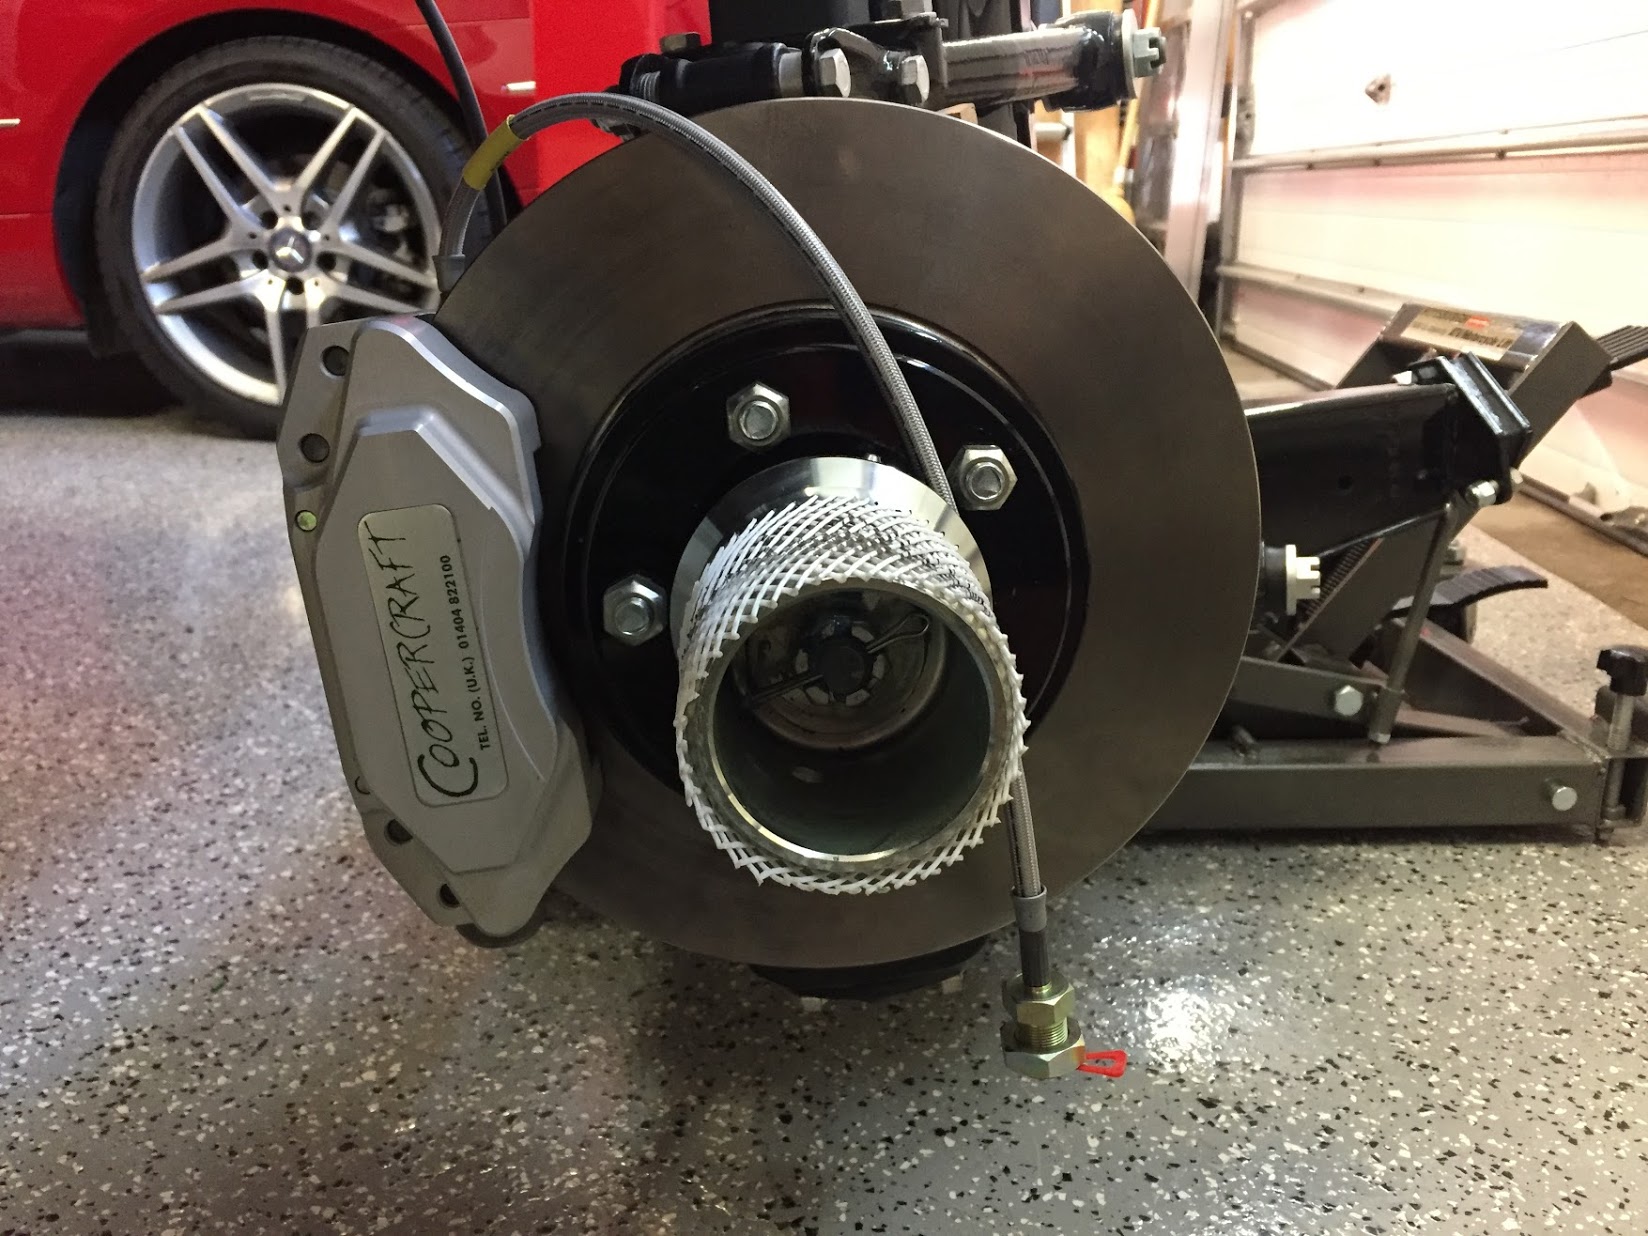
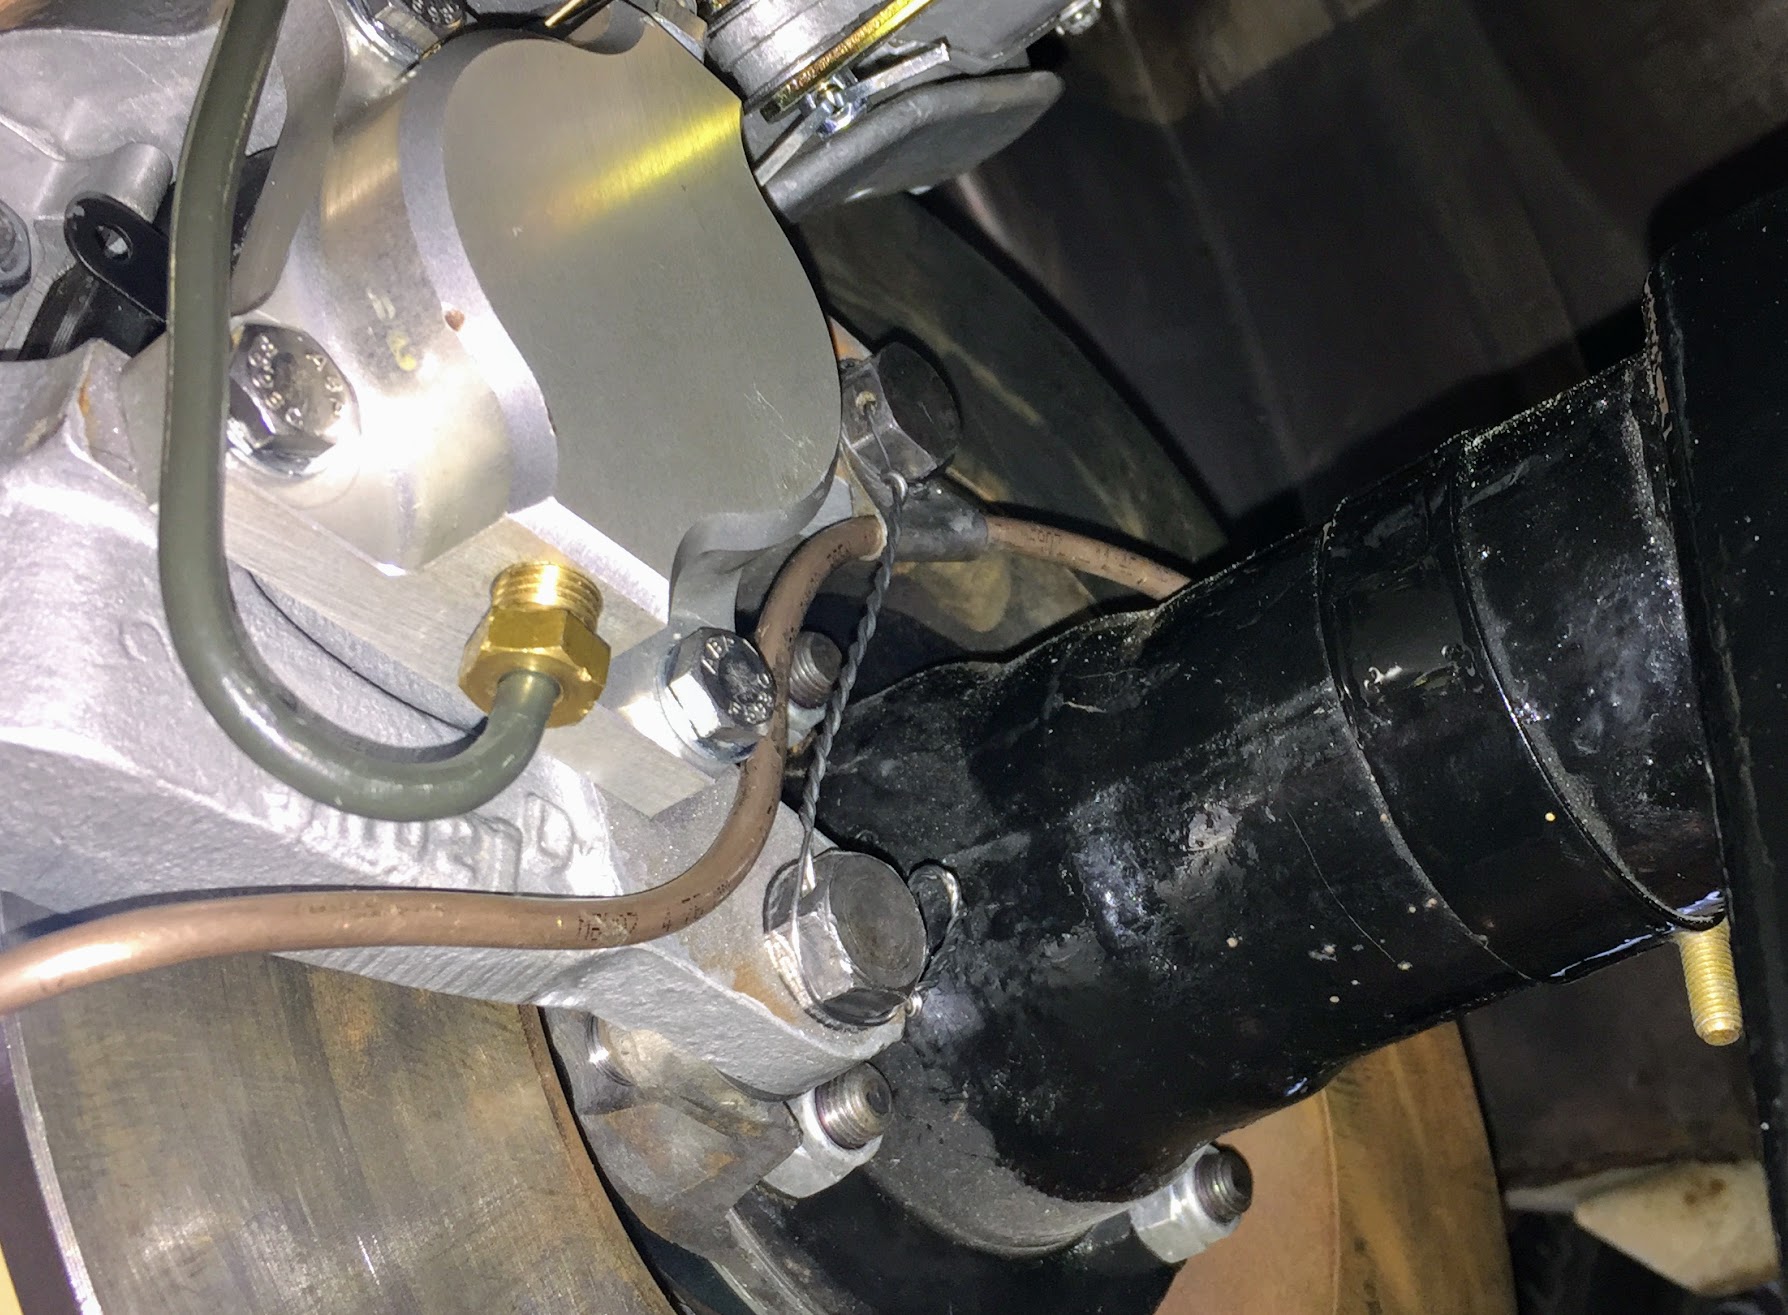
I replaced the original rubber brake hose with Goodridge stainless hoses. The larger fitting on the end of the hose is metric, 16 mm diameter – .50 with with a 16mm -.50 nut.

Goodridge Stainless Brake Hose
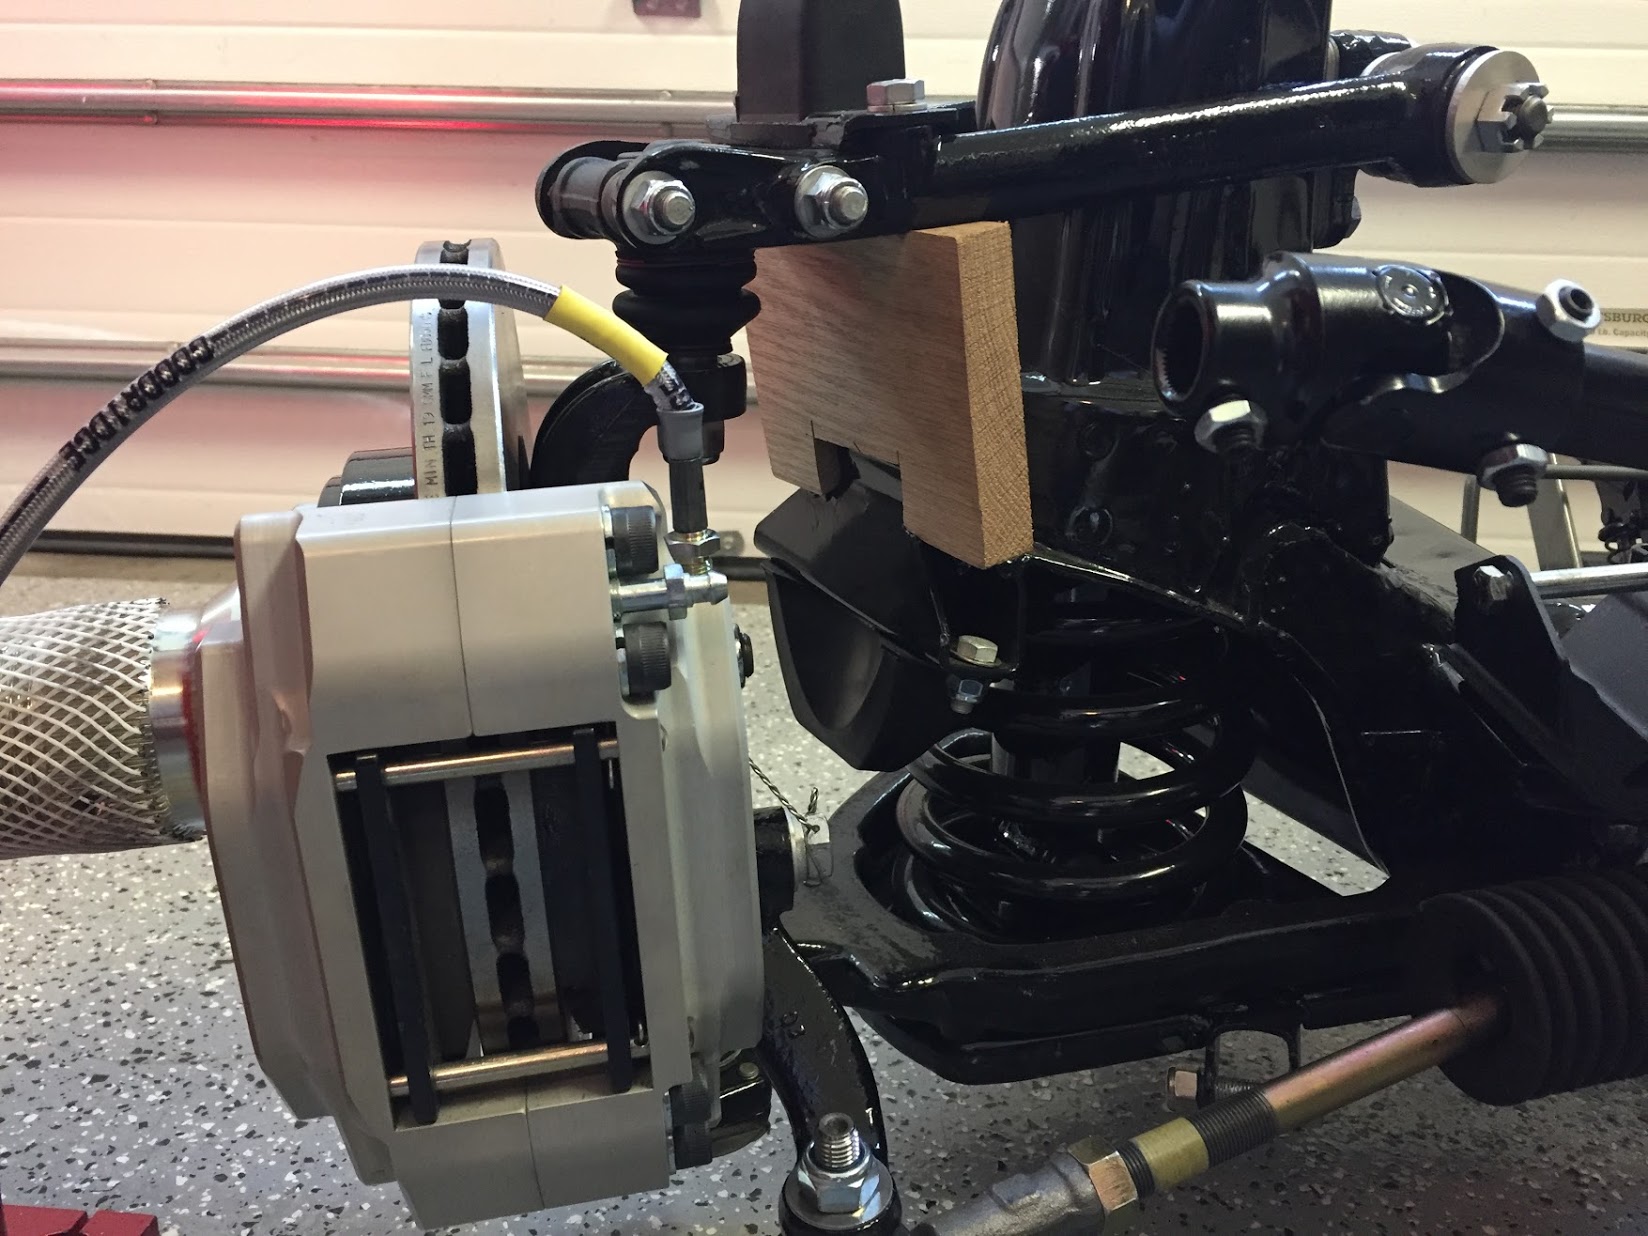
After mounting the calipers I safety wired the caliper mounting bolts.
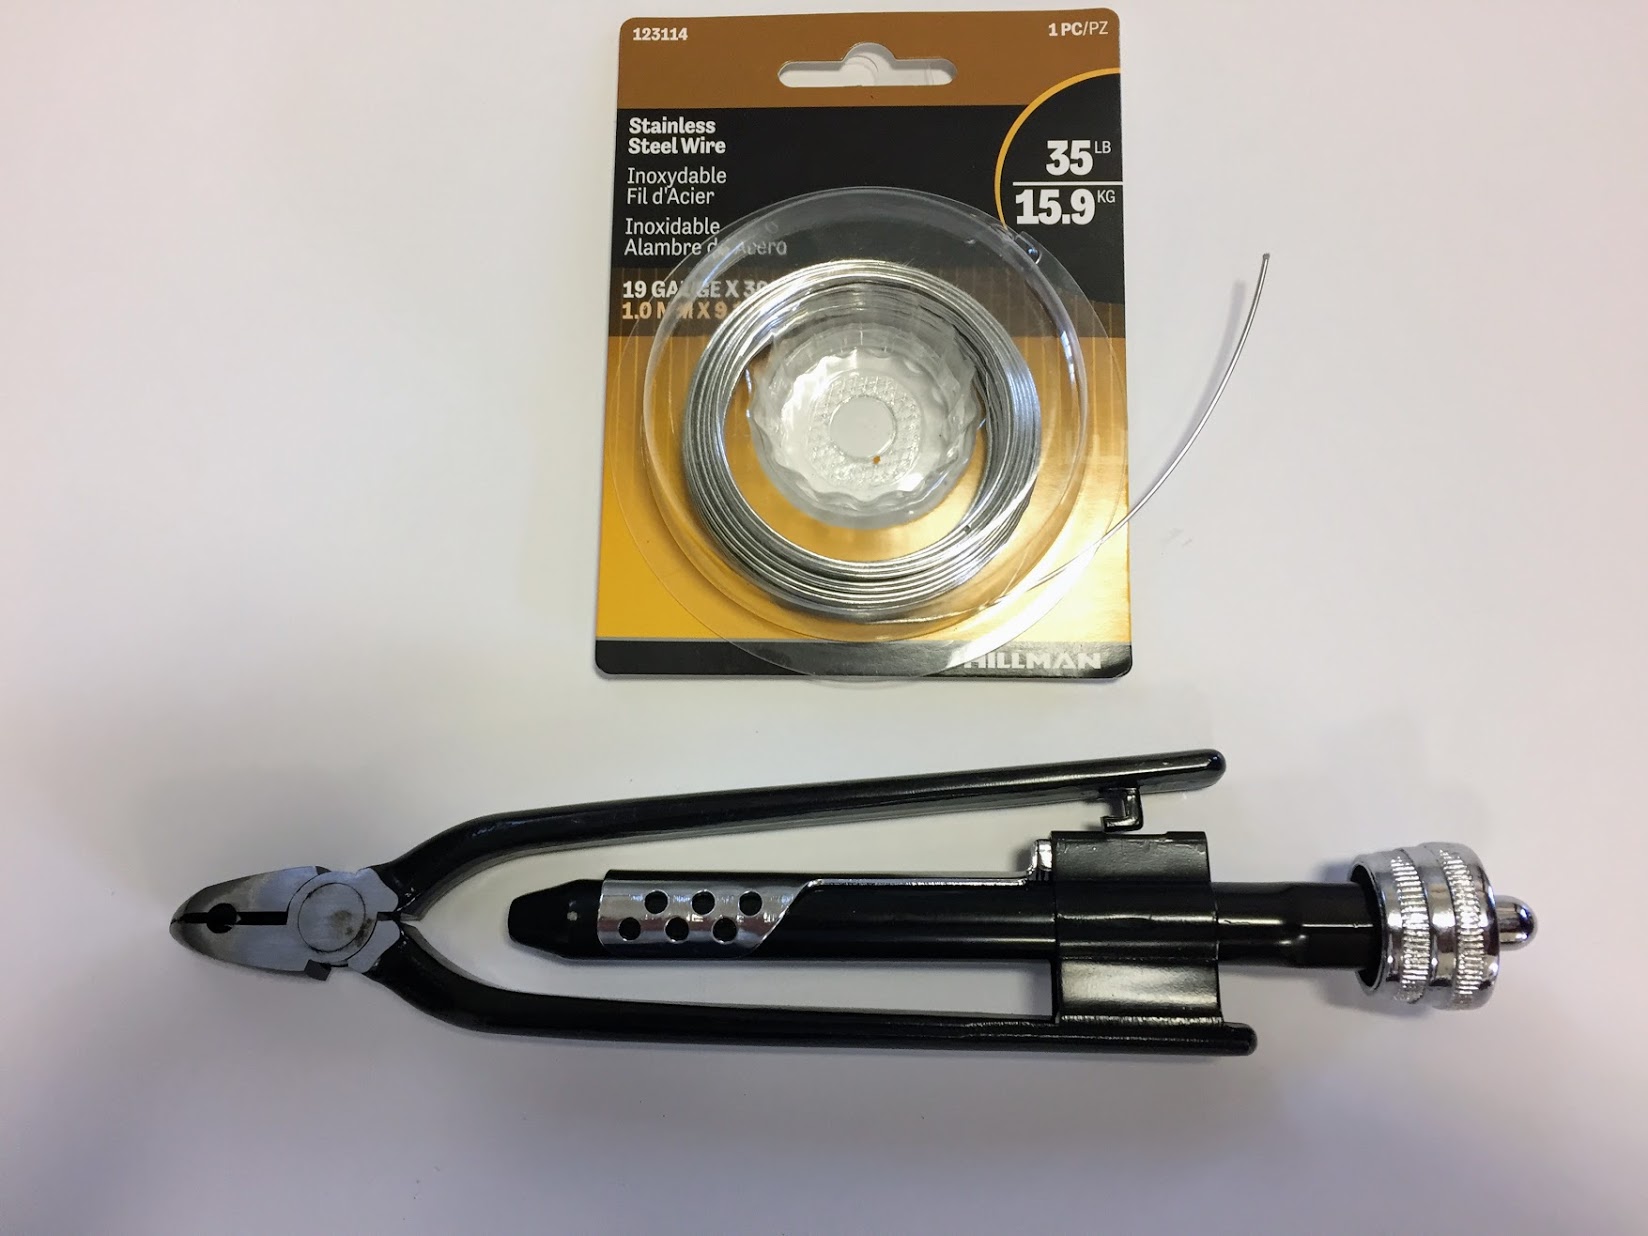
Stainless Safety Wire and Twist Tool
I used 19 gauge wire that is probably a little heavier than needed but it worked just fine. If you are doing safety wiring, it can certainly be done with regular pliers, but the twist tool gives a very nice uniform appearance to the wire and is easy to use.

Safety Wire on Front Brake Calipers
No videos are perfect, but this short video gives you a pretty good look at how safety wiring should be done. There is sound but screen captions are used initially.
Rear Brake Upgrade
In the rear, the Coopercraft upgrade kit consists of four redesigned and uprated cylinders, incorporating stainless steel pistons in an alloy caliper. This kit utilizes the standard handbrake mechanism and is designed to maintain a good balance with their uprated front sets. As stated previously, I did not use the EBC pads and instead substituted the standard pad provided by SNG Barratt.

Alloy Rear Brakes
Rear Brake Friction Pads
The small tabs with holes in each brake pad is to permit the insertion of a hooked wire to pull the pad out when it is replaced. The pads are held in place by the Retaining Plate for Friction Pads as seen below with mounting hardware.
Rear Brake Friction Pad Retainer with Fasteners
The image below shows the Coopercraft Alloy Pistons and Housings installed in the original calipers with new pads secured by the pad retainer.

RH Rear Brake Caliper with Retaining Plate for Friction Pads Installed
The calipers need to be centered around the rotors and this is accomplished with the use of shims on the two bolts securing the calipers to the axle. On my car, I use five .010″ shims on the upper bolt of the RH caliper and five .010″ shims on the lower bolt. On the LH side, I used no shims on the upper bolt and two .010″ shims on the lower bolt.
Following assembly, I safety wired the mounting bolts for both rear calipers.
Safety Wired Rear Calipers
A warranty is also provided by Coopercraft:

Coopercraft Brake System Warranty and Liability
Rear Brake Caliper Rebuild

Rear Brakes
In addition to adding the new Coopercraft Piston/Cylinder Sub-Assemblies I completely rebuilt the Rear Caliper Assemblies including the Handbrake Calipers. As the image below illustrates the original silver color was long gone!

Left Rear Brake Caliper
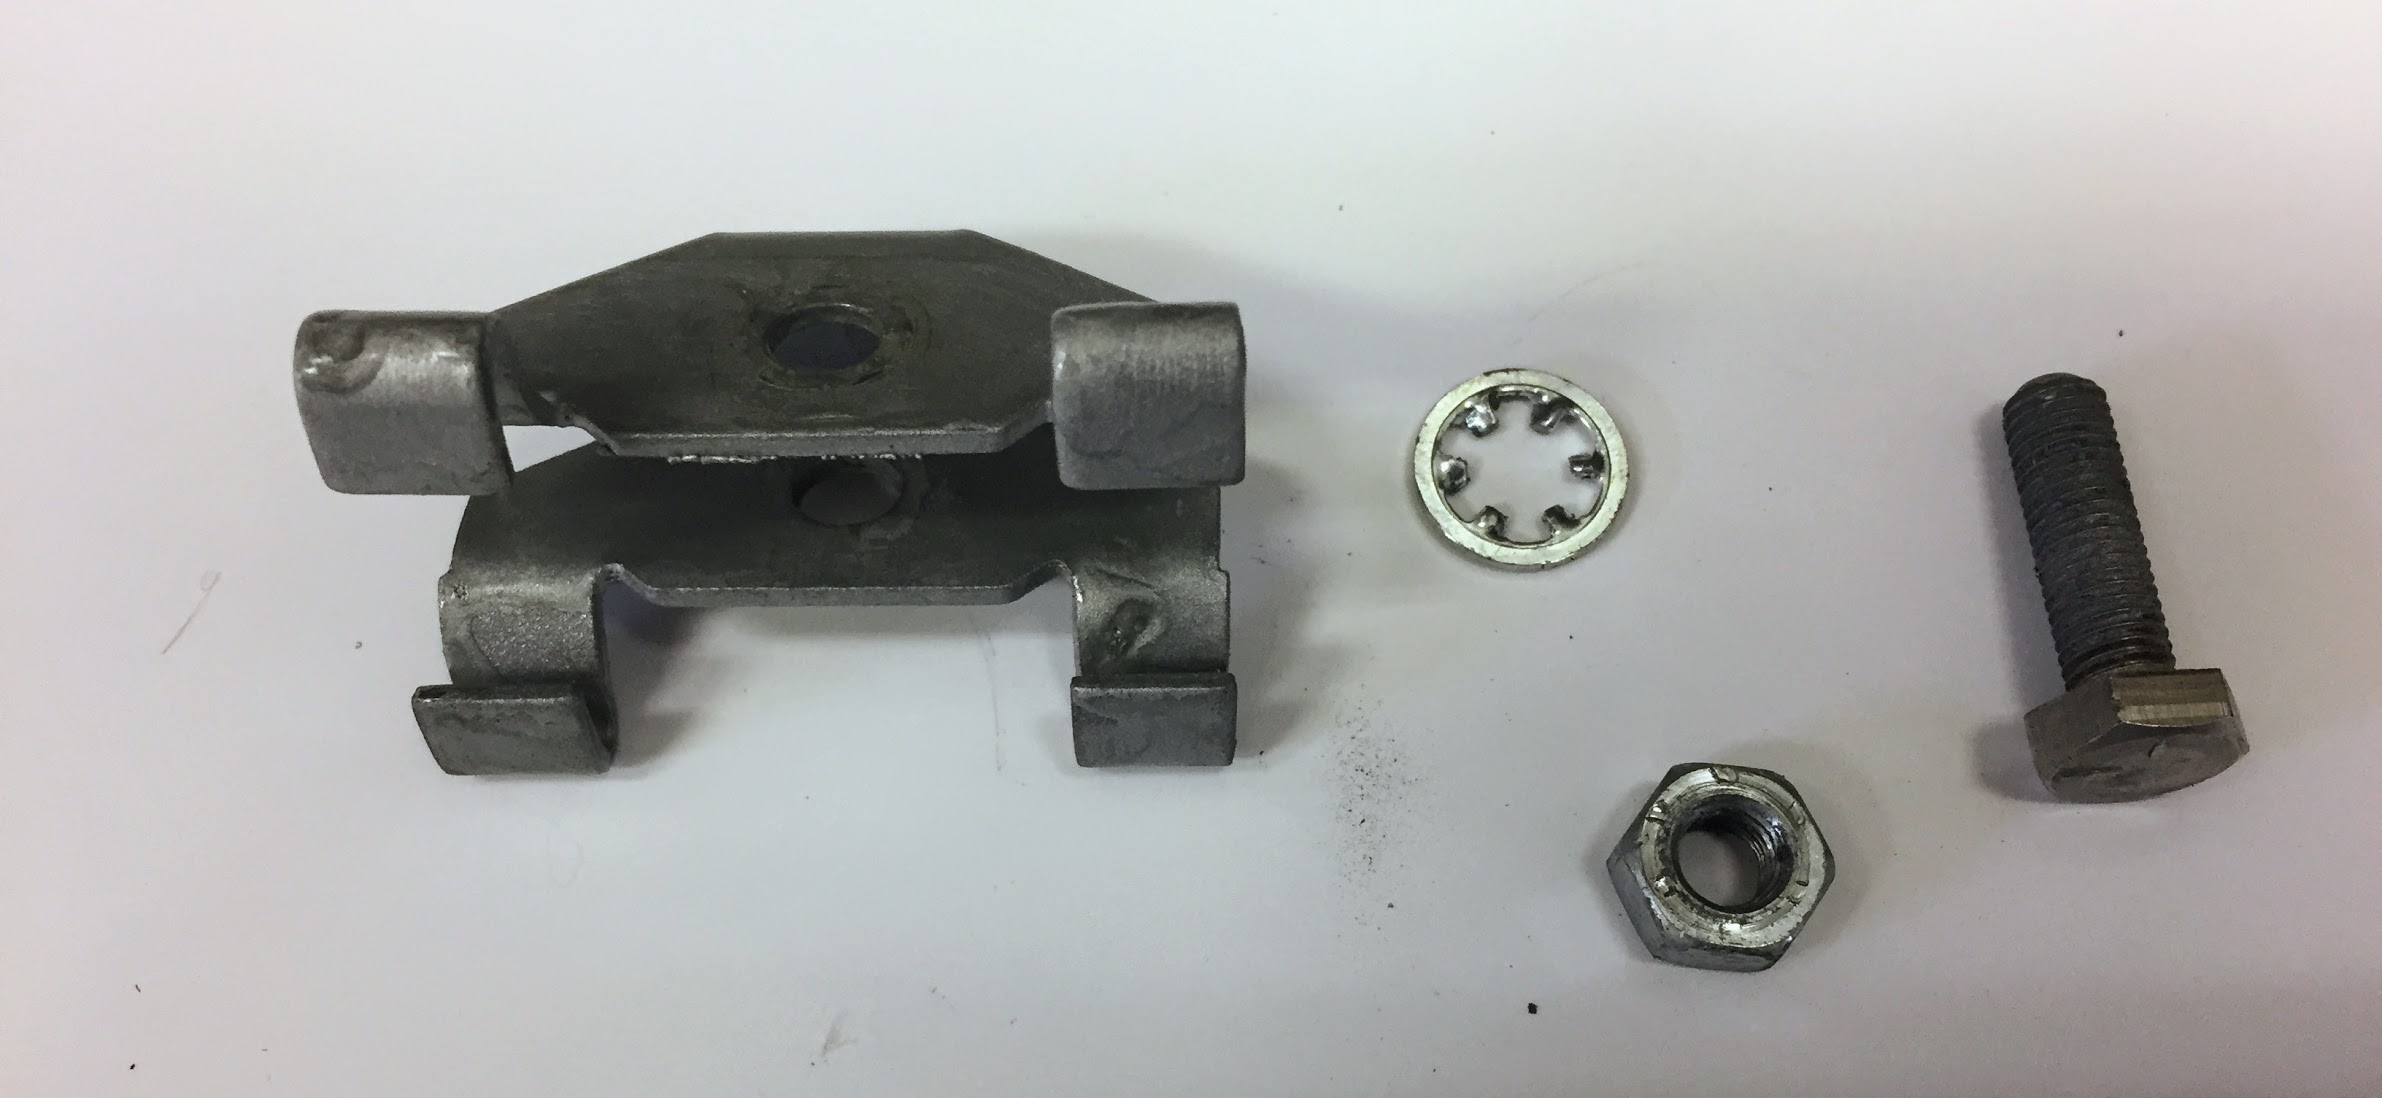
To disassemble the calipers, I first separated the handbrake calipers from the primary caliper. To do so, I bent back the tabs on the Tab Washer and unscrewed the two Bolts, Securing Handbrake Mechanism to Rear Calipers. I then removed the Retraction Plate Fork that permitted the removal of the LH and RH Handbrake Pad Carrier Assembly with the friction pads. The Bolt, Securing Pad Carriers to Operating Lever was then unscrewed separating the two Carriers. I then removed the Support Plates for friction pads which simply fit into slots on the caliper body. Four 1/4″-24 x 7/8″ hex head bolts with shakeproof washers secured each Piston/Cylinder Assemblies. These were removed and the assemblies with the friction pads were removed. The Retaining Plate for friction pads was held in place with a 1/4″ – 24 x 7/8″ hex head bolt. It was removed and will not be replaced until the caliper is mounted and the new friction pads are installed. The Bridge Pipe Assembly and the Bleed Screw and Ball Assembly were removed from the Piston/Cylinder Assemblies and replaced with a new pipe and fittings. All components were then media blasted or otherwise cleaned and painted with Eastwood’s silver ceramic caliper paint. New bolts and screws were installed along with new friction pads.

LH Rear Brake Caliper Components

Right Rear Brake Caliper Refurbished

Right Rear Brake Caliper Refurbished

Rear Caliper LH & RH
zz