
The Original Electrical System
The electricals were a 12 volt positive ground Lucas system. The battery with an interrupt switch was located in the boot. The system consisted of the following: Fuel pump: SU AUA72 Voltage Regulator: Lucas Type 106/2 Single Fuse Box: Lucas Type FS6 with 50 and 35 amp fuses Electric Overdrive: Laycock de Normanville Two horns: Lucas Type HF1748 Dynamo: Lucas No. 22530 A or B
Modified Electrical System
Battery
I decided to go with a modern battery and replaced the original style with an Optima gel battery. Part Number: 34 (8002-002) RedTop®; Battery; Group 34; Cold Crank Amps 800; Crank Amps 1000; Reserve Capacity 110; Ampere Hour 50; Top Terminal; L-10 in.; W-6 7/8 in.; H-7 13/16 in.; UNBOXED.

Optima Battery
Battery Master Switch
Numerous owners have reported failures with the original Lucas voltage interruption switch located in the boot. While these switches can be renewed, I decided to replace mine with a modern equivalent, sourced from Pegusus Racing.

Battery Master Switch
Negative Ground and Alternator
I made many “personalizations” in the Bloody Beast that required modifications to the electrical system. To accommodate these changes, conversion to negative ground and exchanging an alternator for the original dynamo or generator were in order. Alternator Conversion Big Healey. Alternator conversion wiring instructions.
Conversion to Negative Ground
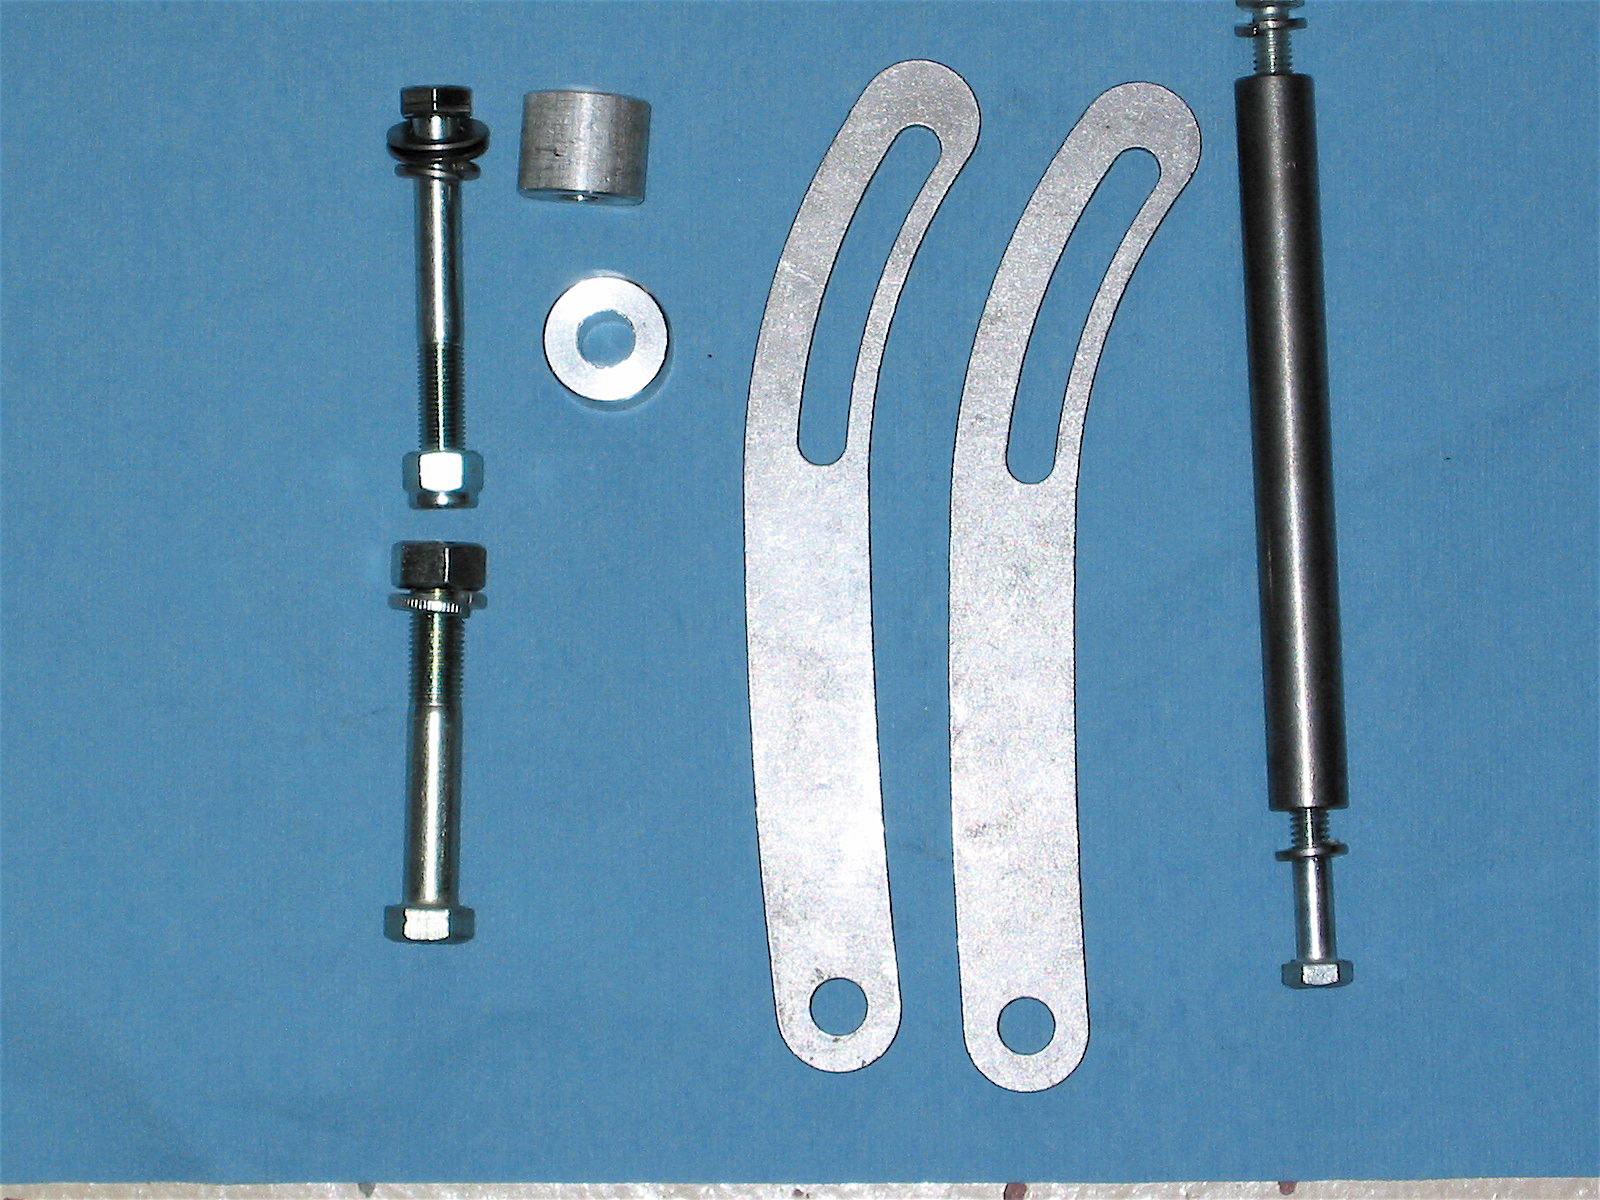
Alternator Mount Kit
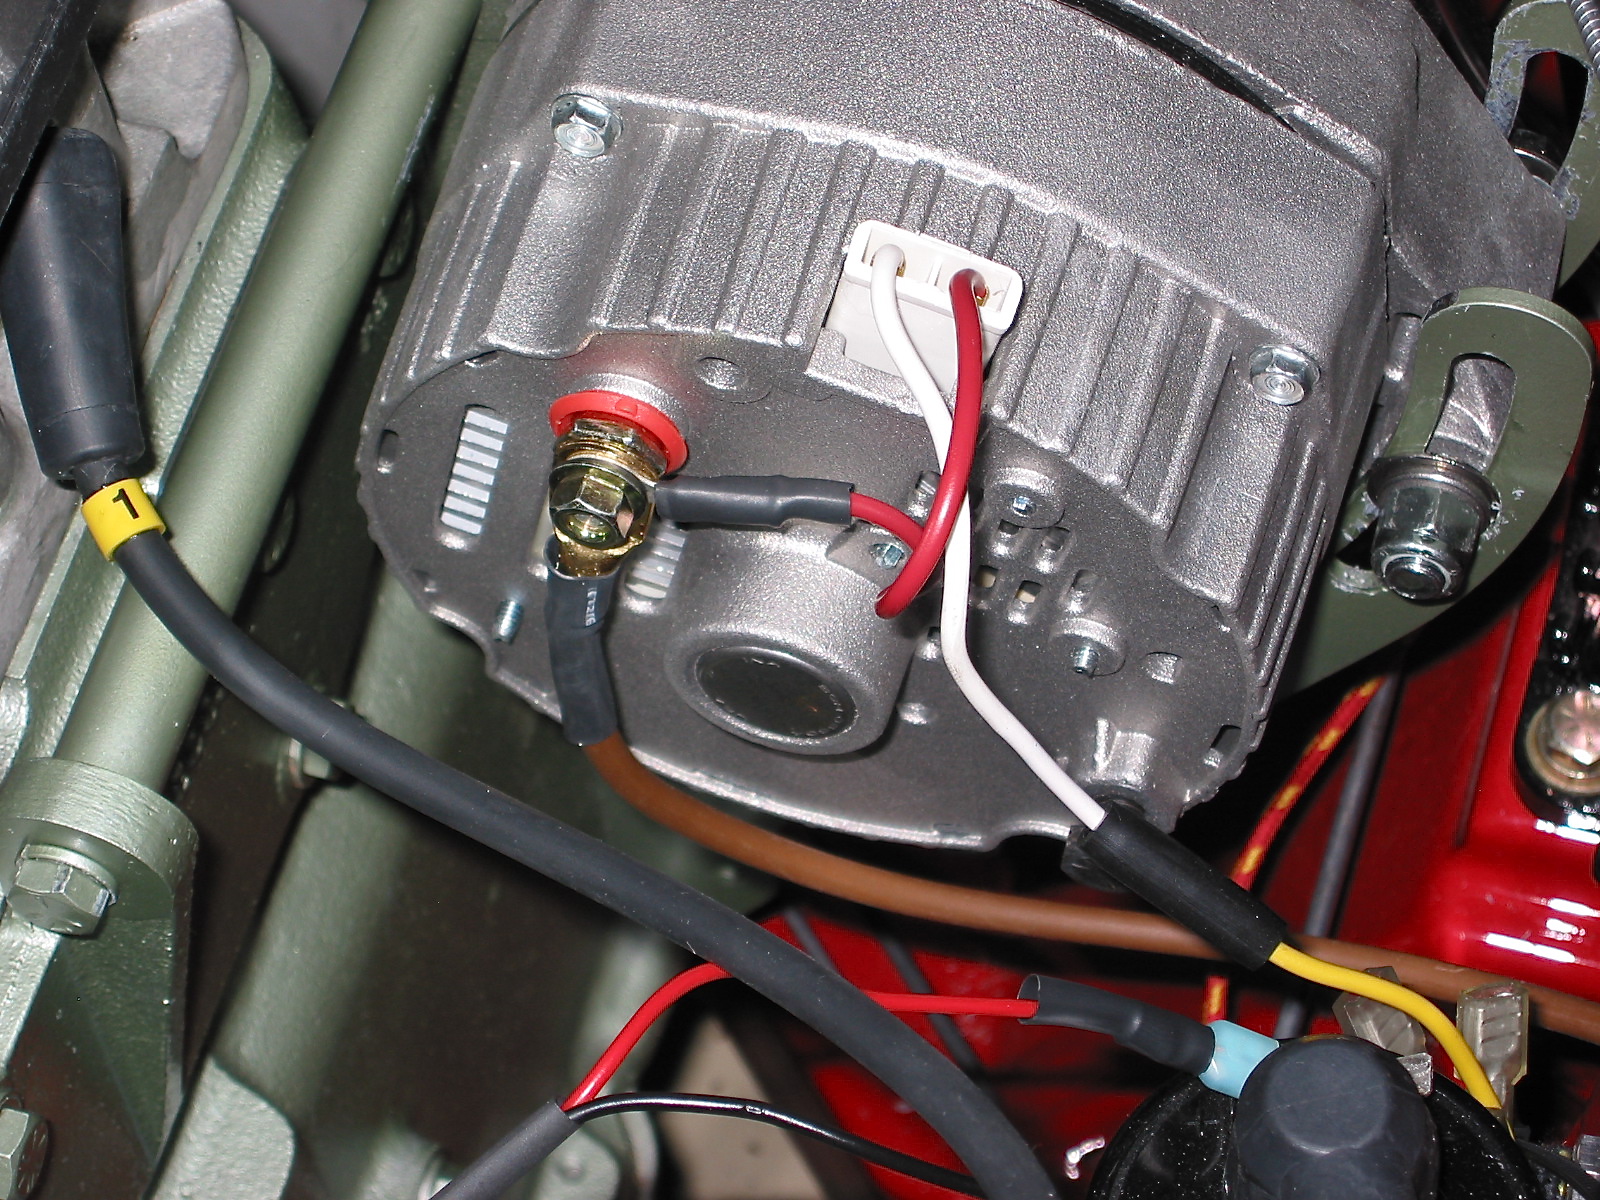
Delco Alternator
Supplementary Fuse Panel
To support the additional electronic functions I would be adding to my BT7 I thought it might prove helpful to add a supplementary fuse panel. The original electrical system was “under-engineered” when it came to protecting the electrical components and wiring. The unit I added was a “Painless” brand, available at most auto parts stores. It utilizes modern blade fuses. ACCY 1 Yellow Ignition Hot – Two speed heater; ACCY 2 Blue Ignition Hot – Amplifier; ACCY 3 Purple Constant Hot – Accessory power (cigar lighter) and the windscreen washer via a red wire. I mounted the panel below the dash fascia on the firewall interior. Accessory Fuse Block

Extra Fuse Block
Gear Reduction Starter
In the engine bay, in addition to replacing the dynamo with a modern alternator, I opted to go with a gear reduction starter. It is a little difficult to see in the image below. It is to the left of the oil filter. These are the installation instructions that came with the starter: Gear Reduction Starter.

Gear Reduction Starter
Fuel Gauge Dampener
Healey owners know that the fuel gauge needle tend to bounce around making it difficult to get an accurate read on fuel level. Steve Gerow found an answer. A small device ordered from Zim’s Autotechnik, http://www.allzim.com/acatalog/Fuel_Gauge_Stabilizer.html a Porsche parts vendor, helps to steady down that needle, minimizing but not eliminating fluctuations. Thanks, Steve!

Fuel Gauge Stabilizer
Remote Control Courtesy Lamps in Interior and Boot
I wanted to install courtesy lamps in the interior footwells and in the boot. However, I did not want to drill holes in the doors for typical courtesy lamp operation, so I decided to modify a remote security key fob to actuate my system. Upon clicking a button on the fob, the floor and boot lamps illuminate for 40 seconds and then extinguish. I also installed a toggle switch on a panel under the dash that permits continuous power to the lamps until switched off. To look “period,” the lamp I used in the boot is actually an original-type Lucas license plate lamp with the chrome metal shroud removed. The system works quite nicely. At night when I approach the car, I can simply hit the key fob button and Viola, I have interior lights!

Courtesy Light Wiring
RH Footwell Courtesy Lamp
LH Footwell Courtesy Lamp

Boot Lamp
Lucas SLR-570 -5″ Driving Lights
I like the looks of the 5″ driving light, while others will certainly prefer the 7″ option. I mounted mine with a combination tie down hook and lamp bracket sourced from Cape International. Wiring guidance was proved by an excellent article written by John Trifari. Details of the installation are provided in the restoration blog.

Lucas Driving Lights
Rear Reflector Conversion to Halogen Lamps
Other Healey drivers recognizing that we have very little illumination in the rear of our cars discovered a neat conversion of the rear reflectors to additional lamps. I modified mine for the safety improvement. I don’t recall the source, but this is a “how to” article on the conversion as I did it. Reflector conversion. A more recent conversion using LED lights is referenced here: Conversion of Reflector to LED Again, details in the restoration blog.

Rear Modified Reflectors
Intermittent Wiper Control and Electric Washer Pump
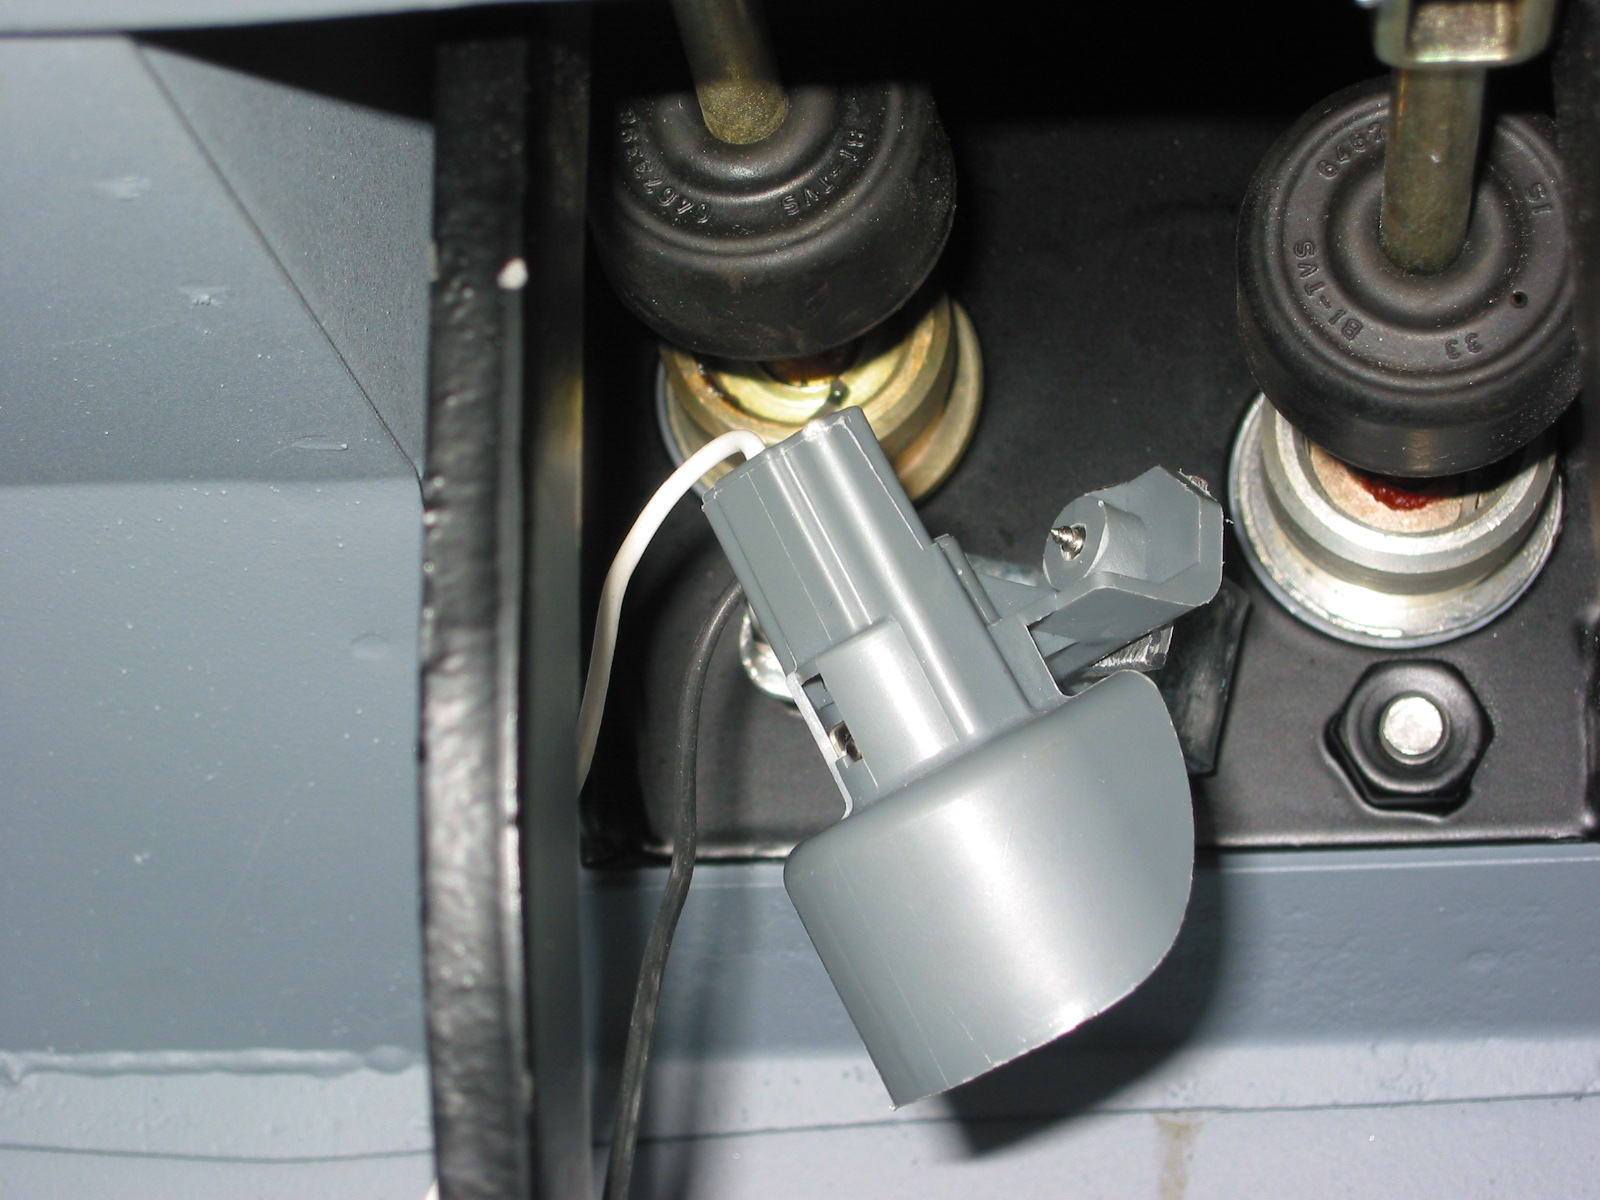
Healeys have wipers that operate at one speed – slow! As original, they were not particularly effective. To address the problem, some Healey owners installed a later Lucas two-speed motor. I came upon an article by Ed Esslinger on a Sunbeam Tigers site who put together a kit to provide unlimited variable control of the speed of the Lucas wiper motor. I got in touch with Ed and purchased his kit and installed it in the Bloody Beast. I installed the control knob for the rheostat under the left hand corner of the dash fascia – hidden out of the way, but easily accessible. The kit can even be wired to accommodate most state laws that now require your lights to be on when the wipers are functioning! The lights come on automatically. On those misty days or when there is light snow the intermittent feature is really nice. This is the instruction sheet: Wiper Control and a wiring diagram:

Wiper Control Diagram
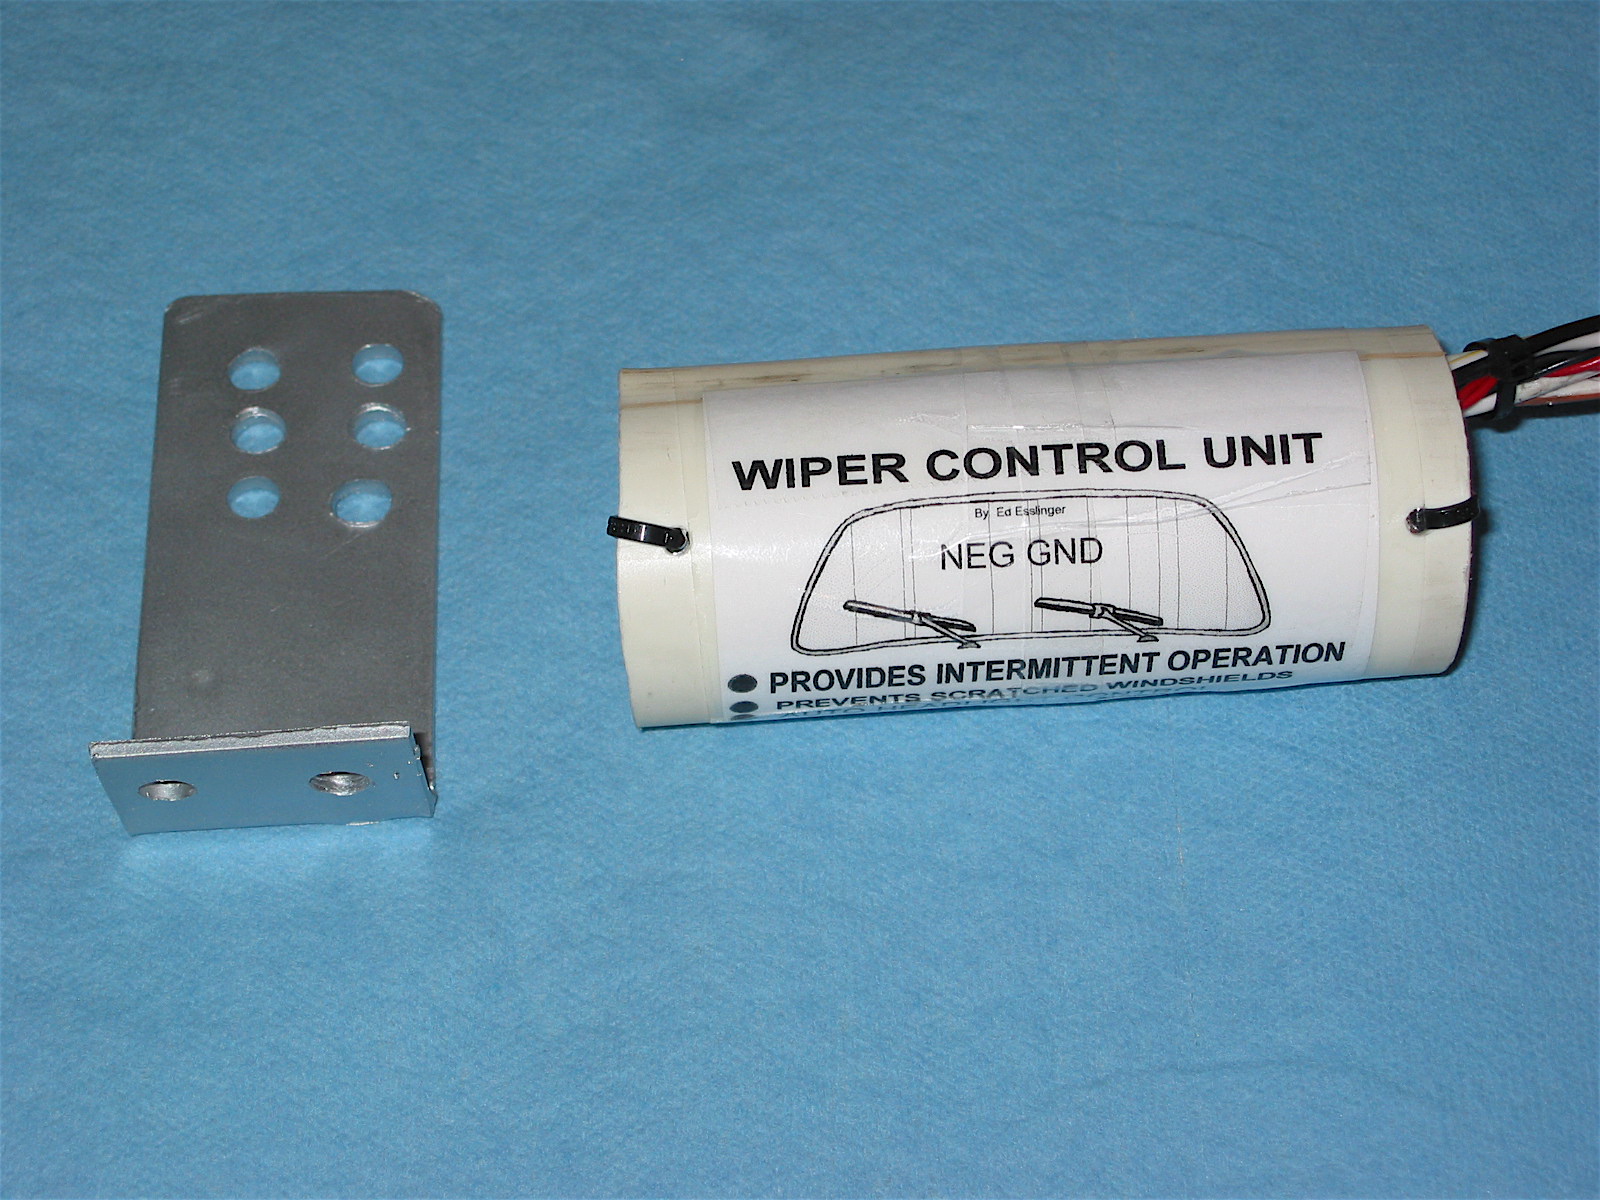
Intermittent Wiper Kit
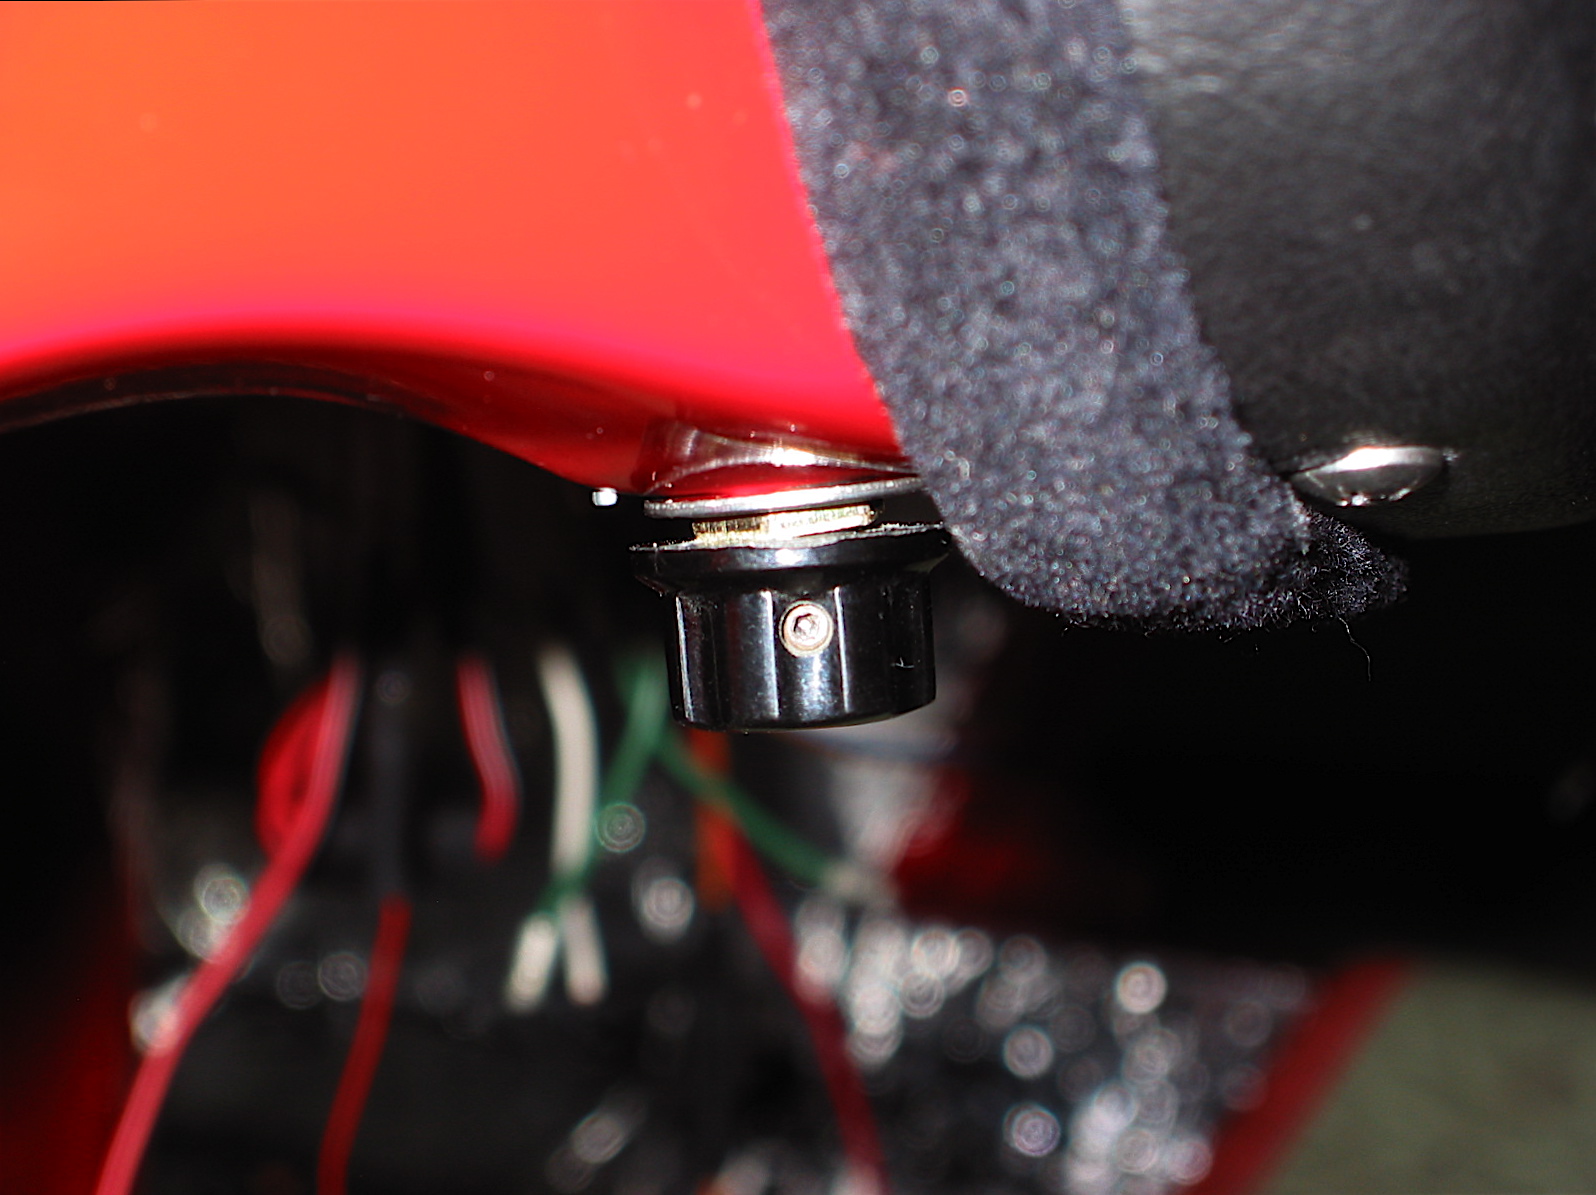
Wiper Rheostat
Another suggestion I picked up from a web site was to convert the manual washer pump into an electric pump by placing a micro switch inside the little aluminum canister. I made this conversion, and then mounted a late model AH Sprite electric pump on the interior side of the firewall. One light touch activates the pump! I know, silly, cute and bordering on absurd, but then was the time to do it! Outward appearance is completely stock. Here are the directions: Rose Elect. Washer Pump Comp.

Washer Pump
Audible Turn Signal
I had installed a little Radio Shack “beeper” in the Bugeye because the run signals are not self-cancelling. Although the Big Healey control head or trafficator is self-cancelling, I thought I would go ahead and add it to the Bloody Beast as well. It is hidden on the fascia support bracket near the steering wheel shaft.

Turn Signal Buzzer
Toggle Switch Panel
I needed a few additional toggle switches, but did not want to add any to the dash as I wanted to keep it looking original. So I made up a little panel from a piece of aluminum angle, painted it red, and to avoid drilling any new mounting holes, I mounted it to two of the three legs of the wiper motor. The panel includes a warning light for when the driving lights are operational, a toggle for my redundant fuel pump (See Fuel System), and a toggle for the interior and boot courtesy lights.

Toggle Switch Panel
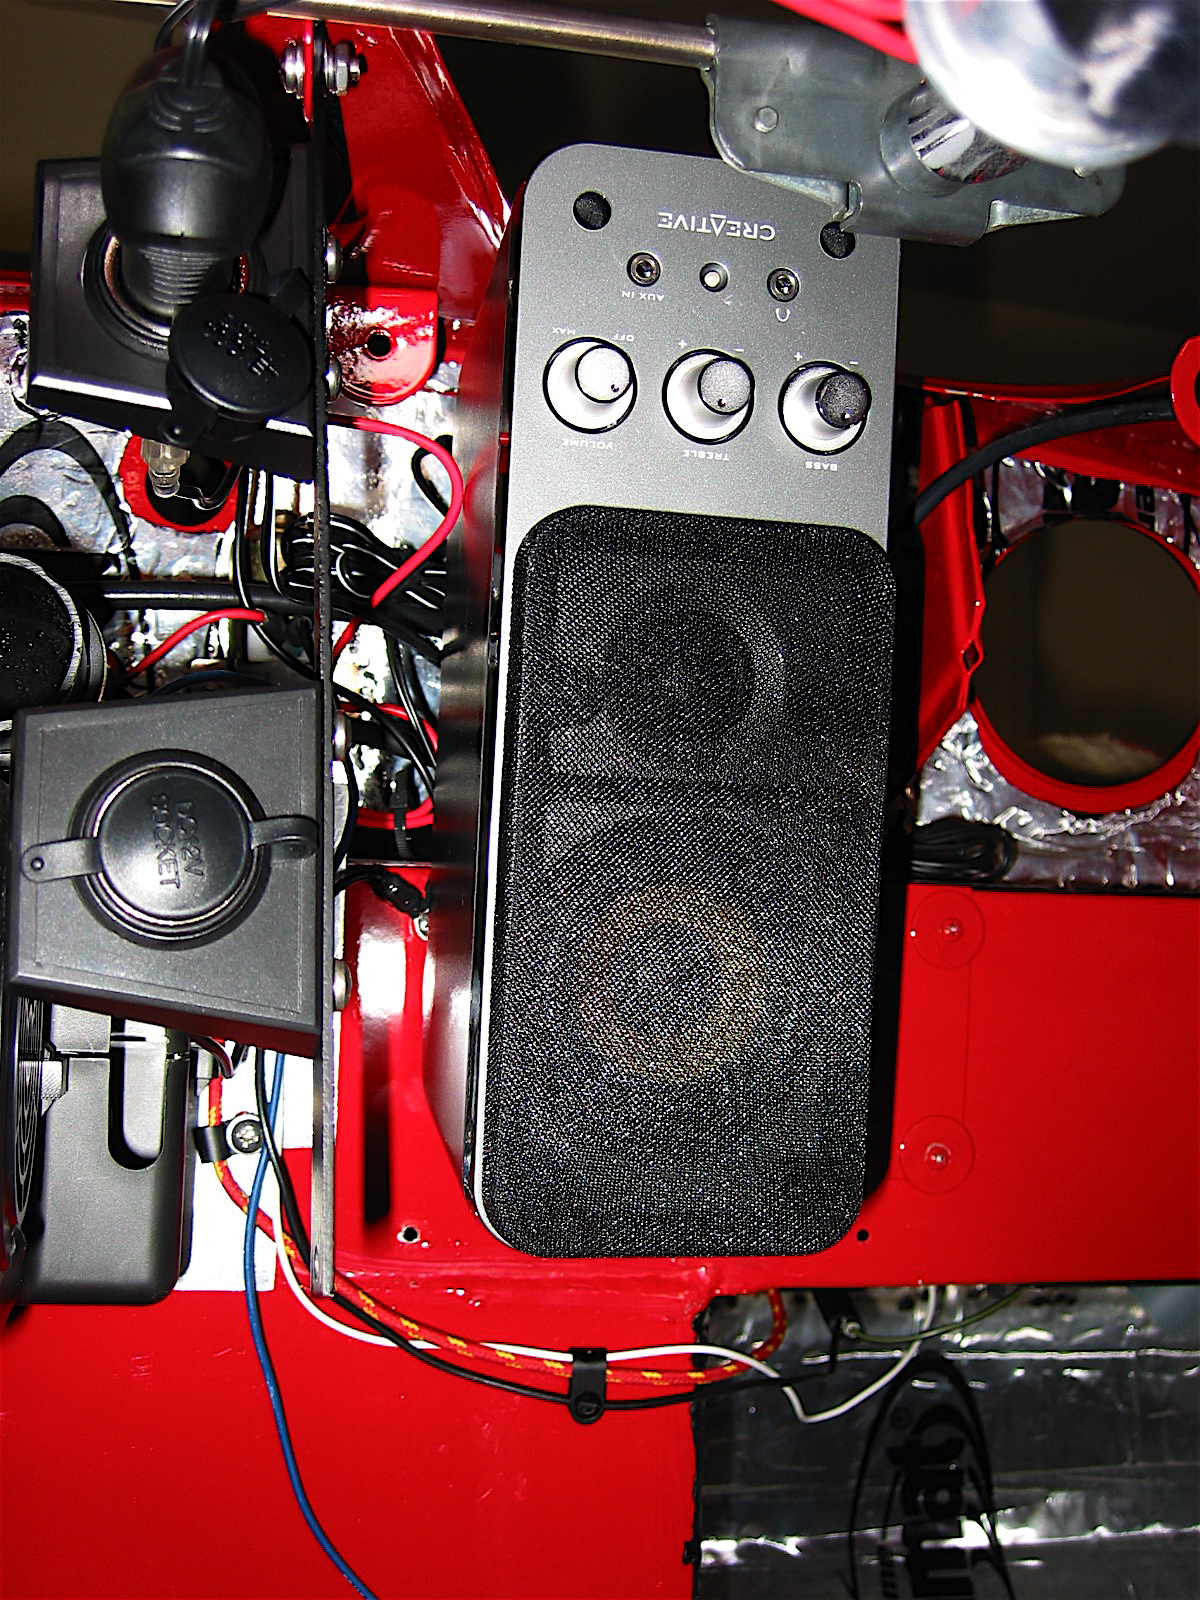
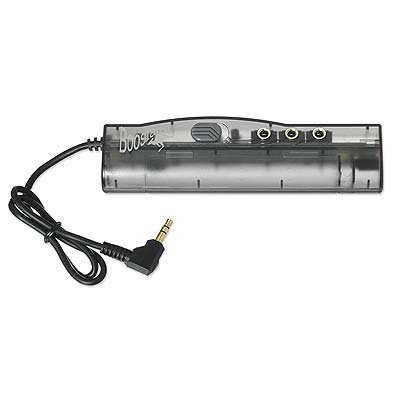
Sound System
Initially, my plan was to install an amplifier and “hidden” speakers to use with an iPod or iPhone. I was not interested in adding a radio to the mix. However, after reading about Roger “AUSMHLY’s” installation of Creative self-powered computer speakers in his car, I decided to go that route instead. The system supports and iPod and does not include a radio. Similar speakers are now available from Creative that work wirelessly using Bluetooth technology. http://us.store.creative.com/Creative-T12-Bluetooth-Wireless-Speakers/M/B00408GUNY.htm The speakers are hidden under the dash. One above the parcel tray and the other to the left of the steering wheel.. The speakers sound great around town at lower speeds, but their output is overwhelmed by road noise at higher speeds. To help with improved output I added a sound booster “Boosteroo T794” from Upbeat Audio to my system. http://www.amazon.com/Upbeat-Audio-T794-Connection-Applications/dp/B000EES34W The Booster was well worth the small investment. For a discussion of sound systems and speaker placement, see this British Car Forum thread:
http://www.britishcarforum.com/bcforum/ubbthreads.php/topics/534047/10.
Creative Speakers
Boosteroo