It seems that we have been working on rebuilding and installing the front suspension for a very long time, but in this post the suspension and front brake components are finally reinstalled in the car.
We attached the lower “A” arm to the hub assembly. This involves positioning the king pin between two cork washers and screwing the fulcrum pin into the “A” arm the outer bushing, through the king pin and into the other side of the “A” arm.
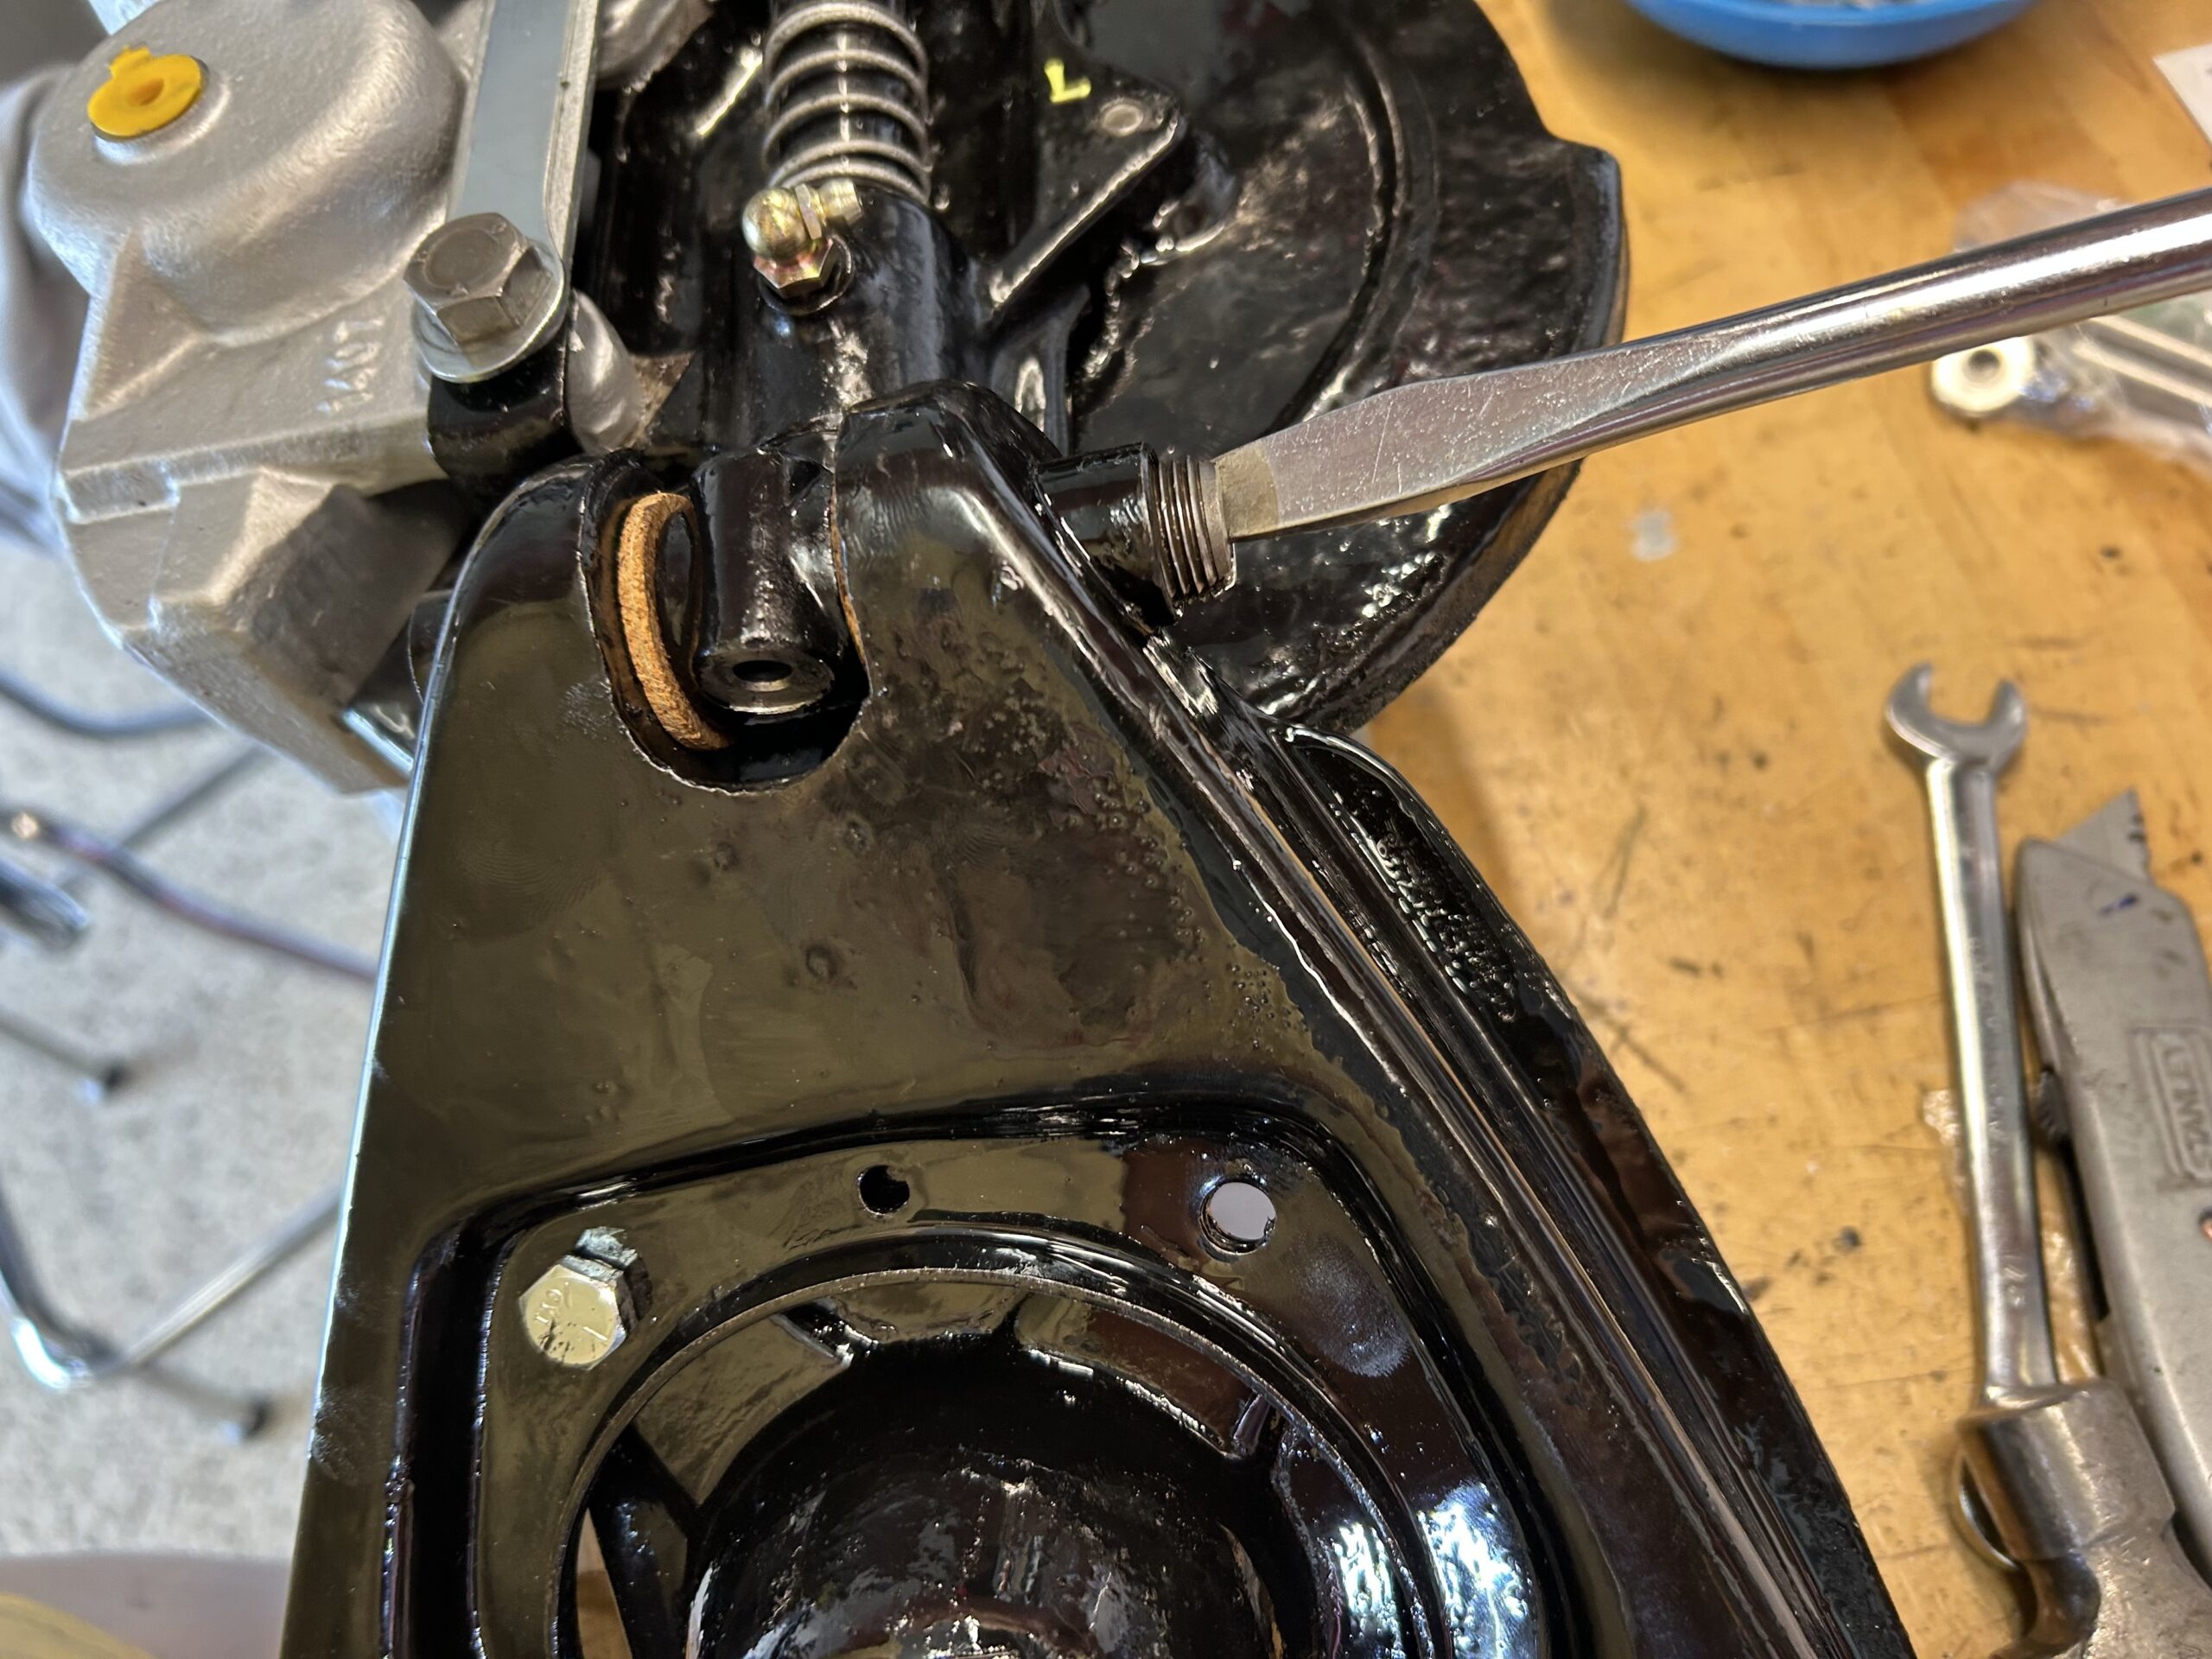
Screwing fulcrum pin into “A” arm and king pin
The fulcrum pin needs to be centered in the king pin with the concave curve in the pin open such that the cotter pin (with one flat side) can be inserted into the king pin and pushed through the fulcrum pin so that a nut can be attached to the lower end of the cotter pin. This process is covered in the attached video.
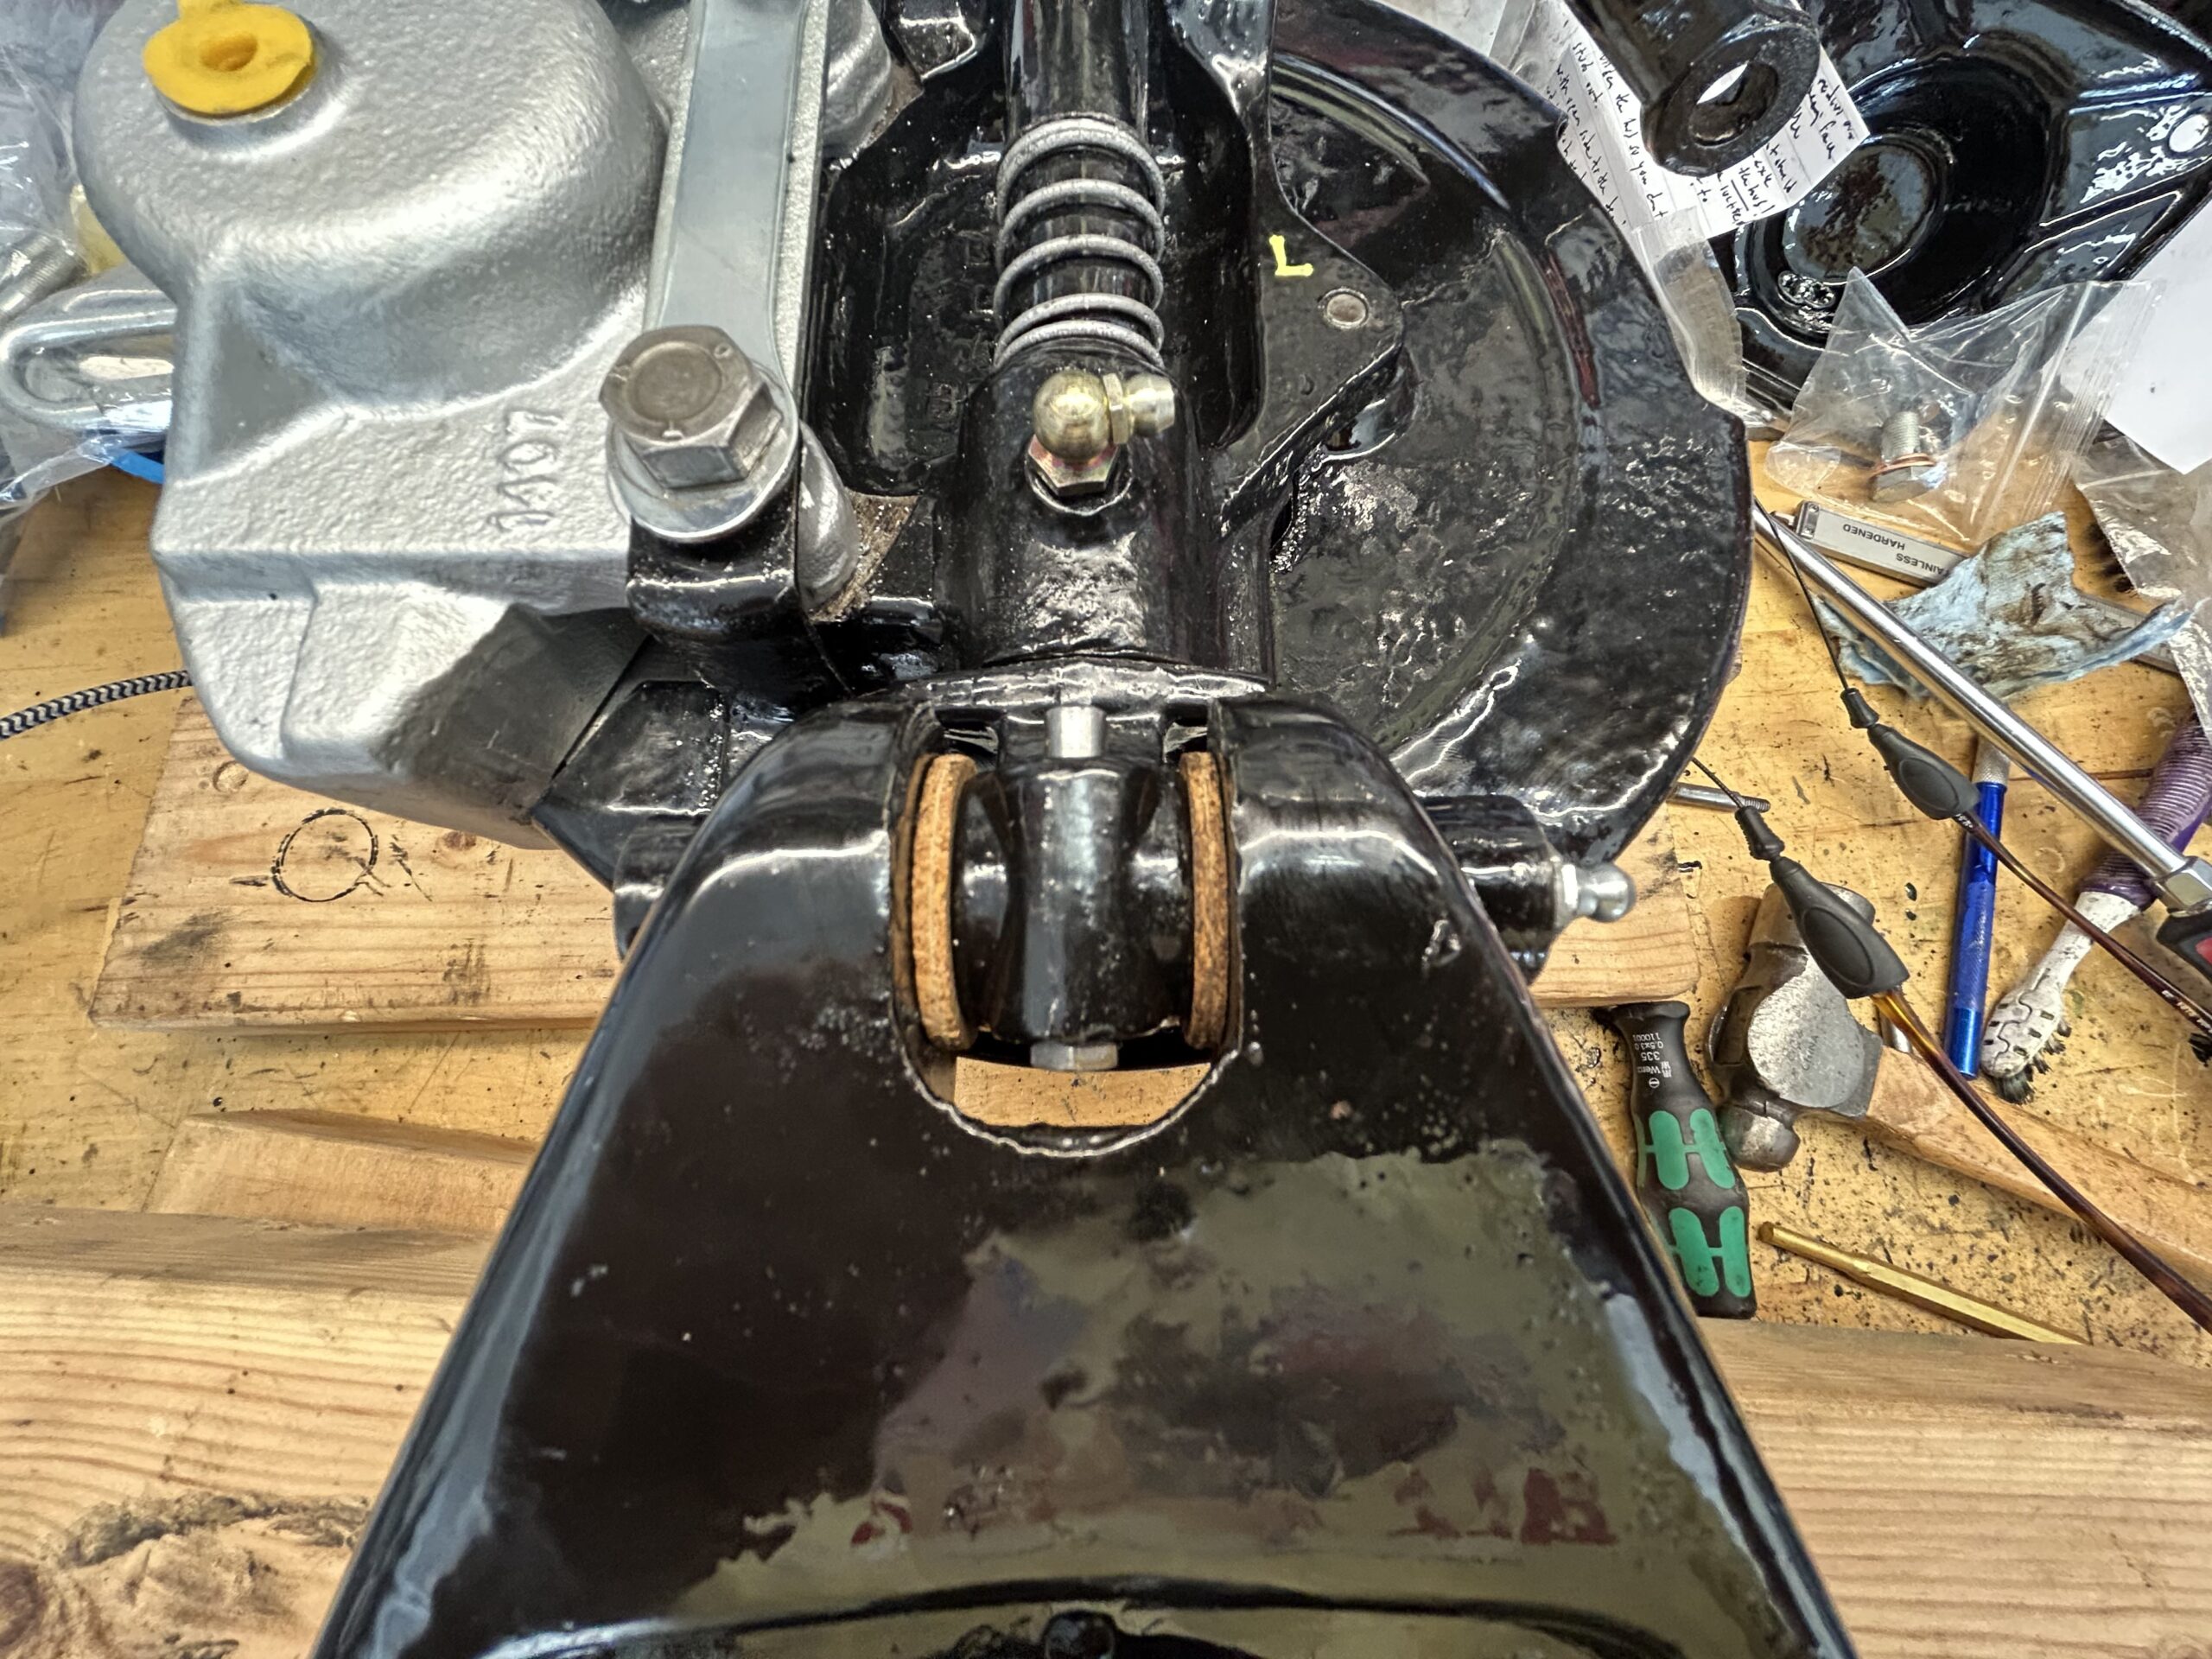
Cotter pin in place
After going through that process we discovered that the steel bushes in the used “A” arms were completely knackered with way too much play and we had to order a new pair. The “a” arms are available from British Heritage and are supposed to be as original, however, they are very expensive. A lower priced aftermarket “A” arm, produced in the UK, is also available and contributors to the on-line Sprite Forum reported that these units are satisfactory. So, we ordered a pair of these from AH Spares and repeated the process of mounting the hub assembly to the “A” arm!
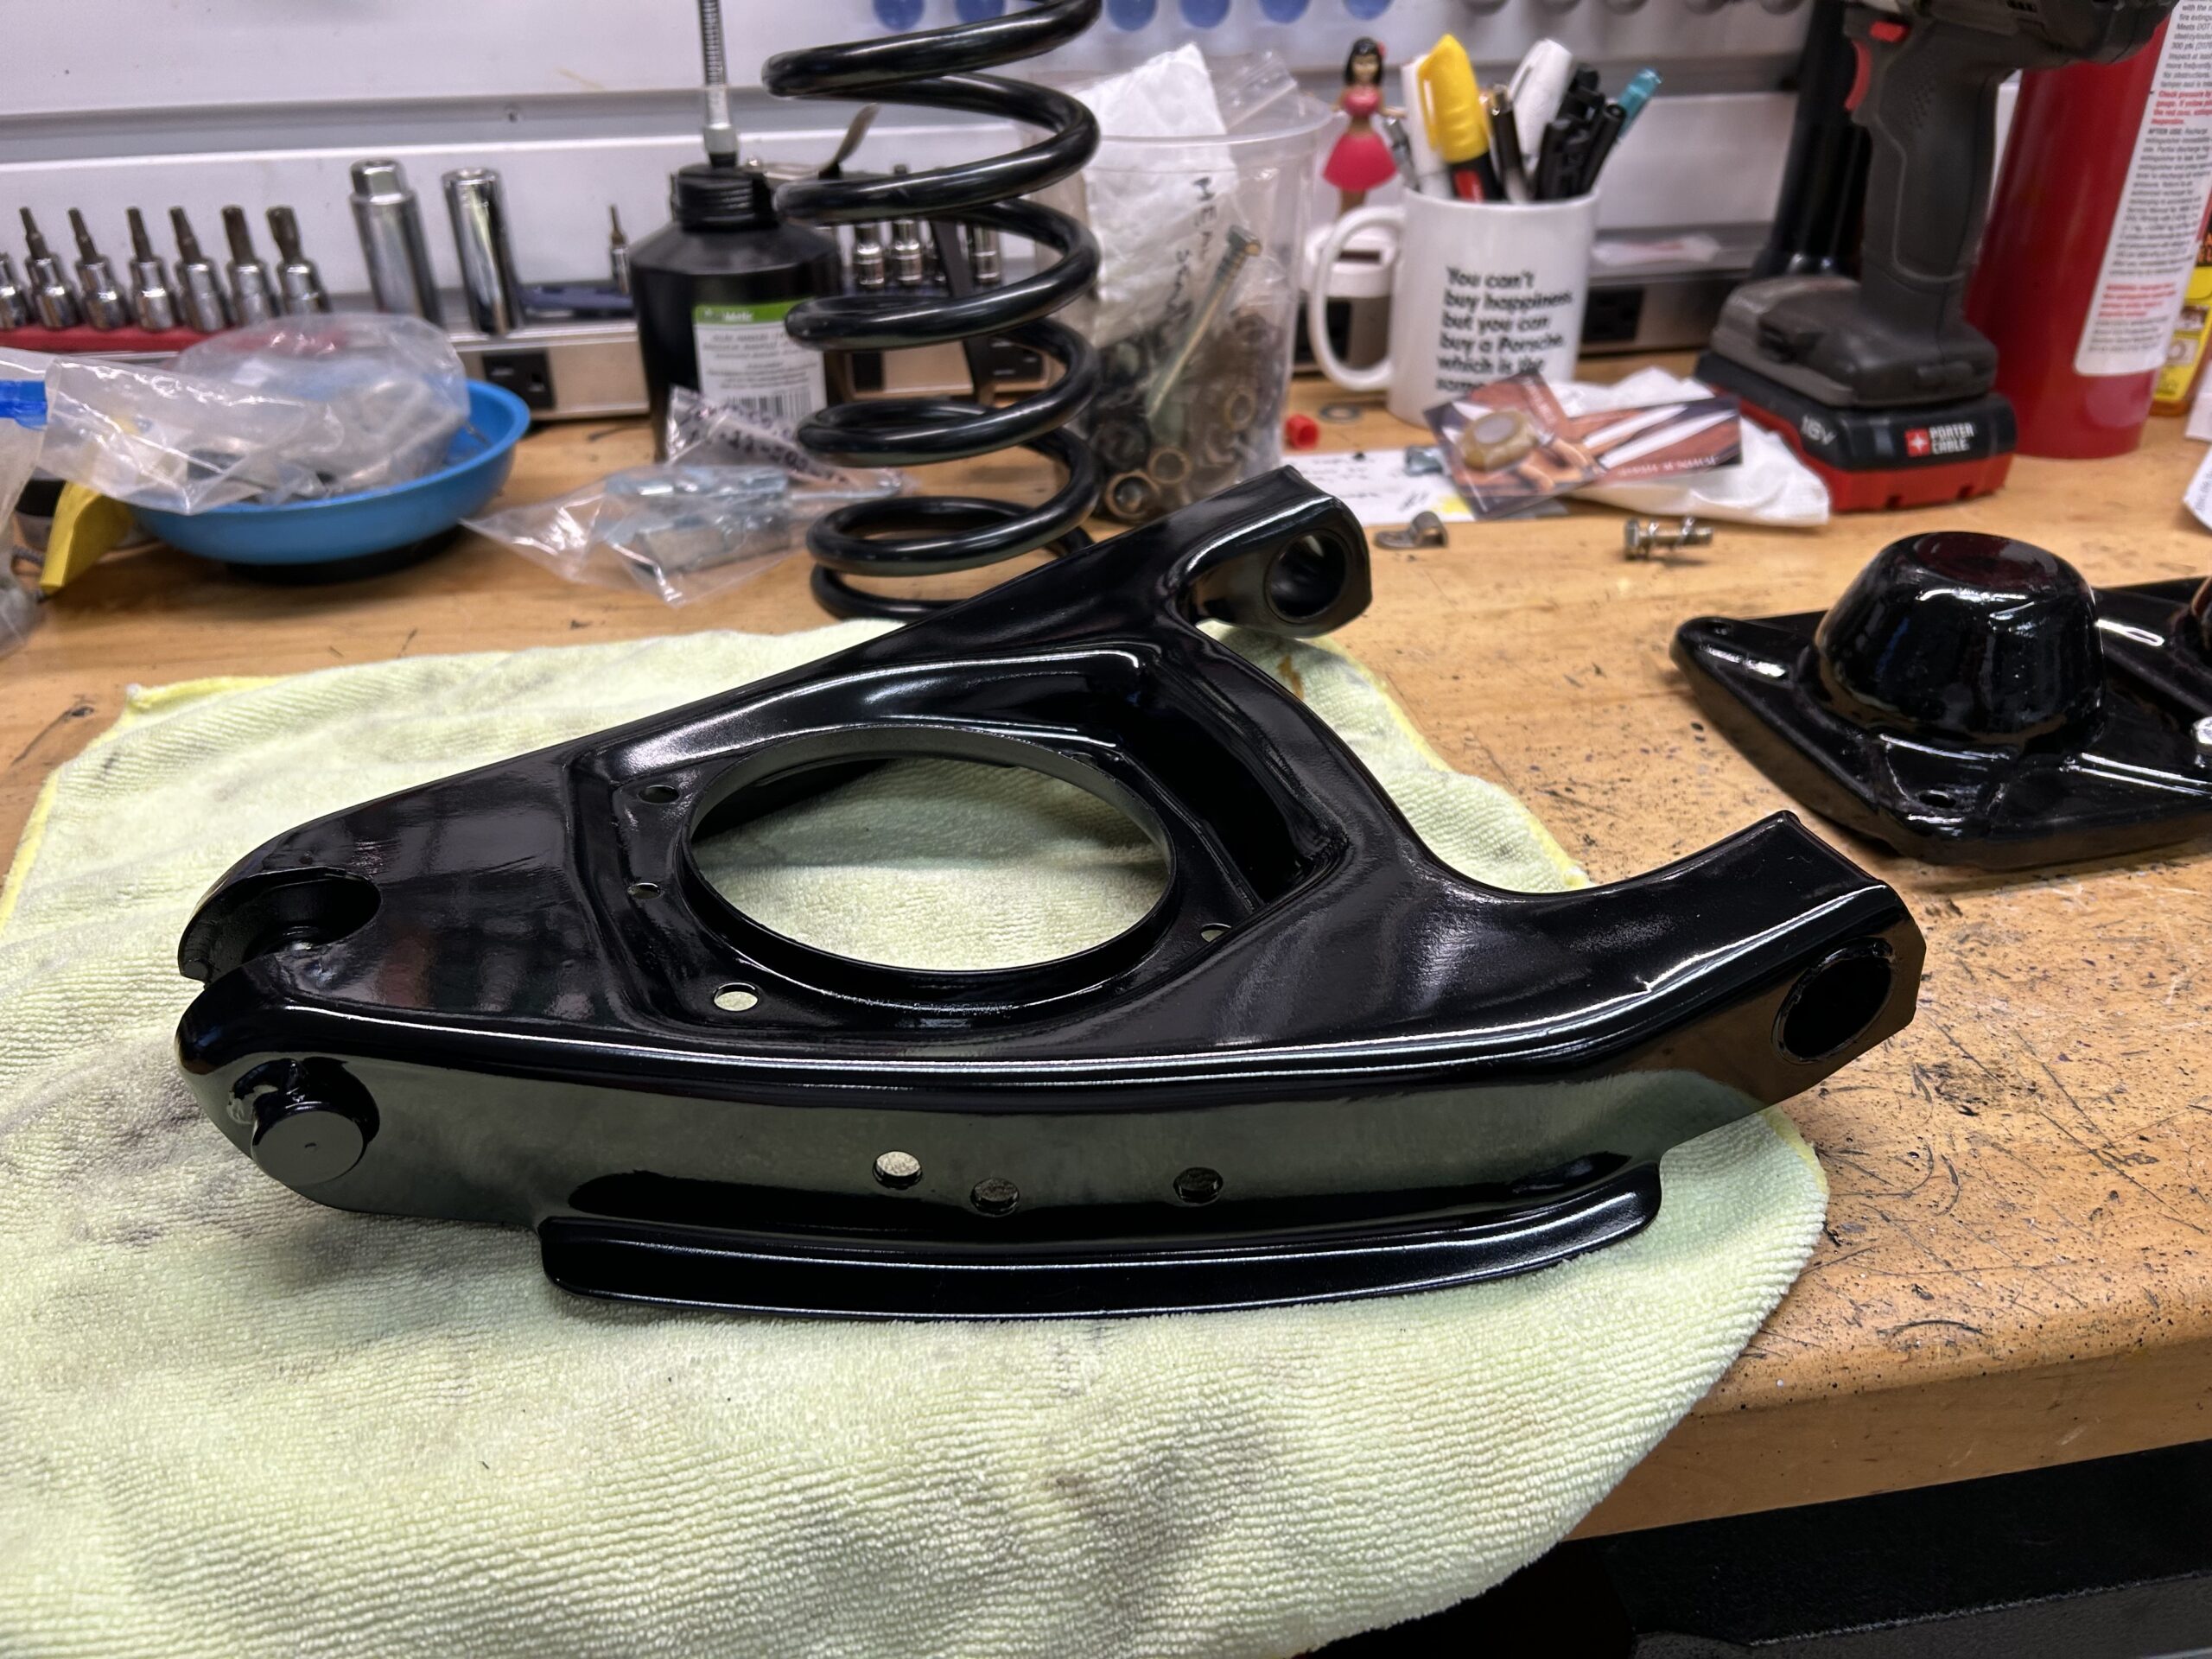
After market “A” arm and new coils spring
One side of the “A” arm outer bushing was already capped, but the other side required a screwed plug and grease zerk to be screwed into place.
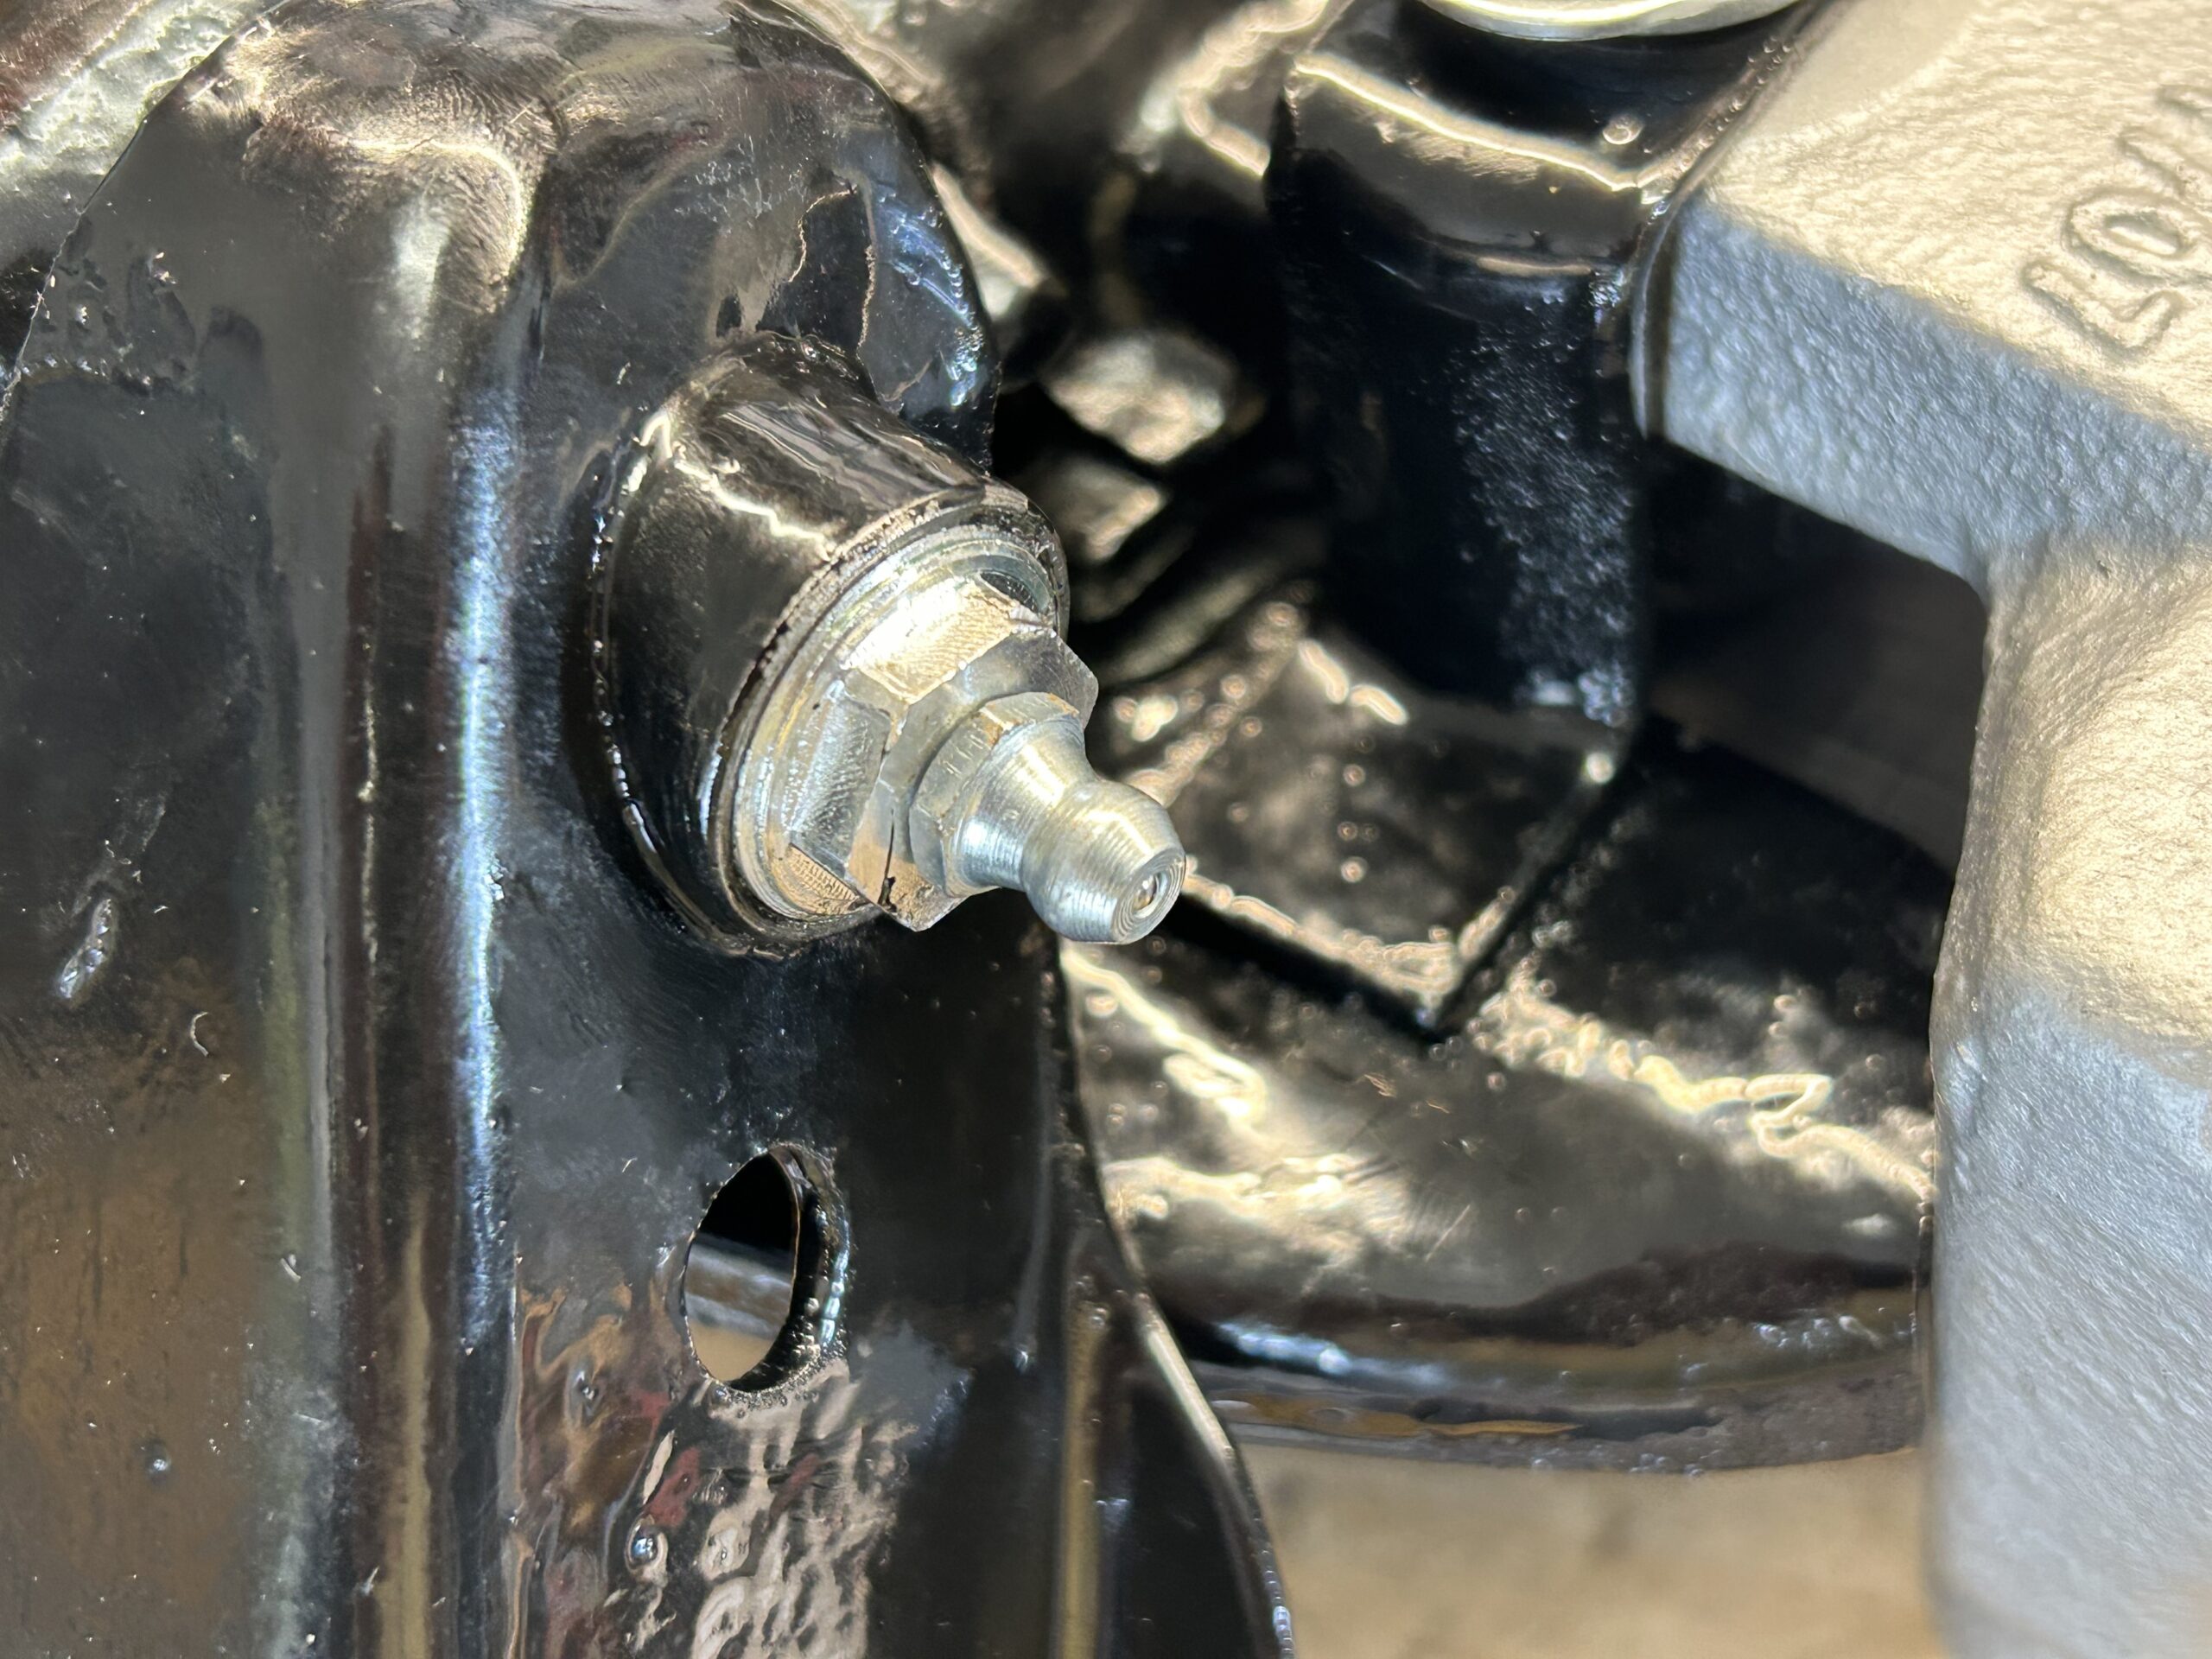
“A” arm grease zerk fitting
The next step was to install the hub assembly and “A” arm (wishbone) to the car. While supporting the weight of the hub assembly on a floor jack, the assembly was secured to the damper arm with the top fulcrum pin.
Supporting hub assembly to insert uppertrunbnion fulcrum pin
Like the lower pin, there is a concave spot on the shaft of the bolt through which the damper pinch bolt must align in order for the pinch bolt to screw into the damper arm. The top fulcrum pin is inserted from the rear through a new rear poly bush, pushed through the upper trunnion, and then through the front poly bushing before passing through the damper arm where it is then secured with a castle nut and split pin.
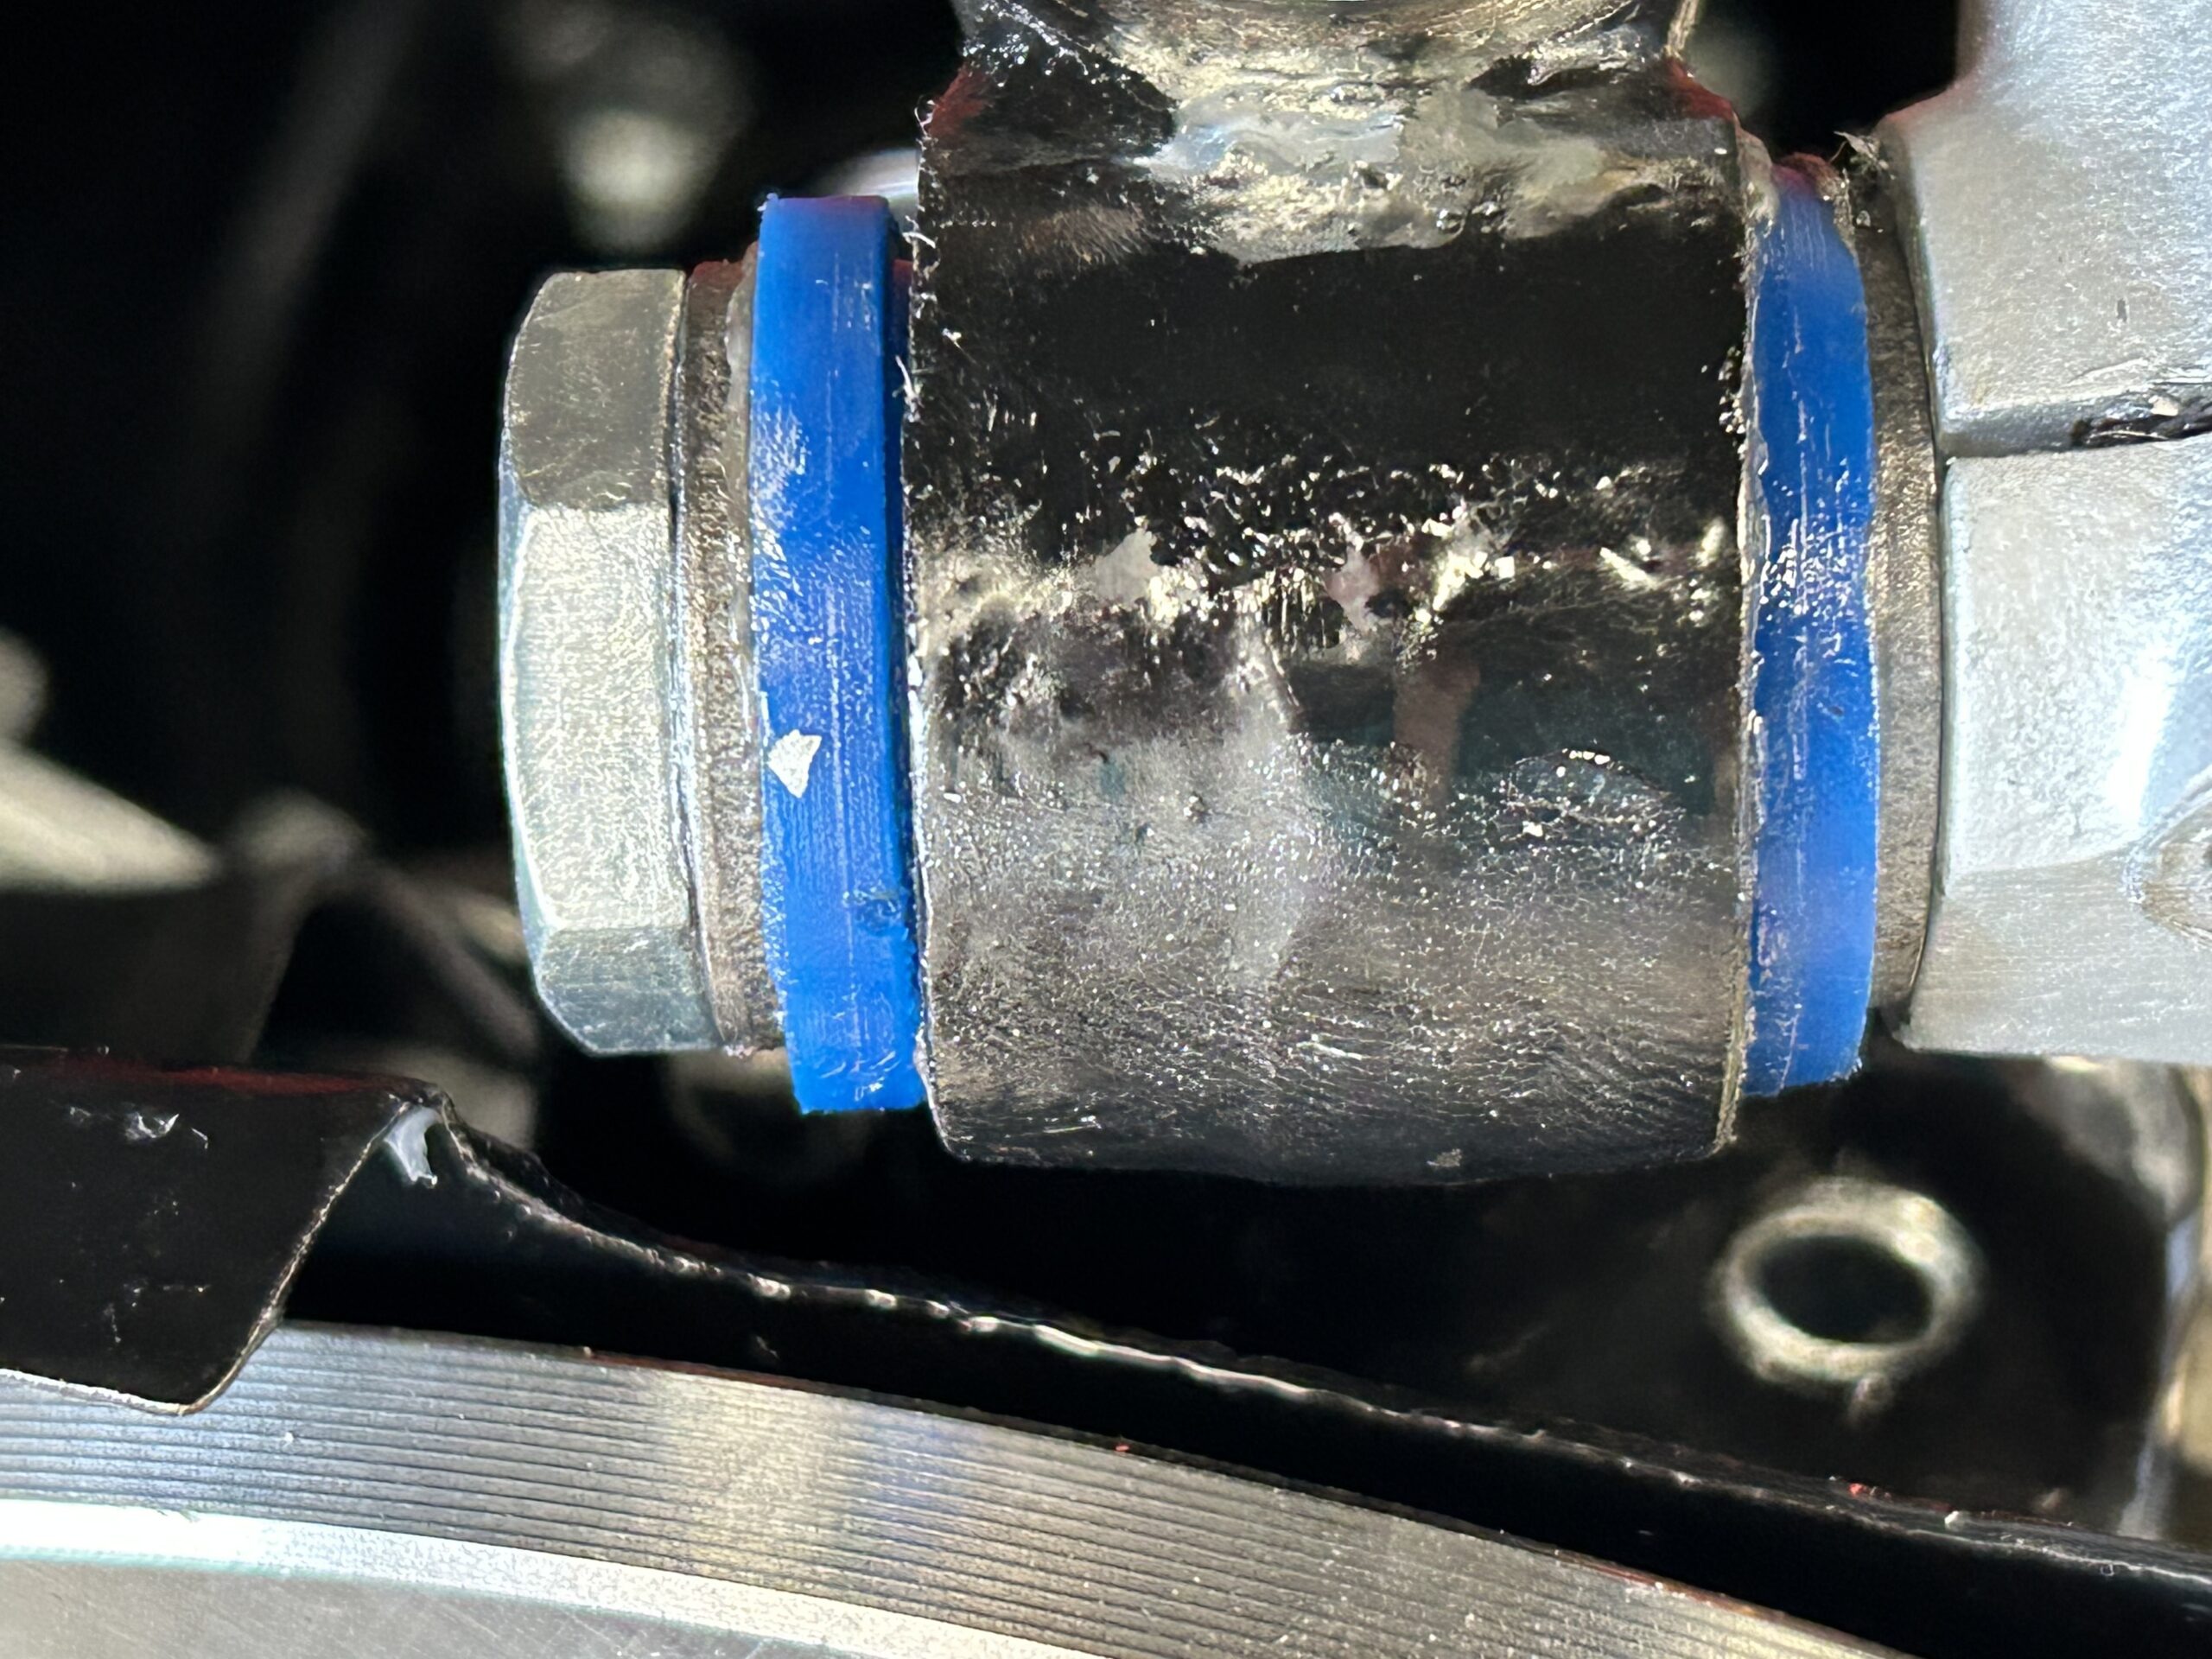
Upper Trunnion bolt washers and poly bushes

Upper Hub Assembling Mounting
The Upper Trunnion sits atop a thrust washer on the swivel axle. Two small shims are placed on the king pin below the thrust washer and upper trunnion before they are placed on the top of the king pin. After the upper trunnion is in place a nylock nut is used to tighten the swivel axle assembly. At this point we have the hub assembly secured at its top. We did not tighten the upper trunnion until after we mounted the lower “A” arm to the car.
New poly bushes were mounted on either side of the inside of the “A” arm and using a combination of a floor jack and a bottle jack the inside of the “A” arm was pushed into place so the the inner fulcrum pins could be pushed through and secured with nylock nuts. These won’t be tightened until we have the weight of the car on the ground.
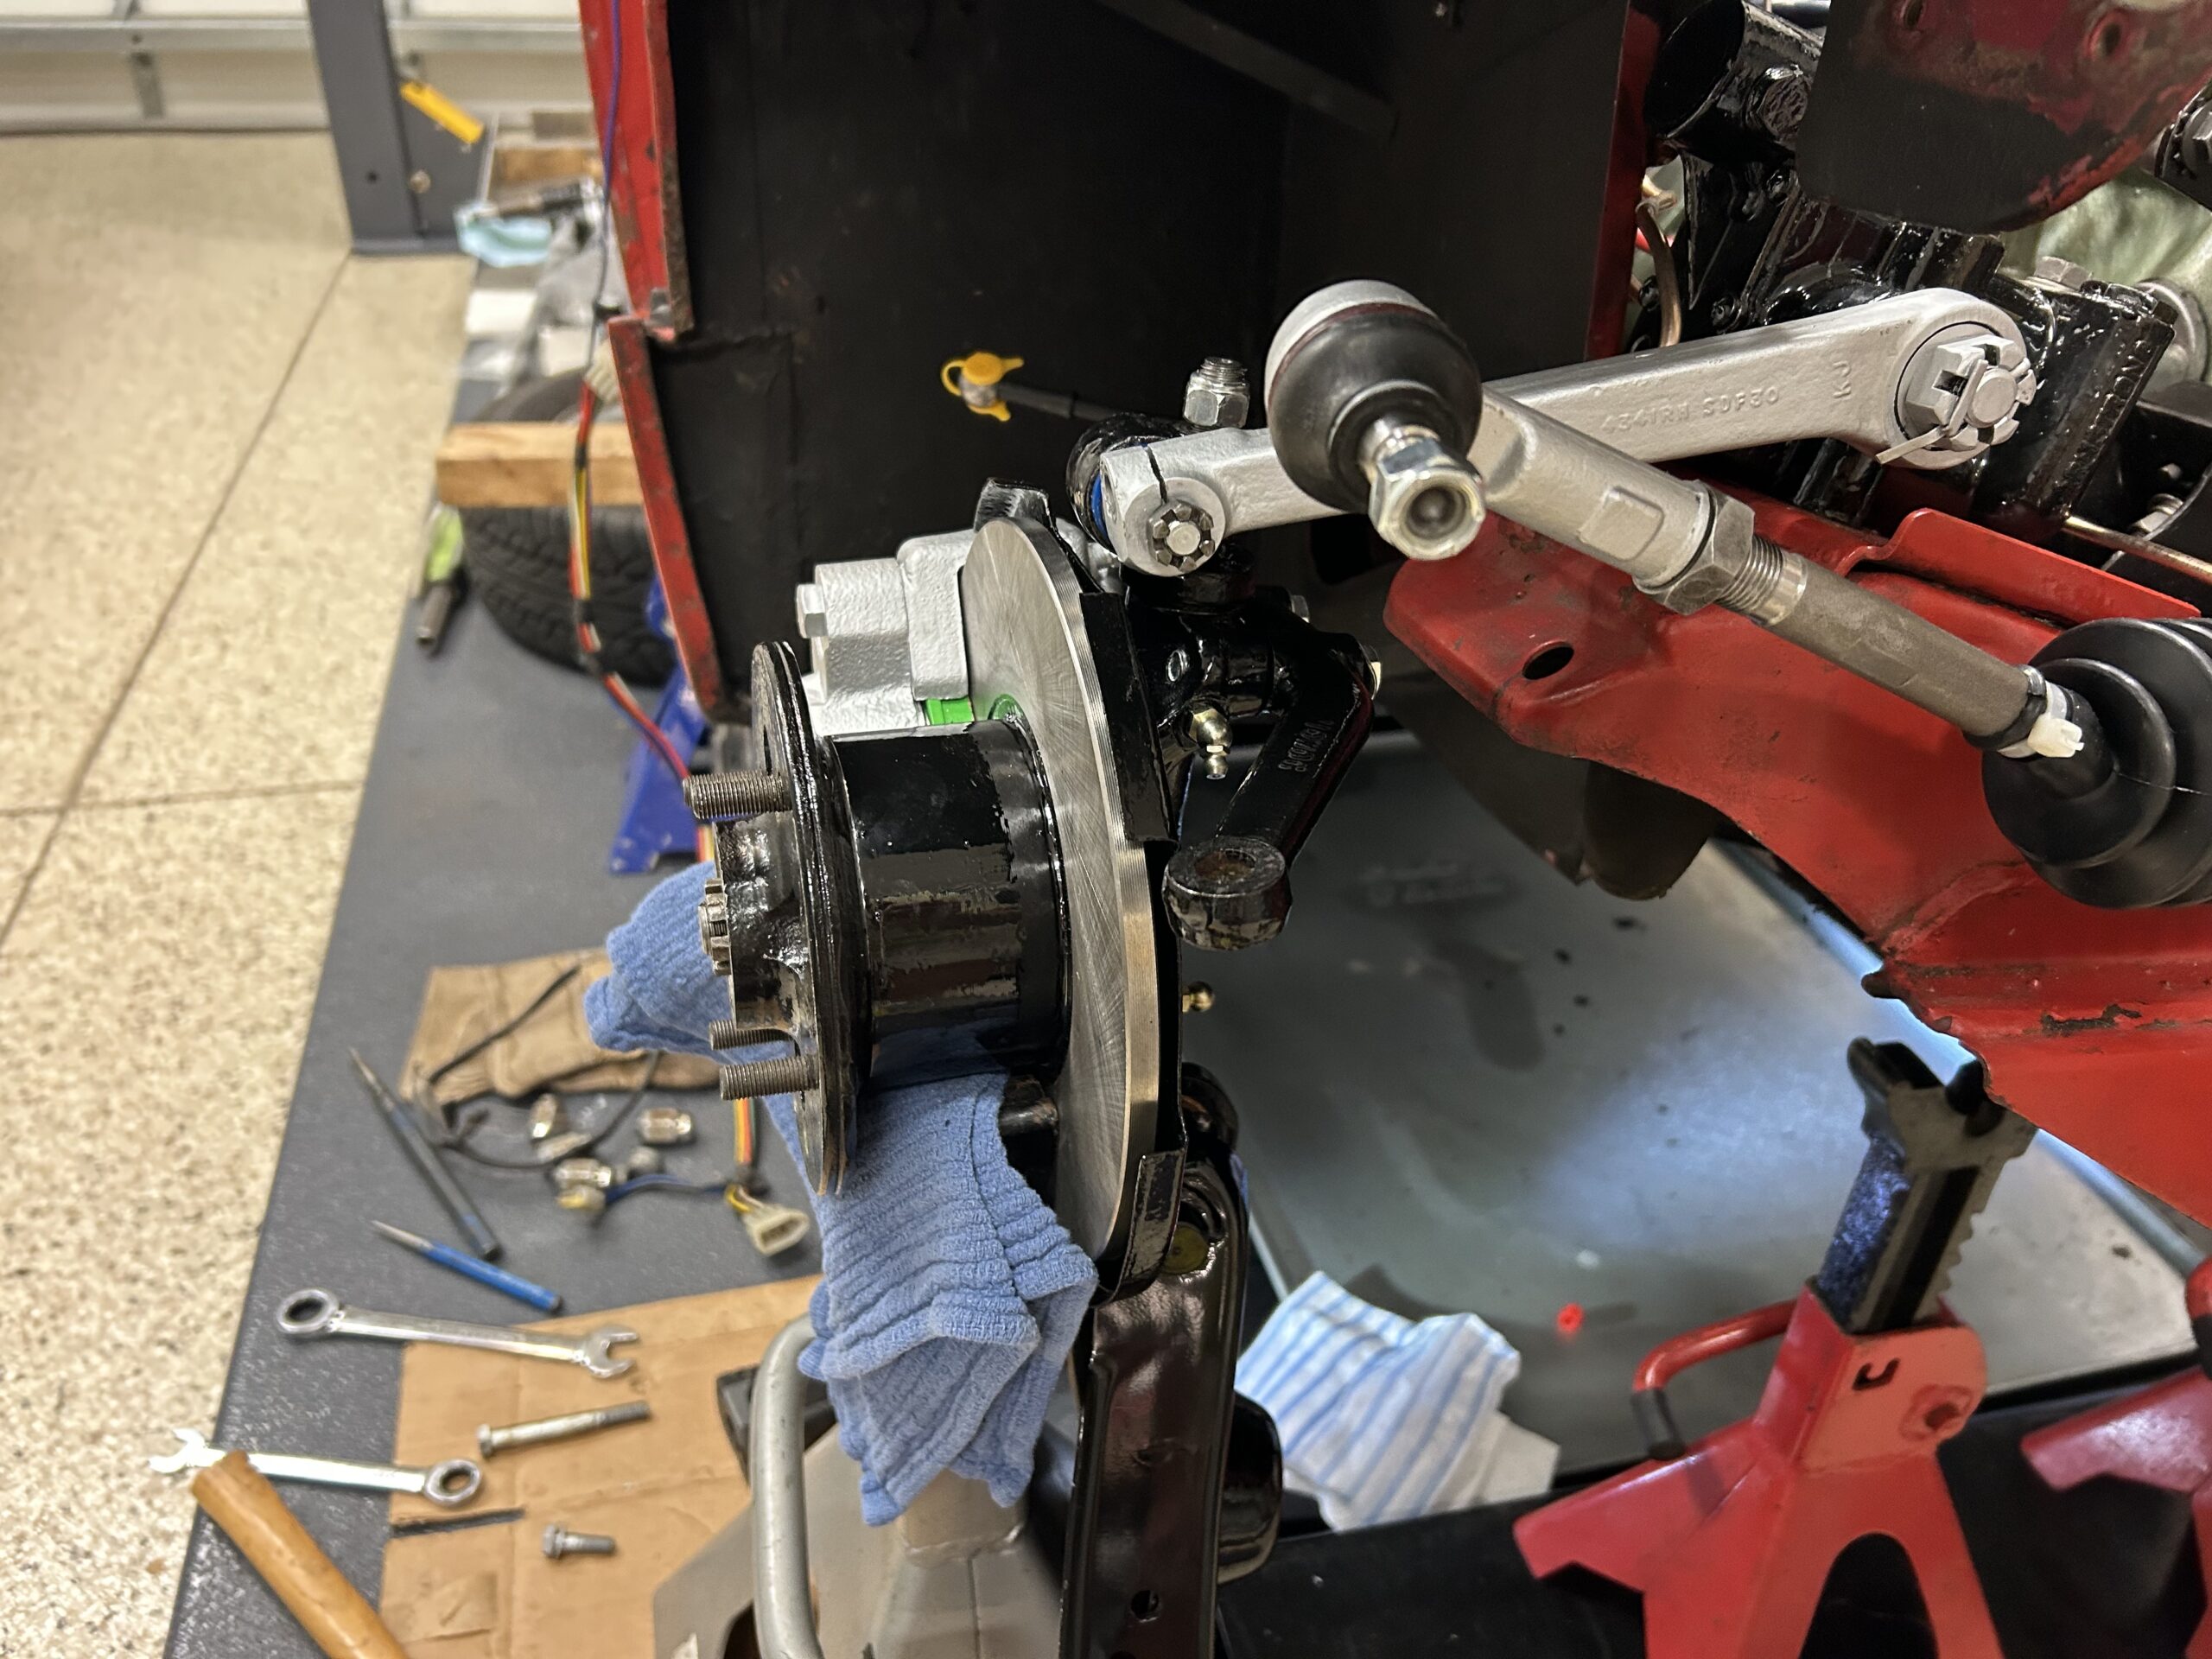
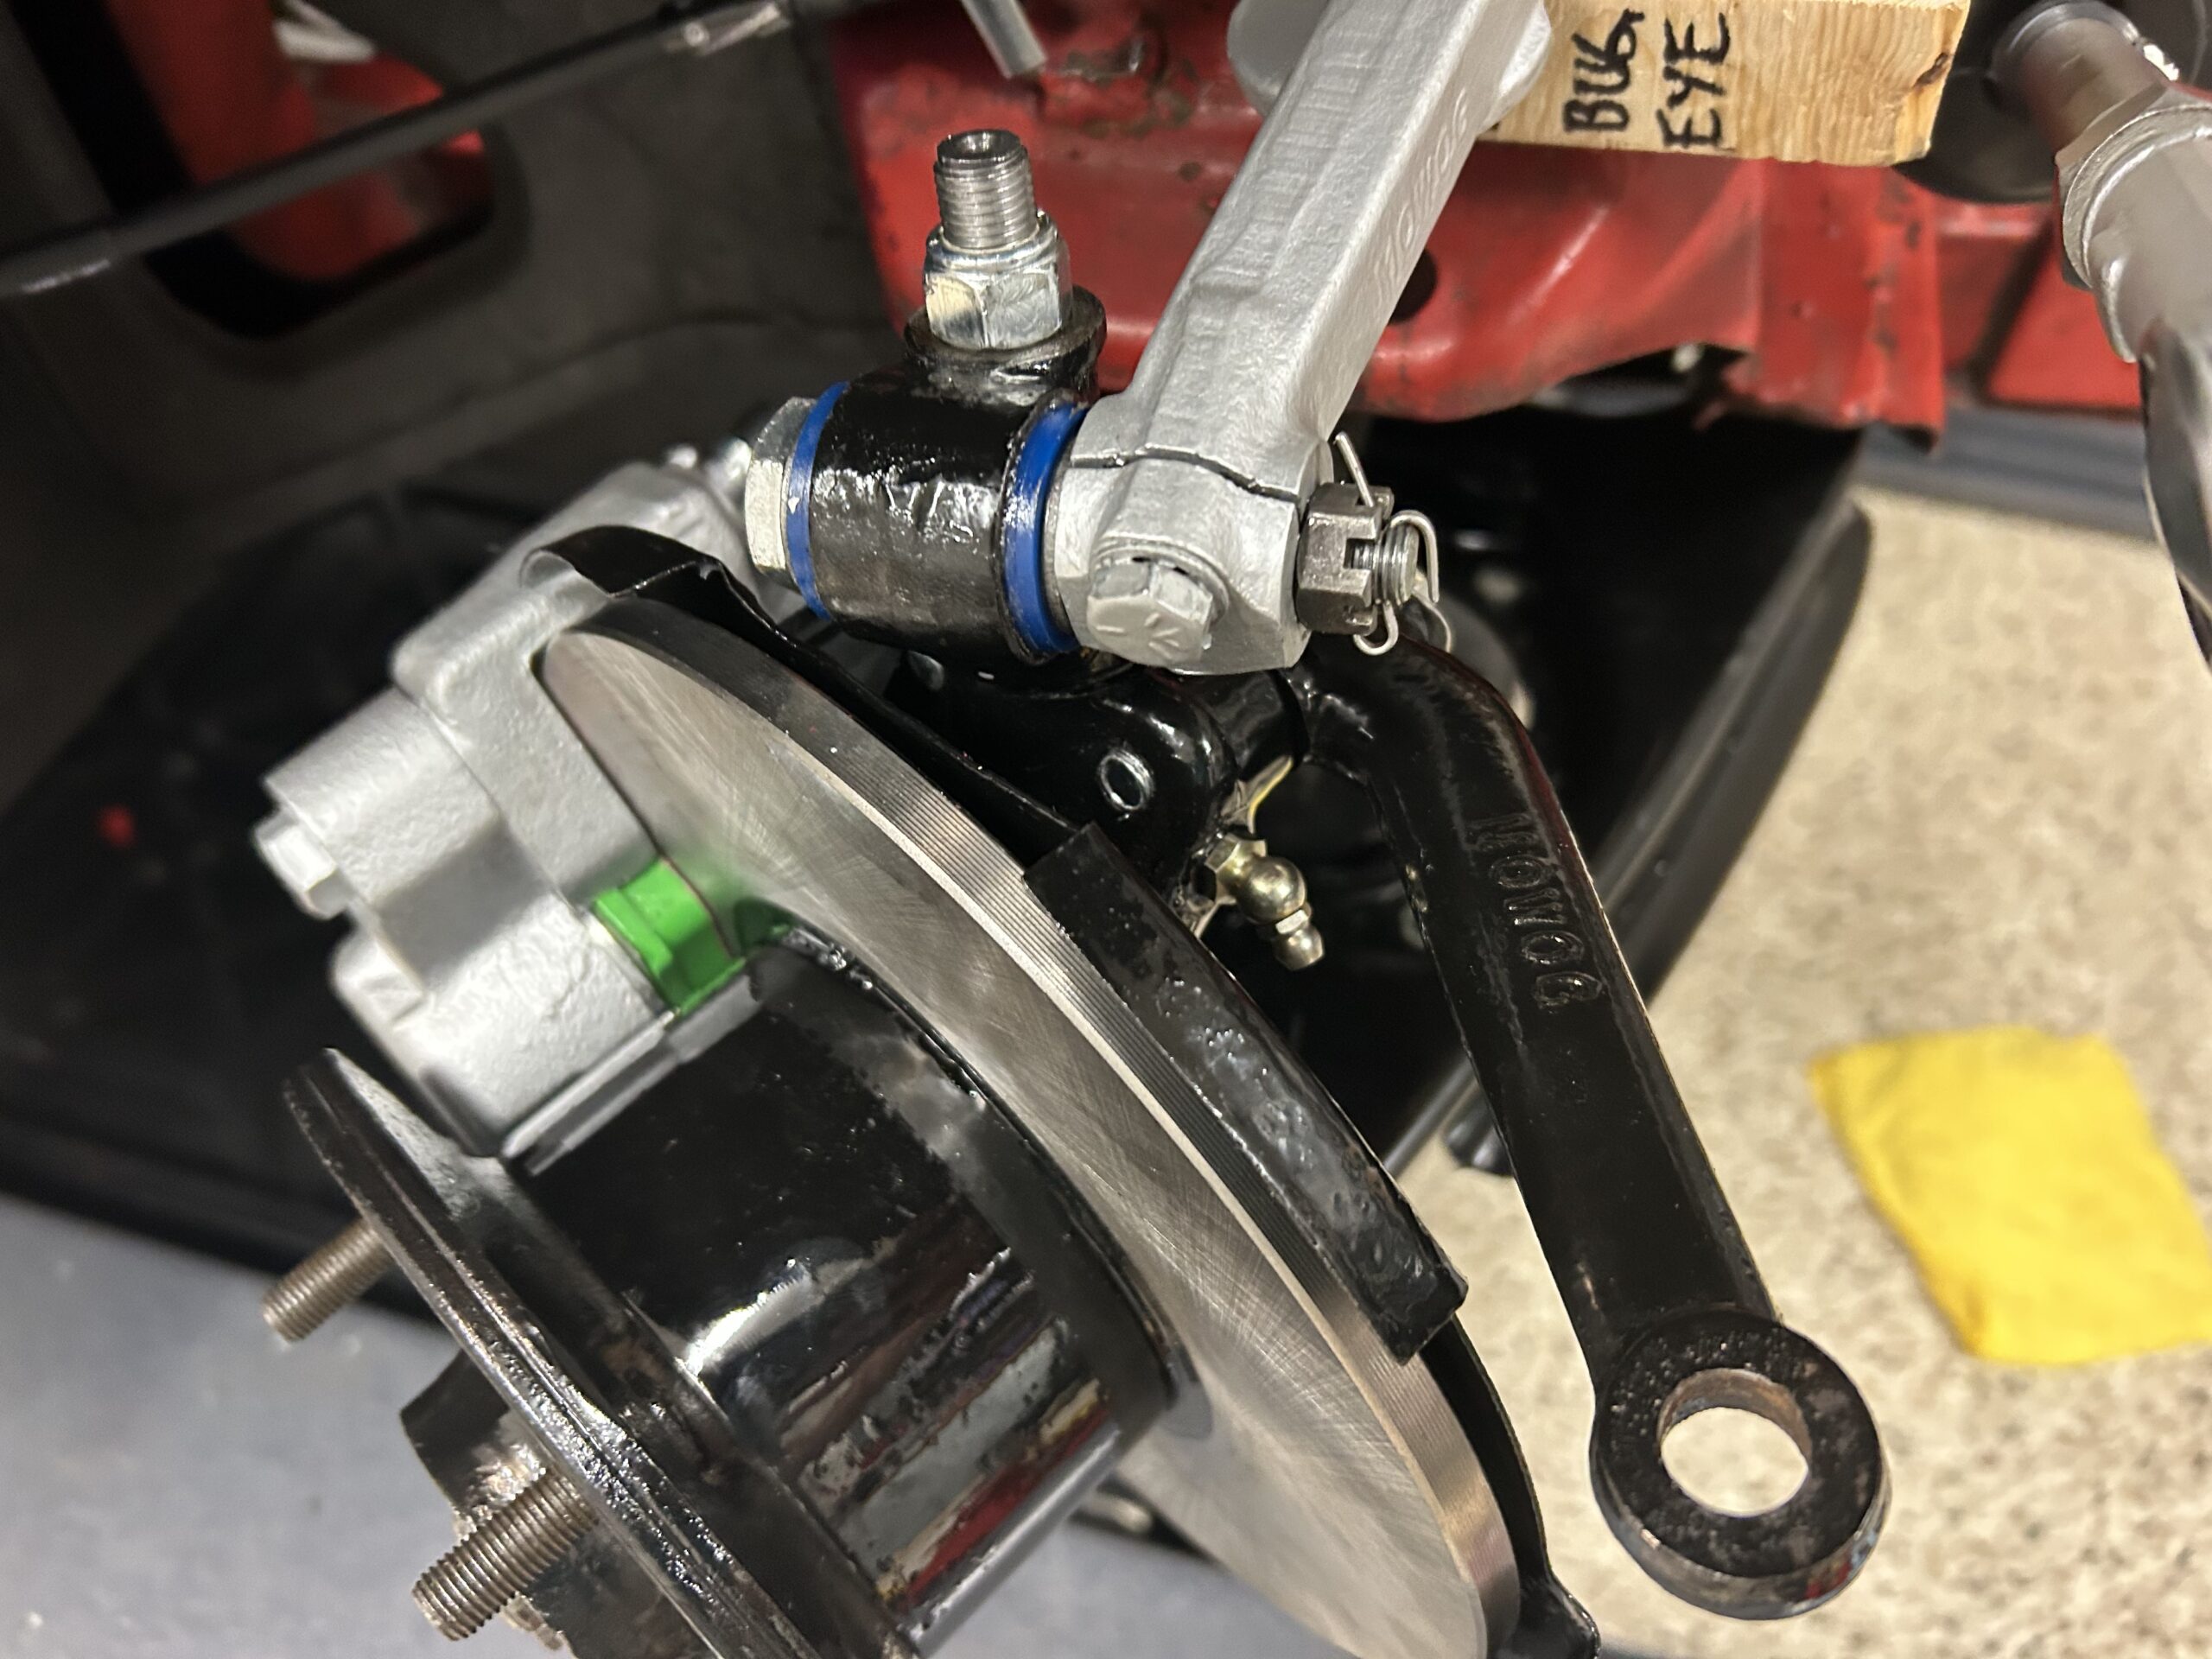
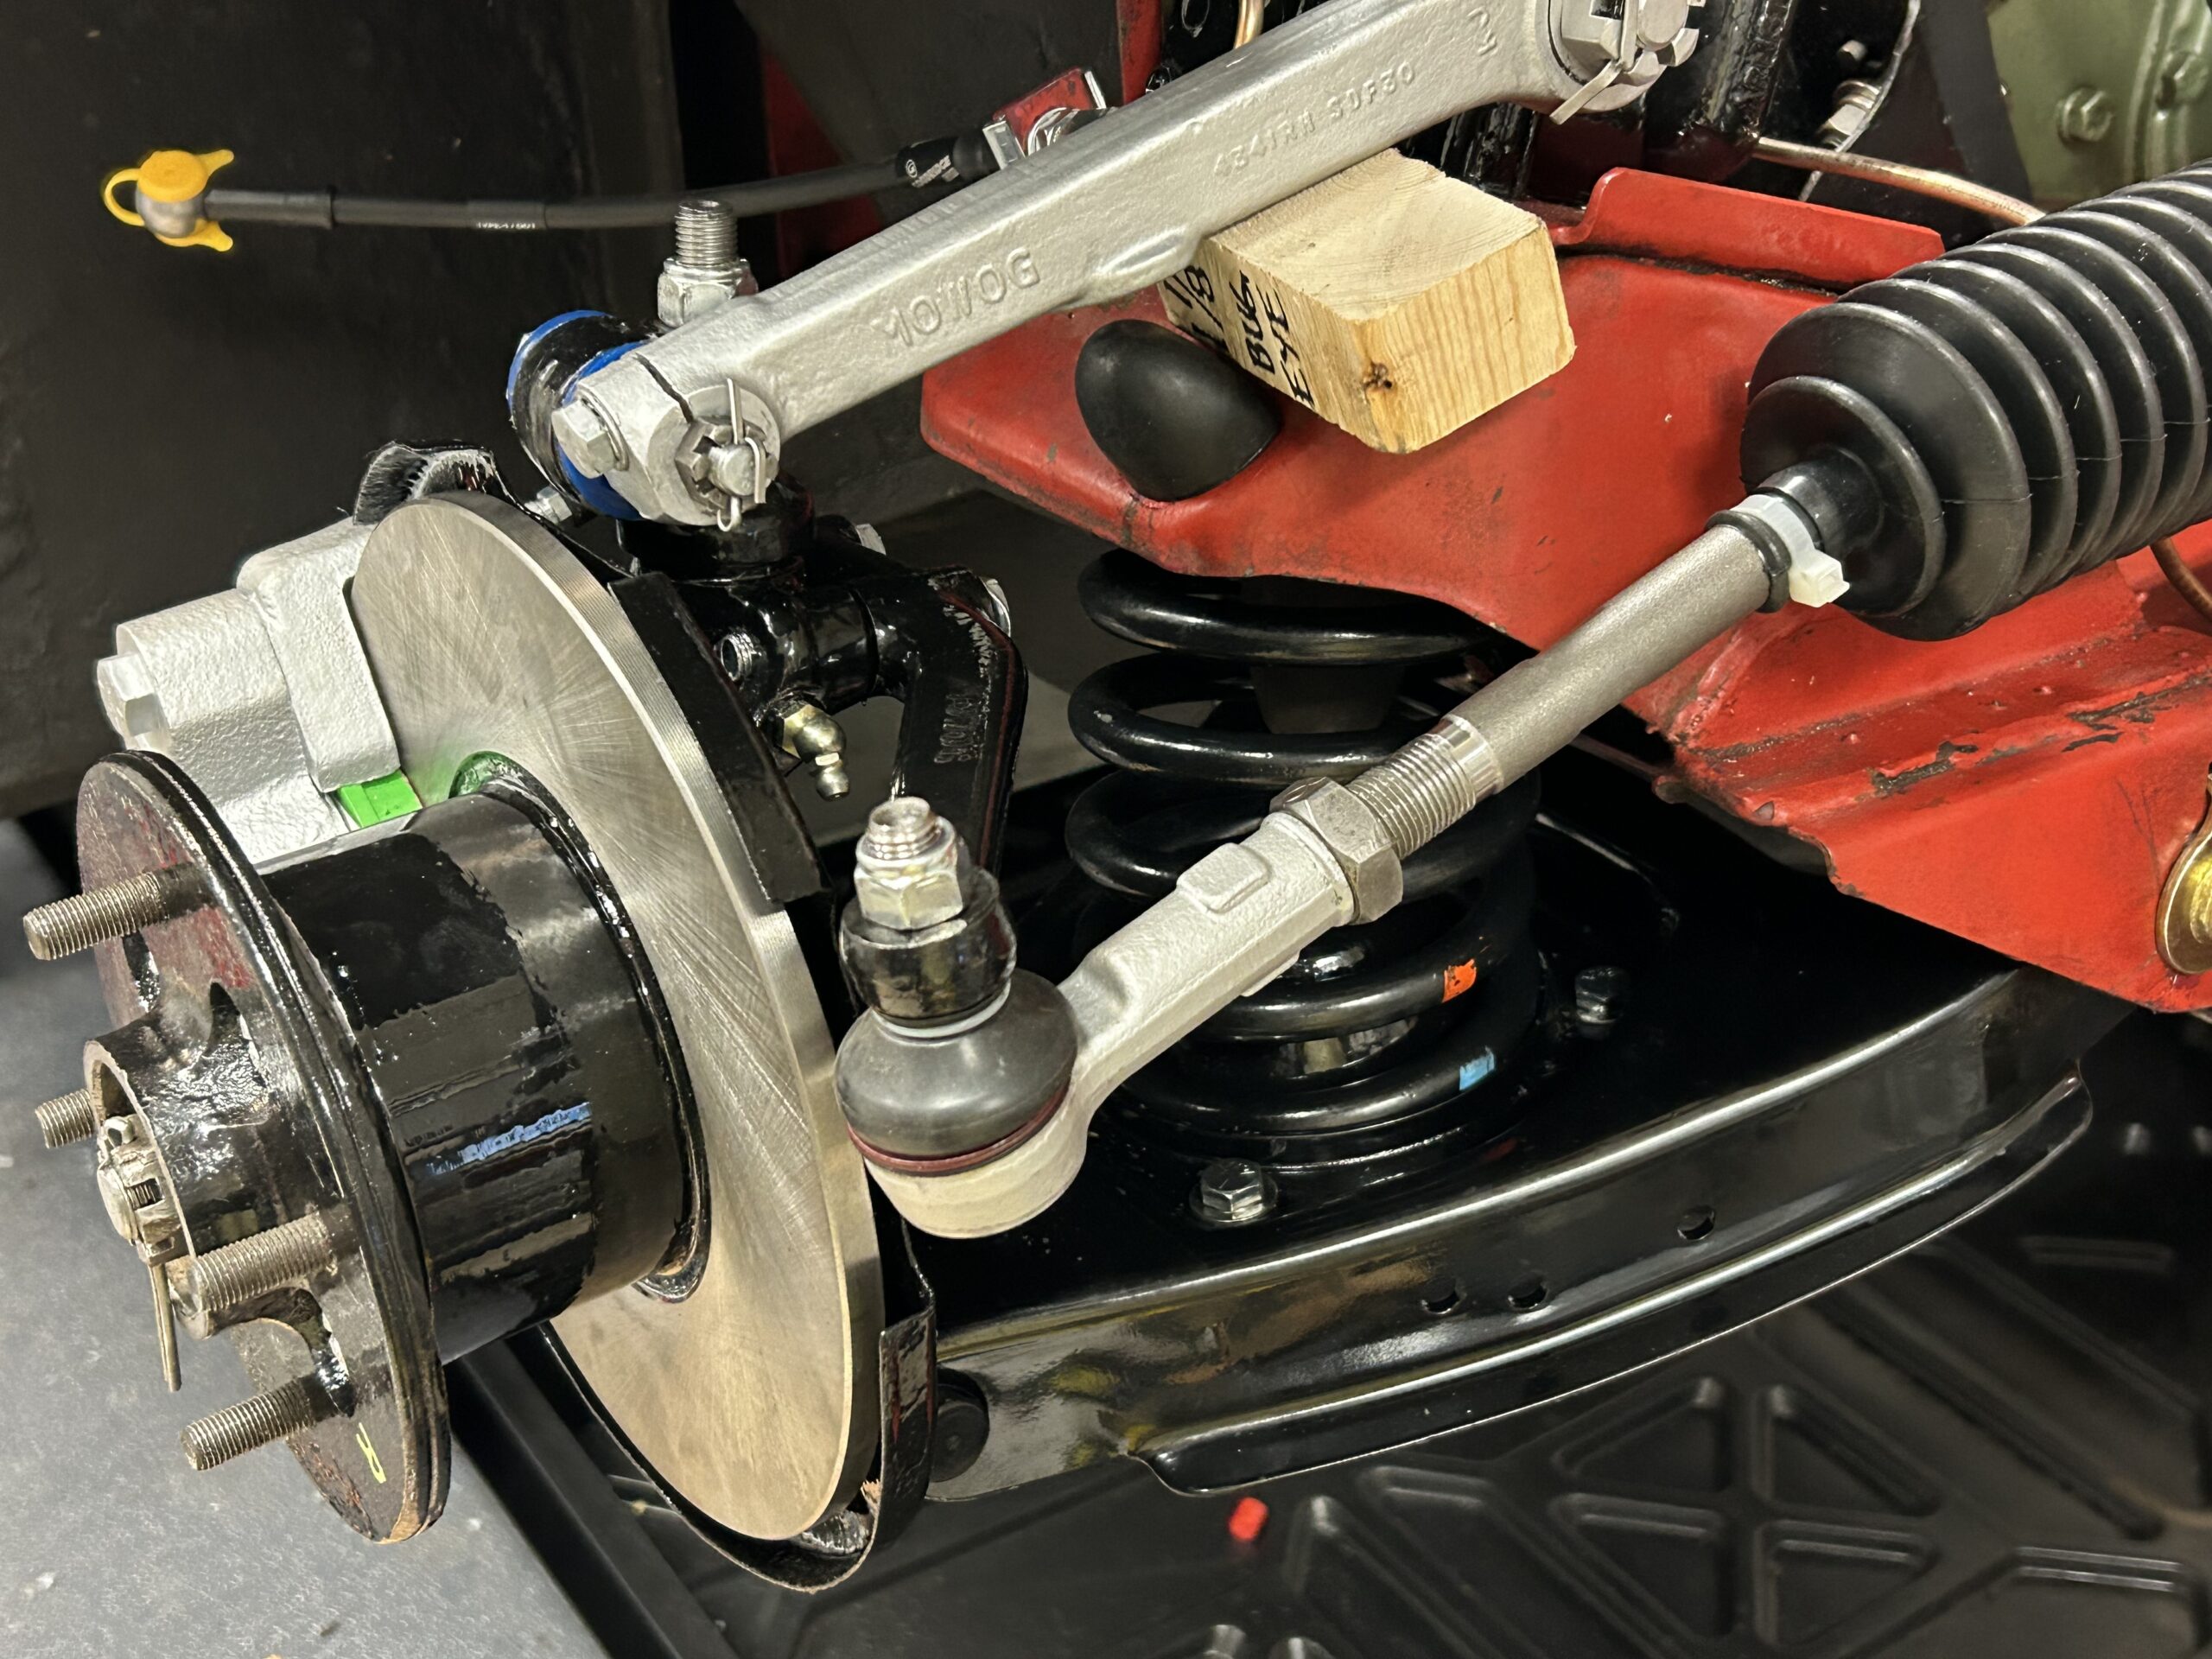
With everything mounted properly it was time to tighten nuts and bolts. The top trunnion nut was torqued to 40 ft. lbs. If the rotation of the hub (front to back) is too tight a shim is added, if there is too much play a shim is removed.
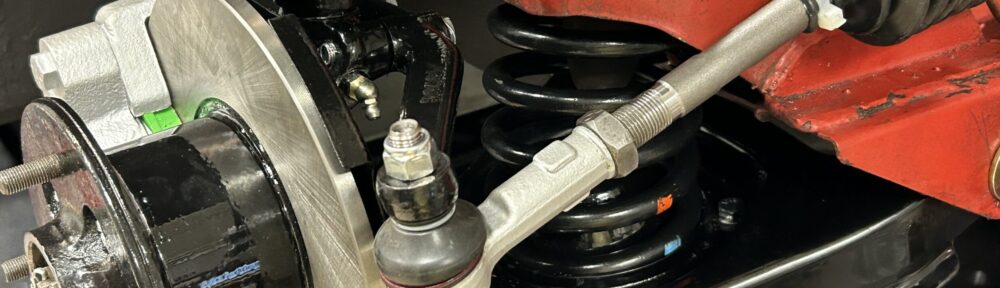
We then tightened the two bolts that secure the caliper to the swivel axle. These are tightened to 46 ft. lbs. The tab washers under the bolt heads will be turned up at a later date. The steering arm bolts were torqued to 39 ft. lbs. The tab washers under the bolt heads will be turned up at a later date. Finally, the three mounting bolts on each damper were torqued to 27 ft. lbs.
Everything buttoned up
The next step was to install the front coil springs. The spring seats, or pans, were removed from the “A” arm. The spring was then placed on the spring seat and pushed upward through the “A” arm wishbone. Compressed springs can be very dangerous and consequently we choose to use long threaded rods to safely compress the springs.
We prepared four 5/16″ – 18 “all-thread” rods by cutting each to six inch lengths. Double nuts were placed on the top of the rods and tightened against one another. Coupling nuts were used on the top and bottom to make the nuts more accessible to turn with a wrench. Flat washers were also used between the spring seat and the nuts.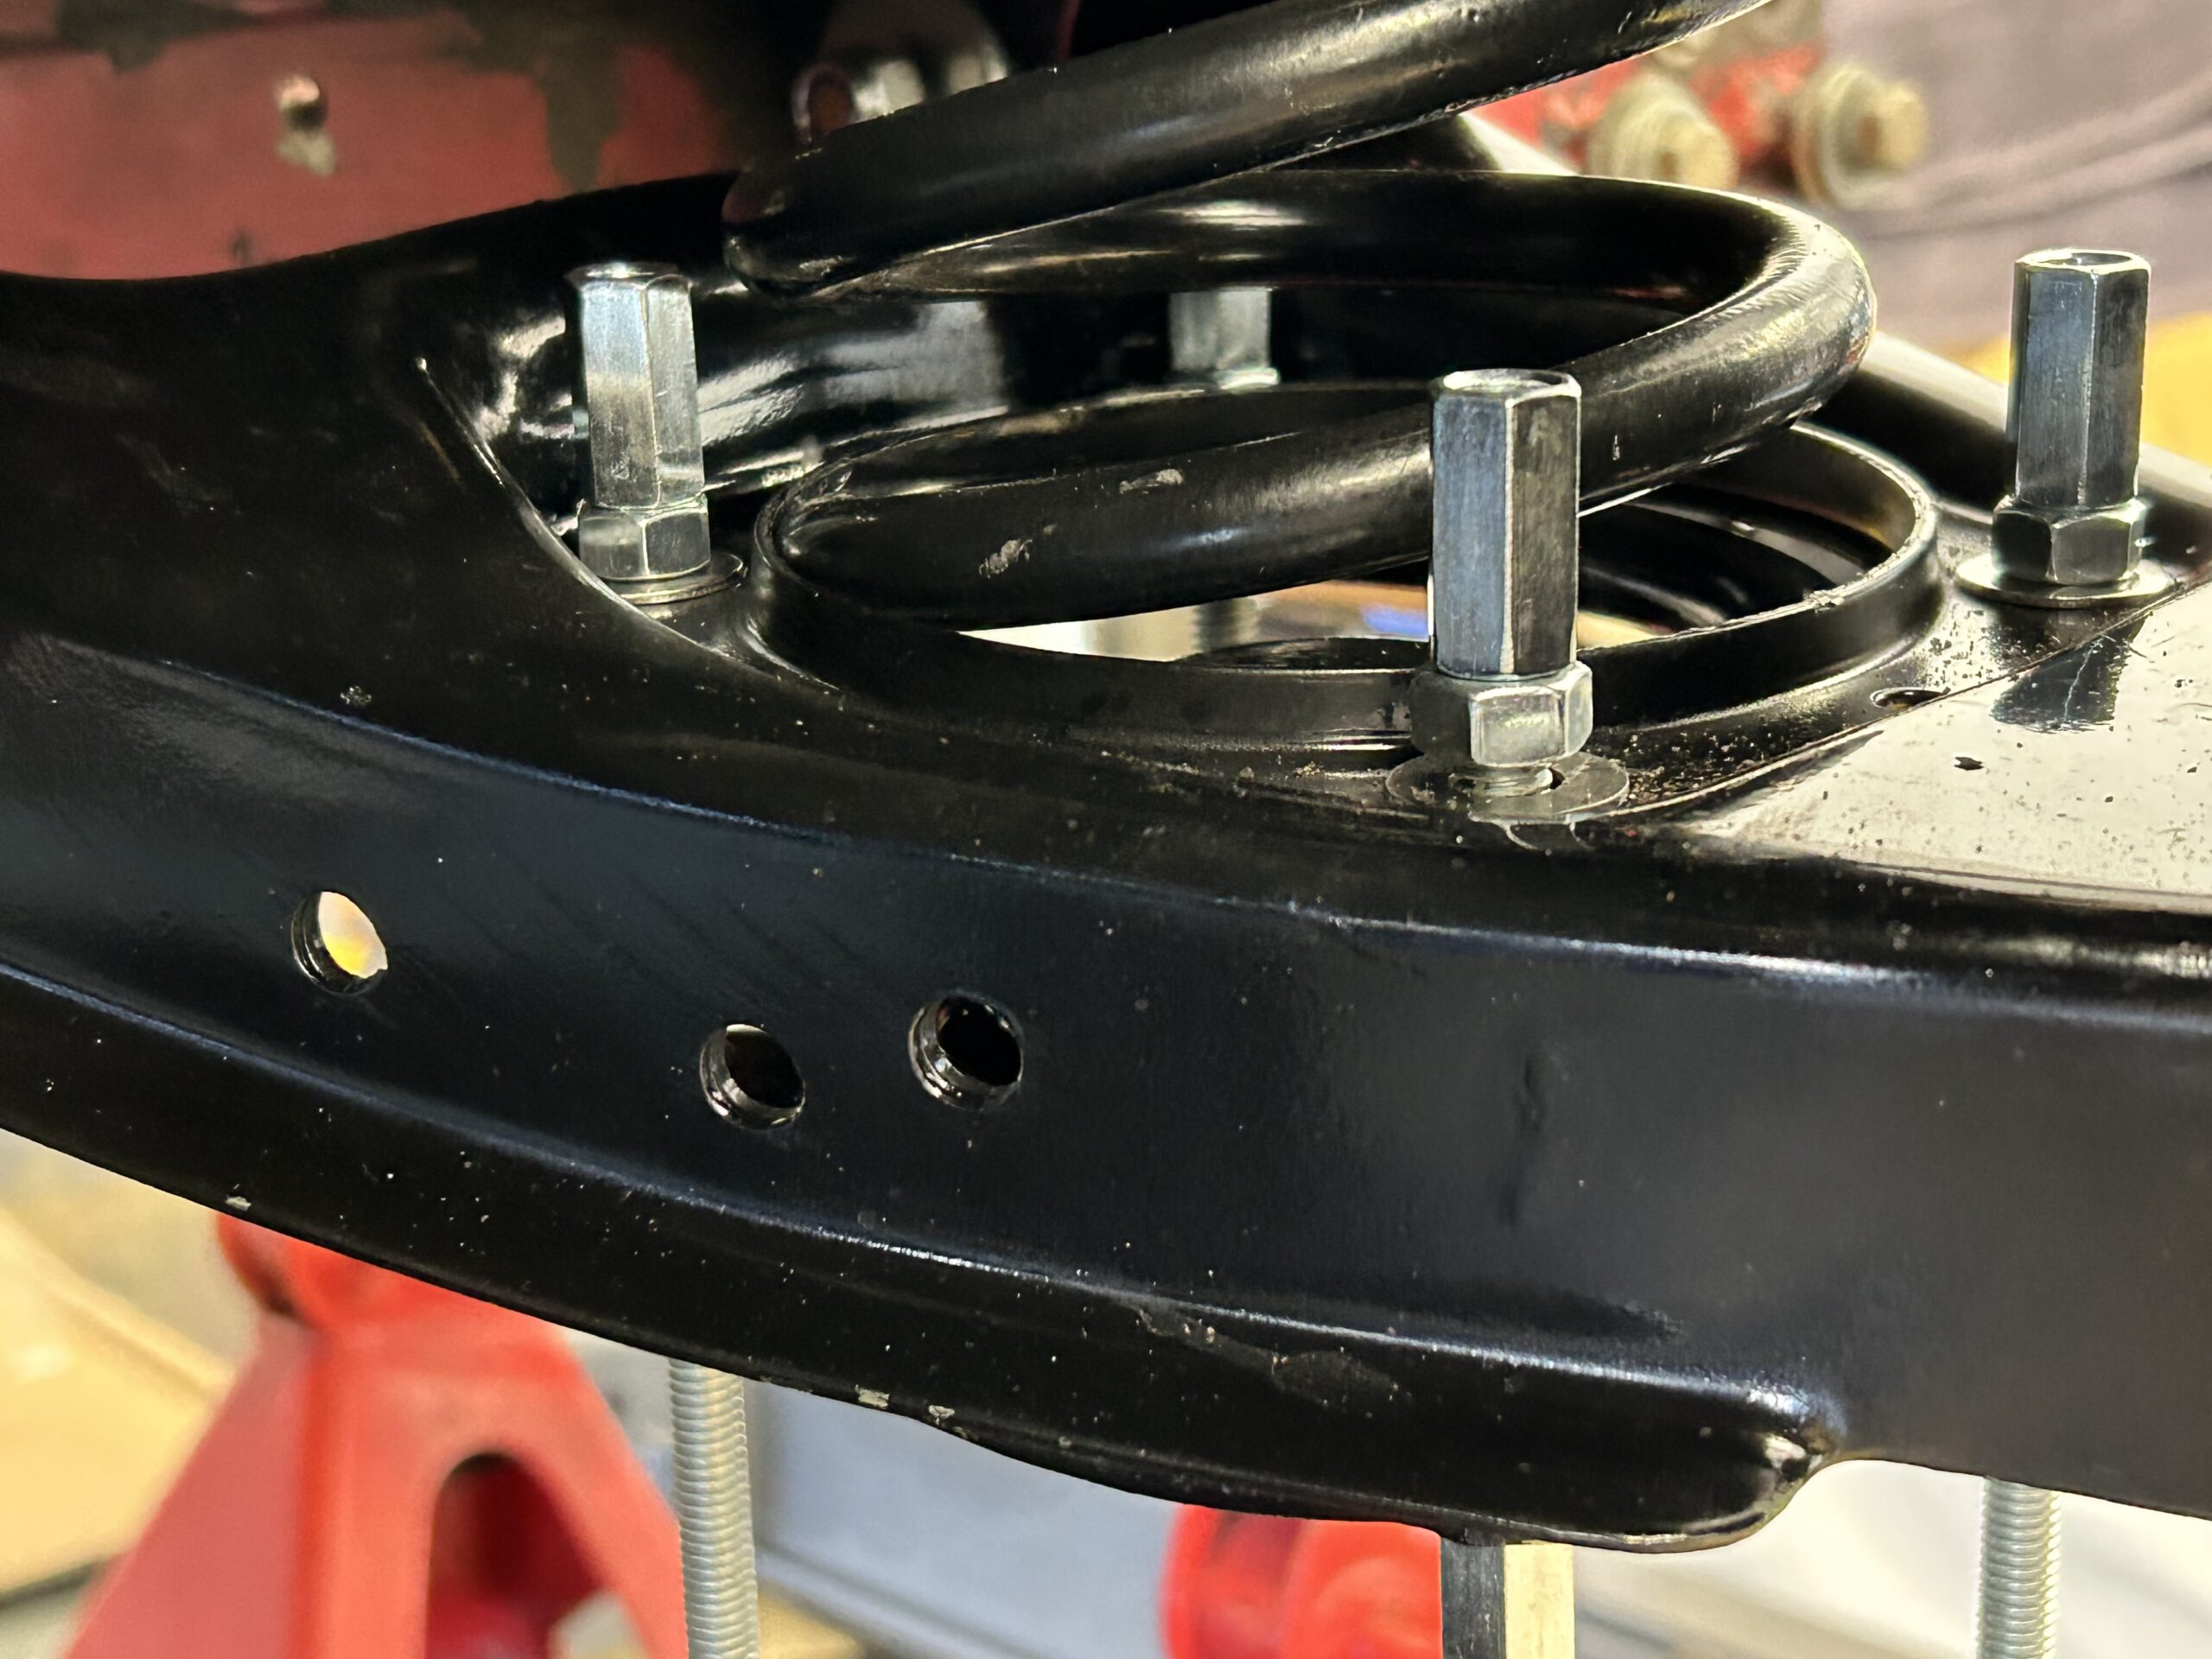
The nuts were gradually tightened until the spring was compressed and the spring seat was tight against the “A” arm. Then, one at a time, the long rods were loosened and replaced with 5/16″-24 x 3/4″ hex head bolts and nylock nuts.

Coil spring installed
1 1/8″ wooden spacer block to simulate normal hub height
We will still need to bend back tab washers, lubricate the grease zerks and tighten the inner “A” arm fulcrum pins, tighten the hub nut and insert its split pin and install the grease caps. But, these are all little steps to be accomplished later. The big stuff is done.
Bugeye Restoration Video Episode Thirty-four addresses the joining of the hub assembly with the lower “A” arm (wishbone) and the the installation of the combined assembly to the car.
https://vimeo.com/807699575/1a3cf45eb0
The following steps are addressed in the video:
0:00 – Lower “A” arm installed to king pin and swivel axle
1:18 – Outer fulcrum pin, cotter pin and grease fitting installed
2:29 – Excessive play discovered in old “A” arms
4:00 – Lower coil spring pans installed in “A”arms
4:30 – Hub assembly and “A” arms installed in car
5:00 – Poly bushes installed in inner “A” arm and then to car
5:53 – Damper pinch bolt and upper fulcrum pin
6:52 – Torqueing the caliper, steering arms, and damper bolts
7:24 – Coil spring installation with “all-thread” rods
Just what I needed. I’m doing a disc brake job on my 1959 AH Sprite. I noticed you have dust cover on your disc brakes. As you know disc brakes were avaiable only with an after market product and they did not have dust covers. (back plate)then. Did you change out the axle hub to fix those dust covers with later year AH Sprite.I believe that was on the MK II Spritt that disc brakes became standard. Thanks, Joseph Viola
Hello Joseph,
Our front disc set up is taken from an early MG midget. Came with the dust shields.
Lin
Thanks. Like yourself I’m trying to keep my cost down which is becoming harder to do these days unless you fall into a “lucky find. ” New swivel Axle Assembliles from Moss are $340 each. (l/r) I’ll run them without just like the old days.