
Our Austin Healeys did not come equipped with oil catch cans but they did have a method of addressing combustion “blow-by.” The image below, with the components outlined in red, depicts the components of the system.
A contaminated air/oil/fuel mix leaks down from an engine’s combustion chamber, around the piston and into the crankcase, where a build up of pressure occurs. This gaseous mix is vacated from the crankcase through a fitting on the middle tappet cover to a ninety degree rubber hose and metal tube, another short rubber hose and into the “T” pipe fitting on the top of the rocker cover. The other side of the “T” pipe fitting on the rocker cover uses a rubber hose to direct the gaseous mix to the rear carburetor where it can then be recirculated through the rear carb into the intake manifold.
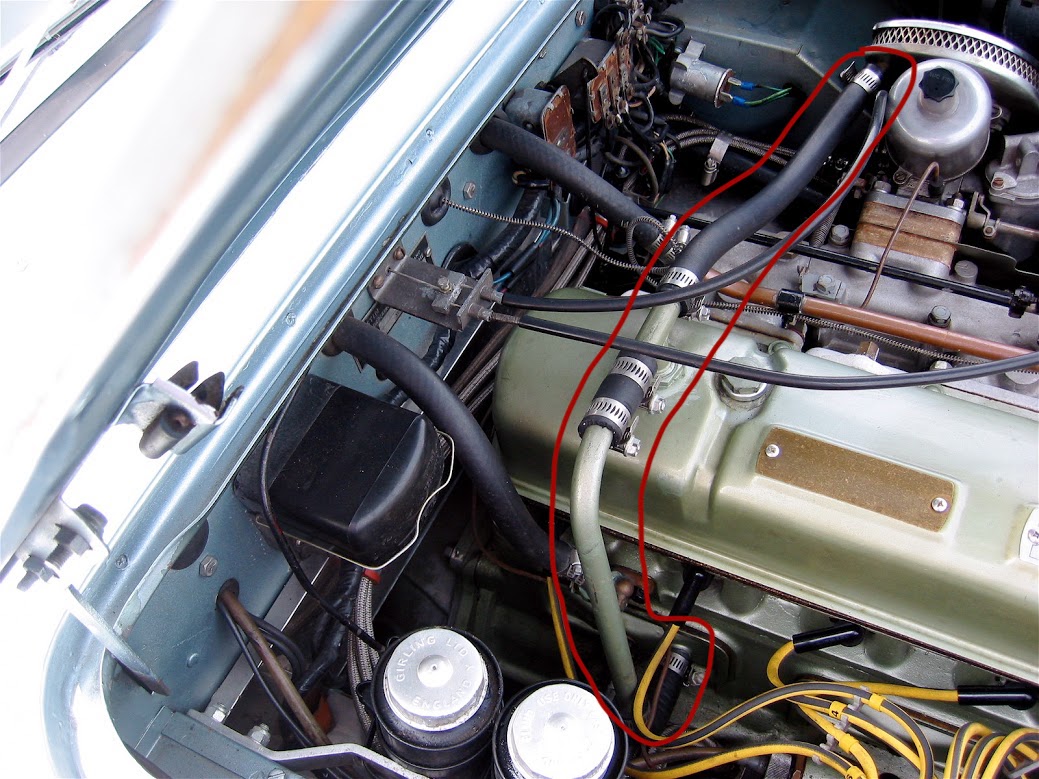
Original Crankcase Breather Design
The consequence of the “blow-by” mix being reintroduced to the combustion chamber and spraying the mix onto the top of the pistons, spark plugs and the intake valves could be carbon build up leading to pre-ignition. In other words, while we go to great lengths to use high quality filtered fuel and oil, the Healey’s system introduces dirty waste products back into the engine. That just doesn’t seem like a desirable situation!
Properly designed oil catch cans address the problems cited above. The oil catch can has an input hose (or more) to collect the contaminated gas and through a system of baffles/filters separates the liquid from the gas. The clean vapor exits the catch can through an air filter and into the atmosphere. Again, if properly designed, this air is relatively clean. The dirty liquid mix works its way to the bottom of the catch can where it is collected and periodically drained off.
So, if this is such a good thing to do for our engines why don’t all cars have catch cans? You usually only see them installed as aftermarket items on performance vehicles or collector cars. The answer is probably as simple as extra cost to the manufacturer and the creation of one more maintenance factor (draining the collected oil/fuel mix) for the vehicle owner.
After only forty-seven years of ownership I decided to “fix” this issue! There are many catch cans on the market, some demonstrate pretty sophisticated engineering while others don’t do much more than “catch the oil” as the name suggests. One more example of you get what you pay for.
I decided to go with a universal oil catch can designed and manufactured by Mishimoto, Model # MMBCC-MSTWO. I ordered it directly from Mishimoto. I like this unit because of its diminutive size, easy mounting, and great filtering design. Other catch cans will work equally well, I am sure.
Mishimoto Universal Catch Can
Mishimoto’s black anodized aluminum mid-size can has two baffles to minimize oil slosh and a 50 micron bronze filter to release clean air to the environment. The can is 3.8″ tall and has a diameter of 2.5″. The inlet, outlet and drain plug holes are all 3/8″ NPT. It holds two ounces of liquid and is easy to take apart to clean with soap and water. It comes with two plastic 1/2″ barbed hose fittings. Mishimoto also markets a Petcock drain kit for this can that I also purchased.
Mishimoto Drain Petcock Kit
Once the catch can decision was made my attention turned to the plumbing required to make the system work in an already very tight Austin-Healey engine bay. I have never been fond of the appearance of the rubber hose exiting the rocker cover to the rear carb. Cape Sport International came up with the solution to my esthetic concerns – all a matter of personal taste.
Their product is part number AEC2041CSF2 and it offers an alternative to the original “T” pipe fitting. Their “U” pipe fitting allows one to easily route to outlets from the rocker cover to the right side of the engine bay. The piece is nicely made and is chromed. It looks like this once installed:
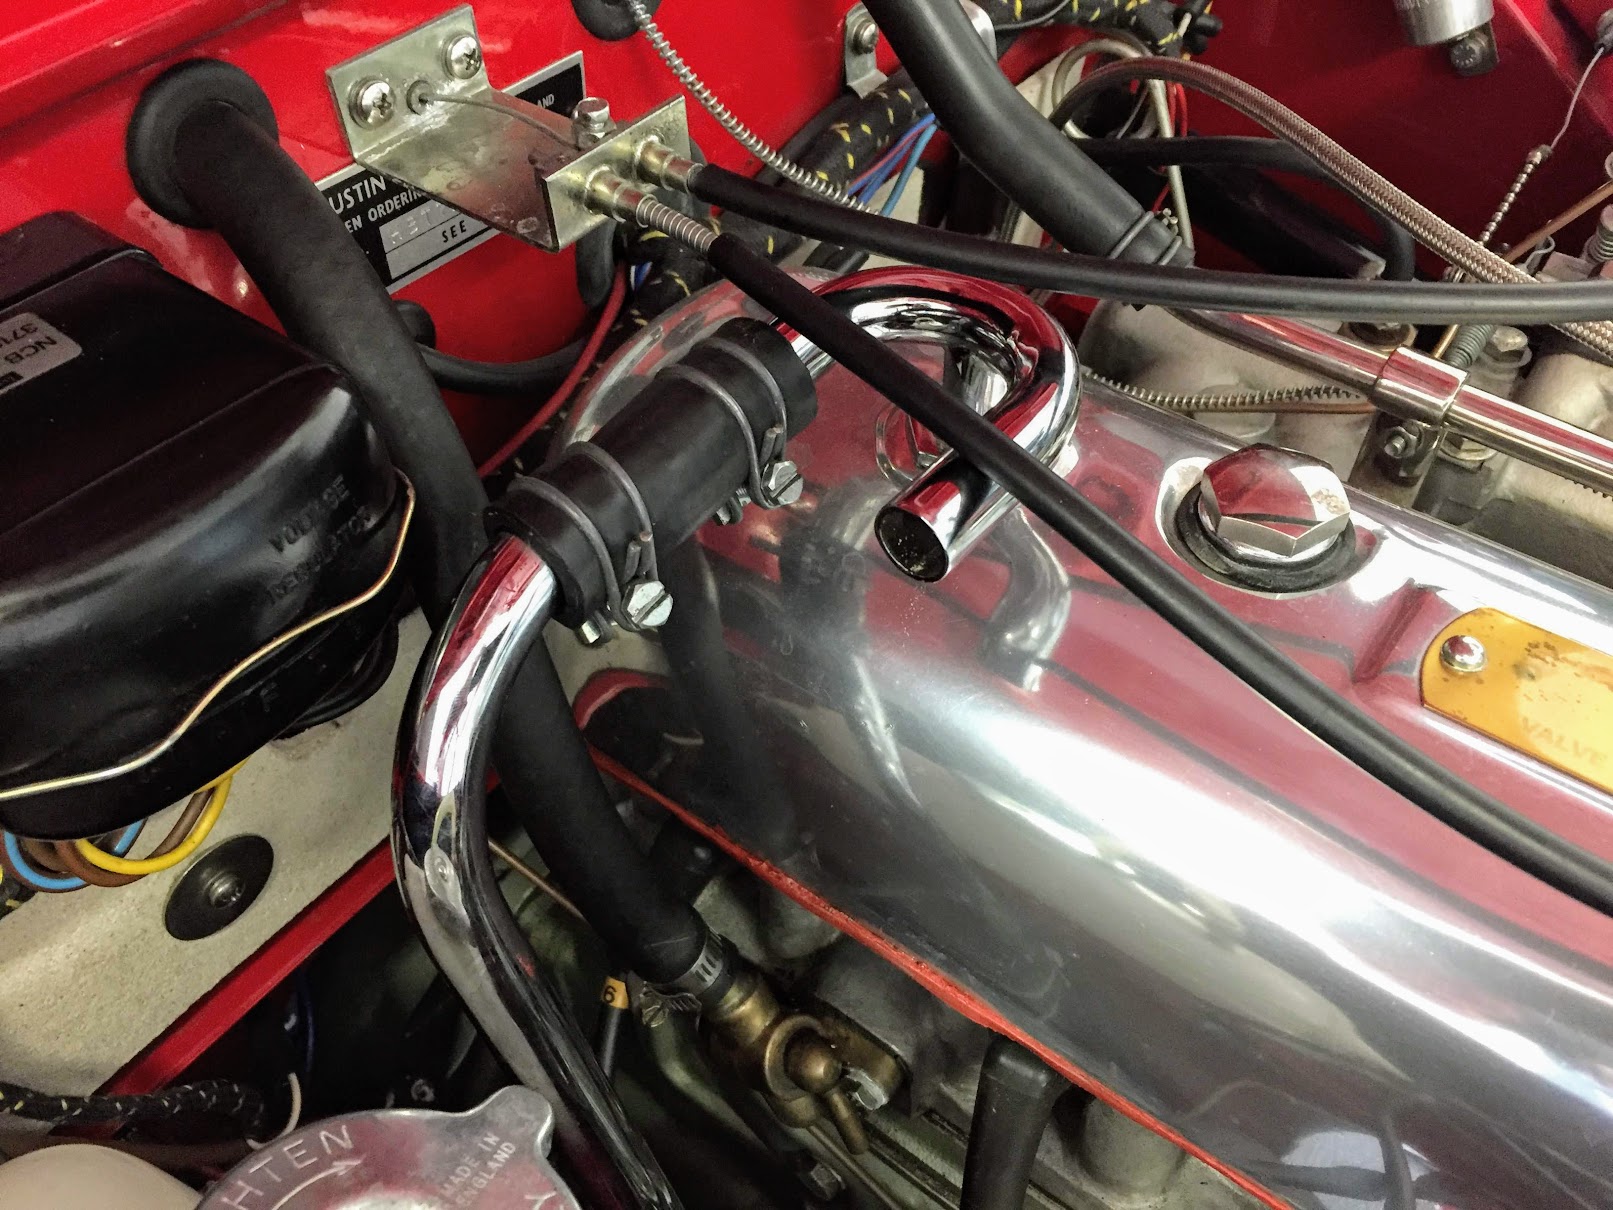
Capesport “U” Breather pipe
These are the components used in my catch can system for the Bloody Beast:
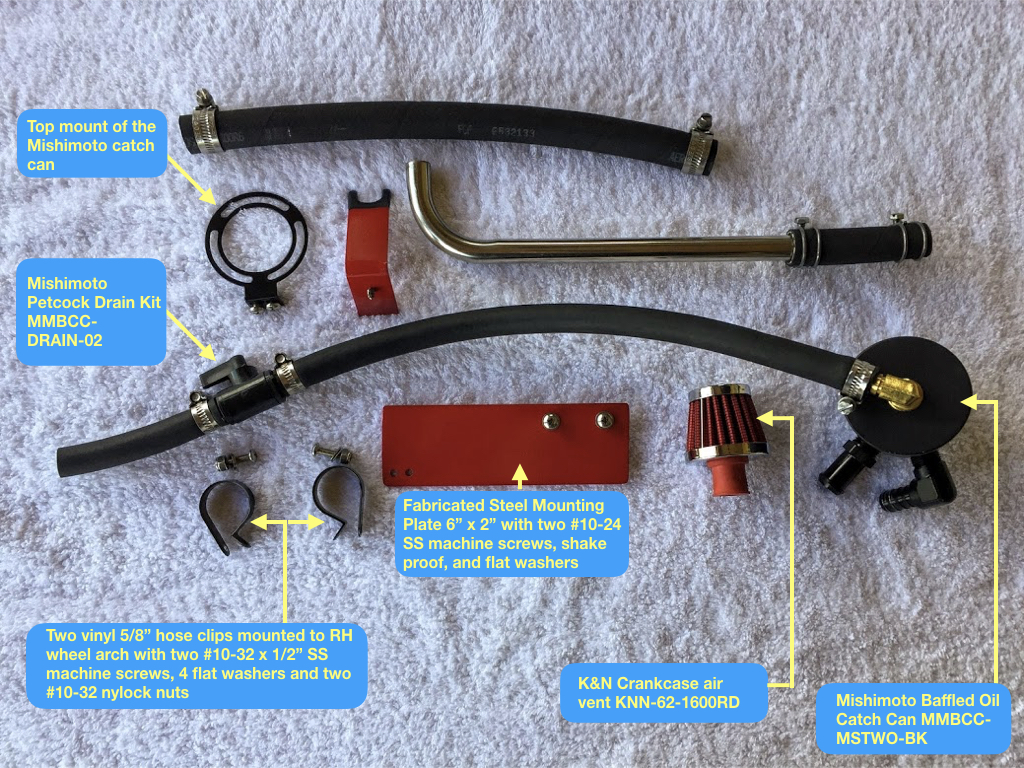
Bloody Beast Catch Can System, Part One
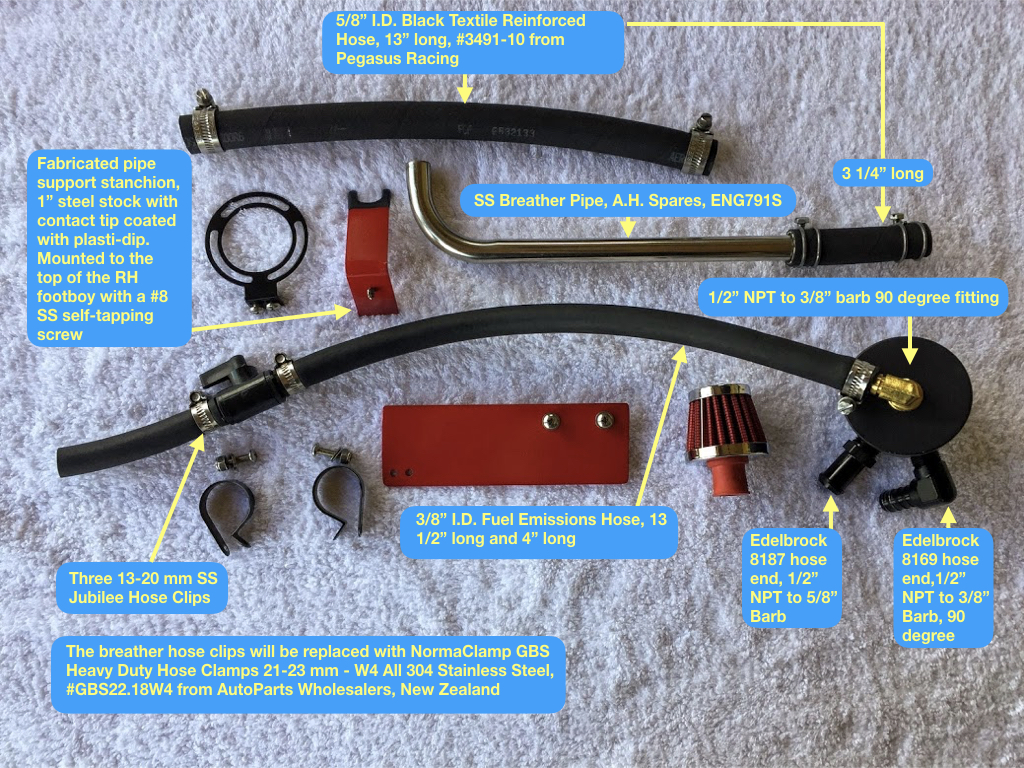
Bloody Beast Catch Can System, Part Two
I used the brass fitting on the bottom of the can because I had it. Apologize for the variance from the black aluminum.
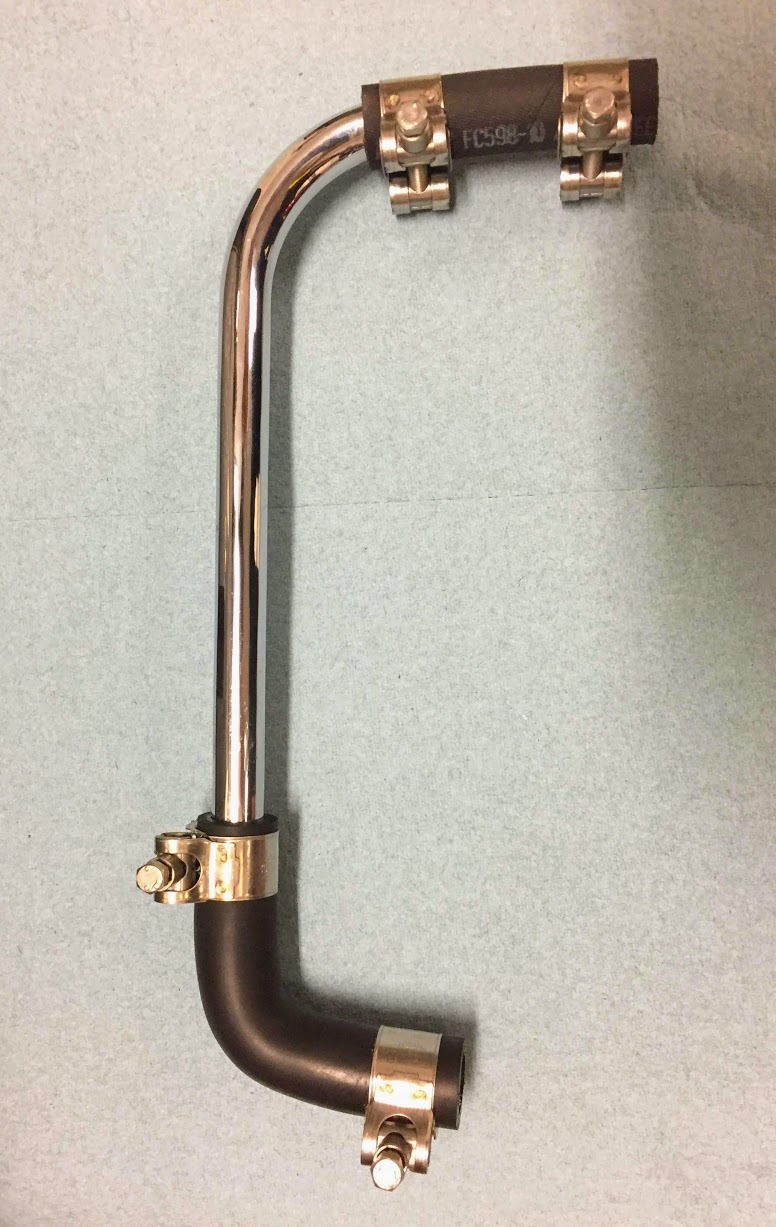
I will substitute a chrome crankcase breather pipe for the stainless steel pipe when I have the chance to get one chromed to match what I have in the car now.
So here is the final installation of the Mishimoto Catch Can and all of its related plumbing. Pay no attention to the hose clamps. They will all be changed when my new clamps arrive from Australia! See note and reference below. As you can see in the image below the catch can is tucked behind the shroud support and under the RH fender. I simply turned a second crankcase breather pipe horizontally to route the emissions rubber hose to the catch can to avoid a rubber hose lying haphazardly across the right hand side of the engine bay.
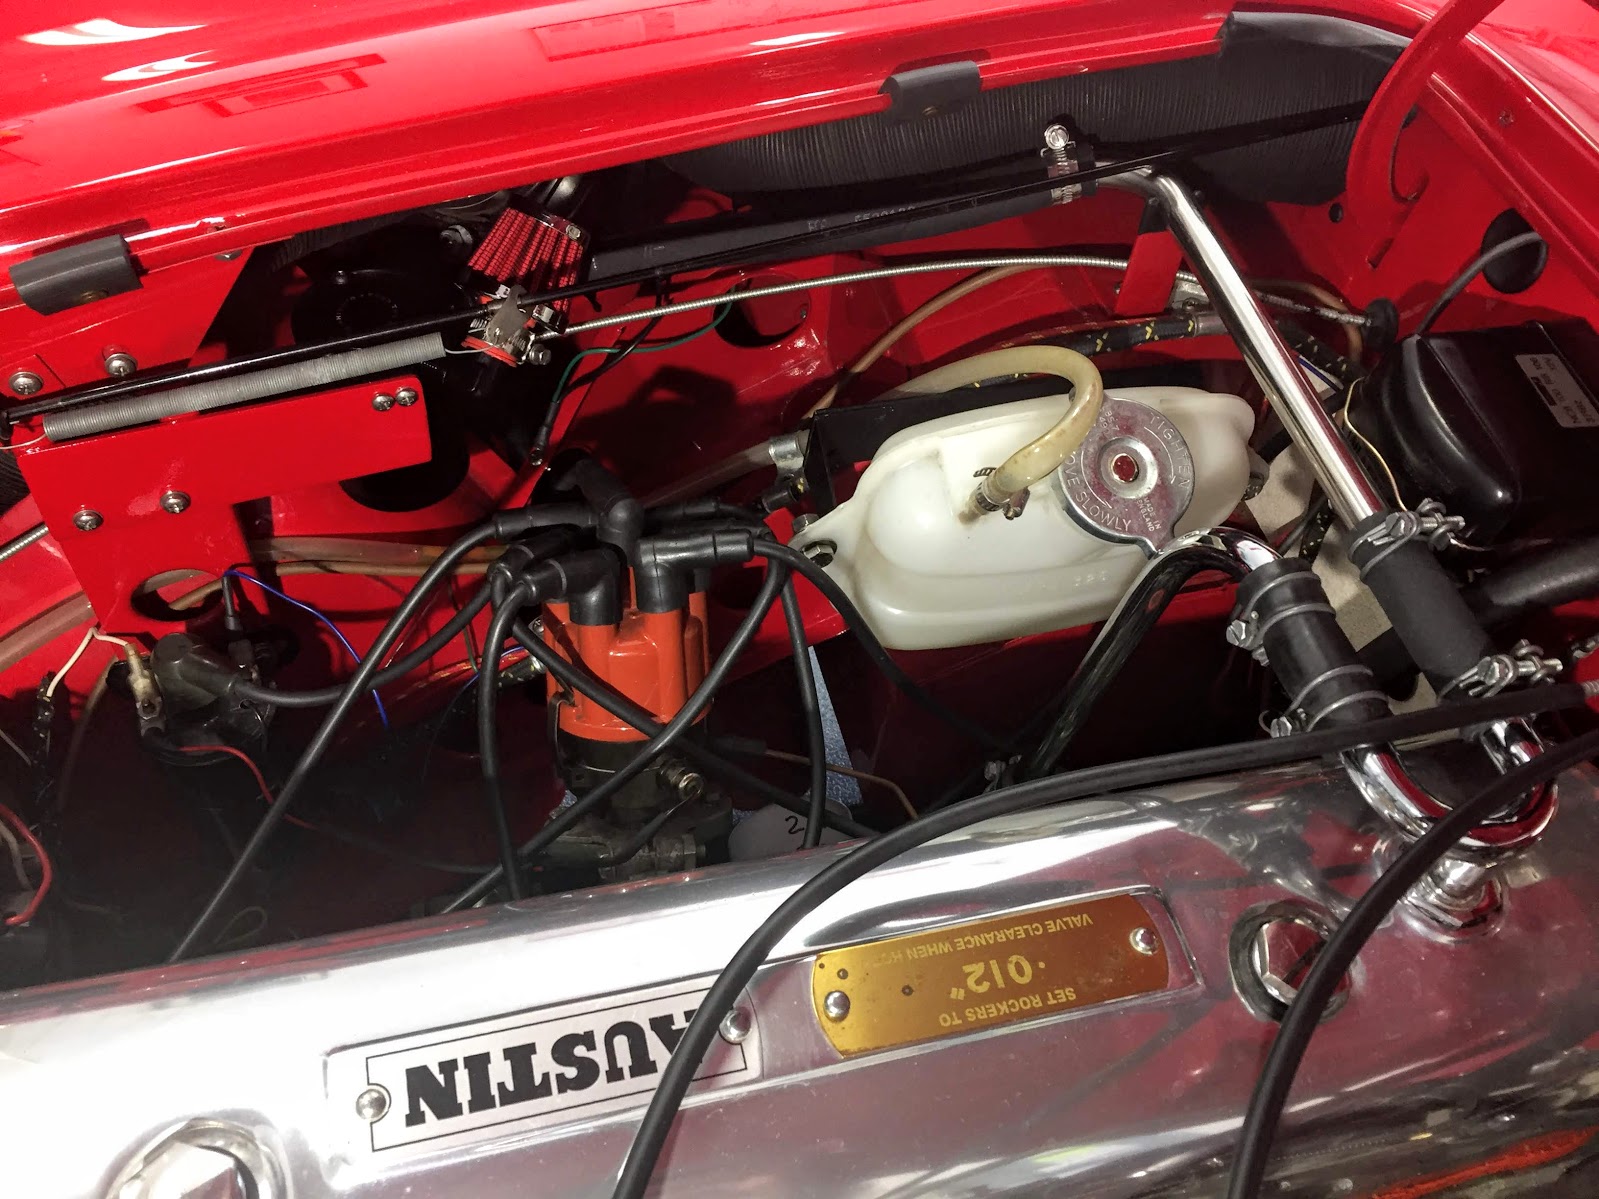
Catch Can Mounting Bracket and Pipe Stanchion
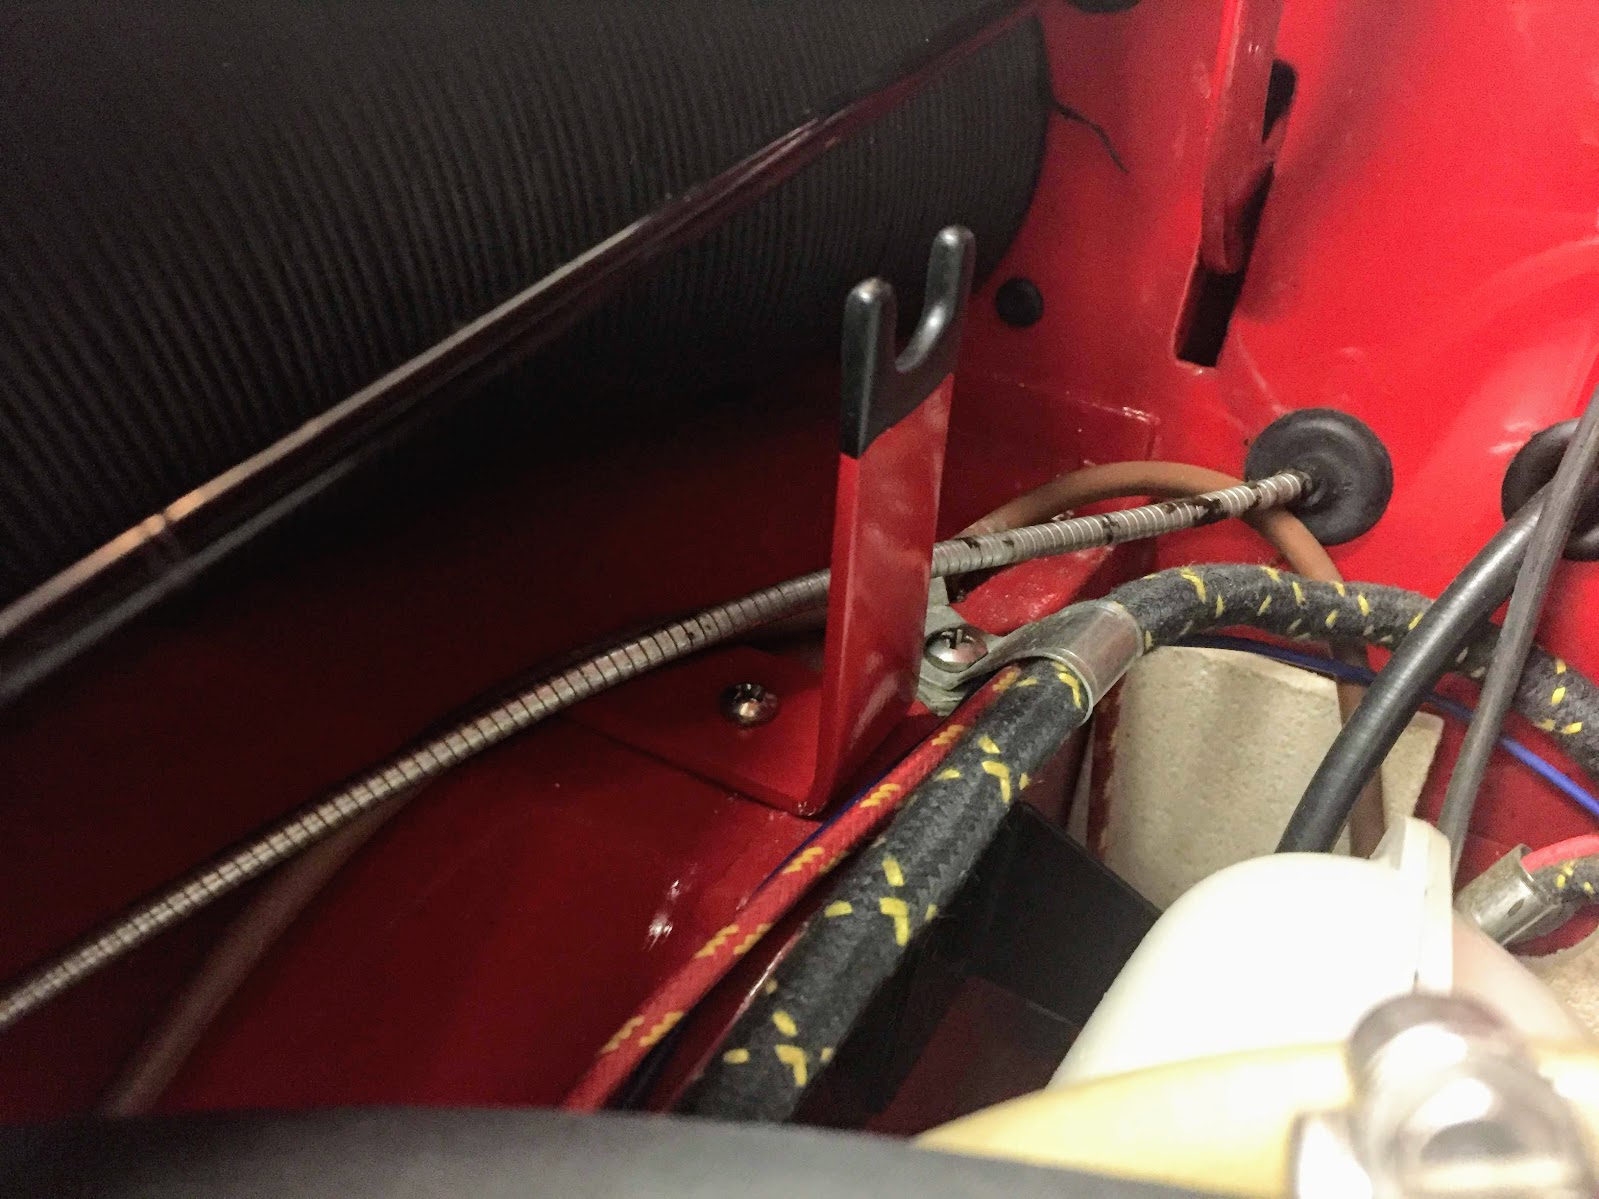
Pipe Stanchion

Hose and Pipe Routing to Catch Can
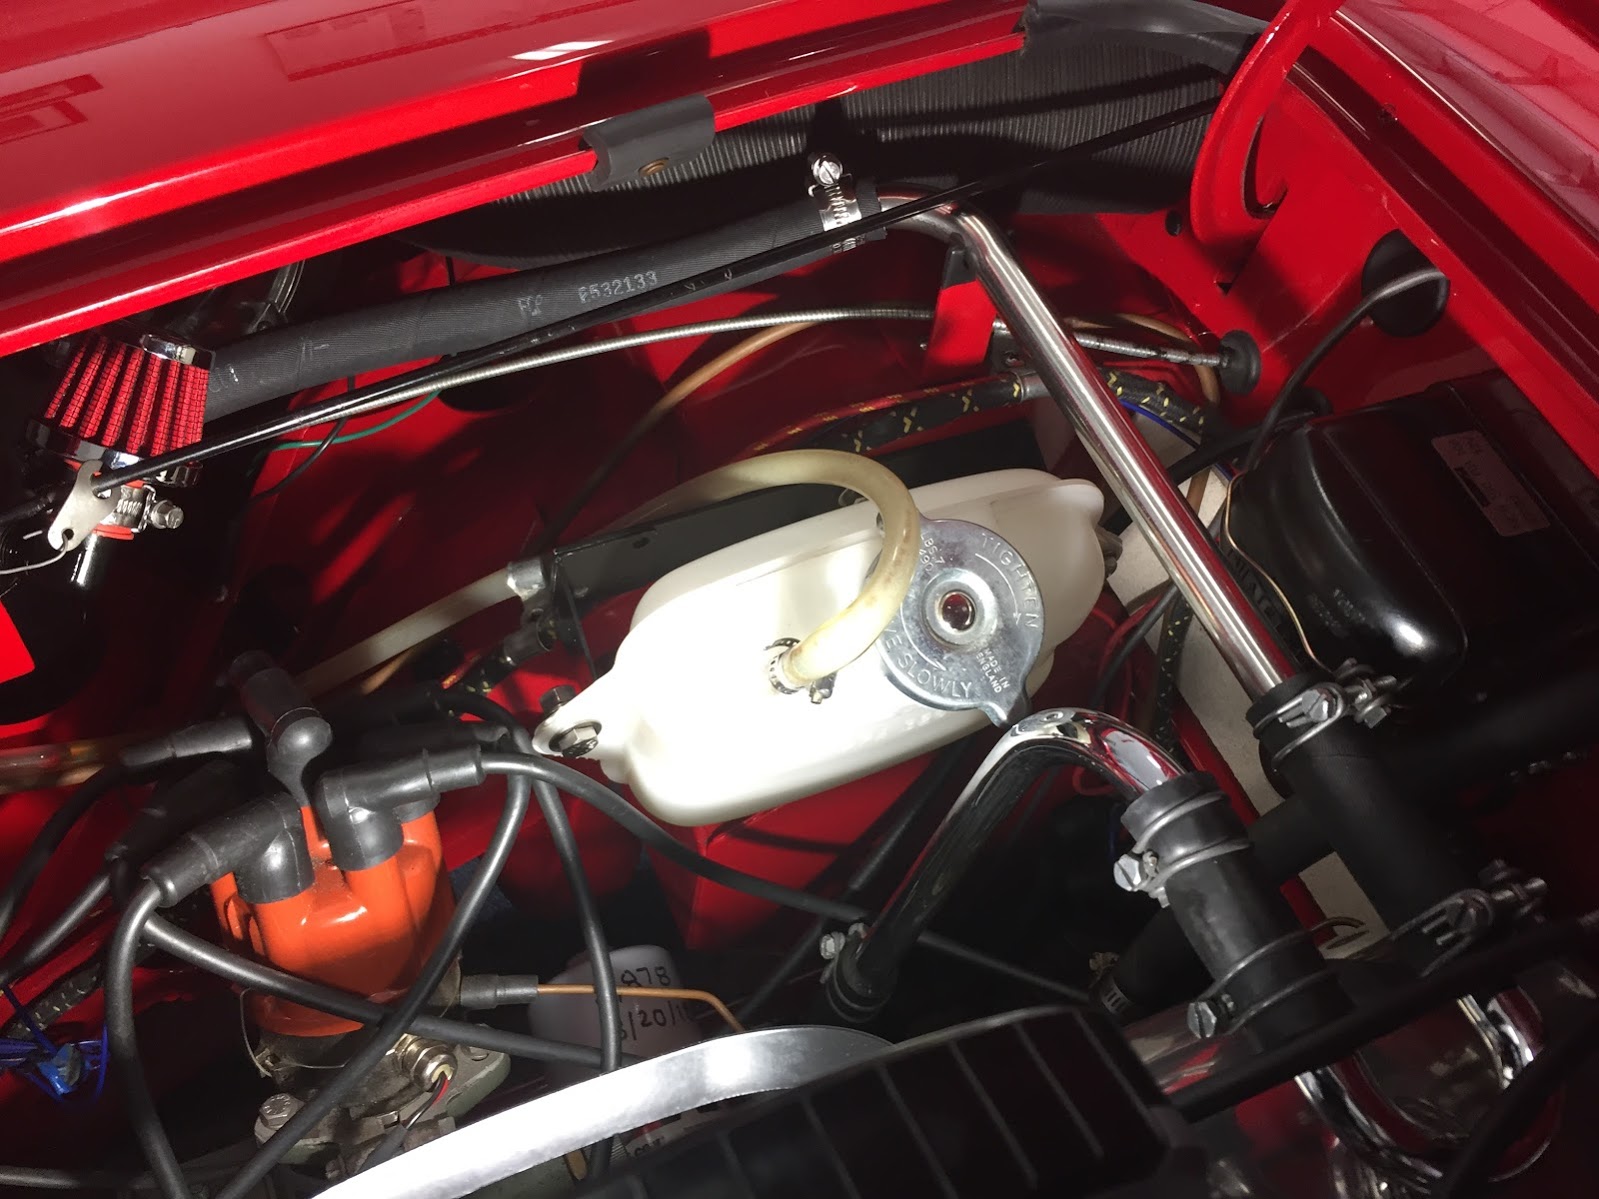
Hose and Pipe Routing to Catch Can 2

Drain Hose and Valve
The Norma hose clamps look great. I saw these on Doug Escriva’s Healey 100-6 race car and had to duplicate the look – no way to duplicate the car! These clamps are apparently made in Germany but the only place I could find to source them was in Australia- go figure! http://www.norma.net.au/products/hose-clamps/norma/normaclamp-gbs-heavy-duty-hose-clamps/normaclamp-gbs-heavy-duty-hose-clamps
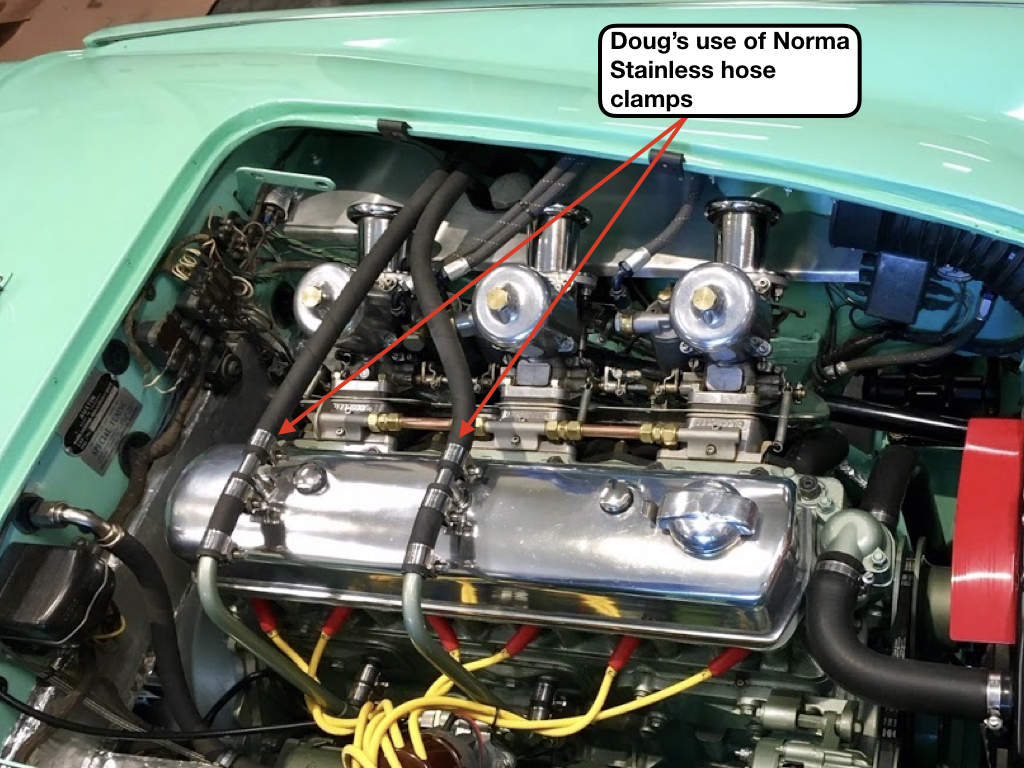
Doug Escriva Norma Hose Clamps
I received the Norma GBS Heavy Duty Bolt Clamps 21-23 mm W4 – All 304 Stainless Steel hose clamps, part #GBS22/18W4, from Auto Parts Wholesalers in Australia and they met expectations! In addition to being very functional and easy to use, they also look great. So here they are on the Bloody Beast:
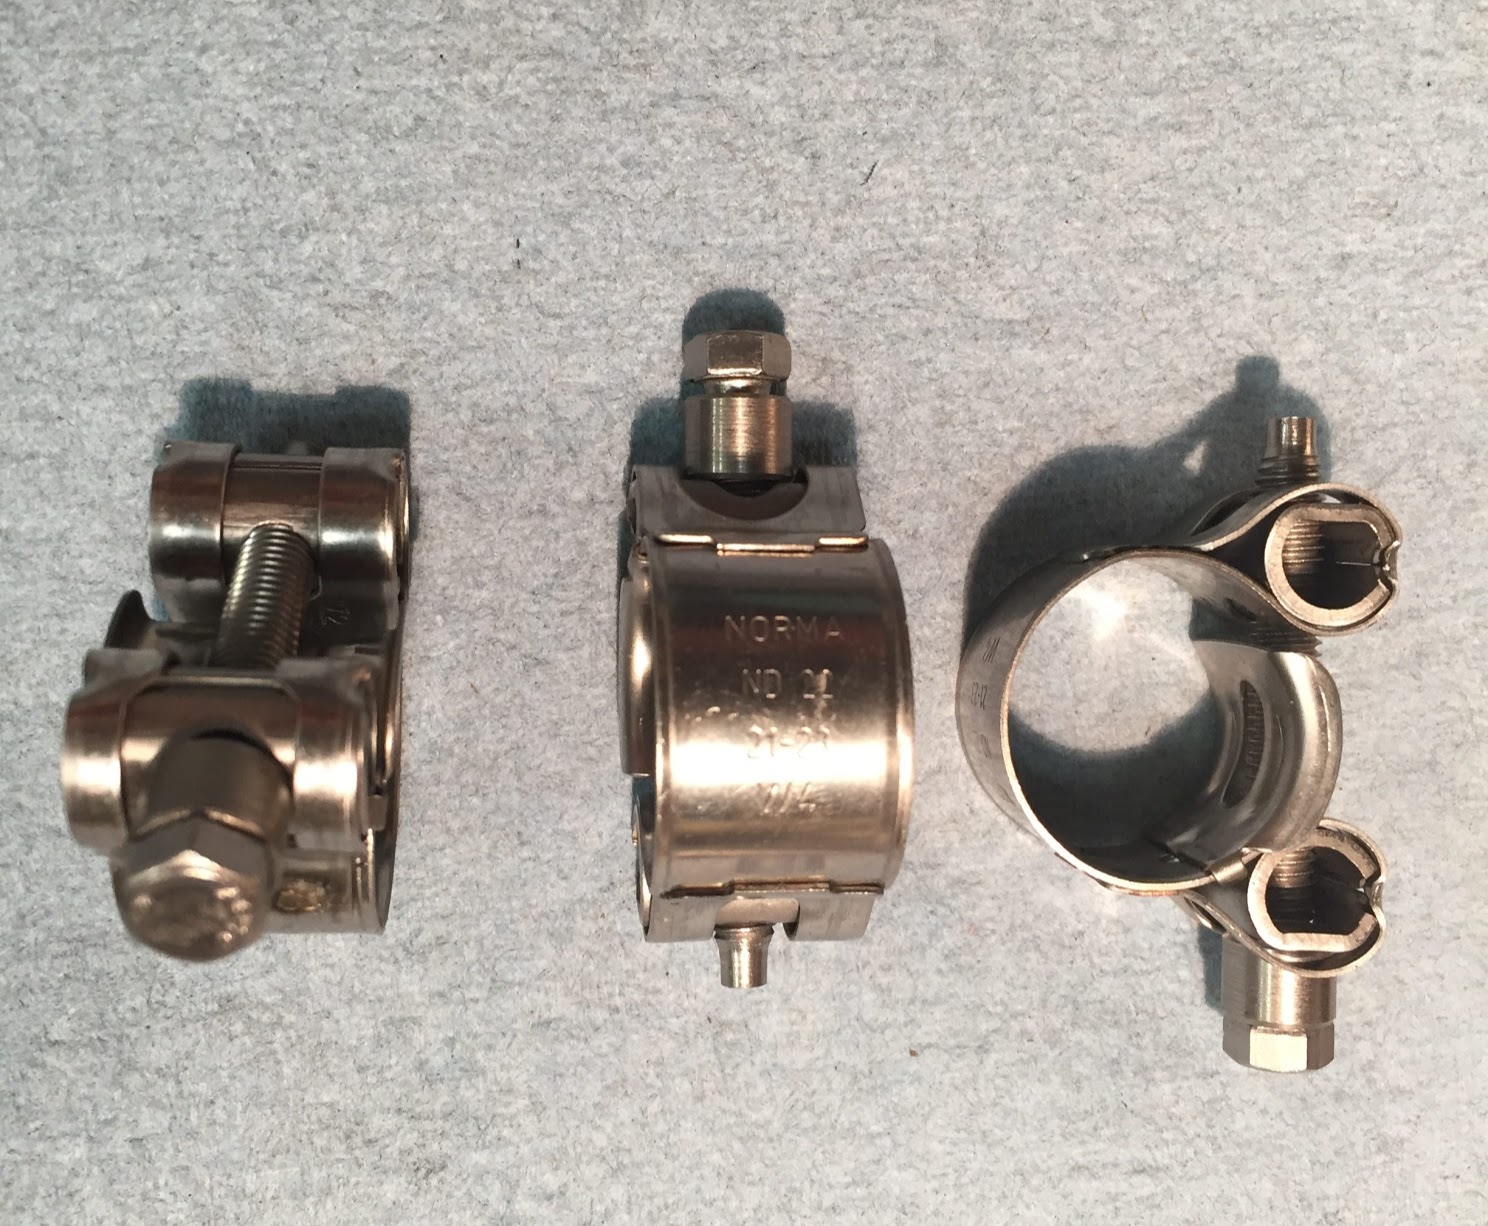
Norma Clamps 21-23 mm
Crankcase breather pipe hose and norma clamps
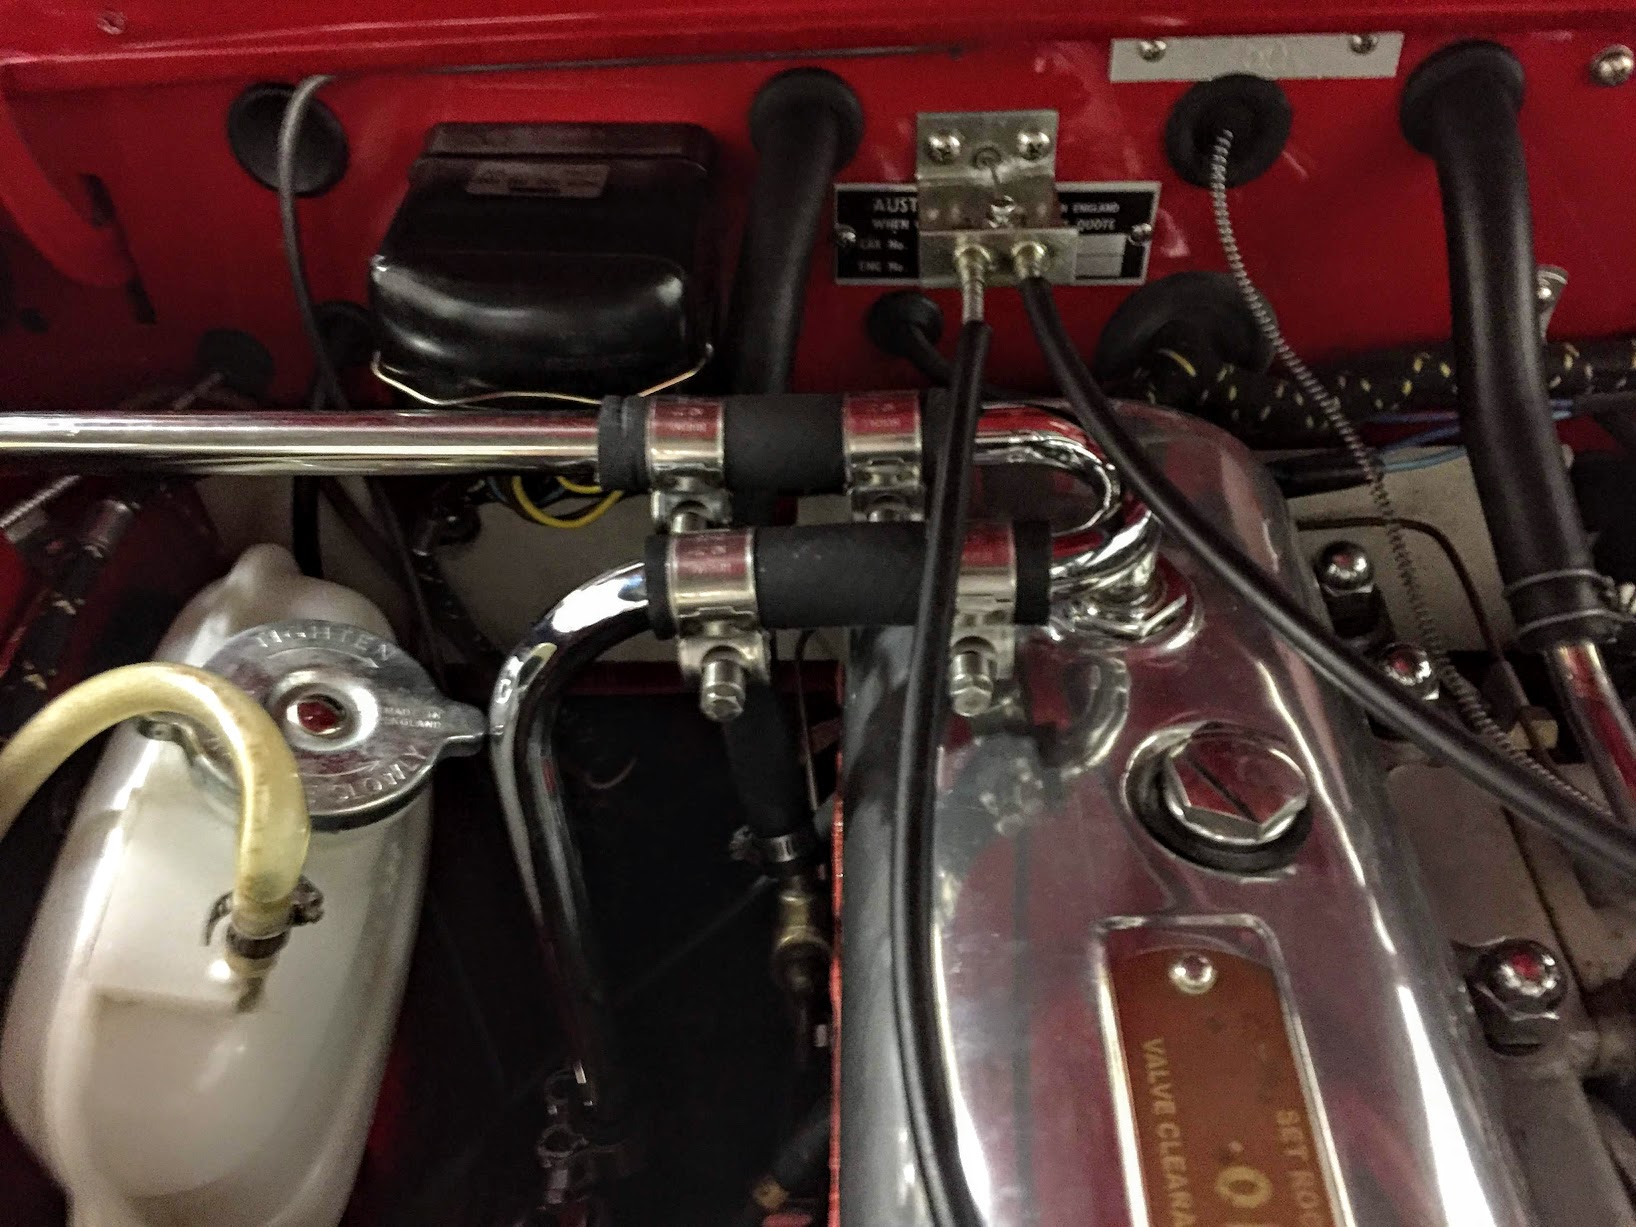
Norma Stainless Clamps Installed