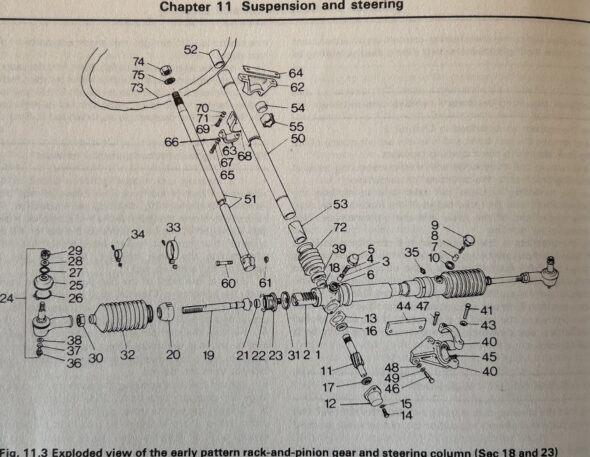
The steering installation story in the Bugeye has been characterized by fits and starts. This often happens in restorations because systems frequently interfere with the installation of other systems. The new steering rack was first discussed in Bugeye Restoration Video Episode Thirty-five: https://vimeo.com/810655660/46123c8339?share=copy The steering rack is a new one purchased from AH Spares. Information related to the steering rack begins at the 5:00 minute point of the video.
Bugeye Restoration Video Episode Eighty-seven shows the installation of the steering components of the car.
We almost missed the shim that fits between the chassis crossmember and the passenger side of the steering rack bracket, part number 44 in the diagram above. This shim aligns the steering column through the dash at the correct angle. We sourced a new one from AH Spares.
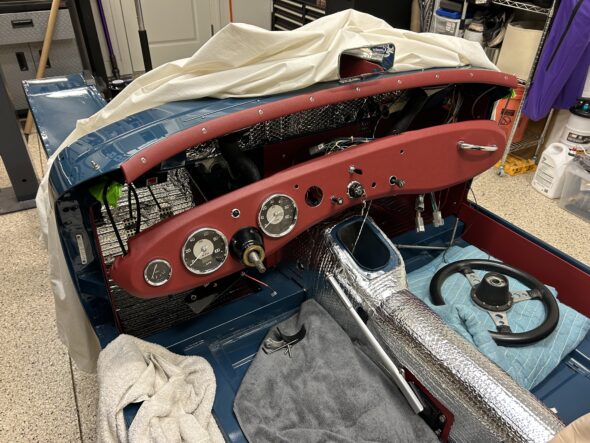
The trickiest part of installing the steering system was the coordination required with the installation of the dash. We installed the column through the firewall and let it hang loose. We then positioned it through the hole in the dash and gradually moved both the column and dash upward and into position on the car. Only then did we begin to connect the various components of the steering system. The horn cone was installed with its three mounting screws, but with plenty of room to move around as the column shifted position. All parts were loosely fitted to ensure that we didn’t have any binding of the parts as they were assembled.
In our final installation we had already centered the steering rack and had also threaded the new tie rod ends to the proper location to hopefully result in a rough alignment of the wheels permitting us to roll the car around in the garage. We will find out later if we were successful! Of course, we will align the steering professionally when all is done.
The following points are covered in Bugeye Restoration Video Episode Eighty-seven:
https://vimeo.com/1010637487/a43c135b98?share=copy
0:00 – Steering column bracket, grommet, and bushings
1:56 – Steering column firewall corrugated grommet
2:18 – Stering rack shims
2:49 – Steering column to steering rack locking bolt
3:00 – Steering rack to chassis brackets installed
3:22 – Steering rack to chassis shim
4:12 – Steering rack bracket bolt torque values
4:22 – Coordinating the dash and steering column installation
4:40 – Final steering components installation sequence
6:19 – Horn cone positioned and secured
7:22 – Testing the steering column connection to the rack
8:20 – Connecting the tie rod ends
9:00 – Steering wheel installed
9:30 – Horn test
nn


