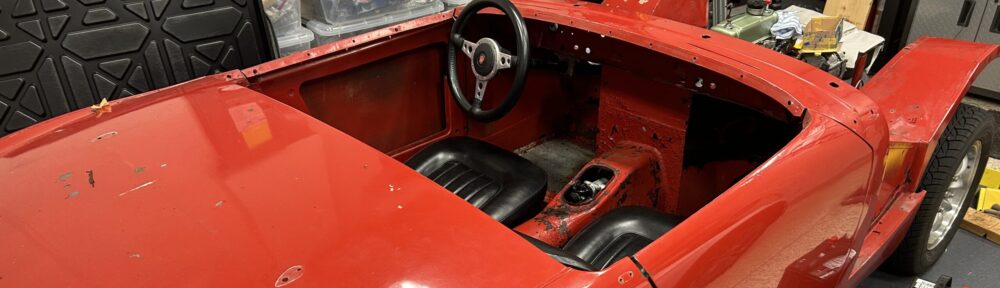
We were plugging away on the new electrical system for the Bugeye (pun intended!) when by chance we happened upon a Facebook listing for the sale of a Bugeye body shell and bonnet that appeared to be in excellent condition. The car was purported to be a rust-free Arizona car and the bodywork, priming and etc. had been completed. Everything was ready for paint. No mechanical restoration had been undertaken – the opposite of our situation. We have most of the mechanical and electrical work done but the bodywork, paint and interior are still ahead of us. Unfortunately, we are in Florida and the car is in Michigan.

Michigan Bonnet
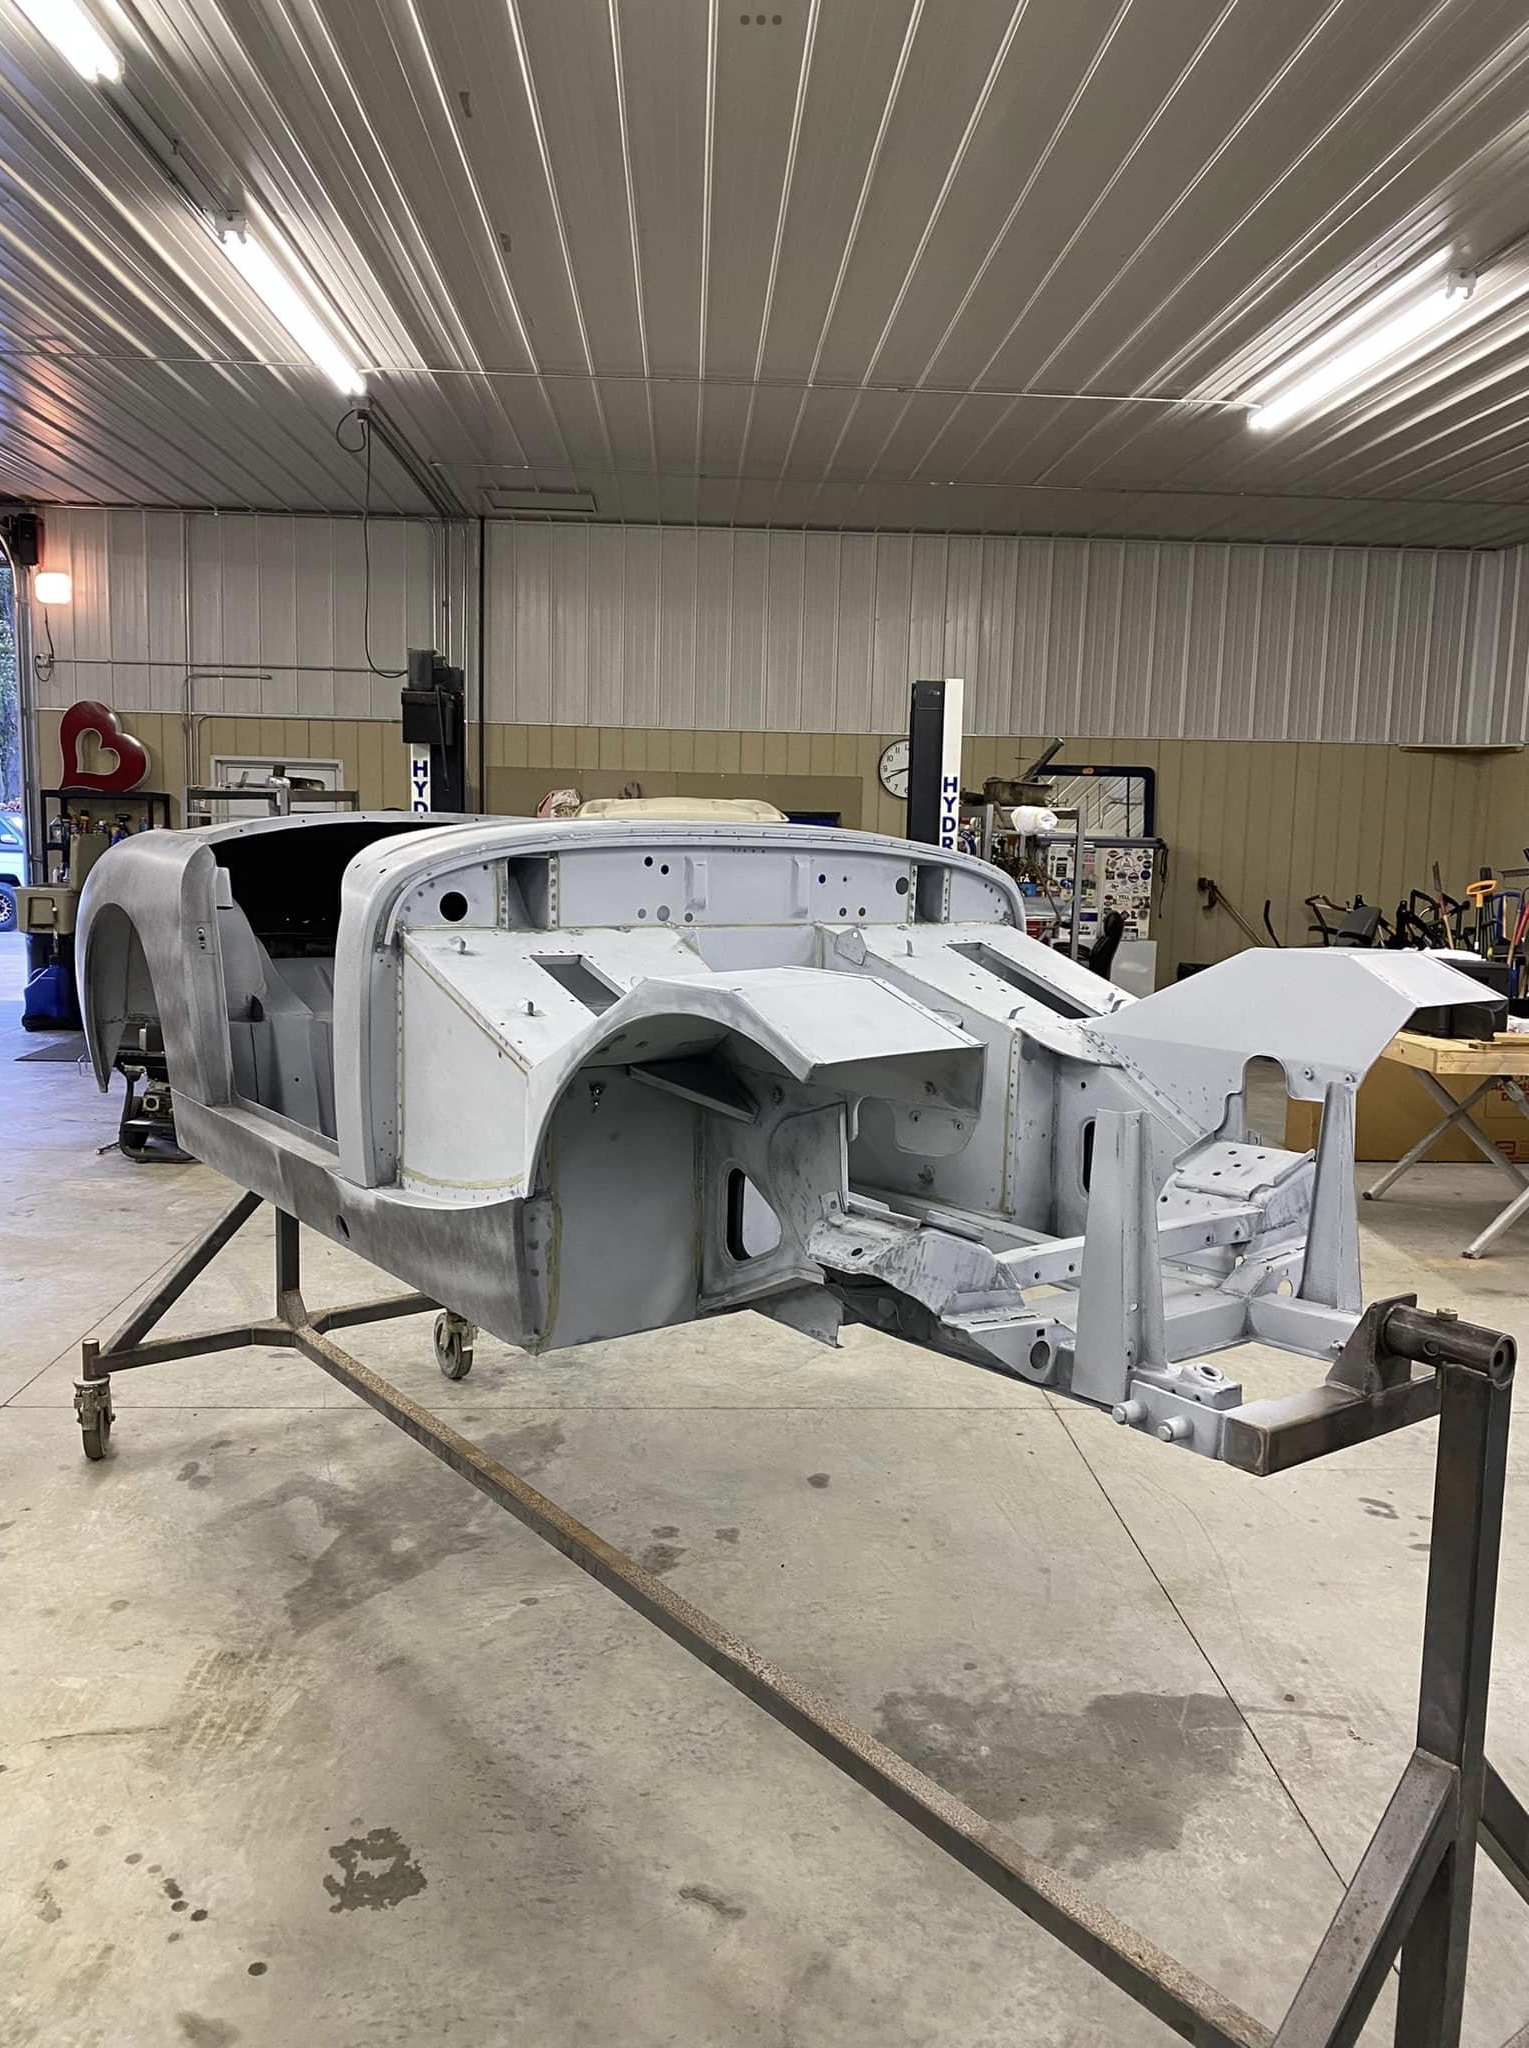
Michigan Chassis
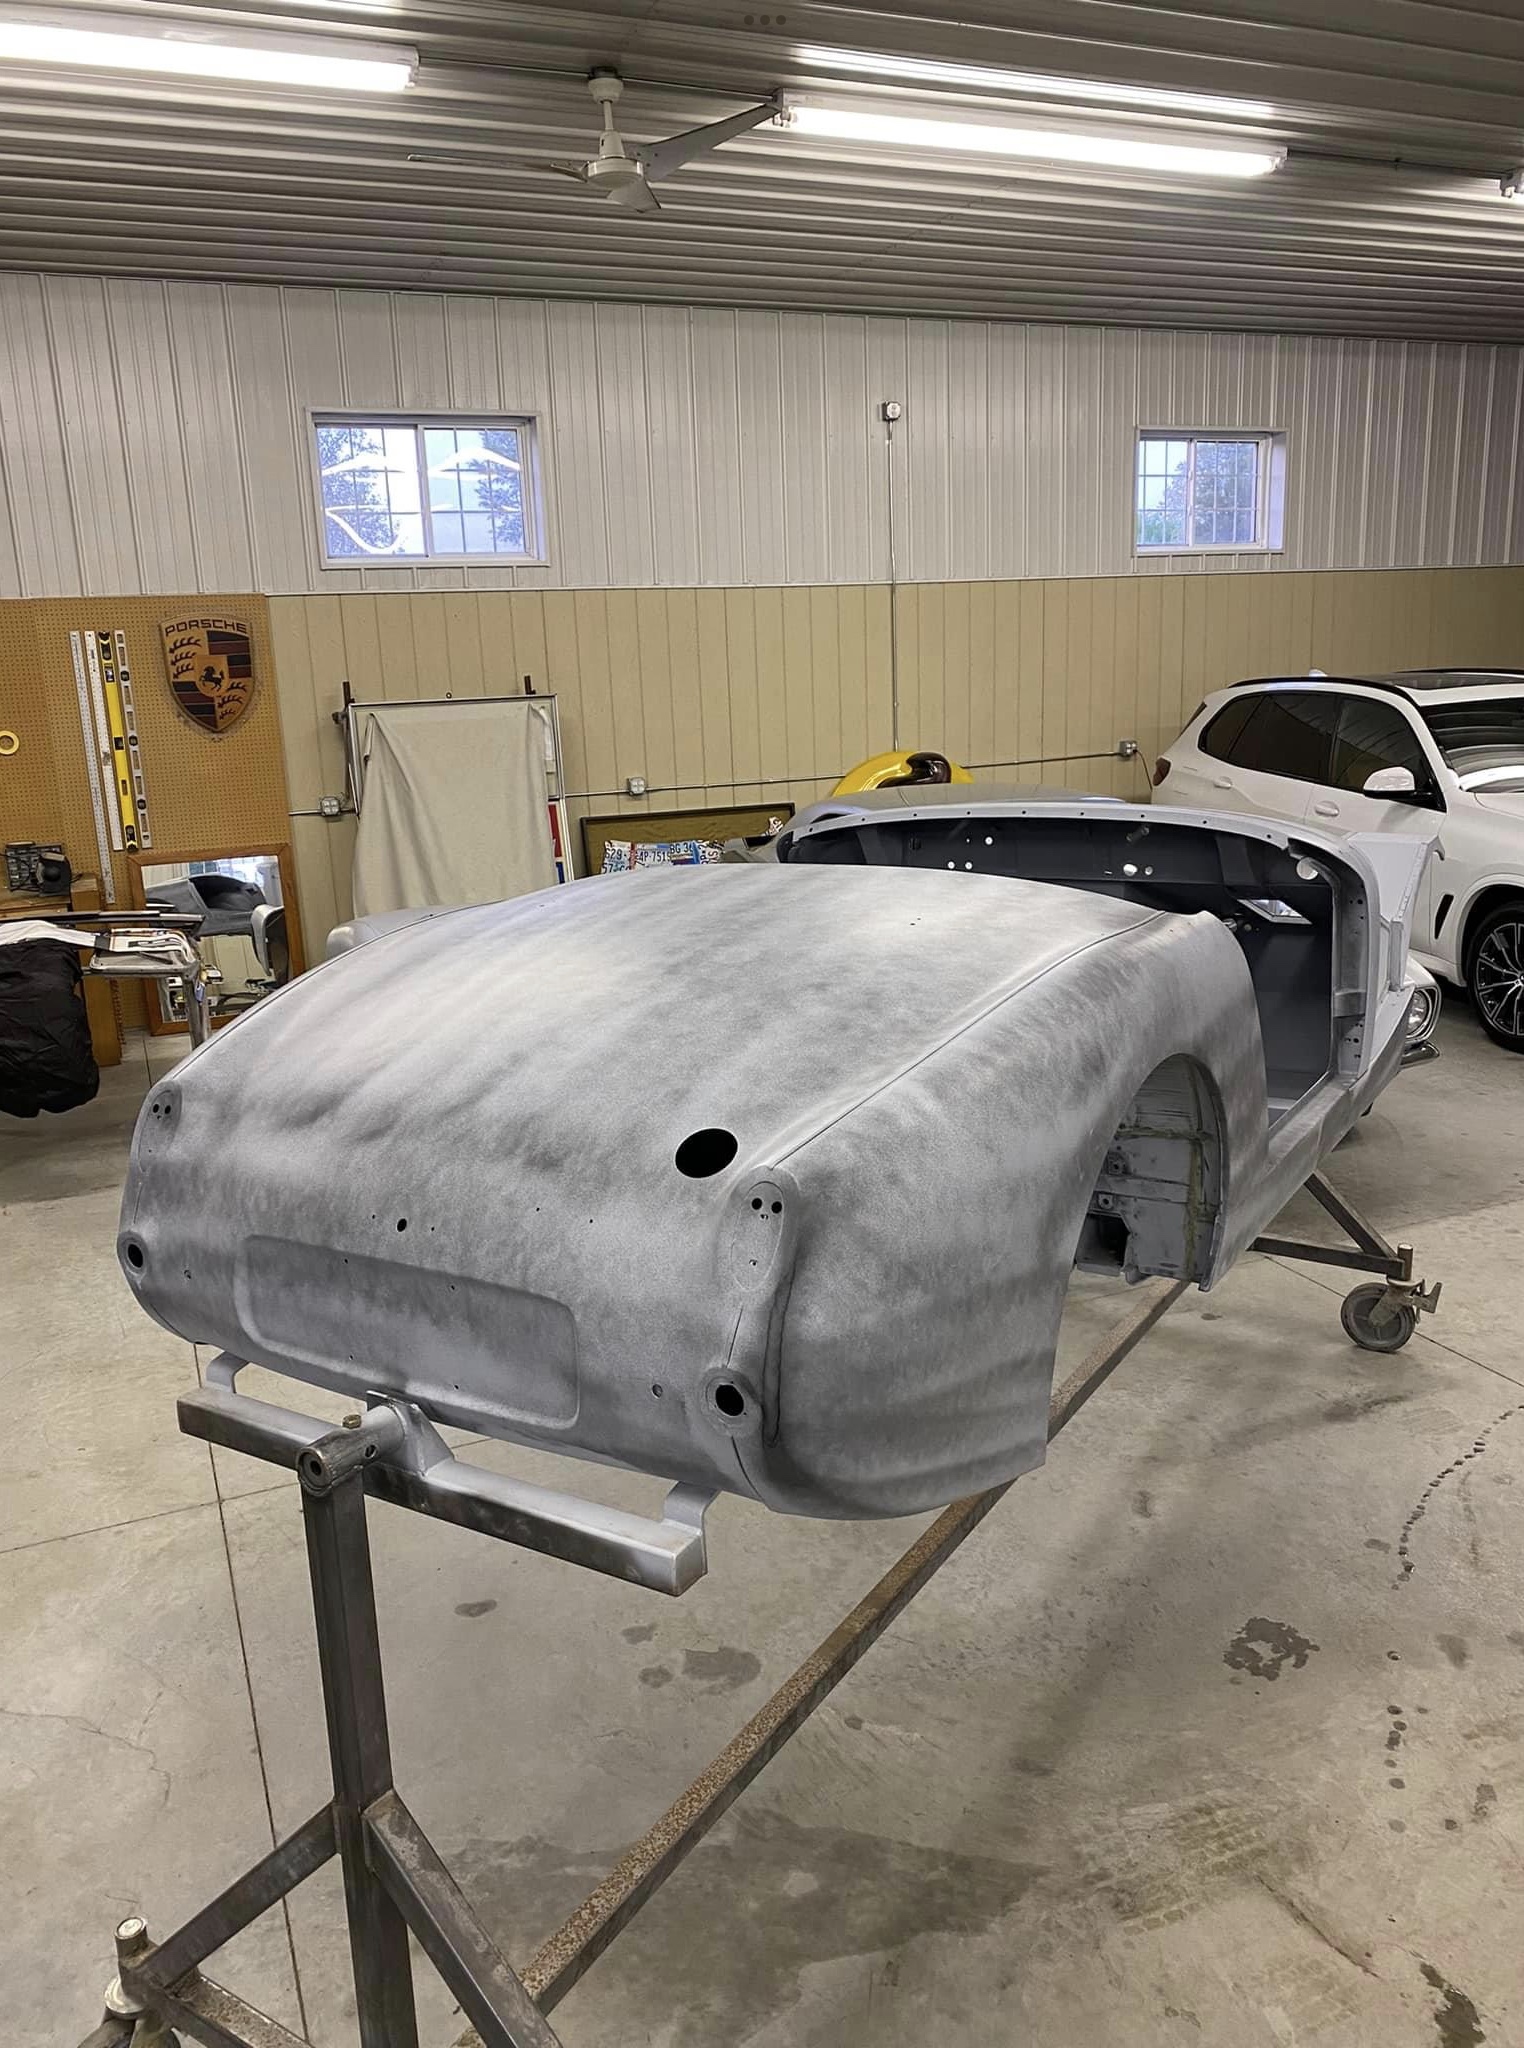
Michigan Rear Shroud

Michigan Underside
To make the proverbial long story a shorter one, the car checked out and we will be purchasing it around mid-June. Because garage space is limited we began with an immediate and total disassembly of the Bugeye to prepare for the arrival of the “new” car. We want to be able to move the old shell and bonnet out of the garage at the same the “new” car arrives.
As of June 1, 2023 everything has been removed from the car except for the front and rear suspension, the steering and the engine. The engine will come out this weekend and then the remaining components will quickly follow suit. A trolley has been built for the new shell so that it will be easy to move around.
The following Bugeye Restoration video episode forty-two covers the disassembly that has occurred since mid-April. In less than thirty minutes, two weeks of work is recorded for help with reassembly later. The list of items covered in the video is very long this time, but to make it easier to find a particular topic without having to sit through the entire video, the index is provided.
https://vimeo.com/832369002/c87fd61c10?share=copy
0:00 – Restoration Disruption explained
1:57 – Exhaust removal
2:23 – Ground Cable from Chassis to Gearbox
2:32 – Rear Propshaft separation
2:39 – Draining Rear Differential, Gearbox and Engine Oils
3:05 – Battery, Battery hold down bracket and battery tray removal
3:15 – Battery cables from positive post to alternator and starter switch
3:33 – Battery ground cable
3:40 – Starter switch
4:01 – Ignition Coil
4:38 – Oil pipe/hose from engine to gauge
4:42 – Oil pressure/water temp gauge and capillary tube
4:58 – Heater hoses
5:05 – Heater Box
5:38 – Heater/Battery tray
5:44 – I.D. number plate
5:57 – Carburetor and heat shield
6:23 – Throttle Cable
7:09 – Intake manifold and exhaust header
7:30 – Oil Catch can
7:39 – Breather hoses from rocker cover and timing chain cover
7:50 – Loosening engine motor mounts
8:31 – Gearbox mount bolts
8:45 – Gearshift cover, gear shift lever and additional gearbox mount bolts
9:47 – Master cylinders and pedal box
10:13 – Brake pipe from master cylinder to brake pipe union
10:28 – Wipers, Wiper rack, wheel boxes
11:26 – Windscreen washer nozzles
11:40 – LH Radiator support brace
11:52 – Rubber seal between body and bonnet
12:15 – RH pedal box blanking plate
12:25 – Assorted rubber grommets, and blanking screws/bolts
13:30 – Four rubber pads between bonnet and body
13:37 – Two metal block and rubber inner fender buffers
13:44 – Windscreen
14:18 – Exterior mirror
14:38 – Interior rear view mirror
14:48 – Tonneau lift-a-dot posts (3)
15:20 – Demister vent nozzles
15:52 – Cockpit and door aluminum trim
16:04 – RH Door seal removal
16:25 – RH Door panel, carpet and latch assembly
16:47 – RH gearbox footwell panel
17:00 – RH Demister hose and elbow
17:03 – RH front floor carpet
17:10 – Slave cylinder access rubber bung
17:25 – RH heater vent door
17:33 – RH accelerator pedal assembly blanking bolts/screws
17:52 – LH door panel, seal, carpet and latch assembly
18:12 – LH vinyl panel below door and rubber grommets covering door hinge access
18:23 – LH gearbox footwell panel and carpet
18:36 – LH gearbox oil filler access bung
18:42 – LH heater vent and demister hose and elbow
18:57 – Accelerator pedal assembly
19:09 – LH carpet snaps
19:15 – LH front floor carpet
19:43 – Rear tonneau/Soft top fastener hardware on the rear shell
21:00 – Rear bumper overrider and bracket
21:28 – Fuel Tank, filler pipe, rubber collar and hard pipe to fuel pump
23:15 – Fuel Pump
23:32 – Fuel pump mounting template
23:58 – “Sprite Flash” emblem for the boot
24:03 – Spare tire and wheel
24:23 – Handbrake assembly and cable
26:30 – Propshaft Grease zerk access grommet
26:54 – Jacking rubber bung
Bugeye Restoration Video Episode Forty-three shows the removal of the engine/gearbox, the front and rear suspension, rear axle, steering rack and steering column and wheel.
https://vimeo.com/834433124/0ce1f668d0?share=copy
0:46 – Engine and gearbox removal
4:15 – Rear axle and suspension removal
5:25 – Front suspension and steering rack removal
10:00 – Steering column and wheel removal
11:25 – Fuel pipe removal
11:50 – Parts storage and dolly construction
With two of us in the garage, and using the four post lift as an engine hoist, we were able to pull the engine and gearbox from the car. A simple and pain-free process. Even though both the engine and gearbox had been drained of oil we still had a little spill out when the unit was angled to release it from the car. With the engine and gearbox sitting on a Harbor Freight dolly we were able to set it aside so that attention could be turned to the rear axle and suspension as well as the front suspension and steering.
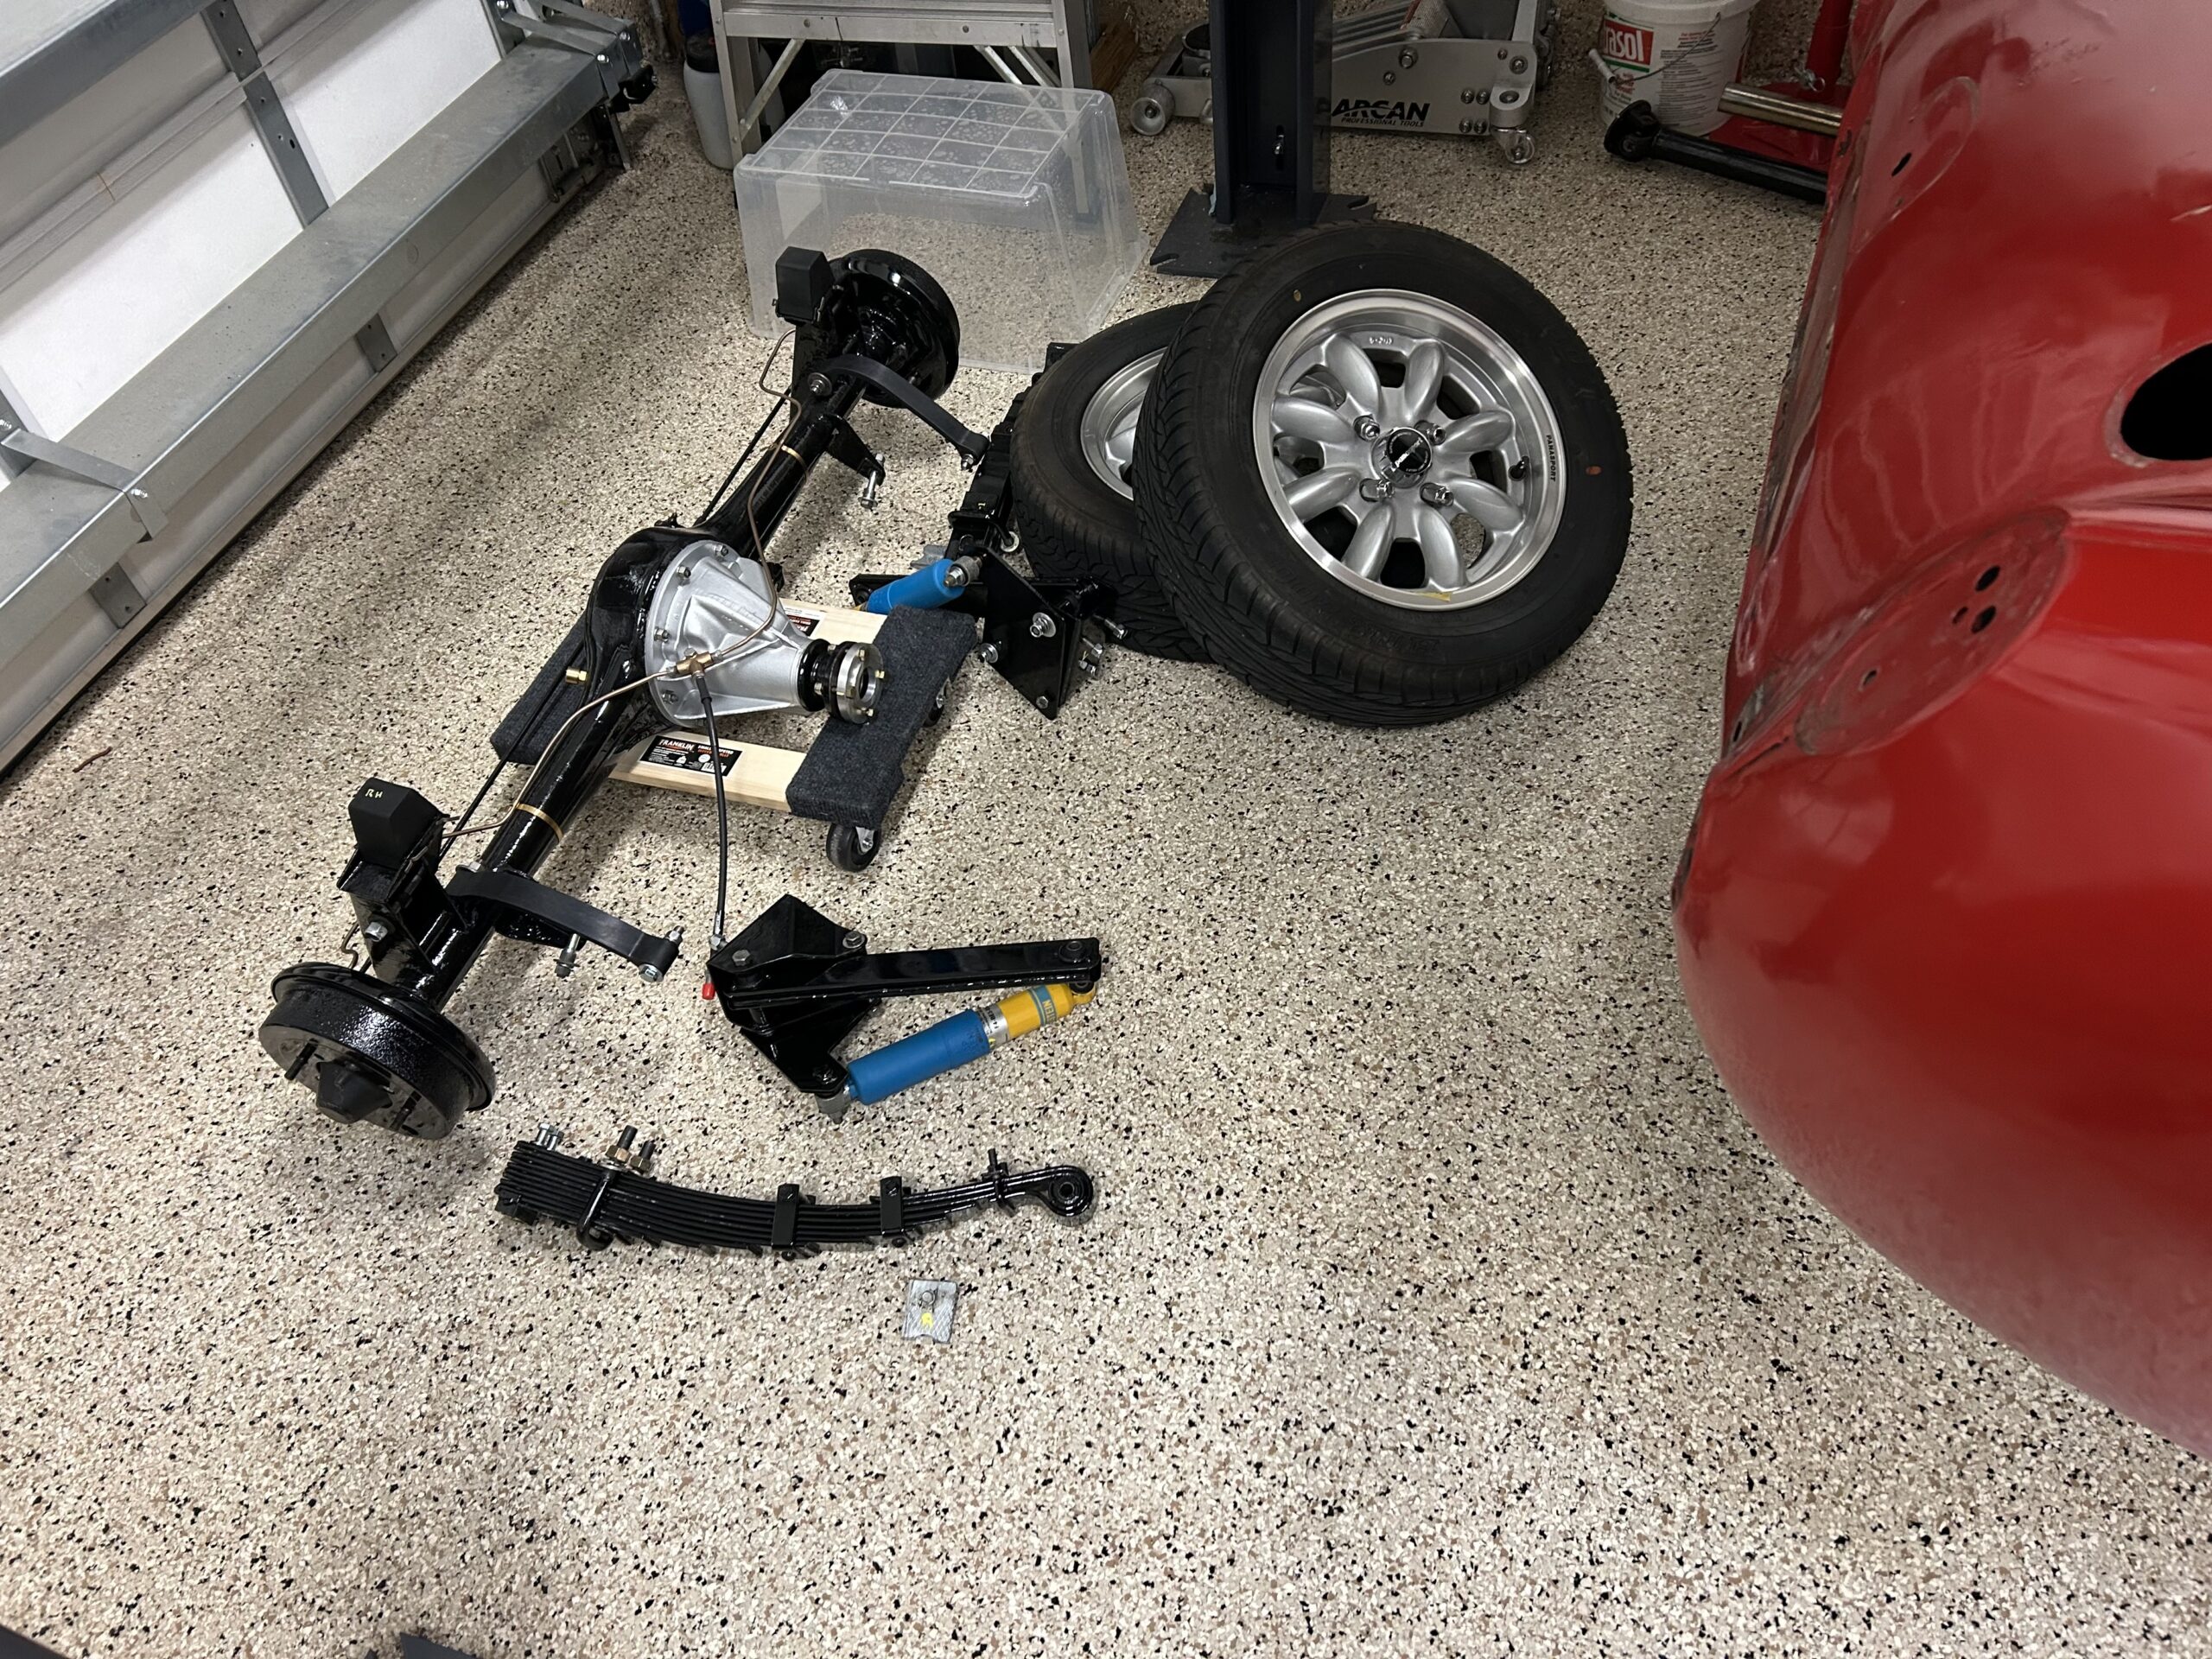
Rear axle and suspension removed
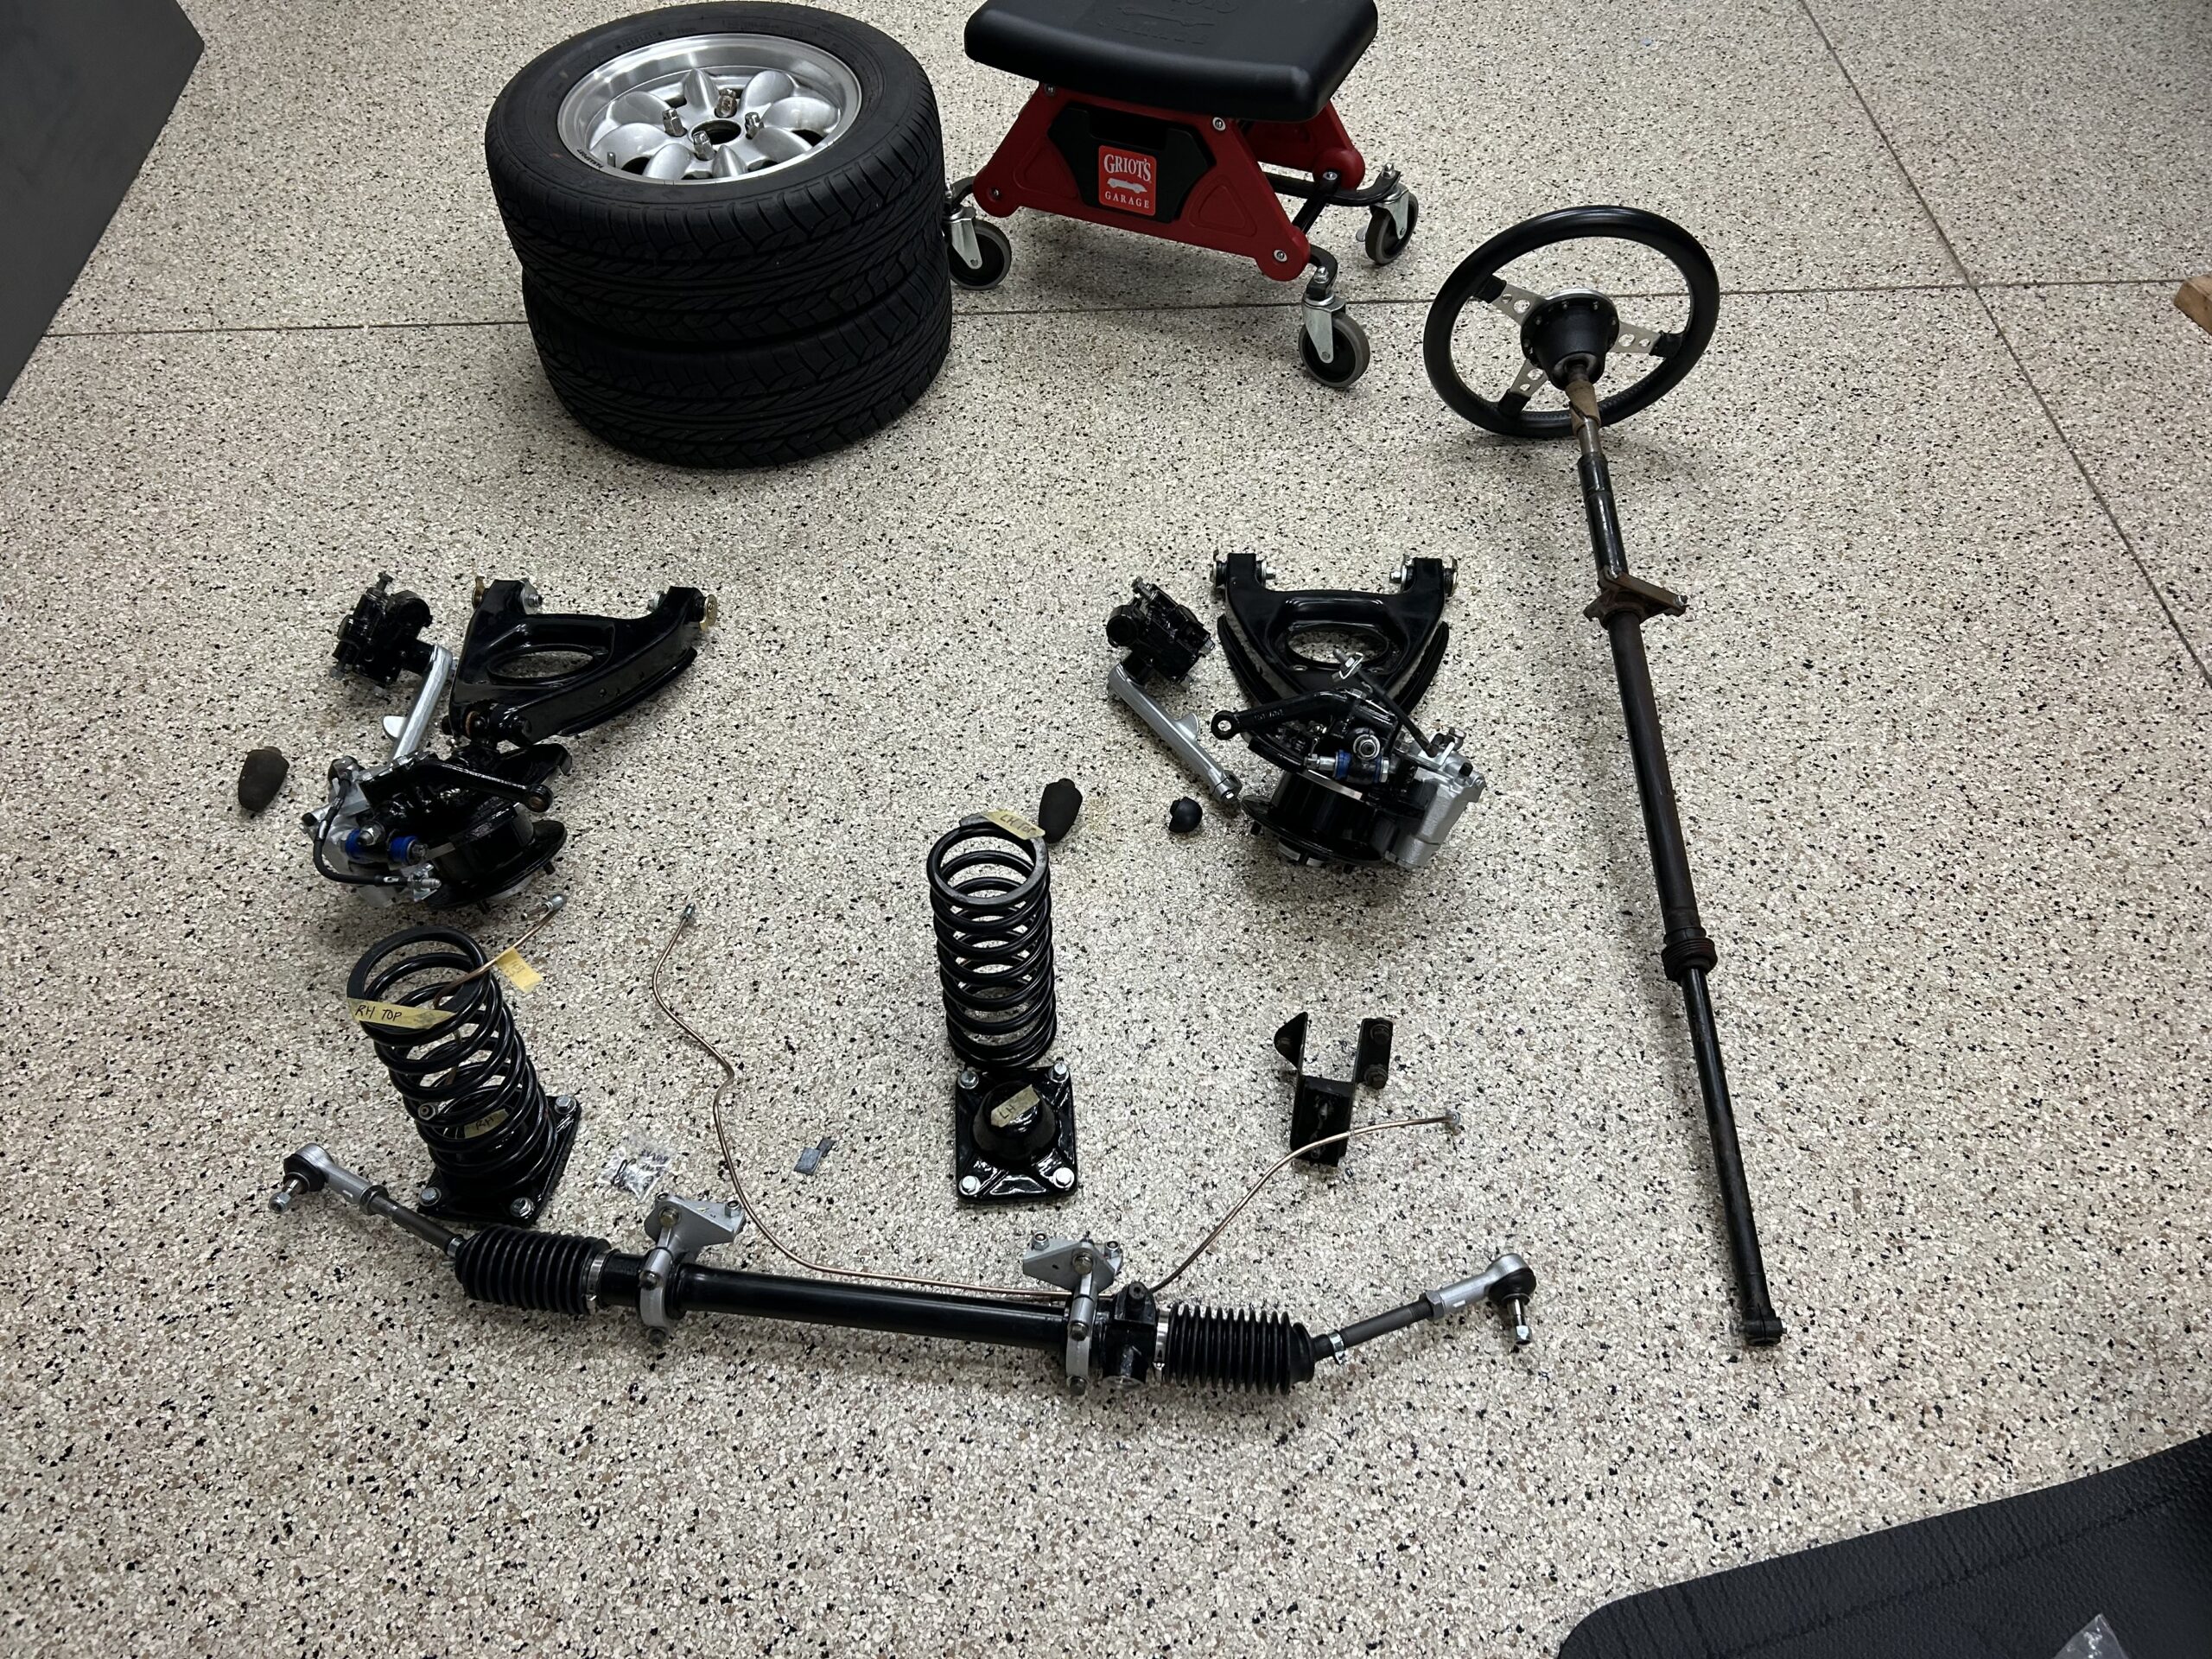
Front suspension and steering removed
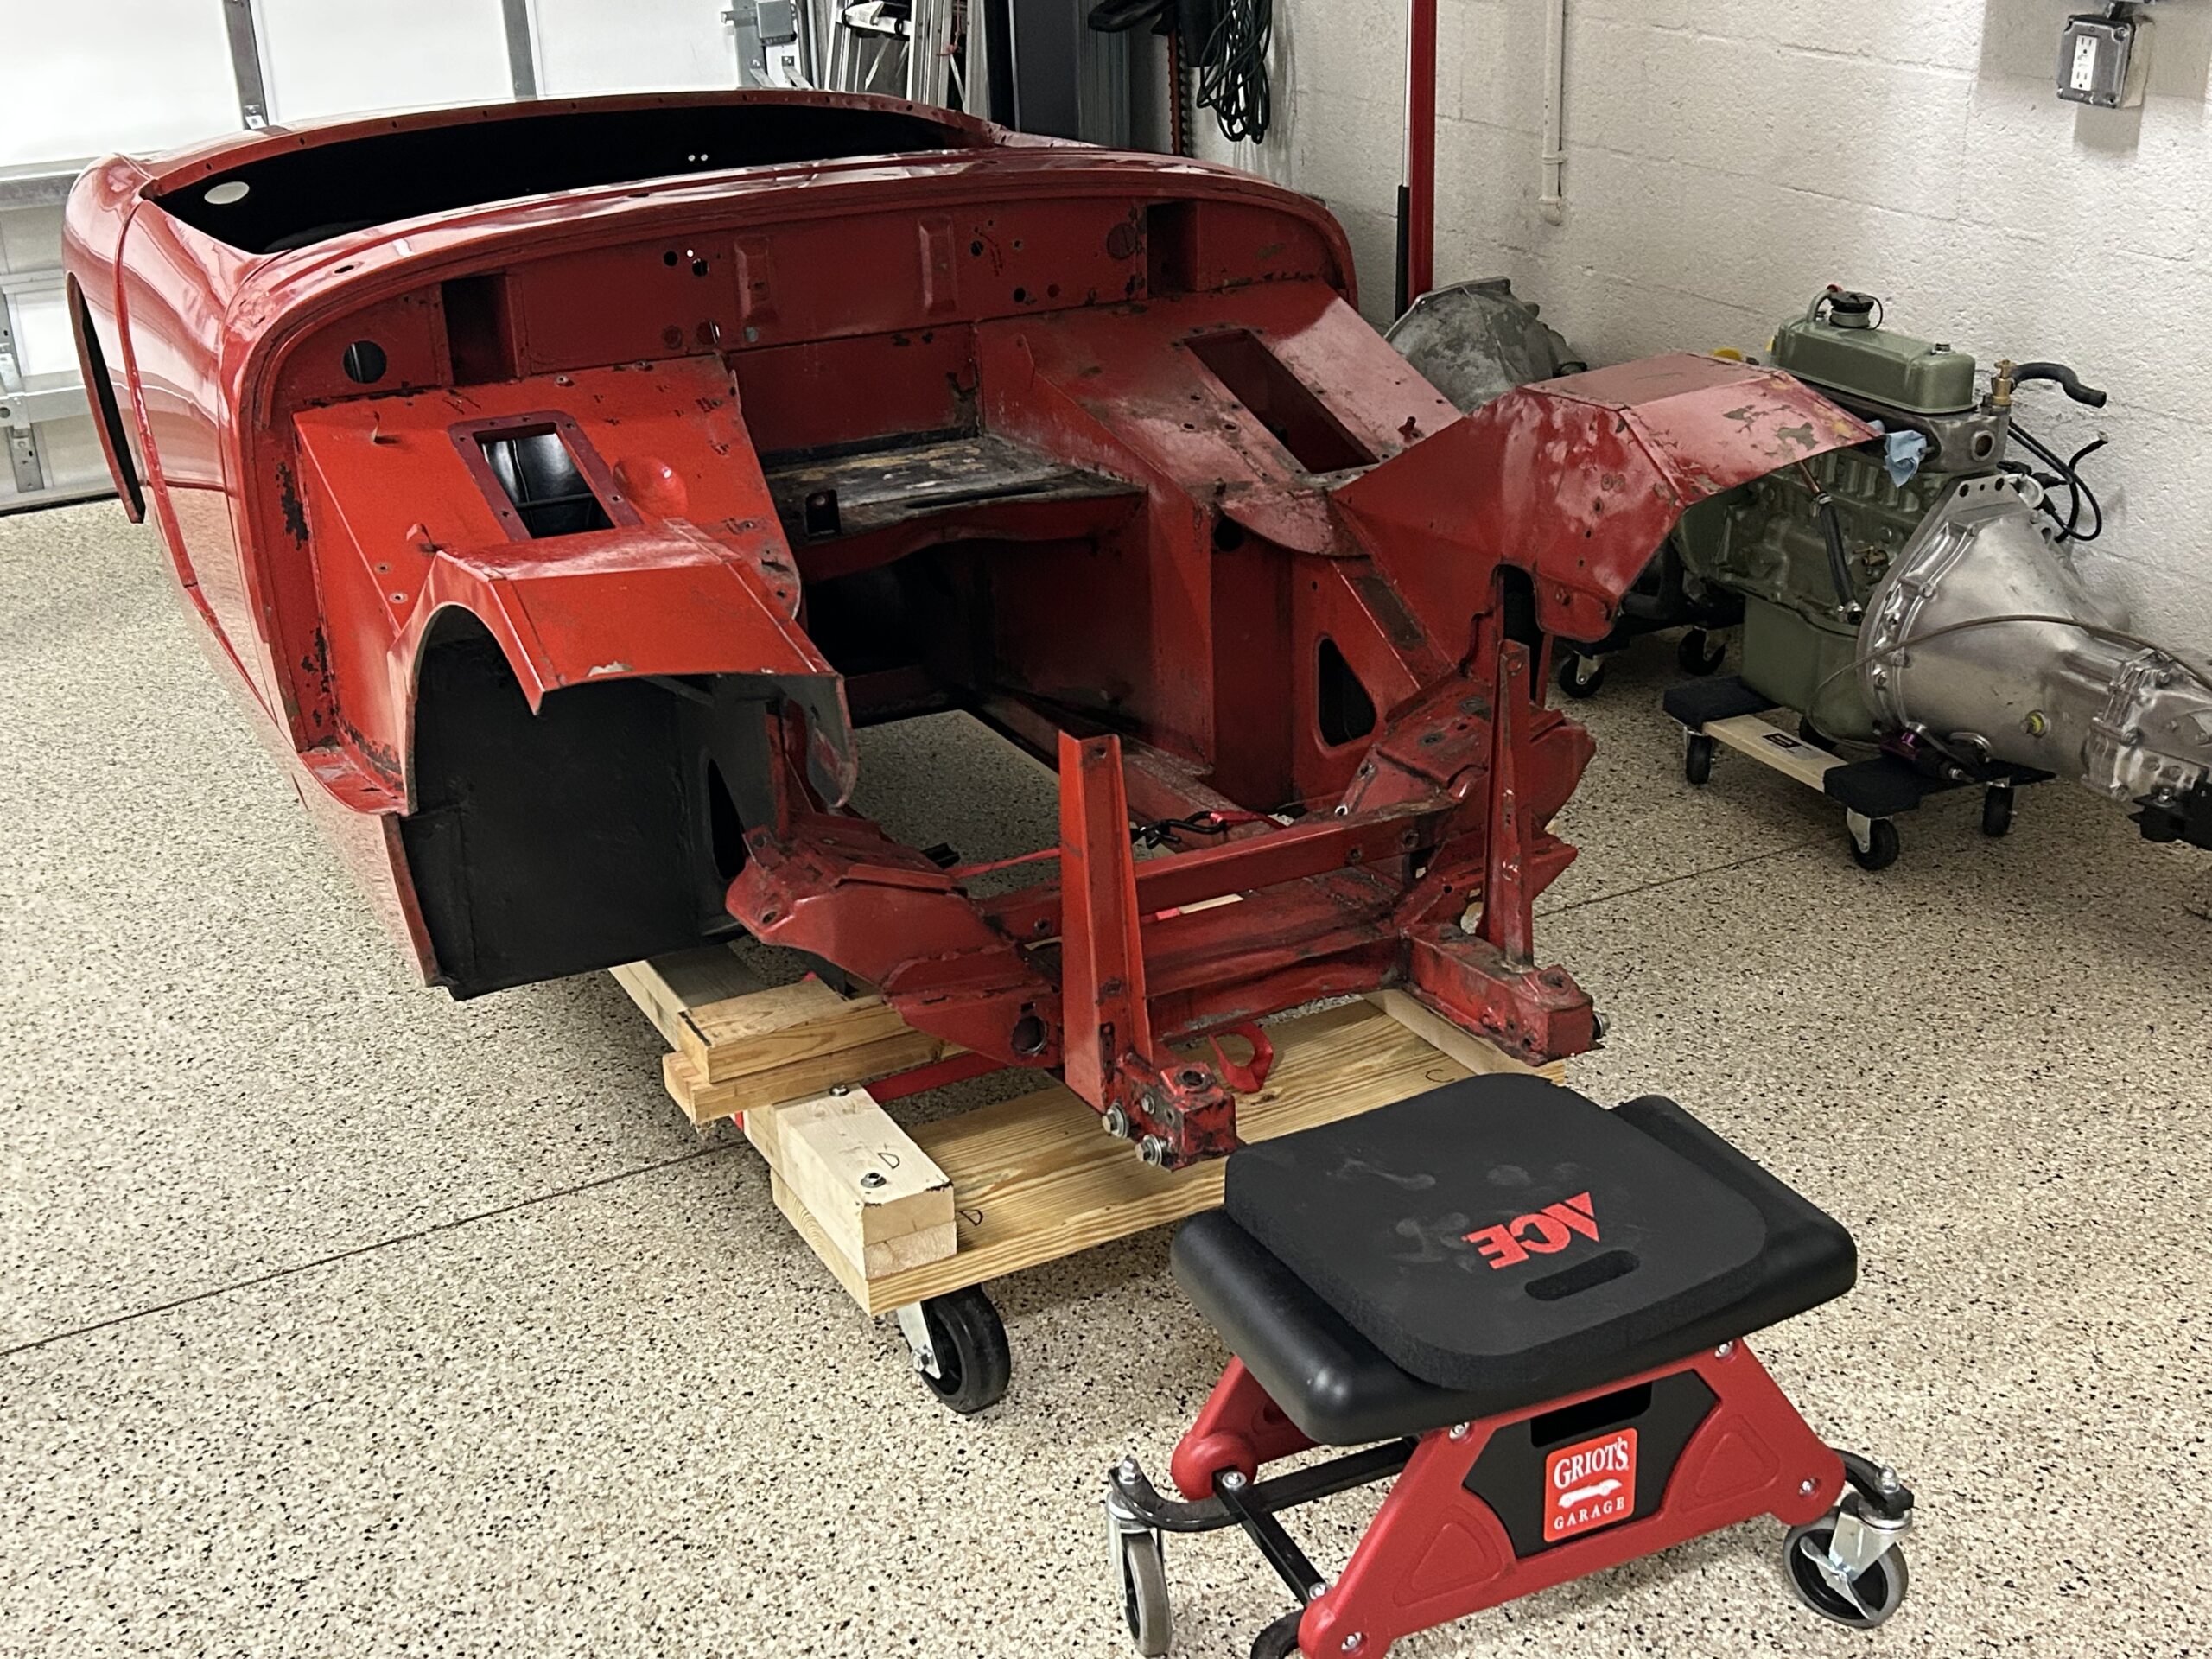
Chassis/shell on the dolly and motor tucked away
We installed some 2x4s between the ramps of the lift and added some plywood giving us the perfect storage platform for all of the Sprite parts. We are now ready for the new chassis from Michigan!
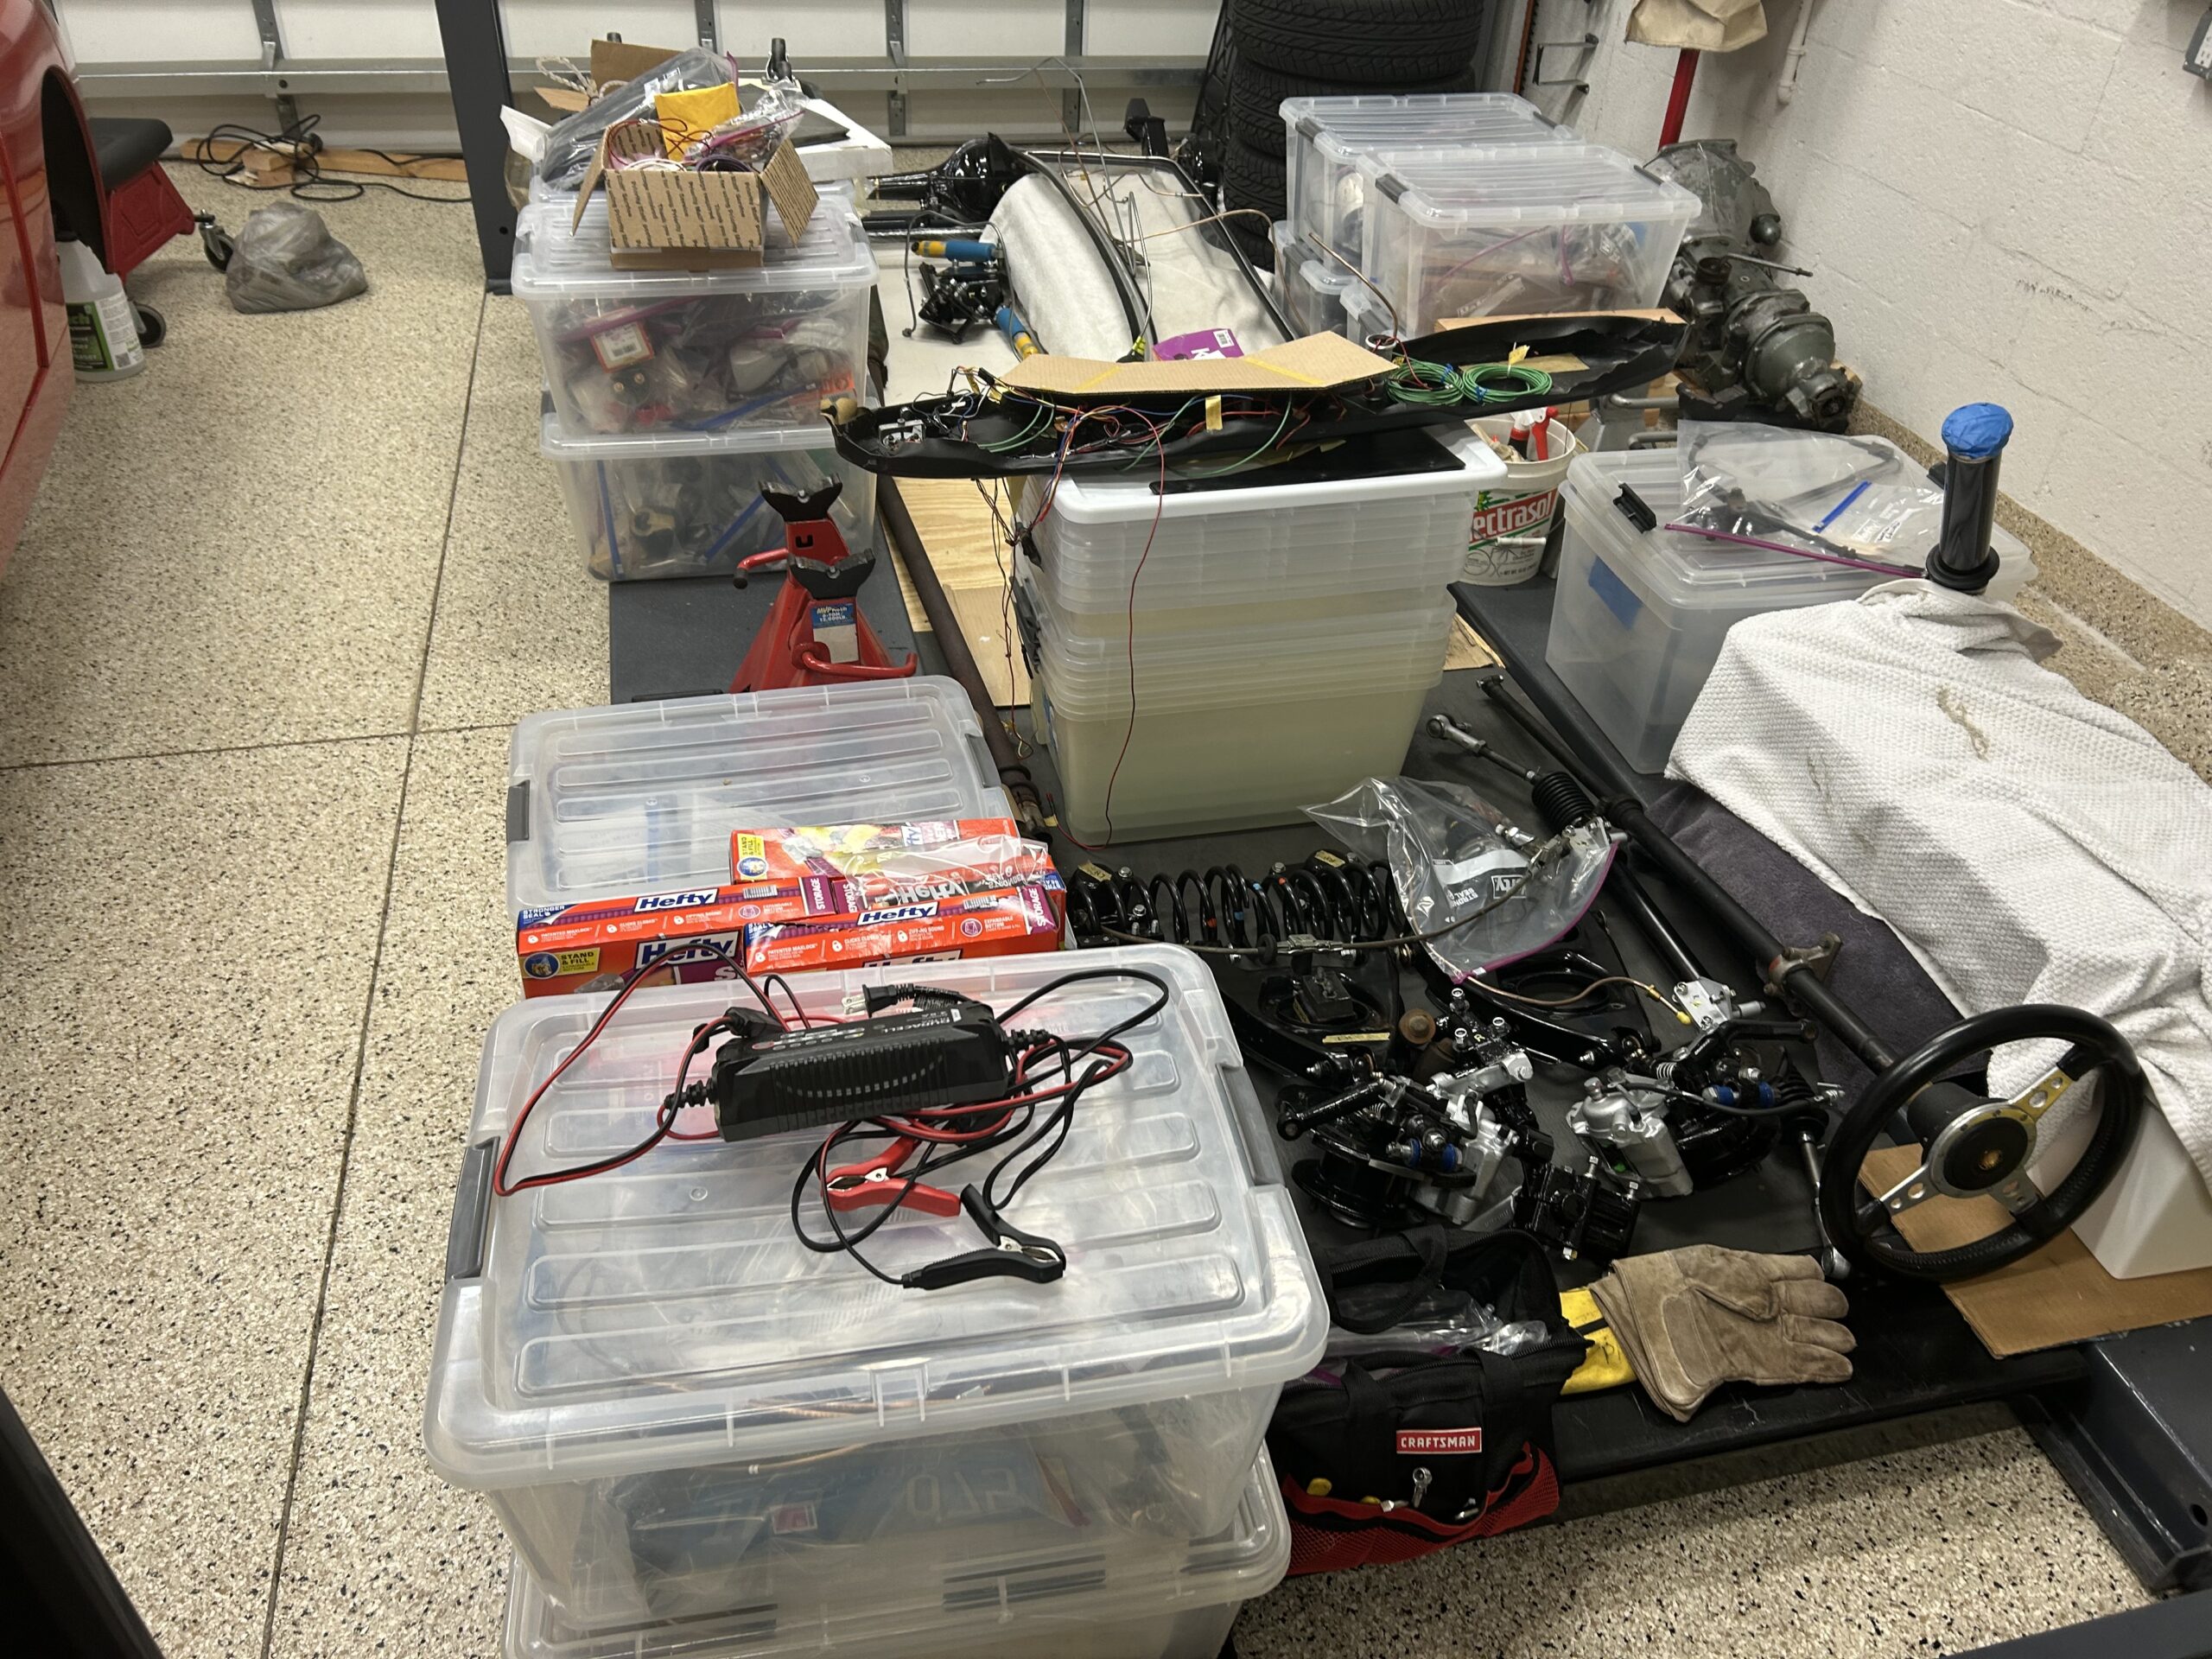
Sprite parts galore