
I have always liked the looks of the Lucas Tri-bar PL700 headlights. Unless one can find some new old stock units on eBay or from an individual seller the originals are hard to locate. However, reproduction vintage lights are available and come with a modern twist in that they utilize H4 bulbs, giving you a vintage headlight look with modern reliability and power. The lights I ordered from NOS Locators come with 12v P43t (9003) H4 bulbs: 60 watt high, 55 watt low. Flosser brand Halogen Bulbs and the bulbs are made in Germany.
This is a link to an article on the technical specifications and general information on the original Lucas PL700s:PL700
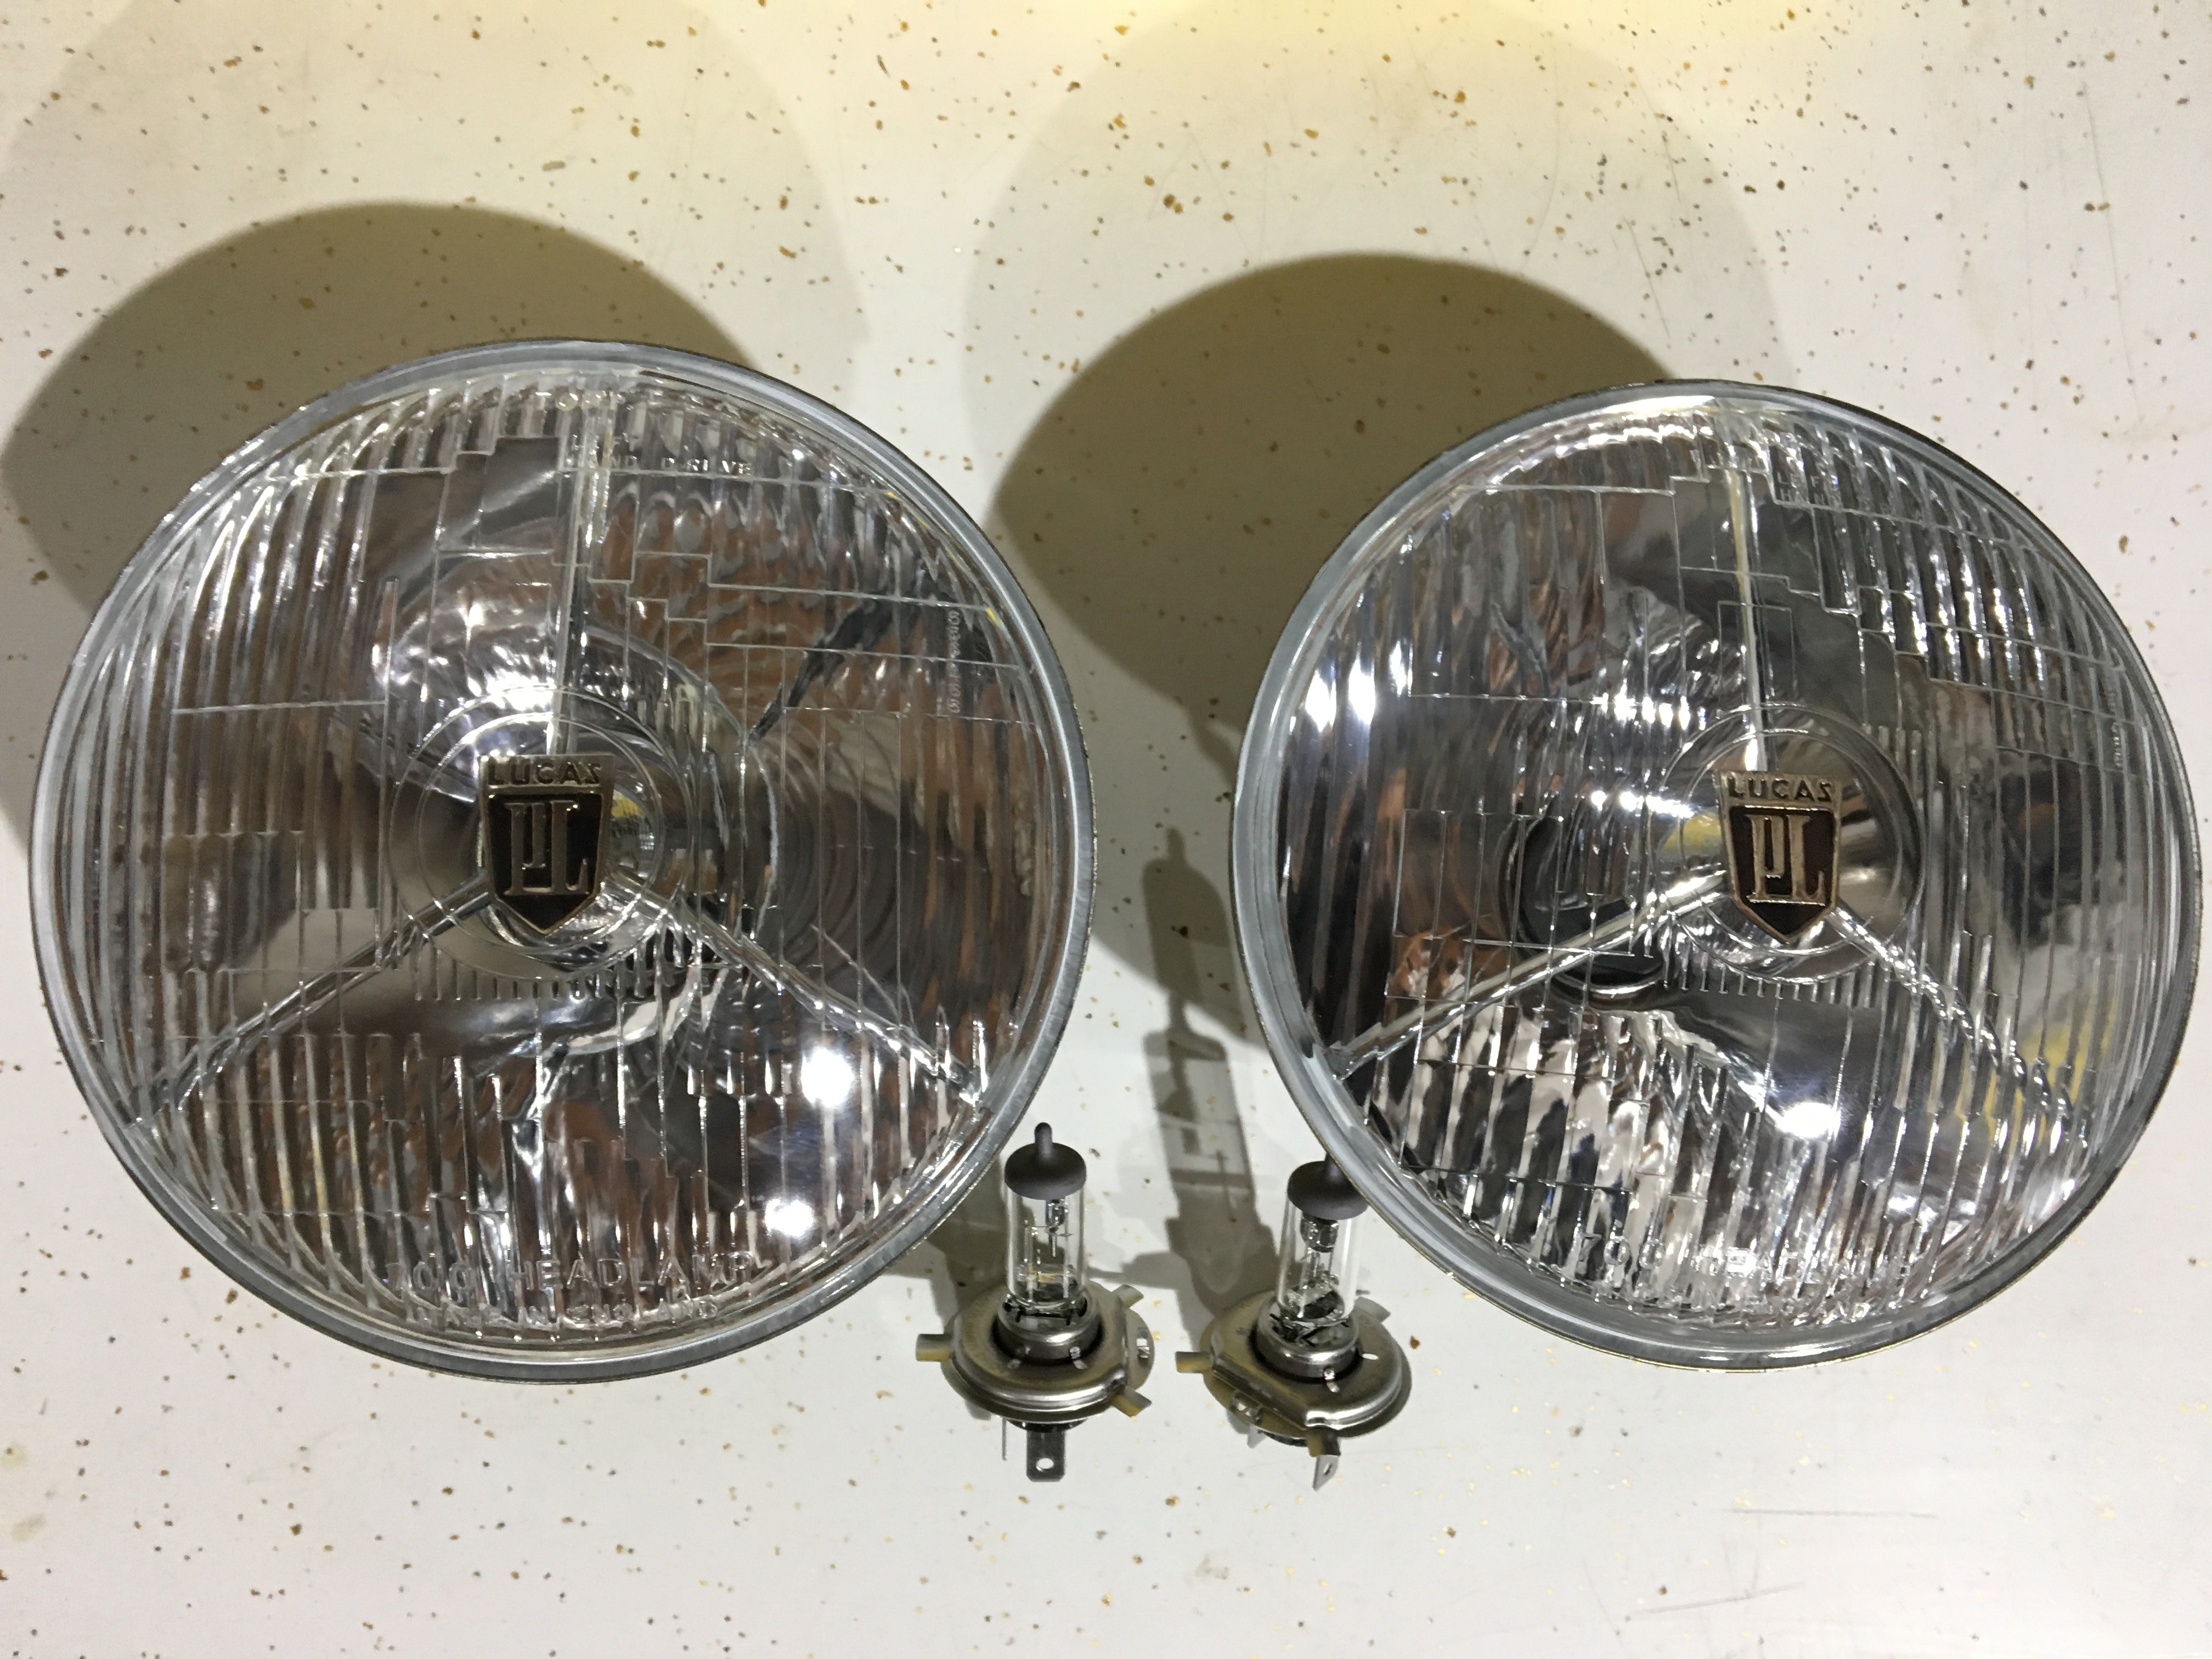
Lucas PL700 Reproduction Headlights
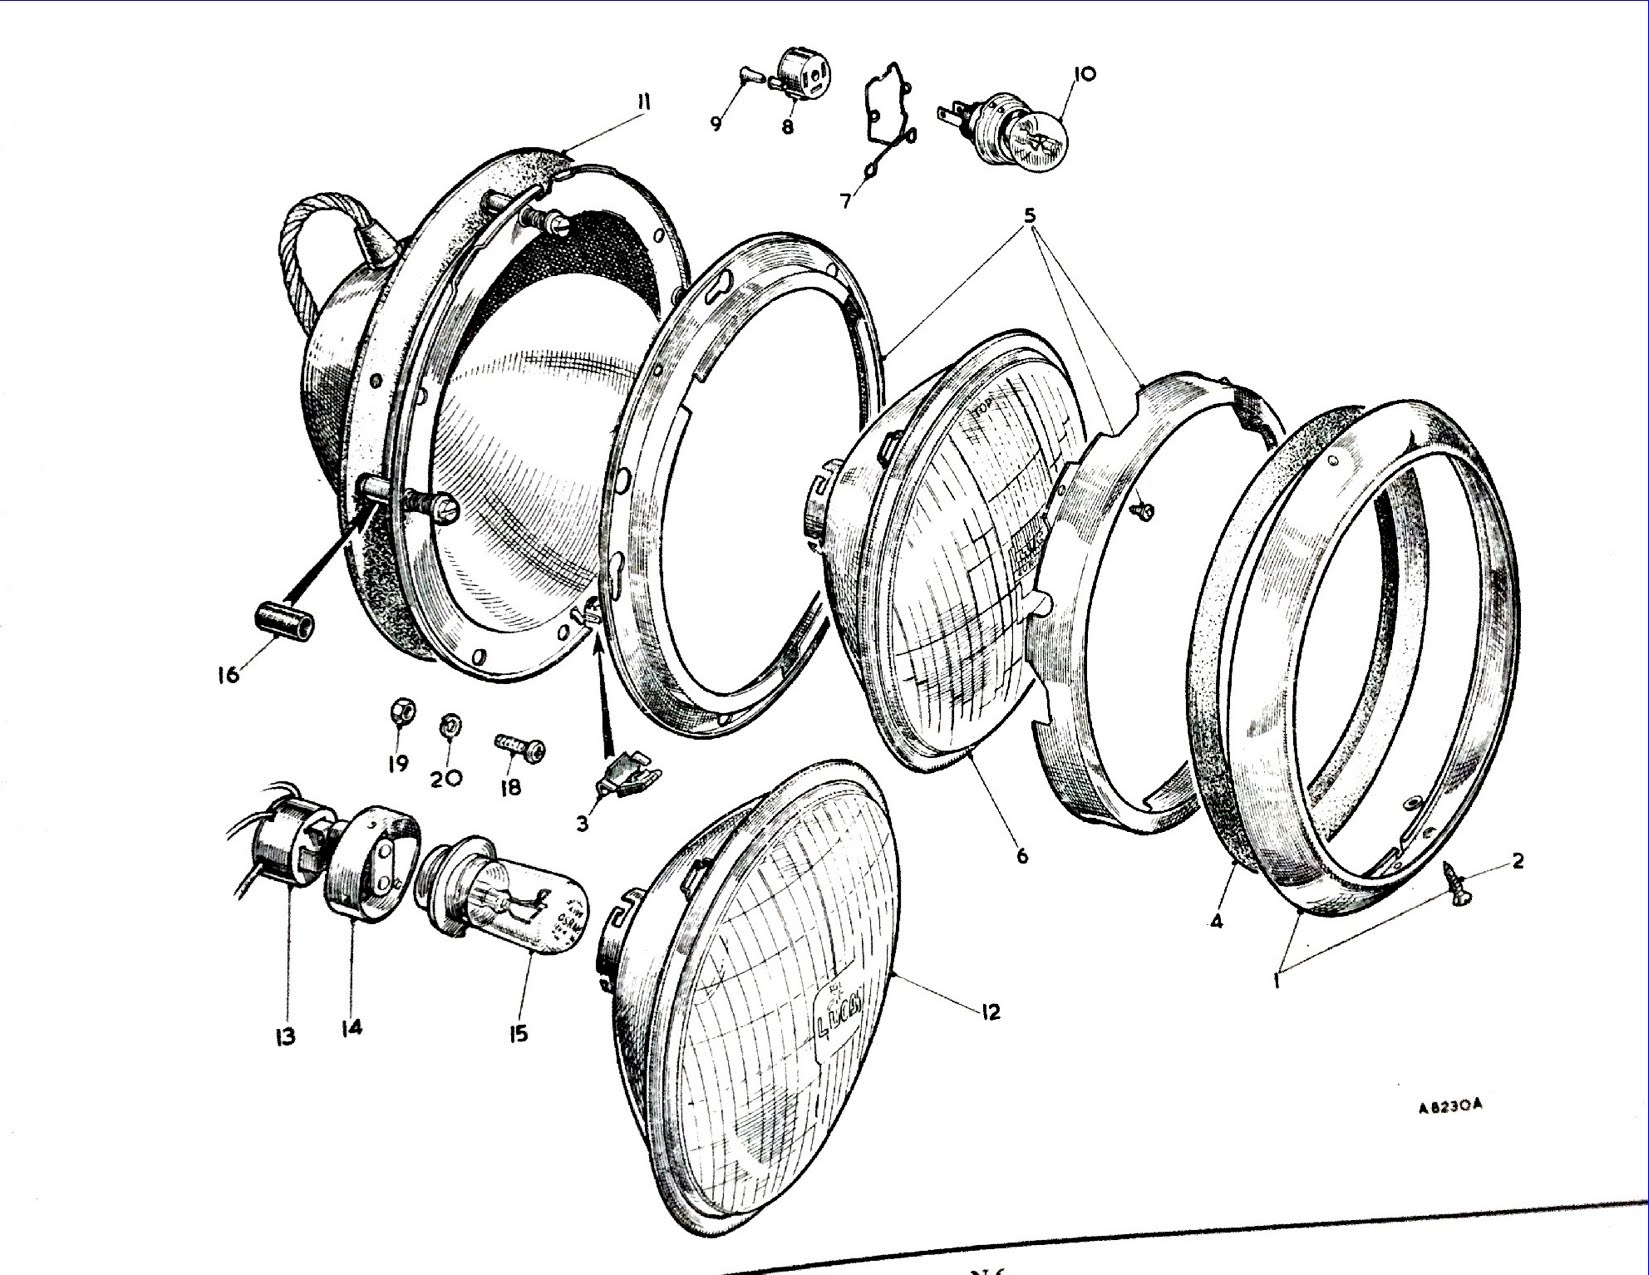
Headlamps
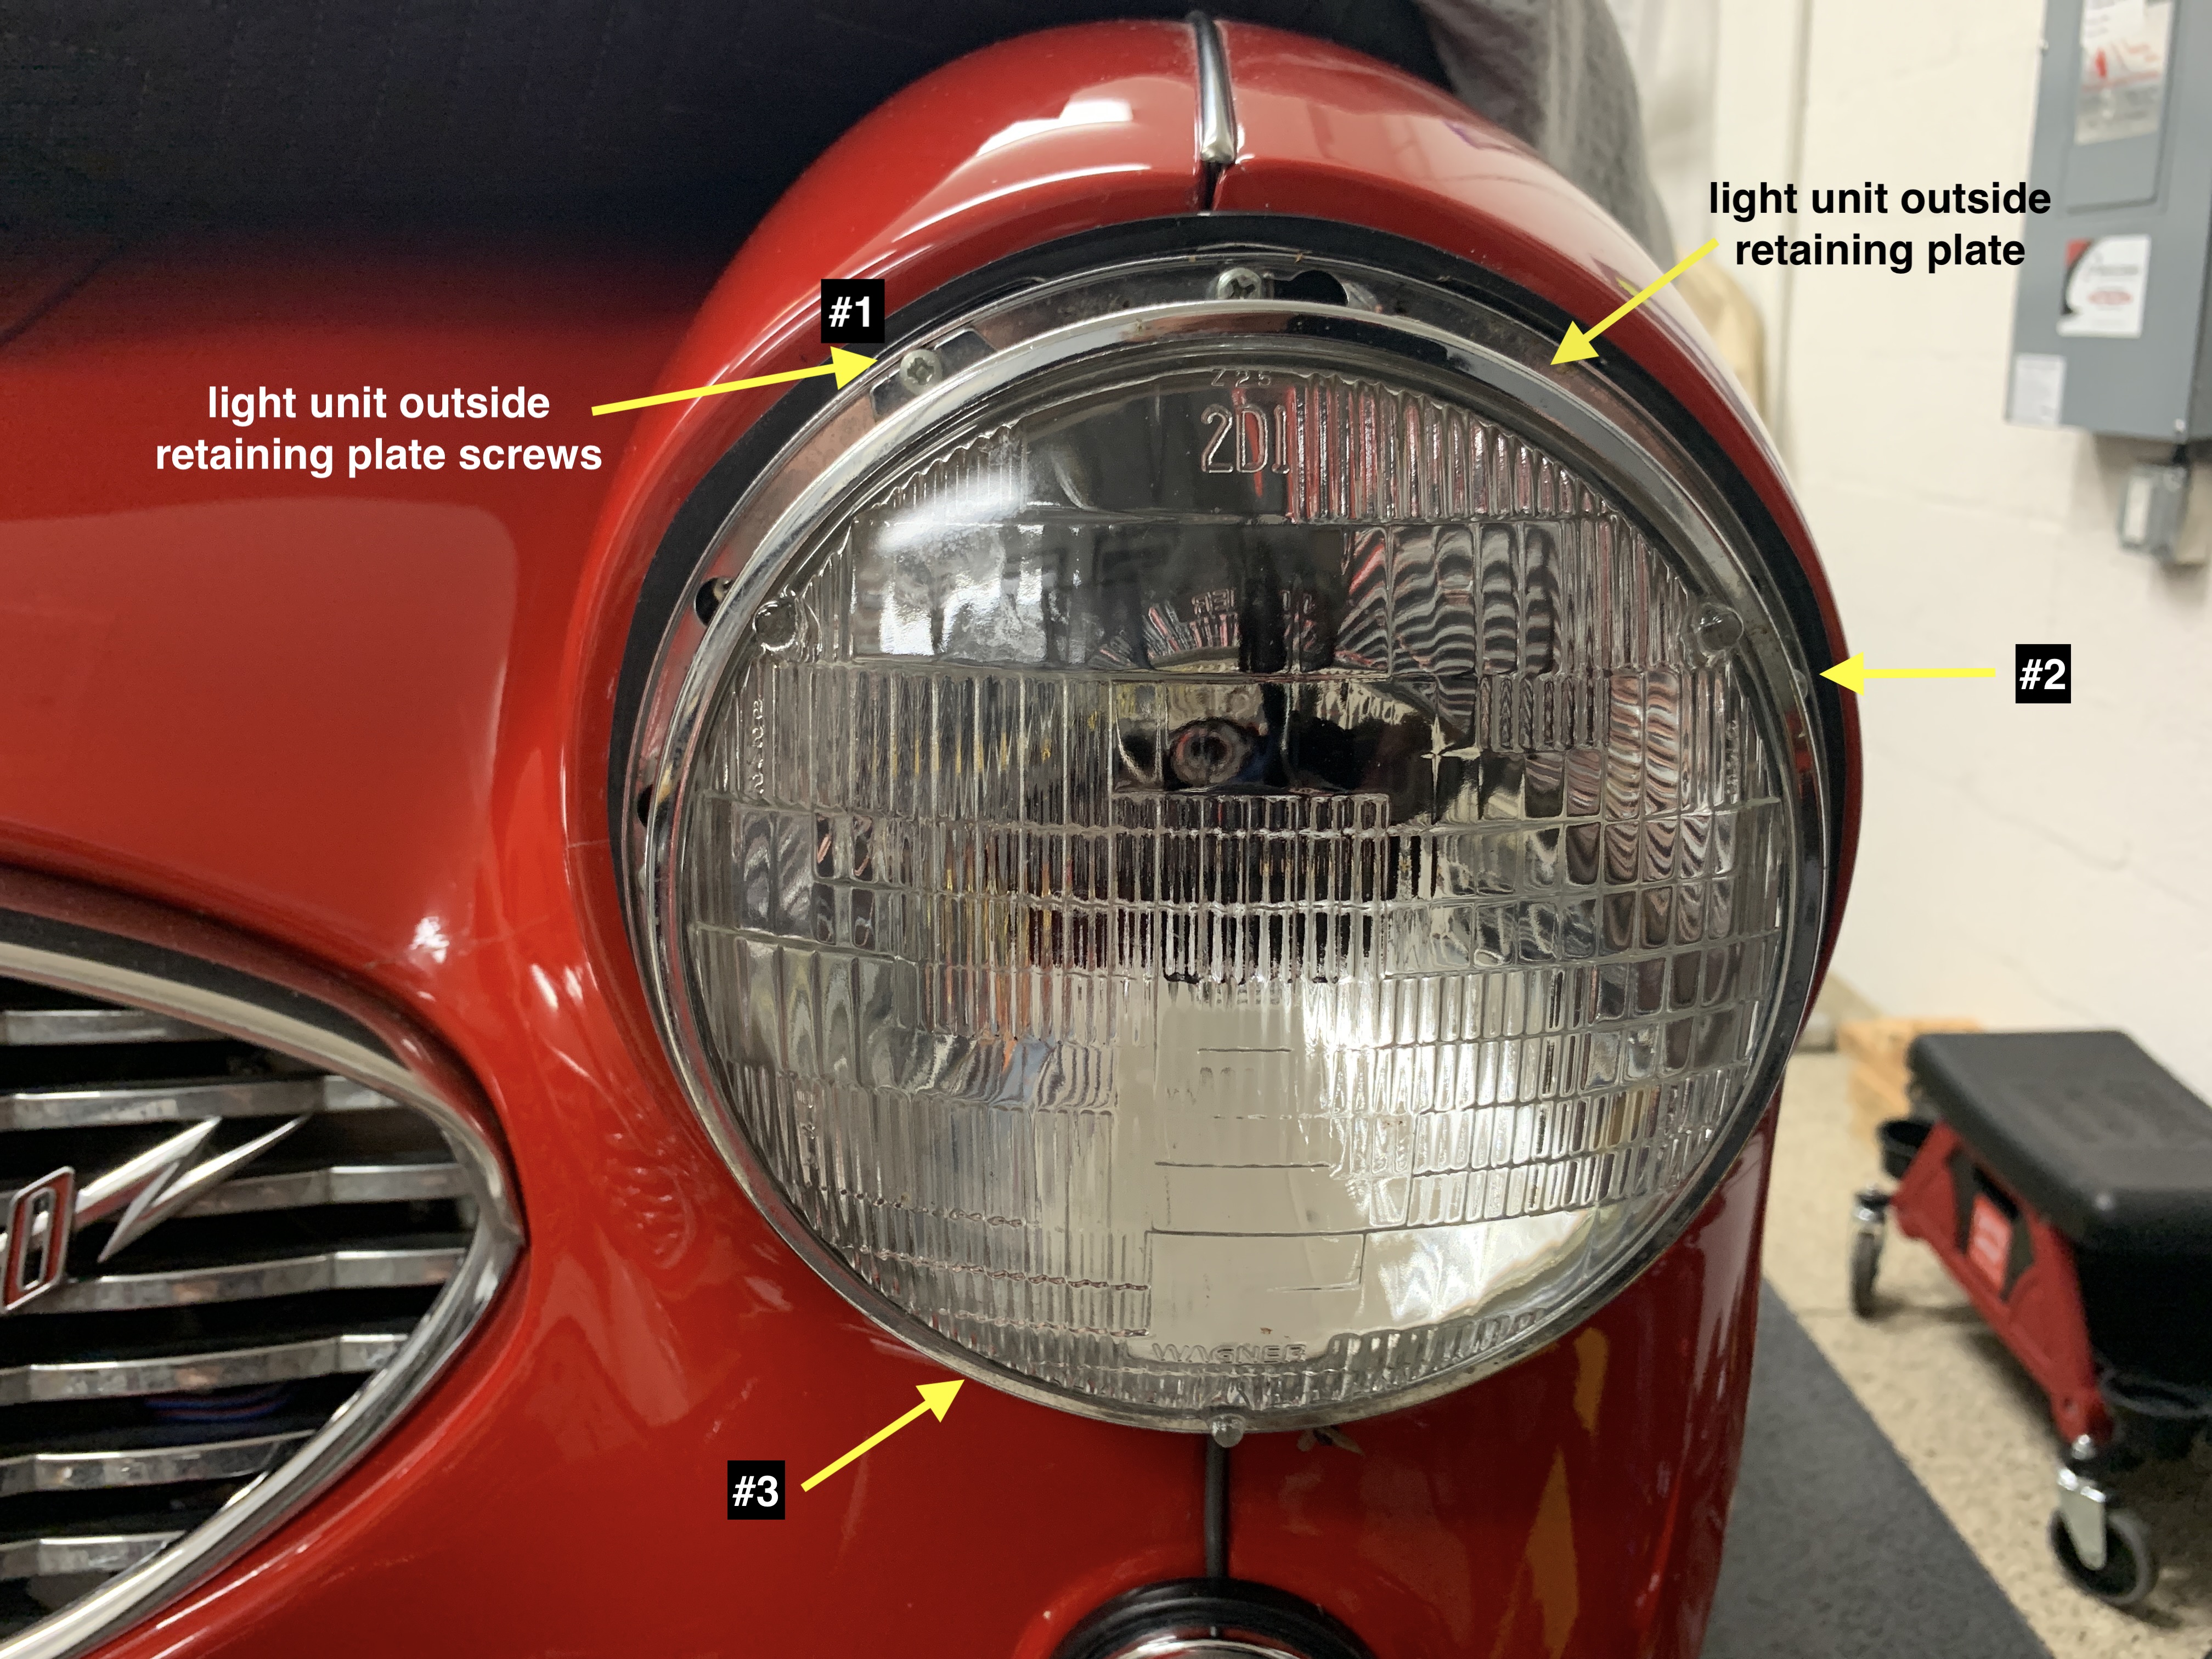
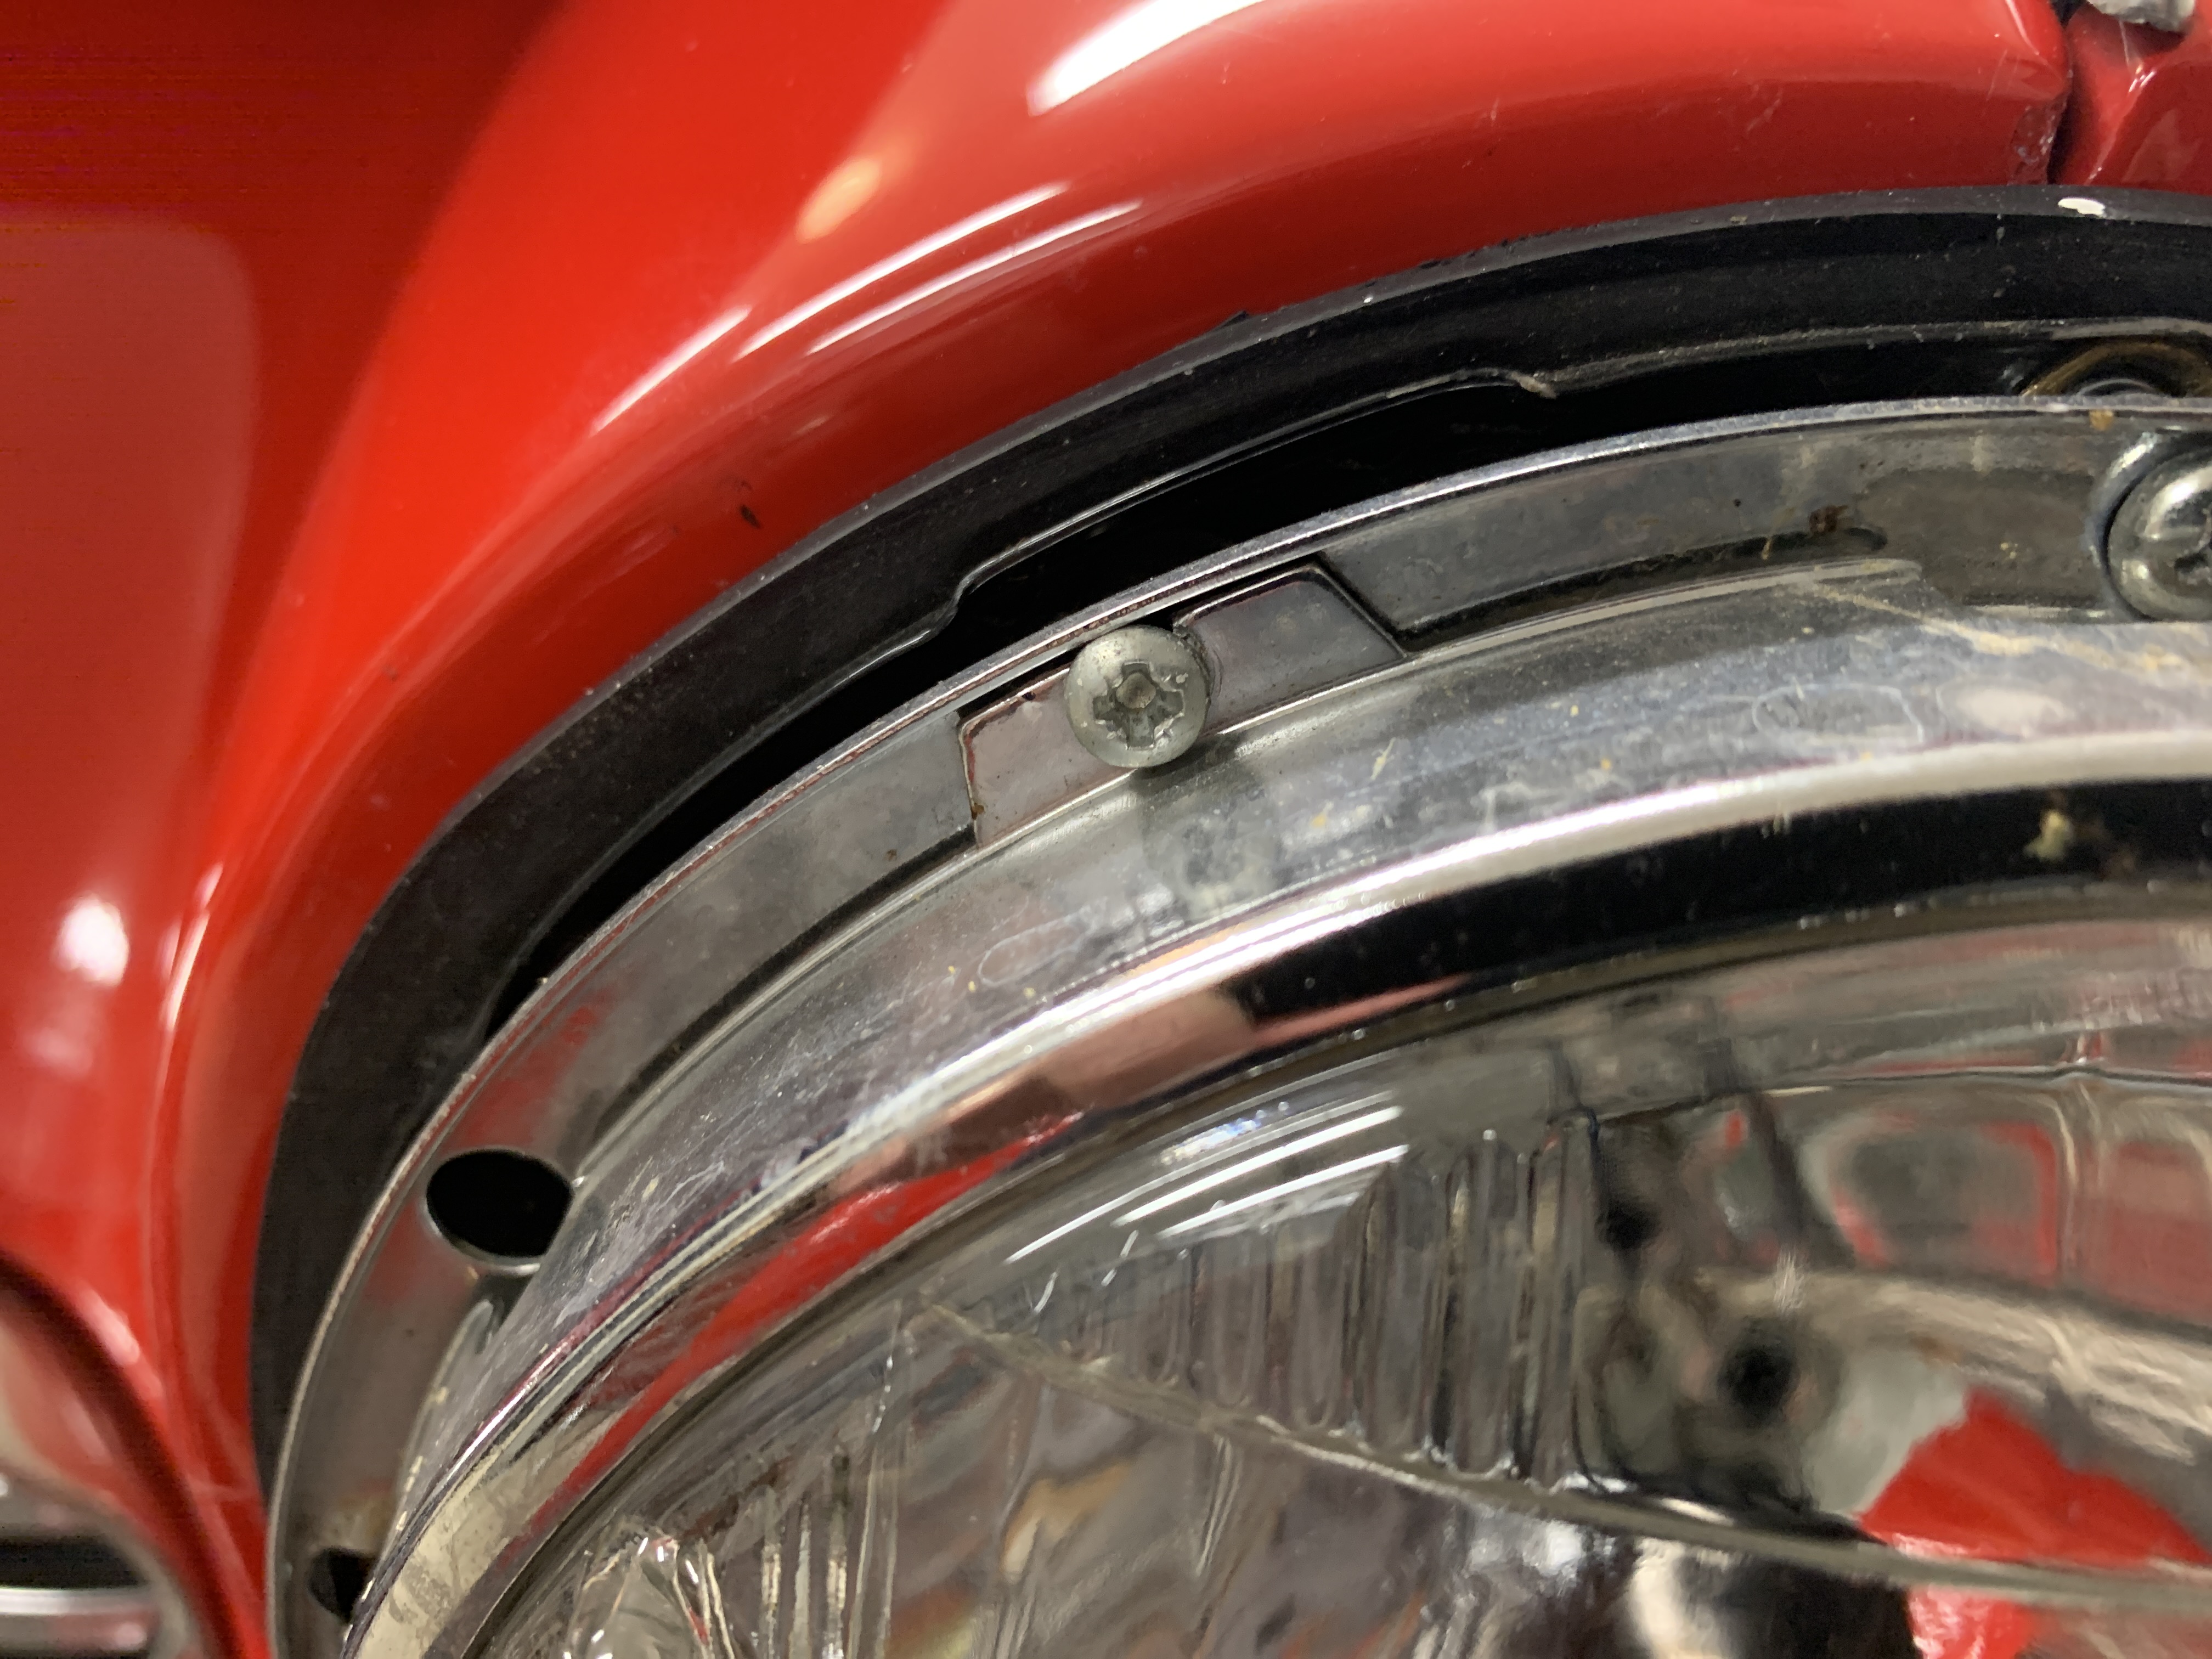
To install the new lights the first thing to do is to remove the Phillips head sheet metal screw (2) holding the headlight rim assembly (1). This screw is located to the right of center at the bottom of the ring.
Then remove the rubber dust excluder (4) and the three Phillips head sheet metal screws holding the outside light unit retaining plate (5).
Rubber Dust Excluder
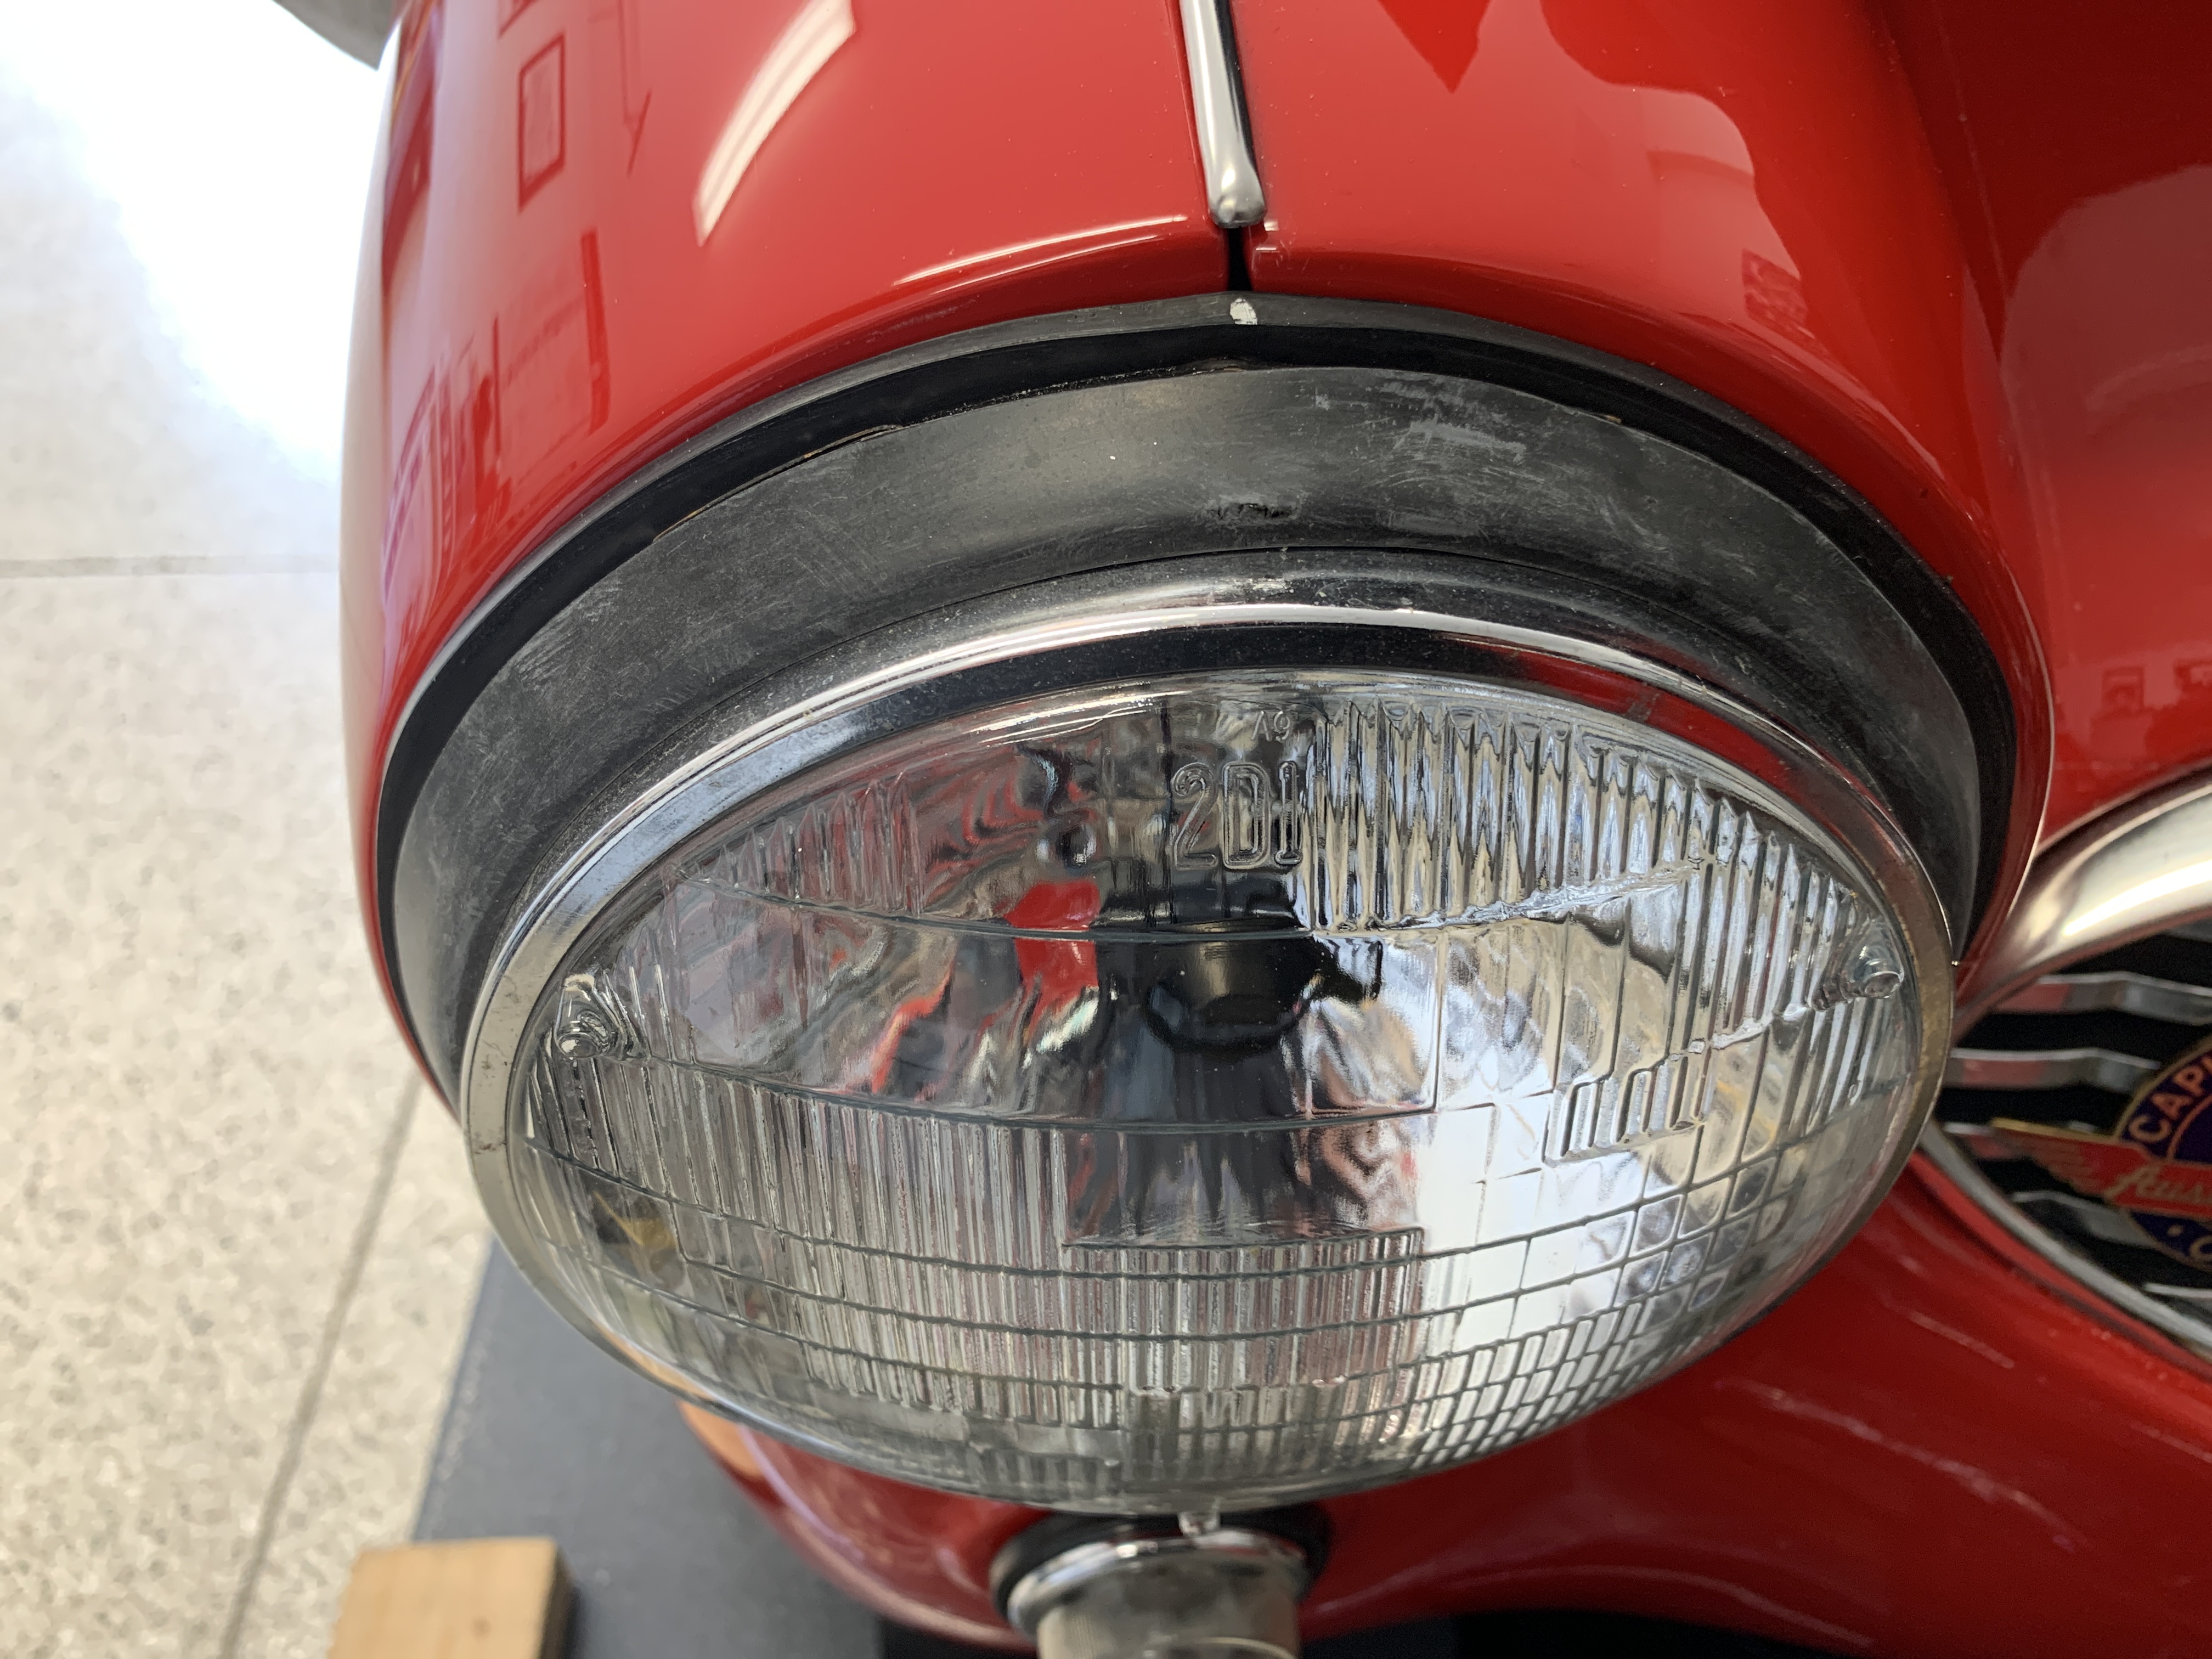
Headlight with light unit outside retaining plate in place
Three screws for outside light unit retaining plate
The retaining ring can then be withdrawn providing access to the bulb and it’s electrical connector.

Retaining plate removed to access headlight
This is a photo of the new headlight with bulb to be installed. A rubber boot to cover the electrical connection was also provided.

Lucas PL700 Headlight and Bulb Rear View
Connecting the new headlight is all “plug and play.” It is just a matter of unplugging the old sealed beam headlight and plugging the three-prong plug into the female plug on the wiring harness.
Then it is simply a matter of holding the PL700 in place while resecuring the light unit retaining plate with the three short Phillips head self tapping screws and replacing the rubber dust excluder. It requires a little finagling but one then slips the tab on the top of the rim assembly over the retaining plate and replacing the Phillips head screw (2) at the bottom of the rim by screwing it into the nut for screw (3).
Other than a final check of the alignment of the headlamp light beams and adjusting with the spring loaded screws, the job is complete. It is a good look!

Lucas PL700 reproduction headlamps installed
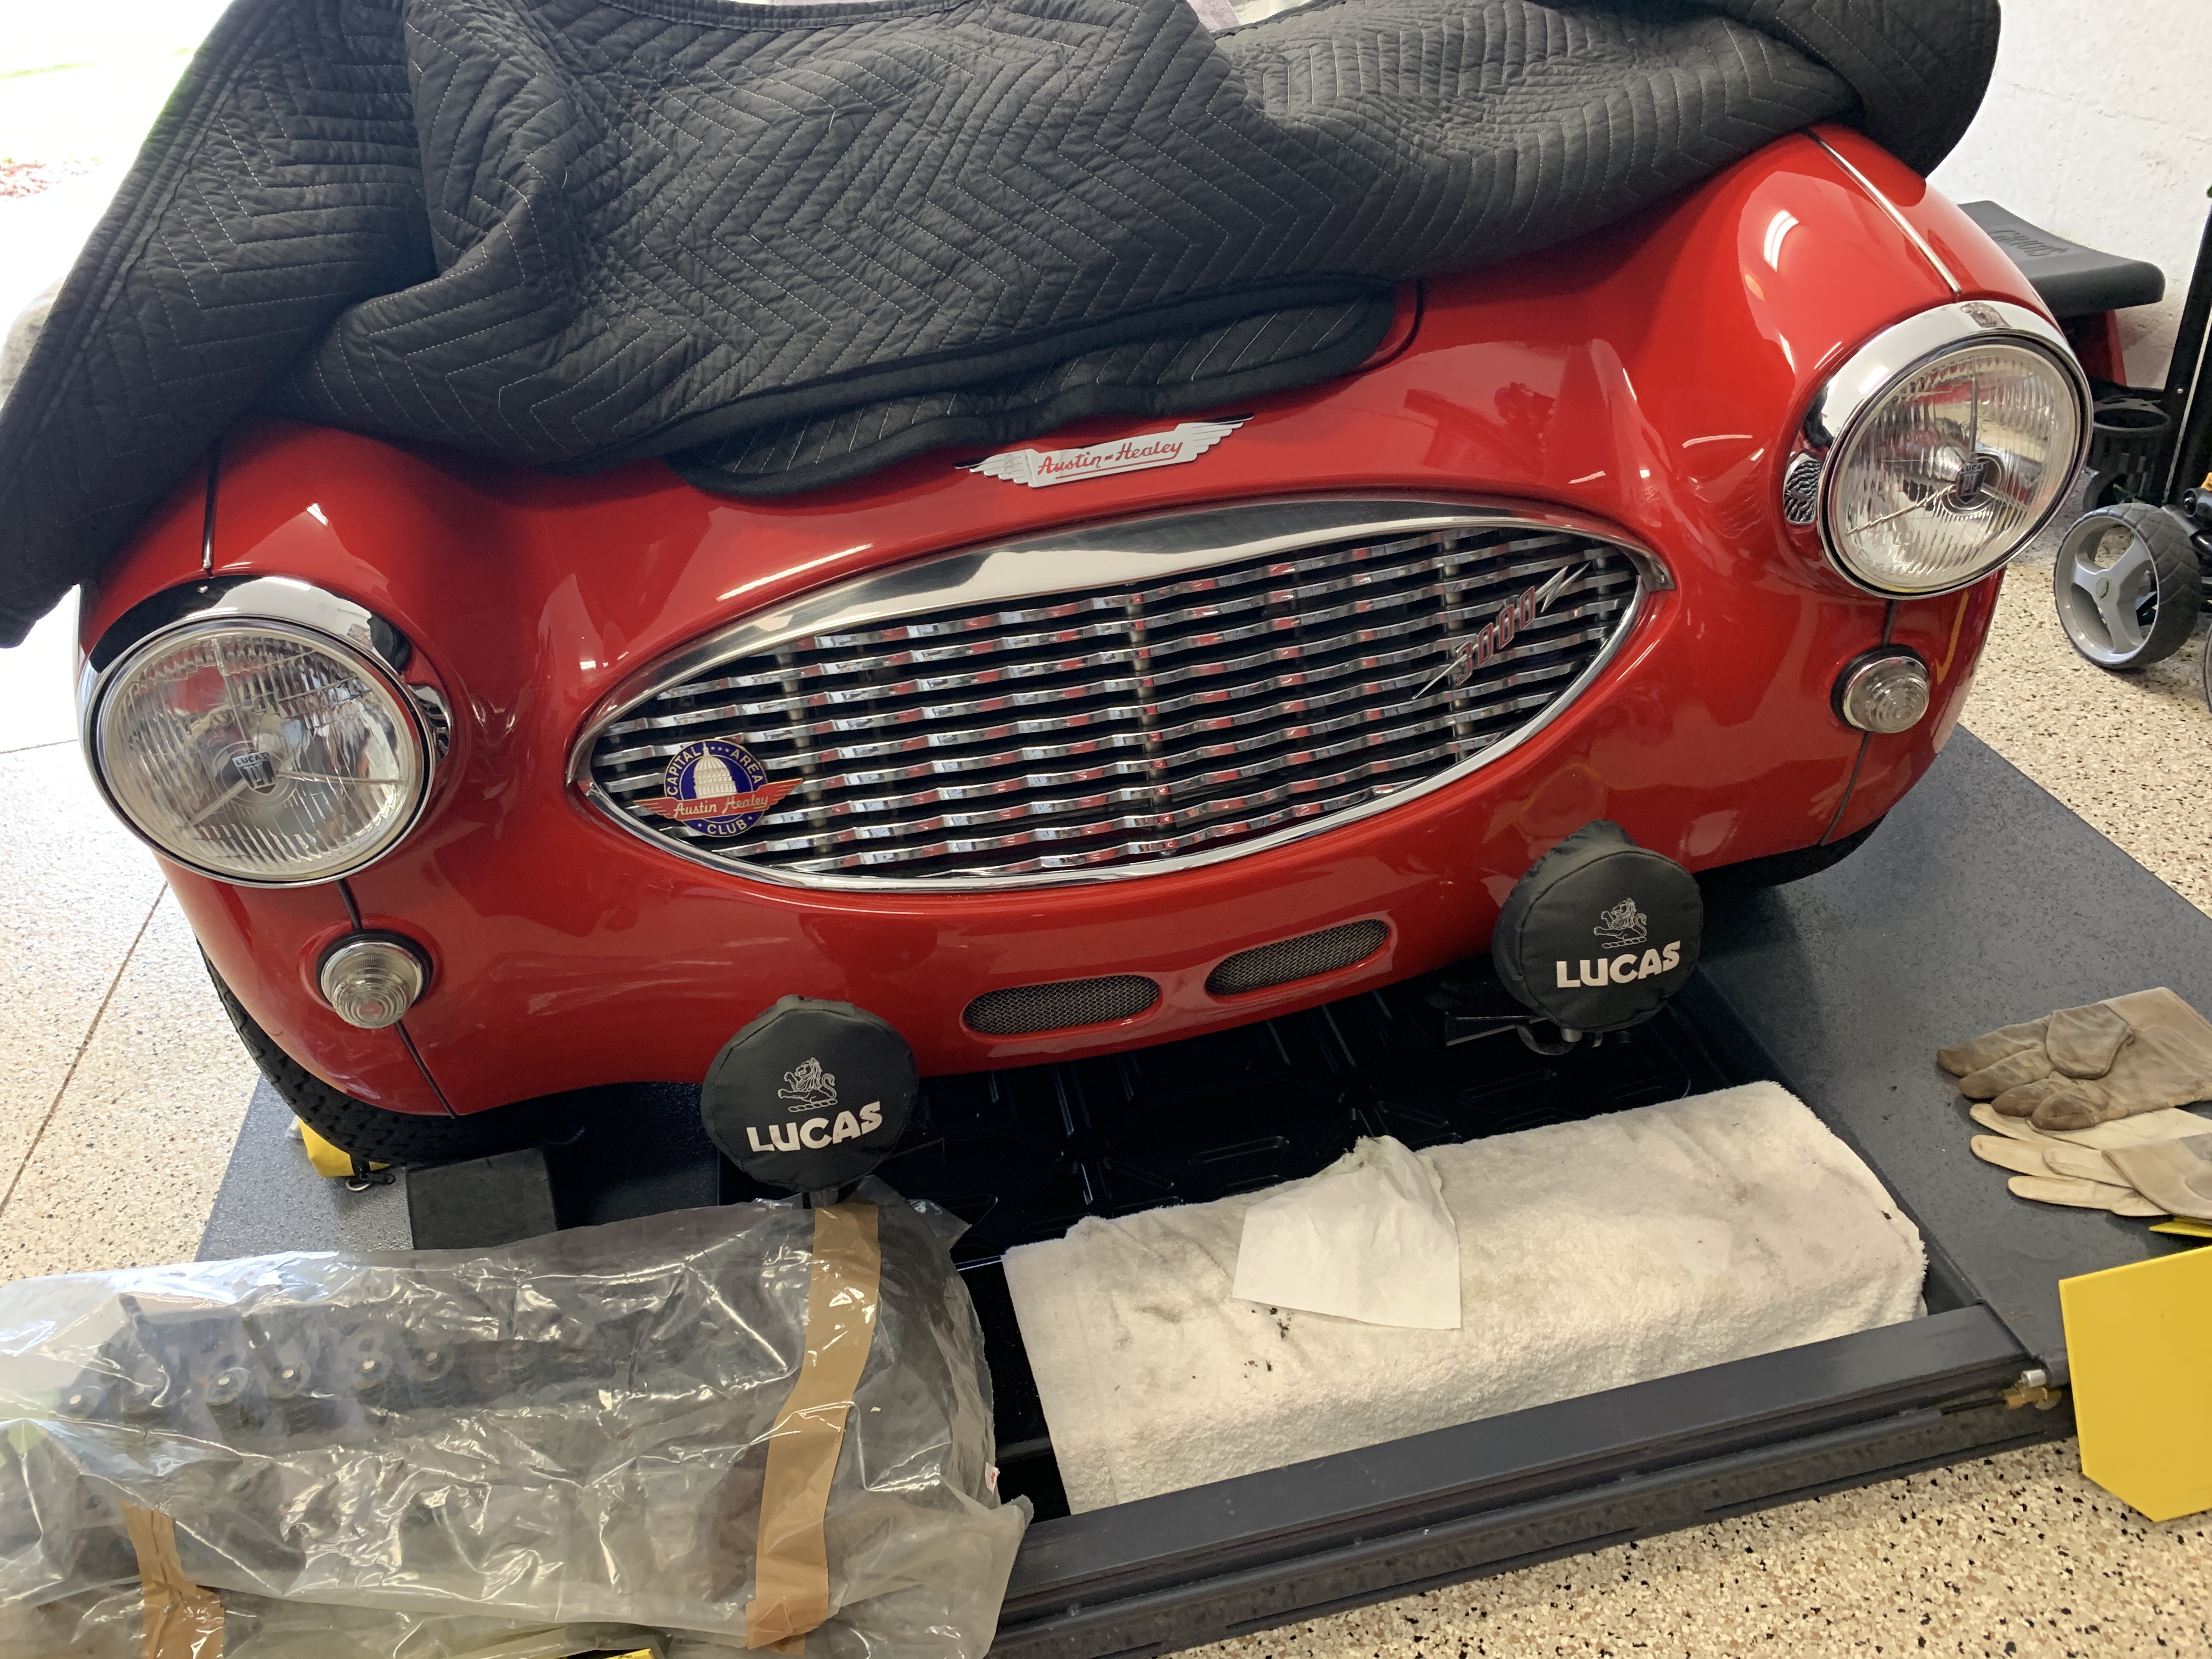
Lucas PL700s ready for use