We have introduced a number of modifications in the interior to suit our interests. These are listed in no particular order below:
Gauges – Speedometer and Tachometer
The right hand drive connector for the speedometer cable on the Rivergate five speed conversion never worked well. Once the cable came loose and a second time the cable broke.
Rivergate Speedo Cable Adapter
Now seemed to be the perfect time to convert to the GPS speedometer sold by Bugeye Guy.
The unit is made by Speedhut instruments and apparently David at Bugeyeguy.com has a custom face made for the unit to look similar to the original Sprite gauge face. Details about installation including the wiring may be found in another post “A New Electrical System.”: https://valvechatter.com/?p=13986
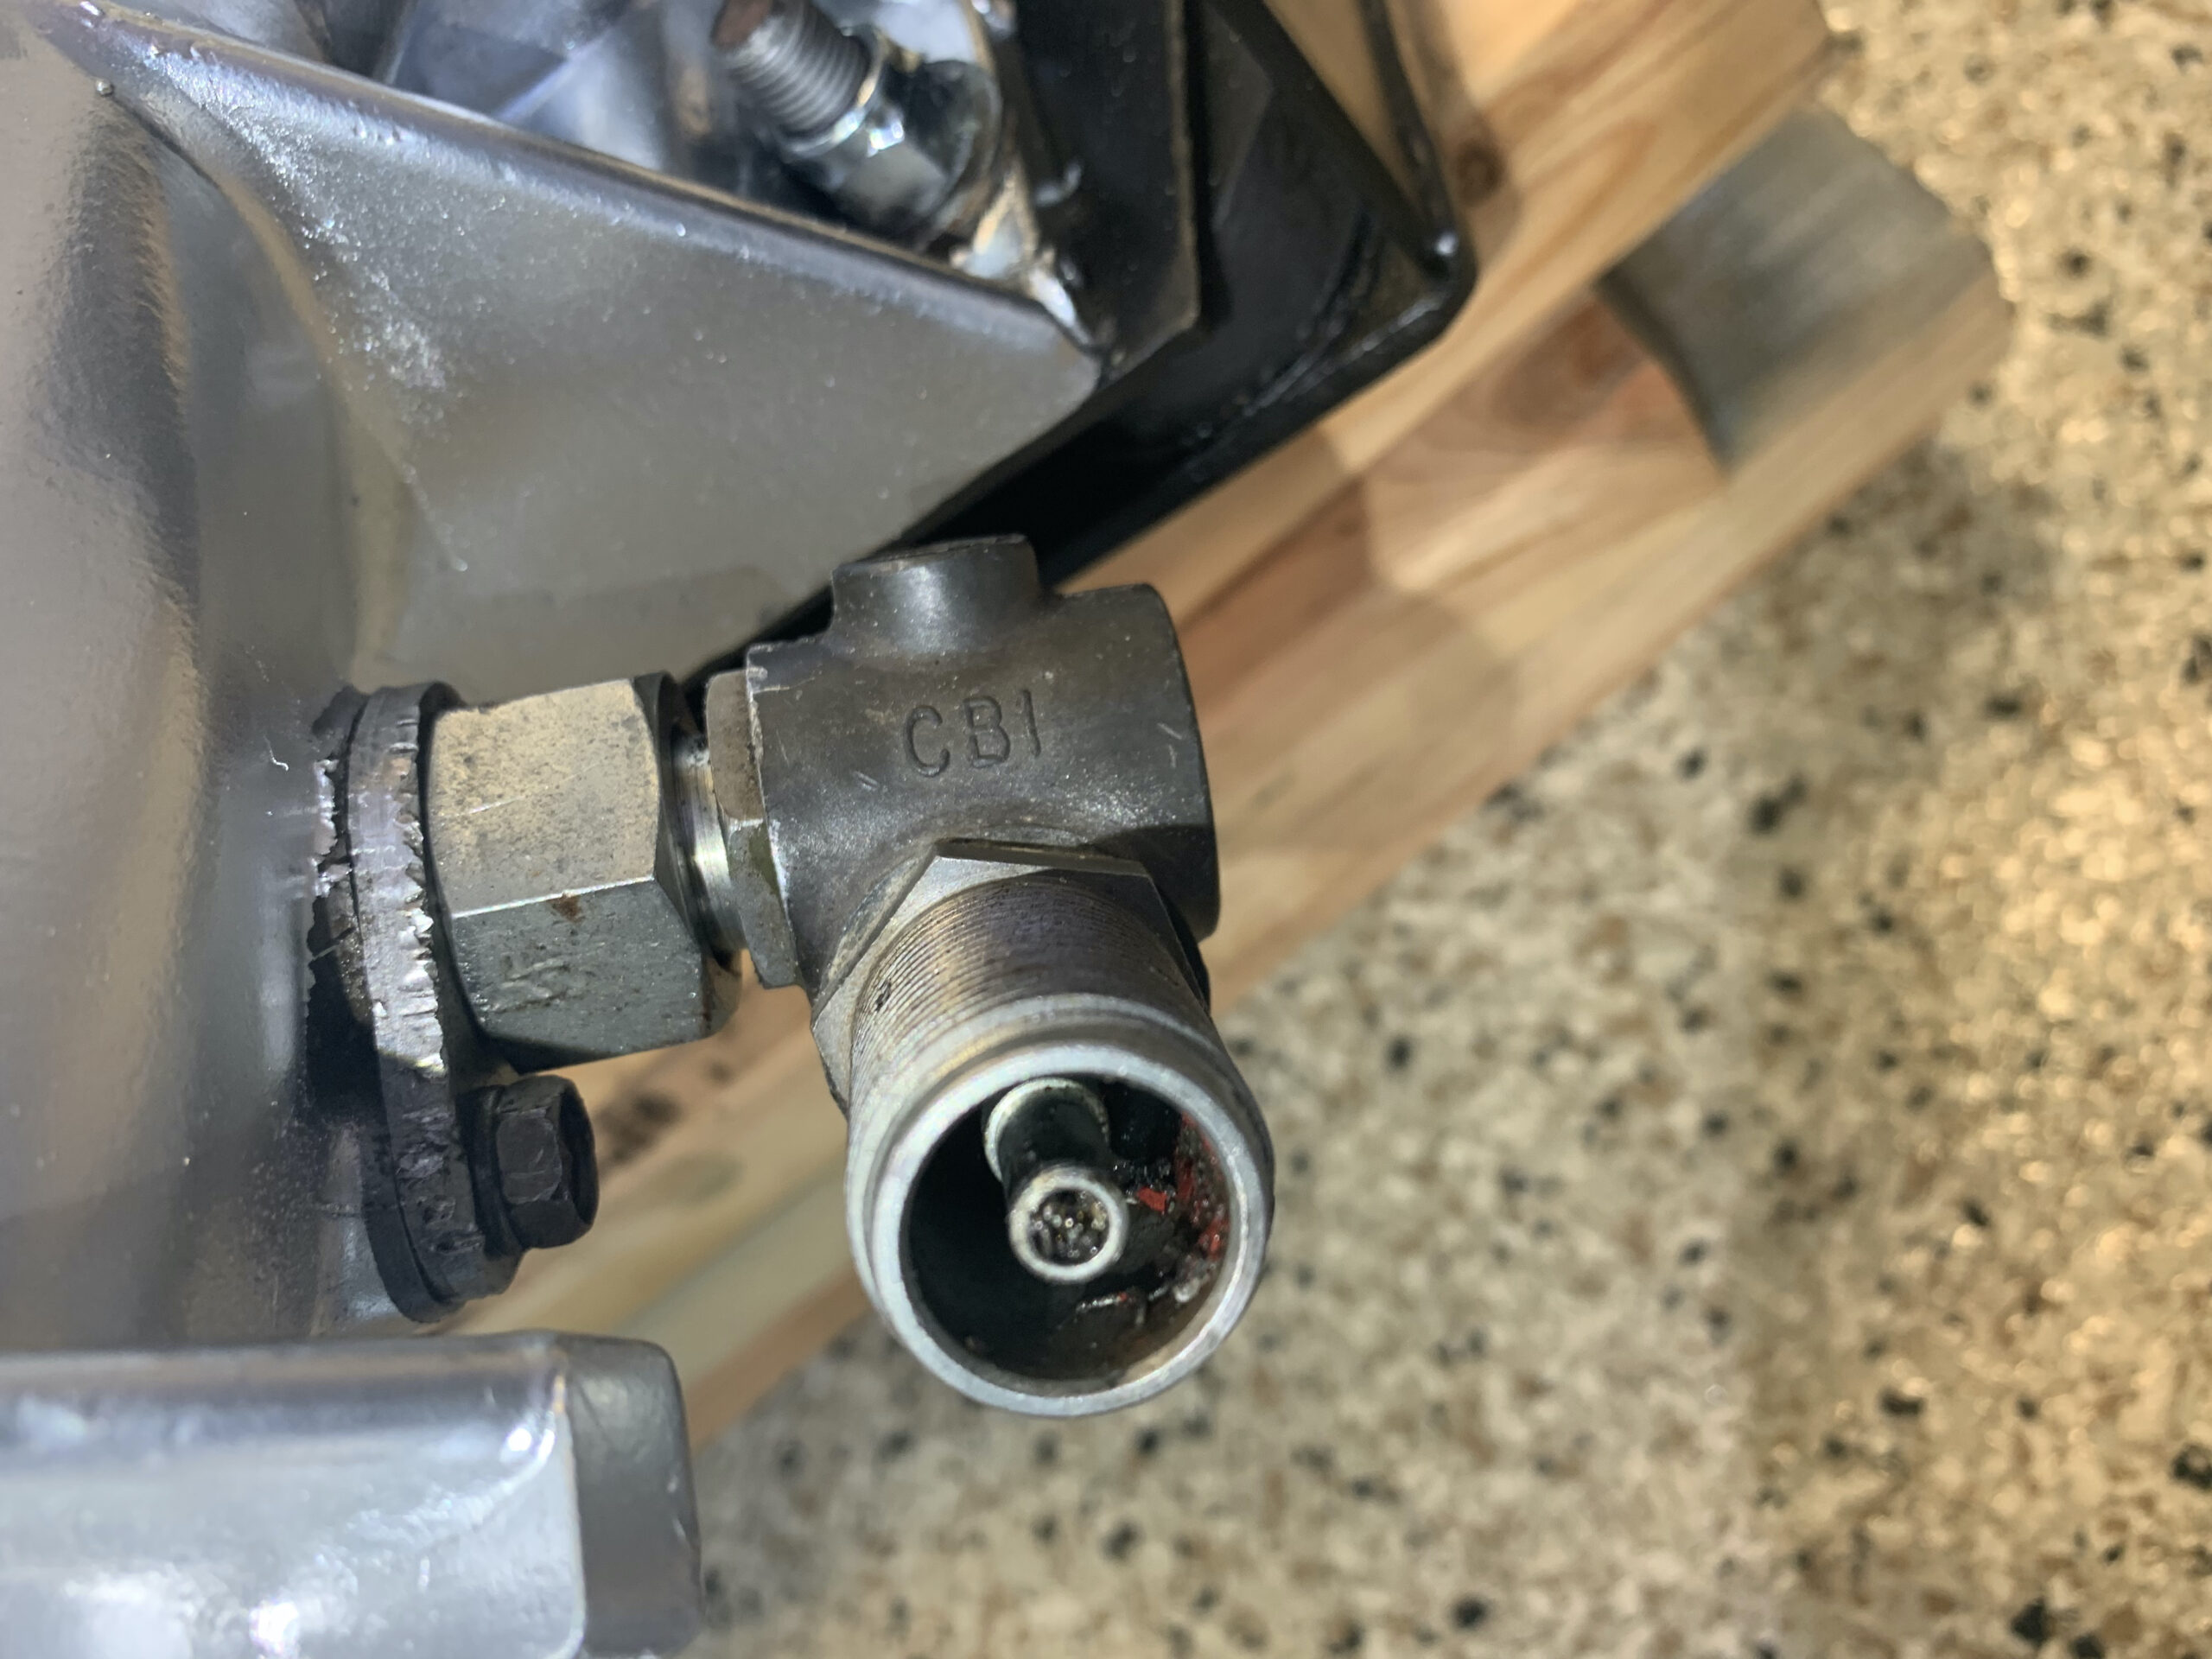
The speedometer uses a gps sensor which routed between the driver’s door and the dash trim and is secured to the top of the dash with a magnetized plate.
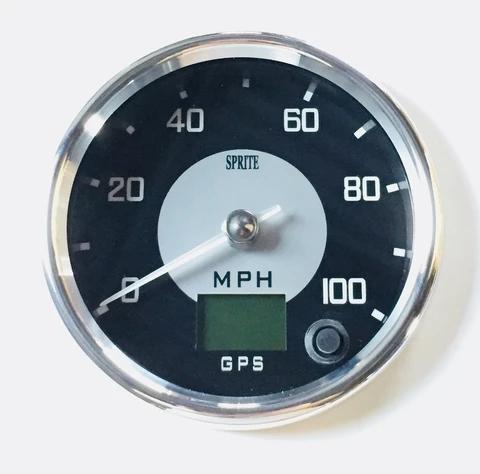
Bugeye Guy GPS Speedometer
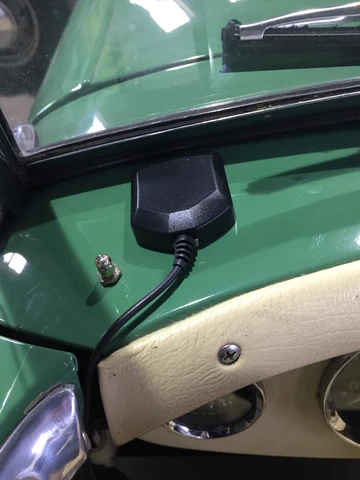
Bugeye Guy Speedo GPS Sensor
We liked the speedometer so much that we ordered the matching tachometer too!
Speedhut tachometer
Many of the electrical connections for the tachometer take advantage of the wiring loom provided with the speedo so that the tachometer can piggy-back for shorter wiring runs. Really happy with both of these upgrades. At first glance, the new instruments do look very much like the originals.
Hazard Switch and Lights
Of course, the Bugeye did not come equipped with hazard or caution lights. However, in today’s world and particularly with such a small car, hazard lights are really essential. The Classic Technologies relay/fuse box incorporates a hazard flasher relay system. We purchased a Lucas 155SA hazard switch to activate the system.
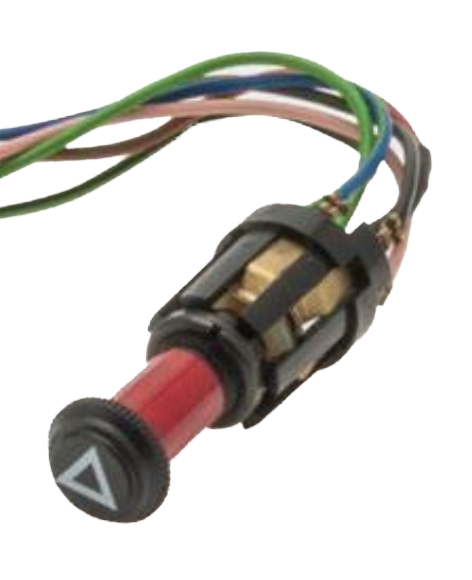
Lucas Hazard Switch
The switch is a push/pull type and incorporates a flashing warning light in the body of the switch. The switch will be added to the dash panel we built and is installed behind the dash.
The Lucas 155SA hazard switch was used in many British cars, and apparently the one we ordered was used in the 1974-75 triumph TR6 and the 1973-77 Triumph Spitfire. Details about installation including the wiring may be found in another post “A New Electrical System.”: https://valvechatter.com/?p=13986
Variable Speed Wiper Controller
Some years ago Ed Esslinger authored an article on a Sunbeam Tiger web site about a kit he put together to provide unlimited variable control of the speed of the Lucas wiper motor. We tried one of his kits on the Big Healey and liked it. Great for handling mist and light rain. Unfortunately it doesn’t make the wipers go any faster!
We installed the control knob for the variable speed rheostat on the vertical panel we made and installed behind the dash. We took advantage of the blanking bolt nuts intended for the steering column bracket in a RH drive car as a location for mounting the controller electronics. No holes were drilled in the chassis. Details about installation including the wiring may be found in another post “A New Electrical System.”: https://valvechatter.com/?p=13986
LED interior gauge lamps
All of the lights were converted from the original incandescent bulbs to LEDs sourced from Moss Motors.
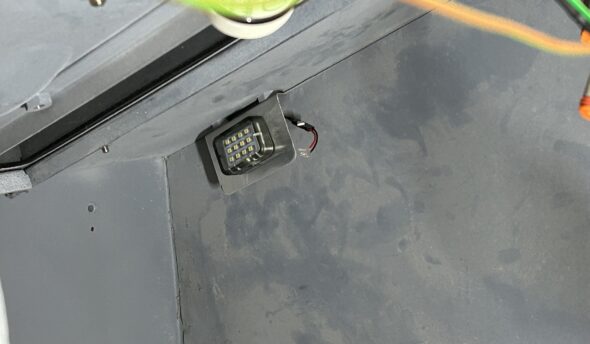
LED Interior footwell and boot courtesy lights
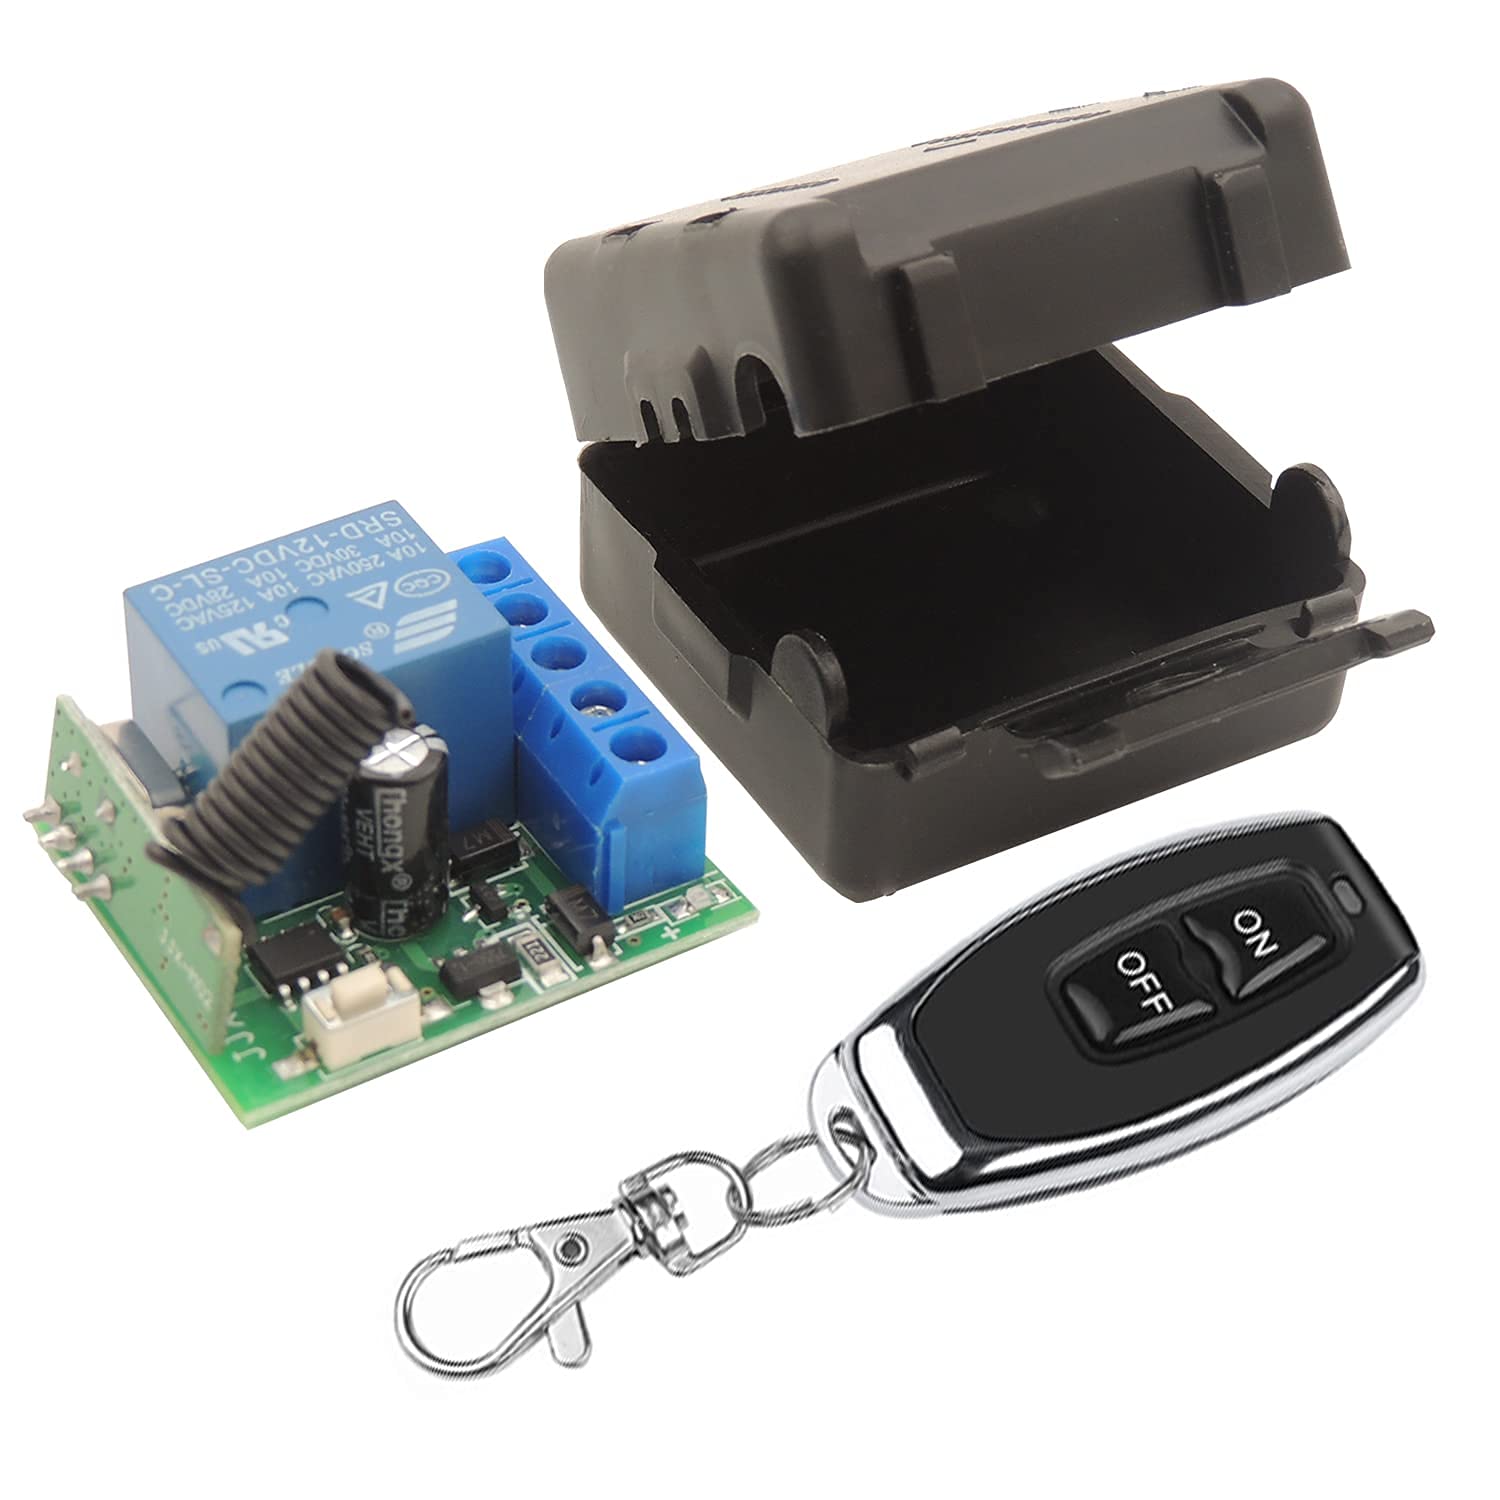
LED interior footwell, map and boot courtesy lights operate remotely by a key fob or manually with a toggle switch on the panel behind the dash. We ordered the RF Relay and key fob from Amazon. DieseRC 433Mhz Universal Wireless Remote Control Switch DC 12V 1CH RF Relay Receiver Module with 1 Transmitter, EV1527 Learning Code Remote Switch. Details about installation including the wiring may be found in another post “A New Electrical System.”: https://valvechatter.com/?p=13986

RF Courtesy Light Controller
The boot has two aimable LED lights. Each one is mounted on the LH and RH rear interior quarter panels. These lights were sourced from SuperBright LEDS.
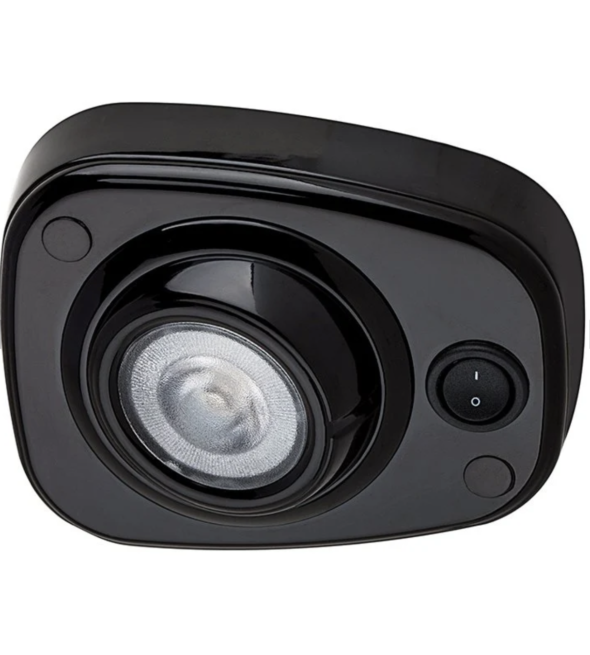
Boot LED Light
In the front footwells we also installed LED lights sourced from Better Car Lighting in the UK.
Footwell Lights and Brackets
Turn Indicator Warning Buzzer
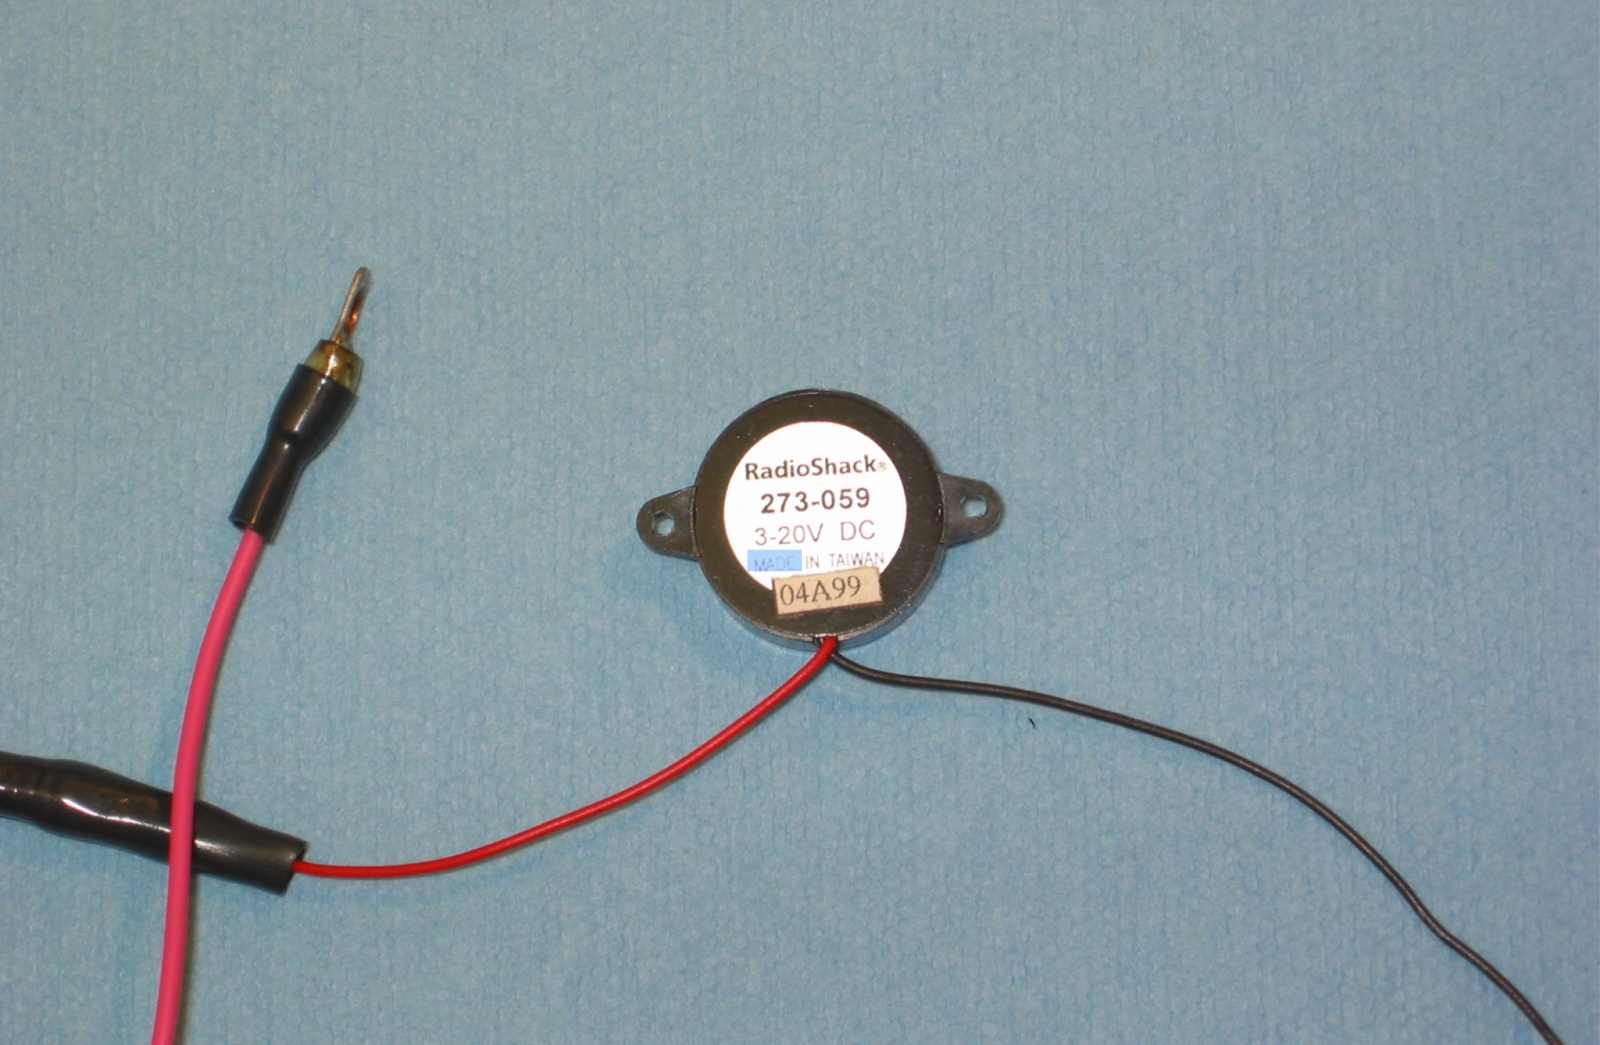
The turn indicator switch in the Bugeye is not self-canceling. While there is a warning lamp on the dash located between the speedometer and the tachometer, it is often not sufficiently bright to let the driver know to turn the switch to the off position. We installed a little buzzer sourced from Radio Shack to provide an audible alert when the flashers are turned on.
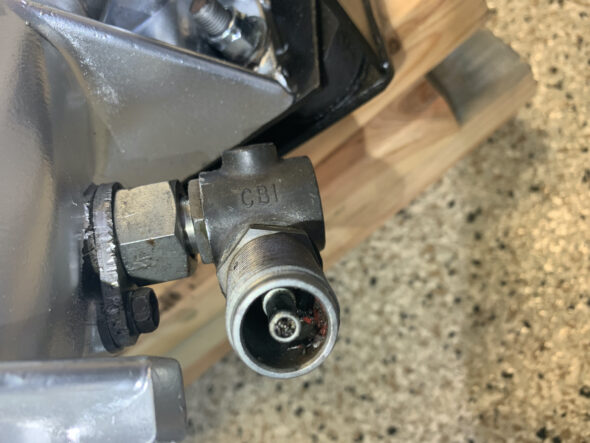
Modified Windscreen Washer Pump (plunger)
The Bugeye came equipped with a windscreen washer system that was activated by pushing a plunger mounted in the dash. The pressure created by pushing the plunger moved the cleaning fluid out to the windscreen. The process worked well enough, but when the Big Healey was restored we became aware of Stu Brennan, an owner of a Sunbeam Tiger, who had converted his hand activated pump windscreen washer to an electric washer. Stu’s idea was to put an electric momentary micro switch inside the aluminum pump canister thereby eliminating the need to install an additional switch somewhere. Since the washer in the Tiger is the same as the one in both the Big Healey and the Bugeye we decided to give it a try.
Two items needed to be purchased for the conversion. An electric pump typically used on later Sprites was ordered from Moss Motors. A Home Depot switch was purchased, Gardner-Bender, Push Button, GSW-22, SPST always-off. Details about installation including the wiring may be found in another post “A New Electrical System.”: https://valvechatter.com/?p=13986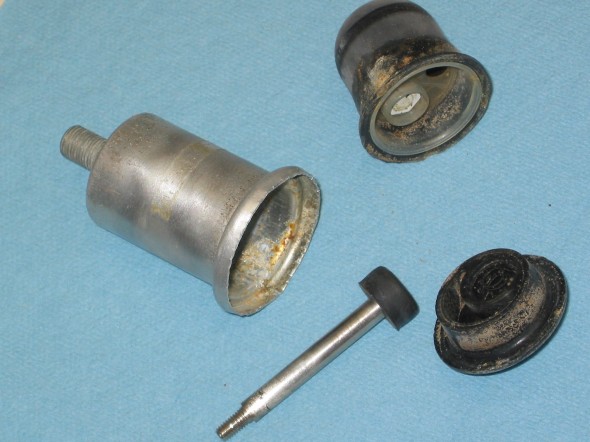
Washer Pump Parts
Under Dash Parcel Tray
Later Sprites and MG Midgets had a parcel shelf mounted under the dash on the passenger side of the car. We decided that it might make sense to add one to the Bugeye as well because there just isn’t much space for storing small items. The shelf was originally made from some type of fiberboard. We located a fellow in the U.K. who makes the shelves out of aluminum and for an extra commission will add the front rubber cushion to the shelf too. All at a very reasonable price.https://www.ebay.com/sch/i.html?item=116168223491&rt=nc&_trksid=p4429486.m3561.l161211&_ssn=bicycle55cps
This is an image of the shelf sans the rubber cushion. All of the mounting holes are incorporated. We will cover the shelf in red vinyl to match the interior.
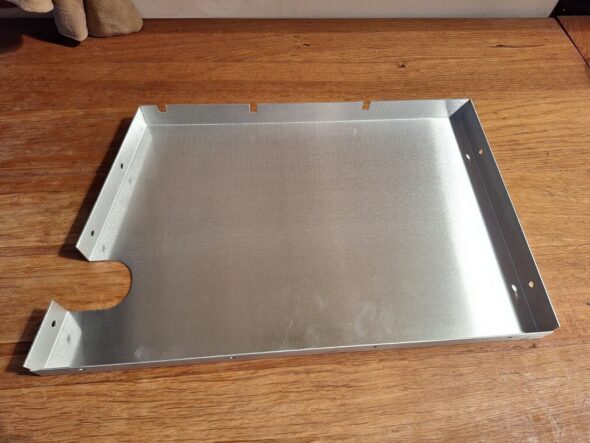
Aluminum Parcel Shelf
Seat Belt Harnesses
Upgrading to shoulder harnesses was a must, but unlike the belts we had in the car previously, we decided on retractable units this time around. We ordered our belts from BugeyeGuys.
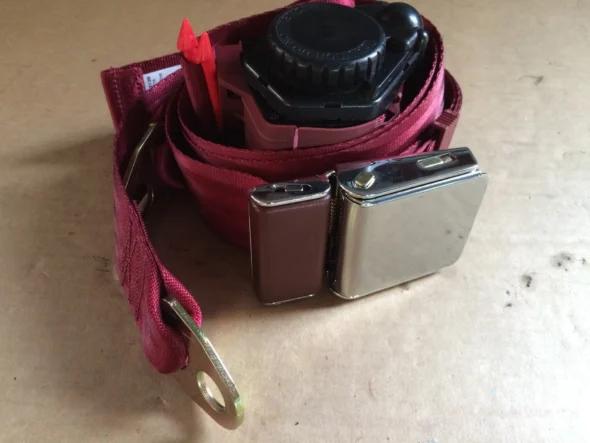
Red Retractable Seat Belts
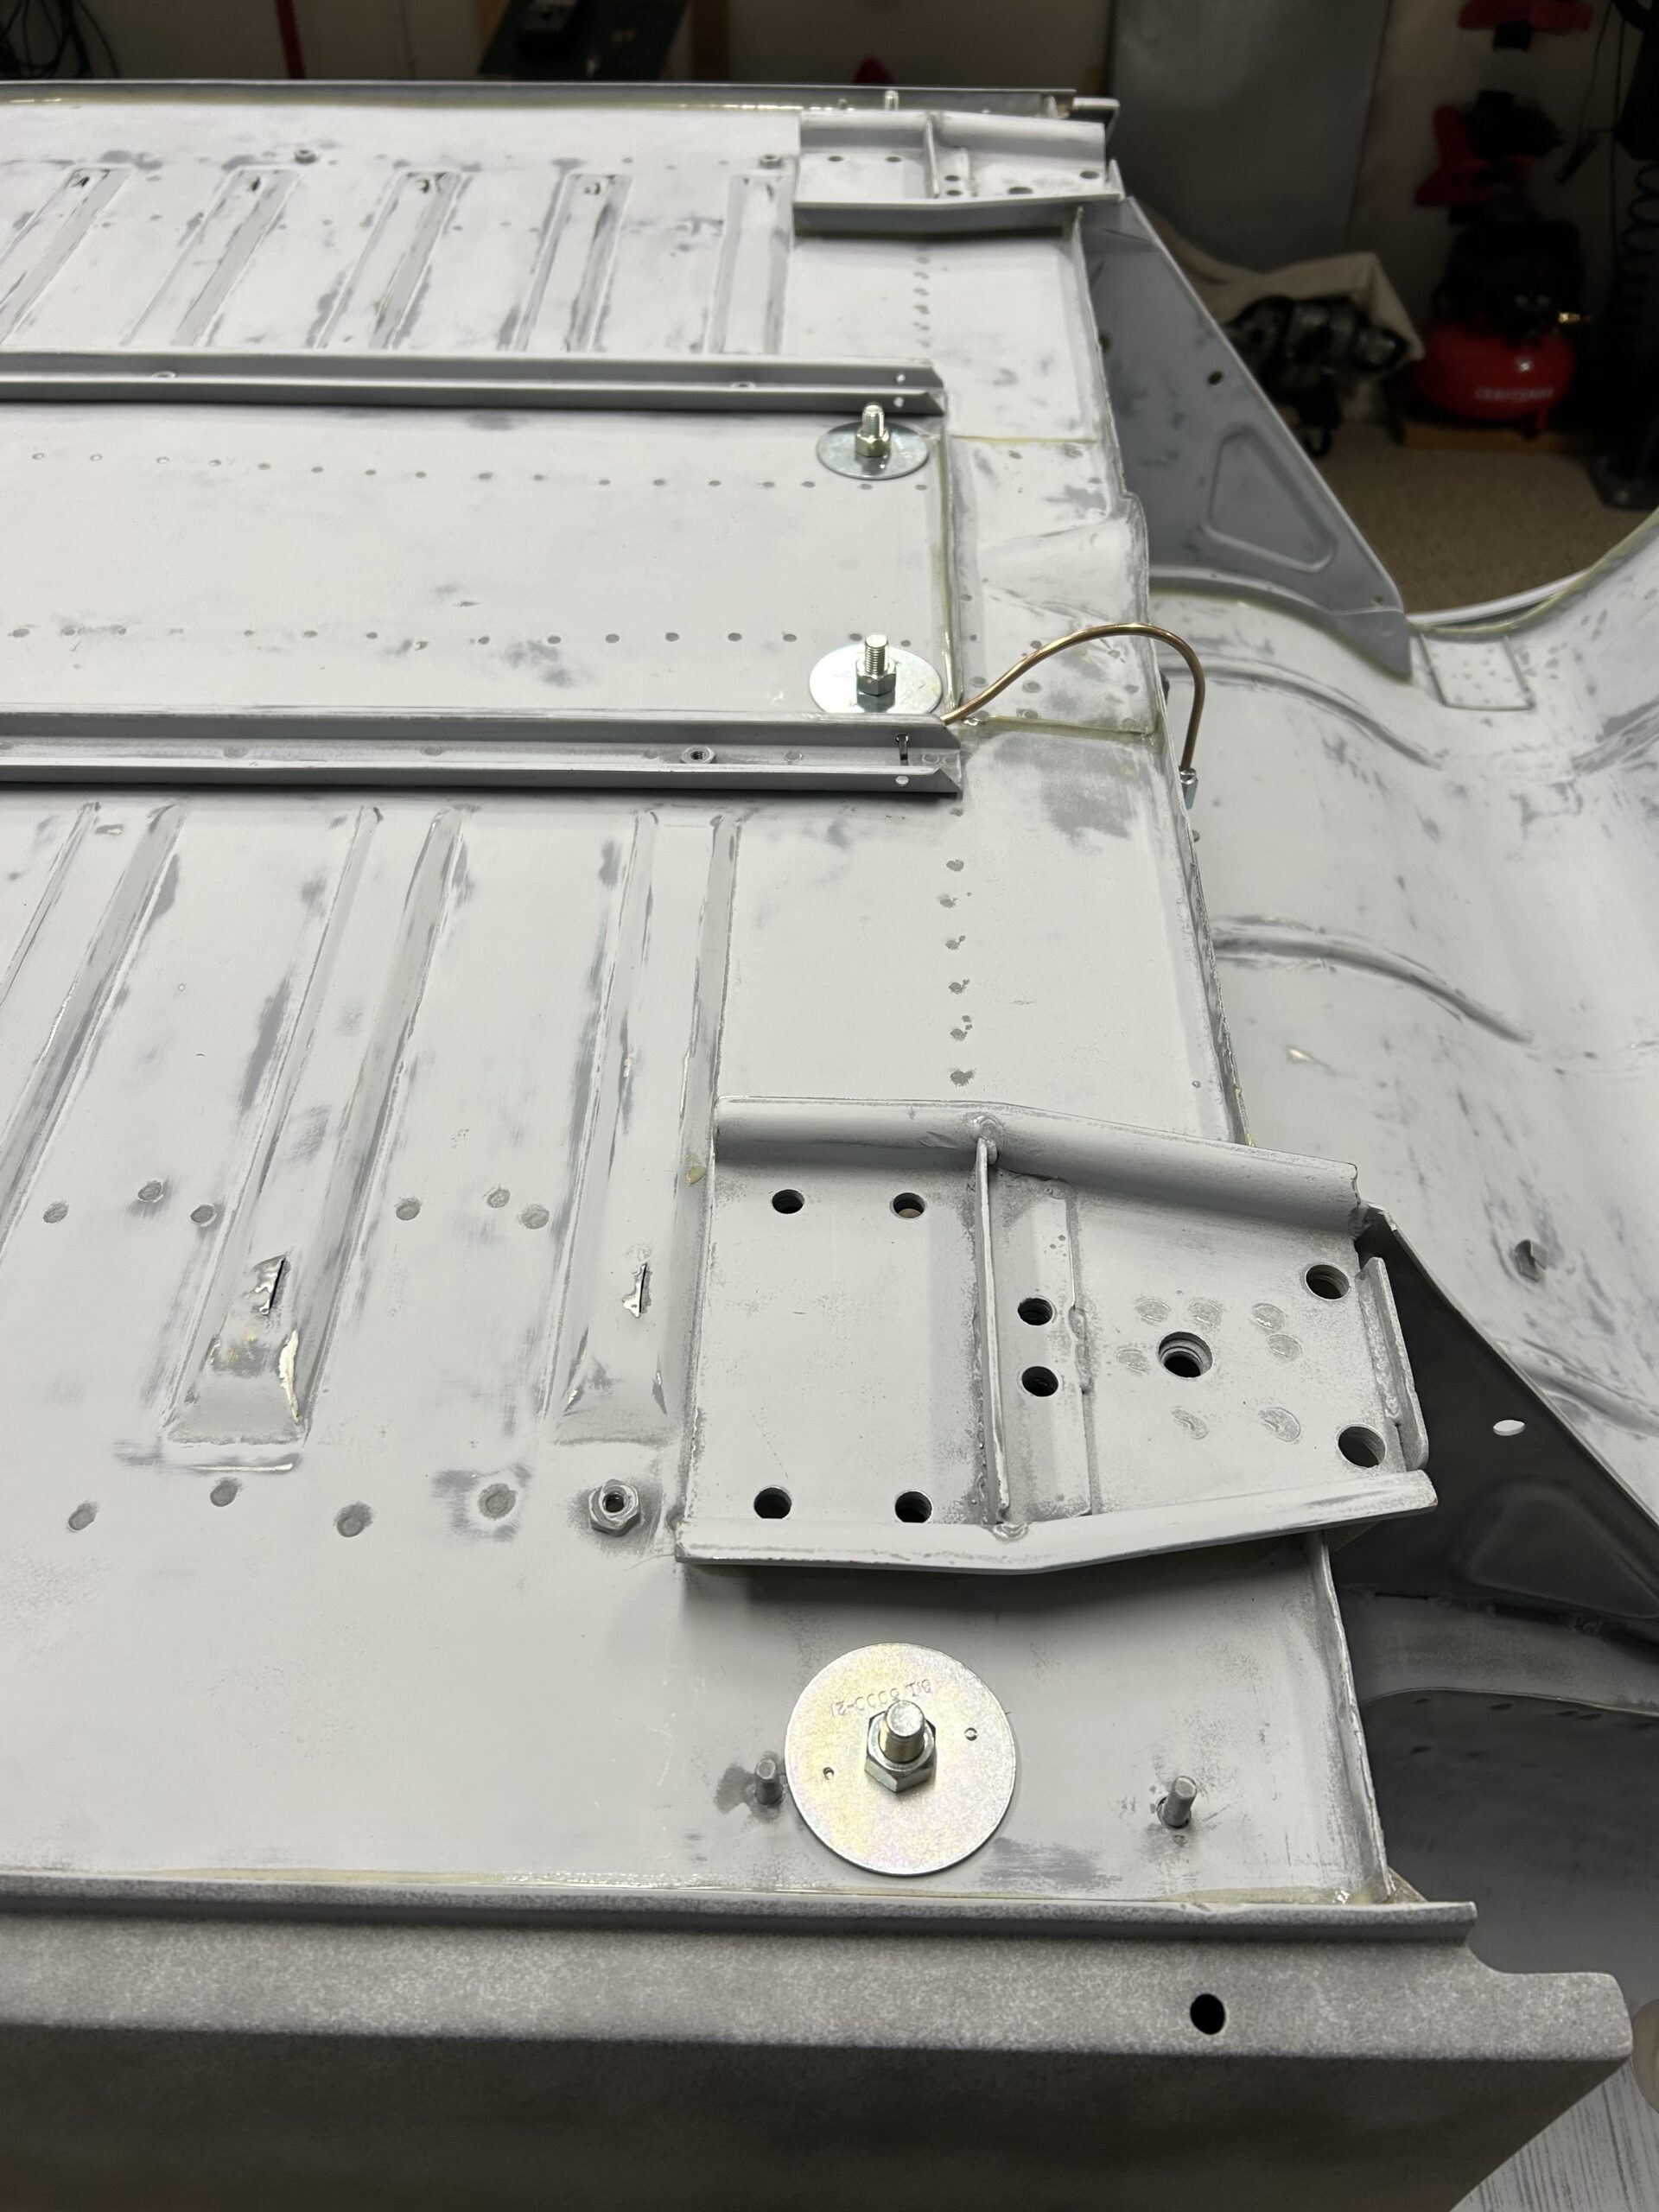
While we generally try to do everything we can to avoid drilling new holes in the Bugeye sheet metal, it is required for this installation. Four holes in the interior floor and two holes in the rear wheel wells.
Seat belt mounting holes

Shoulder Harness Retractor Holes
This is a brief video showing the installed belts:
https://vimeo.com/942791115/4a83c628a8?share=copy
cccccc