We completed the wiring harness for the central part of the car and to the bonnet before the Bugeye went for paint. Now that the car is home we are able to finish up the wiring to the rear so that we can send the harness components off to Rhode Island Wiring to have them wrap the harnesses in cloth braid.
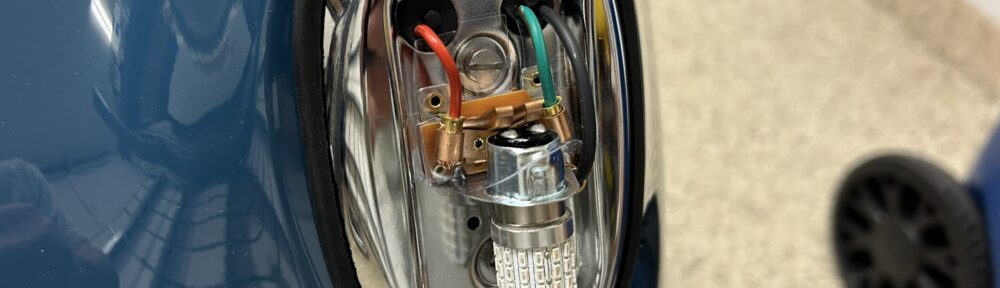
Crawling into the inside rear of a Bugeye, or “hole” as I refer to it, is no easy task. It is best handled by a nimble young contortionist – not by a 6′ 1″ seventy-two year old! Wiring the tail lights with brake lights, flashers and side lights, the license plate lamp, the fuel level sender, the fuel pumps and rear courtesy lights required many a trip into the depths of the “hole.”
The rear flashers require the installation of spire nuts to the body. We purchased some new ones and mounted them.
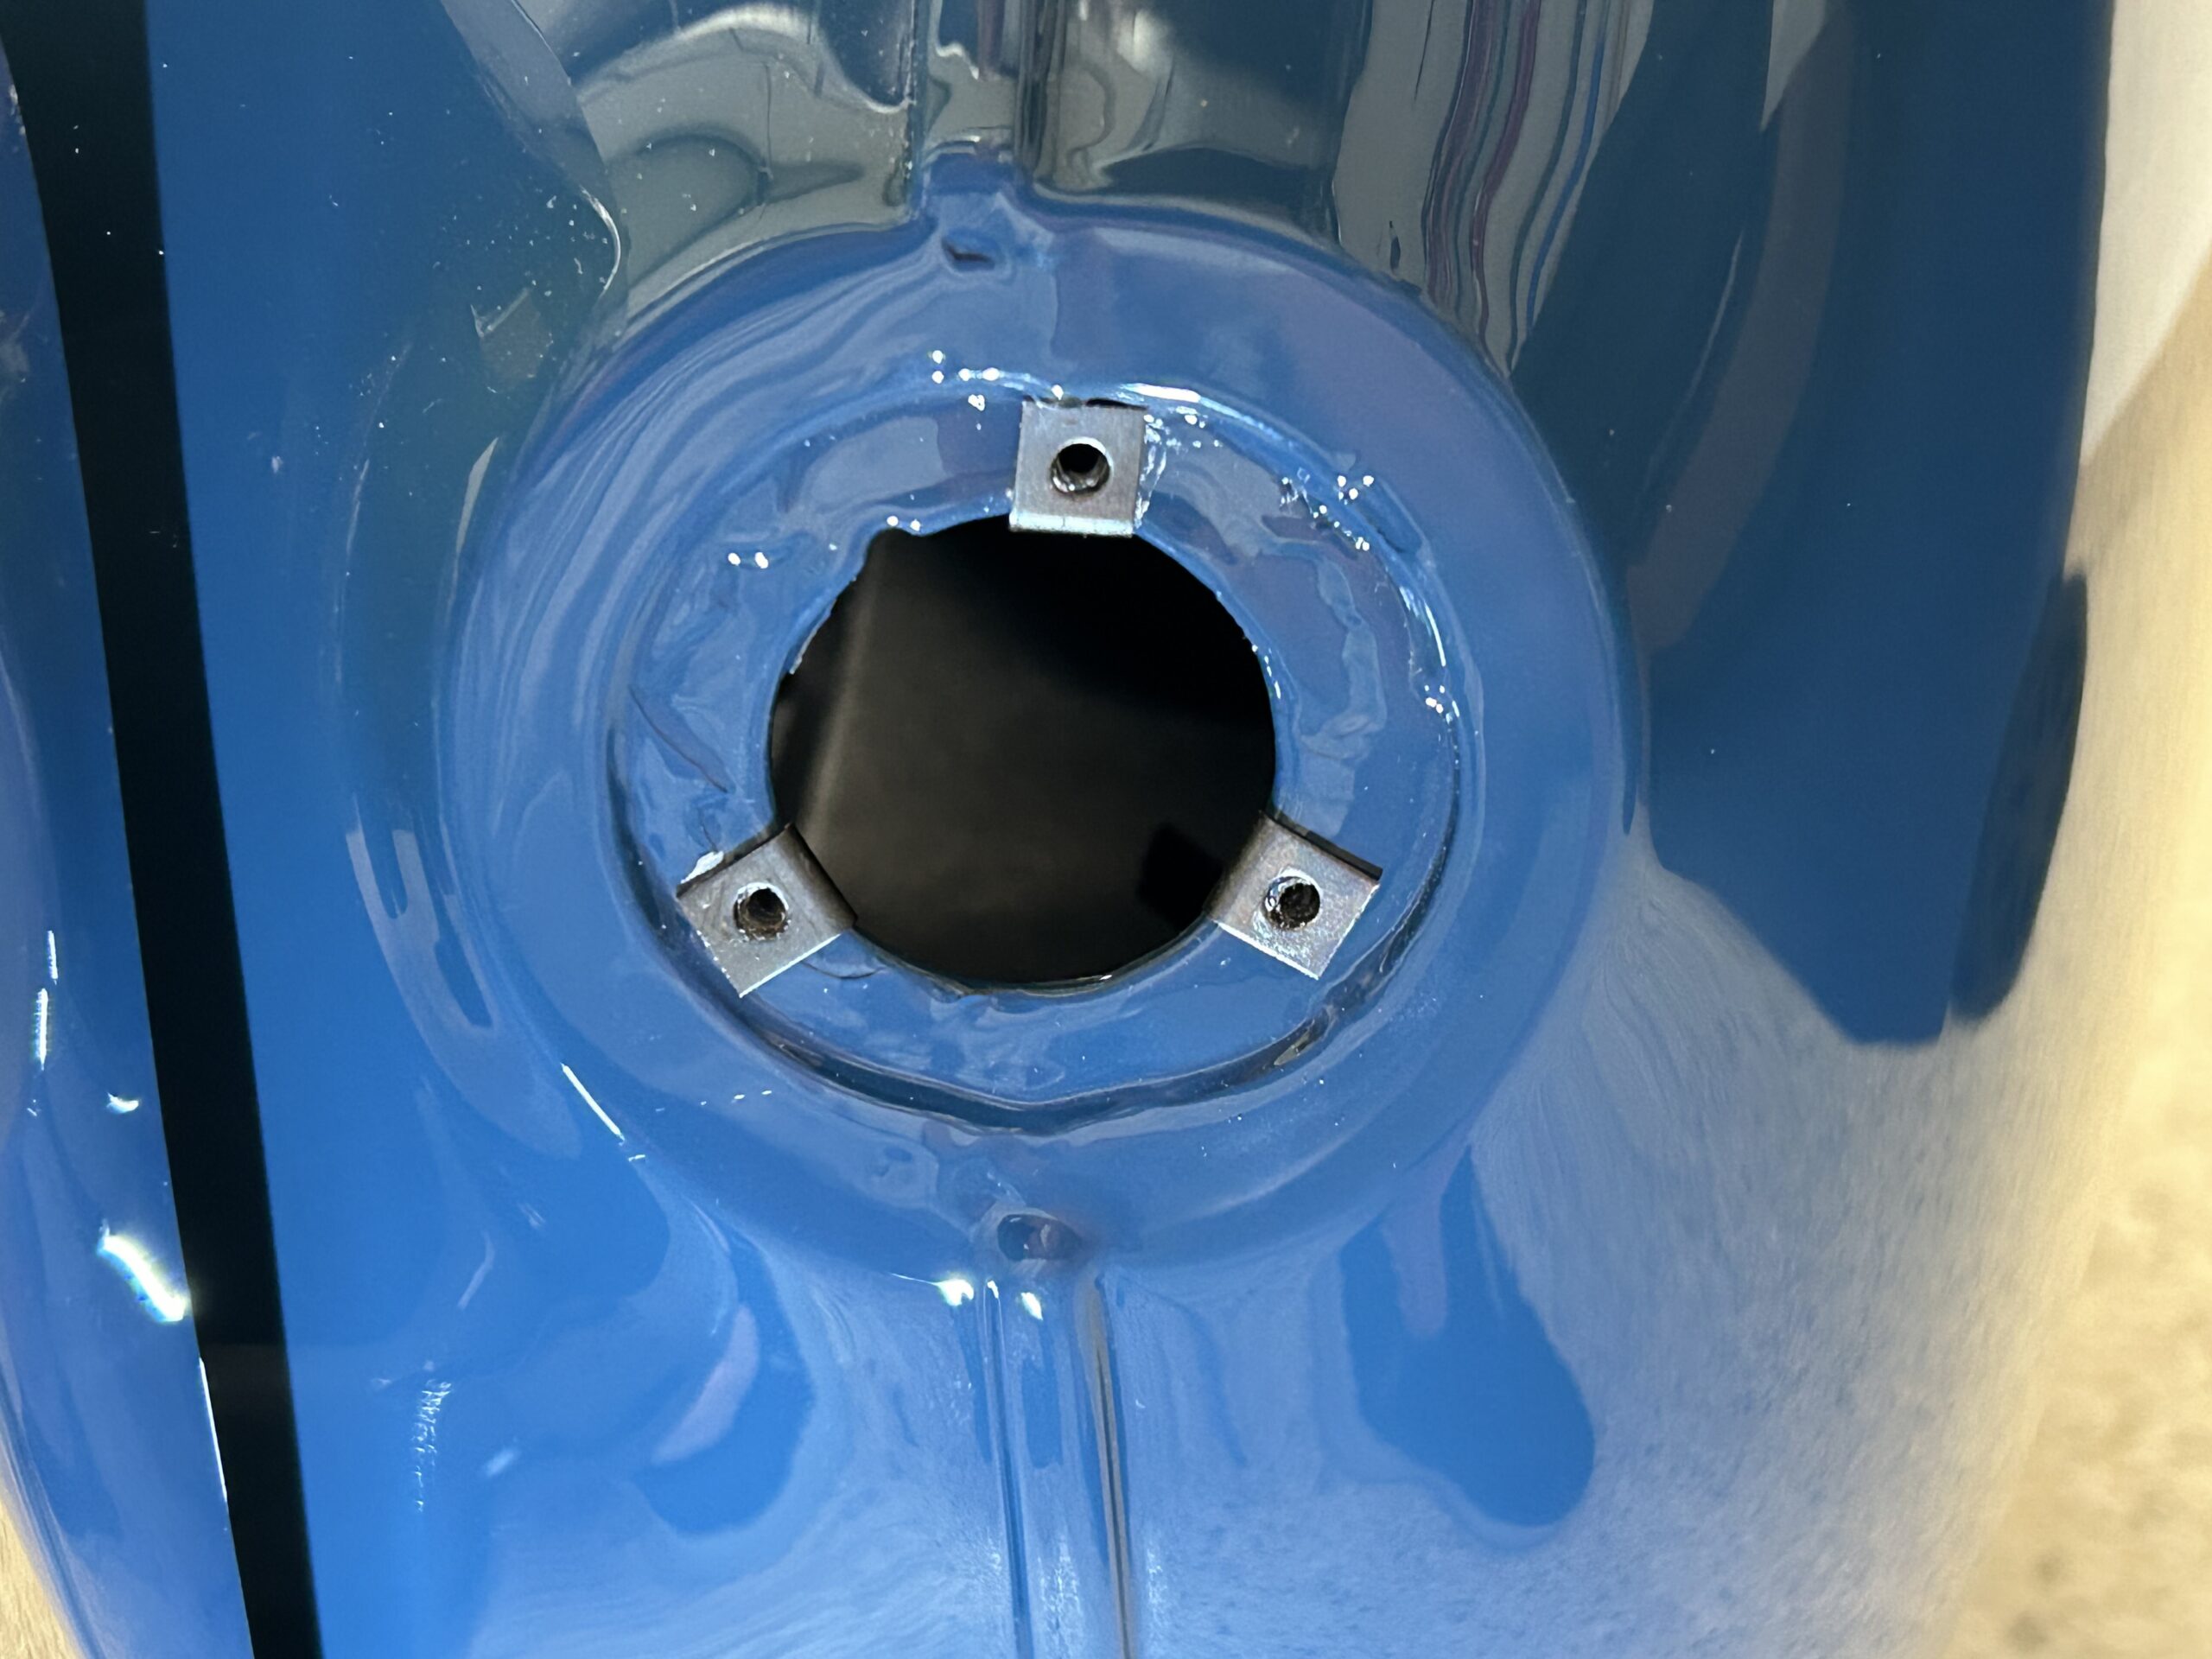
Rear Flashers Spire Nuts
The original Sprite MK I had a mechanical fuel pump but with the onset of later Sprites, and the 1275 engine, the design was modified to incorporate a rear mounted electric pump. In our case, we mounted the SU pump as it would have been secured in the later Sprites, but we also added in series a redundant low-pressure Facet pump with a dash mounted switch enabling the driver to switch between the two pumps as desired. The center position on the switch disconnects power to both pumps providing a form of anti-theft deterrent.
We fit the rear courtesy lights to each of the rear boot trim panels. We purchased the panels from Bugeyeguys.com. They required considerable trimming to fit them to the car, but once achieved we were able to mount the lights and complete the necessary wiring. The panels will eventually be covered in a red vinyl that matches the other interior panels.
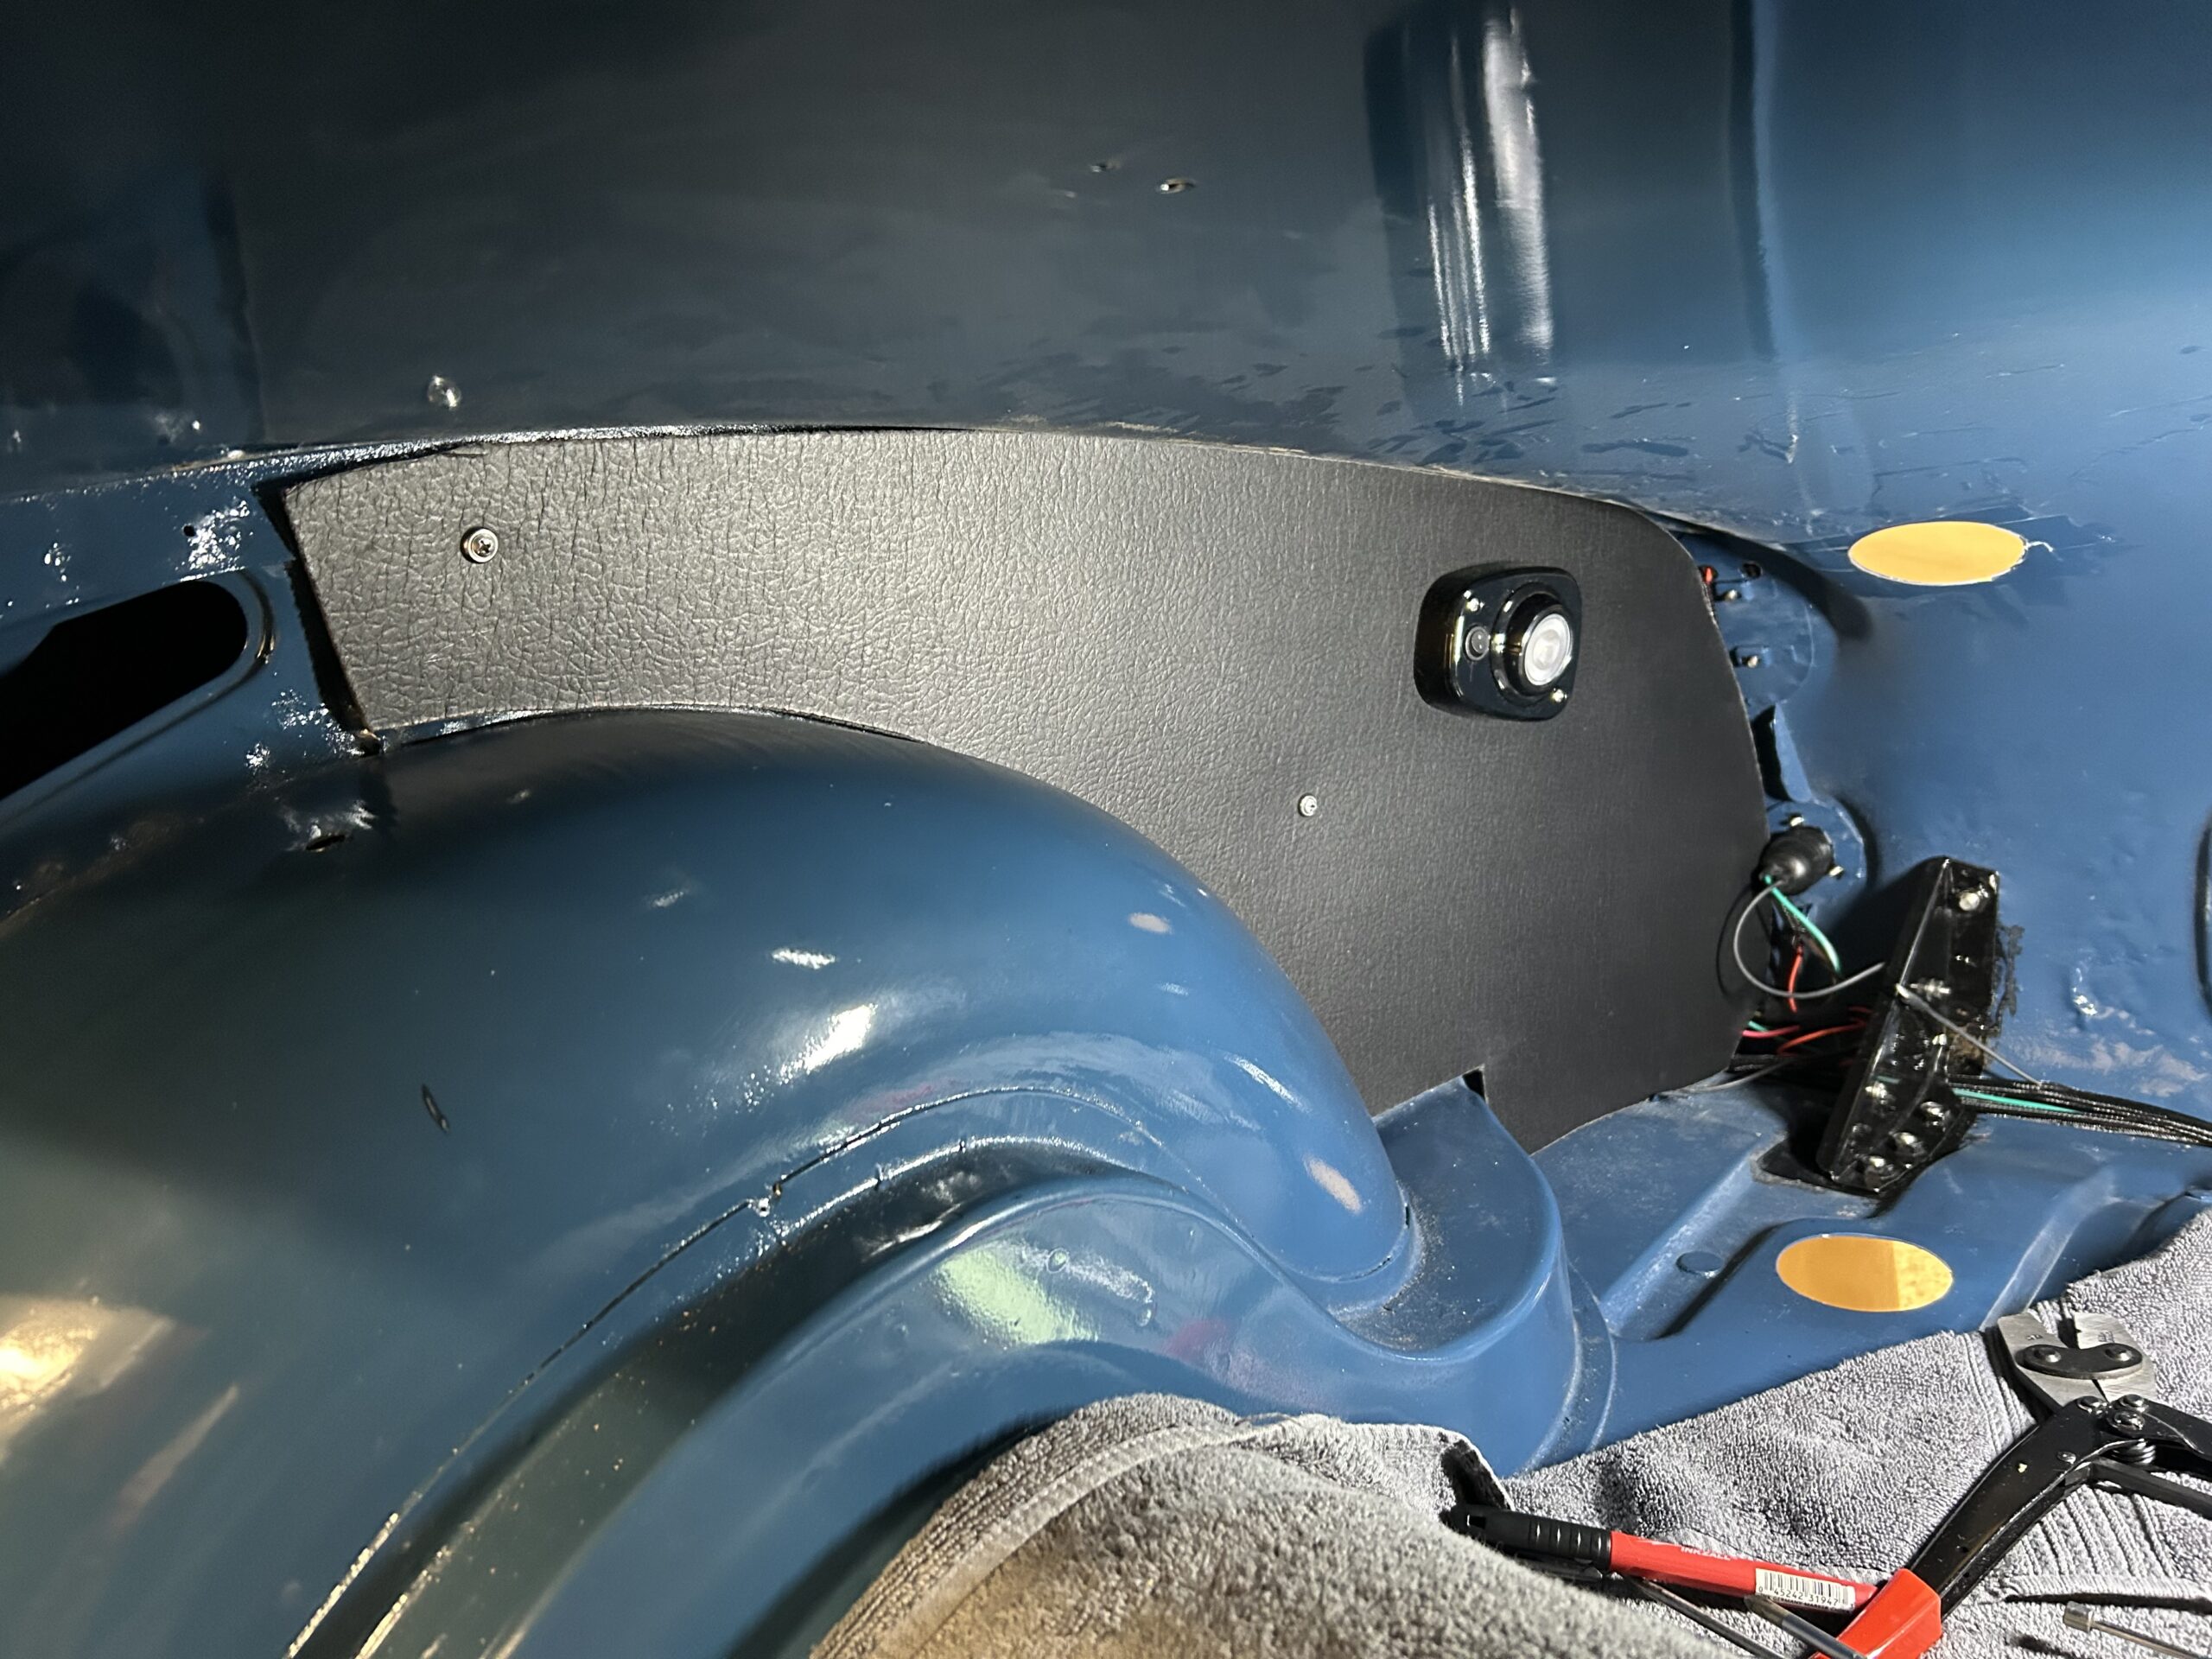
Rear Trim Panels and Courtesy Lights
In the rear we resorted to using rubber covered bullet connectors for a number of fittings. This was done because it is hard to reach into the back of the car and if it became necessary to separate wires for one reason or another it is easier to accomplish with the bullet connectors as opposed to the Deutsch connectors. Since weather isn’t an issue in the boot we should not experience any problems with the bullet connectors.
Once we established our wire lengths and connections we pulled the harness out of the car to send off to have them braided in black with the signature baby-blue tracer used in the Sprite. Originally, all of the wires to the rear of the car were bundled in one braided wire package and routed to the rear under the door sill and rear trim panels. Because we added wires to the mix we decided to bundle the wires into two four-wire groups to run in parallel under the panels. Hopefully this will cause the trim panels to protrude less and yield a nicer finished product.
Bugeye Restoration Video Episode Seventy-one shows the creation and installation of the electrical wiring in the rear of the car for the exterior lights, interior courtesy lights, the fuel pumps, and the fuel sender for the fuel gauge. Fitting of the rear trim panels is also shown.
https://vimeo.com/978445012/5aa017a2ba?share=copy
The following content is found in this video:
0:00 – Wiring for tail lights and flashers
1:24 – Spire nuts for side lights/flashers
1:40 – Wiring the side light/flasher fixtures
2:40 – Chrome trim rings and red beehive glass
3:25 – All rear lights mounted
3:36 – Internal rear lights wiring
4:17 – License plate wiring
5:39 – Dash “F” connector wiring to the rear of the car
6:15 – Bullet connectors for lights wiring
7:54 – Rear courtesy lights and trim panels
12:15 – Fuel pump wiring
14:43 – Facet fuel pump fuel filter
15:00 – Fuel level sender
15:42 – Floor rubber grommet for fuel sender wire
16:00 – Removing wiring to have Rhode Island Wiring braid the harness
16:28 – Taping the wires