Chapter 74 Week Forty-Four October 15, 2007

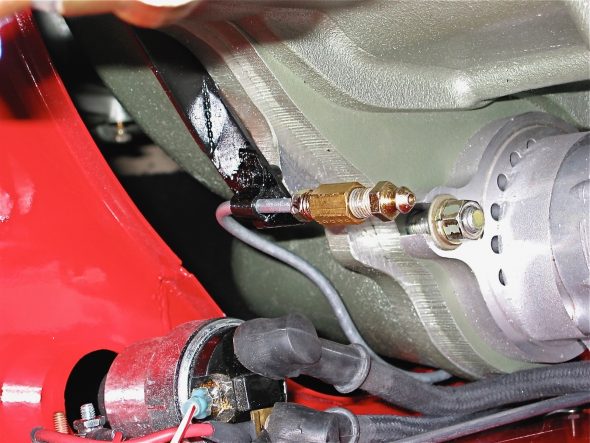
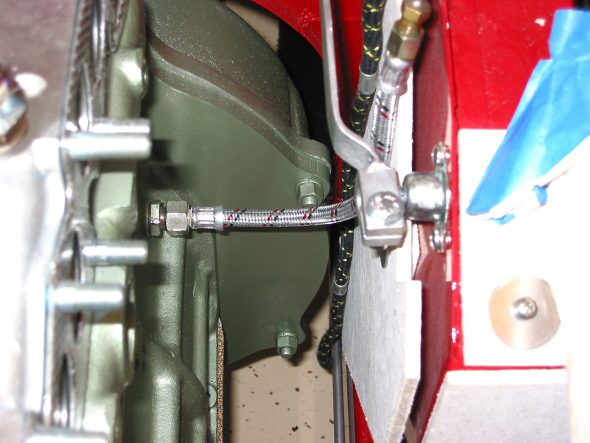
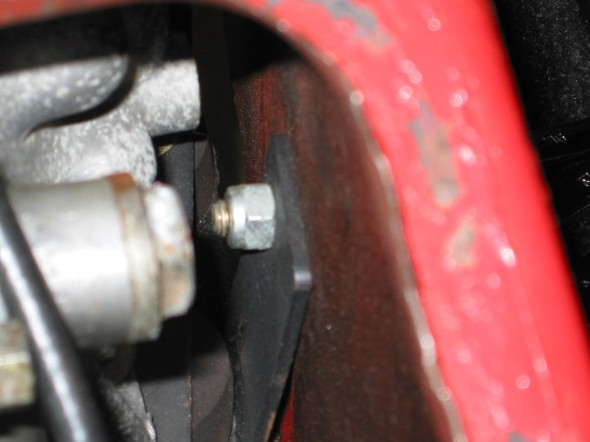
With the engine in place, it was now time to complete the assembly of the various engine components, but first I installed the clutch slave cylinder with the push rod provided in the Smitty conversion kit. It went in without any problem and lined up perfectly. The clutch pedal seemed to work smoothly. The bleeder extension pipe was attached to the bracket I made to support the pipe. Bleeding the slave cylinder will now be a much easier job. Thanks again to Mr. Finespanner – Doug Reid.

Slave cylinder bleeder extension 2

Just to fill the holes and to prevent anything from dropping in unexpectedly I went ahead and loosely fit the NGK Spark Plugs BP6ES, stock number 7333.

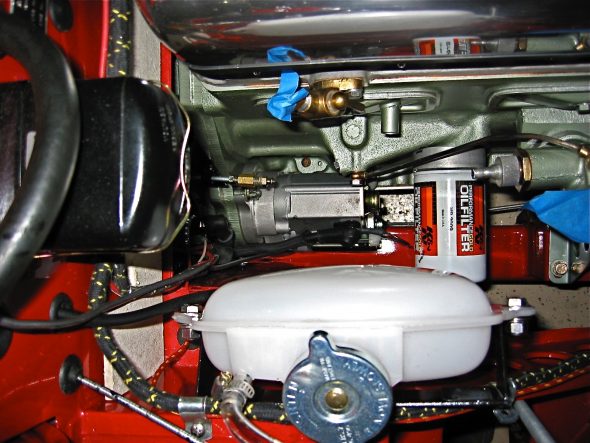
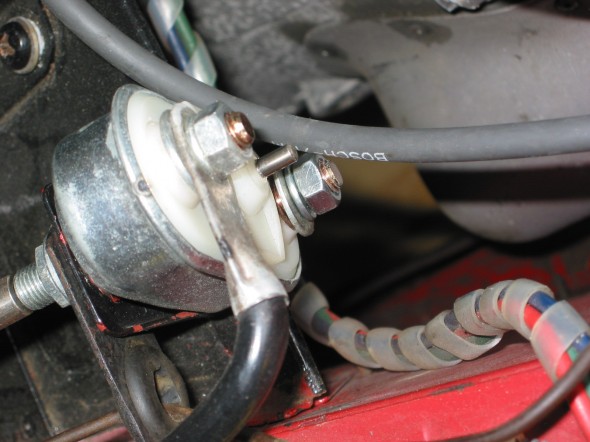
To make installation a little easier I attached the gear reduction starter to the engine prior to installation in the car, and it was now time to hook up the wiring. I shortened the heavy duty starter cable that connects the solenoid and the starter and secured it to the starter with rubber insulation boots attached. Since my intention is to still rely on the original starting configuration, that is, using the external solenoid, I connected the small wire on the starter to the terminal post also used to connect the cable from the solenoid.

Starter

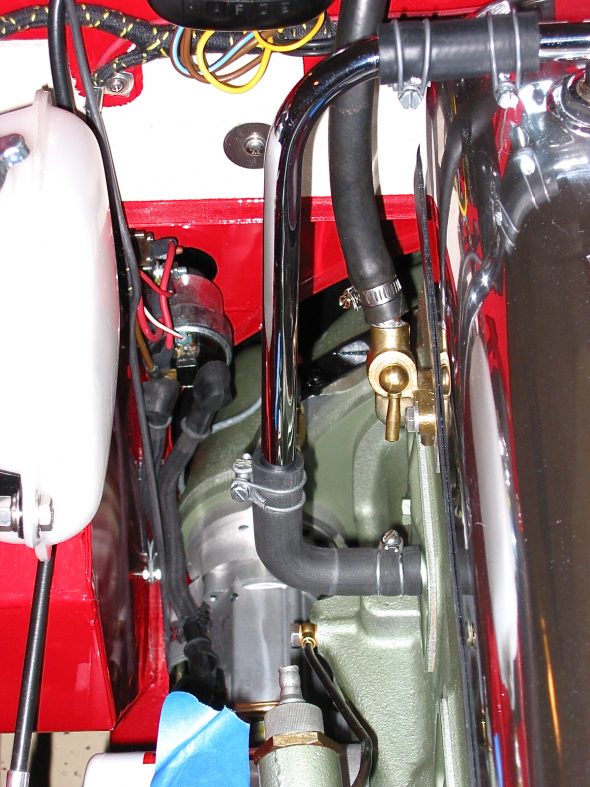
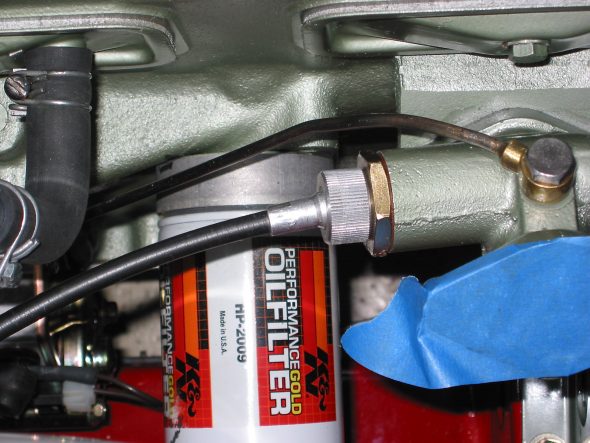
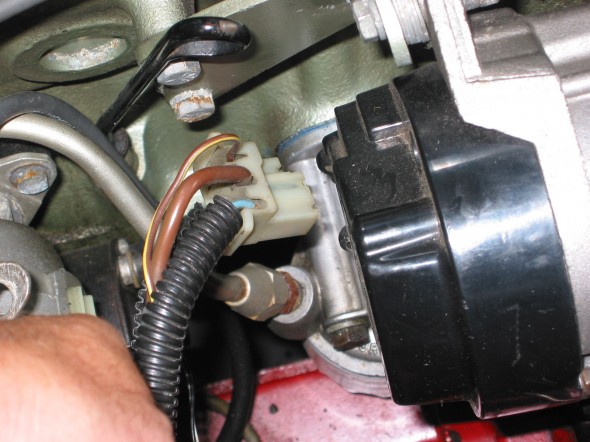
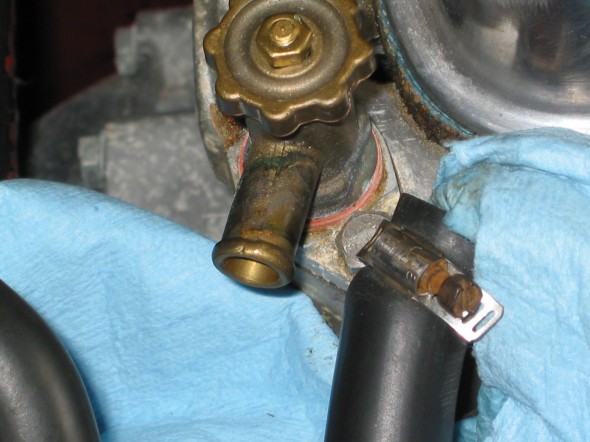
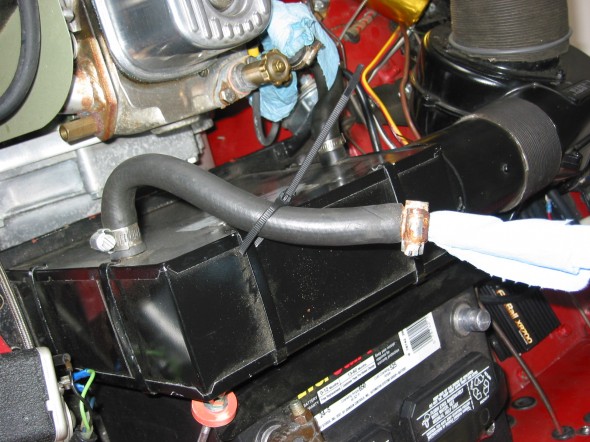
The installation of the breather pipe and hoses was next on my list. Since I will be taking off the rocker cover for valve gap adjustment once the engine is started, I left the clamp to the “T” connection on the cover loose. The inlet heater hose from the heater to the heater control tap on the motor. While in that location I went ahead and connected the tachometer cable to the tach drive housing.

Breather Pipe 2

Tach Cable to Drive Gear

Others have suggested the addition of a PCV valve connecting the breather “T” to the intake manifold to assist in minimizing oil pressure leaks. I bought a little kit from the British Car Specialists that included the valve, rubber piping and a connector for the intake manifold. It will be interesting to see if it does aid in respiration.

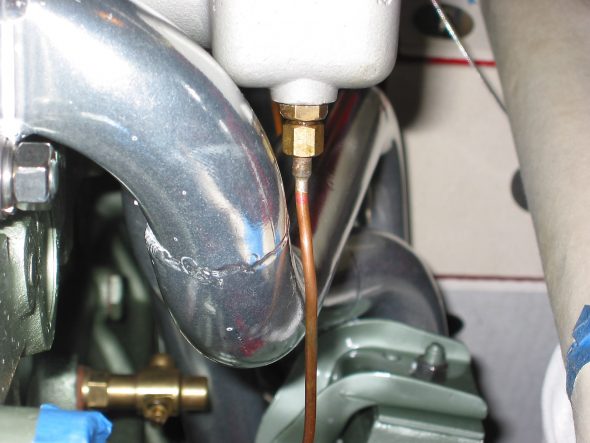
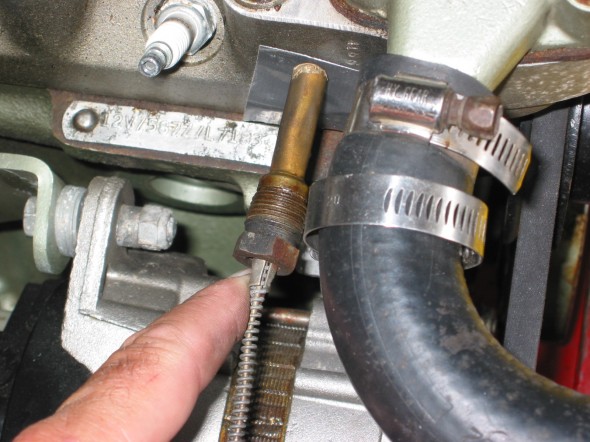
The oil gauge flexible hose was connected next. It connects to a fitting on the block and to the steel oil line that connects to the back of the oil pressure/water temperature gauge.

Oil Pressure Line


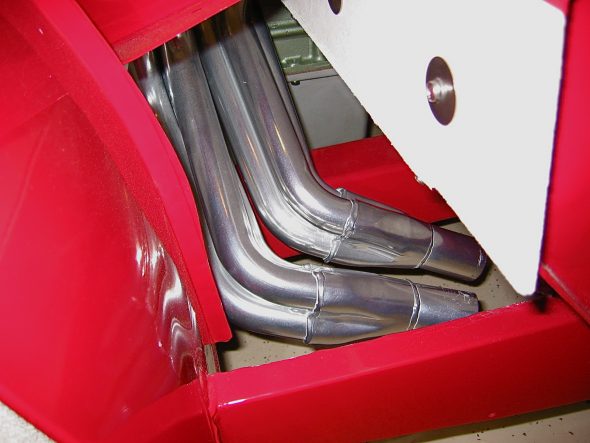
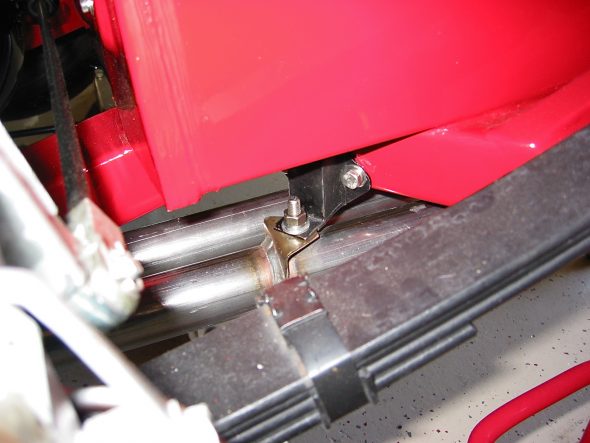
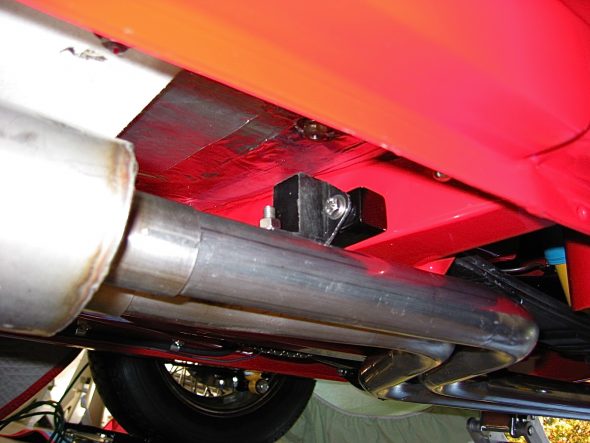
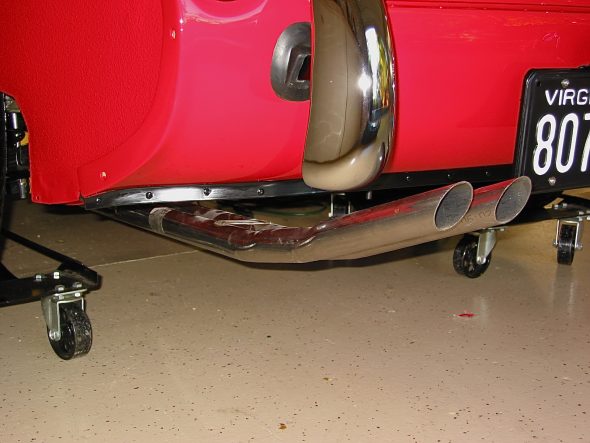
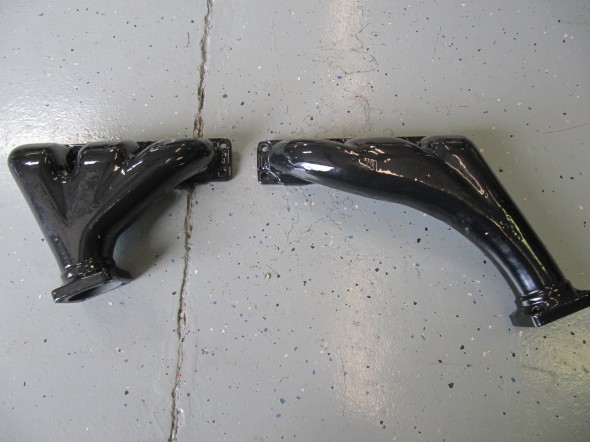
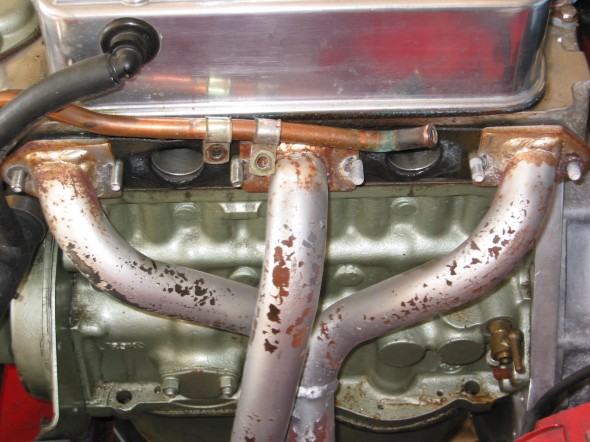
The exhaust headers were next to be installed. These are Phoenix headers and the full big bore exhaust system was sourced from AH Spares. The headers fit perfectly without any adjustments. I had them Jet-Hot coated in the sterling finish to keep them looking nice and to improve thermal qualities. Stainless steel flexible pipe (1 7/8”) was used to connect the headers to the stainless steel silencer and the big bore tail pipes. The front hanger bracket is in the wrong place for a BT7, so I made a custom spacer for that hanger. The rear hanger worked just fine. I was pleased with the final installation of the system.

Headers 1

Headers 3

Rear Hanger 2

Middle Hanger


Tail Pipes 2

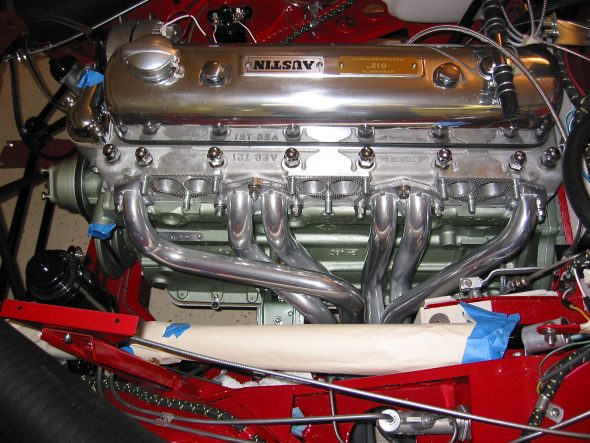
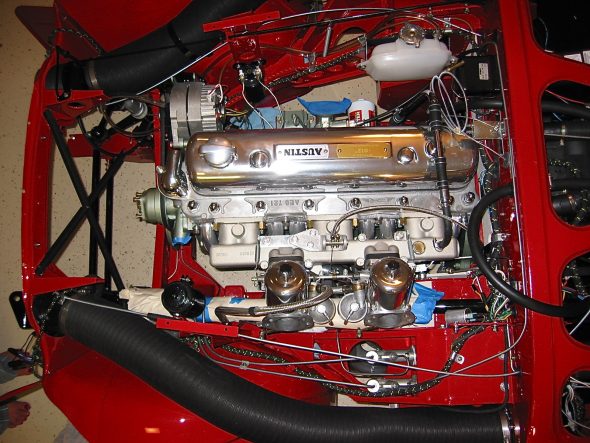
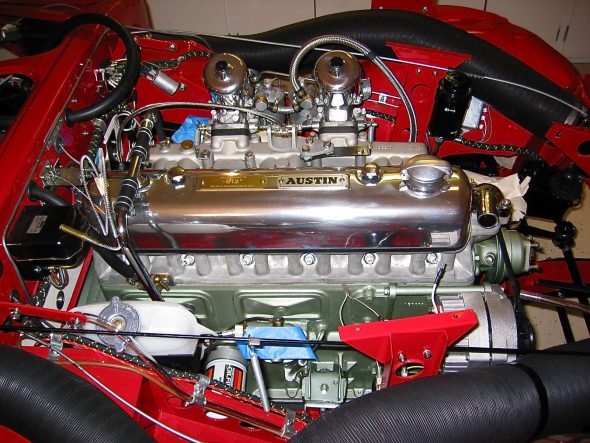
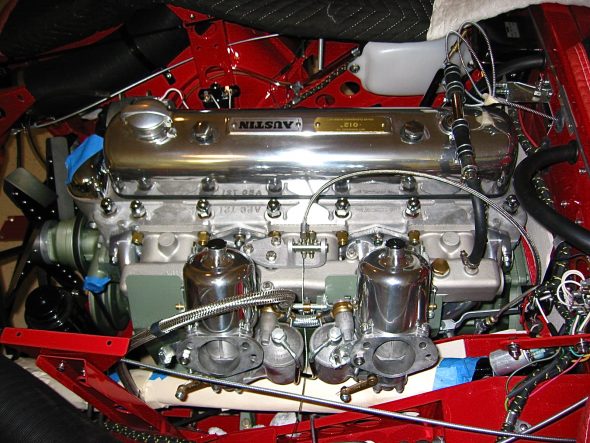
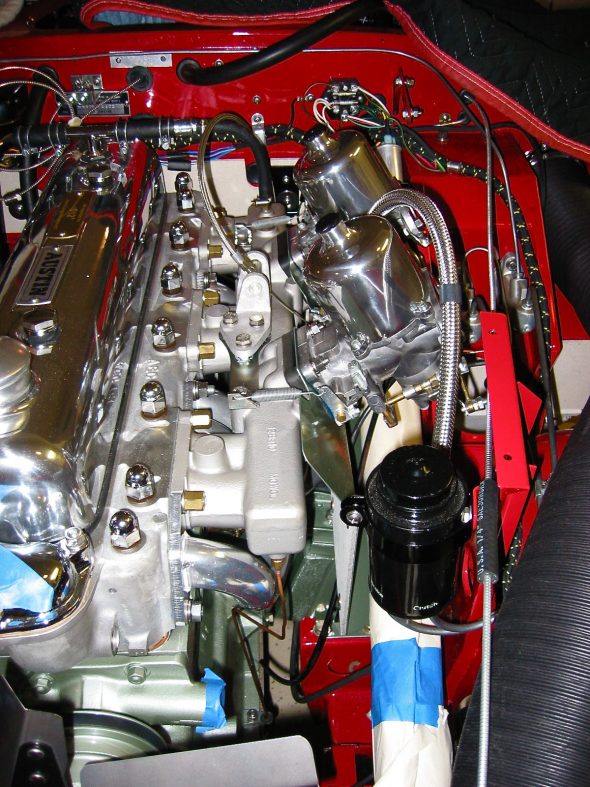
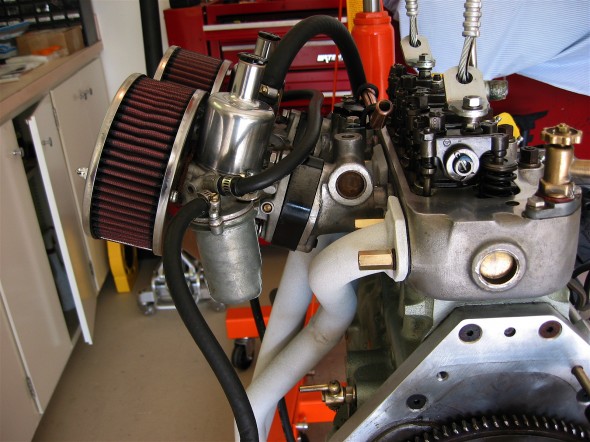
I assembled the intake manifold, heat shield and carbs to the Bloody Beast. Those lower mounting nuts are not easy to access! The stainless steel flexible fuel lines were connected to the steel fuel line and to the two SUs. I had to pull everything off the engine when I realized that I had not yet attached the manifold fuel drain pipes!! As it turned out they are very close to the header pipes, but after checking with a few people who are more informed about such matters than me, I think I am comfortable leaving them as they are. They should have been installed along with the vacuum line BEFORE the rest of the engine components!!!!

Front fuel drain line

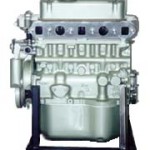
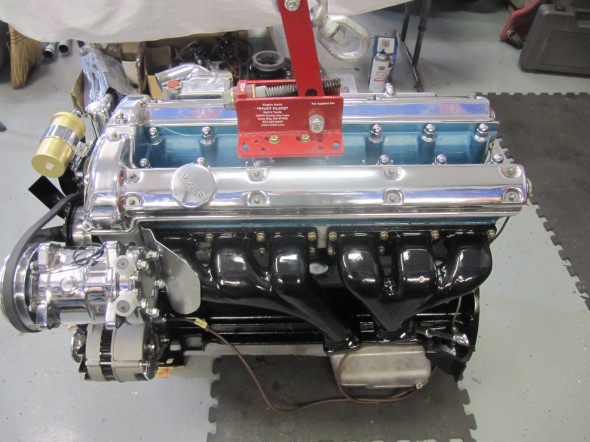
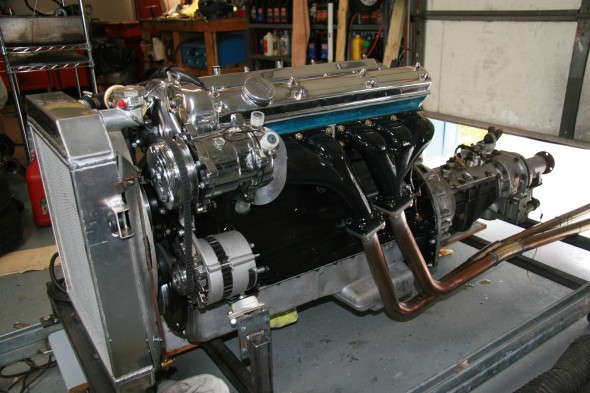
Engine from above

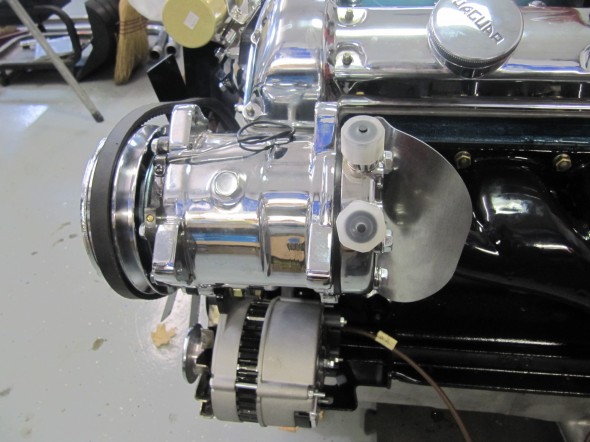
Engine from right

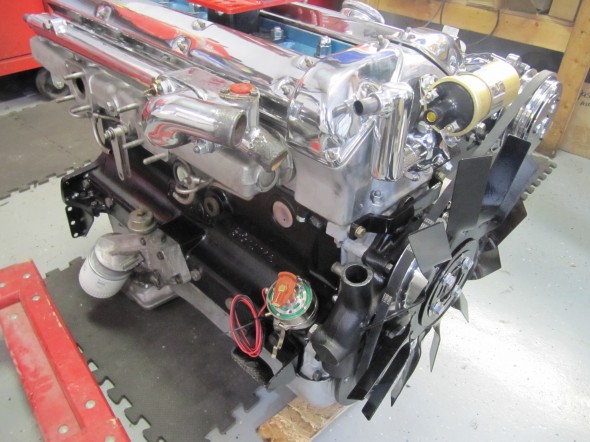
Engine LH view

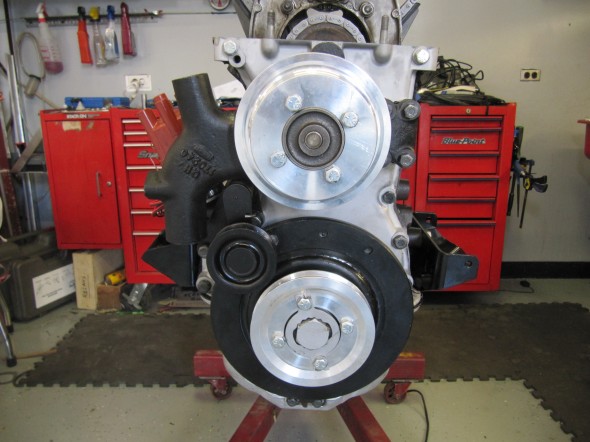
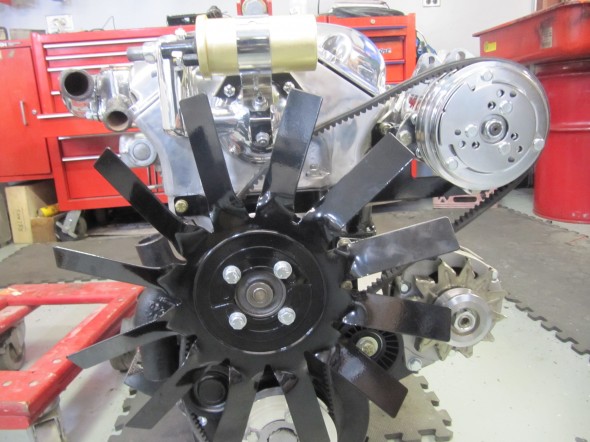
Engine front view

Engine Rebuild

Clean-up Before Rebuild

I had thought about outsourcing the machine block cleaning and machine work and then rebuilding the engine myself, but thought better of it given time limitations and decided to go ahead and give the complete engine to Mike Gassman at Gassman Automotive http://www.gassmanautomotive.com for a soup to nuts rebuild. Mike and his team had done XK motors before and are experienced with the motor, ignition, fuel system and etc.

I spent a few days cleaning the block and head to remove as much grease and grime as possible before turning everything over to Mike.

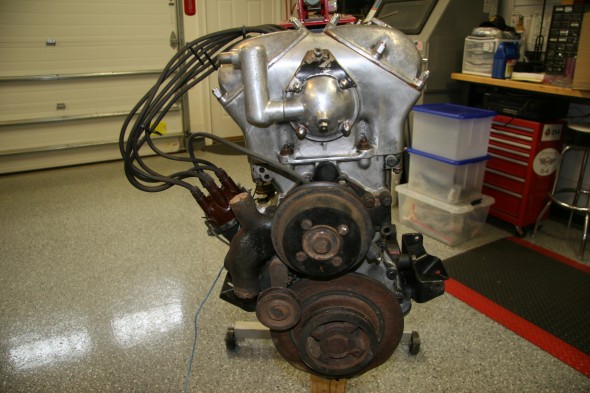
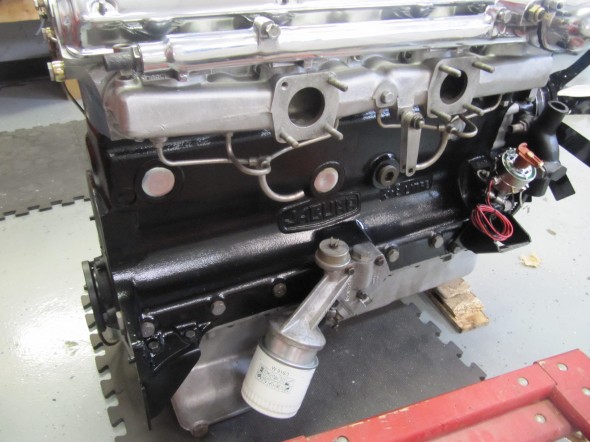
Front of Cleaned Engine Before Rebuild

Front of Cleaned Engine Before Rebuild

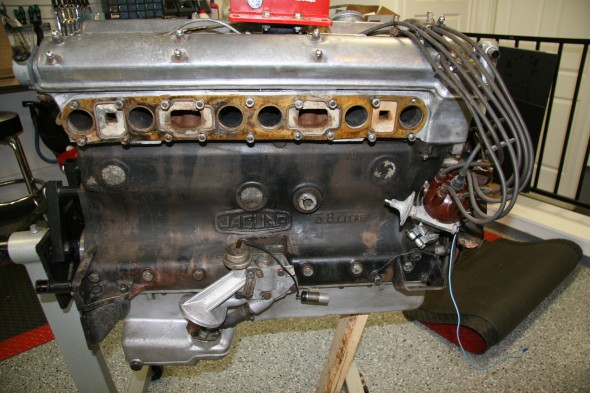
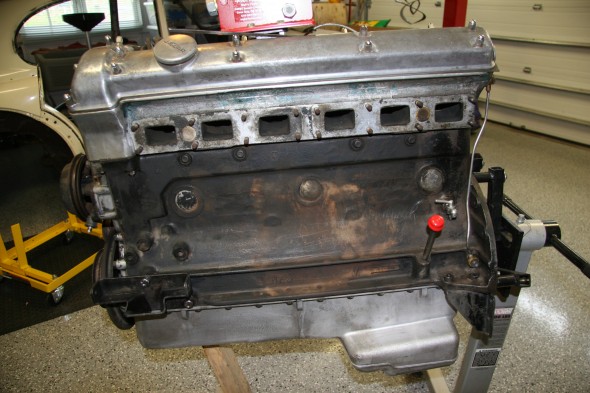
RH Side of Engine

LH Side Engine

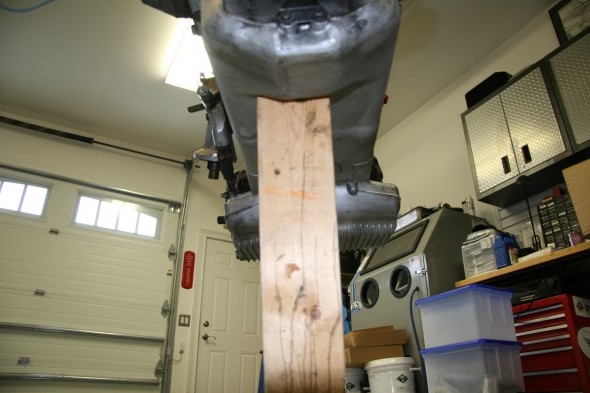
Underside of Engine

Rebuild Engine

Machine Work:

  • Resurface Head
  • Valve Job
  • Install Guides
  • Pressure Test
  • Resurface and weld Exhaust Manifold Cracks
  • Drill for Oversize Lifters
  • Drill for Hold Downs
  • R&R Pistons
  • R&R Bushing Under Over
  • Recondition Big End
  • Grind and Polish Crankshaft
  • Magna-Flux Crankshaft
  • R&R Crank Plugs
  • Rebore and Hone Block
  • Pins
  • Replace Core Plugs
  • Balance Pressure Plate, Cylinder Block
  • Resurface Flywheel
  • Magna-Flux Block
  • Resurface Cylinder Head
  • Polishing Two Valve Covers, Two Carbs Dashpots, Intake Manifold, Oil Cap, Cover and Water Neck

Parts:

Where possible used components in good shape were used in the rebuild; however, in many instances new parts were required to replace worn or broken bits. The original compression for the 3.8 MK2 engine was 9:1; however, primarily because of the lower octane rating of fuel today and due to the way I plan to use this car, I decided to use 8:1 compression Mahle pistons in my rebuild. This is not a complete list and it is in no particular order, but new parts ordered included the following:

  • Cam bearing Set
  • Engine chrome hardware
  • Oil Filter
  • Spin-On Oil Filter Kit
  • Payen Brand Head Set
  • Cylinder Head Studs
  • Seal Kit
  • Lock Tab Kit
  • Thrust Washer Set
  • Piston set
  • Tri-metal Connecting Rod Bearing Set
  • Tri-metal Main Bearing set
  • Core Plug Set
  • Pilot Bushing
  • Clutch Kit
  • Water Pump
  • Timing Chain, Guide and Tensioner kit
  • Lower Gasket Set
  • Tappet Hold Down Kit
  • Tappet Guide
  • Valve Spring Set
  • Oil Pump
  • Oil Pump Adapter
  • Bronze Valve Guide Set
  • Intake Valves
  • Exhaust Valves
  • Oversize Tappets
  • 10W30 Break in Oil with Zinc Additive
  • 15W50 Oil with Zinc
  • Engine and Bearing Assembly Lubricant
  • Sealants/Sealers/Cam Lube
  • Gloss Black paint
  • Metallic Blue Spray Paint for the Cylinder Head
  • Flamethrower Coil
  • Chrome Coil Bracket
  • Flamethrower Ignition Leads
  • Spark Plugs
  • 123 Distributor
  • Brass Nuts
  • Thermostat
  • S.U. Throttle Shaft 1 3/4″ Butterflies
  • S.U. 1 3/4″ Butterflies
  • 5/16 22 BSF Banjo Bolt HD Starting Carb
  • 3.8 MK2 SM/1402 Carb Kits
  • Drive Belt
  • Hoses to Radiator
  • Radiator Hose Clamps
  • Heater Hose
  • Heater Hose Clamps
  • Gear Reduction Starter
  • Engine Ground Strap
  • Oil Pressure Sender
  • Oil Quick Drain Valve
  • Blast, Anneal and Porcelain Coat Exhaust Manifolds
  • Carb Banjo Bolts and Washers
  • Alternator and Mounting Bracket

Rear Main Crankshaft Seal

I did some research on the replacement of the rear main crankshaft seal. A number of the usual vendors sell modern upgrades for this seal to help prevent oil leakage. The apparent most popular upgrade kit does require some machining of the crank.

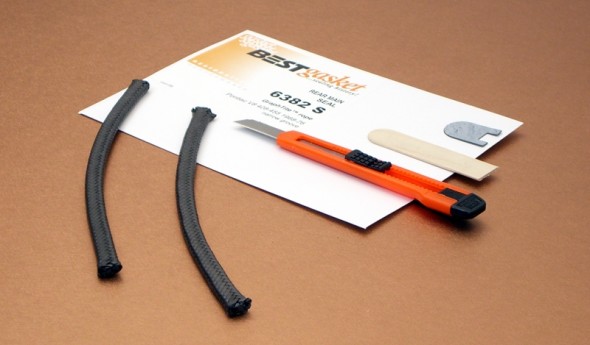
After checking with those on the saloon-lovers forum and a few other MK2 owners, the consensus seemed to be to stay away from the upgrade kits. However, Peter Wise aka “Old Goat” [email protected] recommended a GraphTite seal made by BEST Gaskets as a modern material upgrade to the original rope seal. The kit is available from EGGE Machine http://www.egge.com  part number: 6382S and it is for a Pontiac 1968-76 8 cylinder 428-455. It is a direct replacement for the rope and does not require any machine work. I cannot explain why the Pontiac V-8 seal works in the MK2 3.8 but Pete claims that it works quite well. I have ordered the kit and Mike and his team installed the seal upon rebuild. The seal kit included an installation tool for $17.39!

GraphTite Rear Main Seal

GraphTite Rear Main Seal

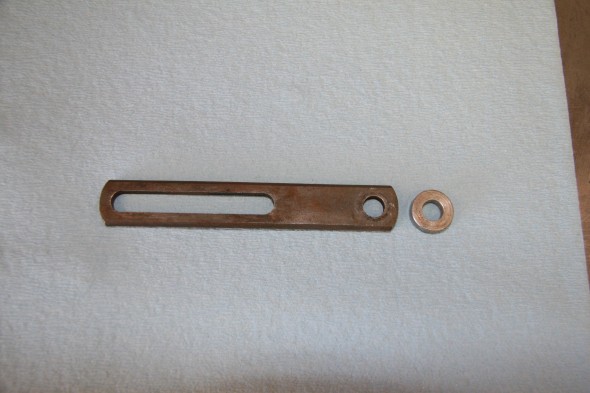
Dynamo Mounting Bracket and Spacer

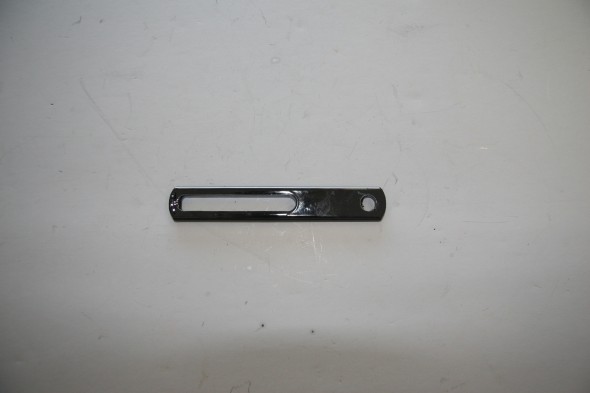
I probably will not use the dynamo bracket with my alternator, in favor of a turnbuckle brace, but I cleaned it up and painted it  – just in case.

Dynamo Adjustment Bracket


Dynamo Bracket

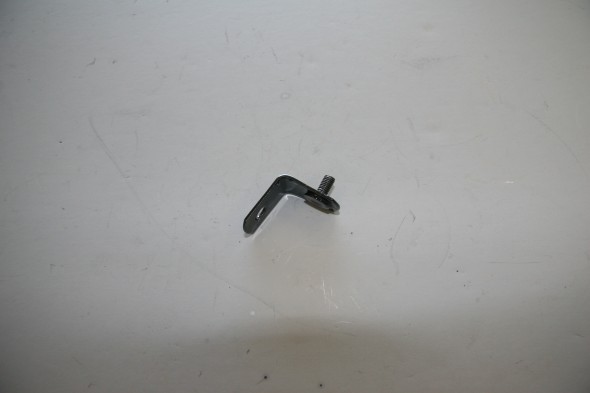
Coil Bracket Extension

Coil Mounting Bracket Extension

Spin-on Oil Filter Kit

Oil Filter Assembly

Oil Filter Assembly

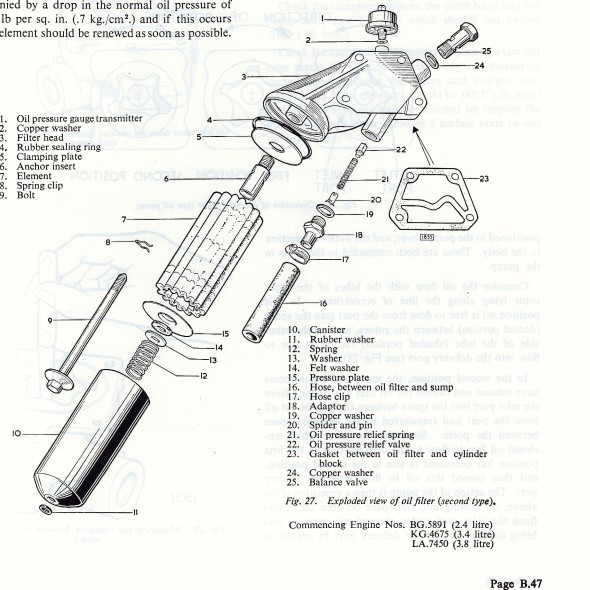
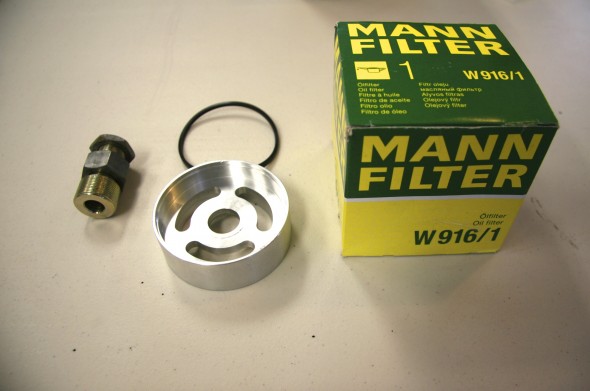
As seen in the image above, the original oil filter is a full flow type and has a renewable felt or paper element. Modern spin-on alternatives are available and I installed the kit provided by SNG Barratt. Purists may object, but most who have installed the spin-on arrangement report success and it is certainly much easier to change.

Spin-on Oil Filter Instructions

SNG Barratt Spin On Oil Filter Kit

SNG Barratt Spin On Oil Filter Kit

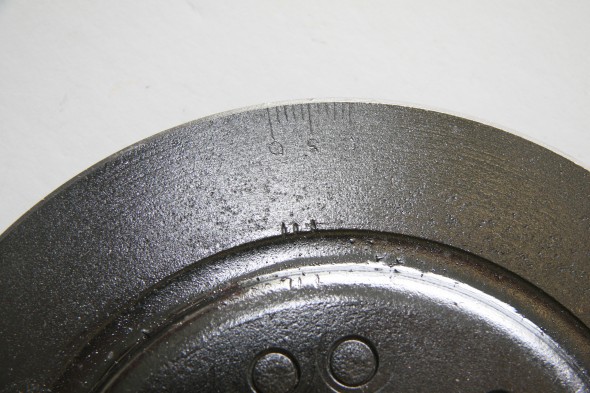
Harmonic Balancer

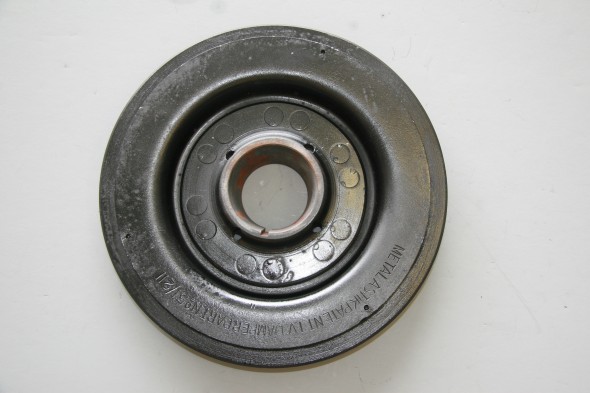
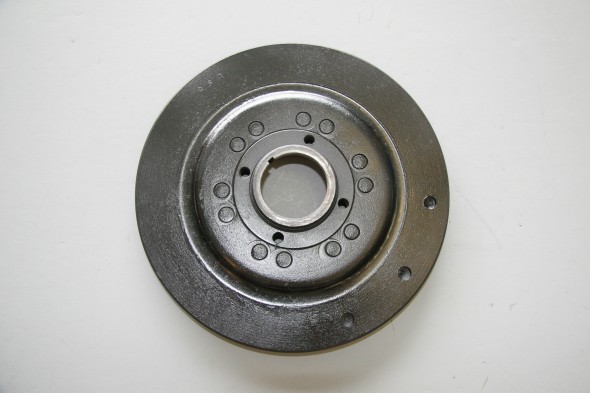
I decided to have the harmonic balancer rebuilt by Dale Manufacturing http://hbrepair.com/harmonicbalancer_018.htm in Salem, Oregon rather than purchase a new one. The rebuild was under $150 and the final product looked pretty good.

Harmonic Balancer

Harmonic Balancer

Timing Marks

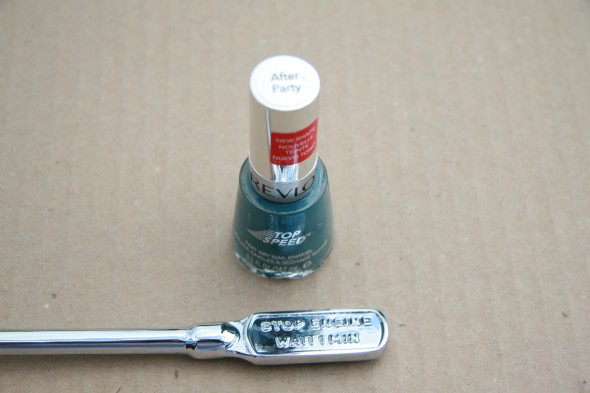
Oil Sump Dipstick

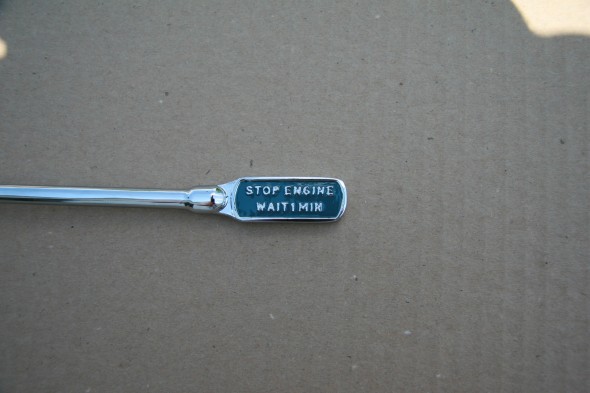
Got the dipstick back from the plater. I vaguely recalled that the background on the handle was a somewhat unusual blue color. Someone on the Forum indicated that Revlon’s After Party nail polish was the perfect color, so I ordered some and painted the handle:

Revlon's After Party Nail Polish

Revlon’s After Party Nail Polish


Revlon's After Party Nail Polish after Application

Revlon’s After Party Nail Polish after Application

Oil Drain Plug

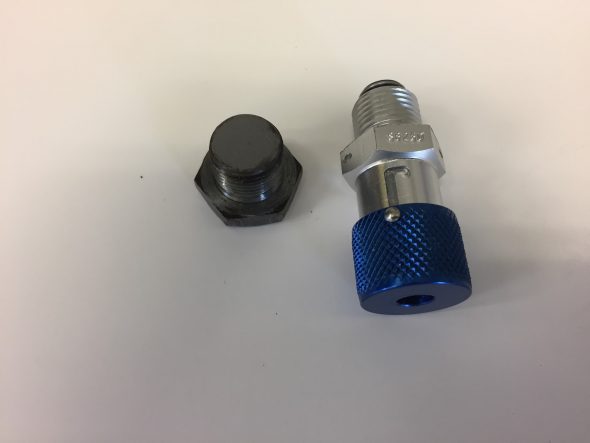
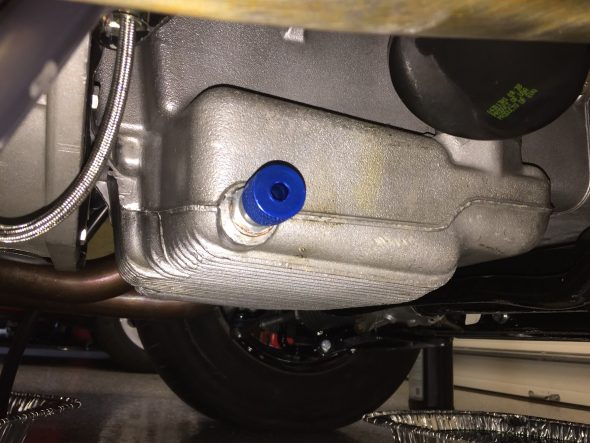
I ordered an EZ Oil Drain Valve for XK Engines from Cool Cat Express just to make the oil drain process a little easier. As their advertisement says; “This all aluminum drain valve mounts permanently in place of your drain plug. A simple twist of the wrist will open and close it. No more stripped threads, no more lost plugs. One piece aircraft quality 6061 aluminum and 302 stainless steel. Aluminum has clear anodized finish for long, corrosion free life. Seals are replaceable. Nothing to break, nothing to lose: saves labor, saves your oil pan, save aggravation. The perfect companion for our spin on conversion kits! Fits all Jaguar oil pans with 5/8″-18 thread. This includes ALL XK motors, and many V12’s.”

This is a photo of the Valve and the plug it replaces:

Cool Cat Express Oil Drain Plug

Here is a photo of the new valve installed:

Cool Cat Express Oil Drain Valve Installed

Engine Rebuild Process

Mike Gassman Installing bearings

Mike Gassman Installing Bearings

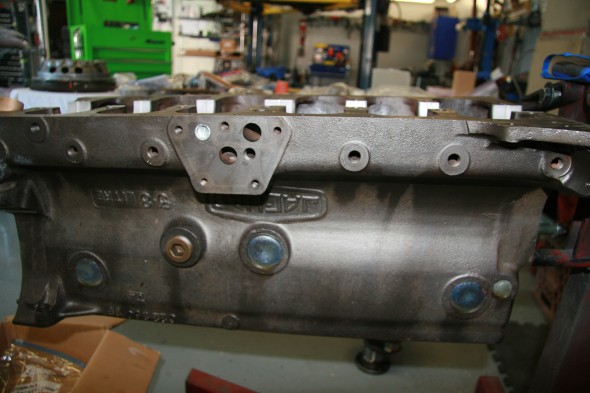
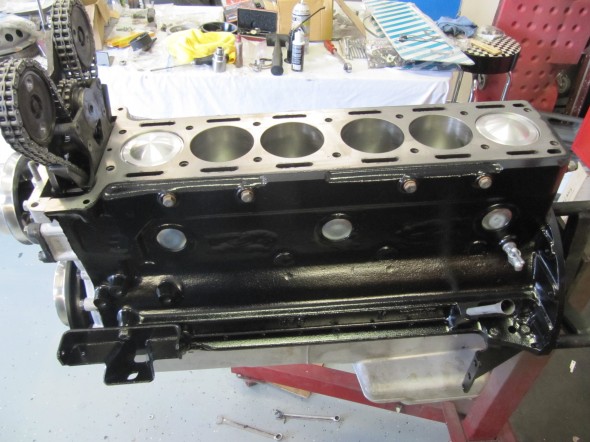
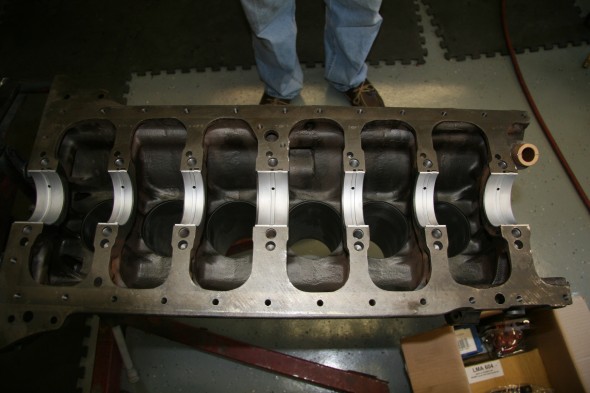
Engine Block

Engine Block

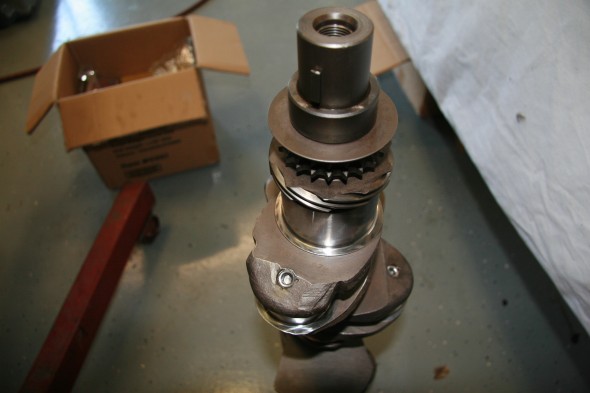
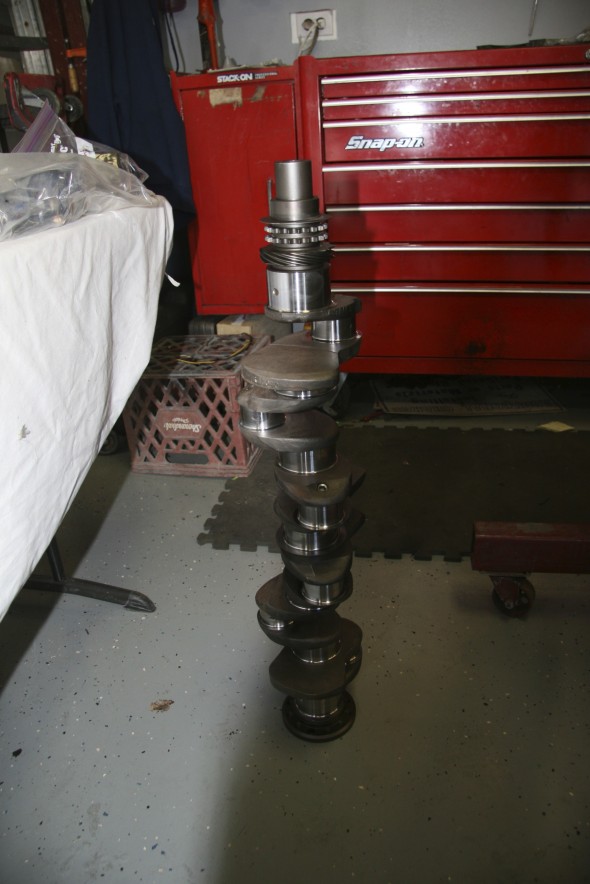
Crankshaft

Crankshaft

New Main Bearings

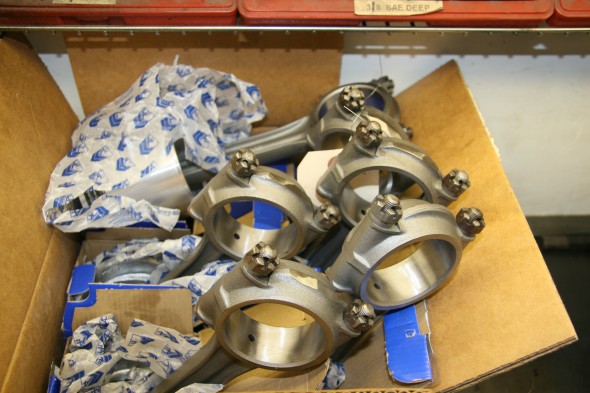
Connecting Rods

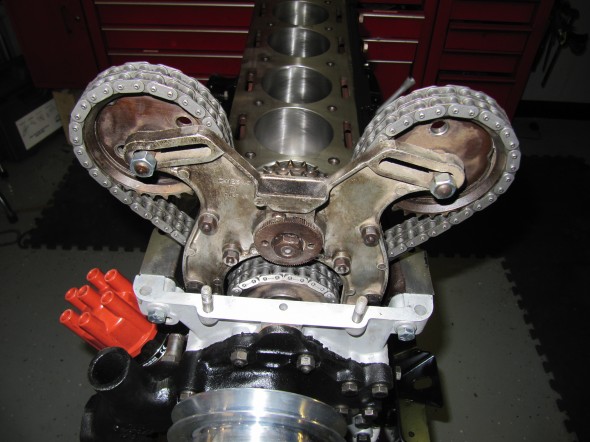
Timing Gear Chain

Pistons & Timing Gear

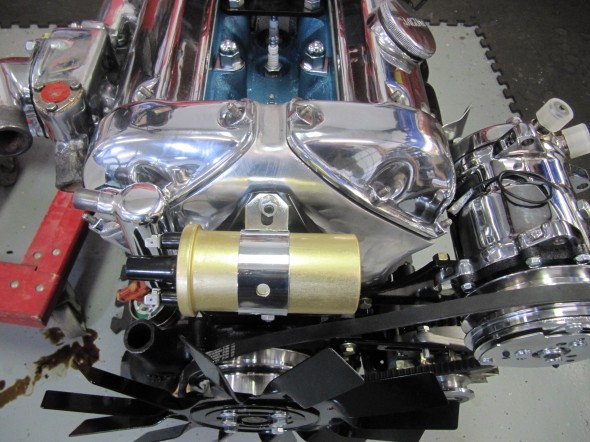
RetroAir Aluminum Pulleys


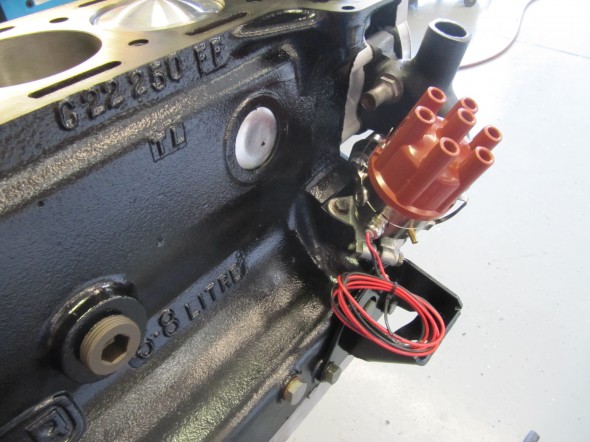
123 Distributor

New Porcelain Exhaust

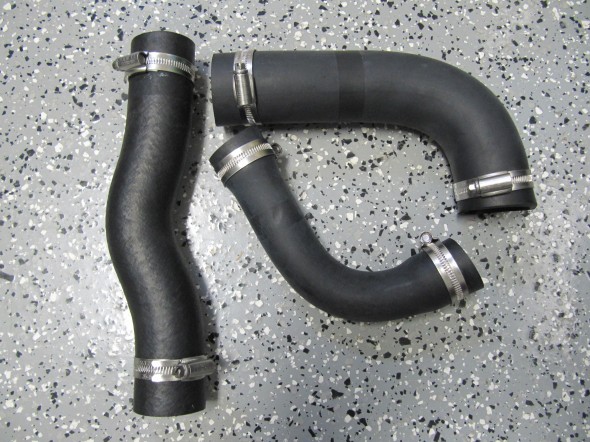
Primary Coolant Hoses

Engineering Art

Compressor & Shield

New Belt Routing

Distributor

Spin-on Filter

Front View

Engine Run-In

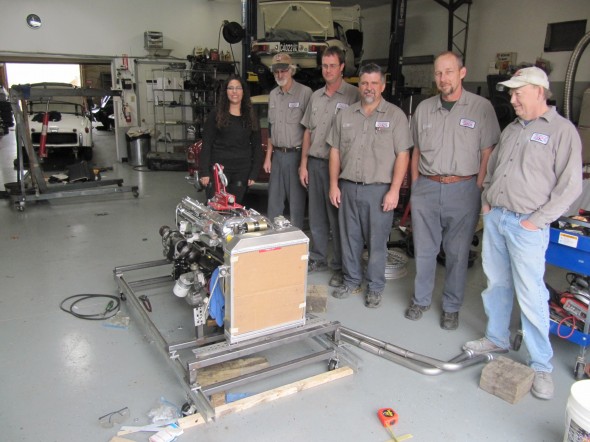
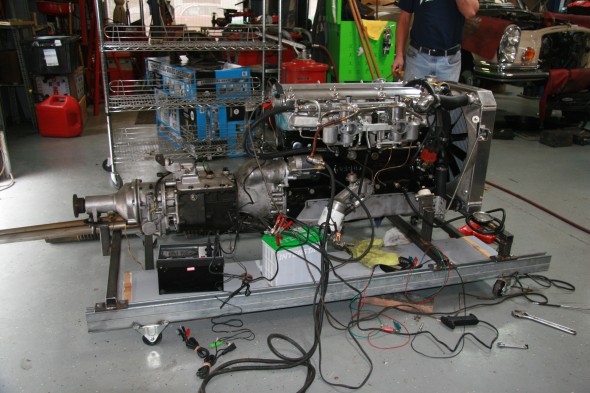
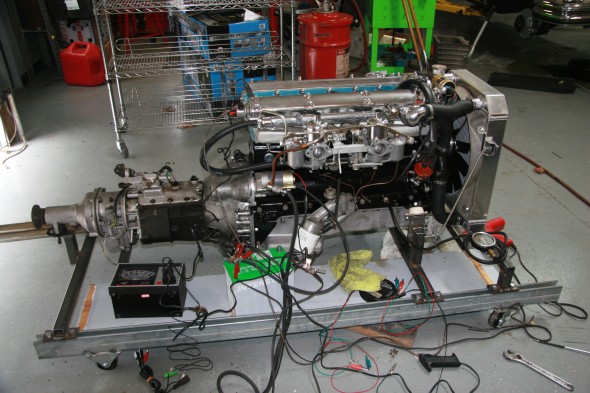
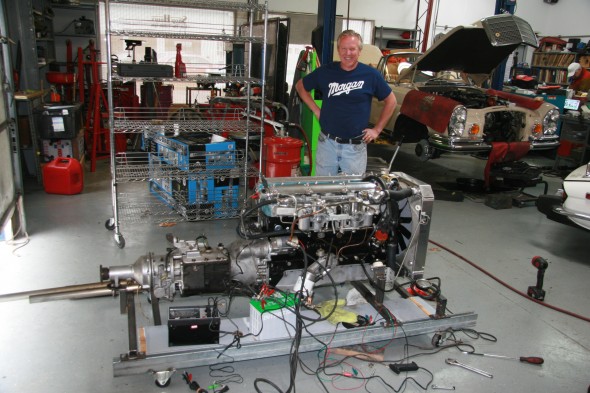
After Mike and his staff got the engine together they made a test stand so that we could do preliminary adjustments and make sure we were leak free. I am trying Evans Waterless Coolant in this engine and it was used in the testing.

All of the attention to balancing really paid off as the engine runs very smoothly with very little vibration. Everything checked out beautifully.

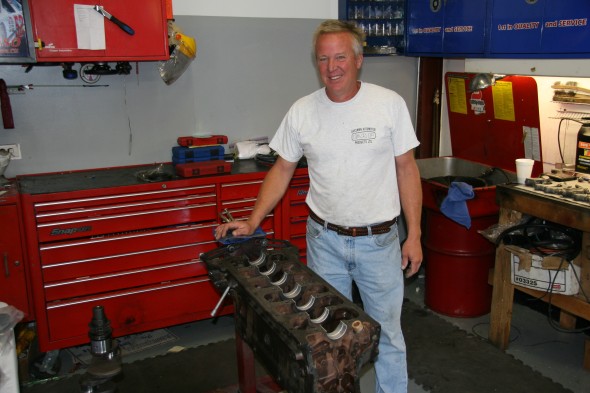
Thanks to Mike for a beautiful engine and a beautiful job. I recommend him to others without reservation.

The Gassman Team

The Gassman Team

Engine Testing

Engine Testing

Engine Testing

Maestro Mike

Maestro Mike


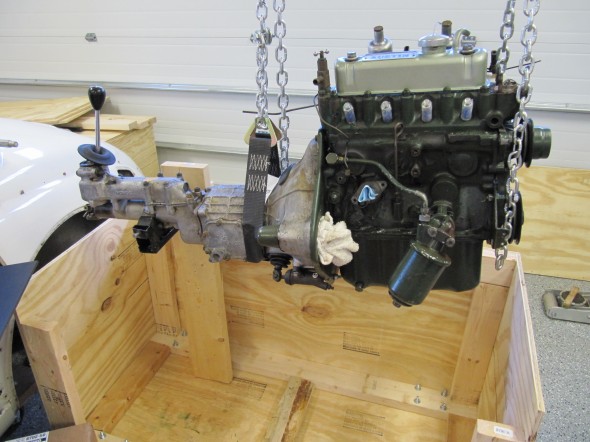
Storing the Original 948cc Motor

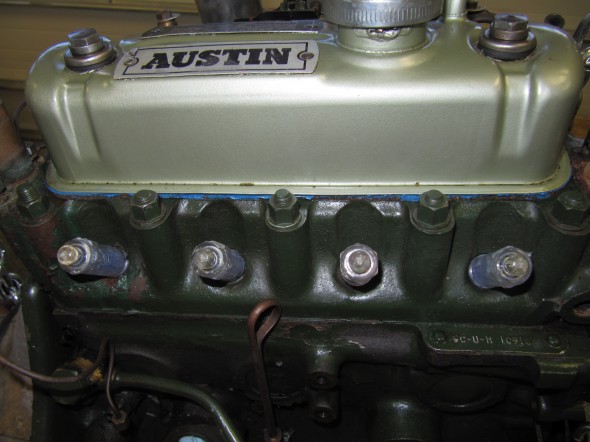
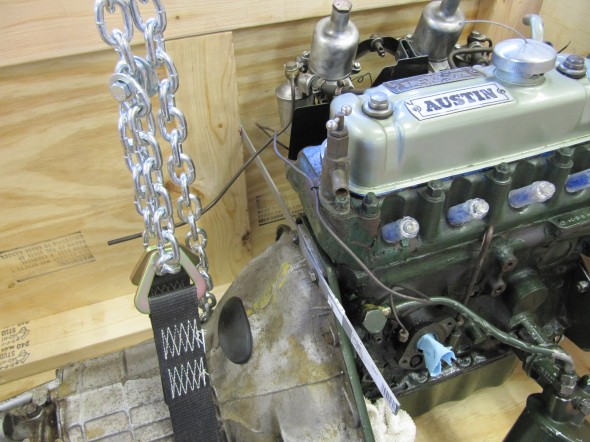
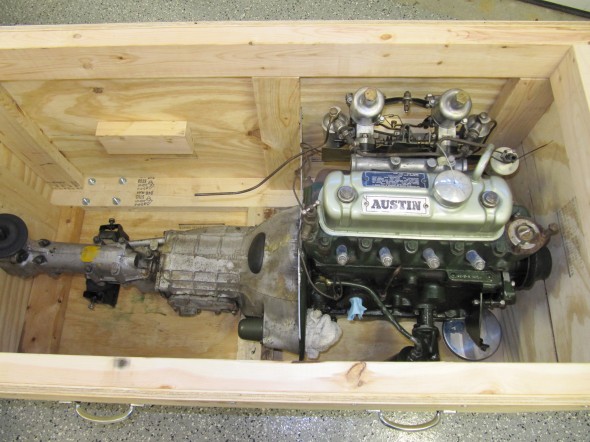
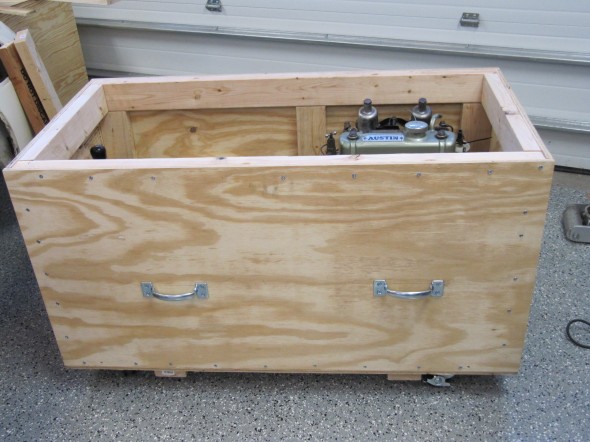
Engine & GearboxMy Dad built a new house and he is “downsizing,” so some car parts are needing to go to a storage unit. When we upgraded to a 1275 motor and Datsun 5-speed gearbox, we kept the original 948cc. I will never plan to go back to the 948, but if the car is ever sold it will be nice to have the original numbers-matching engine. Apparently, the original gearbox was replaced with the ribcase box somewhere in its history..He has a climate controlled unit, but the motor and gearbox needed to be put away properly so he built a nice plywood box for the storage unit.

Fluids were drained, and Marvel Mystery Oil squirted into each cylinder. Desiccant plugs were purchased from Moss Motors and installed in place of the Champions. Holes were plugged and the top of the box was screwed in place. Who knows when this motor and gearbox will see the light of day again!

Desiccant Plugs

Desiccant Plugs

Backplate Brace

Backplate Brace

Tucked in for the Night

Tucked in for the Night

Engine Storage Box

Engine Storage Box

Engine Clean-up and Reinstall

Engine Install

Engine Install

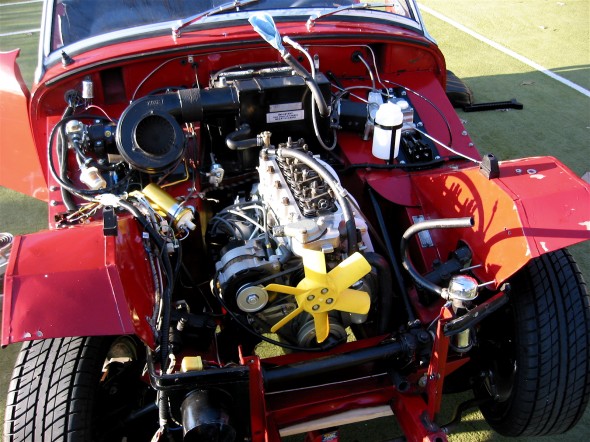
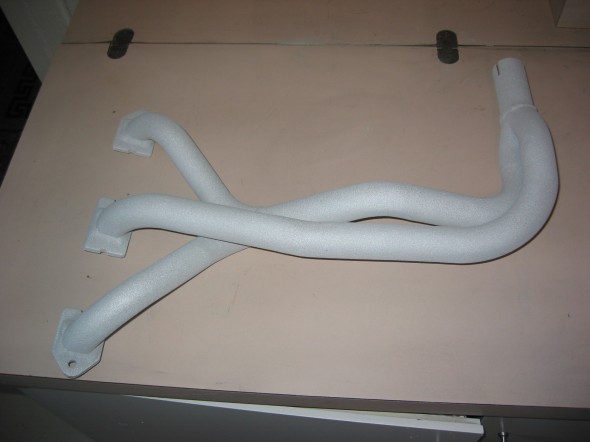
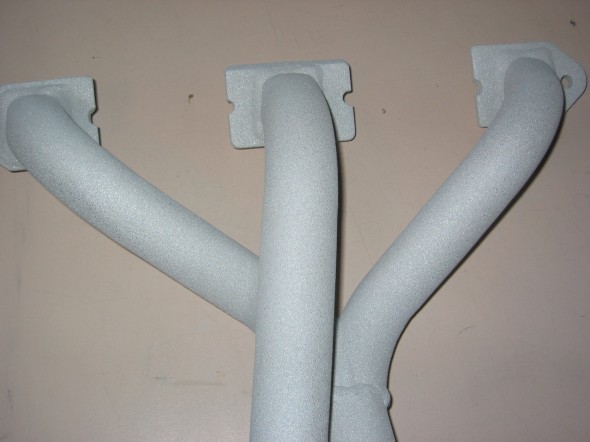
One of the things I wanted to accomplish with the engine clean-up was to have the  exhaust header coated to reduce heat in the engine compartment and interior. I used Swain Coatings. The header came back looking great. Time will tell if the coating holds up and is effective in reducing heat.

Swain Coat Header

Swain Coat Header

Swain Coat Header

Swain Coat Header

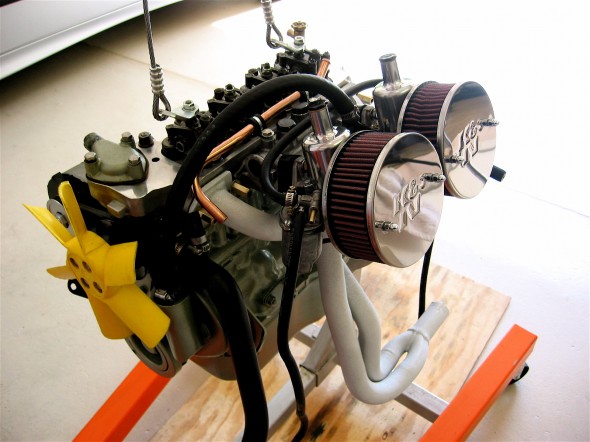
I also did a general cleaning of the engine including a new paint job while the gearbox was being worked on by Jack Harper. I replaced the oil sump gasket and the rocker cover gasket, too. I tested and reinstalled the gear reduction starter. The air cleaners were cleaned and oiled with K&N products.

Clean Motor Assembly

Clean Motor Assembly

Clean Motor Assembly

Clean Motor Assembly

I developed the following list of items for reinstalling the engine and gearbox into the Bugeye:

Reinstalling a Bugeye Engine and Datsun 5-speed Transmission

  1. Grease the shaft splines on the engine and the yoke before installing the engine.
  2. Set the exhaust header in place so that it will be positioned to install once the engine is tightened into its mounts.
  3. Guide the motor into place with the lift so that the yoke on the driveshaft lines up with the transmission. If this does not work then remove the driveshaft and install after the engine and transmission are in place.
  4. Loosely secure the engine to the front motor mounts. The mounts themselves should be loose then tightened after all bolts/nuts are in place.
  5. Install the long bolts up through the crossmember into the rear transmission mount and tighten.
  6. Tighten the front engine mounts.
  7. Center the transmission in the rear mount, then push it as far to the right as possible, and tighten the transmission pad mounts on the bracket.
  8. Install the bolts in the sides of the transmission rear mounts from inside the car with the self locking nuts inside the tunnel. (Hint: tape the nuts in the wrench to make starting the threads easier.)
  9. Replace the gearshift lever.
  10. Connect the ground strap to the frame of the car.
  11. Replace the rocker cover and connect the breather hose.
  12. Install the intake and exhaust manifolds.
  13. Install heat shield and carbs.
  14. Connect throttle and choke cables.
  15. Connect breather hose.
  16. Connect hot water hose to copper tube and connect to radiator hose. Tighten clamps. It is easier to put the clamp on the hose/copper pipe when the copper pipe clips are loose from the manifold.
  17. Connect the short hot water hose from the water control valve to the heater.
  18. Connect the electrical cable from the gear reduction starter to the starter solenoid.
  19. Connect the oil pressure pipe to the fitting on the engine block by the banjo bolt.
  20. Reconnect the white/black line from the electronic ignition to the distributor.
  21. Connect the high tension line from the distributor to the coil.
  22. Reconnect the plastic terminal (3 wires) to the alternator.
  23. Connect the fuel line from the fuel pump to the carbs.
  24. Reattach the water temperature sensor to the engine head.
  25. Remove the banjo bolt where the oil line exits the rear of the block. Pour motor oil down the hole in the block to prime the oil pump. Reinstall the bolt.
  26. Remove the oil filter and pour it full of motor oil and reinstall.
  27. Fill engine with oil – Castrol GTX 10W-40.
  28. Fill the gearbox with Gear lube – Redline MT90. 2 1/4 pints. Use long clear plastic tube. Try pump.
  29. Connect the stainless steel flex line from the master cylinder to the slave cylinder.
  30. Bleed the clutch slave cylinder. (See Page 9 of Rivergate’s manual)
  31. Install radiator and fill with 50% coolant and 50% distilled water.
  32. Fix the carb drain lines to the mounting clamp at the lower rear of the engine compartment.
  33. Insert the 1 ½” connecter pipe (with sealant) for the exhaust system into the header pipe.
  34. Install the exhaust and muffler assembly.
  35. Tighten clamps on the exhaust connecter pipe.
  36. Reconnect the battery cables.
  37. When ready to start the engine, pull the spark plugs and spin the engine with the starter until the oil pressure goes up to normal on the pressure gauge, and stays.
  38. Check for any oil, coolant and fuel leaks.
  39. Reinstall the spark plugs and start engine.
  40. If engine does not start turn distributor 180 and try again!
  41. Install 4” fresh air heater hose and clamp.
  42. Install the leather shifter cover and surround.

Start It Up And Have Some Fun!

I Know It Fits!

I Know It Fits!

Motor Protection!

Motor Protection!


Engine Install

Engine Install

Pulling the Engine for Minor Repairs

July 2006 Bugeye It is time to fix some of the problems we have lived with for a while and to make a few improvements. The oil leak we caused when we failed to seal the oil sump properly, the gear grinding in 2nd and 3rdin the gearbox, jet coating the headers among other things will improve the car for the future. These improvements require pulling the engine. We bought a cherry picker and an Oberg tilt lift rather than continuing to rent at $45 a pop. The following details the process to get ready to lift out the engine: Disconnected the battery positive lead from the terminal. Drained the engine oil, tried the gearbox, but couldn’t get the plug out so will return to that. Disconnected the ground strap and removed the two gearbox mounting bolts from the bottom of the car.

ground strap

Ground Strap

Gearbox Mount Bolts

Gearbox Mount Bolts

Disconnected the fuel line at the carbs and pulled out of the way, and disconnected the temperature sensor from the head.

Fuel Line

Fuel Line

Temperature Sensor

Temperature Sensor

Disconnected the oil pressure gauge line and the oil feed line from the engine block, and disconnected the cable from the starter solenoid to the starter.

Solenoid Connection

Solenoid Connection

Oil Temp Connection

Oil Temp Connection

Unsnapped the plastic connector for the white/black line to the distributor from the electronic ignition device, and disconnected the plastic terminal (3 wires) to the alternator.

Ignition Wiring

Ignition Wiring

Alternator Wiring

Alternator Wiring

Disconnected the high tension line from the distributor to the coil. Disconnected the short hot water hose from the hot water valve control on the head and then the longer line on the other side of the engine to the copper tube. It is easier to put the clamp on the hose/copper pipe when the copper pipe clips are loose from the manifold.

Water Valve

Water Valve

Heater Hose

Heater Hose

Disconnected the throttle cable at the carb linkage and pulled it out of the way, and then also disconnected the choke cable at the carb.

Throttle Cable

Throttle Cable

Choke Connection

Choke Connection

Disconnected the fitting at the slave cylinder (and got brake fluid everywhere).

Fuel Drain Line

Fuel Drain Line


Intake Manifold

Intake Manifold


Very Ugly Header

Very Ugly Header

Removed the manifold brass nuts from the head and lifted the intake manifold and carbs free of the engine. The carb drain lines tied together with plastic straps will need to be rerouted to the retainer clips upon installation again. The headers will not come out of the engine bay until the engine is pulled or the heater is removed. Need to set the headers in place prior to the engine install.

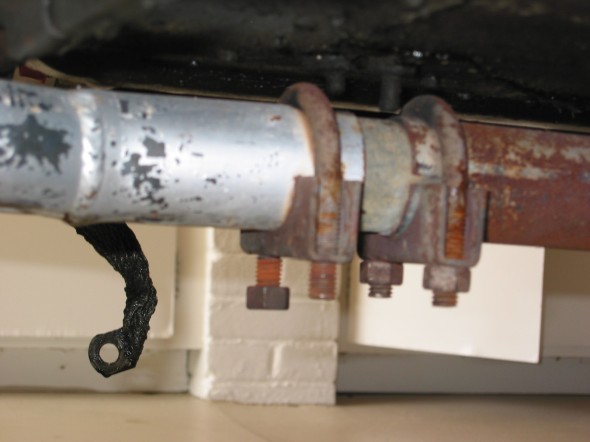
Exhaust Clamps

Exhaust Clamps

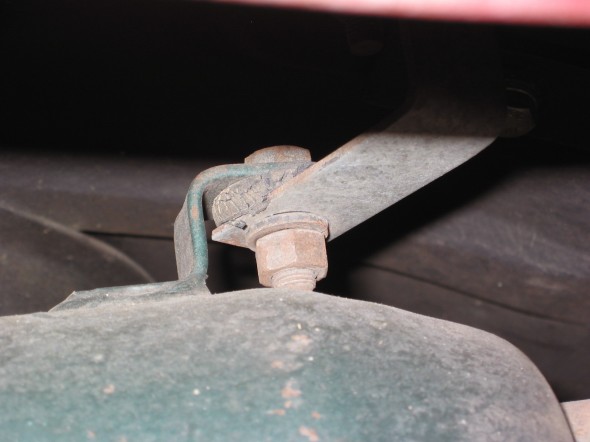
Exhaust Mount

Exhaust Mount


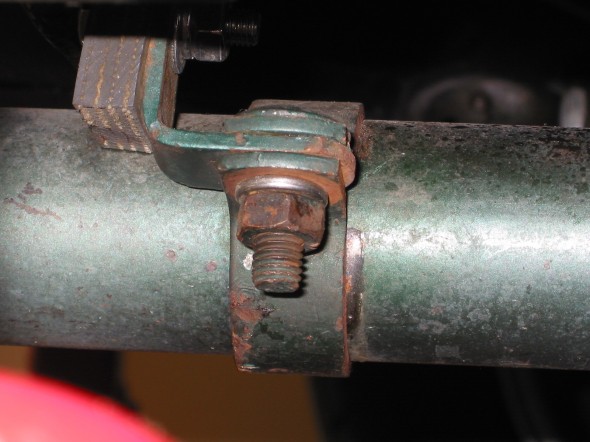
Exhaust Clamp

Exhaust Clamp

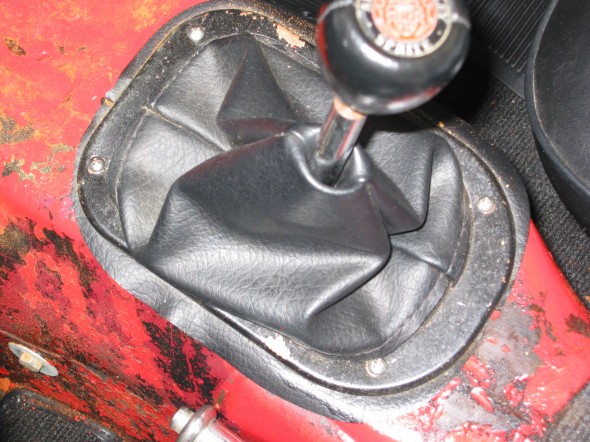
Removed four Phillips screws attaching the shift boot to the gearbox tunnel, the shifter knob, and removed two bolts on each side of the tunnel securing the gearbox bracket to the car. Use of the offset wrench made this an easier job.

Shifter Trim Ring

Shifter Trim Ring

Gearbox Rear Mount

Gearbox Rear Mount


Shifter Connection

Shifter Connection

Loosened the right hand motor mount from the car so that it will lift free with the engine, but will not completely disconnect until the engine lift has the pressure off of the mounts. Loosened the screws to the engine at the mount on the left side of the car. The left mount will stay in the car.

Removed the cardboard heater hose to have it out of the way from the engine when it is lifted.

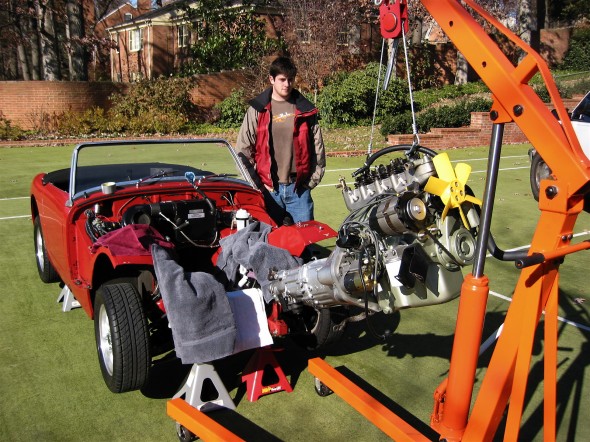
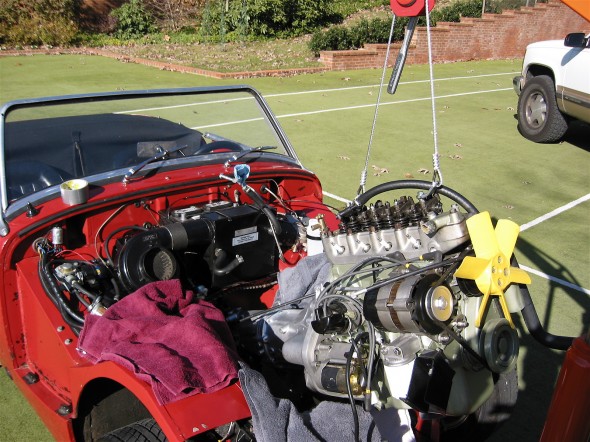
Connected the Lift Chain to the Rocker Shaft mounting studs and lifted the engine from the car.

Engine Enhancements

crane ign. The car is running a little rich. I attempted to adjust which became an experience. As the book says, I backed off the jet adjusting nuts 11 flats only to find that the car would not start at all. After a little help from the midget/sprite email list, I backed off the jet nuts one flat at a time until I got to 24 flats before the car began to run well. However, now it runs better than ever.

Hayden Electric Fan

The car is running slightly hot (past normal temp) with just the hayden electric fan. Dad decided to put the 6 blade plastic fan on as well. The two together work effectively. Now we seem to be staying well within acceptable temperature range. I had tried to save the horsepower used by the water pump fan, but oh well.

Electronic Ignition

We installed a Crane XR-700 electronic ignition and had the timing, valve clearances checked by Jack Harper at Coach Works. This is the installation manual for the Crane Electronic Ignition: Crane XR700 Installation Instructions

Began installation of the electronic thermostat for the electric fan, but decided against it. Will just switch it on manually when needed. It’s a little noisy!

Safety Check & Rivergate Modifications

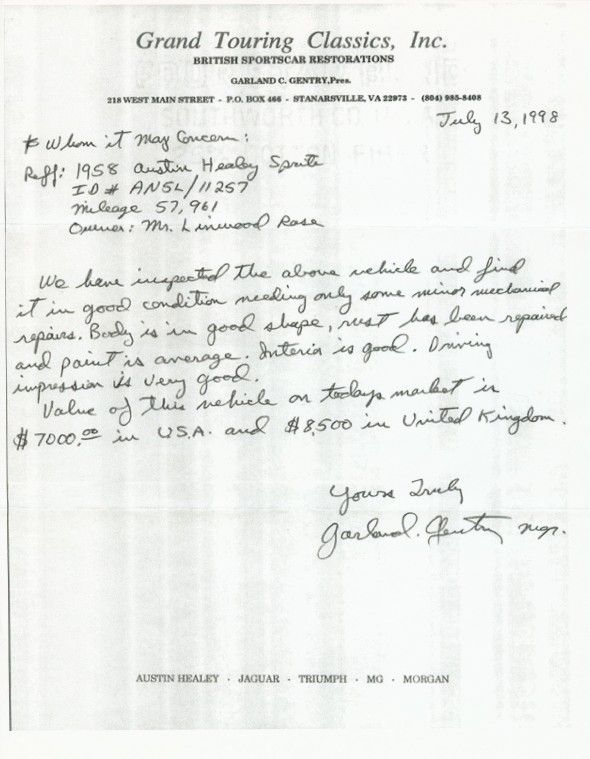
The week after we got the Bugeye home, Dad took it over the mountain from Harrisonburg to Grand Touring Classics in Stanardsville, VA. An unlikely place for a British car shop, but they seemed to know Healeys and were in the process of restoring a Bugeye. Garland Gentry ran the shop and was willing to give the Sprite a good going over to make sure it was safe to operate. Engine compression was good but it was in need of some minor mechanical work. Dad asked Garland to prepare an insurance appraisal of the car and it is found below:
Appraisal

Appraisal

We had read that converting the drum brakes on the front of 948 Bugeye to disc brakes from a later Sprite or MG Midget was pretty straight foward. Dad didn’t have the time to make the conversion so he had Garland go ahead and get the parts and install the upgrade. As things turned out, the brakes worked a little too well. Garland had forgotten to remove the check valve from the master cylinder and consequently the rear brakes kept locking up and overheating. After making some calls and emailing some sprite owners, Dad figured out the problem and took care of it. Brakes were much improved but still not as good as hoped. We would later find out that the 1098 Sprite with disc brakes used a 3/4” bore master rather than the 7/8” found in the earlier bugeye.

So the disc brake conversion became the first of many “improvements” to the Bugeye that we would make. We knew after driving the Sprite on the Washington Beltway with the big trucks passing us, that conversion to a 1275 motor and a Datsun B210 gearbox wouldn’t be far behind.

 
Dad contacted Rivergate Restoration about purchasing their conversion kit to the Datsun transmission. After talking to Bill Perry it was decided that a rebuilt 1275 and a rebuilt Datsun B210 gearbox would be purchased as an assembled unit. The Rivergate folks are great to work with.Their contact information is below:
Rivergate Restoration Products
340 Reavley Road Sale Creek, TN 37373
423-332-2030 (Fax: 332-6914)

[email protected]


If one was sourcing a gearbox, the following guidance is provided by Rivergate:


Sprite/Midget 5-Speed Kit Transmission Required


A Datsun 5-speed transmission from August 1979 to 1982 Datsun 210. This can be from a coupe, sedan or wagon.
 
 
The input and output shafts should be 20mm (about 25/32″) diameter and 18 spline.

The serial number on top of the bellhousing should begin with the letter “F” (FL, FA, FX etc. OK).

The number “60” is cast into the right side of the main case.  These transmissions come from the Datsun 210, but the model number for these cars, imbedded in the Serial Number, is B310.

The model number for the transmission, FS5W60A, is sometimes found on the Serial Number plate on the firewall. This is not found on the transmission.


When the transmission is bought, the gearshift lever, throwout bearing carrier and clutch release fork are needed.

The Rivergate Five Speed Conversion Kit includes:


An aluminum adapter machined from a billet of 6061 aluminum
A rear crankshaft seal fitted to the adapter plate to help eliminate oil leaks
A rear motor mount assembly (with 6 durometer 40 pads built in)
A new clutch disc to be used with the standard pressure plate
A pushrod assembly and spacer for the slave cylinder
A plug for the transmission case
A 5/8″ and 3/4″ pilot bushing
Forty bolts and washers for attaching the adapter plate and the transmission
New driveshaft yoke with U-joint installed
Throw-Out Bearing
Rear Transmission Seal
Clutch Alignment Tool

Instructions, detailed, with color photos for clarity

This is the most complete, easiest to install kit ever made for the Spridget. It requires no modification to the engine, the flywheel, the driveshaft, or to the chassis or body of your Sprite or Midget.
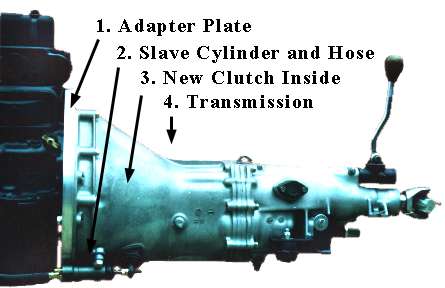
Modification Kit Side 1
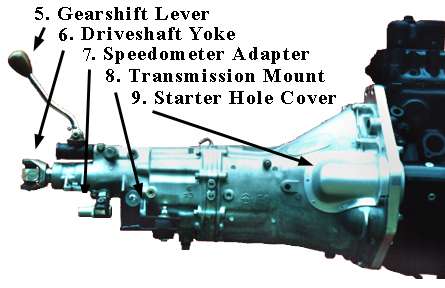
Modification Kit Side 1

Modification Kit Side 2

Modification Kit Side 2


1.  Adapter Plate: Machined from 6061 Aluminum billet. All tapped holes have helicoil inserts. Attractive and precision. Replaces original steel plate. The plate includes a rear crankshaft seal integrated into the design.

2.Clutch Slave Cylinder and Hose: You may use the original slave cylinder presently on your Spridget or the billet aluminum cylinder with stainless steel braid covered Teflon hose we offer.

3. Inside:  New clutch disc that works with stock pressure plate.  No mods to flywheel.  New pilot bushing included.

4. Transmission: Five speed overdrive, all synchronized.   From 1979-82 Datsun 210.  Buy locally or from sources listed here.   Expect to pay around $200.00 — maybe less.

5. Gearshift Lever:  Shorten it to match length of stock lever.  Will use either 5 speed knob or stock Spridget knob.

  1. Driveshaft Yoke: Installation of yoke and U-joint adapts driveshaft without any cutting or modification.
  2. Speedometer Angle Ratio Adapter:  Part of Angle Ratio Adapter and Speedometer cable kit.  Custom geared to match the rear end ratio and tire circumference on your car.   Corrects speedometer reading and makes cable installtion easier and more reliable.   Optional item.
  3. Transmission Mount Assembly:  Bolts in like stock unit, with bolts up through the crossmember.  Utilizes six durometer 40 pads.
  4. Starter Clearance Hole Cover:  An optional item, primarily for appearance.  Only needed for kits purchased before September 2000.

A Rear Crankshaft Seal System was installed in the 1275 motor we purchased. Rivergate had developed a rear crankshaft seal for Sprites & Midgets. The seal system uses a spring backed neoprene seal, and is incorporated into the aluminum transmission conversion adapter plate. It applies to 948, 1098 and 1275cc engines. No engine teardown nor modification is required for installation, but the engine must be out of the car. It is designed to stop oil leaks at the rear of the engine whether they are from around the crankshaft itself, or if the leak is thru the machined surface between the block and the rear main bearing cap.

The crankshaft seal arrangement is furnished with a tube of special aluminum sealant. In addition to use with the seal, it is large enough to use to seal the adapter to the back of the engine block and the oil pump cover into the adapter plate.

The crankshaft seal requires a specially machined 5 speed conversion kit adapter plate. The plate is furnished as part of the conversion kit. In addition, Rivergate can re-machine any of our adapter plates built since February of 1996 to accept the seal kit. See the price list for information.

Also available is the service of machining the standard Rivergate adapter plate to allow for installation of the Bolt-on rear crankshaft seal available from several of the Spridget and Mini Vendors.
John's engine1275-1

John’s engine1275-1

John's engine1275-2

John’s engine1275-2


The following specifications describe the rebuilt engine purchased from Bill Perry at Rivergate.
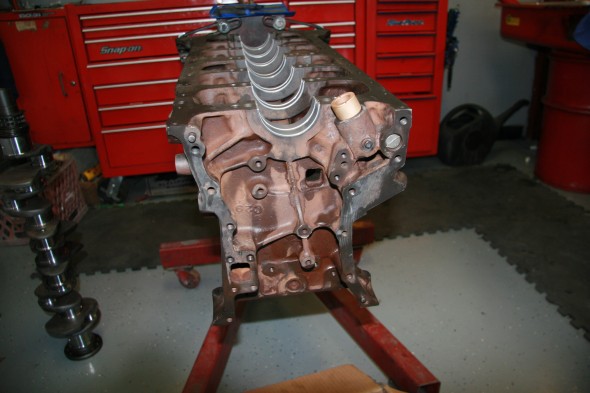
Rebuilt 1275cc Sprite/Midget motor, bored .030″ over to give 1301cc.
Includes:

Prepared 1275 Engine

Bored .030″ oversize

Pistons – modern 3 Ring, High Compression

Rod, Main, Thrust Bearings

Oil Pressure Release Valve and Spring

All Gaskets, Front Seal and Valve Stem Seals

Water Pump

Oil Pump

Cam – choice of 266 or 276 Kent Performance Cam

Cam followers

Valve Springs – Upgraded Quality

Timing Chain

Valve Guides

Thermostat

Pricing

Rebuilt 1275cc Sprite/Midget Motor $2,450.00

Balance all Rotating & Reciprocating Parts $125.00

Lighten flywheel – modest lightening for street use $50.00

Aluminum Cylinder Head – Improved flow and performance, Stellite valve seats, 19 pounds lighter than stock, ready for no-lead fuel, bronze valve guides – a beautiful, functional addition to Sprite/Midget – $725 price only applies to a cylinder head purchased with a rebuilt motor.

Additional Options:

New Pressure Plate – should be purchased if balance option is chosen, so it can be balanced with all other rotating parts $69.00

Camshaft – Scatter Pattern SPVP3 or SPVP4, your choice, (others available) $90.00

Convert to 11 studs – Requires Aluminum Cylinder Head and ARP studs $75.00

Tubular Chrom Moly Pushrods $69.00

Convert to use unleaded fuel — bronze valve guides & Stellite valve seats & valves $140.00

ARP Fasteners

Very high quality fasteners as used on most Spridget Race Motors:

Head Stud Set, includes rocker studs $125.00

Main Stud Kit $70.00

Flywheel Bolt Set $18.00

Rod Bolt and Nut Set $106.00

SHIPPING:

Shipped in custom crate which must be promptly returned.

Crate Core Charge is $125.00  (will be applied to orders when billed and refunded when the crate is returned) $125.00

Crating Charge $35.00

Shipping (actual cost) $120.00 to $450.00

If engine is purchased along with a five-speed overdrive conversion kit, the engine will be assembled with the aluminum adapter plate rather than the stock iron rear plate.