Engine/Gearbox Installation

John and Molly came over to assist in the “Big Lift,” the installation of the engine and gearbox into the car. This has been a long time coming. As a reminder, we are installing the 1275 engine along with a Datsun 210 5-speed gearbox. The following image shows the same procedure twenty years go!

Engine Install 2005

Unfortunately, many have reported that the heater plenum needs to be “bashed” upward to provide clearance for the entry of the gearbox. We had hoped that we could avoid this step if we were very careful and took our time, but it was not to be. In the end we had to “adjust” the plenum to make room. That process is shown in the accompanying video. 

We put together a check list of items that combines preparation steps along with necessary connections to get the engine in and then make it ready to start.

Remove Bonnet – struts and hinges.take the strut off first. before removing the bonnet hinges disconnect the Deutsch connector and the spade connector at the horn.

Jack Stands – place the car on jack stands.

Engine Hoist Leveler – Remove rocker cover and install leveler on engine.

Engine Mounts – Move rubber buffer from engine stand to the car mount.

Starter – Attach the power cable to the starter that will connect to the starter switch later in the process.

Battery Ground cable to firewall – disconnect during engine install.

Engine fan –  install six blade fan and spacer. Install fan belt and check tension.

Crossbar protector – put the custom-made sheet metal protector over the steering rack crossbar to avoid damaging the paint.

Remove fluids –  from engine, radiator and transmission

Timing marks – make sure these are visible on the pulley before installing the engine.

Driveshaft Prop – Grease the yoke and the transmission splines.

Slave cylinder – check threads of the two mounting bolts, should be metric. The threads of the push rod extend beyond the arm by approximately one half inch (6-8 threads showing). The excess on the spacing shim goes to the front of the engine. Find the slightly shortened Allen key for the new cap screws.

Engine Mounts – Install the left-hand engine mount onto the chassis and leave it loose. Install the right hand engine mount onto the engine and leave it loose.

Header – Set the exhaust header in place so that it will be positioned to install once the engine is in place.

Engine/transmission install with engine hoist – Check to see if the heater plenum will require modification. Before the assembly is all the way home push the driveshaft yoke into the rear of the transmission.

Transmission mount – install the ⅜” – 24 x 3 ½” bolts through the chassis and into the mount and tighten. Next, tighten the front engine mounts. Now center the transmission in the rear mount and tighten the transmission pad mounts. Install the bolts in the sides of the rear mounts from the inside of the car with the self locking nuts inside the tunnel. It may be helpful to tape the nuts in the wrench to make starting the threads easier.

RadiatorIt is a little tricky to install. It works best to begin with the upper right (passenger side of the car) mounting point first, then the lower right, followed by the upper left mount and finally the lower left mount. 

Radiator hoses – connect and clamp

Overflow coolant tank – determine right place for the overflow tank drain line and install a fitting in hose. Connect the radiator overflow to the tank.

Alternator – connect the wiring for the alternator.

Vacuum Pipe – connect the vacuum hose from the distributor to the carburetor.

Starter – attach the power cable from the starter to the starter switch.

Ignition Coil – attach the wiring to the coil and distributor. Connect the high tension line from the distributor.

Oil pressure gauge pipe/hose – connect to engine.

Water temperature gauge – connect capillary tube two cylinder head.

Rocker Cover – install the rocker cover.

Breather hose – connect the hoses and clamp

Driveshaft – connect and tighten bolts/nuts.

Refill fluids in engine, radiator and transmission – transmission requires 2 ¼ pints of Redline MT-90.

Clutch – Bleed the clutch master and then the slave cylinder. To eliminate all air, the slave cylinder piston should be held in the fully retracted position while bleeding. Do this by running out the adjustable push rod until it is pushing firmly on the clutch fork. Keep the master cylinder reservoir topped up while slowly and gently pumping the clutch size cylinder Into operating position. A power bleeder works well here.

Adjust the push rod length to give some free travel at the clutch pedal. Assure clutch is releasing fully while the vehicle is still up on jack stands. Confirm free play assuring that you can move the clutch operating lever away from the clutch slave cylinder push rod. Finger pressure against the lever should be able to move it against the pressure of the spring inside the Bell housing. Generally 1/4 inch to 1/2 inch of free play measured at the fork will be adequate. Be aware that the clutch pressure plate can be over traveled. If the clutch releases when the pedal is partway down, but then seems to reengage at full pedal down. It is being over traveled. Add free play until this condition disappears.

https://youtu.be/k11eIyfErMY?si=YUO94N5qavN61VFl

Battery ground cable to firewall – reattach.

Ground Strap – Attach engine to frame

Intake and Exhaust Manifolds with gasket – brass long nuts

Carburetor –  install heat shield, phenolic spacer, choke and accelerator cable. Connect fuel hose from pipe to carb. Connect vacuum hose to distributor. Put ATF in the carb piston. Connect carb drain hose.

K&N Air Cleaner – Install and spray with special oil.

Heater hoses – attach both and clamp

Exhaust system – install, exhaust header, exhaust pipes, and muffler.

AFR gauge – connect gauge to the O2 sensor and power.

Gasoline – partially fill fuel tank with gasoline.

Battery – reconnect the battery ground cable to the firewall.

Start engine!


These things always take longer than expected, or at least hoped! However, at the end of the day, all that is important is that you got the “thing” in. Well, it was about the end of the day and we did get it in!

We did install the new slave cylinder sourced from Will Perry at Rivergate before the engine went into the car. Once the engine is installed there is not much room between the gearbox and the frame making it a tight squeeze to install the slave cylinder. We are also using a remote bleeder with a flexible hose.

Slave cylinder install

Bugeye Restoration Video Episode One Hundred-One shows the process involved in the installation of the engine and gearbox as well as the short-throw gear shifter sourced from Gerard Chateauvieux at Gerard’s Garage.

https://vimeo.com/1076516667/7bc5103b4c?share=copy

Additional information about Gerard’s shifter is provided in another post: https://valvechatter.com/?p=13520

Bugeye Restoration Video Episode One Hundred-Three shows the process involved in making the various connections required to prepare the engine to start and the gearbox to operate properly. This video will be posted when complete. 

Conversion to 1275 Engine & 5 Speed Gearbox

I am creating this post after the fact. Twenty-one years after the fact to be precise!

Unfortunately, I don’t have precise records, but in 2000-2001 we decided that the 948 cc engine just wasn’t powerful enough to provide the driving fun that I had hoped to experience. After shopping around a bit and doing some research my Dad and I decided to purchase a 1275 motor from Bill Perry at Rivergate. Bill completely rebuilt a 1275 that he had and added a new aluminum head. We also purchased a Datsun B210 5 speed gearbox conversion and had Bill assemble everything as one unit, crate it, and send it to us, essentially ready to install.

The engine numbers 12V/587Z/L7183. This engine was sourced from either an Austin-Healey Sprite, MK4 or from an MG Midget, MK3. The 587 engine was produced for North American Sales and was apparently rather rare in the States, so it may have been a Canadian car. The “L” stands for low compression, that is 8.0:1. The engine was produced  from 8/1971 to 8/1972. The engine, as produced at the time, would have been painted black.

Bill recommended using a Crane “Fireball” XR700 optical trigger ignition system and we installed one shortly after receiving the engine/gearbox package. We also purchased and installed the speedometer adapter kit available from Rivergate.

Rivergate Prepared 1275 Engine and Datsun 5 Speed

1275 Engine and Datsun 5 Speed

Before too long we also converted the original starter to a high-torque gear reduction starter and the generator to a Lucas alternator.


Safety Check & Rivergate Modifications

The week after we got the Bugeye home, Dad took it over the mountain from Harrisonburg to Grand Touring Classics in Stanardsville, VA. An unlikely place for a British car shop, but they seemed to know Healeys and were in the process of restoring a Bugeye. Garland Gentry ran the shop and was willing to give the Sprite a good going over to make sure it was safe to operate. Engine compression was good but it was in need of some minor mechanical work. Dad asked Garland to prepare an insurance appraisal of the car and it is found below:

Appraisal

Appraisal

We had read that converting the drum brakes on the front of 948 Bugeye to disc brakes from a later Sprite or MG Midget was pretty straight foward. Dad didn’t have the time to make the conversion so he had Garland go ahead and get the parts and install the upgrade. As things turned out, the brakes worked a little too well. Garland had forgotten to remove the check valve from the master cylinder and consequently the rear brakes kept locking up and overheating. After making some calls and emailing some sprite owners, Dad figured out the problem and took care of it. Brakes were much improved but still not as good as hoped. We would later find out that the 1098 Sprite with disc brakes used a 3/4” bore master rather than the 7/8” found in the earlier bugeye.

So the disc brake conversion became the first of many “improvements” to the Bugeye that we would make. We knew after driving the Sprite on the Washington Beltway with the big trucks passing us, that conversion to a 1275 motor and a Datsun B210 gearbox wouldn’t be far behind.

 
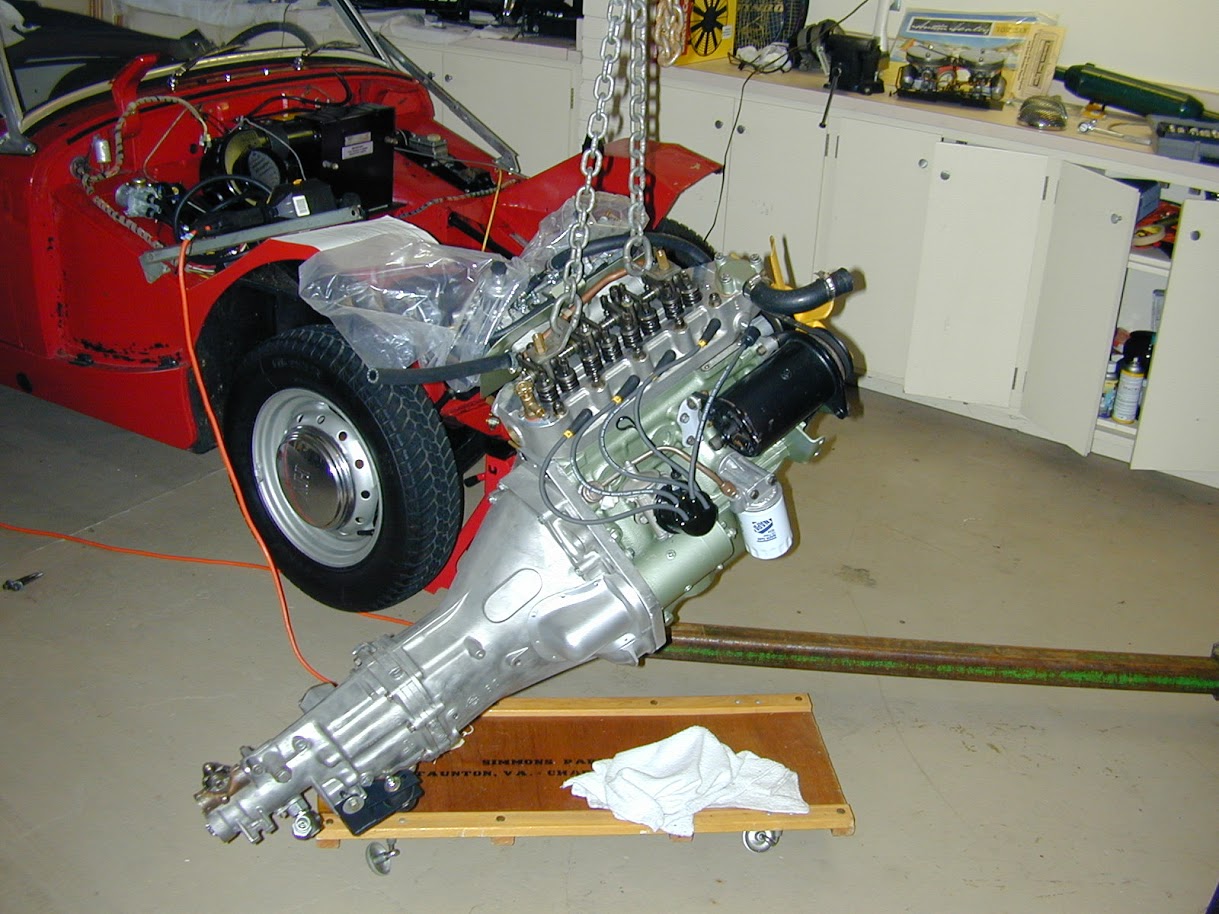
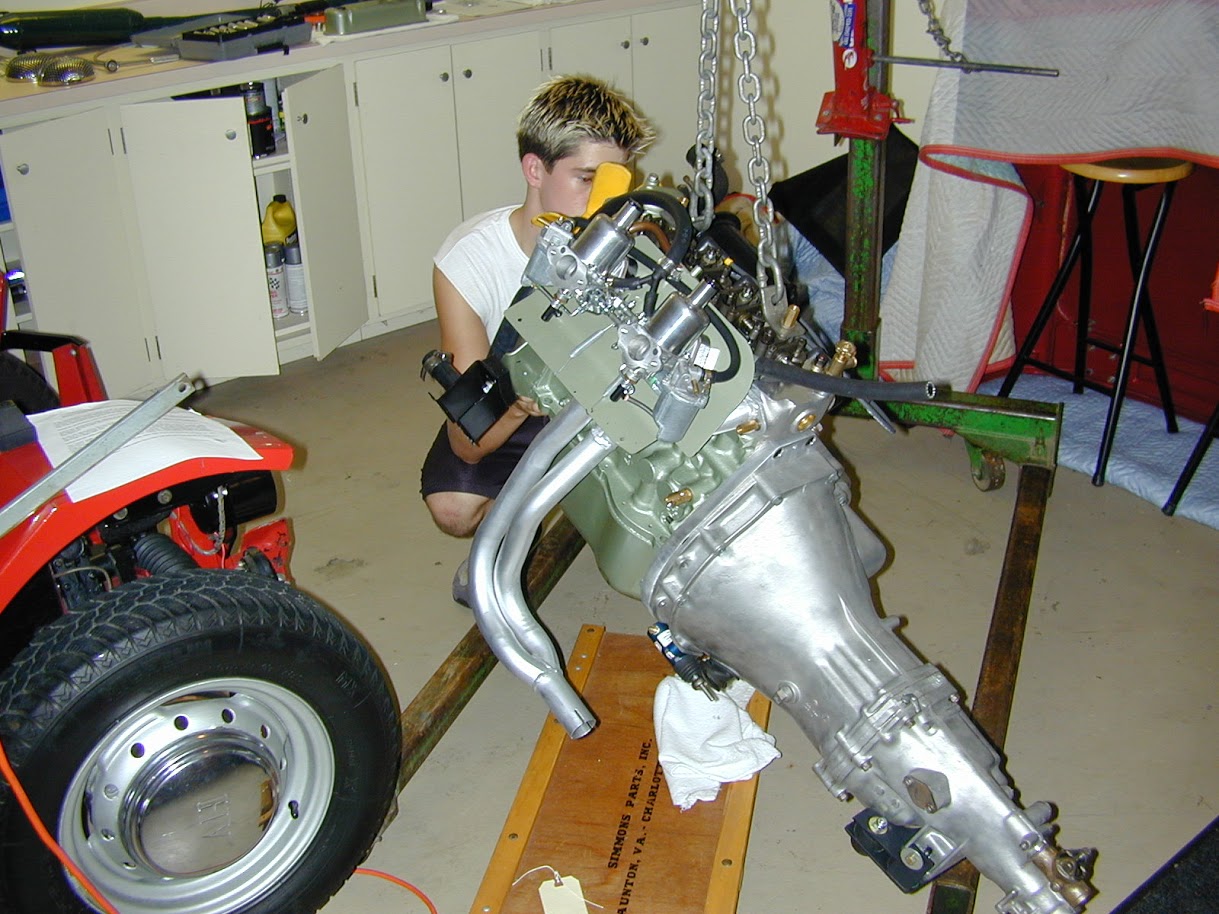
Dad contacted Rivergate Restoration about purchasing their conversion kit to the Datsun transmission. After talking to Bill Perry it was decided that a rebuilt 1275 and a rebuilt Datsun B210 gearbox would be purchased as an assembled unit. The Rivergate folks are great to work with.Their contact information is below:
Rivergate Restoration Products
340 Reavley Road Sale Creek, TN 37373
423-332-2030 (Fax: 332-6914)

rivergate5speed@bellsouth.net


If one was sourcing a gearbox, the following guidance is provided by Rivergate:


Sprite/Midget 5-Speed Kit Transmission Required


A Datsun 5-speed transmission from August 1979 to 1982 Datsun 210. This can be from a coupe, sedan or wagon.
 
 
The input and output shafts should be 20mm (about 25/32″) diameter and 18 spline.

The serial number on top of the bellhousing should begin with the letter “F” (FL, FA, FX etc. OK).

The number “60” is cast into the right side of the main case.  These transmissions come from the Datsun 210, but the model number for these cars, imbedded in the Serial Number, is B310.

The model number for the transmission, FS5W60A, is sometimes found on the Serial Number plate on the firewall. This is not found on the transmission.


When the transmission is bought, the gearshift lever, throwout bearing carrier and clutch release fork are needed.

The Rivergate Five Speed Conversion Kit includes:


An aluminum adapter machined from a billet of 6061 aluminum
A rear crankshaft seal fitted to the adapter plate to help eliminate oil leaks
A rear motor mount assembly (with 6 durometer 40 pads built in)
A new clutch disc to be used with the standard pressure plate
A pushrod assembly and spacer for the slave cylinder
A plug for the transmission case
A 5/8″ and 3/4″ pilot bushing
Forty bolts and washers for attaching the adapter plate and the transmission
New driveshaft yoke with U-joint installed
Throw-Out Bearing
Rear Transmission Seal
Clutch Alignment Tool

Instructions, detailed, with color photos for clarity

This is the most complete, easiest to install kit ever made for the Spridget. It requires no modification to the engine, the flywheel, the driveshaft, or to the chassis or body of your Sprite or Midget.

Modification Kit Side 1

Modification Kit Side 1

Modification Kit Side 2

Modification Kit Side 2


1.  Adapter Plate: Machined from 6061 Aluminum billet. All tapped holes have helicoil inserts. Attractive and precision. Replaces original steel plate. The plate includes a rear crankshaft seal integrated into the design.

2.Clutch Slave Cylinder and Hose: You may use the original slave cylinder presently on your Spridget or the billet aluminum cylinder with stainless steel braid covered Teflon hose we offer.

3. Inside:  New clutch disc that works with stock pressure plate.  No mods to flywheel.  New pilot bushing included.

4. Transmission: Five speed overdrive, all synchronized.   From 1979-82 Datsun 210.  Buy locally or from sources listed here.   Expect to pay around $200.00 — maybe less.

5. Gearshift Lever:  Shorten it to match length of stock lever.  Will use either 5 speed knob or stock Spridget knob.

  1. Driveshaft Yoke: Installation of yoke and U-joint adapts driveshaft without any cutting or modification.
  2. Speedometer Angle Ratio Adapter:  Part of Angle Ratio Adapter and Speedometer cable kit.  Custom geared to match the rear end ratio and tire circumference on your car.   Corrects speedometer reading and makes cable installtion easier and more reliable.   Optional item.
  3. Transmission Mount Assembly:  Bolts in like stock unit, with bolts up through the crossmember.  Utilizes six durometer 40 pads.
  4. Starter Clearance Hole Cover:  An optional item, primarily for appearance.  Only needed for kits purchased before September 2000.

A Rear Crankshaft Seal System was installed in the 1275 motor we purchased. Rivergate had developed a rear crankshaft seal for Sprites & Midgets. The seal system uses a spring backed neoprene seal, and is incorporated into the aluminum transmission conversion adapter plate. It applies to 948, 1098 and 1275cc engines. No engine teardown nor modification is required for installation, but the engine must be out of the car. It is designed to stop oil leaks at the rear of the engine whether they are from around the crankshaft itself, or if the leak is thru the machined surface between the block and the rear main bearing cap.

The crankshaft seal arrangement is furnished with a tube of special aluminum sealant. In addition to use with the seal, it is large enough to use to seal the adapter to the back of the engine block and the oil pump cover into the adapter plate.

The crankshaft seal requires a specially machined 5 speed conversion kit adapter plate. The plate is furnished as part of the conversion kit. In addition, Rivergate can re-machine any of our adapter plates built since February of 1996 to accept the seal kit. See the price list for information.

Also available is the service of machining the standard Rivergate adapter plate to allow for installation of the Bolt-on rear crankshaft seal available from several of the Spridget and Mini Vendors.

John's engine1275-1

John’s engine1275-1

John's engine1275-2

John’s engine1275-2


The following specifications describe the rebuilt engine purchased from Bill Perry at Rivergate.

Rebuilt 1275cc Sprite/Midget motor, bored .030″ over to give 1301cc.

Includes:

Prepared 1275 Engine

Bored .030″ oversize

Pistons – modern 3 Ring, High Compression

Rod, Main, Thrust Bearings

Oil Pressure Release Valve and Spring

All Gaskets, Front Seal and Valve Stem Seals

Water Pump

Oil Pump

Cam – choice of 266 or 276 Kent Performance Cam

Cam followers

Valve Springs – Upgraded Quality

Timing Chain

Valve Guides

Thermostat

Pricing

Rebuilt 1275cc Sprite/Midget Motor $2,450.00

Balance all Rotating & Reciprocating Parts $125.00

Lighten flywheel – modest lightening for street use $50.00

Aluminum Cylinder Head – Improved flow and performance, Stellite valve seats, 19 pounds lighter than stock, ready for no-lead fuel, bronze valve guides – a beautiful, functional addition to Sprite/Midget – $725 price only applies to a cylinder head purchased with a rebuilt motor.

Additional Options:

New Pressure Plate – should be purchased if balance option is chosen, so it can be balanced with all other rotating parts $69.00

Camshaft – Scatter Pattern SPVP3 or SPVP4, your choice, (others available) $90.00

Convert to 11 studs – Requires Aluminum Cylinder Head and ARP studs $75.00

Tubular Chrom Moly Pushrods $69.00

Convert to use unleaded fuel — bronze valve guides & Stellite valve seats & valves $140.00

ARP Fasteners

Very high quality fasteners as used on most Spridget Race Motors:

Head Stud Set, includes rocker studs $125.00

Main Stud Kit $70.00

Flywheel Bolt Set $18.00

Rod Bolt and Nut Set $106.00

SHIPPING:

Shipped in custom crate which must be promptly returned.

Crate Core Charge is $125.00  (will be applied to orders when billed and refunded when the crate is returned) $125.00

Crating Charge $35.00

Shipping (actual cost) $120.00 to $450.00

If engine is purchased along with a five-speed overdrive conversion kit, the engine will be assembled with the aluminum adapter plate rather than the stock iron rear plate.