Preparations for Engine Starting

Getting the engine and gearbox into the car was a big step in the restoration process, but there is still much to be done to get the engine ready to start and the car on the road.

In advance of the engine installation, we put together a check list of items associated with the engine/gearbox that needed to be accomplished. The list is in no particular order. As we completed items we gave ourselves a check mark and it was fun to see the checks start to add up as we got things done.

✅Remove Bonnet – struts and hinges.take the strut off first. before removing the bonnet hinges disconnect the Deutsch connector and the spade connector at the horn.

✅Jack Stands – place the car on jack stands.

✅Engine Hoist Leveler – Remove rocker cover and install leveler on engine.

Engine Mounts – Move rubber buffer from engine stand to the car mount.

✅Starter – Attach the power cable to the starter that will connect to the starter switch later in the process.

Battery Ground cable to firewall – disconnect during engine install.

✅Engine fan –  install six blade fan and spacer. Install fan belt and check tension.

✅Crossbar protector – put the custom-made sheet metal protector over the steering rack crossbar to avoid damaging the paint.

Remove fluids –  from engine, radiator and transmission –

✅Timing marks – make sure these are visible on the pulley before installing the engine.

Driveshaft Prop – Grease the yoke and the transmission splines.

✅Slave cylinder – check threads of the two mounting bolts, should be metric. The threads of the push rod extend beyond the arm by approximately one half inch (6-8 threads showing). The excess on the spacing shim goes to the front of the engine. Find the slightly shortened Allen key for the new cap screws.

Engine Mounts – Install the left-hand engine mount onto the chassis and leave it loose. Install the right hand engine mount onto the engine and leave it loose.

Header – Set the exhaust header in place so that it will be positioned to install once the engine is in place.

✅Engine/transmission install with engine hoist – Check to see if the heater plenum will require modification. Before the assembly is all the way home push the driveshaft yoke into the rear of the transmission.

✅Transmission mount – install the ⅜” – 24 x 3 ½” bolts through the chassis and into the mount and tighten. Next, tighten the front engine mounts.

✅Now center the transmission in the rear mount and tighten the transmission pad mounts.

✅Install the bolts in the sides of the rear mounts from the inside of the car with the self locking nuts inside the tunnel. It may be helpful to tape the nuts in the wrench to make starting the threads easier.

✅RadiatorIt is a little tricky to install. It works best to begin with the upper right (passenger side of the car) mounting point first, then the lower right, followed by the upper left mount and finally the lower left mount. 

✅Radiator hoses – connect and clamp

✅Overflow coolant tank – determine right place for the overflow tank drain line and install a fitting in hose. Connect the radiator overflow to the tank.

✅Alternator – connect the wiring for the alternator.

✅Vacuum pipe – connect the vacuum hose from the distributor to the carburetor.

✅Starter – attach the power cable from the starter to the starter switch.

✅Ignition Coil – attach the wiring to the coil and distributor. Connect the high tension line from the distributor.

✅Oil pressure gauge pipe/hose – connect to engine.

✅Water temperature gauge – connect capillary tube two cylinder head.

✅Heater hose from cylinder head water valve to heater – uses two 10-22 mm jubilee hose clips

✅Heater hose from heater box to copper pipe – 

✅Rocker Cover – install the rocker cover.

✅Breather hose – connect the hoses and clamp

✅Driveshaft – connect and tighten bolts/nuts.

✅Refill fluids in engine, radiator and transmission – transmission requires 2 ¼ pints of Redline MT-90.

✅Remote clutch bleeder valve – connect the remote bleeder stainless steel flexible hose to the bracket on the left side of the heater box.

✅Clutch – Bleed the clutch master and then the slave cylinder. To eliminate all air, the slave cylinder piston should be held in the fully retracted position while bleeding. Do this by running out the adjustable push rod until it is pushing firmly on the clutch fork. Keep the master cylinder reservoir topped up while slowly and gently pumping the clutch size cylinder Into operating position. A power bleeder works well here.

Adjust the push rod length to give some free travel at the clutch pedal. Assure clutch is releasing fully while the vehicle is still up on jack stands. Confirm free play assuring that you can move the clutch operating lever away from the clutch slave cylinder push rod. Finger pressure against the lever should be able to move it against the pressure of the spring inside the Bell housing. Generally 1/4 inch to 1/2 inch of free play measured at the fork will be adequate. Be aware that the clutch pressure plate can be over traveled. If the clutch releases when the pedal is partway down, but then seems to reengage at full pedal down. It is being over traveled. Add free play until this condition disappears.

https://youtu.be/k11eIyfErMY?si=YUO94N5qavN61VFl

Battery ground cable to firewall – reattach.

✅Ground Strap – Attach engine to frame

✅Electric Radiator “Pusher” Fan – see Moss Motors site for directions: https://mossmotors.com/media/instructions/231-658.pdf

✅Intake and Exhaust Manifolds with gasket 

✅Carburetor –  install heat shield, phenolic spacer, gaskets, choke and accelerator cable. Connect fuel hose from pipe to carb. Connect the float bowl overflow hose. Connect the breather hose from the timing chain cover canister to the carb. Connect vacuum hose to distributor. Put ATF in the carb piston. 

K&N Air Cleaner – Install and spray with special oil.

✅Exhaust system – install, exhaust header, exhaust pipes, and muffler.

AFR gauge – connect gauge to the O2 sensor and power.

Gasoline – partially fill fuel tank with gasoline.

Start engine!

Our first step was to install the ground strap that connects the chassis to the engine/gearbox. The strap we used was sourced from Moss Motors. We actually connected the strap to the starter motor bolt that secures the starter to the engine backplate as it is important to have a strong ground connection for the electrical draw of the starter. As with most things in this post, the details are in the Bugeye Restoration Video Episode One Hundred-three.

Ground Strap from chassis to Engine

Our next item was to install the starter motor power cable from the battery post of the starter switch to the starter motor terminal.

We then installed the oil pressure gauge pipe and hose from the gauge to the fitting on the right side of the engine block. Originally this arrangement was just copper pipe but we used a copper fitting and hose supplied by Bugeyeguys. Copper, when it gets old, also becomes brittle and can be subject to breaking and leaking. The rubber hose used in the kit helps to absorb vibration.

Oil Pressure Gauge Pipe and hose fitting kit

Oil Pressure Pipe and Hose

Next, we connected the distributor to the coil wiring. Red wire to the positive terminal on the coil (it is marked) and the black wire to the negative terminal.

Distributor to Coil Wiring

The capillary cable from the water temperature/oil pressure gauge was then connected through several clamps on the right hand engine bay valance to the cylinder head. We believe that fitting to be a 5/8″-18 thread.

Capillary Tube to Cylinder Head

The alternator wiring was then connected. The large red 8AWG wire from the starter switch is connected to one of the large terminals on the alternator. The smaller 18 gauge brown/yellow wire connects the charging warning light in the alternator to the small spade terminal on the alternator.

Alternator Wiring Connections

The heater hose from the water valve on the cylinder head was then installed and connected to the heater box matrix. This hose is pre-bent and in our case was sourced from Bugeyeguys.

Heater hose from water valve

We then moved to the clutch slave cylinder and the installation of the remote bleeder kit purchased from Rivergate Restorations. We did need to add an extra “spacer” fitting (circled in red below) at the master cylinder so that braided hose would clear the edge of the “Sebring” foot box.

Modified Clutch Fitting Assembly

The slave cylinder mounted easy enough but the upper bolt is a real pain to get to once the gearbox is in the car. We used cap screws to make the job a bit easier. A cut-off (shortened) Allen key does the trick.

We fabricated a little bracket to hold the remote bleeder and used the two LH heater box mounting screws to hold it in place. In doing so, we avoided having to make any extra holes in the chassis.

Clutch Remote Bleeder Mounting Bracket

I installed a stainless bleeder valve in the fitting that Rivergate supplied. That was wrong and it leaked! We went back to the two-piece bleeder that Rivergate had supplied and everything was fine. We were able to successfully bleed the clutch system and we had no leaks. Again, this is detailed in the accompanying video.

Correct Bleeder Assembly for Remote Clutch Bleeder

We then mounted the radiator and the 10″ electric fan to the car. This also involved completing the wiring to the fan from the toggle switch below the dashboard. Instructions for wiring and mounting the fan are provided by Moss Motors. Contrary to what we typically see, the black wire from the fan is for power and the blue wire is for ground. Hayden Fan Instructions

The radiator mounts with four 1/4″ hex bolts. It is definitely easier to mount he RH side of the radiator first as seen in the video.

Radiator and Electric Fan Installation

It was then time to mount the gasket and the intake manifold and header to the cylinder head. We also added a new polished stainless steel carb heat shield. The order or sequence of the gaskets between the intake, the heat shield, the phenolic spacer block, the carb and the air cleaner is important. The K&N air filter will be added later after initial tuning of the engine. Lastly, the HIF44 carb was added.

Intake Manifold, Header and HIF44 Installed

We made some stainless steel brackets sourced from McMaster-Carr and added a nut-sert fitting in each to hold the stainless clamps used to support the heater pipe. The original intake manifold had cast fitting for the heater pipe mounting but hose were forfeited with the new Maniflow intake.

Heater Pipe Installed

We then connected the fuel delivery hose, the carb float bowl overflow hose, the breather hose from the timing cover canister, and the vacuum hose from the carb to the distributor.

Hose connections to the HIF44 Carb

HIF 44 Carburetor (RH Side)

We added a little heat protection to the fuel delivery hose with a heat shield wrap from Techflex Thermoshield https://www.cabletiesandmore.com/thermashield-t6-wrap and secured it with four stainless steel zip ties.

Thermotec Hose Covering and Stainless Zip-ties

The coolant recovery tank we had selected did not have an overflow port. We added one by drilling a hole in the top side of the tank with an “R” drill bit. We then tapped the hole with a 1/8″-27 NPT tap and thread in a straight brass fitting and painted it black. We used some clear silicone (opaque) tubing from the radiator to the tank so that we could visually inspect coolant flow and we used some black silicone hose for the overflow.

Coolant Tank Hoses

Next, it was time to put fluids into the Bugeye!

Fluids into the Bugeye

We then installed the wiring for the AFR gauge from the interior to the oxygen sensor. We will only be using the AFR gauge for tuning and therefore it does not require a permanent wiring routing nor a placement of the gauge on or below the the dash.

Details on the forgoing are shown in this video: Bugeye Restoration Video Episode One Hundred-Three.

https://vimeo.com/1088106527/9f6138ea7f?share=copy

The following content is included:

0:00 – Engine ground strap to chassis

1:44 – Starter cable 

2:12 – Oil pressure gauge pipe

2:31 – Distributor and coil wiring

2:46 – Water temperature capillary tube

3:27 – Alternator, wiring connections

4:26 – Heater hose from water valve to heater box

4:44 – Clutch slave cylinder, remote bleeder

5:53 – Clutch bleeding

6:07 – Clutch slave cylinder

7:00 – Radiator

7:50 – Radiator hoses

7:53 – Electrical radiator fan installation

8:40 – Radiator fan wiring

9:50 – Intake manifold and header with gasket

11:05 – HIF44 carburetor

12:25 – Stainless steel carburetor heat shield

12:40 – Copper heater pipe and hose

13:25 – Breather hose from timing chain cover canister to carb

13:50 – Fuel delivery hose and float bowl overflow hose

15:30 – Techflex fuel hose insulation

16:23 – Vacuum hose from carburetor to distributor

16:40 -Coolant recovery tank relief port installation

18:45 – Fluids into the car for the radiator, engine, differential, and gearbox

20:38 – Temporary wiring for the AFR gauge


Exhausting

Twenty years ago we installed a Maniflow exhaust system on the Bugeye. It was purchased from MiniMania. We were always happy with the sound of the car so we opted for another Maniflow system with this new version of the Bugeye. The header was the same one we had used previously we simply updated the finish opting for the Jet-Hot ceramic coating. 

The exhaust pipes, mounting hardware and the muffler were sourced directly from Maniflow in the U.K. https://www.maniflow.co.uk/index.php?view=product&from=207&product=1260. The parts come from Maniflow painted in their signature dark metallic green paint. We opted to paint over the green with a high temperature Rustoleum satin black spray paint. 

We were hoping to be able to use one of the left rear bumper mounting bolts for the rear mount of the muffler but we weren’t happy with the fit. In fact, we weren’t happy with the rear muffler at all. Perhaps on the MG midget or square body Sprite, the muffler is fine but on the Bugeye the muffler seems to hang to low and is very obvious from the rear of the car. Consequently, we decided to reuse the Maniflow silencer we already had. We cleaned it up, painted it and mounted it to the car. We did end up drilling an extra hole in the trunk floor for the rubber mounting bobbin to secure the silencer. 

The video below shows the installation of the exhaust system in the car.

Bugeye Restoration Video Episode One Hundred-Four: https://vimeo.com/1082272507/6be54040aa?share=copy


Exhaust

Nothing in our exhaust system is as original! From the header to the oxygen sensor in the exhaust pipe to the dual tip muffler, everything is a modification. We have had the header fitted since the early 2000s. We don’t have a record but we are pretty sure that it was sourced from Mini-Mania and produced by Maniflow in the U.K. The header is a long branch, 1 5/8.” Before we initially installed it we had it Swain-Coated for thermal insulation. While beautiful then, it looks a little tired now so we will send it off to Jet-Hot Coatings to have them refinish it so that it will match our intake manifold.

Header

The Jet-Hot coating now matches the intake manifold.

Jet-Hot coated header

We purchased new exhaust pipes and a twin-tipped muffler from Maniflow to fit the header. The pipe comes in two sections. We will be installing a bung in the front pipe for an oxygen sensor to feed our AFR gauge. We also purchased Maniflow’s installation kit which has the hangers and clamps needed to do the job.

Maniflow Exhaust System


Engine Clean-up and Reinstall

Engine Install

Engine Install

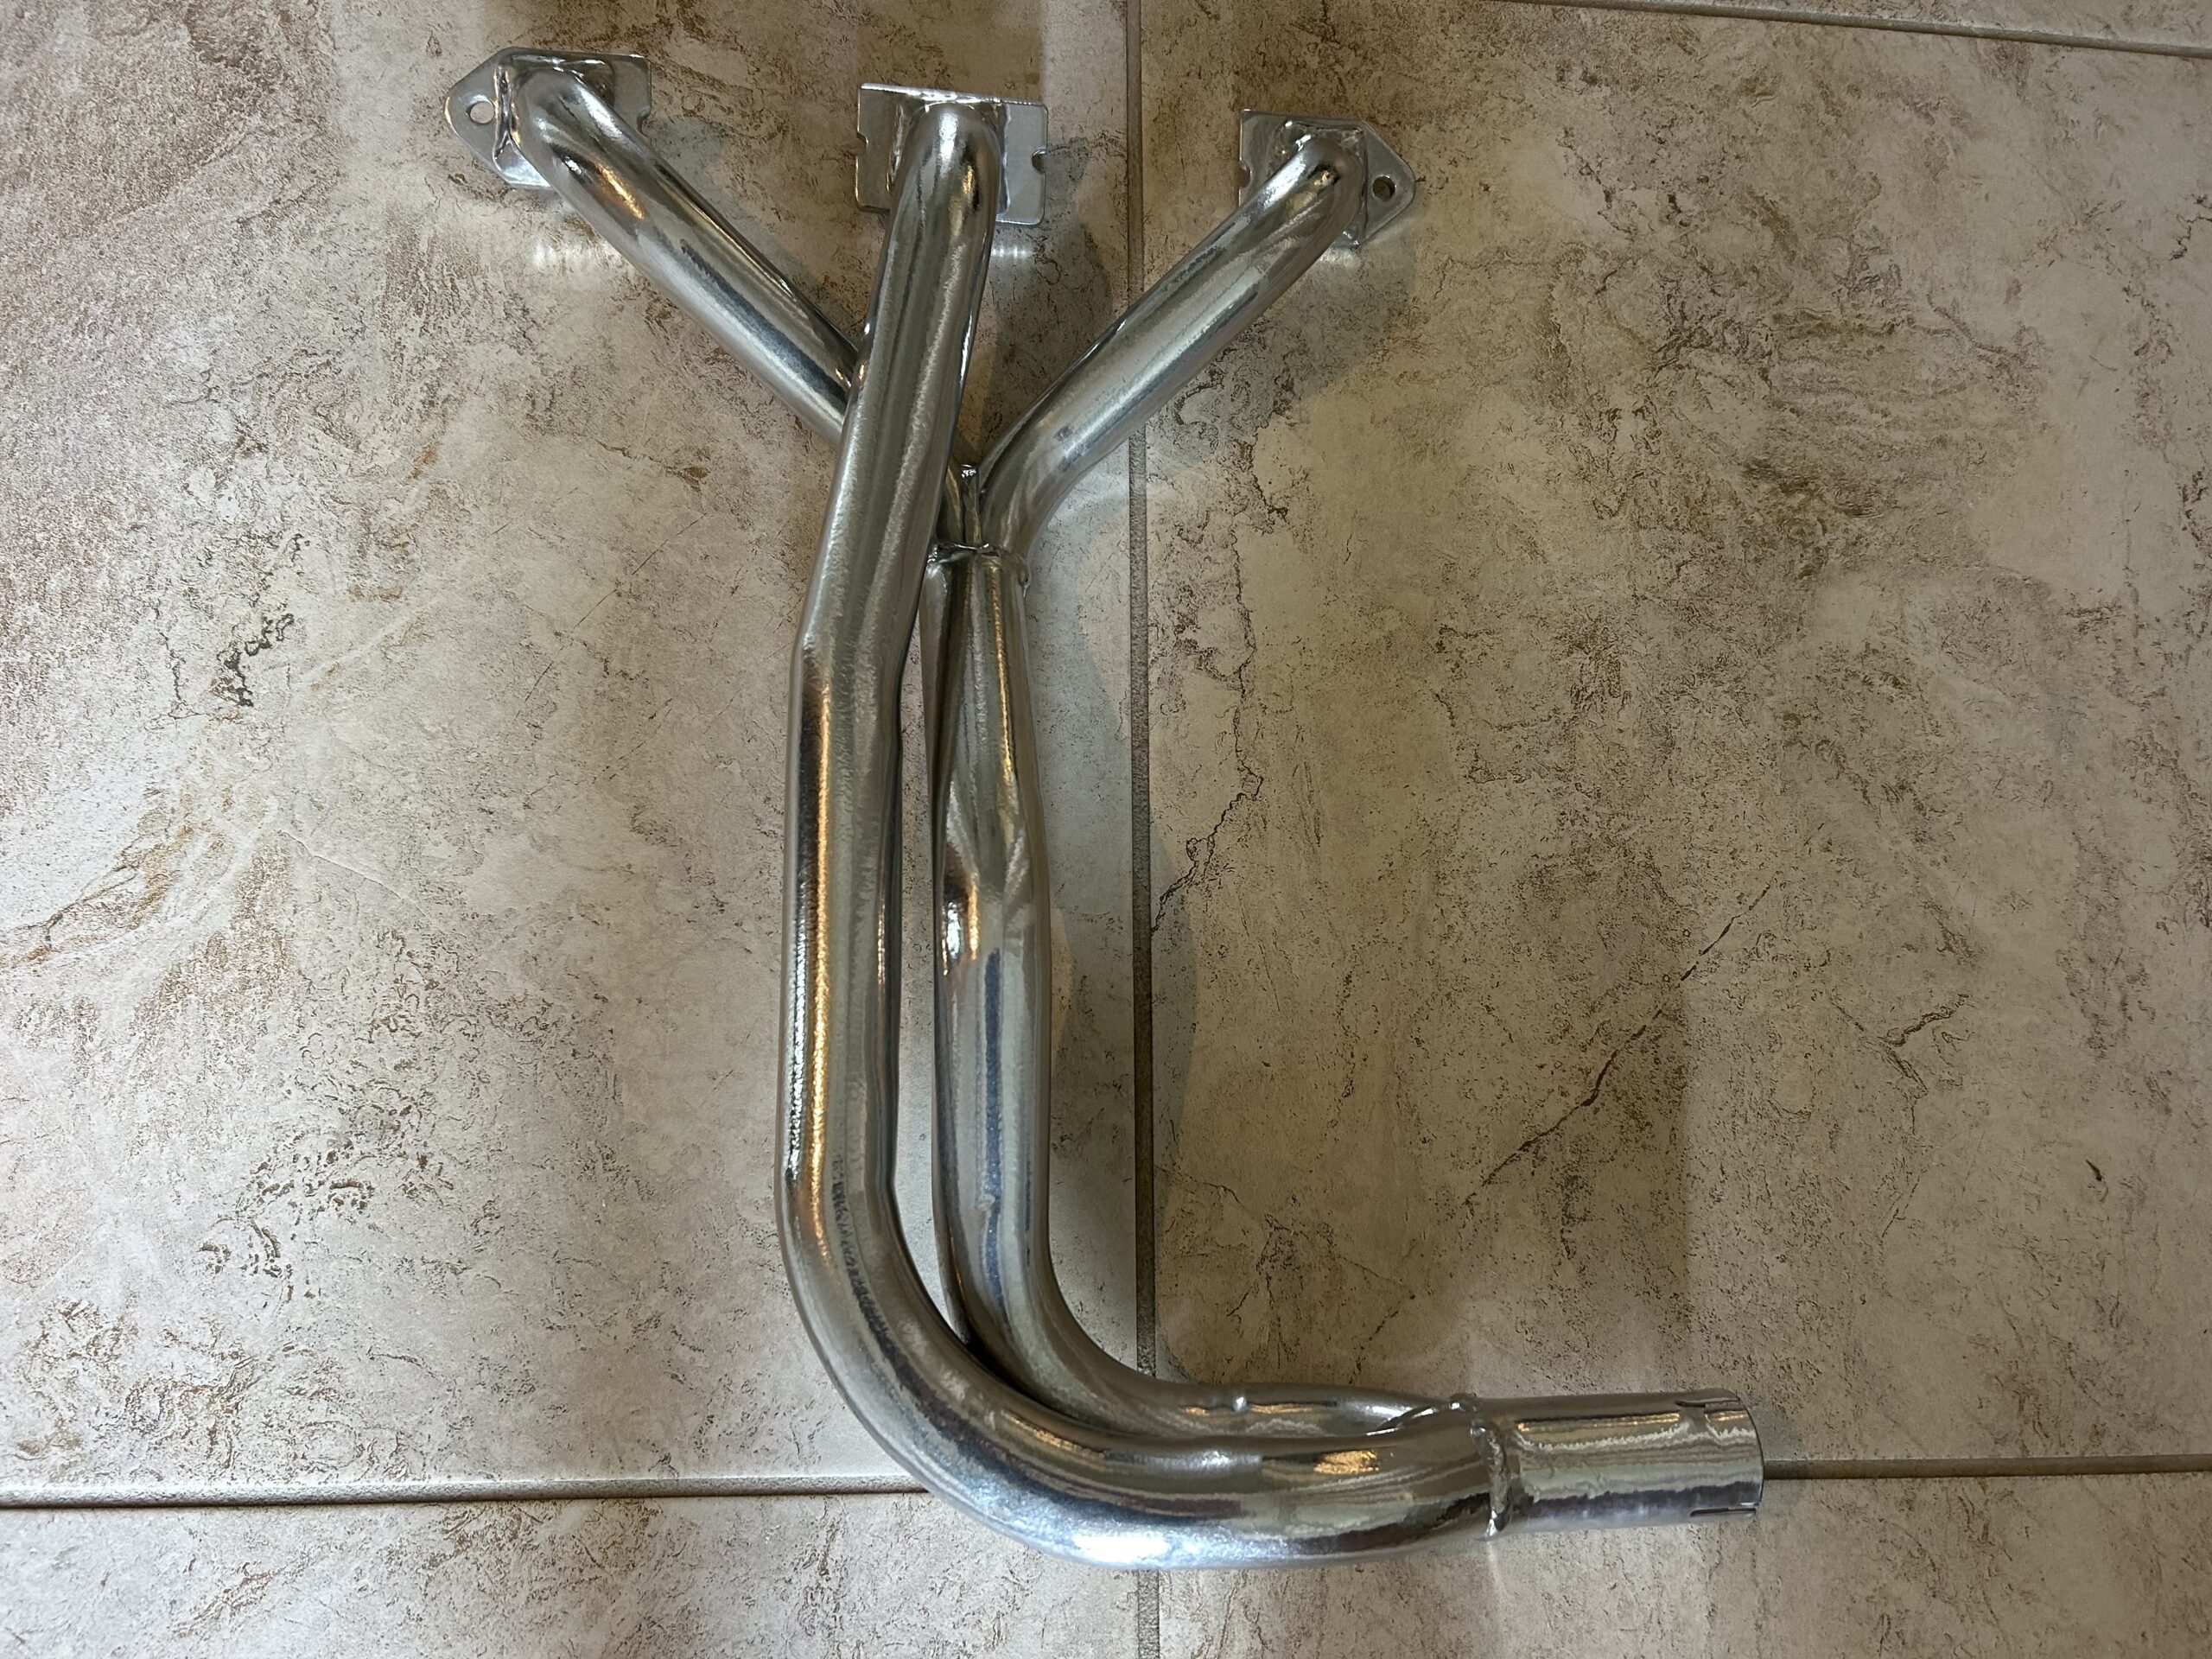
One of the things I wanted to accomplish with the engine clean-up was to have the  exhaust header coated to reduce heat in the engine compartment and interior. I used Swain Coatings. The header came back looking great. Time will tell if the coating holds up and is effective in reducing heat.

Swain Coat Header

Swain Coat Header

Swain Coat Header

Swain Coat Header

I also did a general cleaning of the engine including a new paint job while the gearbox was being worked on by Jack Harper. I replaced the oil sump gasket and the rocker cover gasket, too. I tested and reinstalled the gear reduction starter. The air cleaners were cleaned and oiled with K&N products.

Clean Motor Assembly

Clean Motor Assembly

Clean Motor Assembly

Clean Motor Assembly

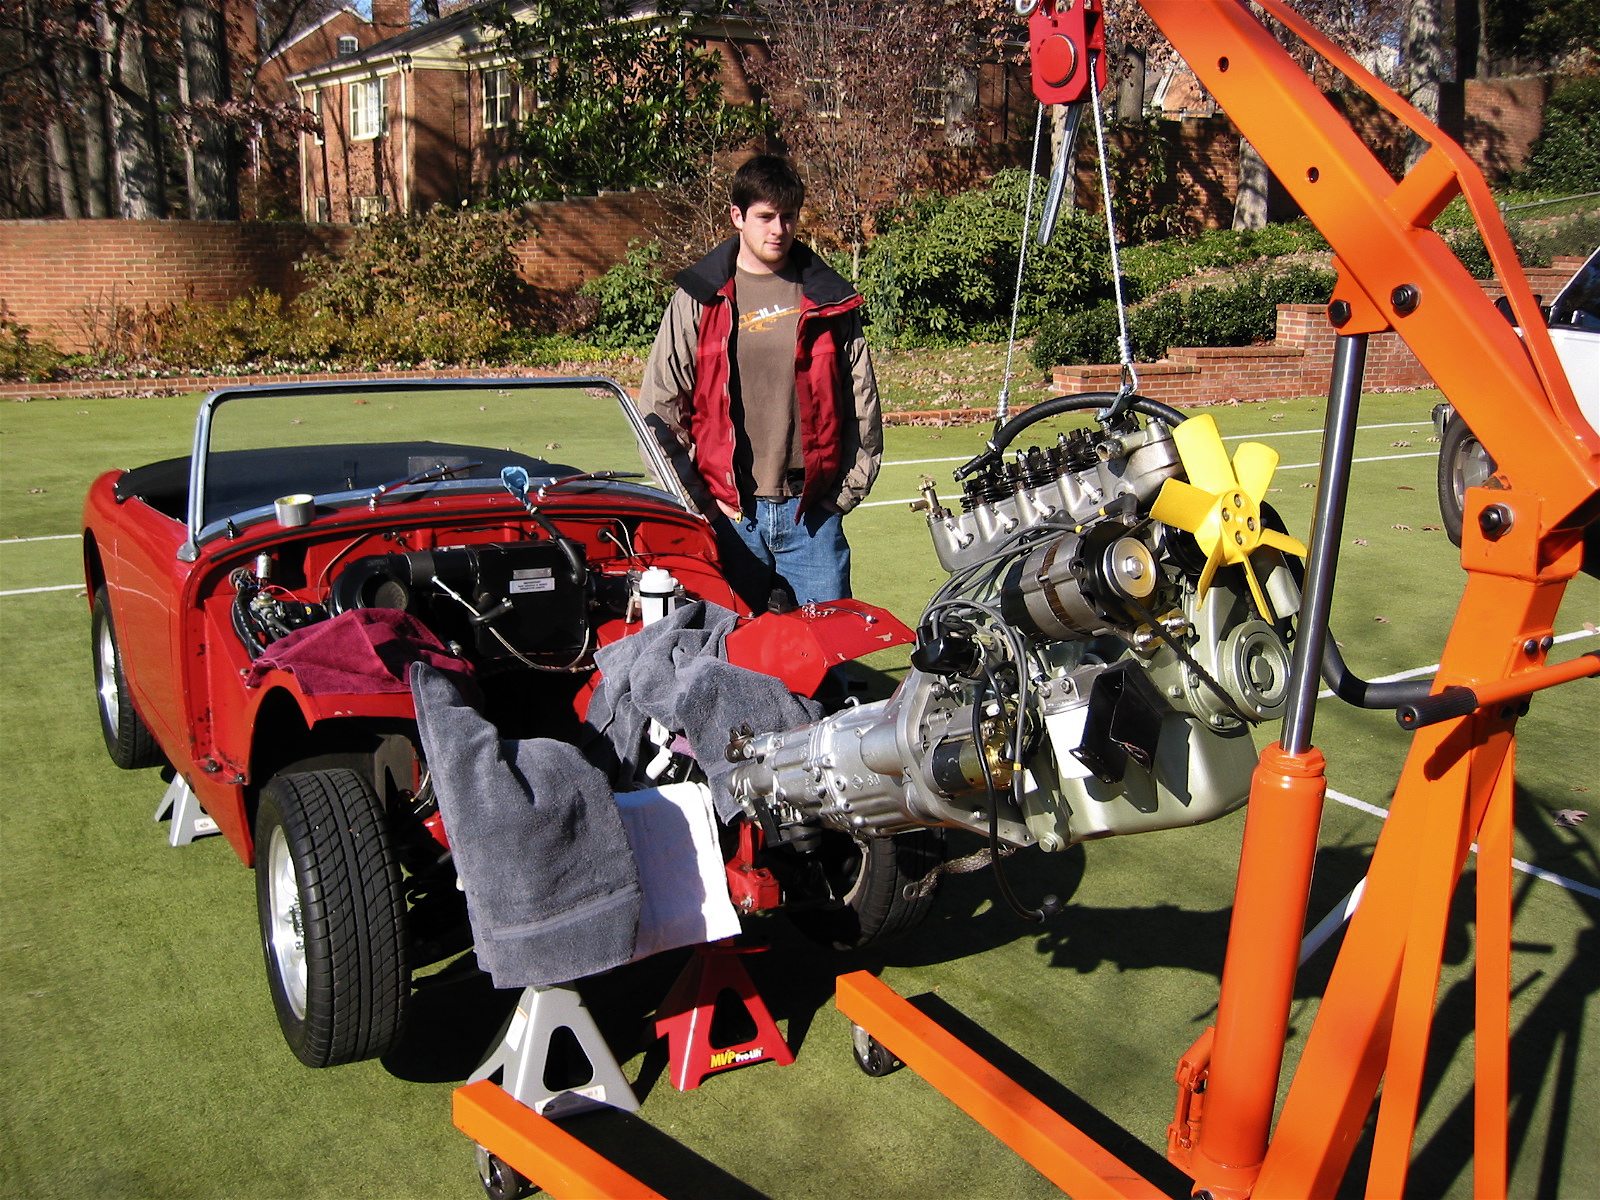
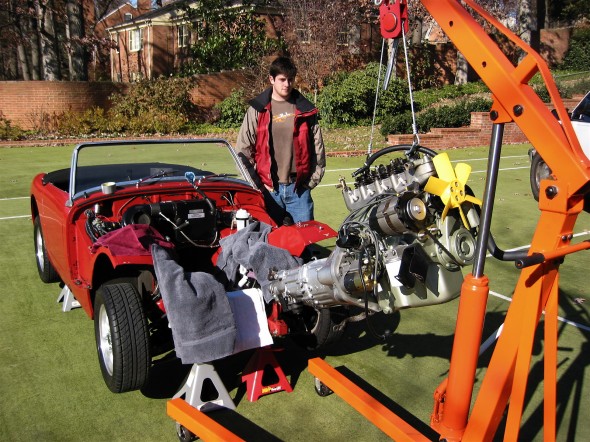
I developed the following list of items for reinstalling the engine and gearbox into the Bugeye:

Reinstalling a Bugeye Engine and Datsun 5-speed Transmission

  1. Grease the shaft splines on the engine and the yoke before installing the engine.
  2. Set the exhaust header in place so that it will be positioned to install once the engine is tightened into its mounts.
  3. Guide the motor into place with the lift so that the yoke on the driveshaft lines up with the transmission. If this does not work then remove the driveshaft and install after the engine and transmission are in place.
  4. Loosely secure the engine to the front motor mounts. The mounts themselves should be loose then tightened after all bolts/nuts are in place.
  5. Install the long bolts up through the crossmember into the rear transmission mount and tighten.
  6. Tighten the front engine mounts.
  7. Center the transmission in the rear mount, then push it as far to the right as possible, and tighten the transmission pad mounts on the bracket.
  8. Install the bolts in the sides of the transmission rear mounts from inside the car with the self locking nuts inside the tunnel. (Hint: tape the nuts in the wrench to make starting the threads easier.)
  9. Replace the gearshift lever.
  10. Connect the ground strap to the frame of the car.
  11. Replace the rocker cover and connect the breather hose.
  12. Install the intake and exhaust manifolds.
  13. Install heat shield and carbs.
  14. Connect throttle and choke cables.
  15. Connect breather hose.
  16. Connect hot water hose to copper tube and connect to radiator hose. Tighten clamps. It is easier to put the clamp on the hose/copper pipe when the copper pipe clips are loose from the manifold.
  17. Connect the short hot water hose from the water control valve to the heater.
  18. Connect the electrical cable from the gear reduction starter to the starter solenoid.
  19. Connect the oil pressure pipe to the fitting on the engine block by the banjo bolt.
  20. Reconnect the white/black line from the electronic ignition to the distributor.
  21. Connect the high tension line from the distributor to the coil.
  22. Reconnect the plastic terminal (3 wires) to the alternator.
  23. Connect the fuel line from the fuel pump to the carbs.
  24. Reattach the water temperature sensor to the engine head.
  25. Remove the banjo bolt where the oil line exits the rear of the block. Pour motor oil down the hole in the block to prime the oil pump. Reinstall the bolt.
  26. Remove the oil filter and pour it full of motor oil and reinstall.
  27. Fill engine with oil – Castrol GTX 10W-40.
  28. Fill the gearbox with Gear lube – Redline MT90. 2 1/4 pints. Use long clear plastic tube. Try pump.
  29. Connect the stainless steel flex line from the master cylinder to the slave cylinder.
  30. Bleed the clutch slave cylinder. (See Page 9 of Rivergate’s manual)
  31. Install radiator and fill with 50% coolant and 50% distilled water.
  32. Fix the carb drain lines to the mounting clamp at the lower rear of the engine compartment.
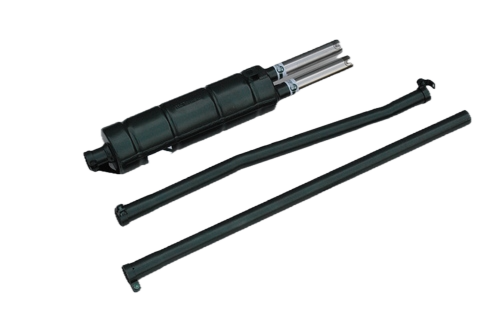
  33. Insert the 1 ½” connecter pipe (with sealant) for the exhaust system into the header pipe.
  34. Install the exhaust and muffler assembly.
  35. Tighten clamps on the exhaust connecter pipe.
  36. Reconnect the battery cables.
  37. When ready to start the engine, pull the spark plugs and spin the engine with the starter until the oil pressure goes up to normal on the pressure gauge, and stays.
  38. Check for any oil, coolant and fuel leaks.
  39. Reinstall the spark plugs and start engine.
  40. If engine does not start turn distributor 180 and try again!
  41. Install 4” fresh air heater hose and clamp.
  42. Install the leather shifter cover and surround.

Start It Up And Have Some Fun!
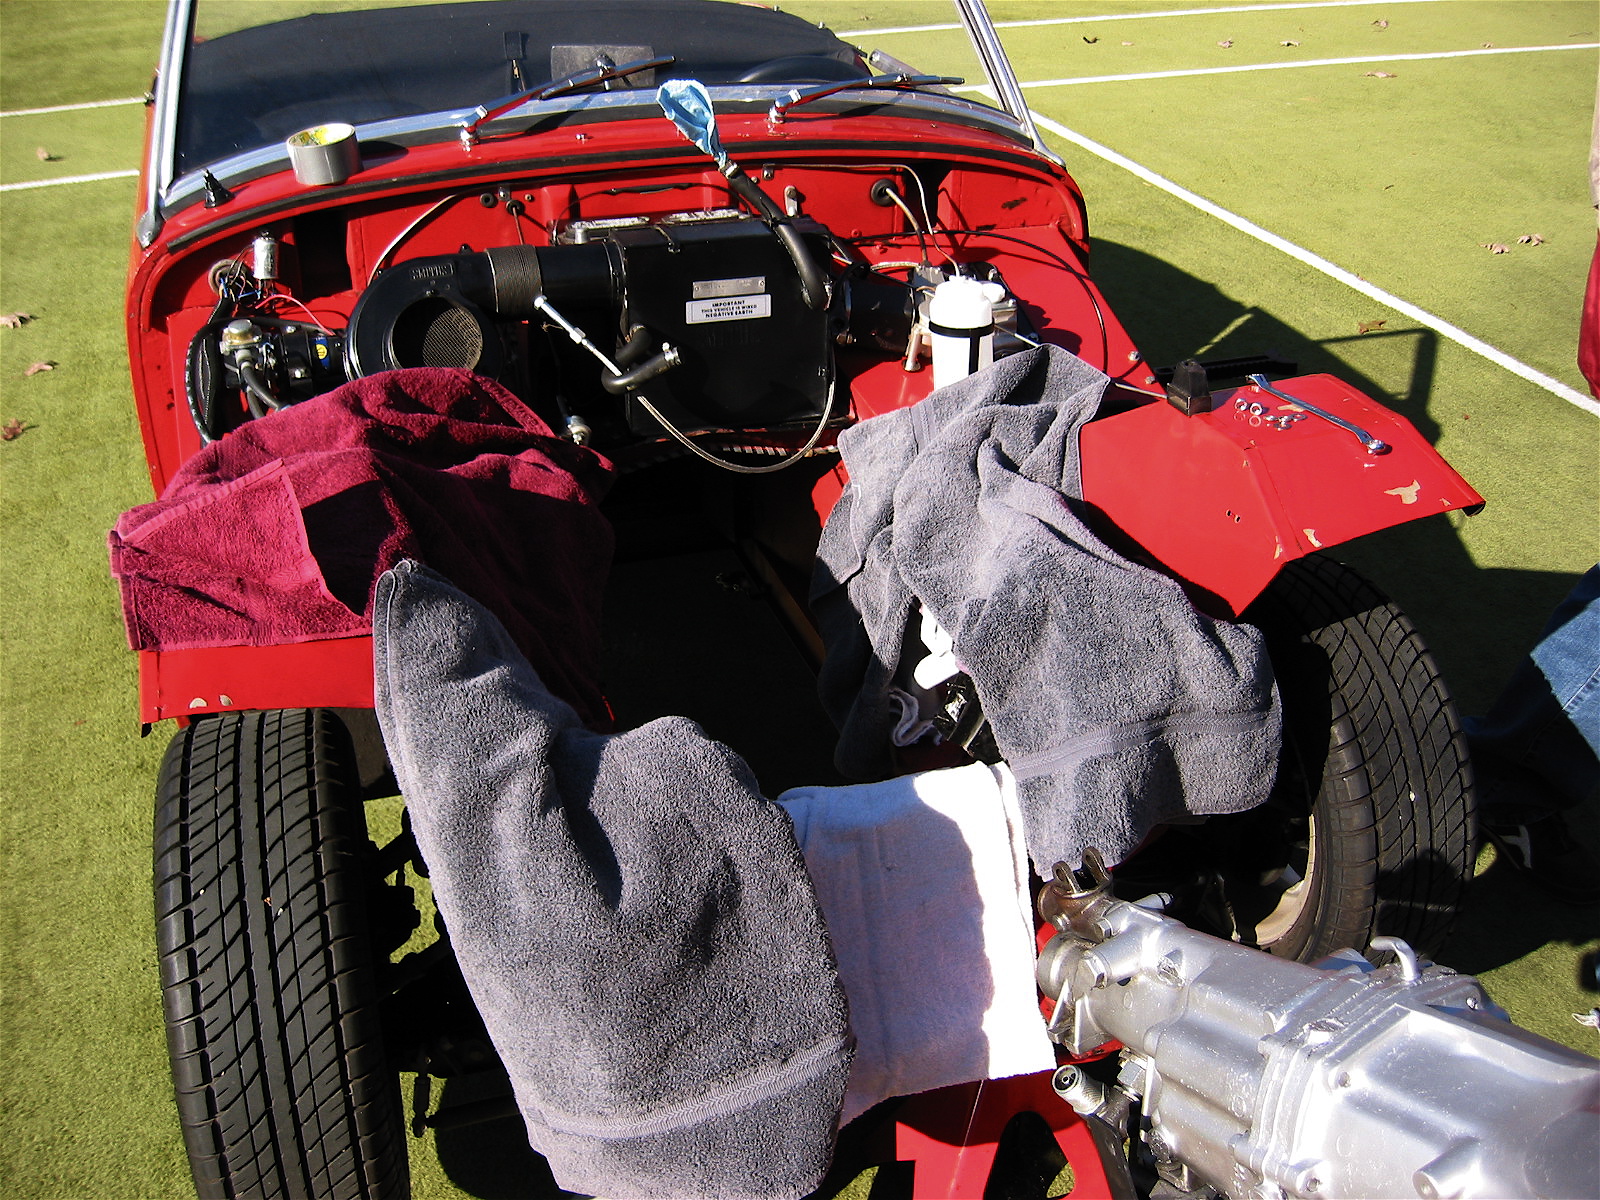
I Know It Fits!

I Know It Fits!

Motor Protection!

Motor Protection!


Engine Install

Engine Install