Front Hub Assemblies and Brakes

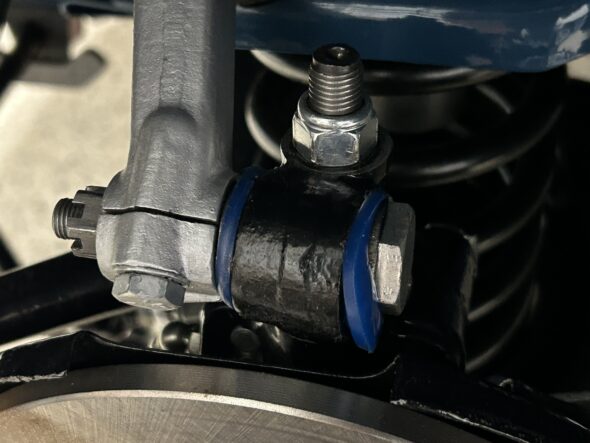
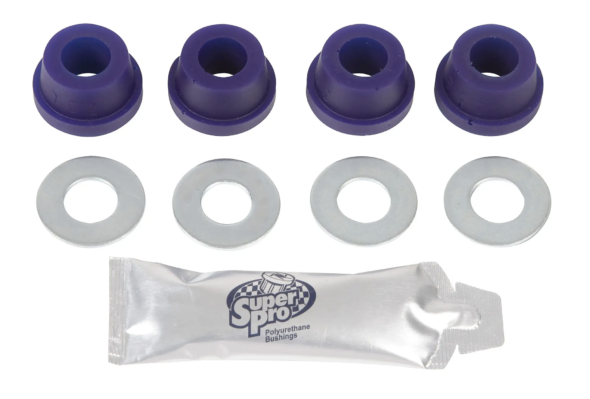
Continuing with the front suspension rebuild, we assembled the swivel pins (stub axles) to the hubs and brake rotors. New king pins were installed in the axles after new bushings were fitted and reamed. New grease zerks were fit and poly bushes were installed in the upper trunnion.

Front Suspension
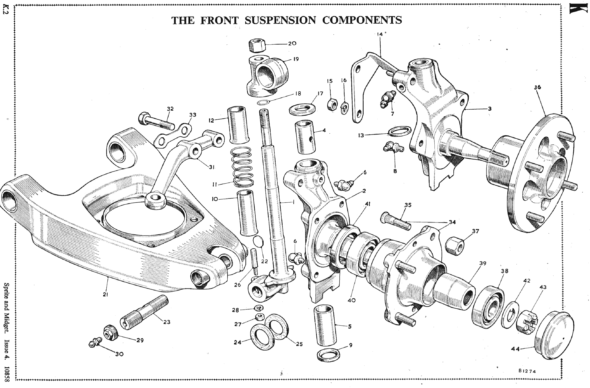
Front suspension Components

We did a fair amount of research regarding the proper ball bearings to use for the Sprite/Midget front suspension. Bearings from the usual British parts suppliers don’t seem to completely replicate the original bearings used as manufactured. A British supplier, Ransome and Marles, https://www.ransomeandmarles.co.uk does sell the original ball bearings. They are pricey, but in this case the quality and value seem worth the price. Proper fit and tight tolerances are important! The bearings came with a new oil seal as well. We packed the bearings with high quality bearing grease and installed them in the hubs and then installed the oil seals.

Front Hub assembly
R&M Bearings and Lucas Bearings Comparison

We then secured the new brake rotors to the hubs with the original four bolts and torqued each to 40 ft. lbs. The brake dust shields must be attached to the swivel axles with the one hex bolt before the hub and rotor are slipped onto the swivel axle.

Dust Shields Installed

Once the hub and rotor and the swivel axle are mated the tab washer can be installed on the axle followed by the castle nut. The nut is then torqued to 46 ft. lbs and then rotated clockwise until the hole in the axle lines up with an opening in the castle nut. A cotter pin can then be inserted and bent back although we will wait to bend the pin until the hub assemblies are actually on the car.

Tab washer on stub axle
Hub Assemblies


The new brake calipers sourced from Moss Motors were then installed on the hub assembly. As the accompanying video shows, the two 7/16″ bolts that secure the calipers to the assembly pass through the locking tab washer, the brake hose locating bracket, the dust shield, the caliper and then into the swivel axle. These bolts are torqued to 50 ft. lbs. Again, we will wait to bend back the tab washer until the hub assemblies are on the car.

The proper steering arms were then fastened to the hub assembly along with a tab washer that will be bent back later.

Calipers Installed on Hub assemblies

Classic Gold brake pads purchased from Moss Motors were installed into the calipers along with shims. The shims were coated with a Permatex lubricant designed for this purpose. The pads are extremely tight against the rotor. We tried releasing the bleeder valve and pushing back the pistons but this did not rectify the problem.

Brake caliper with classic gold pads

Some EBC green pads were ordered to see if they might fit better. 

The Episode 32 video shows the process of the hub and brake assembly: https://vimeo.com/797978369/33c374192a

0:00 – New king pins in swivel axles

0:25 – Axle grease zerks and poly bushes in the upper trunnion

1:10 – Ransome and Marles ball bearings on axle

2:10 – Bearings installation

2:43 – Packing bearings with grease

4:20 – Tapping bearings into the hub and installing the spacer

6:50 – Install oil seals in hub

7:05 – Brake rotors fastened to the hub

7:40 – Dust shield installation

8:20 – Tab washer installation on axle shaft

8:42 – Castle nut on axle shaft torqued to 46 ft. lbs.

9:10 – Brake calipers, brake hose brackets, tab washers installed

11:10 – Steering arms with tab washers installed

11:40 – Classic Gold brake pads and shims installed


Heater Blower, Fuel Pump Bracket, Washer Bottle and Bracket Removal

We have yet to decide if the heater will be retained in the restored car. Living in southern Florida makes the heater unnecessary, so we may just carefully store the blower and heater box with matrix away for safe keeping to be used at a later date. So, we removed the heater blower and documented the heater blower wiring.

The Old Fuel Pump Mounting Bracket Removed

Smiths Heater Blower Removed

The heater air-flow control cable is disconnected and the dash heater control switch is described in the accompanying video.

Heater and Fresh Air Control Cable

Since the SU fuel pump has been relocated to the rear of the car, the “under bonnet” fuel pump bracket is removed.

The Old Fuel Pump Mounting Bracket Removed

Fuel Pump Bracket

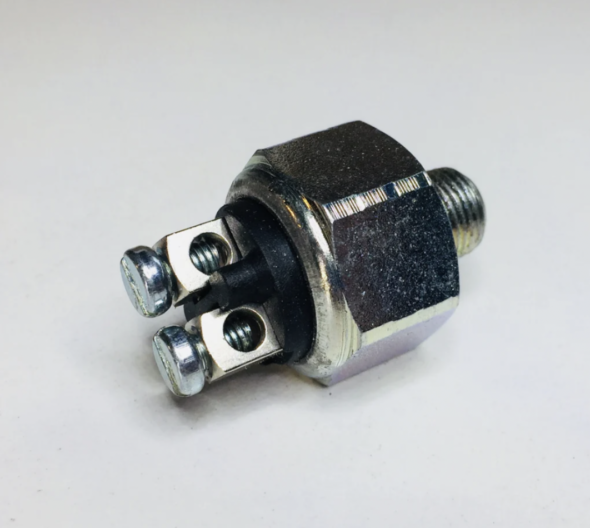
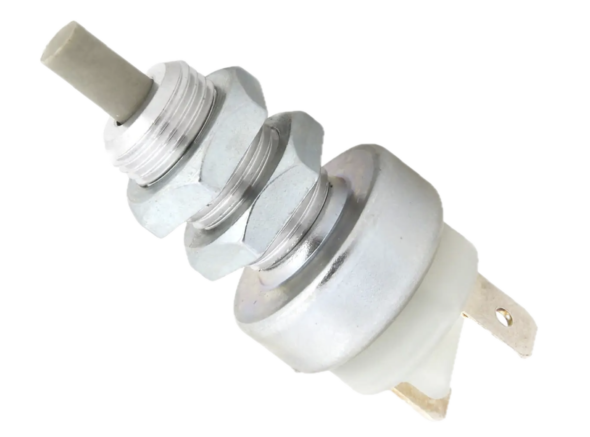
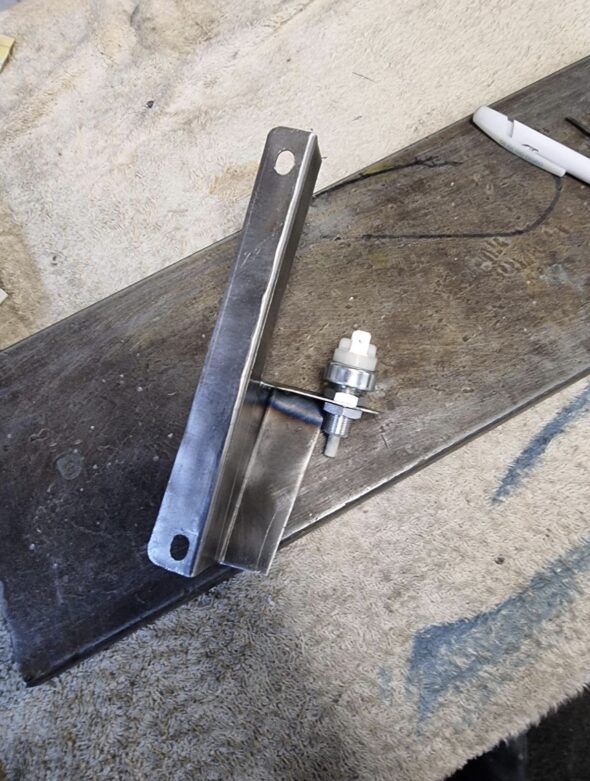
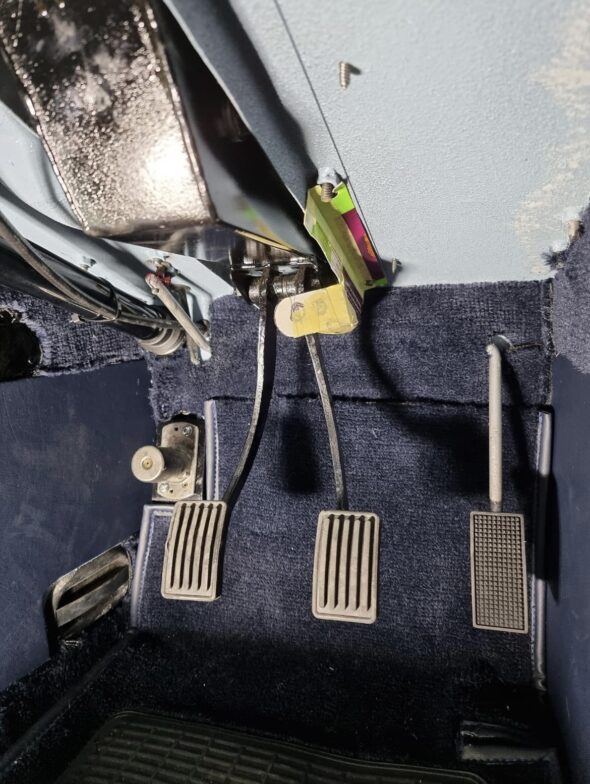
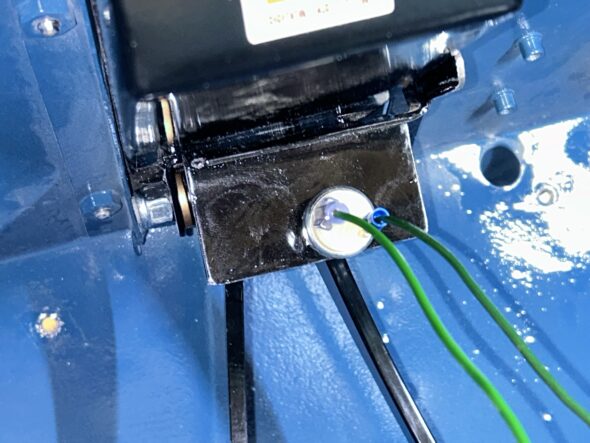
We won’t be needing the brake lights so the pressure switch wiring is documented and disconnected.

Brake Pressure Switch Wiring

The wiper motor mounts are loosened to allow a slight shifting of the motor to make it a bit easier to install the new “Sebring-type” pedal box and finally, the washer bottle with its bracket are removed.

Windscreen Washer Bottle and Bracket Removed

The Episode Thirty-one video shows the actions related to the items above:

https://vimeo.com/795889672/fc43b0721c

The following steps are addressed in the video:

0:24 – Heater Blower removal

1:00 – Heater Blower wiring

1:35 – Fuel Pump bracket removal

1:48 – Wiring harness to the front of the car

2:14 – Heater control switch and air flow control cable removal

3:15 – Brake pressure switch and wiring

3:55 – Wiper motor mounts

4:15 – Washer bottle and bracket removal


Horns, Air Intake, Steering Rack, Pedal Box Removal

This post covers the cleaning of the horns, the fresh air intake, the RH radiator brace and the old steering rack. A comparison of the old and new steering racks is made. The pedal box assembly with the single dual chamber master cylinder is removed from the car. New aluminum polished pedal covers are installed on the pedals of the new dual master “Sebring-type” pedal box. The replacement of the brake hydraulic pipes is begun with the removal of the pipe from the master cylinder to the brake pipe union.

The Hella horns were cleaned and the wiring checked out:

Horn with Mounting Bracket

Horn with wiring

Cleaned Horns

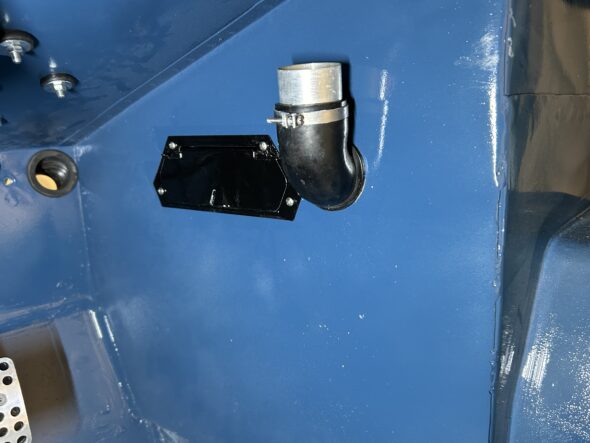
Fresh Air Intake Cleaned:

Fresh Air Intake

RH Radiator Brace

The original twin chamber master cylinder and pedal box were removed:

Twin Chamber 3/4″ Master Cylinder

Original Pedal Box and Push Rods

To be replaced with a “Sebring-Type” pedal box with separate 3/4″ master cylinders. New aluminum drilled and polished pedal covers were installed on the brake and clutch pedals:

Sebring-Type Pedal Box with Separate Master Cylinders

Aluminum Pedal Covers


This Video Episode Thirty shows the content described above:

https://vimeo.com/795013969/b024bf4392

The following steps are addressed in the video:

1:30 – Cleaning the horns, fresh air intake, RH radiator brace, and old steering rack. 

3:40 – Brake/Clutch master cylinder (Sebring-Type)

5:13 – Pedal Box removal

5:35 – Installation of new aluminum pedal brake and clutch pedal covers

6:08 – Removal of brake pipe from master cylinder to brake union

Front Suspension Chassis Clean-up and Further Disassembly

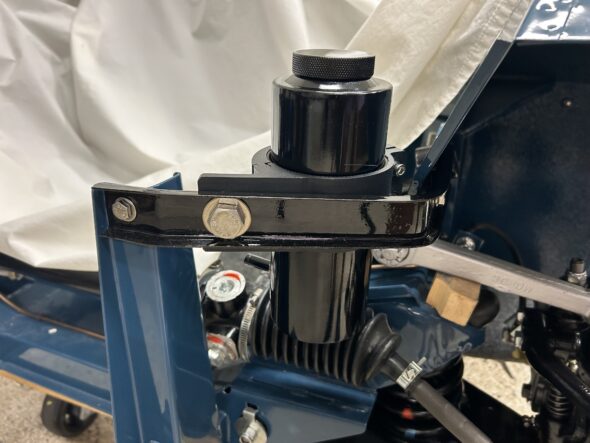
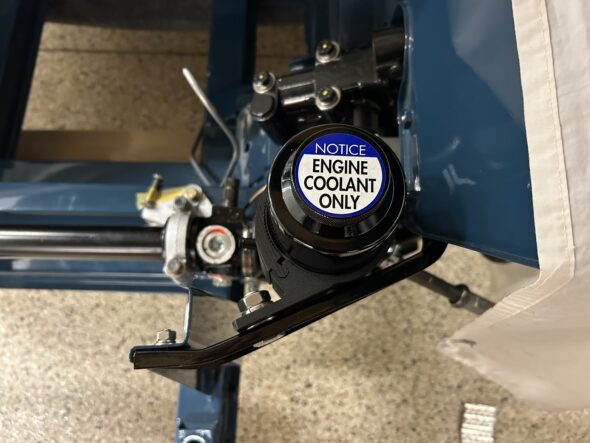
Steering Rack – Our next step is to remove the steering rack. We are going to replace the old rack with a new one from AH Spares. The tie rod ends were previously disconnected from the steering arms so this was just a matter of disconnecting the steering columns and removing the two aluminum brackets that secure the rack assembly to the chassis crossbar. To get to the rack we did have to remove the coolant overflow tank from the LH inner finder valance that was fastened to the inner fender with 1/4″ – 28 x 1/2″ hex head bolts and nuts.

Coolant Expansion Tank

The steering column was then disconnected from the steering rack by removing the special pinch bolt and nut from the column. Note that the bolt fits through the indentation groove in the steering shaft.

Steering column Pinch Bolt to Rack

Steering column pinch bolt

The steering rack brackets are aluminum and consist of a lower piece with a cap. Once the caps were removed, the steering rack assembly could be lifted away.

LH Steering Rack Bracket

RH Steering Rack Bracket

Steering rack bracket caps

LH Steering Rack Lower Bracket

RH Steering Rack Lower Bracket

On a left hand drive car, there is supposed to be a shim on the lower right hand bracket and we did find that to be in place. To our surprise there were two aluminum shims on the left hand lower bracket. These were apparently installed to compensate for the damage to the chassis crossbar. This will need to be investigated further at a later time.

RH Steering Rack bracket with one steel shim

LH Steering Rack Bracket with two aluminum shims

With most of the front suspension components removed and out of the way, it is time to clean up the front of the chassis and get rid of the grease and grime. This looks much better than it did!

Cleaned Chassis crossmember

Video Episode Twenty-nine shows the removal of parts and the clean-up of the front of the chassis. The front shocks, the steering rack and its mounting brackets are removed. The rebuilt front shocks from World Wide Imports are received and painted. The fresh air intake and its mounting braces are removed. The horn wiring harness is disconnected from the horn relay and horns, and the horns are removed from the car. The location of the horn wiring harness clips is shown. Unfortunately, some damage to the front chassis is discovered and pointed out.

https://vimeo.com/791725643/86659de9f0

The following steps are addressed in the video:

0:00 – Front shock removal

0:20 – Steering rack removal

0:46 – Steering column pinch bolt

1:02 – Steering rack chassis brackets

2:25 – Steering rack chassis crossbar damage

3:20 – Rebuilt front shocks

4:33 – Front of chassis clean-up

5:35 – Fresh air intake removal

6:00 – Horn relay wiring and wiring harness

7:48 – Chassis/Inner finder brace removal

8:22 – Horn removal

9:12 – Horn wiring harness and clips

9:48 – Lights and electric radiator fan wiring harness

10:15 – Front of chassis clean-up complete

The front shocks were rebuilt by Jane and Peter Caldwell at World Wide Auto Parts. They do a great job with refurbishing the lever shocks. We are going to revert to these and give them a try before possibly reinstalling the front Bilstein tube shocks.

Rebuilt Front Lever Shocks

There are two wiring harnesses that run along the right inner fender valance. The smaller one is for the horn and the larger one is for the front lights and the electric radiator fan. The smaller horn harness is held in place by two “P” clips that are secured with Phillips head machine screws that are #10-32 x 1/2″ to captured nuts in the valance. 

Horn wiring harness

Horn wiring harness

The horn harness is routed to a relay with four wires. The dark red wire is connected to relay terminal 84, the blue wire is connected to terminal 87, the green/brown wire is connected to terminal 86 and the red wire to the horns is connected to terminal 30.

Horn Relay

Lower Horn

Horn Wiring Connections

There are two horns. The upper horn is mounted to the fresh air intake panel and the lower horn is mounted to the chassis via a bracket and two Phillips head #10-32 x 1/2″ machine screws. Power to the horns comes from the relay terminal 30 that feeds to a splitter with one red wire then routed to each horn. Each horn also has a black ground wire. 

The larger lights and fan harness is zip-tied to the RH inner fender brace. The air intake is also held in place with the brace.

Air Intake and Inner Fender Brace

Lights and Fan wiring harness

The inner fender brace is secured to the inner fender captured nuts with 1/4″ – 28 x 5/8″ hex head bolts. The bolts were removed as was the brace.

RH Inner fender brace

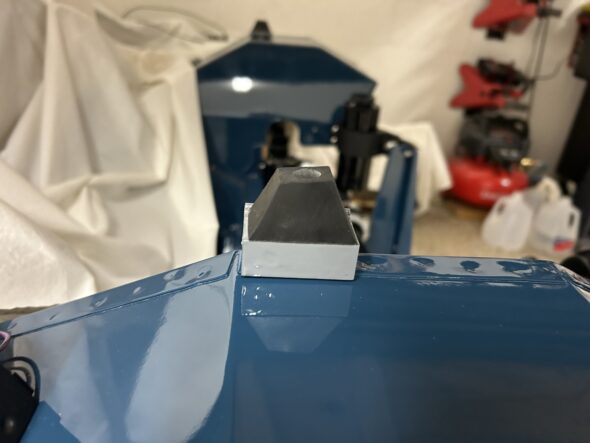
Removing components and cleaning unfortunately revealed chassis damage. The left front bonnet brace extension has been bent and the LH radiator upright has been previously repaired. These items will require attention later.

Damaged Chassis Bonnet Extension

Damaged Radiator Mount Upright

Previous Upright Damage Repair


RH Front Suspension Removal

Having completed the work on the refurbishment of the rear axle and suspension it is now time to turn to the front suspension. Our plan will be to remove and refresh or replace the suspension components on the right side of the car, then after building back the passenger side of the car we will go through the same process on the LH side. My car was converted to front disc brakes shortly after we purchased it around 1999.

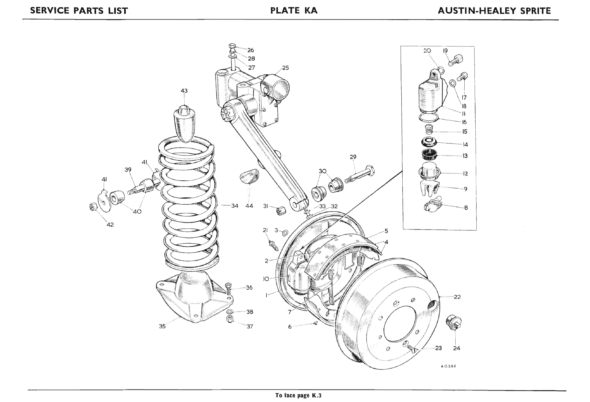
Bugeye Front Suspension Components


https://vimeo.com/777904083/768f53fb47

The Episode Twenty-seven video shows the deconstruction and removal of the RH front suspension. The following steps are addressed in the video:

1:00 – The proper tie rods

1:45 – Draining and removal of radiator

4:00 – shock absorber removal

4:40 – Brake caliper removal and stowage

5:45 – Grease cap, split pin, castle nut, tab washer and brake rotor/hub removal

6:40 – Dust shield removal

7:20 – Upper Trunnion/bolt

8:00 – Coil spring, spring perch, and lower shock mounting plate removal, tie rod end separation

11:20 – Fulcrum bolts, washers and bushings

11:20 – Cotter pin, fulcrum pin and king pin removal from the “A” arm assembly

Now it is time to order some parts and clean and paint some of the components we will be reusing.

The RH suspension components that were not completely disassembled as they were removed from the car were dismantled on the work bench. All parts were cleaned and painted with POR 15. A hub puller was purchased and used to separate the brake rotor and hub.

Hub Puller

After the hub was separated from the brake rotor, the oil seal and bearings could be removed from the hub. New bearings and seals will be installed in the rebuild.

Video Episode Twenty-eight shows the completion of the dismantling process for the RH front suspension and the removal of the LH front suspension is begun.

https://vimeo.com/780172337/d31b642b97

The following steps are addressed in the video:

0:00 – Steering arm removal from the stub axle

1:05 – Spring dust tube

1:25 – Spring pan and bolts

1:45 – Upper Trunnion

2:00 – Hub separation from rotor

3:00 – Oil seal and bearing removal

3:38 – Bushing removal from the “A” arm

4:05 – Hub puller is used to separate hub and rotor

4:28 – Begin RH side front suspension removal


Engine Starting

Fire in the Hole! Well sort of. We have been working on getting this engine running for some time. The focus in this video is the ignition. We suspected that the distributor was installed 180 degrees out, so we pulled the distributor and its drive. We flipped the drive gear over so that the larger “half” was on the top and reinserted it into the housing. Reinstalled the distributor and connected the spark plug wires and fired it. The engine ran but was very rough with considerable knocking and banging around. Looks like the ignition issues may be corrected, so now it is time to turn our attention to the carburetors and the fuel side of things.

The 5/16″-24 x 3 1/2″ Bolt used to withdraw the distributor drive needs to be threaded into the drive dog BEFORE the black housing is removed! Also, attention needs to be paid to the proper replacement of the distributor mounting plate – the bolt head must face the front of the car – NOT the nut!

This video Episode Twenty-five provides a summary of the process of correcting the orientation of the distributor drive dog and the firing of the engine: https://vimeo.com/774454868/69e2fc7381

Carburetor Tuning – Video Episode Twenty-six covers the tuning of the HS2 SU carburetors on the Bugeye. We discovered that turning the jets down an equal number of turns on each carb did not produce equivalent results, so we instead measured the the depth of the jet from the bridge in each carb body. While we will surely do some more fine tuning, we ended the video with each of the jets down 2.5mm. The throttle adjusting screws were set to synchronize the two carbs using an air flow meter. The end result was pretty smooth idling and running with the idle at about 750 rpms. The exhaust is still a little uneven. We will put a timing gun on it before we are completely finished it to complete the tuning process. https://vimeo.com/774463593/b2605101e8

HS2 Carb Adjustment

We found these instructions for HS2 tuning in the Haynes Repair Manual for the MG Midget/AH Sprite 1958-1980 to be very helpful:SU carb tuning-page-2

Interior Removal

This will be a gradual process, but we did begin the removal of the interior components. Most of the interior will be replaced with new parts, but we will save everything until the new pieces are installed near the end of this project.

The first action taken was to remove the shoulder harness mounting points for both seats. We will probably replace these with retractable belts when we are at that point in the rebuild.

Shoulder Harness Removal

Shoulder Harnesses

At :13 in the video Episode Twenty-Two summary the soft top frame stowage bracket is removed. Each bracket is held in place with three self-tapping sheet metal screws.

Soft Top Frame Stowage Bracket in Place

Soft Top Frame Stowage Bracket

Next was the removal of the rear shelf carpet and its securing snaps. The process begins at the 1:00 minute mark in the video.

Rear Shelf Carpet

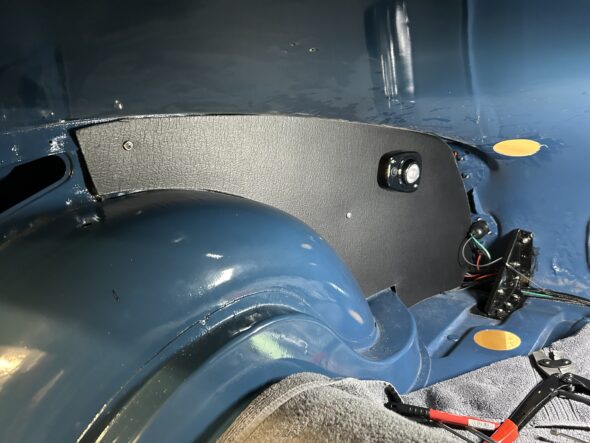
At 1:25 minutes into the video, the rear upholstered quarter panels and hardura covered wheel wells are removed.

Quarter Panel and Wheel Cover removal

Because the hardura wheel covers are glued in place, they left quite a mess when removed. We will need to try some adhesive removal to clean the surfaces.

Hardura Residue at Wheel Wells

We discovered that the covers were originally red. A previous owner had dyed or painted them black.

Hardura Covers removed

Although not removed at this point, it was noted that the wiring harness to the rear of the car is routed through a hole in the frame that is covered by the rear quarter panel.

Wiring Harness Behind rear Quarter Panel


At 4:24 into the video, the RH side seat, seat rails and carpet are removed. Each seat rail is secured to the floor with two bolts into captive nuts.

RH seat, seat rail and carpet removal

There is a wooden packer piece between the carpet and the floor for each seat rail.

Wood Packing Pieces at the Seat Rails

The upholstered panel under the RH door was then removed. It was held in place with four self tapping oval head screws with cupped trim washers.

Upholstered Panel Under the RH Door

Episode Twenty-Two summarizes the removal of the interior components highlighted above. https://vimeo.com/770800213/f36ec43100

RH Side Front Kick Panel  and Carpet – On November 17, while working on the final installation of the fuel delivery system it became necessary to remove the RH side front kick panel and front carpet. The kick panel was held in place by three self-tapping oval head chrome screws with cup washers and the two slotted screws that hold the door check strap in place. Once the fasteners were removed the kick panel was lifted out of the car exposing the wiring harness that is routed to the rear of the car.

The carpet was held in place with two floor snaps at the top of the carpet.

Video Episode Twenty-four summarizes the removal of these components:https://vimeo.com/773034332/b4bf5c4504

RH front kick panel

RH Side Front Carpet


Propshaft, Axle and Fuel Tank Install

Axle Install – This process has taken longer than expected but it is now time to reinstall the prop shaft, the rear axle, the new fuel tank and to connect the fuel delivery lines. Installing the prop shaft can be a bit of a struggle because of the flexible front yoke, but it was much easier with the axle and fuel tank out of the way. A clear look at the target (rear of the gearbox) is possible with the axle out of the way. The Episode Twenty video shows the quick job of the prop shaft install: https://vimeo.com/770233750/3412849430

Details of the installation process of these components is provided below. However, the Episode Twenty-One video also summarizes the installation: https://vimeo.com/770295832/305b6fdd14

Before reinstalling the axle into the car, we needed to install the axle brake pipe securing straps to the axle housing. These were not on the car when we acquired it, but the brass straps, which are very similar to the original straps, can be purchased from Moss motors. These are easy to install. One first loops the strap around the brake pipe and then around the axle housing. There is one for each side of the axle.

Brake Pipe Axle Straps

Axle Straps Installed

Garage assistant Fiona, using the floor jack, lifted the rear axle and pushed it forward under the car.

Axle on Floor Jack

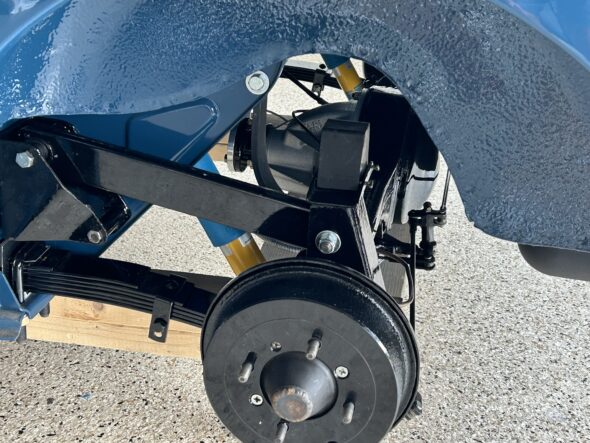
After a little manipulation we were able to put the special bolts for the spring eyes and for the radius arms into position and secure with nylock nuts. Works best to install the radius arm bolts first, then leaf spring eye bolts. Nothing was tightened completely and won’t be until the car is on the ground.

Axle in Place

Connecting Axle to Suspension

We were then able to install the prop shaft spacer onto the end of the unit and attached it to the rear differential with grade 8 5/16” x 24 x 1 1/2” bolts with nylock nuts.

Prop shaft spacer

Just so we wouldn’t forget we went ahead and tightened the axle assembly nuts to 140 foot pounds of torque. We then bent the tab washer down over one facet of the nut.

Axle Nut Torqued to 140 ft. lbs.

Locking Tab Washer Folded Over the Nut

Bilstein Shock Install – Our next step is to install the rear Bilstein tube shocks. The lower mounting bolts are ⅜”-24 with 9/16” hex heads. Note the spacer on the lower mount must be in the hole properly before tightening down the assembly. With the original leaf springs we had the lower mount bolt head closest to the springs and the nut closest to the differential,  however, with these new springs the shackle for the springs conflicts with the bolt and makes it almost impossible to insert it into the mounting point. So we just switched the direction.

Lower Shock Mount

Upper Shock Mount

Rebound Straps – Next, is the installation of the rear axle rebound straps. New straps from Moss Motors are used. The top bolt is a ⅜”-24 x 1 ¼”. The lower mount is a ⅜”-24 stud affixed to the axle casing.

New Rebound Straps

New Rebound Straps Installed

Hub Seals – After bending down the locking washer tab on the axle nut, a new rubber “O” ring was pressed into its hub cavity.

Rubber “O” ring Installed in Hub

Followed by the paper gasket which was coated with Permatex high tack gasket sealant on both sides before installing the axle half shaft. This sealant was recommended by Mini Mania and was used in their YouTube video of the Sprite rear axle assembly.

Permatex Sealant

Paper gasket installed with Permatex High Tach on both sides

We then installed the axle half shaft and quickly screwed in one of the countersunk pozi drive screws into the axle hub.

Axle Half-shaft Installed

Brake Drum – We then installed the brake drum and screwed in two of the pozi drive screws through the brake drum into the axle half shaft and the hub. Those screws were tightened as tight as possible and then we installed four hub nuts on the hub studs and tightened those. I could then re-tighten the two screws. That should give us a good seal.

Brake Hubs Installed

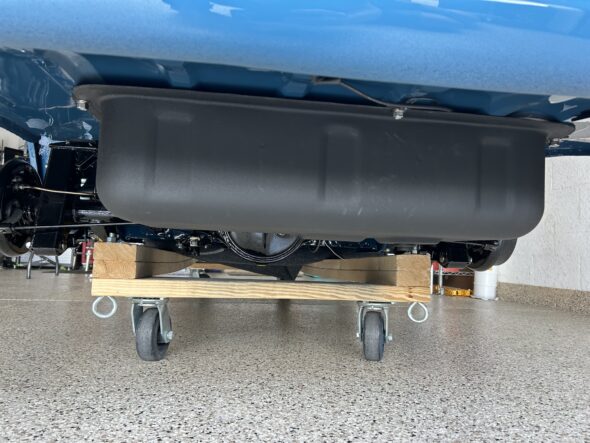
That completed the axle work for the time being so we reinstalled the fuel tank being careful to connect the power wire to the fuel tank sender. This was a quick and easy job.

Fuel Pipe – We then installed the fuel pick up line from the front of the tank over the axle and to the new location for the SU fuel pump.

Fuel Pipe from Tank to Pump

Fuel Pipe to Pump

Reconnect handbrake cable at rear axle, fill rear Differential with oil and install fuel tank filler pipe – We reconnected the handbrake cable in the same position that it was prior to disassembly. 15/16″ of threads showing. We will ultimately replace the handbrake cable with a new one, so this is just temporary and of course we will need to adjust the shoes in the brakes and then adjust the handbrake tension.

Handbrake Cable Connection to Lever

Thread Runout on Handbrake Cable

We then filled the rear differential with just under 1 quart of MT 90 gear oil. The Red Line MT 90 product is a 75W – 90 synthetic G4 gear oil. We used a syringe to push the oil into the filler plug hole until it just starts to drip out of the hole then installed the filler plug

Red Line MT-90

Fuel Tank Filler Pipe Install – As stated previously, the original fuel tank for the Bugeye had the filler pipe welded to the tank as one piece. The Bugeyeguy supplied fuel tank has a separate filler pipe which is joined to the tank with a rubber collar and two hose clamps.

Fuel Filler Pipe, Rubber Sleeve and Clamps

Fuel Filler Pipe Installed

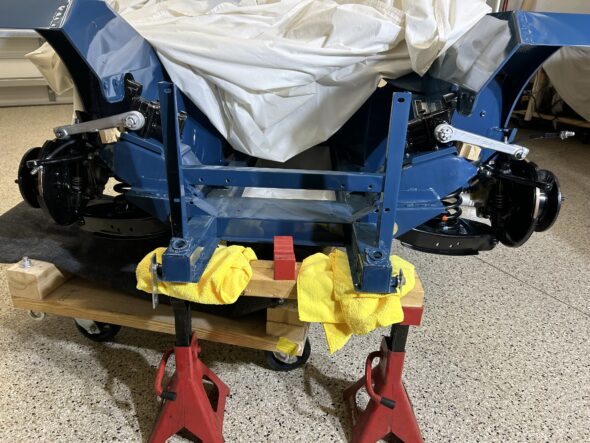
We were finally able to get the car off the jack stands and onto the ground. Now it is time to move to the front suspension.

Finally, Back on its Tires

Finishing Up the fuel delivery and Suspension – We got the Bugeye up on the lift on November 17 to make it easy to tighten all of the fasteners associated with the rear suspension. We also added a fuel filter in the hose from the fuel tank to the fuel pump.

Hastings Fuel Filter GF160

Fuel Filter, Pump and hoses

Video Episode Twenty-three shows the work done in finishing the suspension and fuel delivery systems: https://vimeo.com/773027554/131aff730b

Temporary power to the fuel pump – We will address a permanent solution to routing an electrical wire to the fuel pump when we work on a new wiring harness. As a temporary solution to test the fuel delivery system to the carburetors, we simply ran a wire from the switched side of the fuse panel, through the firewall, along the RH seat rail and through the seat belt bolt hole in the interior floor to the fuel pump. To accomplish this we went ahead and removed the RH side front interior kick panel and front carpet.


Bugeye Fuel Pump, Fuel Tank & Fuel Pipes

Fuel Pump – We converted from the manual fuel pump on the 948 engine to an SU electronic pump a long time ago. For years the SU pump has been mounted under the bonnet, but it is time to move the pump to the rear bulkhead near the fuel tank and axle. This is a fairly simple job. After figuring out the ideal location, holes were marked for drilling and two 1/4″-20 steel nut serts were installed in the bulkhead.

Riv Nuts or Nut Serts

A mount for a later MG Midget and a rubber cushion were ordered from Moss Motors for the installation.

Fuel Pump Bracket

Although not shown in the initial videos, two rubber mounts were ordered from Pegasus Racing and installed to dampen the pump vibration.

Fuel Pump Isolators

Video Episode Seventeen summarizes the work performed in relocating the fuel pump. https://vimeo.com/770047578/9e09186ee0

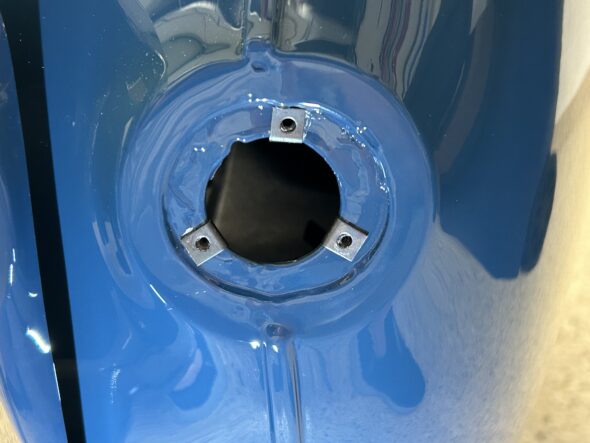
Fuel Tank – The next step will be to paint and trial fit the new fuel tank. The new tank was sourced from BugeyeGuy. It came with a new sender and viton seal installed, and the tank was pressure tested for leaks. The kit also included a foam seal to fit over the filler pipe between the tank and the body, as well as some rubber strips that fit between the tank and the body at each stud fixing point. All six of the studs were in pretty rough shape so they were all cleaned and a thread chaser was used on each one.

Unlike the original tank that has the filler pipe and tank as one piece, the new tank has a separate filler pipe with a rubber hose collar and two hose clamps to join the filler pipe to the tank. This is done from inside the car after the tank is installed.

The tank had a pretty good paint job as it arrived from BugeyeGuy, but we chose to repaint the top of the tank with POR-15 to add some rust protection. The underside of the tank was painted with 3M Rubberized Undercoating.

POR-15 on Top Of fuel Tank

3M Undercoating on Bottom of Fuel Tank

We will then remove the tank to make it easier to install the rear axle. Once we have the prop shaft and axle in place, the new fuel tank will be reinstalled. The Episode Eighteen video shows the removal of the old tank and the power wire to the fuel gauge sender, as well as a general clean up of the underside of the car in preparation for the axle and tank.
https://vimeo.com/770216486/10dd8a7cb9

Fuel Delivery – The fuel delivery from the tank to the carbs uses a combination of hard pipe and 1/4″ ethanol resistant rubber fuel hose. A short piece of pipe travels from the fitting on the fuel tank, over the axle and is secured by a few clips on the body, to a piece of rubber hose that connects to the input port on the fuel pump.

Video Episode Nineteen shows the fuel pipe/hose routing from the fuel tank:

https://vimeo.com/770224843/9889f07d88

Before final assembly a fuel filter will be added prior to the fuel pump input port. Another short piece of rubber fuel hose connects the output of the fuel pump to the hard pipe that is clipped to the underside of the car and then travels up to the front of the car and across to the LH side near the carbs.

Fuel Pipe Under Car

The pipe is held to the channel by two clips that look like those on the right in the image below:
Pipe Clips

Another short piece of rubber hose connects the hard pipe to the front carb. The hard pipe we are running to the front of the car is temporary to permit testing the fuel delivery system. Upon final assembly the hard fuel pipe will routed somewhat differently.

Bugeye Rear Suspension Removal and Reinstallation

The rear suspension in the Bugeye is comprised of the quarter elliptical leaf springs, the shock absorbers, the radius arms and their mounting boxes, the rebound straps, the rubber bump stops, and of course, the axle. Video Episode Thirteen shows the removal of the original fifteen leaf springs: https://vimeo.com/769992972/c923375ecc

We chose to replace the original springs. The only springs readily available at this time are the 10 leaf “Rally” springs. We ordered a pair from BugeyeGuy.com along with five degree shims that will lower the car to give it a proper ride height. We disassembled these springs, removed the poor paint, cleaned them and repainted with POR-15 and installed teflon tape between each leaf to reduce friction and squeaking. That process is shown in Video Episode Fourteenhttps://vimeo.com/754389824/9ab8550b67

We wanted to clean and paint the radius arm bracket, the shock brackets and the radius arms so these components were removed from the car. This is seen in Video Episode Fifteenhttps://vimeo.com/770007831/bc38a03b36

Radius Arm

Rear Shock and Mounting Bracket

Shock Bracket Spacers

Spacer Between Shock and Bracket

After getting everything cleaned and painted it was time for re-installation. The following Video Episode Sixteen shows that process. https://vimeo.com/770028004/a16a02bd5d