New Vinyl Door Piping and Ignition Wiring

Two more little jobs need to be accomplished in my journey to “renew” the Healey:

Vinyl Door Piping

After a little over ten years of use, the vinyl piping that edges the aluminum trim plate on the passenger side door shut face pillar was just worn out. My rear door gap is a little tight and the vinyl piping sometimes gets caught as the door closes.

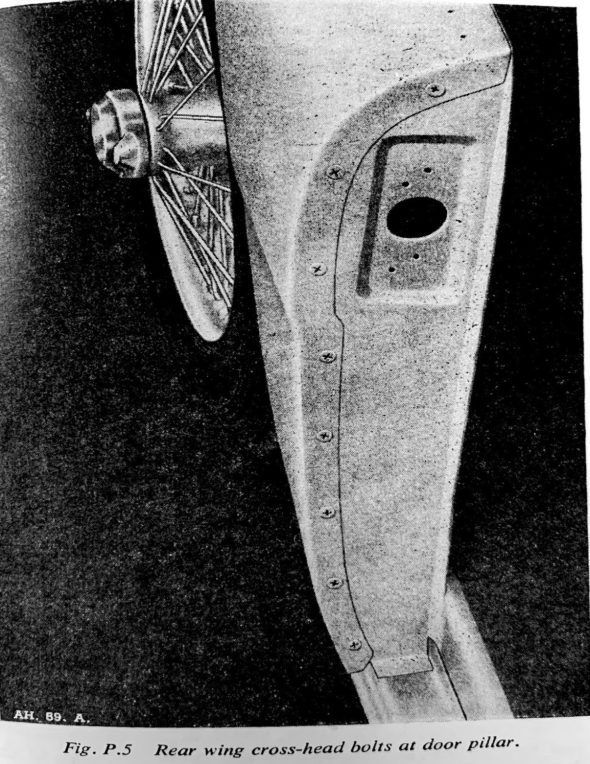
According to Anderson and Moment’s book, Austin-Healey Restoration Guide, the bottom and rear door sills were covered with aluminum trim plates, textured in a raised pattern. A vertical section covered the shut face pillar, secured to the pillar with eight chrome Phillips screws, 54K3024, #28 in the illustration.

Shut face Pillar

Black grained vinyl piping separated the rear trim plate from the rear fender along the door opening. This piping extended up and over the trim panel with its core removed so that it wouldn’t catch on the edge of the door when opened and closed.

From the Concours Guidelines: From the introduction of the Abingdon BN6 through possibly the end of BJ7 production, the shut facing was fastened with small, #4 truss-headed Phillips screws with very small cross- head screwdriver slots. Starting around 1963 or 1964 the screw head was changed from Phillips to Pozidriv. 

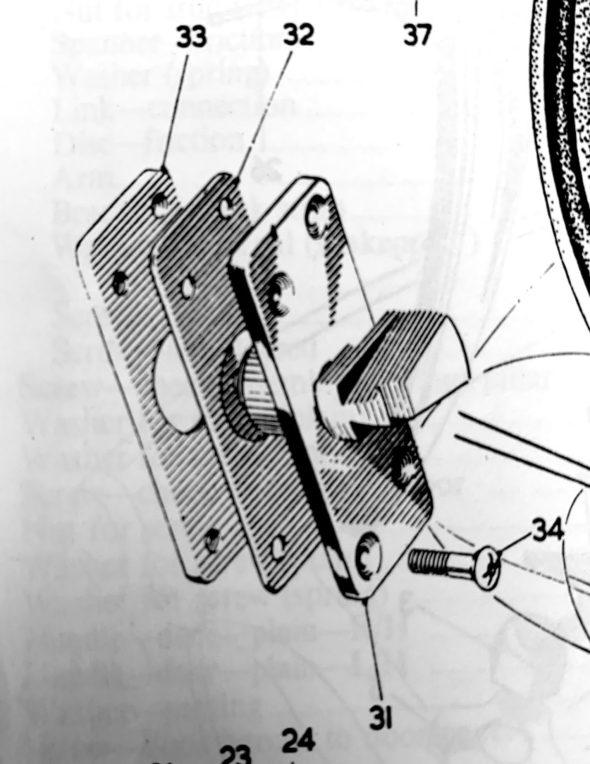
To remove the aluminum trim plates, one must remove the door lock striker, 14B2841, #31; that is attached through the door shut face pillar and packing plate, 14B2842, #32, into a tapped plate, 14B2843, #33. The assembly is secured with four chrome Phillips Head striker fixing screws, RMP0312, #34 (#10 x 3/4”)

Door Striker Assembly

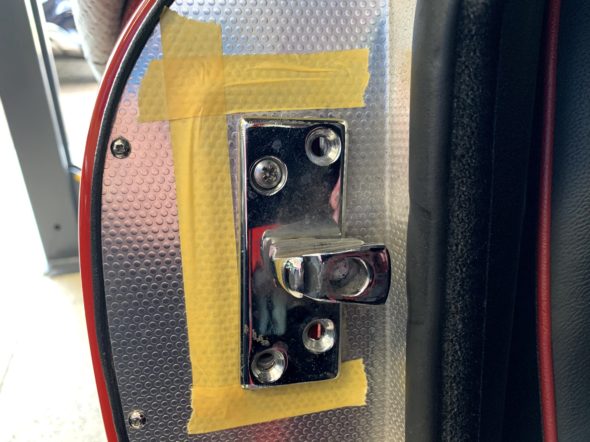
The striker assembly is adjustable so to be sure to return the assembly to the same position once reassembled, tape was used to mark the outside edges of the striker on the aluminum trim plate.

Marked Position of Door Striker Before Removing the alloy trim

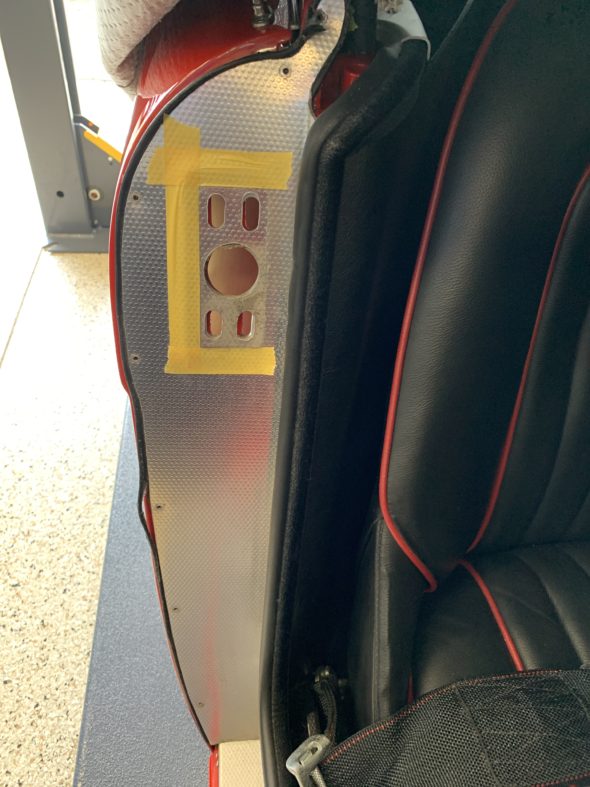
I removed the striker plate assembly by loosening the 4 Pozi Drive screws.

Door Lock Striker Removed

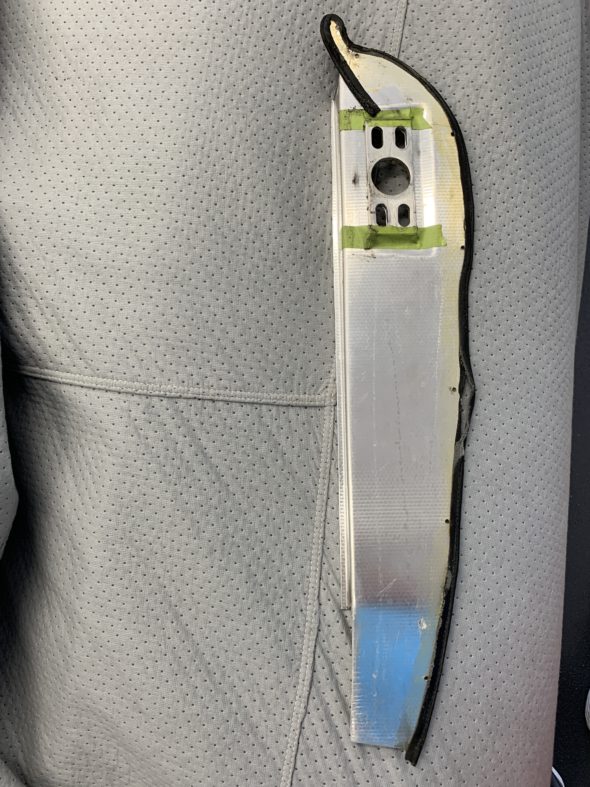
I then removed the seven #4 Phillips head screws that secure the aluminum trim plate to the door shut face pillar. The trim plate could then be removed. The image below shows how the piping is glued with contact cement to the trim plate before reinstalling.

Reverse Side of Alloy Trim Plate

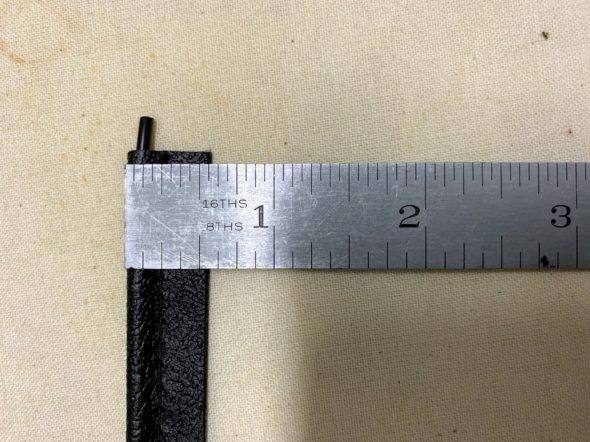
Geoff Chrysler, owner of Rightway Heritage Trim, made a pair of the piping pieces for me that are the proper size.

Chrysler Vinyl Trim

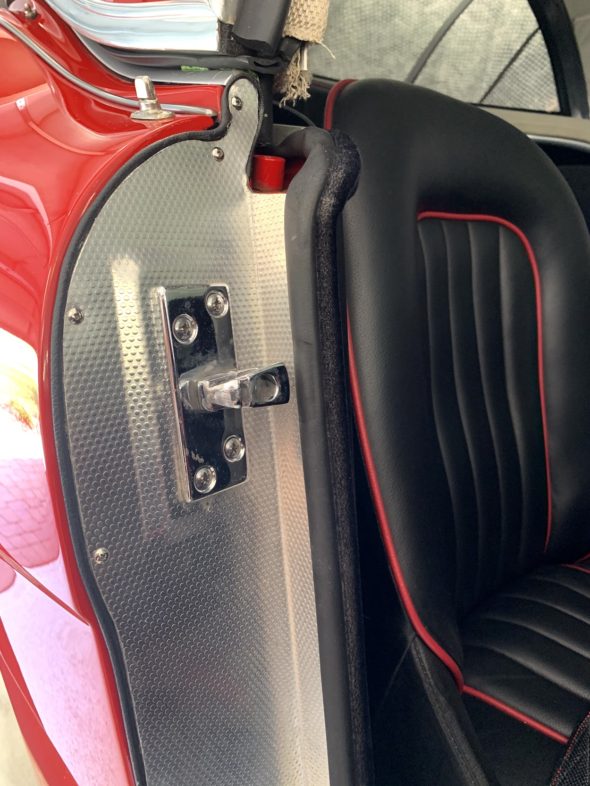
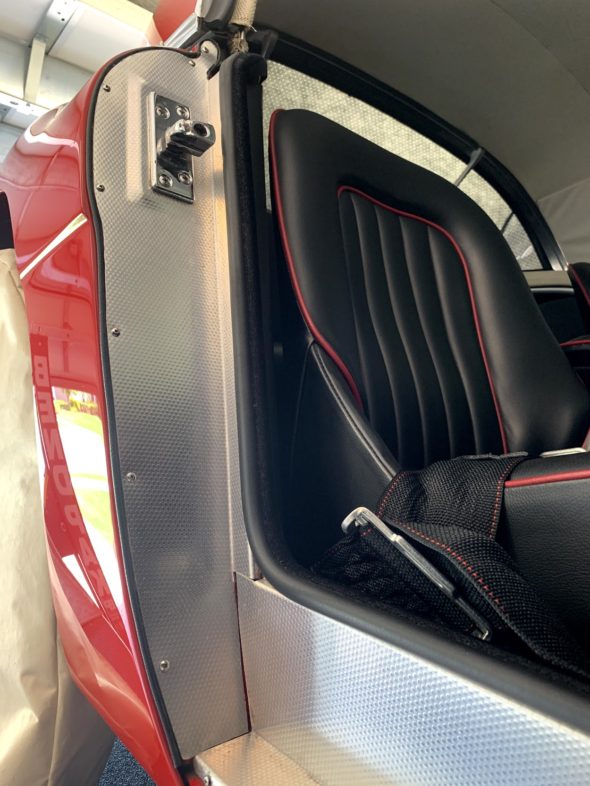
I glued the piping to the plate and then remounted the plate on the pillar. The turn at the top of the trim plate is difficult to address and it does take some patience. This is the finished product reinstalled on the car.

Vinyl Piping on Door Shut Face Pillar Alloy Trim

Vinyl Piping on Door Shut Face Pillar Alloy Trim

Ignition wiring

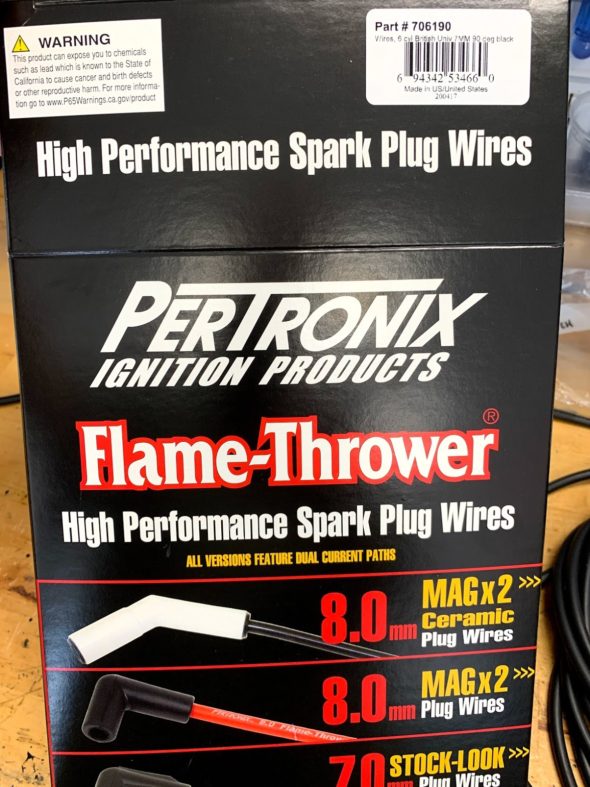
The ignition wiring for the coil, distributor and spark plugs was operating perfectly but I thought as a preventative maintenance item I would go ahead and replace the wires so I would be good for another ten years. This included replacing the distributor cap and rotor on the 1-2-3 electronic ignition device. I used the same type of wiring installed on the car when it was restored. The product is made by Pertronix and is designed for use with electronic ignition systems.

Pertronix Spark Plug and Coil Wires

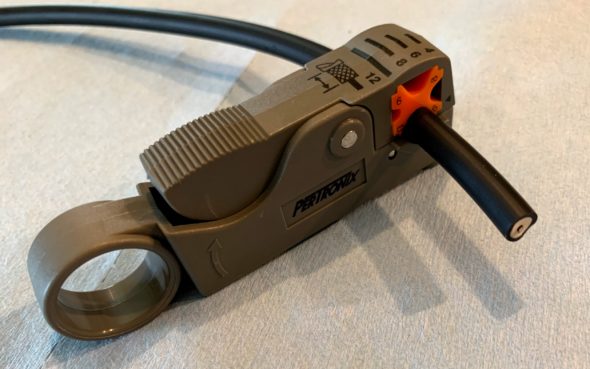
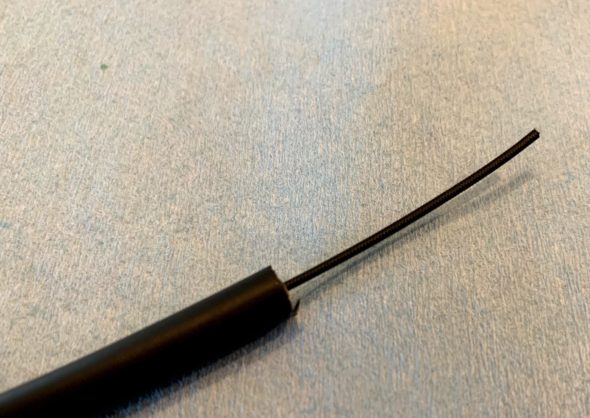
As supplied, the spark plug terminals and boots are already mounted on the individual wires. One only needs to cut the wires to length and install the terminals and boots for the distributor end of the wires. To make the job a little easier I used a wire/insulation cutter made by Petronix for the task. It works perfectly and leaves a nice clean core to wrap around the terminal.

Pertronix spark plug wire Insulation stripping tool

New Spark Plug Wire Trimmed

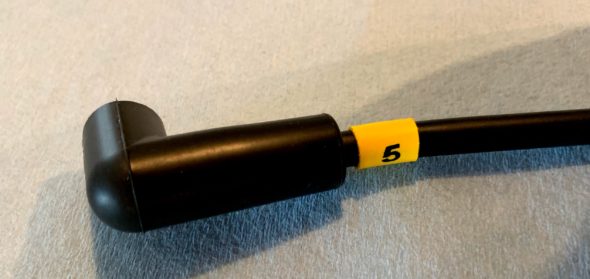
I also installed heat shrink wire numbers on the wires to help with sorting the wires.

Pertronix Spark Plug Wire Boot and Number

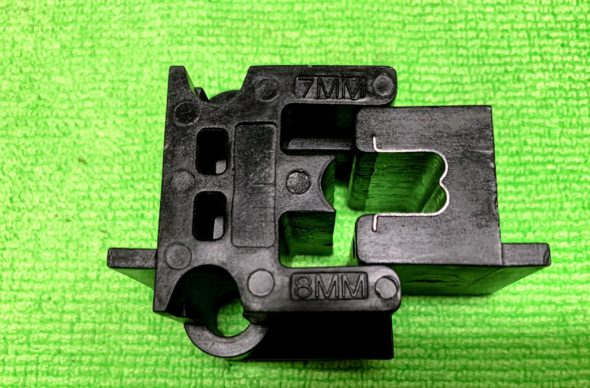
Pertronix also sells a two piece crimper used to crimp ignition wire terminals to the cable. It works for 7mm and 8mm wires, and produces perfect crimps every time. One places the terminal and wire between the two pieces of the device and then tightens them together in a vice.

Ignition Wire Crimper

All the new products were installed and the car is running just fine.


Bell Housing Oil Drain

Healeys, as they came from the factory, did not have a rear main oil seal. The factory must have anticipated oil leaks from the crank because they put a small hole in the bottom of the bell housing to provide a place for the leaking oil to go other than to accumulate and potentially get thrown onto the clutch – not good. They even placed a small split rivet in the hole so that the hole was kept clear from any clogging. As the car moved around while driving the split pin would vibrate and move around keeping the hole free for drainage. The image below is not my car but you can see the split rivet in the bell housing.

Bell Housing Drain Split Rivet

Some Healey owners install rear main seal kits available from a couple of different vendors to help keep the oil in the engine. I did that when I restored my car and used the Dennis Welch kit. Some Healey owners also install PCV valves to help with reducing oil leakage by pulling air from the rear of the engine into the crankcase. I did that too! These changes do seem to help but some Healey owners report that even with these changes they still have some leakage. I did.

I decided to take the PCV valve off of my engine. Some controversy surrounds the use of the valve particularly as it relates to leaning out the rear cylinders. I figured that after removing the PCV valve I would get some more oil leaks and I have. Not bad, but definitely more than I used to see. 

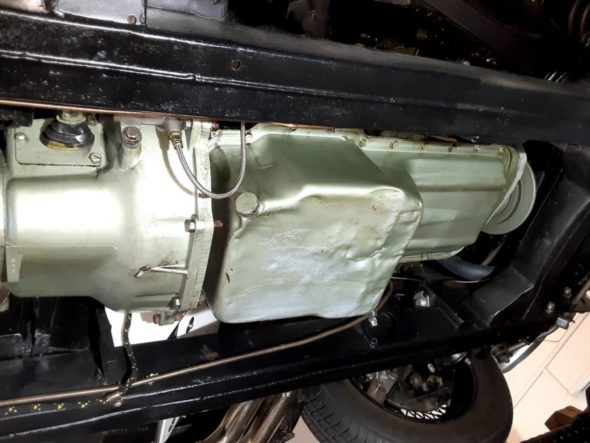
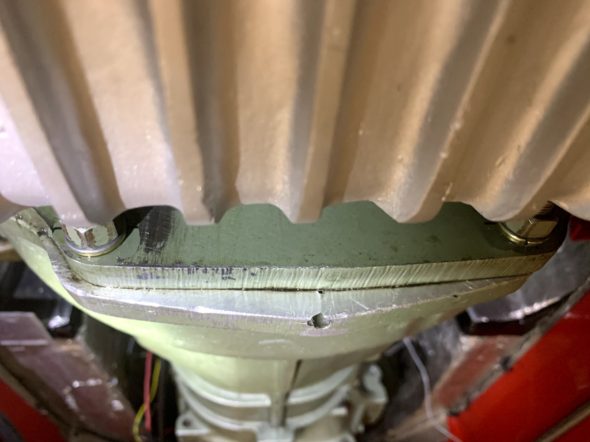
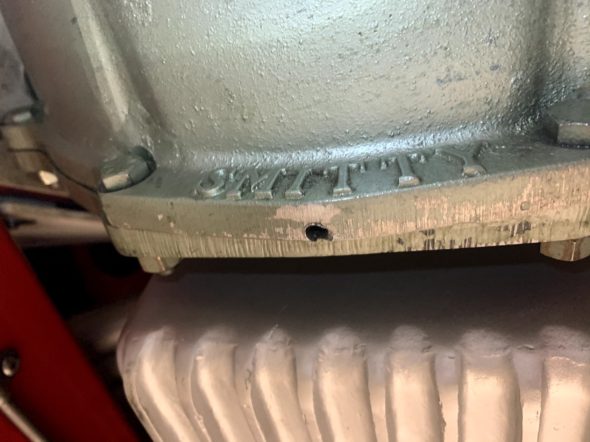
I have a Smitty 5-Speed gearbox on my car. The Smitty bell housing does not have the little drain hole the factory included. I checked in with the guys on the British Car Forum and Steve and Dave were particularly helpful. They were ahead of me in that they had both already incorporated a small drain hole in the Smitty bell housing on their cars. Steve suggested a 3/16″ hole drilled right between the mating of the steel backplate of the engine and the flange lip of the aluminum bell housing. As the photos show below, I drilled my hole at the low point of the bell housing right where Steve and Dave suggested. The depth of the flange is approximately 1 1/4.”

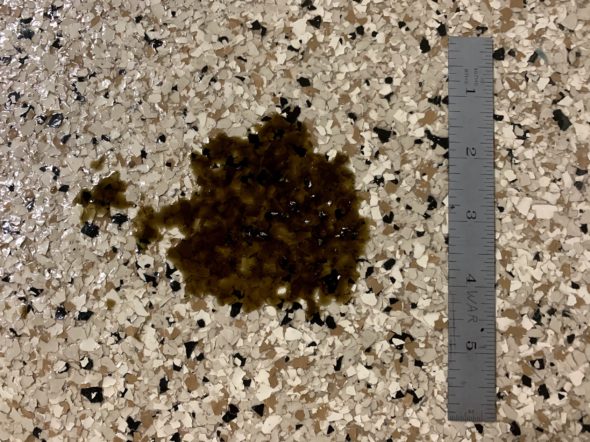
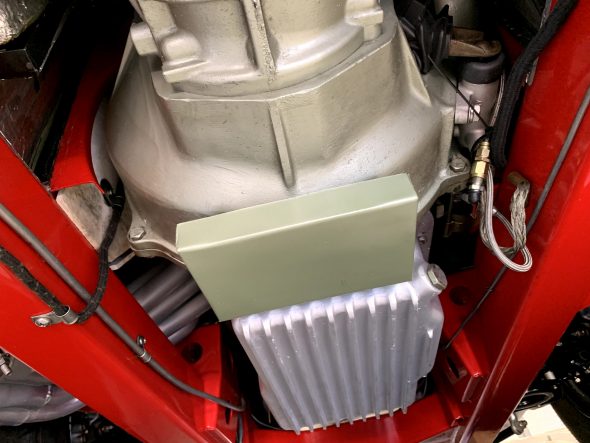
Oil began to drip out immediately, so much so that it got me a little worried. However, it stopped almost as quickly as it started so I didn’t seem to have too much oil accumulation. You may recall that I had already installed a little catch pan under the mating point of the bell housing and backplate. I removed the pan to drill my hole and then reinstalled. This will make it easy to monitor how much oil I lose from my new drain.

Smitty Bellhousing Oil Drain

Smitty bellhousing Oil Drain Closeup

Initial Oil Drainage

Main Seal Diaper in place

Changing Gearbox Oil

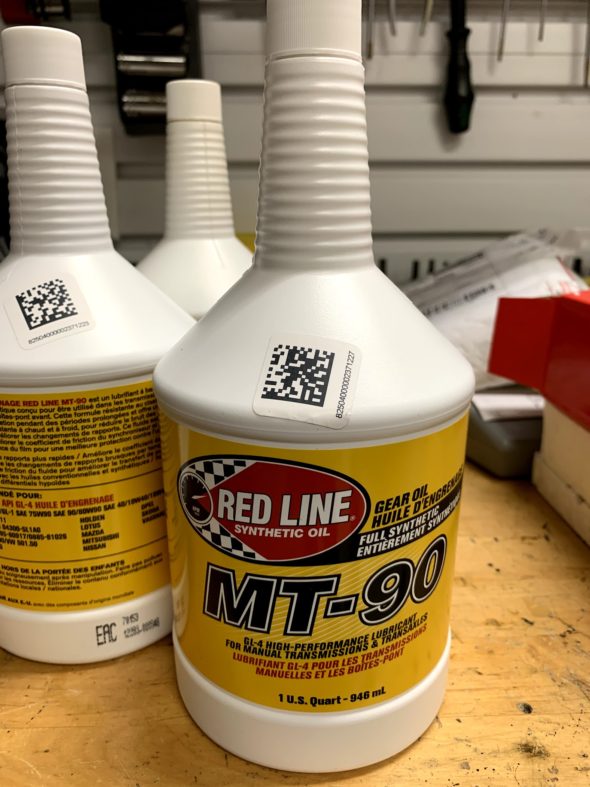
I have not changed the gearbox oil in the Toyota 5-speed since it was initially  filled around 2007, so as part of my ten year renewal process I thought it should be done. The gearbox uses just under three quarts of oil and I use Redline MT-90.

Redline MT-90

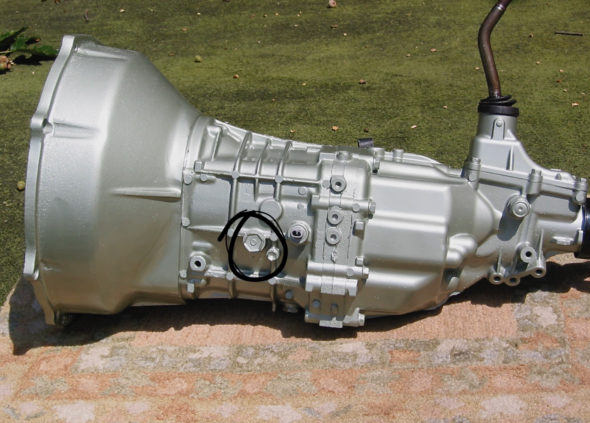
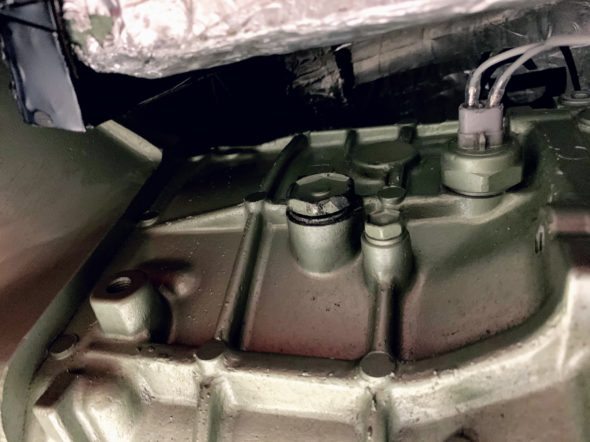
This image taken before I installed the gearbox in the car shows the fill hole for the oil:

Fill Plug LH side of Toyota 5 speed

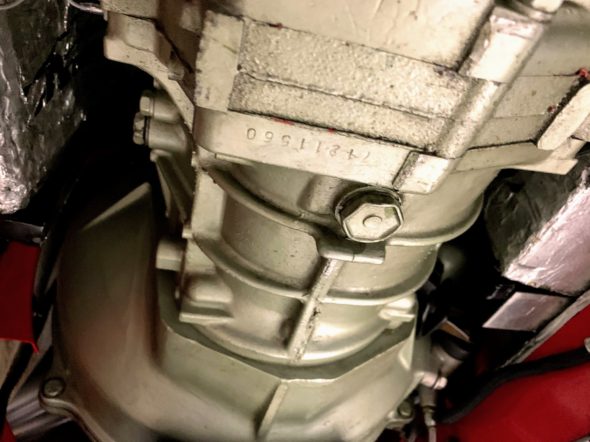
Both the drain and fill plugs use a 24mm or 11/16″ wrench to loosen. I always loosen the fill hole first because if for some reason you ran into a problem and could not remove the fill plug, you would not want to be stuck with no oil in the box because you had already drained it. After both plugs were removed, the oil was drained and it looked almost as good as when it is fresh. That is always nice to see!

Drain Plug Toyota 5 Speed

Fill Plug Toyota 5 Speed

Following cleaning up around the plug holes and installing a new aluminum crush washer on the drain plug I installed the drain plug and filled the gearbox with oil until it just started to leak out of the fill hole. As stated previously, just slightly under three quarts of oil are used. I then reinstalled the fill plug and washer and the job was complete. Another item on my renewal list checked off.

Cooling System Renewal – 3,600 miles on the odometer

I noticed a very slight wobble in the shaft of the water pump that was ascertained when holding the fan at opposing sides and shaking. Since I am I the midst of a ten-year renewal I decided to go ahead and replace much of the cooling system to include the water pump, mechanical fan, the thermostat and gasket, both radiator hoses, the fan belt and the coolant. 

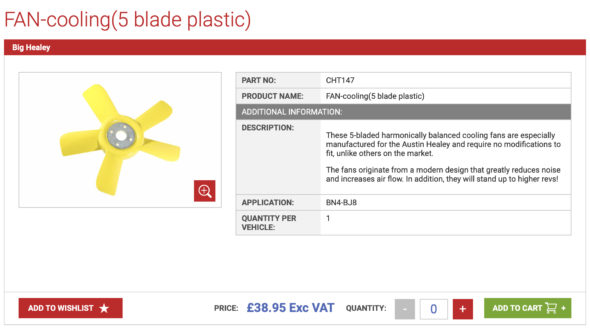
When I restored my car I installed the stainless steel flex fan sold by British Car Specialists. It seemed to work quite well, but was pretty noisy. I noticed that AH Spares was marketing a yellow asymmetrical plastic fan similar to the “Texas Cooler” fan which so many owners seem to favor.
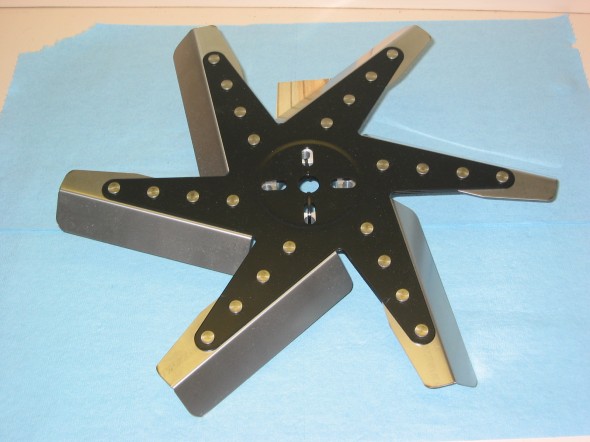
Stainless Fan
Stainless Fan

AH Spares Fan

The water pump to be replaced on my car is not the original pump. I am really not sure who produced the pump I used when I restored my car. It does not have any external markings on the pump body. Michael Salter restores original pumps but does not want to deal with replacements so I purchased a newly produced pump marketed by AH Spares which is claimed to be superior to what is commonly available on the market. The pump, as unwrapped, is painted black so I roughed up the painted surface, taped off the vent holes and painted the pump and pulley “Healey Green.” A gasket is applied with the pump. I also ordered new water pump/engine block studs to install.
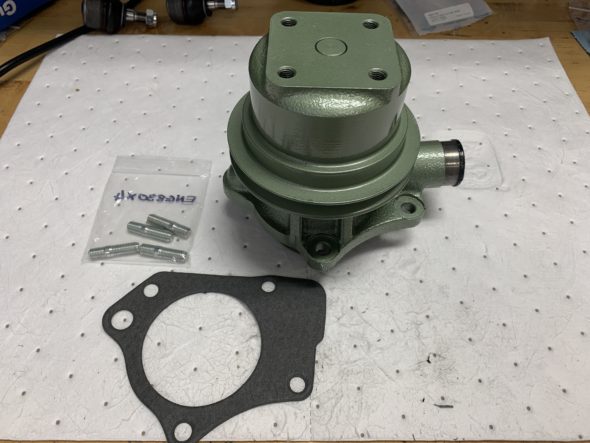
AH Spares Water Pump, Gasket, and Studs

I chose to replace both radiator hoses with Kevlar hoses from AH Spares. The bottom, or lower, Hose has a provision for the heater pipe.
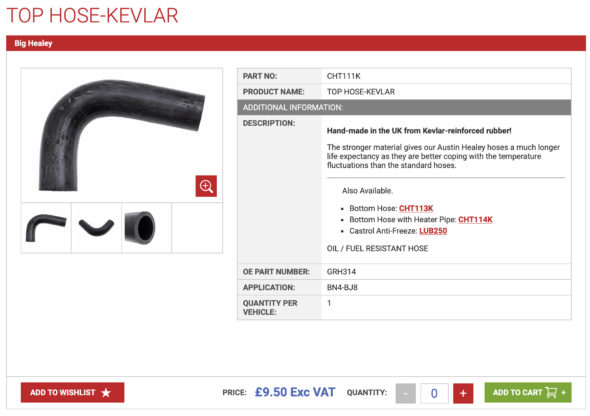
AH Spares Kevlar Upper Radiator Hose
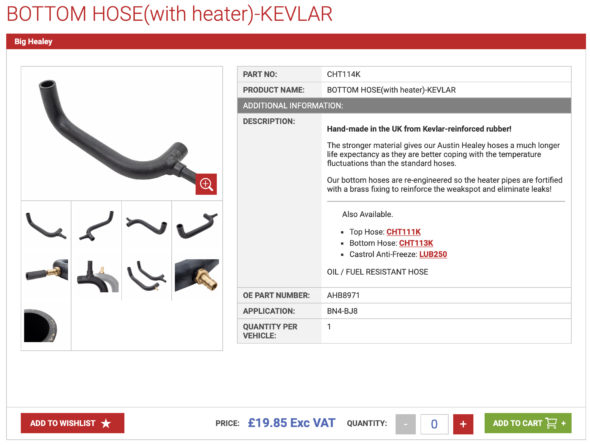
AH Spares Kevlar Lower Radiator Hose With Heater Port

The fan belt is an odd size attributable to the addition of the Delco alternator, but I found one through Amazon from an outfit called Global Power. The belt is a “V” belt 3/8″ x 43.”
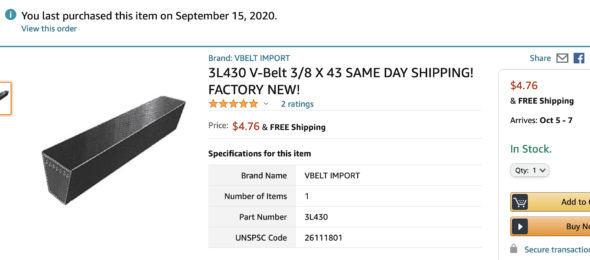
Global Power V-belt 3/8 x 43″

Finally the thermostat. Having lived in Virginia with considerably cooler winter temperatures than Florida, I had been using a 195 degree thermostat. I took this occasion to switch to a sleeved 160 degree unit supplied by David Nock at British Car Specialists.
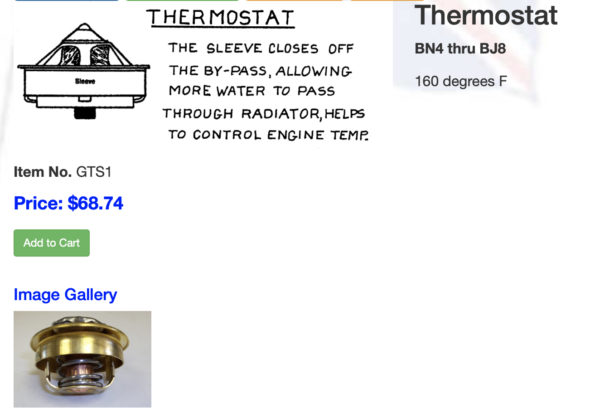
British Car Specialists Thermostat

That concludes the list of parts used on this project. Now to the removal of the old and the installation of the new!

My first step is to remove the stainless panel between the shroud and the radiator. This requires loosening the top radiator mount bolts so the radiator can be pushed rearward slightly. Then disconnect the bonnet pull rod by pulling out the split pin, followed by the four stainless self-tappers.
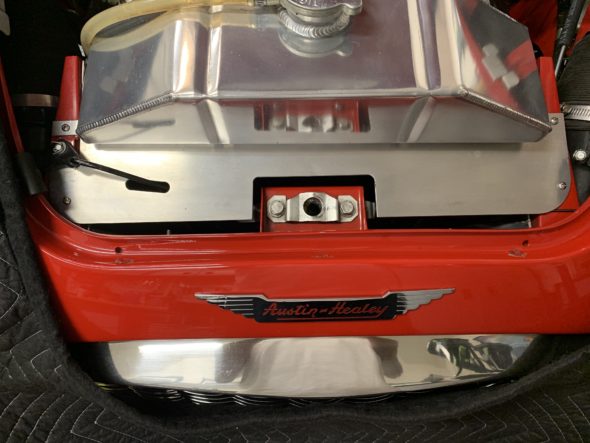
Radiator Front Stainless Panel

The radiator mounting bolts are metric. 6mm requiring a 10mm wrench. A zip tie is used to secure the coolant overflow tube to the radiator mount so that it cannot foul against the alternator fan.
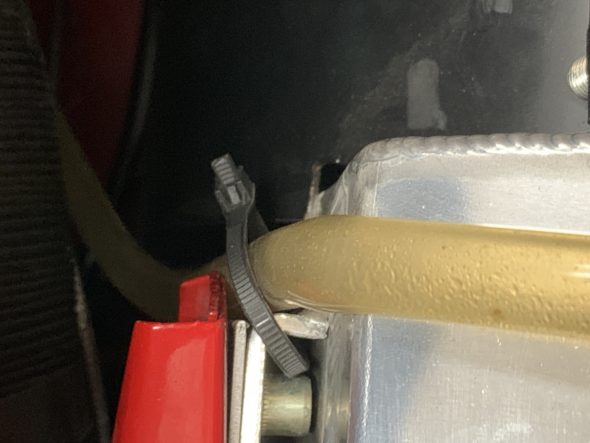
coolant overflow hose

I then removed the four lower radiator mounting bolts all with 10mm wrench.
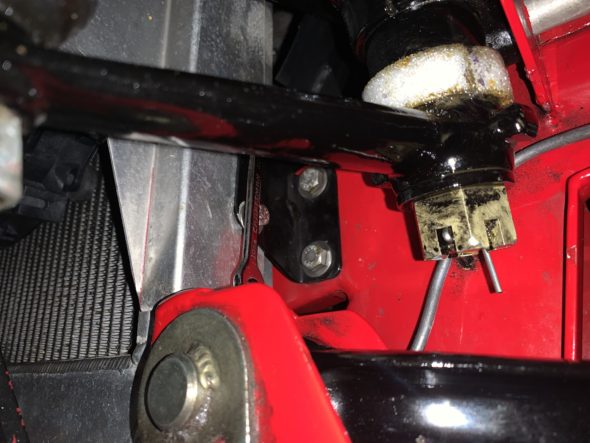
Lower Radiator Mounting Bolts

Disconnected the overflow hose from the radiator cap.
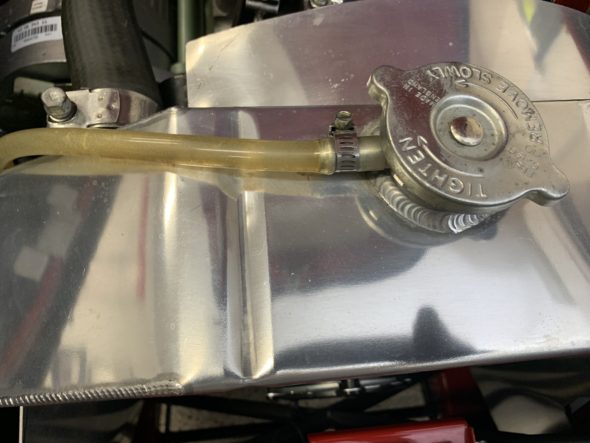
Radiator Overflow Tube Clamp at Radiator neck

Removed the radiator drain plug with a 6mm hex Allen wrench and drained the coolant from the radiator. With the mounting bolts removed and the coolant drained one can push the bottom of the radiator forward providing easier access to the lower radiator hose clip. I then loosened the clip with a 10mm socket wrench and freed the hose, of course, more fluid drained out.
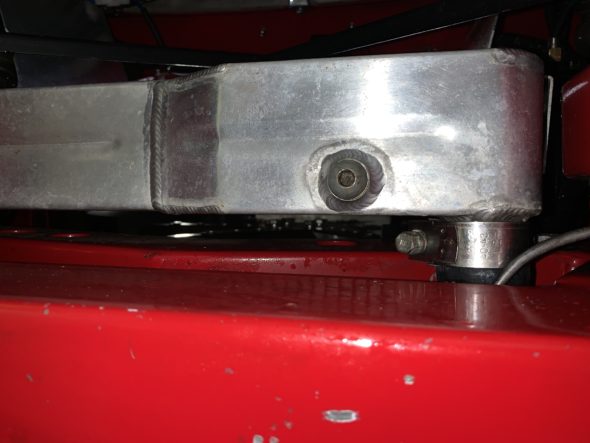
Radiator Drain Plug 6mm hex

I then loosened the upper radiator hose bracket at the radiator, again with a 10mm socket. To remove the hose I had to loosen the upper mount for the radiator shroud. It is a 10-32 hex head machine screw.
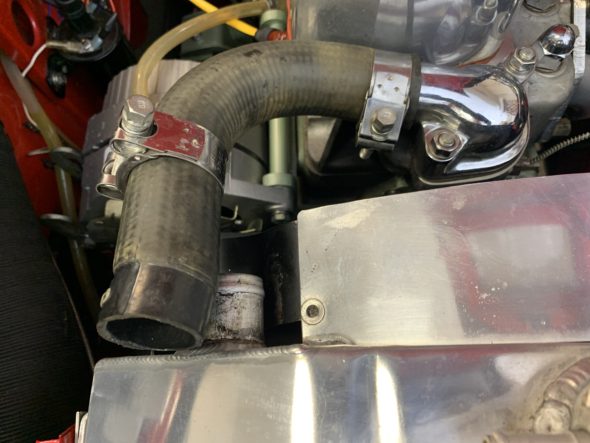
Radiator Hose Clamp for Upper Hose 10mm

I Loosen the hose clamp at the thermostat housing and tilted the hose upward where I will leave it until I replace it with a new hose.
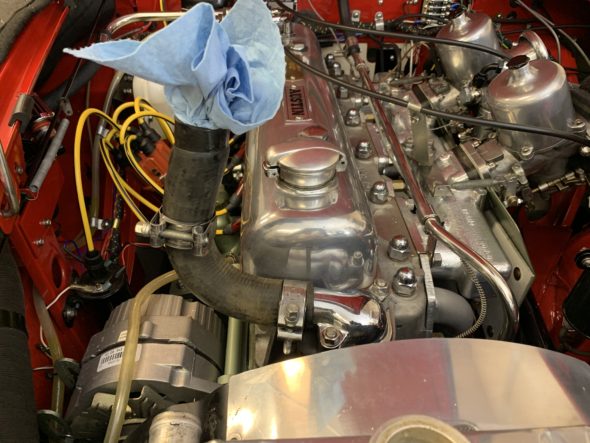
Upper Radiator Hose

Then I moved on to loosening the clamp on the lower radiator hose for the heater pipe. This clamp requires a 7mm socket. I then loosened the clamp for the lower radiator hose at the water pump  with a 8mm socket.
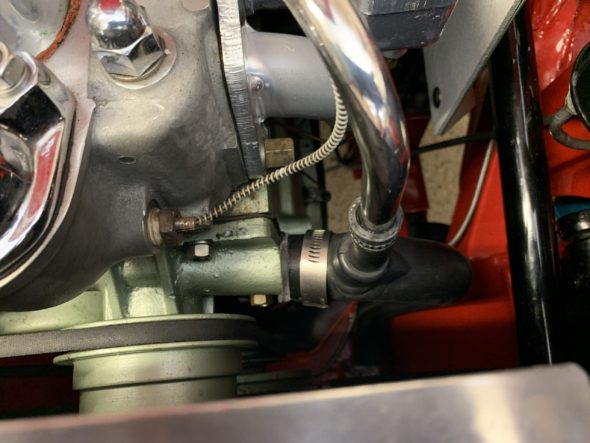
Lower radiator Hose Clamps

The next step is to remove the lower shroud mounts on both sides of the radiator which is connected to the lower radiator mount. This requires a half inch socket with a long extension for the right side.
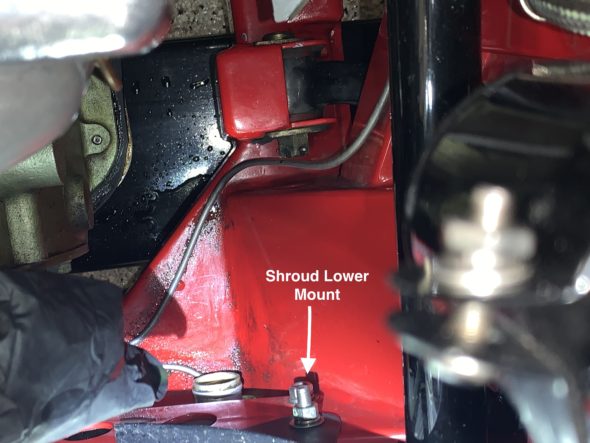
Radiator Shroud Lower Mounts

I then disconnected the wiring to the electric radiator fan. This requires unplugging the electrical connector and disconnecting the clamp securing the wire.
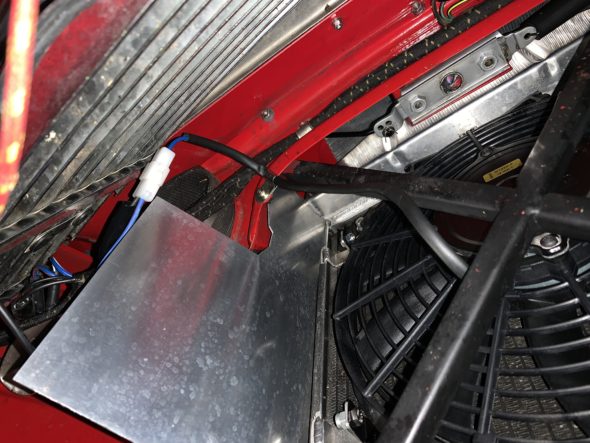
Electric fan Wiring Connector
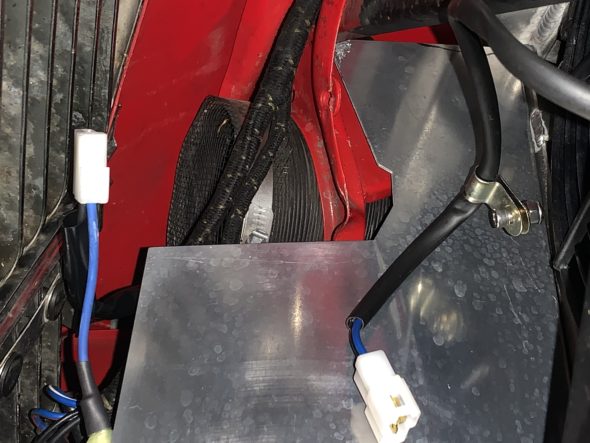
Electric Fan wiring and clip disconnected

I was then able to lift the radiator out from the car as well as the left and right baffles.
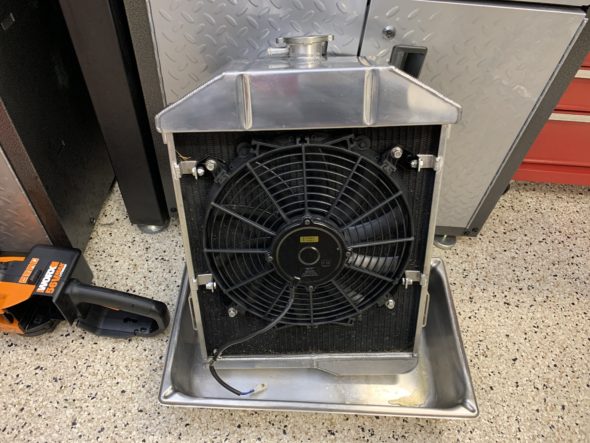
Radiator and Fan Assembly Removed From Car
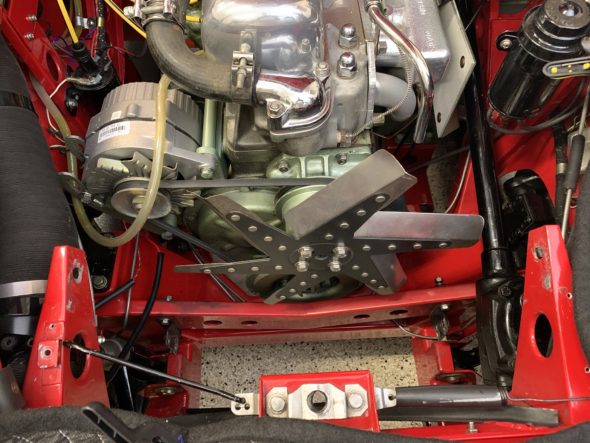
Engine Bay Sans Radiator and Baffling

The next step is to remove the engine fan and its spacer. Four bolts with 1/2” wrench.
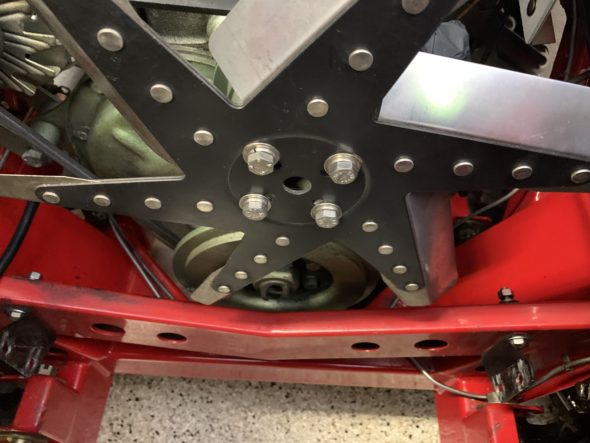
Engine Fan Mounting

I then needed to take tension off of the fan belt by loosening the alternator swing bracket and locking nut. The locking nut is 13mm while the others are 9/16”.
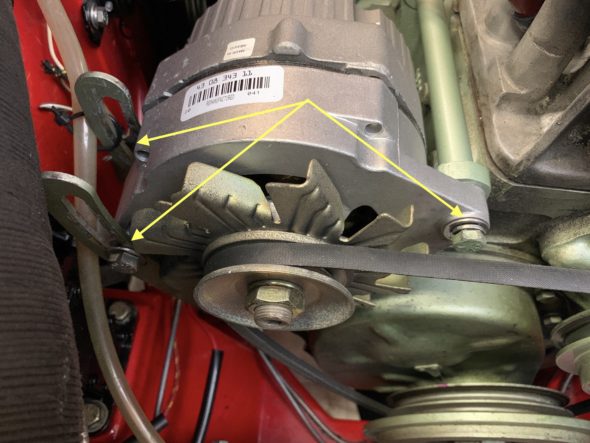
Alternator loosening points

Following removal of the old fan belt, I removed the nuts and split washers on the four water pump studs, gave the pump body a few taps and removed the pump. Again, be prepared for coolant spillage. The lower center nut is a bit hard to access, but it is doable. I then used a blade and some brake cleaner and cleaned up the surface of the block to prepare for the pump gasket.
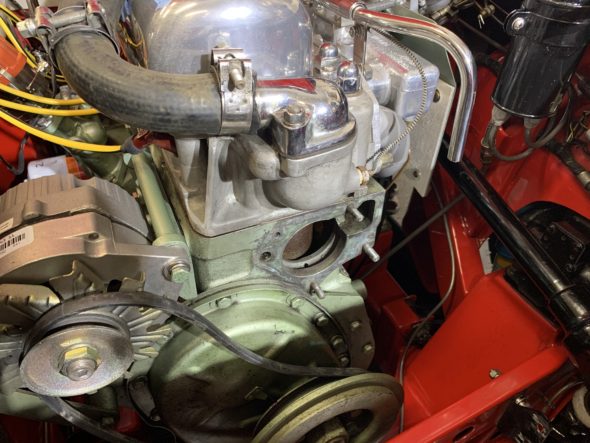
Water pump removed

I removed the four water pump studs from the engine using my handy-dandy stud remover which worked beautifully.
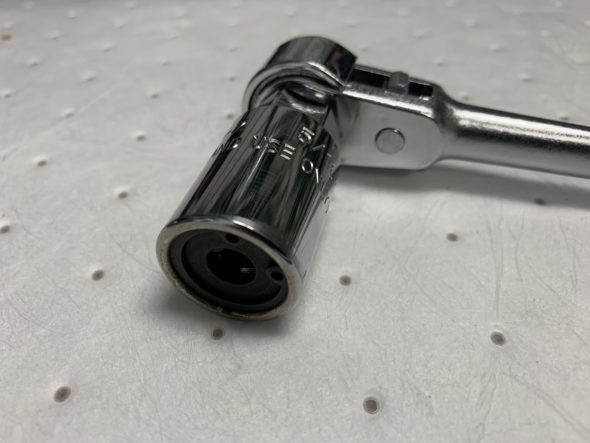
5/16″ Stud Removal Tool

I then chased the threads in the block just to be sure that they were nice and clean.
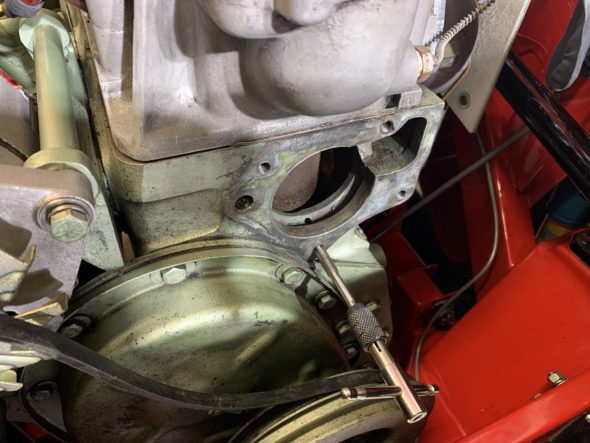
Cleaning water pump stud threads

Then using the two nut method I installed the new studs with a little blue Loctite on the engine end.

New studs installed with a little blue locktite on the threads of the engine side:
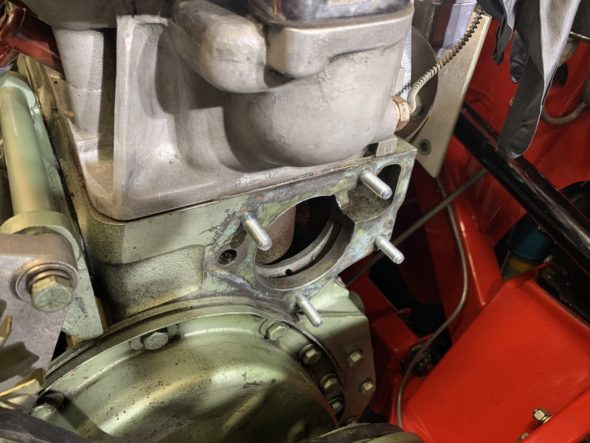
Water Pump Studs Installed

After installing the new water pump using Permatex Water Pump and Thermostat Housing RTV silicone sealant and the new gasket, I then installed a new Gates 43” fan belt and tightened the alternator in place.
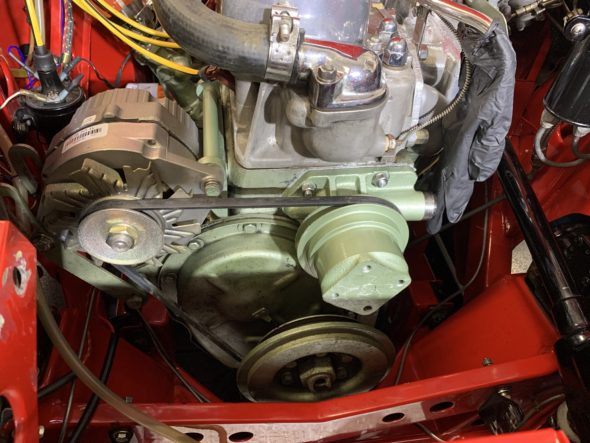
Water Pump, Pulley and New fan Belt Installed

While they were out I freshened up the two pieces of the fan shroud just a little sanding and some fresh paint.
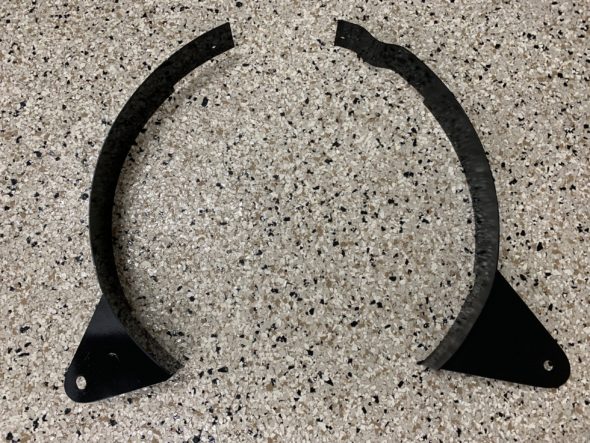
Fan Radiator Shroud Repainted

I then loosely installed the shroud to the frame of the car.

Next was the installation of the new fan from AH Spares with four 5/16-24 x 7/8” hex bolts.
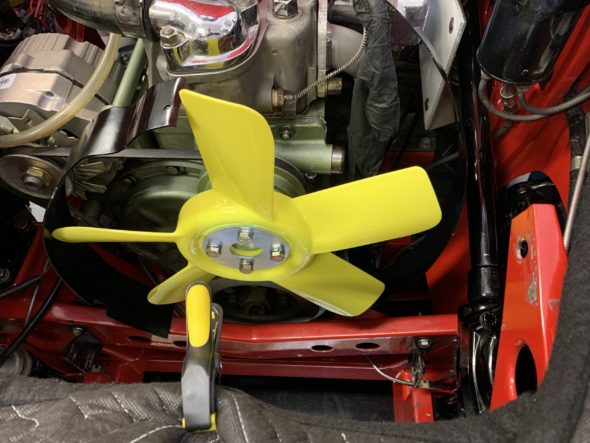
AH Spares Fan Installed

I then installed the new Kevlar radiator hoses. So they are ready to connect to the radiator once in.
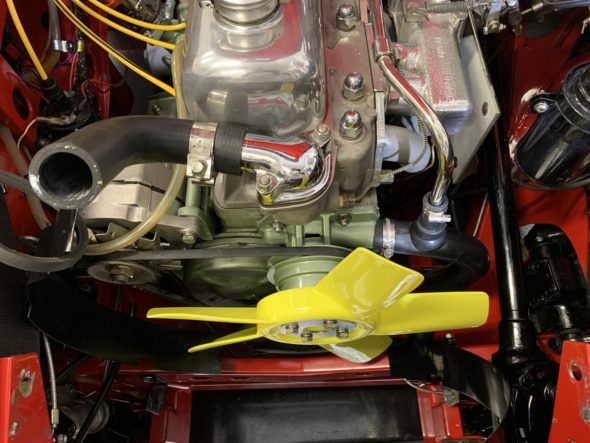
New Hoses Installed

I lifted the radiator into position and loosely attached the upper two mounting bolts. I then raised the car on the lift to get to the lower mounting brackets.

I reinstalled the radiator drain plug, connected and clamped the lower radiator hose, and loosely fitted the four screws into the lower brackets.

Then the biggest challenge was to install the two air baffles around the radiator. I installed both from below. Difficult but got them in.
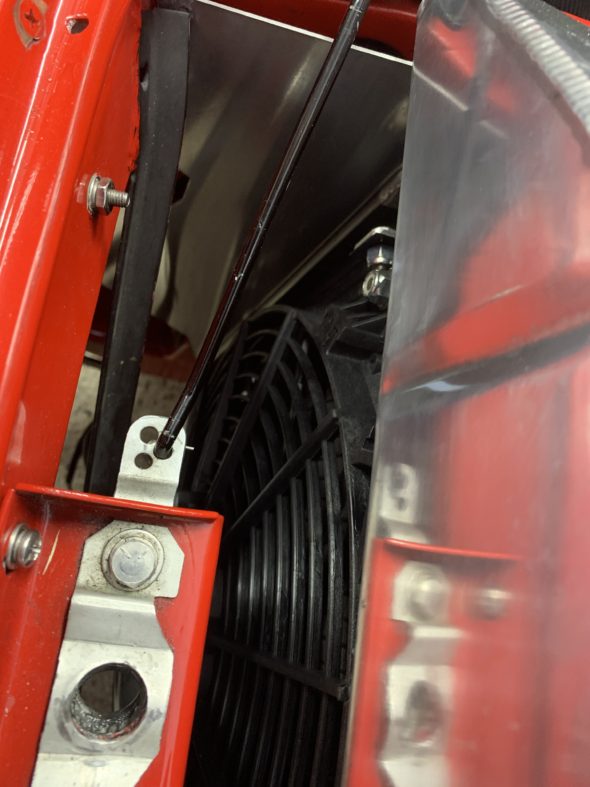
RH Radiator Baffle Installed

I then tightened the heater pipe hose clamp and the clamps for the upper radiator hose and the water pump hose. These need to be pretty tight to be effective and eliminate leaks!
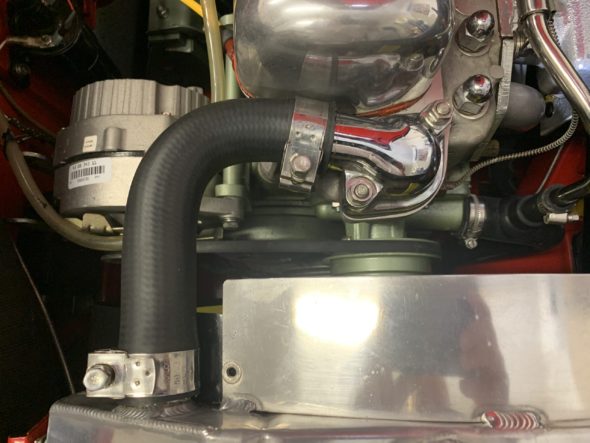
Hose Clamps Installed and Tightened

I then raised the car and from the underside reconnected the electric fan and tightened the four lower radiator mount bolts.
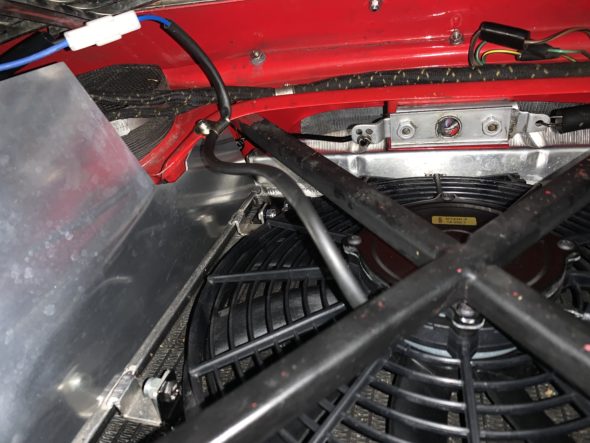
Electric Fan Wiring Reconnected

I then purchased some new tubing from the local hardware store for the overflow hose to the radiator neck, installed the aluminum cover panel, and reconnected the bonnet opening rod lever.

I then backed up a bit and loosened the two nuts and lock washers on the thermostat cover and lifted it away from the head. I removed the old thermostat and cleaned up the mating surface on the head and the cover to prepare for the new gasket.
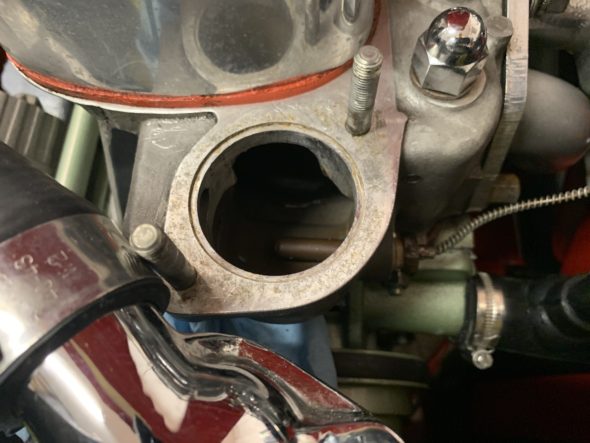
Thermostat seating in the cylinder head.

I decided to use a sleeved thermostat this time around to try to enhance cooling functionality. The following photo shows the hole in the cylinder head permitting recirculation of engine coolant to the engine. The sleeve of the thermostat blanks off the opening until the thermostat opens and coolant from the radiator is introduced to the system.
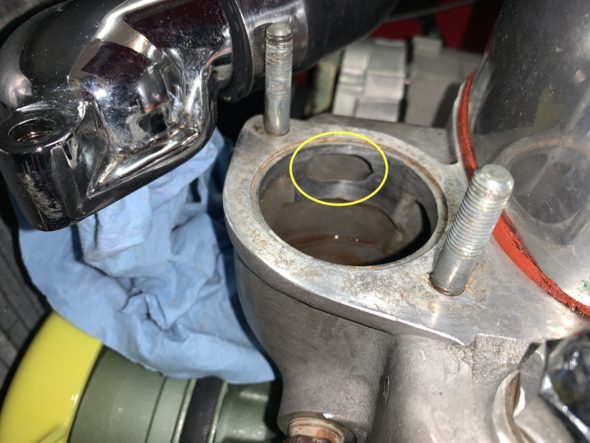
Coolant bypass opening circled

I again used Permatex Water Pump & Thermostat Housing RTV silicone on both surfaces of the gasket and installed the gasket and thermostat. I then tightened the two split washers and nuts and cleaned up around the edges where the sealant pushed out of the joint.

I decided while I was at it that I would check the accuracy of my dash fascia temperature gauge so I unscrewed the sensor from the head, freed the capillary tube from its two holders and put it in hot water and measured the temperature. While it didn’t exactly match the thermometer I was using in the hot water it was within a few degrees so I felt good about the accuracy of my gauge. I then put a little paint on the nut and reinstalled the sensor to the head using some yellow plumbers tape intended for oils.
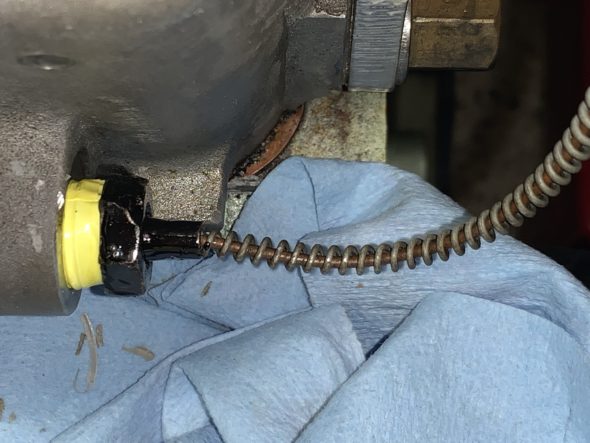
coolant temperature sender reinstalled

The sensor nut is hard to access. I used a flare wrench to do the job.
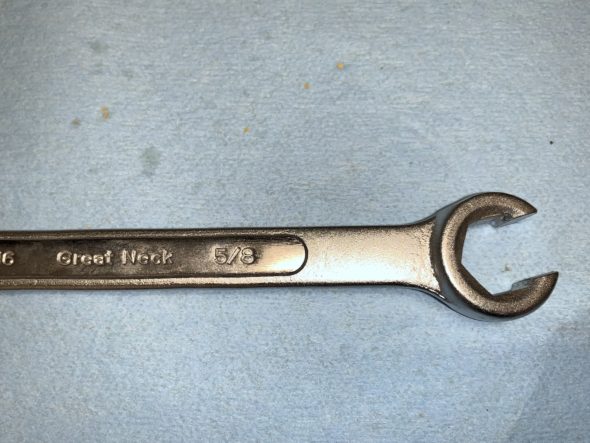
Flare Wrench 5/8″

After buttoning everything up, I took the car out for a short trip around the block and then inspected the engine bay to make sure that I had no coolant leaks. Having none, I then went out for about a thirty minute drive to “heat-soak” the engine. All systems were “go” with no problems and the engine getting no hotter than about 165 degrees. 

Kent Lambert in Oregon located an original proper water pump (AEC206), pulley, key, lock washer and nut for me. It requires rebuilding so I have sent it to Michael Salter in Canada to have that job completed. I will then keep it as my spare water pump for the future! Thank you Kent and Michael.

Another ten-year renewal job checked off the list!


HD8 Carb Final Tuning

Well, I guess that there is never a “final” stage of SU tuning, but the objective in this tuning is to get the car running well and at a place where I can enjoy driving The Bloody Beast, rather than sorting and fiddling.

I described the initial SU carb set-up in an earlier post, https://valvechatter.com/?cat=1367. The initial setting enabled the car to start and run on its own although still a bit rough. I was able to drive the car around the block a few times to get the oil and water temperature up to normal operating temperature before beginning the final tuning.

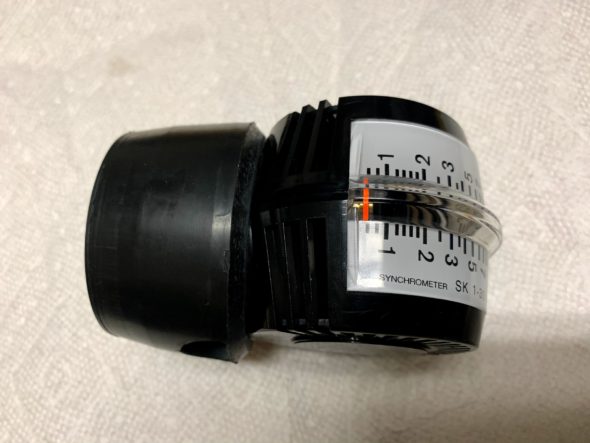
I used the air flow meter EMPl Carb Synchronization Tool (EMPl Carb Synchronization tool Instructions )to check the air flow balance of the individual carbs and found them to be quite different.

EMPI Carb AIr Sync Tool

I adjusted the slow run valves to bring the air flow to the point where it was reading the same for each carb and I noticed almost right away that the engine was idling more smoothly. I was able to obtain and idle speed of about 500 rpms. 

I then adjusted the jet mixture screw on each carb to bring the idle speed up to about 750 rpms. Leaving everything alone at this stage results in little effect when one pulls out the choke knob.

To increase the effectiveness of the choke I then pulled out the choke knob about half way. I then turned the  fast idle screw on the rear carb clockwise (downward) until the idle increased to 1,000 rpm.  I then turned downward the front carb fast idle screw until it very slightly increased the idle beyond 1,000 rpm, and then backed it off to 1,000 rpm. This procedure evens the throttle shaft load between the two carbs.

The car is running better than ever. Now it is time to enjoy the ride!  

Velocity Stack Filters

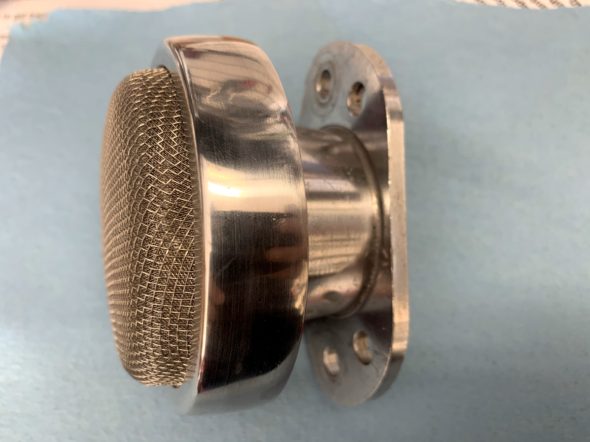
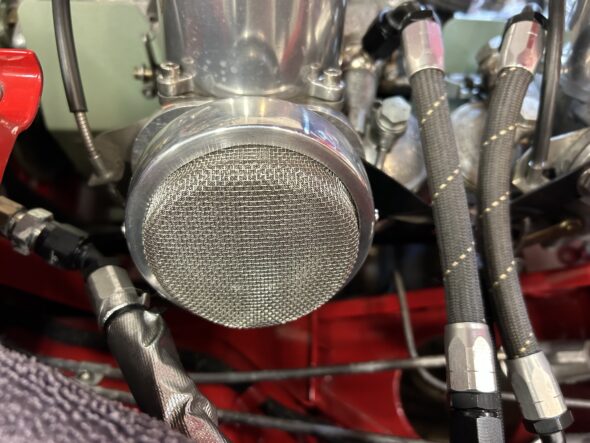
Some time ago I installed velocity stacks, also sometimes known as ram pipes, on my HD8 carbs and for filtration I was using foam air socks from ITG. While these seem to work effectively, I was just never real excited about using foam and I wanted a filtration method that was also a bit more esthetically pleasing. After some searching, I came across PJ Motorsports in Oregon. 

The filter ring is semi-polished aluminum made of .063 aluminum and 3/4″ tall. Their filters use three layers of filtration screens. The first screen is 18×14 mesh; the second is 70 mesh Stainless fabric and the third is 18×14 mesh. Their website states, “We try to filter your airflow without allowing particles through, at the same time trying NOT to deprive the air to the velocity stacks.


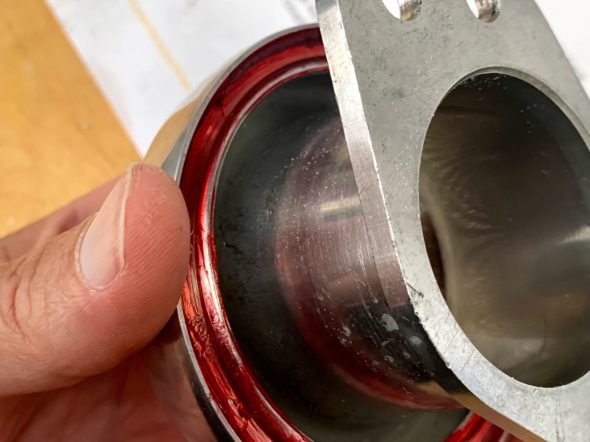
Their filters are not made specifically for rimmed velocity stacks like mine from AH Spares, but I was able to order extra ring clips that secure the filter material in the rim and after mounting the filters to the velocity stacks I pressed in the ring clip to secure the stack to the filter rim. I then applied some Loctite 581 Flange Sealant to help keep things together. After two trial runs of over fifty miles, the assembly seems to be secure.

Velocity Stack and Filter Installed

Loctite 518 Flange Sealant and locking Ring in Place

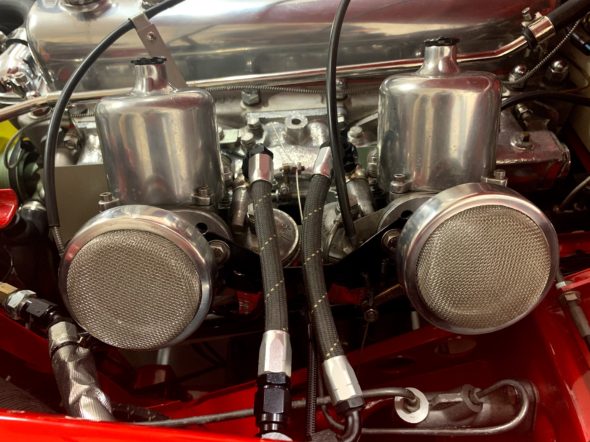
Velocity Stack Filters Installed

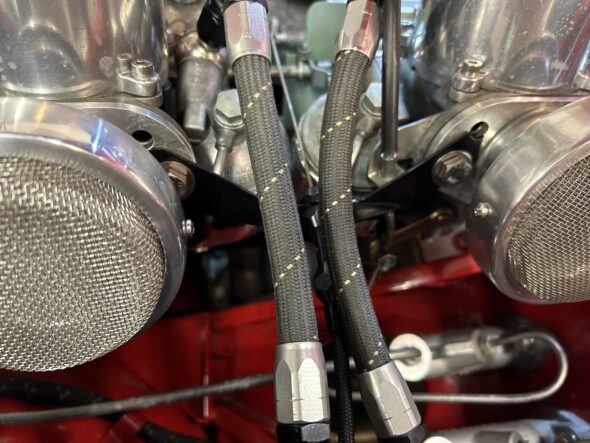
March 20, 2023 Update: The flange sealant method of attaching the filters to the velocity stacks described below did not hold up. So, I drilled 1/8″ holes through the filter rims and the velocity stack curled edges and attached the filter rims to the stacks with #6 x 1/2″ self tapping screws.

Velocity Stack Filters screwed to the Stacks

Velocity Stack Filters screwed to the Stacks

I am very pleased with both the look and performance of the new filtration system.

Ten Year Renewal Check List

Bloody Beast Ten Year Renewal Plan


This is an initial draft of a check list for my ten year renewal project. I would love to have feedback from others on the completeness of the list. Obviously, some of these items will have been tended to rather recently during routine maintenance and they will now just get a quick check. My car is low mileage since its total restoration nine-plus years ago. Consequently, numerous items will not involve the typical wear one might see for this period of time. Instead, the item might need attention for age rather than wear.

Thanks to those readers who have written suggesting items to add to my check list. I appreciate your review! I have updated the list and it is current as of October 3, 2018


Bloody Beast Ten Year Renewal Plan


Body

RH side curtain vent installation – Unique to my situation

Repair all paint chips with touch up paint

Modify the Cape International rear bumper brackets to move the bumpers closer to the shroud. – Unique to my situation

Clay, Polish, and Wax

Lubricate Bonnet, Door, and Boot hinges and locks

White grease on door locks

White grease on bonnet catch

White grease on boot lock


Brakes and Clutch

Flush and refill hydraulic fluid and consider replacement of the master cylinders, bleed system. Outer portion of reservoir feeds the braking system. Inner portion feeds the clutch.

Check condition of all brake lines and rubber hoses and replace if needed

Consider replacing parts of the Cape International rear disc brake conversion with Steve Gerow’s kit. Unique to my situation

Inspect brake pads and renew if needed.

Check tightness of the slave cylinder fasteners.

Grease handbrake cable and compensator


Cooling

Replace radiator upper and lower hoses

Replace the fan belt

Check condition of the radiator cap

Flush coolant and replace with new coolant.


Electrical System

Replace alternator – Unique to my situation

Check all electrical connection points

Check condition of the battery and clean posts if needed.

Check tightness of fasteners securing the ground strap in the boot.

Add a back-up light from the gearbox

Replace the incandescent courtesy lamps with LED lights


Engine

Check tightness of Crankshaft starter nut and harmonic balancer

Adjust valve clearances

Oil and oil filter (K&N HP-2009) change – replace copper crush washer at drain plug

Check engine for leaks and repair where possible. Check the oil sump bolts.

Replace gaskets/seals for generator mounting plate and tappet covers.

Check tightness of all oil sump mounting bolts.

Replace rocker cover seal.

Replace the rocker cover “T” breather pipe with Cape International “U” pipe to take breather hoses to a Mishimoto oil catch can.- Unique to my situation

Check condition of engine mounts and bolt tightness.

Visually inspect core plugs for any seepage


Exhaust

Inspect system for any leaks and repair if needed

Check for tightness of fasteners


Fuel

Replace fuel filter – Malassi Filter King and Holley Gauge

Replace rubber fuel hose with ethanol resistant hose.

Check tightness of Carb fittings. Clean and polish carbs check damper oil level.

Change ITG air filter to Burlen Ram Pipes. – Unique to my situation

Adjust carbs as needed. See Steve Byers instructions.

Consider a reworking of the fuel delivery hose system from pipe to carbs. Unique to my situation.

Add a ground connection wire from the fuel sender unit to the frame.

Check fuel sender/gasket for any fuel leakage.

Lubricate carb linkages with light oil


Front suspension

Check condition of rubber boots on ball joints and other bushings.

Check the tightness of all shock absorber mounting bolts.

Check Oil in the shock absorbers.

Check the tightness of the nuts/bolts under the spring pans.

Check the working condition of all grease zerks and grease them.

Inspect the front bearings. Repack or replace. Set end-float to spec.

Inspect the splines on the hubs and the wheels. Make sure all hub nuts are tight.

Check for wear in the king pin by testing to see if there is movement when grabbing the tire at the bottom and trying to move it in and out.


Gearbox & Propshaft

Check all mounting fasteners for tightness.

Drain gearbox oil and replace with a little less than 3 quarts of Red Line MT-90 synthetic gear oil.

Check condition of U-joints (?)


Heater

Inspect rubber heater hoses and replace if needed.

Consider replacement of the heater water valve to ensure it is not clogged.


Ignition

Inspect ignition system wiring and connection points

Inspect spark plugs and replace with new NGK BP6ES plugs

Check engine timing


Interior

Replace bristleflex door seals

Treat leather surfaces with conditioner.

Check oil seal on the back of the tachometer to see if there are any drips.


Lights

Check all bulbs and flashers for correct operation

Check operation of all dash lights


Rear Axle & Suspension

Refresh Axle Differential Gear Oil

Check fasteners for U-bolts, shock absorbers

Check the working condition of all grease zerks and grease them

Check the breather on the the axle casing

Check rear bearings for smooth turning and seals for leaks

Check oil in the shock absorbers


Steering

Check fill levels of the steering idler and steering box and add Penrite Steering Oil.

Check tightness of all fasteners and rubber ball joint boots.


Tires

Inspect for age and wear. Replace if needed.

Check inflation pressures and adjust if needed.


Wheels

Inspect all wheels for loose spokes. Repair if needed.


Windshield & Windshield Washer

Inspect and refresh fluid in reservoir

Replace wiper blades


Wheels & Tires

The Original Tires and Wheels

The wheels were Dunlop 15” 48 spoke center-lock wire wheels painted silver-grey secured with a two-eared chromed bronze knock-off. The car was fitted with Dunlop Roadspeed RS4 tubed black-wall bias ply tires.

Tire and Wheel Modifications

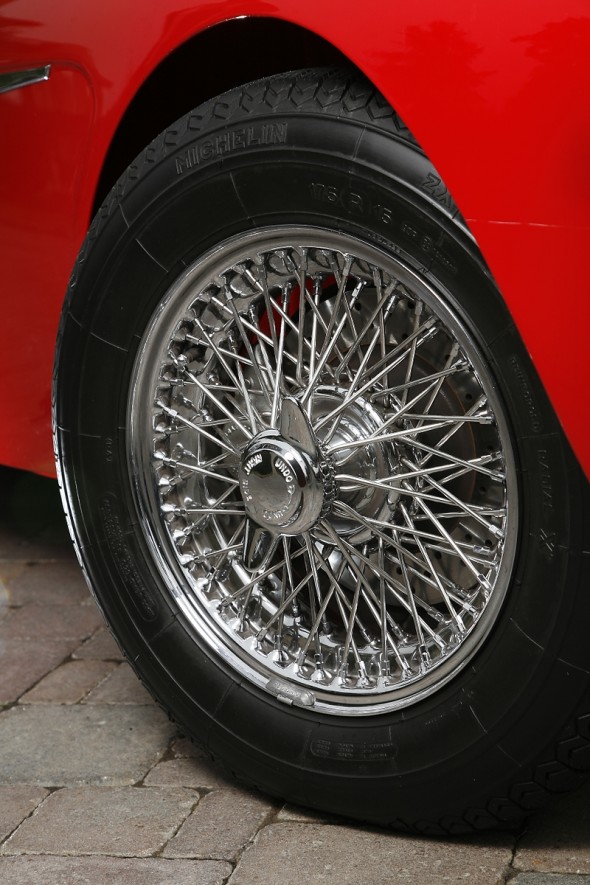
I decided to use Dayton chrome/stainless wire wheels supplied by Hendrix Wire Wheel. The selected tires were Michelin 175 x 15″ ZX. Alan Hendrix and Jerry Anderson were both very helpful with the purchase and with follow up questions.

Tires and Wheels

Tires and Wheels

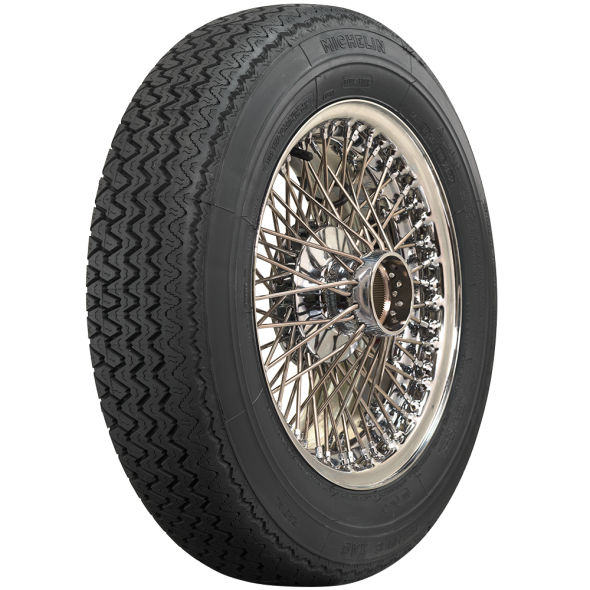
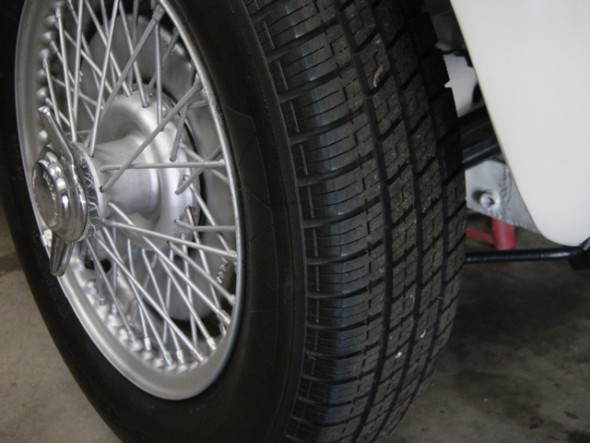
Fast forward to August 2015. I am way overdue to replace my Michelin ZXs. They still look great but they have surpassed their useful life by a considerable number of years! The sad news is that the ZXs are no longer available. That is a shame as I really liked the way they looked and performed. Following a fair amount of research, I have concluded that the Michelin XAS 180 HR15 is the best tire to replace my ZXs. Many Healey driver’s have switched to Vredestein Sprint Classics, but I favor the Michelin tire. The XAS has a slightly larger diameter: I believe 26.7″ versus the ZX 26.” The XAS has asymmetric treads favored for a smooth nice ride with good traction. There are a couple of downsides. Unfortunately these tires are $260 each plus another $27 for a tube for each tire. The ZXs were tubeless! My other concern is that the slightly larger tire may not fit in the boot. As a consequence, I have decided to take Allen Hendrix’s advice and go with a smaller 165 Nexen tire ($100) as a spare. This should work fine. On the off chance that I actually need the spare, it won’t be on the car for long.

So I ordered the XAS tires from Coker Tire in Chattanooga, TN and had them drop shipped to Allen Hendrix. Next week the wheels and ZXs go to Hendrix Wire Wheel to have the wheels checked, tires mounted and trued and then shipped back to me.

michelin-XAS-180HR-15

michelin-XAS-180HR-15

Nexen 165 for the Spare

Nexen 165 for the Spare


Suspension/Axle

The Original Front Suspension

The front suspension used coil springs, a 5/8” anti-sway bar, rubber bushings and Armstrong lever shocks.

 Front Suspension Modifications

Tube Shocks

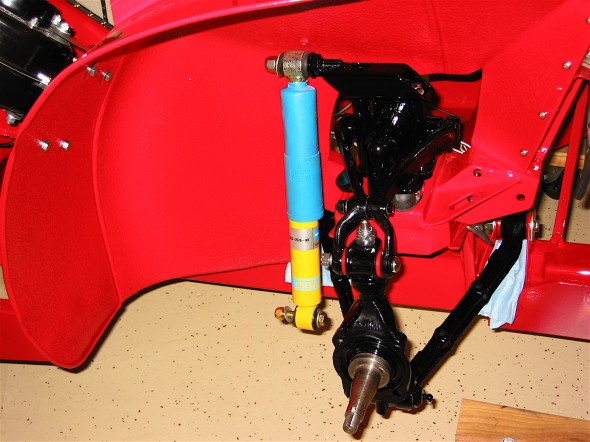
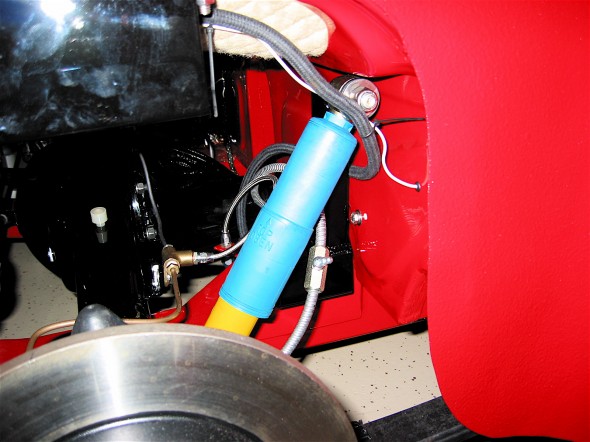
I had the front shocks rebuilt by World Wide Auto Parts http://www.nosimport.com/, but decided to install Bilstein Tube shocks supplied in Udo Putzke’s Fahrspass http://www.putzkes-fahrspass.com/Eng/kits.html Tube Shock Kit. I ave been very pleased with the performance of the shocks. This is a document describing the installation: Putzkes Fahrspass Tube Shock Kit.

Blistein Tube Shocks

Blistein Tube Shocks

Anti-sway Bar

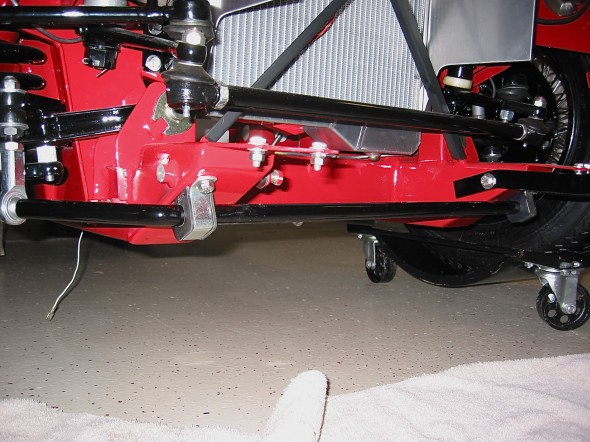
I replaced the standard 5/8″ bar with a heavy duty 7/8″ sway bar with poly bushing and rose joint links sourced from Cape International. http://www.cape-international.com/

Anti-Sway Bar

Anti-Sway Bar

Poly Bushings

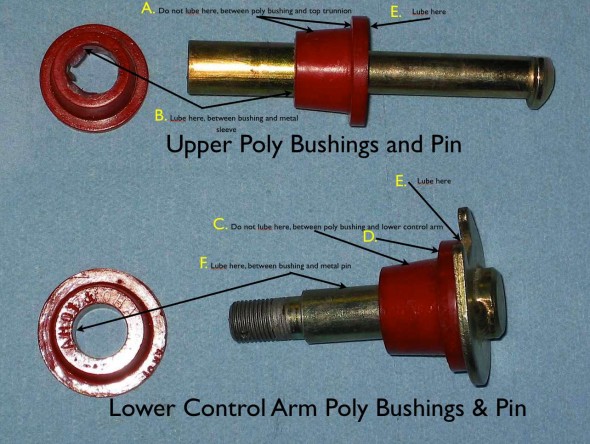
All of the front suspension rubber bushings were replaced with poly bushings purchased from Putzke’s Fahrspass http://www.putzkes-fahrspass.com/Eng/BigHealey_poly_page.htm   Lubricating poly bushes is important. The image below illustrates the proper lubricating surfaces.

Putzke's poly bush lubrication

Putzke’s poly bush lubrication

Coil Springs

At the recommendation of others, I replaced the BT7 springs with springs from the BJ8.

Front Lowering Kit

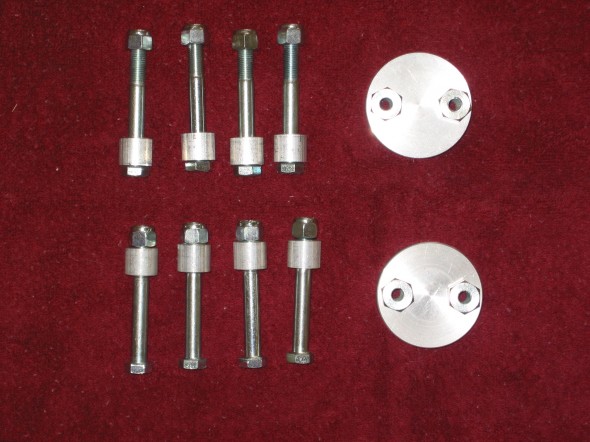
I like a slightly more aggressive look accomplished by lowering the front end so I purchased a lowering kit from Denis Welch Motorsport http://www.bighealey.co.uk/content/lowering-kit. When you lower the front end it is also necessary to add a spacer to the rubber bump stop. This was also sourced from Denis Welch http://www.bighealey.co.uk/content/bump-stop-spacers-and-tube-nuts.

Lowering Kit

Lowering Kit

 Ball Joint Dust Covers

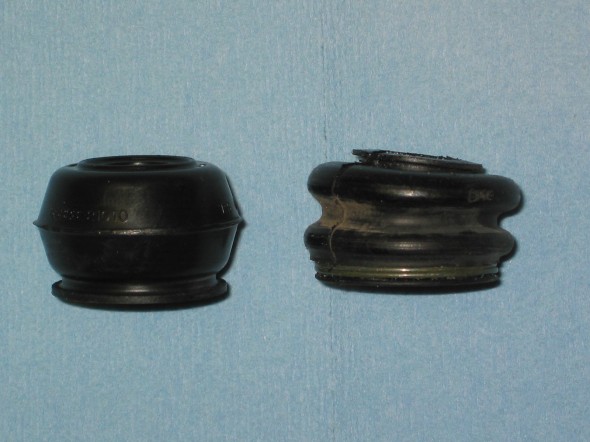
Rubber components in today’s restoration world are often very poor quality. Someone on the Healey list serve discovered that Hyundai ball joint covers, past #56828-21010, are of superior quality to that available for the Healey. I ordered and used them and they worked perfectly!

Tie Rod Dust Seals

Tie Rod Dust Seals

Original Rear Suspension/Axle

 Semielliptic leaf springs, solid axle with transverse panhard rod, 3.909 rear differential

 Rear Suspension/Axle Modifications

Tube Shocks

As with the front shocks, I decided to install Bilstein Tube shocks supplied in Udo Putzke’s Fahrspass http://www.putzkes-fahrspass.com/Eng/kits.html Tube Shock Kit in the rear. I ave been very pleased with the performance of the shocks. This is a document describing the installation: Putzkes Fahrspass Tube Shock Kit.

Bilstein Tube Shock

Bilstein Tube Shock

Rear Leaf Springs

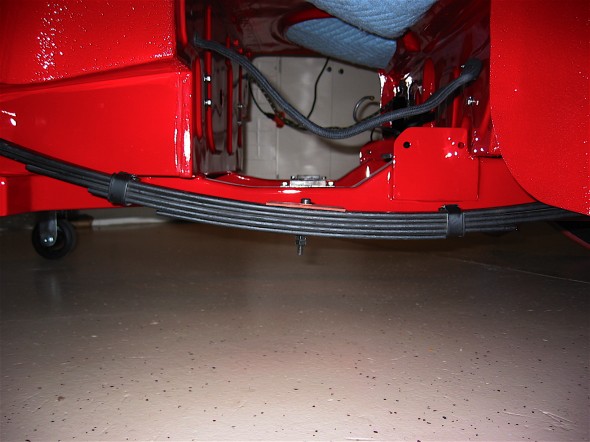
Having used the Jule Enterprises frame, I also decided on Martin Jansen’s custom made leaf springs. They worked perfectly. Ride is great and the car sits nicely with the proper gap between the tires and the body. Martin’s springs use BJ8 mounting hardware.

Leaf Spring

Leaf Spring

Rear Differential Gears

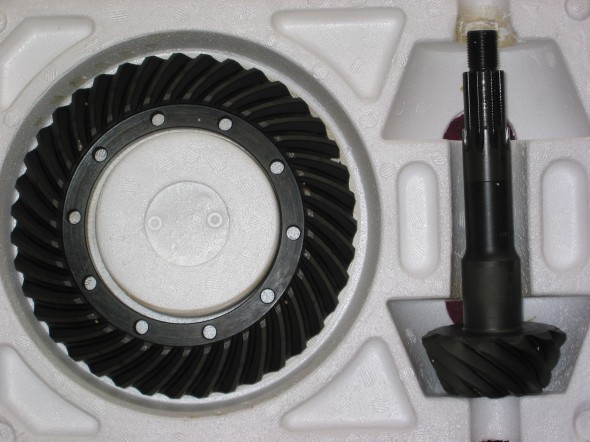
Many Healey owners who converted to the Toyota 5-speed gearboxes suggest that the 3.54 gears in the rear end make for a nice combination. Mike Lempert, who makes Healey steering wheels also arranged for the manufacture of the 3.54 gear sets. I was fortunate to be able to purchase a set and install them in the Bloody Beast.

Lempert 3.54 Gears

Lempert 3.54 Gears

zz