New Vinyl Door Piping and Ignition Wiring

Two more little jobs need to be accomplished in my journey to “renew” the Healey:

Vinyl Door Piping

After a little over ten years of use, the vinyl piping that edges the aluminum trim plate on the passenger side door shut face pillar was just worn out. My rear door gap is a little tight and the vinyl piping sometimes gets caught as the door closes.

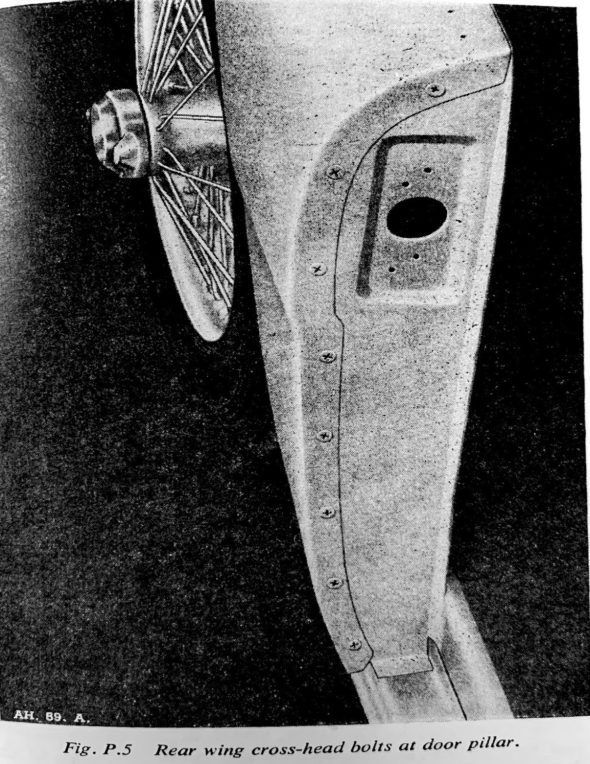
According to Anderson and Moment’s book, Austin-Healey Restoration Guide, the bottom and rear door sills were covered with aluminum trim plates, textured in a raised pattern. A vertical section covered the shut face pillar, secured to the pillar with eight chrome Phillips screws, 54K3024, #28 in the illustration.

Shut face Pillar

Black grained vinyl piping separated the rear trim plate from the rear fender along the door opening. This piping extended up and over the trim panel with its core removed so that it wouldn’t catch on the edge of the door when opened and closed.

From the Concours Guidelines: From the introduction of the Abingdon BN6 through possibly the end of BJ7 production, the shut facing was fastened with small, #4 truss-headed Phillips screws with very small cross- head screwdriver slots. Starting around 1963 or 1964 the screw head was changed from Phillips to Pozidriv. 

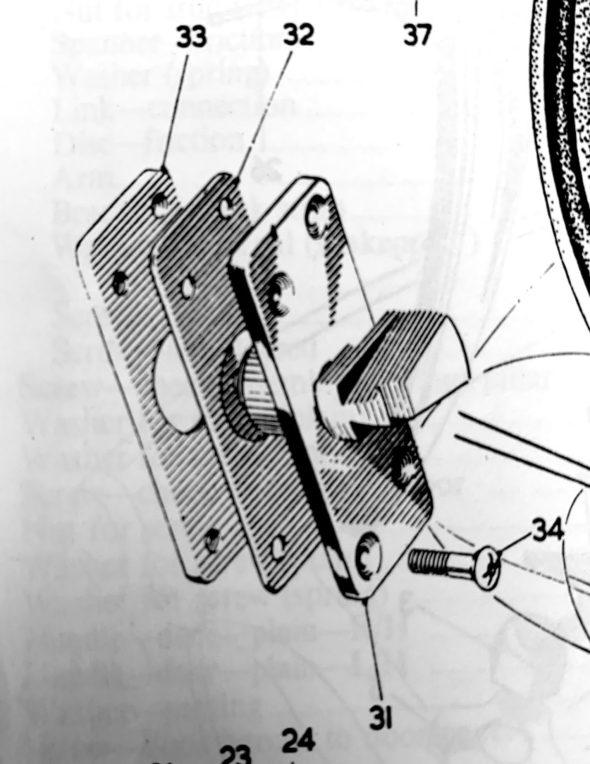
To remove the aluminum trim plates, one must remove the door lock striker, 14B2841, #31; that is attached through the door shut face pillar and packing plate, 14B2842, #32, into a tapped plate, 14B2843, #33. The assembly is secured with four chrome Phillips Head striker fixing screws, RMP0312, #34 (#10 x 3/4”)

Door Striker Assembly

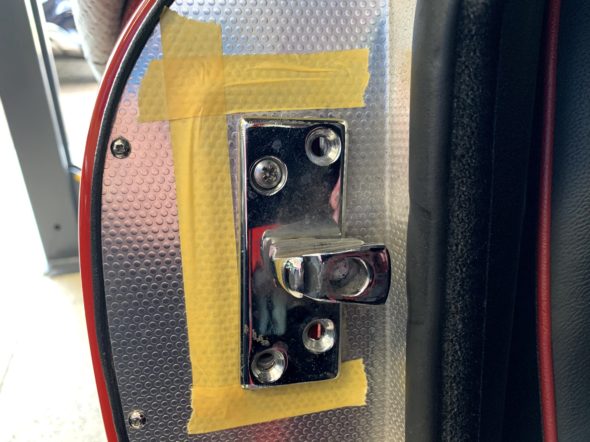
The striker assembly is adjustable so to be sure to return the assembly to the same position once reassembled, tape was used to mark the outside edges of the striker on the aluminum trim plate.

Marked Position of Door Striker Before Removing the alloy trim

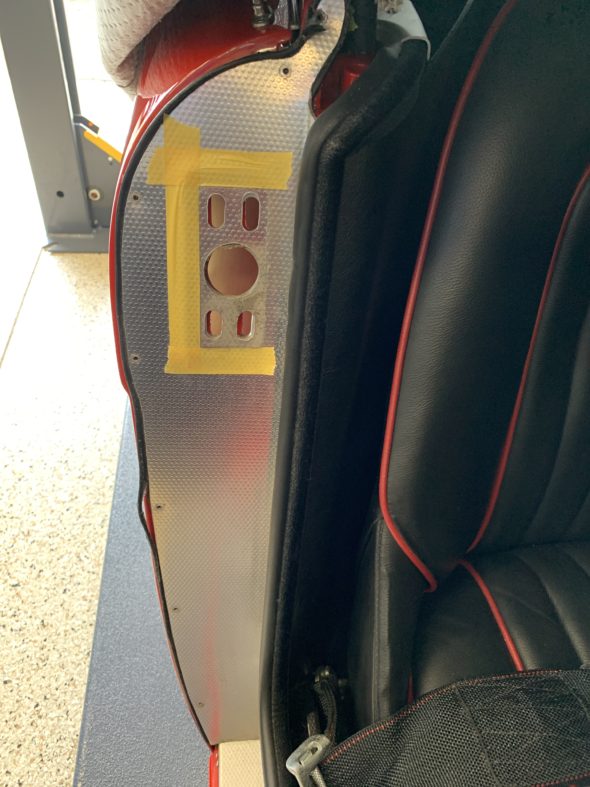
I removed the striker plate assembly by loosening the 4 Pozi Drive screws.

Door Lock Striker Removed

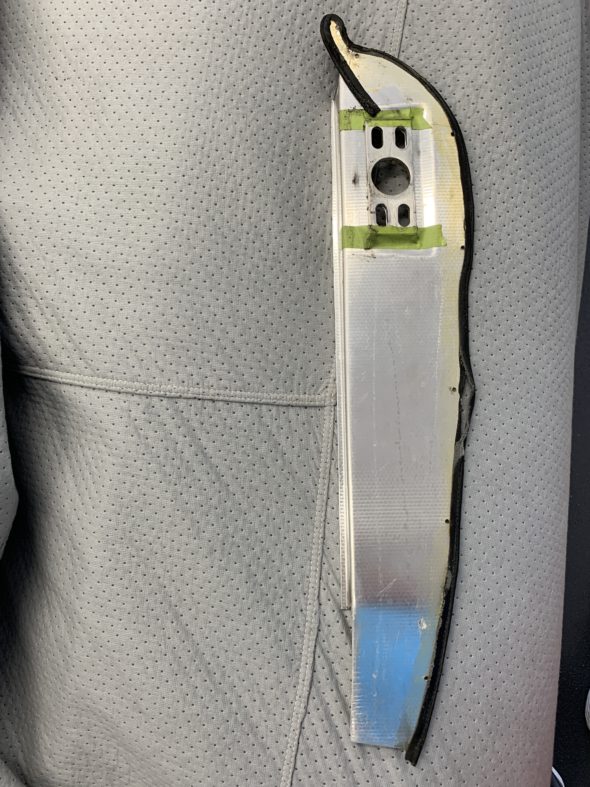
I then removed the seven #4 Phillips head screws that secure the aluminum trim plate to the door shut face pillar. The trim plate could then be removed. The image below shows how the piping is glued with contact cement to the trim plate before reinstalling.

Reverse Side of Alloy Trim Plate

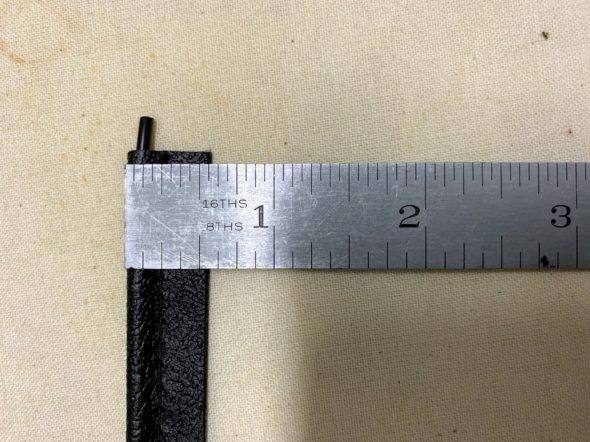
Geoff Chrysler, owner of Rightway Heritage Trim, made a pair of the piping pieces for me that are the proper size.

Chrysler Vinyl Trim

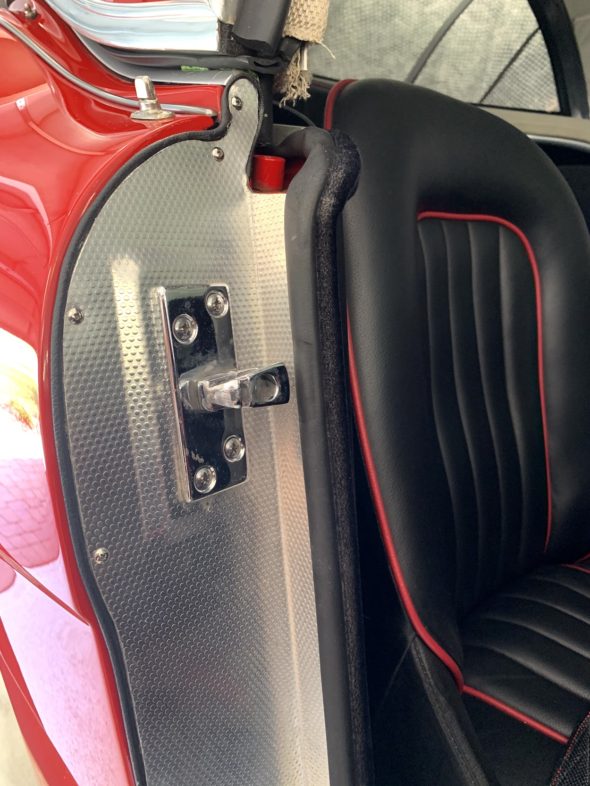
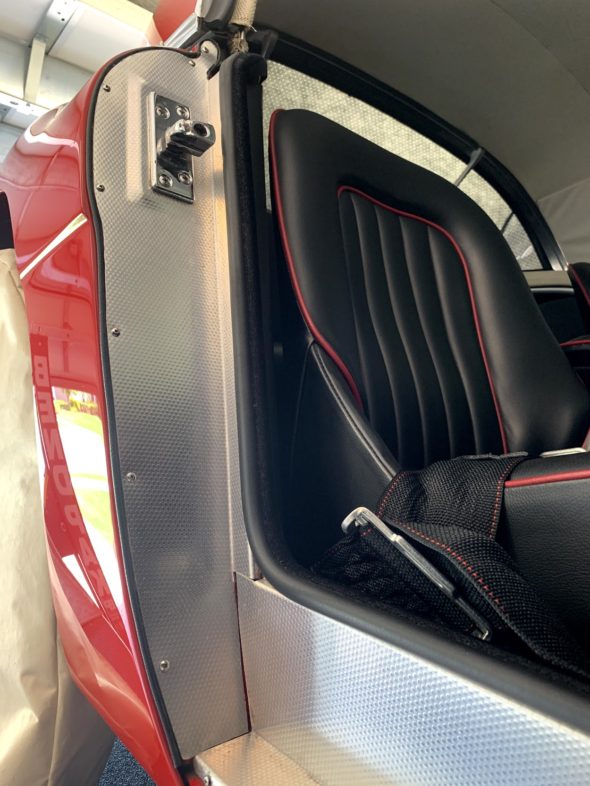
I glued the piping to the plate and then remounted the plate on the pillar. The turn at the top of the trim plate is difficult to address and it does take some patience. This is the finished product reinstalled on the car.

Vinyl Piping on Door Shut Face Pillar Alloy Trim

Vinyl Piping on Door Shut Face Pillar Alloy Trim

Ignition wiring

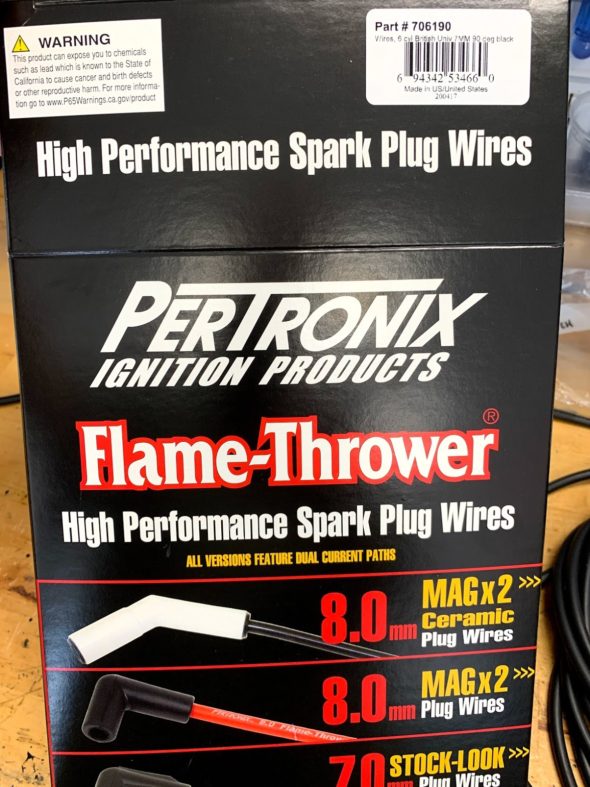
The ignition wiring for the coil, distributor and spark plugs was operating perfectly but I thought as a preventative maintenance item I would go ahead and replace the wires so I would be good for another ten years. This included replacing the distributor cap and rotor on the 1-2-3 electronic ignition device. I used the same type of wiring installed on the car when it was restored. The product is made by Pertronix and is designed for use with electronic ignition systems.

Pertronix Spark Plug and Coil Wires

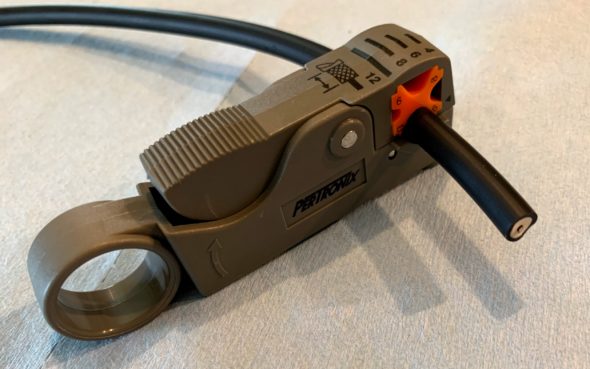
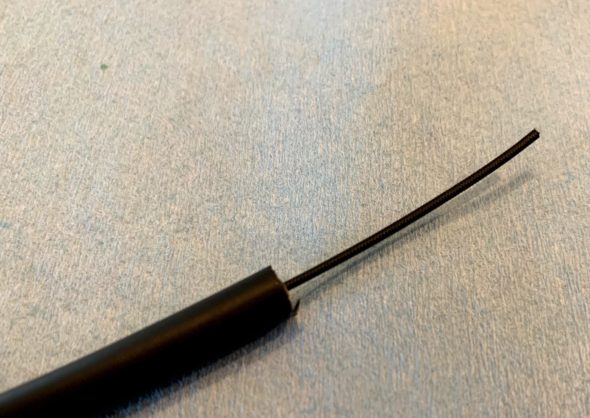
As supplied, the spark plug terminals and boots are already mounted on the individual wires. One only needs to cut the wires to length and install the terminals and boots for the distributor end of the wires. To make the job a little easier I used a wire/insulation cutter made by Petronix for the task. It works perfectly and leaves a nice clean core to wrap around the terminal.

Pertronix spark plug wire Insulation stripping tool

New Spark Plug Wire Trimmed

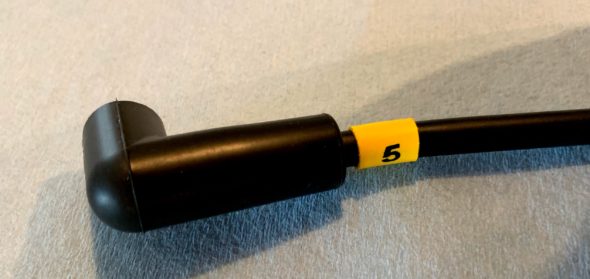
I also installed heat shrink wire numbers on the wires to help with sorting the wires.

Pertronix Spark Plug Wire Boot and Number

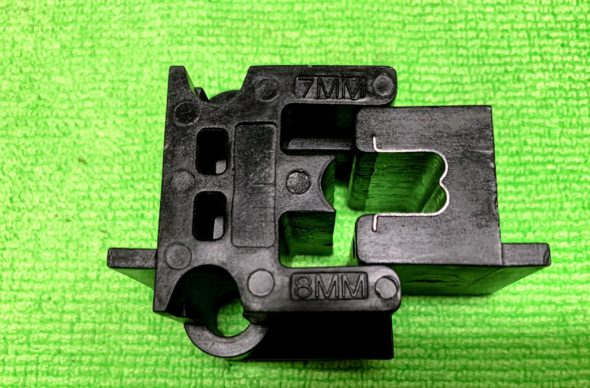
Pertronix also sells a two piece crimper used to crimp ignition wire terminals to the cable. It works for 7mm and 8mm wires, and produces perfect crimps every time. One places the terminal and wire between the two pieces of the device and then tightens them together in a vice.

Ignition Wire Crimper

All the new products were installed and the car is running just fine.


Assorted Ignition Modifications

The Original Ignition System

Distributor: Lucas DM6A

Coil: Lucas HA 12 volt

Spark Plugs: Champion UN12Y

Modified Ignition System

Distributor

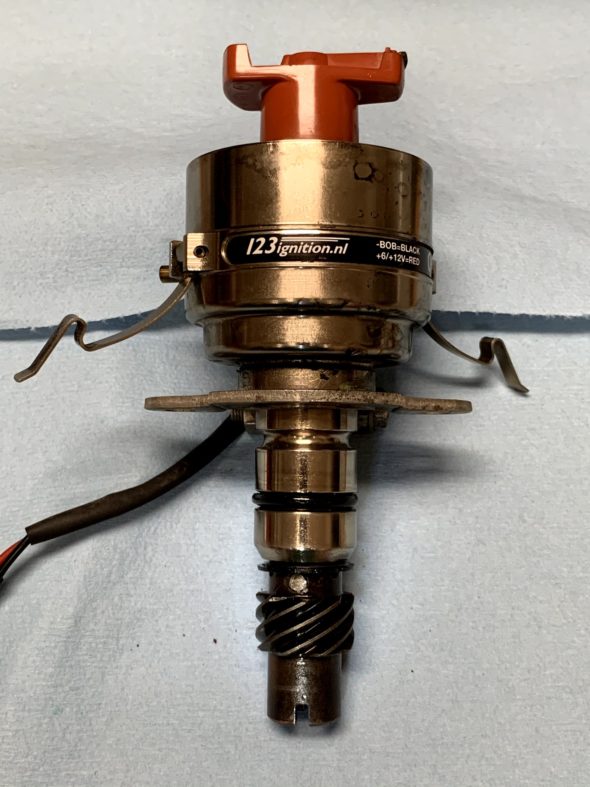
Having converted the Bugeye to electronic ignition with a Crane system, I knew that I wanted to use electronic ignition with the Bloody Beast, but unlike the Crane system, I wanted to use a system that would be housed in the distributor such as a Pertronix. After doing some research I decided to replace the entire distributor with a newly introduced Dutch product, the 123 Distributor. The United States distributer is https://123ignitionusa.com

More information about the installation is provided in this website post: https://valvechatter.com/?p=12431

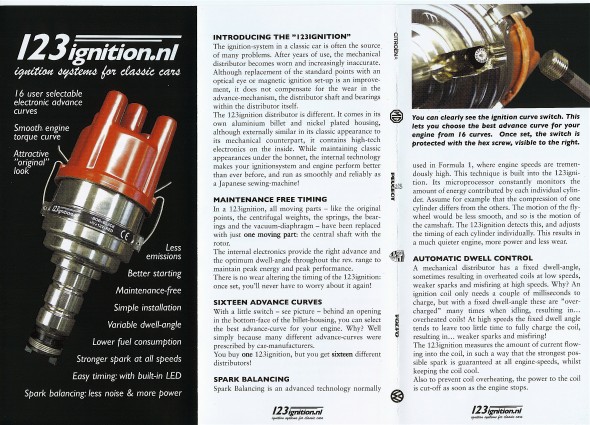
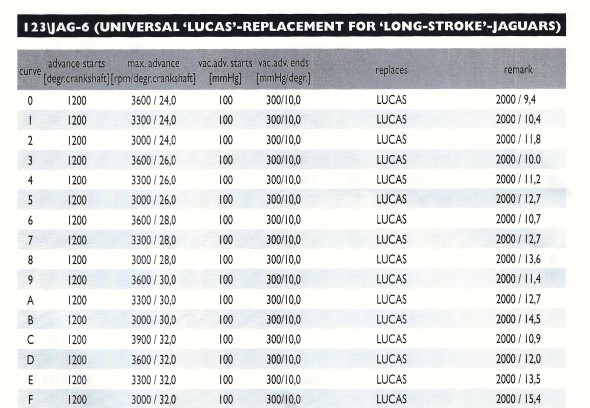
One appealing aspect of the 123 is that the advance curve is determined by simply adjusting the settings by turning an adjustment on the outside of the distributor and “clicking” it into place. Sixteen curves are available from which to select. Since my purchase the vendor has introduced a programmable bluetooth distributor that can be managed with a laptop. The model number of the unit I used is 123/GB-6-R-V.

For initial set-up, I chose the recommended “B” setting. While the distributor is a “drop-in” in for the BJ8 with an electronic tach, a kit is supplied to adapt it for the mechanical tach drive of the BT7. The shaft did need to be drilled and the drive dog from the original Lucas unit installed with a few spacing washers. My unit was supplied by a German vendor Brits’N’Pieces.

123 Distributor

123 Distributor

Coil

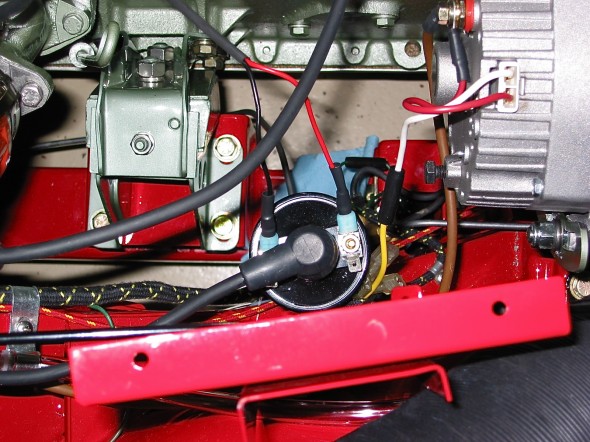
Rather than the original Lucas Coil, or Lucas Sports coil, I decided to go with the Pertronix Flame Thrower Coil in the Bloody Beast. The coil was originally mounted on top of the generator, but since I am using an alternator, that mounting position was not available. I mounted the coil on the vertical upright shroud support post.

Pertronix Flame Thrower Coil

Pertronix Flame Thrower Coil

 Ignition Wiring

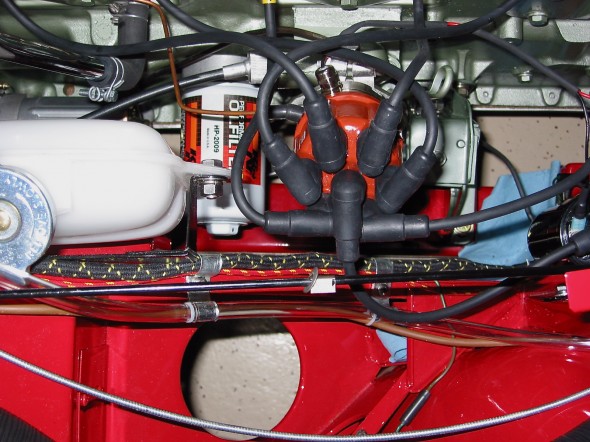
To complement the Pertronix Flame Thrower Coil, is used Pertronix ignition wiring as well.

Ignition wiring

Ignition wiring


cvcvbvcb

1-2-3 Ignition Installation

I am making this post to provide documentation for others on the subject of 1-2-3 electronic distributors and their installation in Big Healeys. There isn’t too much content regarding the 1-2-3 distributors on the Healey Forums, but I suspect that I am not the only one using this product from the Netherlands. I am not writing this to promote the product or even to encourage others to use it, although I have been very happy with my installation.

I have been using my 1-2-3 since about 2008 though I have never contributed much on the various Forums and bulletin boards about it. A programmable bluetooth unit allowing the owner to to test various advance curves using his/her laptop is now available. However, I purchased mine before that technology was on the market. You can check out their website (or at least the USA marketer) at https://123ignitionusa.com/6-cylinder-lucas-distributors/ for info on the unit I used – 123\GB-6-R-V, or for other models. The unit I purchased has 16 different advance curves. The owner is given parameters for each of the curves and you select the one you want by simply turning a small “click wheel” on the side of the distributor to your choice. In my case I am using the “B” profile.

Click here for the 1-2-3 Installation Instructions and for information regarding the sixteen advance curves.

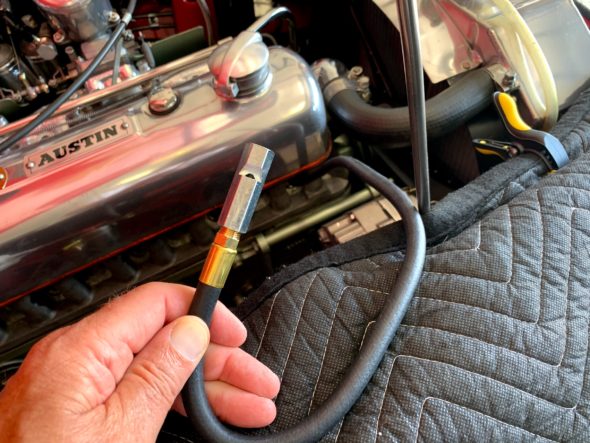
Top Dead Center Whistle Tool

I like to begin the installation process by first getting the #1 cylinder piston at top dead center on the compression stroke. There are a number of ways to accomplish this, but in my case I used a whistle on a hose screwed into the spark plug location for the #1 cylinder.

This is a neat little tool! I removed all of the spark plugs and put the car in fourth gear. I then pulled the car forward. I prefer to pull rather than push because it is much easier to watch the pointer and pulley and to hear the whistle. I passed the point where the timing gear cover pointer and the pulley mark aligned with no whistle, and concluded that the piston was elevated but on the exhaust stroke. I continued to pull the car forward and slowly approached the intersection of the marks a second time. Sure enough, as the pulley mark began to near the pointer the whistle started making its noise. This lasts a little longer than one might think. I stopped when the pointer and the pulley mark aligned again (and the whistle stopped blowing) knowing that I had achieved top dead center on the compression stroke.

The 1-2-3 distributor is not set-up out of the packaging for earlier Healeys with tachometer drives. While the distributor is a “drop-in” in for the BJ8 with an electronic tach, a kit is supplied to adapt it for the mechanical tach drive of the BT7. The shaft did need to be drilled and the drive dog from the original Lucas unit installed with a few spacing washers.

1-2-3 Distributor Rotor Alignment

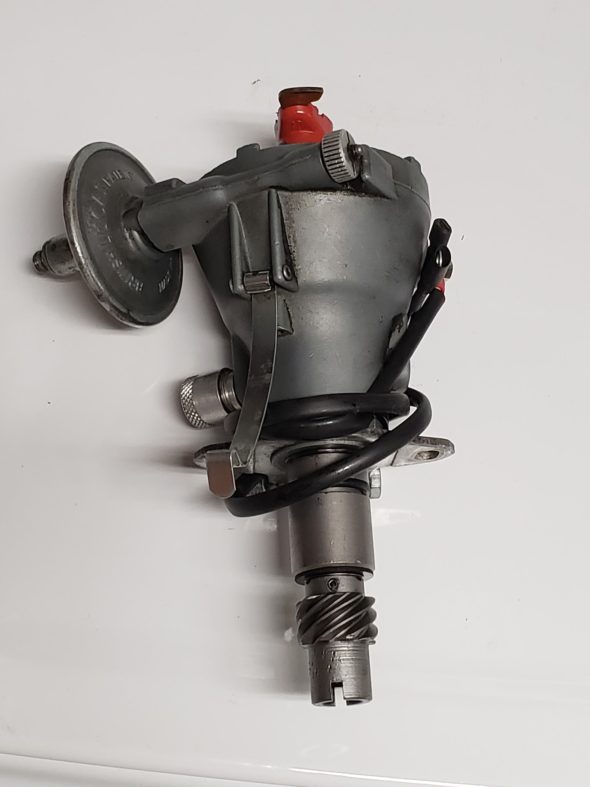
Note that with the shaft lined up identically, the Lucas DM6A rotor is in line with the slot at the bottom of the gear. (Thanks, Steve Gerow for the photo). While the 1-2-3 distributor is clocked 90 degrees out from the Lucas distributor.

Lucas DM6A Distributor

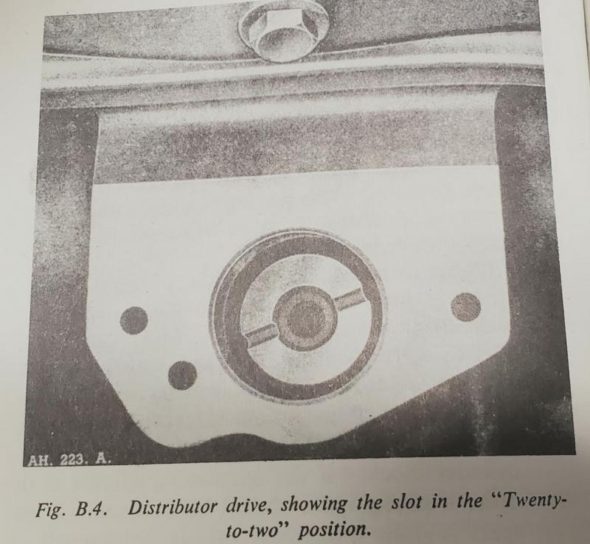
This means that unless one manipulates the distributor driving gear (AEC242) from its original “twenty-to-two” position, the rotor will not point in the 2 o’clock position to approximately the #1 cylinder spark plug when the first cylinder piston is at top dead center on the compression stroke. If you don’t mind that your #1 cylinder spark plug is fed by a lead wire from the distributor’s 5 o’clock terminal then you are ready to go. Simply begin the numbering sequence of 1-5-3-6-2-4 moving counterclockwise for your ignition wires.

1-2-3 5 o’clock Rotor Position

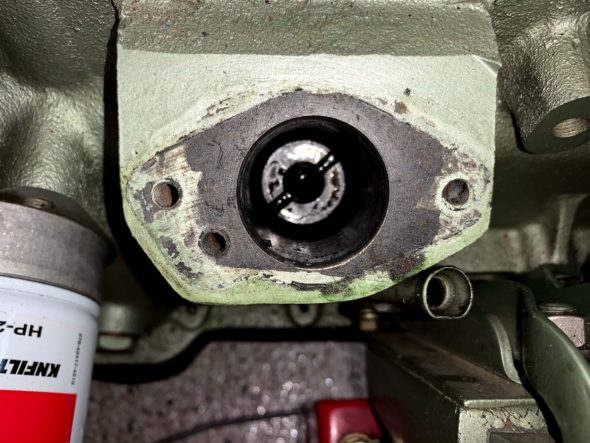
However, If you want your wiring scheme to look “normal,” this can be accomplished quite easily. Note that when you observe the tachometer spindle in the tachometer drive housing the slot in the shaft is not centered. It is offset with the smaller segment in the downward position.

Distributor Drive in the Block

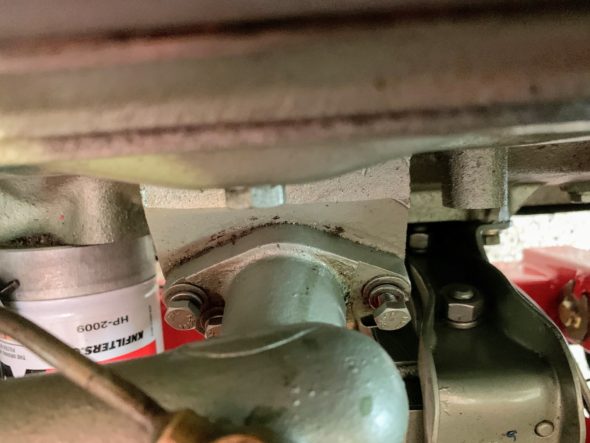
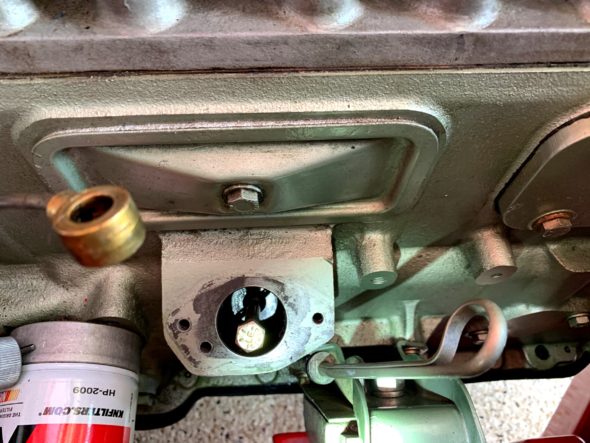
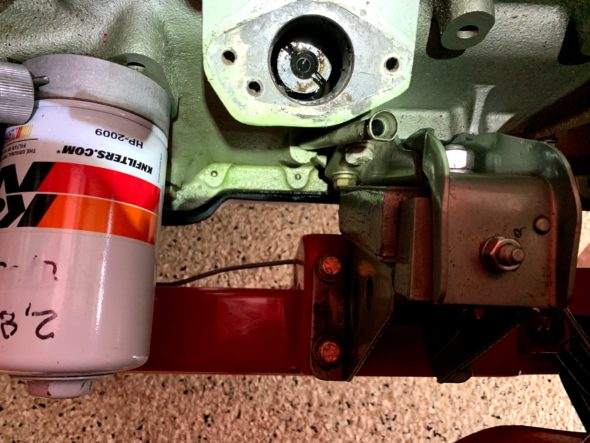
The distributor drive gear is very easy to adjust. Remove the tachometer drive housing by loosening and removing three ¼-28 x ⅞” hex head bolts.

Tachometer Drive Housing Mounting Bolts

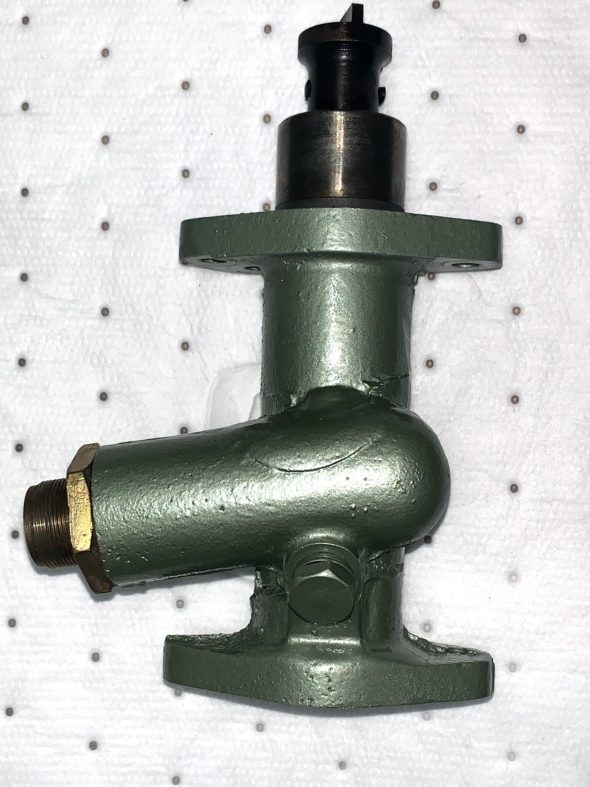
The oil feed banjo and the tachometer cable must be freed from the housing. Then slightly twist and lift away the housing. Then you can give it a fresh coat of paint while it is off the car!

Tachometer Drive Housing

The top of the distributor drive gear is then exposed in its “twenty-to-two” position.

Distributor Drive Gear

Using a 5/16”- 24 x 3 ½” bolt, screw the bolt in a few turns into the center of the drive gear.

Repositioning the Distributor Drive Gear with Bolt

Lift the bolt and the gear up slightly until you can turn the gear and move it to the “ten-to-five” position. It will drop down into position.

Distributor Drive Gear Repositioned to “Ten-to-Five”

Reassemble everything as it was removed. 

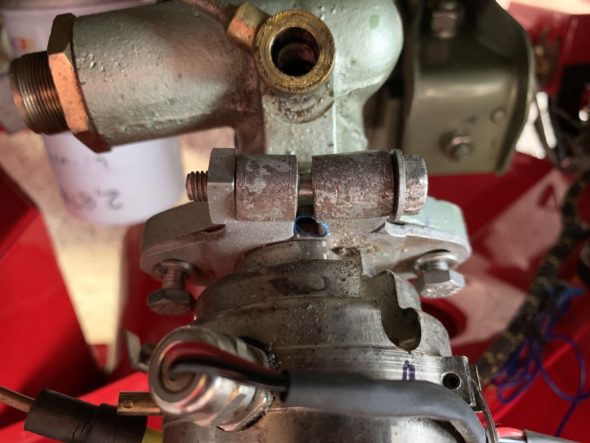
If you happened to have turned the shaft in the housing, when you reinstall it make sure that the tachometer spindle is in the correct position with the smaller segment of the offset dog in the downward position. If it is in the wrong position you will find that the distributor will not seat properly. Reinstall the distributor base plate with two ¼”-28 x ½” hex bolts and the distributor.

Distributor Bse Plate and Mounting Bolts

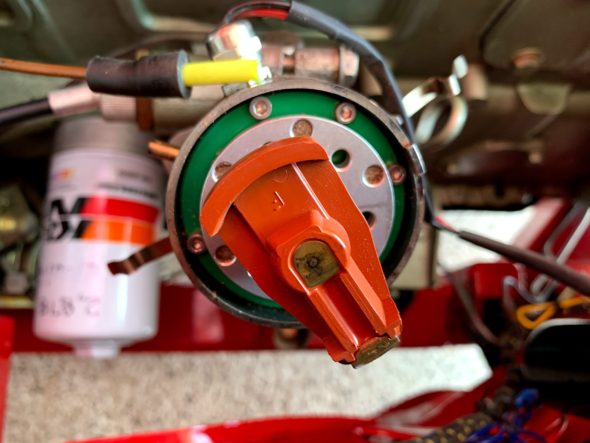
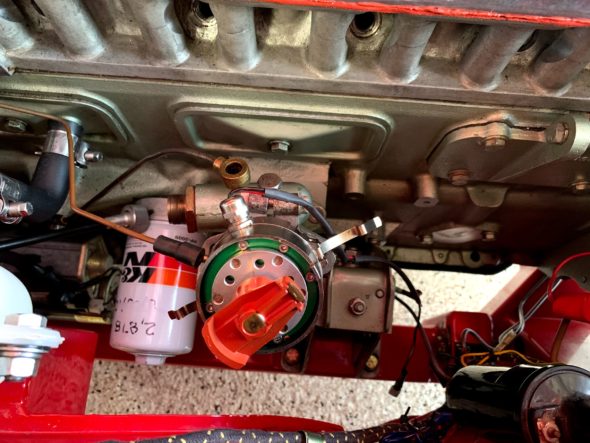
With the #1 cylinder at top dead center on the compression stroke the 1-2-3 rotor should now be adjusted to be pointing to the #1 cylinder spark plug at approximately the 2 o’clock position. 

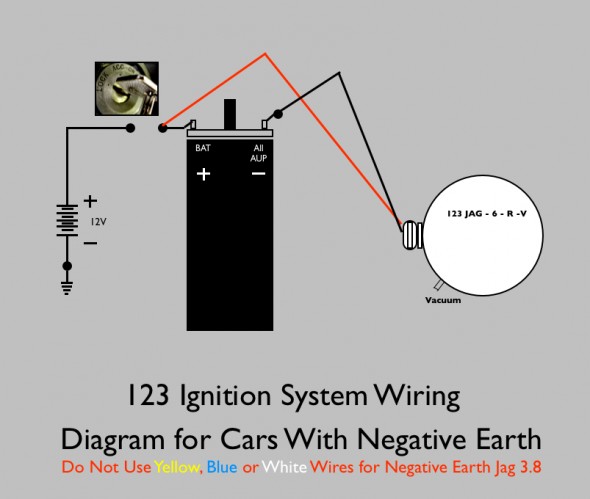
Before placing the cap on the distributor, the 1-2-3 installation instructions state to rotate the distributor body until the distributor wires (black and red) and the vacuum port are in a convenient position for connections. Then connect the red wire to the + terminal on the coil. Leave the black wire disconnected. 

To static time the 1-2-3, turn on the ignition and slowly rotate the body of the distributor and the rotor (to remove any free play) in a clockwise direction until a green LED lights. Then tighten the base plate holding the distributor. Connect the black wire from the distributor to the – terminal on the coil. Attach the ignition wire from the coil to the distributor.

Repositioned Rotor to 2 o’clock

Then install the distributor cap and the ignition wires beginning with the #1 cylinder wire to the distributor cap terminal at the 2 o’clock position (where the rotor is pointed), and then moving counterclockwise connect the other spark plug leads in the prescribed firing order 1-5-3-6-2-4. Attach the ignition cable from the coil to the distributor, and connect the vacuum hose to the distributor. The engine should now start and enable running to get the engine to operating temperature before final ignition timing.

To fine tune the ignition timing with a stroboscope timing light, disconnect the vacuum hose and plug it. Then set your timing in accordance with specifications – in my case, 15 degrees BTDC.  

That should do it. I hope this will be helpful to a Healey owner trying a 1-2-3 distributor for the first time.

Prepared by Lin Rose
July 15, 2020


Chapter 79 Week Forty-Nine November, 19 2007


I am now waiting on Jack Harper to get free from his shop duties at Coachworks to come by the house and help me with starting and tuning the engine. While waiting, I took a few moments to check on 
sealing the firewall from fumes and heat emitted from the engine bay. I turned off the the lights in the garage and put a shop light in the engine bay and then inspected the firewall for any light coming through the firewall. As expected, I did find a few places, so I used a little 3M body caulk to seal the holes.

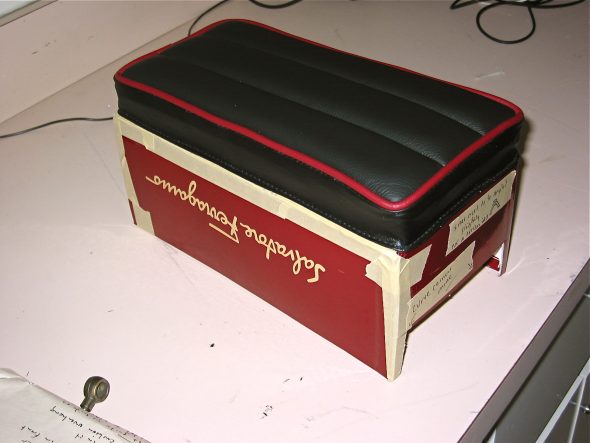
Another variance from originality on my project is the “personalized” arm rest. Its standard location makes it virtually useless as a functioning arm rest while driving. I am going to make a wooden box to fit the arm rest pad sourced from Heritage Upholstery and Trim to serve as a storage console and to lift the height of the pad to make it work as an arm rest while driving. I will cover the box with matching black carpet and hinge it at the rear of the pad. To begin my little project, I made a mock-up of the box from a cardboard shoebox. For me, 2 3/4” appeared to be the proper height of the box, with the cushion on top of the box.

Arm Rest Prototype

Jack Harper came over to the house and we readied the engine for starting. First, we connected the cables for the throttle and choke. While the previous injection of oil through the engine should have sufficiently lubricated everything, I still pulled the spark plugs and turned the engine with the starter until the gauge showed oil pressure. I put 5 gallons of fuel in the tank and we turned on the ignition to try out the fuel pump. The carb float chambersfilled and we were then ready to try firing up the Bloody Beast.

We reinstalled the spark plugs, turned on the ignition and hit the starter button. After about 10 seconds we had the engine running! Jack ran the engine up between 2,000 and 2,500 rpms and then we adjusted the carbs to bring the idle down to about 700. After 30 years another Healey is saved and running. It was an exciting moment.

I did have two problems to be fixed. I had taken apart the hot water valve, cleaned it, reassembled and installed it on the engine. It leaked! So I ordered a new one to replace the original. The second problem was my own stupidity! I did not replace the  Toyota gearbox real oil seal and I quickly discovered that I should have as a pool of MT-90 formed under the car. New seal ordered also. Cannot wait to get both pieces, install them, and get her running again!
Ignition

Spark Plugs

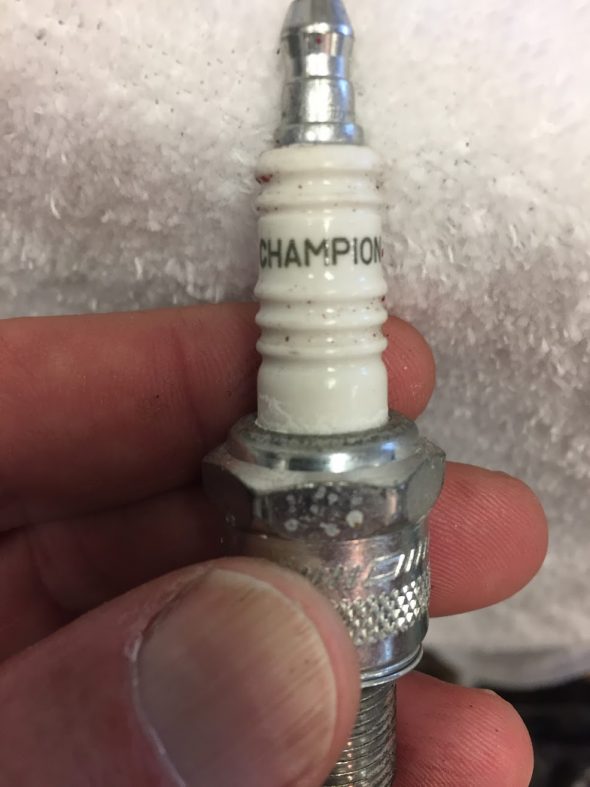
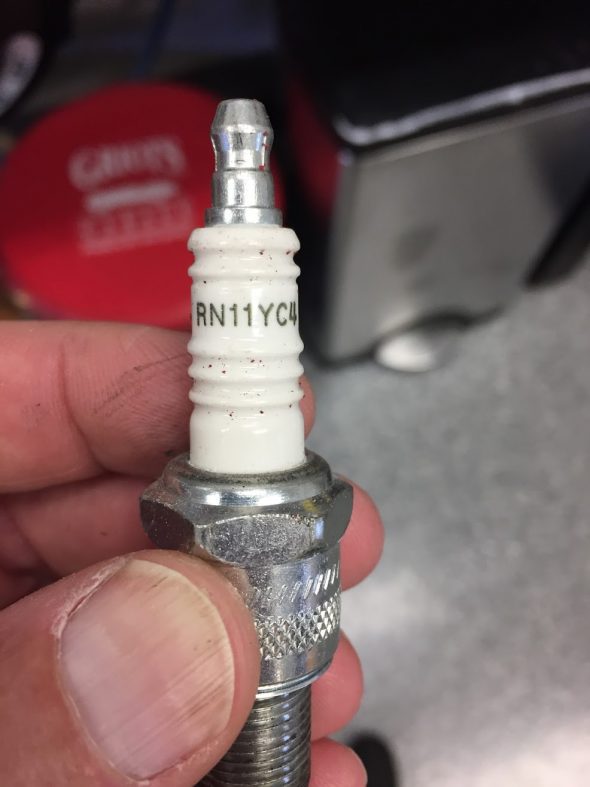
I don’t know if I will stick with the Champion plugs or not, but Mike Gassman installed Champion RN11YCA plugs when the engine was rebuilt and they remain in the engine at this point.

Champion Spark Plug Jag MK2

Champion Spark Plug RN11YC4 Jag MK2

Distributor

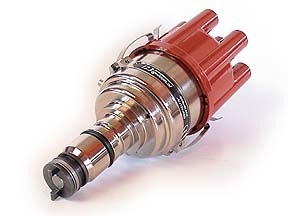
There are several options available for upgrade to an electronic ignition. I used a 123 Electronic Distributor on my 1960 Austin Healey 3000 and was very pleased with the installation so I ordered the same distributor designed for the Jaguar XK motor – negative ground. The company that produces the distributor is located in the Netherlands. This is the link to their website: http://www.123ignitionusa.com/jaguar.html.

I ordered the “Jag 6-R-V” from Classic Jaguar, 9916 Hwy 290 West, Austin, TX 78736     (512) 288 8800 Austin, TX. http://classicjaguar.com/cj/ign_sys.htm for $425.00.

This web site provides some useful commentary on the 123 distributor, although it should be clear that I am using the Jag specific model, not the generic british model.

http://jaguaretype.wordpress.com/home/technical/123-distributor/

123 Distributor

123 Distributor


Directions for Installation Provided with the Distributor

WITH THE OLD DISTRIBUTOR STILL IN PLACE

1. Mark the output towards cylinder #1 on the cap.

Remove the low voltage cable from the distributor to the coil, and remove the cap.

Now ask someone to crank the starter, and make a note: is the rotor rotating clockwise (CW) or is it rotating counter-clockwise (CCW)?

2. Crank the engine in its normal direction until you see that the rotor points toward the mark you made for cylinder #1, and verify that the static timing-marks of your engine align.

Do not rotate the engine anymore!

3. Check the firing order of the cylinders.

Use your workshop manual, or follow the cables from the cap to the spark plugs.

You start with cylinder #1, and remember to count in the direction that you have found earlier.

Make a note of the firing order, too. E.g. ‘1-4-2-6-3-5.’

4. Check which advance-curve is required for your engine. Use your workshop manual, check the model number of the existing distributor. Also compare the curve-listings for the various models in this manual.
 

OUT WITH THE OLD DITRIBUTOR, IN WITH THE 123 IGNITION!

5. Turn the ignition off, and (with the engine still in the static position for cylinder #1) and remove the old distributor.

6. Using an 8mm Allen wrench, open the cap at the side of the 123 Ignition. Rotate the micro-switch to select the proper advance curve using a small screw driver. Close the cap tightly.

123 Ignition JAG-6 Curves

123 Ignition JAG-6 Curves

7. Mount the unit carefully, and ensure that the drive-dog mates correctly. Find a position so that the vacuum nipple and cables come out conveniently. Fasten it in such a way, that you can still rotate the new distributor.

8. Follow the appropriate wiring diagram on the last two pages of the manual, but leave the black wire unconnected for now.

9. Turn the ignition on. A timing LED shines through one of the six holes in the aluminum disc. Rotate the body until the LED is “off.”

Now slowly rotate the body OPPOSITE to the direction that you have found under point 2, until the green LED just lights up. While turning the body, also press the rotor in the same direction to remove any free-play in the drive gear. Now, tighten the 123 Ignition securely.

10. Connect the black wire to the coil. Connect the spark plug leads in the proper sequence to the new cap (see point 4), starting with cylinder #1, to which the new rotor is pointing. Also connect the high voltage lead from the coil to the center position of the cap. Attach the cap to the 123 Ignition. Keep low-voltage wiring well away from the high-voltage cables and from moving parts. Do not connect the vacuum tube yet.

123 Ignition Wiring Diagram

123 Ignition Wiring Diagram

11. You can now start your engine. Use a stroboscope to adjust the maximum advance for your engine. If that is correct, you can attach the vacuum-tube to the nipple of the 123 Ignition with the ‘V’ option.

Coil

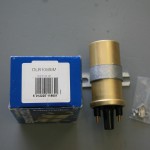
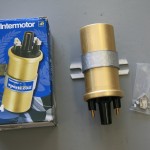
I also ordered the coil recommended by Classic Jaguar as an upgrade for the original unit. It was available for $35.00. It is an Intermotor Sports Coil.

Intermotor Sports Coil

Intermotor Sports Coil

Intermotor Sports Coil

Intermotor Sports Coil


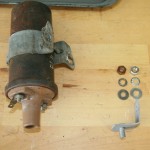
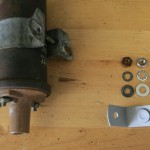
Extension Assembly for Coil Bracket

There is a small bracket that mounts to the coil bracket that is used to attach the coil to the front of the cylinder head.

Coil Extension

Coil Extension

Coil Extension

Coil Extension

Bracket Extension

Bracket Extension


Ignition Wiring

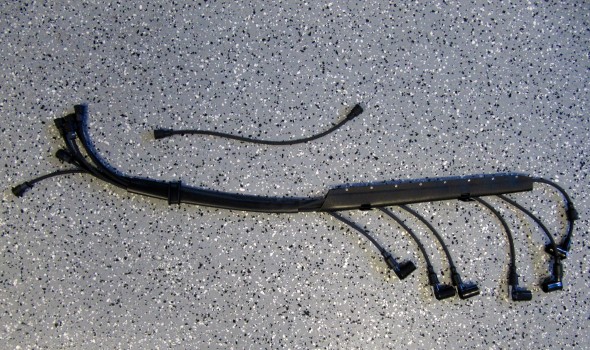
Xks Unlimited fabricates an ignition wiring loom with Petronix wiring and press on leads for the cap of the 123 distributor. While expensive, the loom will result in a neat package across the top of the motor.

Pertronix Ignition Wiring Loom

Pertronix Ignition Wiring Loom