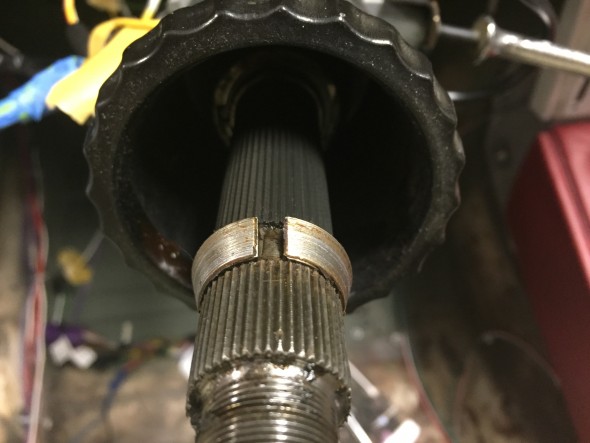
Steering/Trafficator

Steering

I made no modifications to the original steering system consisting of the steering box, steering idler, and steering arms. However, both the steering box and idler were completely rebuilt.

Steering Wheel

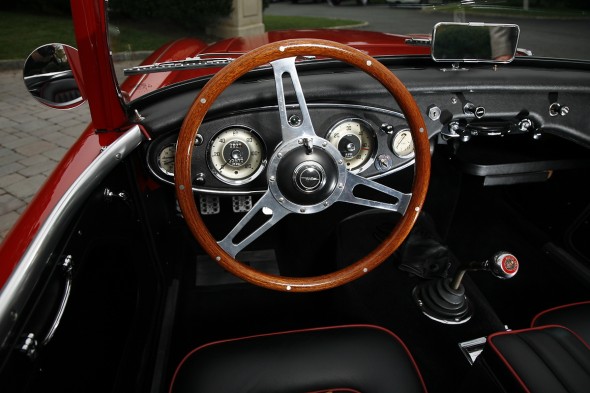
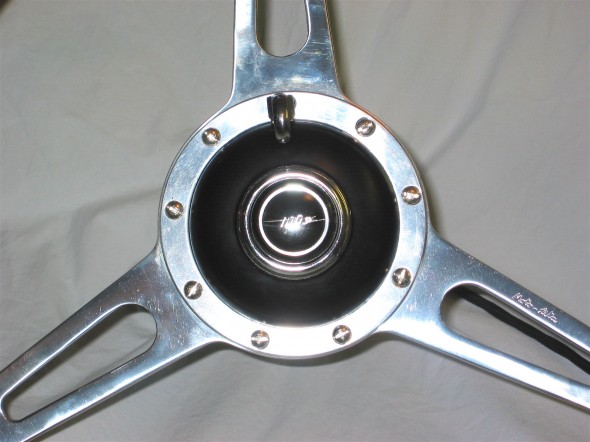
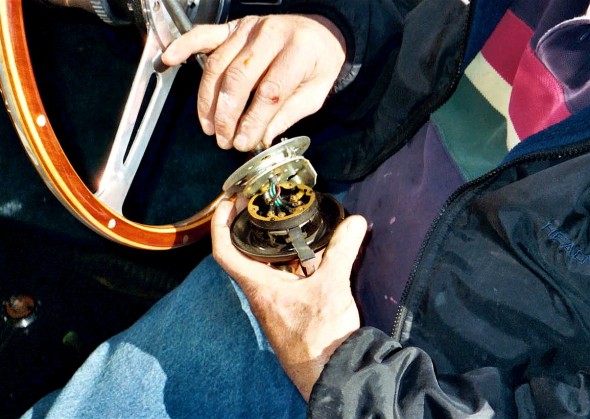
I did replace the original steering wheel with a Moto-Lita Mahogany Wood Wheel. This also requires adding a new hub.

Moto Lita Wheel

Moto Lita Wheel

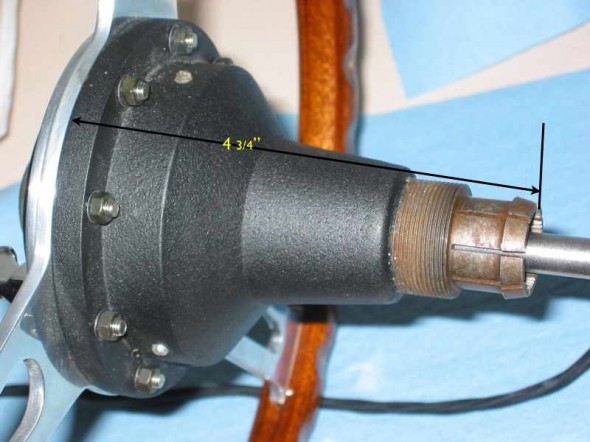
Moto-Lita Hub

Moto-Lita Hub

Control Head/Trafficator

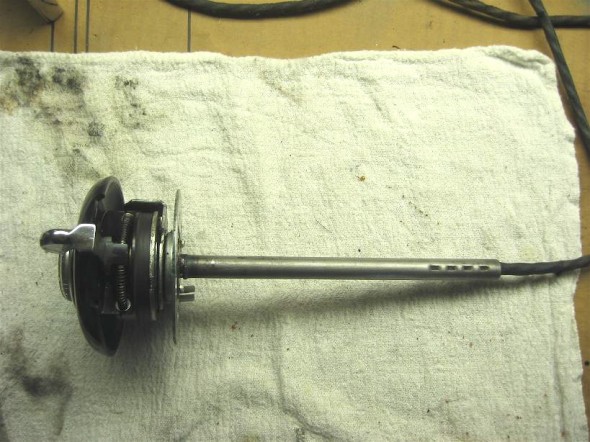
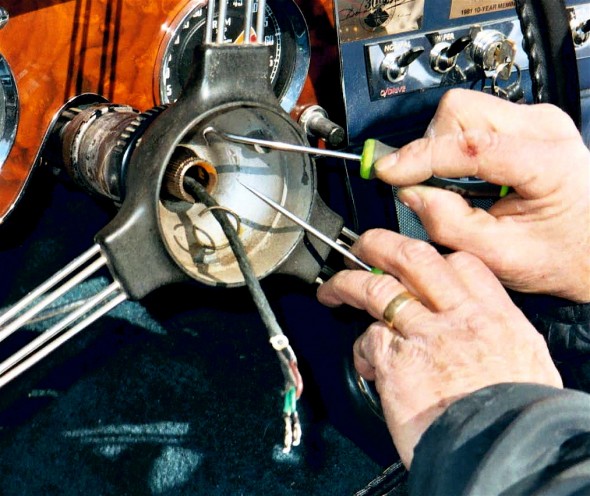
The control head or trafficator, as it is more often called, often needs a rebuild on our forty plus year old cars. The control head has the turn indicators with a self-canceling feature, and the horn button with wiring. I rebuilt my control head myself and benefitted from some of the images that Tracy Drummond had assembled. To try to help others I put together the following article:

Control Head (Trafficator) Rebuild for an Adjustable Wheel

July, 2005 – Revised October 2, 2005

Well, I have been putting off the task of rebuilding the control head to prepare it for installation in my Moto-Lita wood rim steering wheel. I rebuilt the original control head when I was in college and I don’t recall it being a fun task. Although, back then I did so without any instruction. Today I have the benefit of helpful tips from Norman Nock, Michael Salter, Steve Byers, John Trifari and Tracy Drummond and others. The notes below and some of the images are “borrowed” from their work. Tracy’s photos were particularly helpful.

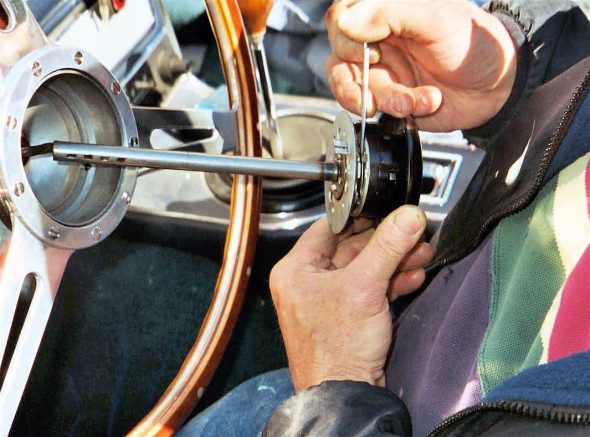
If your control head or trafficator is fine, but you want to install a restored or new steering wheel, Roger Moment has provided some useful tips for partially disassembling the trafficator to permit switching out the wheel without pulling the wiring. His guidance is provided at the end of this article.

For starters I now know that the way to begin is not to pry up the bent tabs at the back of the unit! Instead, the process is much simpler but less obvious. Turns out the whole job was not as bad as I had remembered.

In my case I needed to completely rebuild my control head because the signal lever was broken and because I needed to install new wiring. I also wanted to improve the finish of the Bakelite head which had turned a bit brown with age. If one only needed to replace the wiring the suggestions from Michael Salter proved to be very helpful. That was my first step.

Read through these instructions completely before starting the disassembly!! If you don’t want to try this then I understand that Vic Wright (cv@spiritone.com) does a great job of rebuilding used units!

On the steering wheel, you will see three set screws on the steering wheel hub, forward of the spokes. Loosen (probably remove, to avoid losing them) the screws. The four wires that go to the control head need to be disconnected from the harness at the front of the car not far from where they exit the long stator tube at the steering box. The job is made easier if one simply cuts the bullet connectors off the wiring and then solders a wire or ties fishing line to the wire. Having the line attached to the wiring will make inserting the new wiring much easier than it would otherwise be. The line should just rest in the steering column until the replacement is ready to install. The control head with a short stator tube and the wiring can then be removed from the steering column by pulling straight out (not twisting). Neil Trelenberg suggests drawing a line on the stator (short and long) tube with a felt marker as a guide for realigning later.

Now to the disassembly of the control head unit:

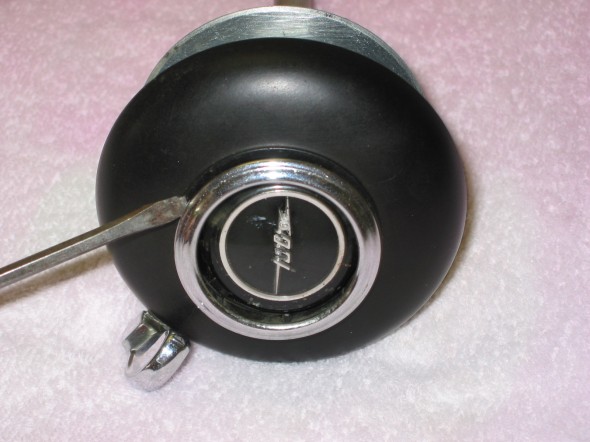
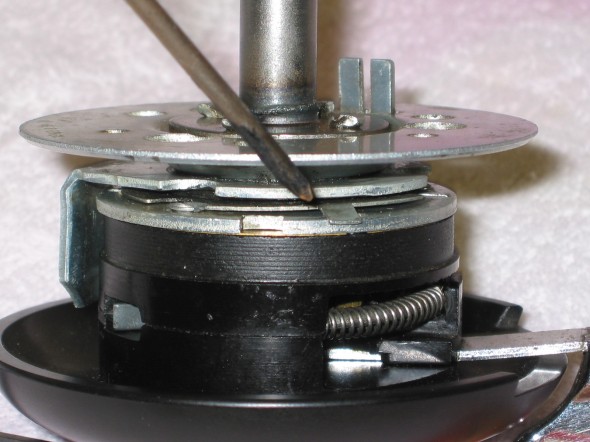
First, carefully pry the horn button trim ring away from the bakelite head being careful not to scratch it.

Trafficator Rebuild Image 1

Trafficator Rebuild Image 1

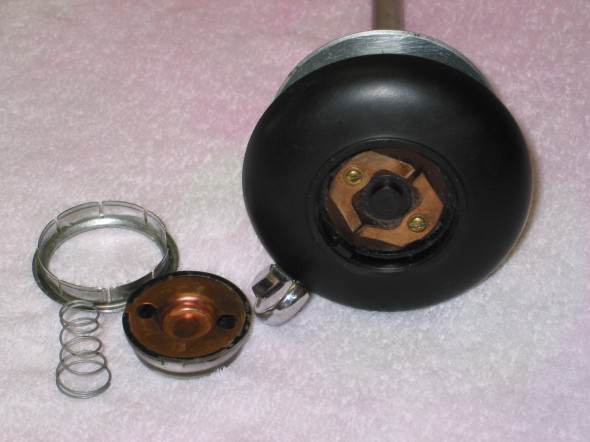
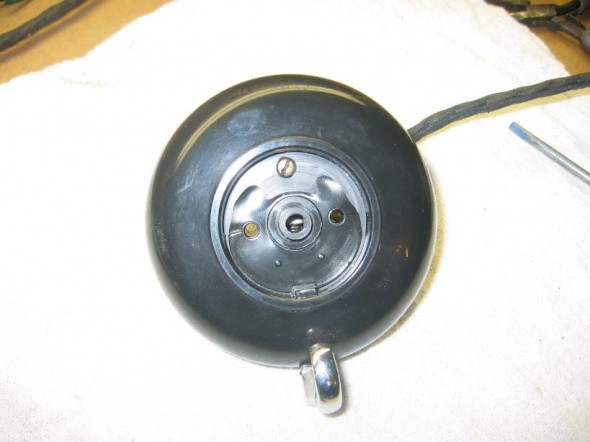
Once the horn button is loosened, the horn spring will be revealed. Its small diameter end faces to the bakelite head. The laminated blades of the horn switch secured by two brass screws also become evident.

Trafficator Rebuild Image 2

Trafficator Rebuild Image 2

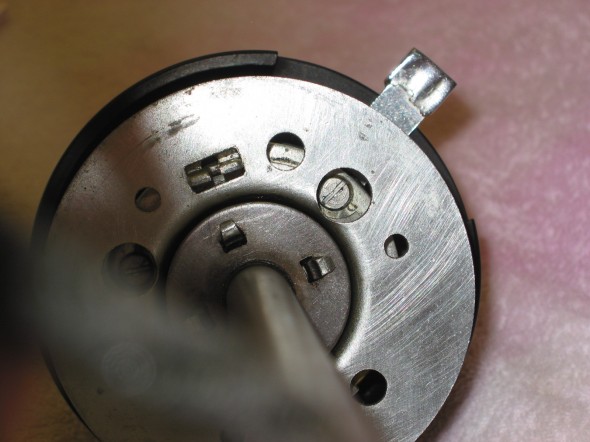
Examine the entire assembly. On the back of the unit, viewed from the side, a small tab bent down into a slot can be observed.

Trafficator Rebuild Image 3

Trafficator Rebuild Image 3

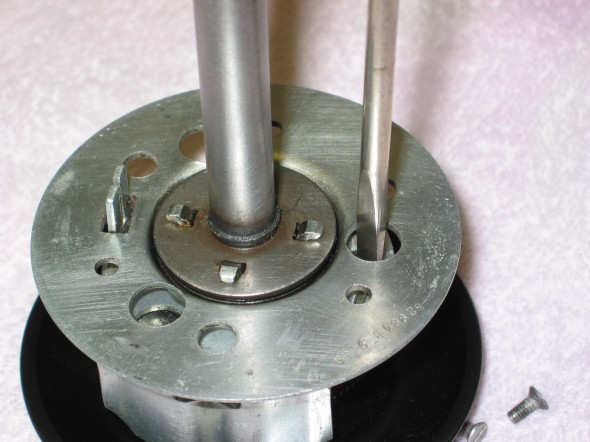
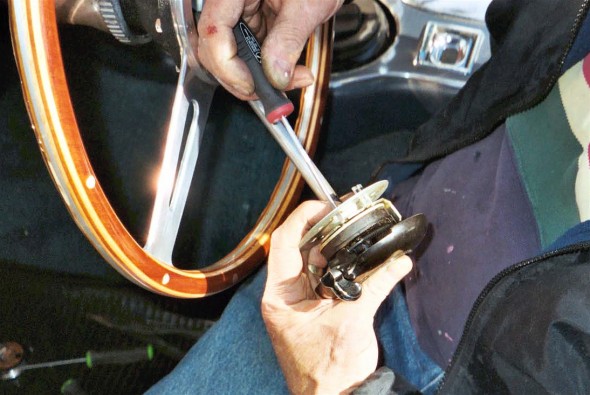
The tab can be pushed up so that it slides on the flat plate and the unit can be rotated slowly. Doing so provides access through 3 holes in the base mount plate to 3 slotted screws.

Trafficator Rebuild Image 4

Trafficator Rebuild Image 4

Before removing the three screws, make a note or reference mark of how the two halves of the unit secured by the three screws goes together. Then remove the screws. The correct orientation of the turn signal lever is straight up, but if the two halves are oriented incorrectly, the turn signal lever will be either pointed down, or off to the side.

Trafficator Rebuild Image 5

Trafficator Rebuild Image 5

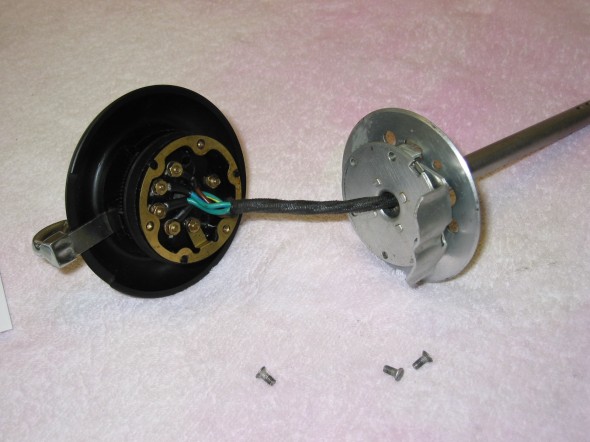
The stator tube, base plate, locating plate, the base mount plate and assorted washers and spring can then be separated from the bakelite mounting plate and head. This assembled unit does not need to be disassembled. It can be pulled off the wires and set aside for assembly later.

Trafficator Rebuild Image 6

Trafficator Rebuild Image 6

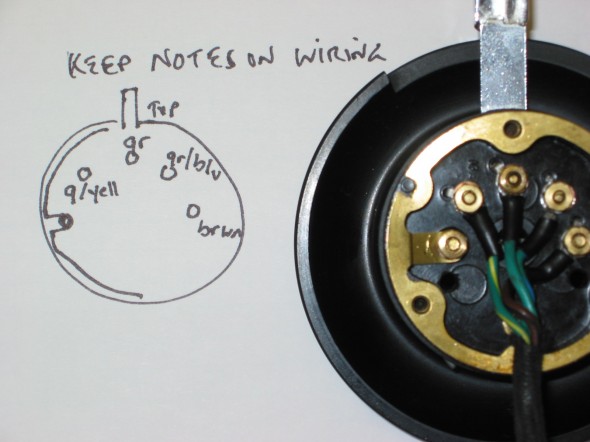
Examine the back of the mounting plate. There are six nuts visible. Three are for the turn signal switch, two are for the horn (one goes through the brass gound ring) and the one without an attached wire is to hold the head and the mounting plate together (It is barely visible in the photo under the wiring sheath). Make a drawing to illustrate the color code and where each of the wires should reconnect to its proper fitting.

Trafficator Rebuild Image 7

Trafficator Rebuild Image 7

If your plan is to install a new wiring harness only and you do not wish to disassemble the control head to access the turn signal switch it is IMPORTANT to install the new wires onto the screws one wire at a time.

A. The screw on the right in the photo is accessed under the horn button. Hold it with a screw driver and loosen the nut holding the wire, remove the nut, change the wire, refit and tighten the nut.

B. The nut second from the right is held in place by a hex head screw recessed in the bakelite mounting plate. The turn signal lever must be moved so that it is aligned behind the screw/nut. It will hold the screw in place permitting removal of the nut and old wire, change the wire and refit and tighten the nut. Do not let the turn signal lever slip while doing this procedure or you will likely be disassembling the complete unit!

C. Reposition the turn signal lever to the center position and repeat B. above for the screw/nut located third from the right.

D. Move the turn signal lever behind the screw/nut located fourth from the right and repeat B. above.

If all you are doing is replacing the wiring you are finished. Leave the screw/nut to the far left, through the horn ground ring, alone.

Feed the wire through the base plate and the stator tube. Reinstall the three base plate screws with the trigger opposite the turn signal lever. I found it easiest to install the screws with the unit on its side. Don’t forget to then reposition the thin plate with the locating tab to the slot and push it down. Reinstall the horn button, spring and chrome trim ring. Note that the button and ring have a locating notch that matches up with the bakelite head.

I recommend cutting the bullet connectors off the wires, solder the wire or tie the fishing line left in the steering column, to the new wires and slowly pull the new wiring harness through the stator tube and out the end of the steering box. The fit of the harness in the tube is tight so it might be best to tape the wire ends together as they are pulled through. The short stator tube fits down and into the longer stator tube in the column. The tubes go together in only one orientation, directed by the dimples found on the side of the short tube.

If you are installing the control head into a non-stock wooden steering wheel you may need to install a shim (I used the plastic top of a yogurt container) inside the hub between the hub and the control head to move the control head toward the driver slightly so that the turn signal lever does not contact the wheel ring. Then reinstall the three set screws to tighten the control head to the wheel hub.

Cleaning or repairing the turn signal mechanism. 

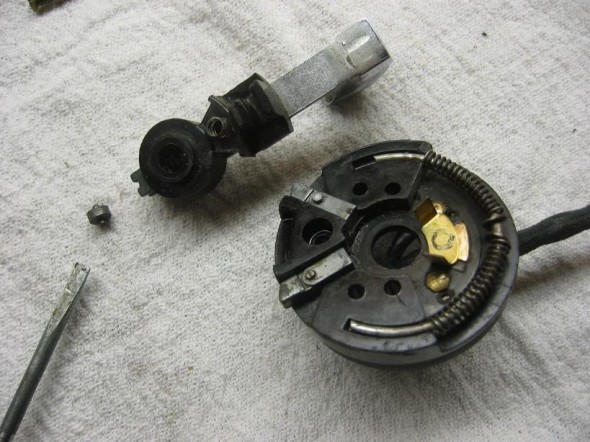
Remove the two screws holding the laminated blades of the horn switch under the horn button. The horn switch will lift out. The third screw can then be removed and the bakelite head can then be separated from the mounting plate.

Trafficator Rebuild Image 8

Trafficator Rebuild Image 8

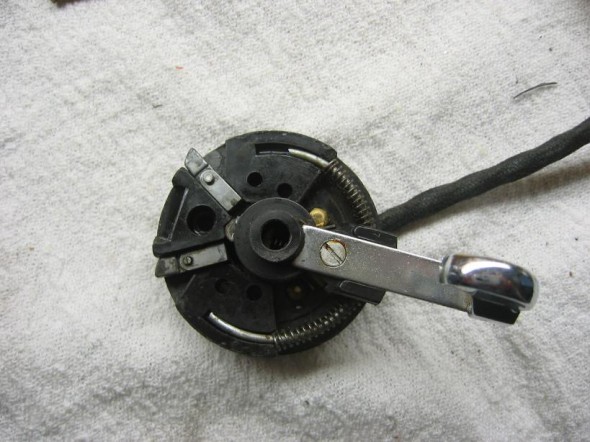
The turn signal lever is attached with one screw to the back of the bakelite mounting plate. Underneath it is a curved wire with a spring on each side of the lever.

Trafficator Rebuild Image 9

Trafficator Rebuild Image 9

Trafficator Rebuild Image 10

Trafficator Rebuild Image 10

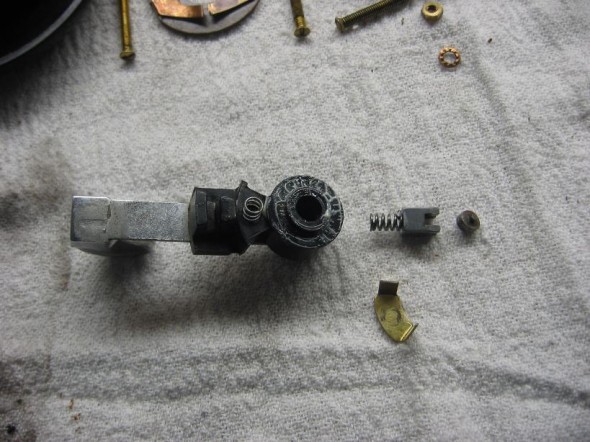
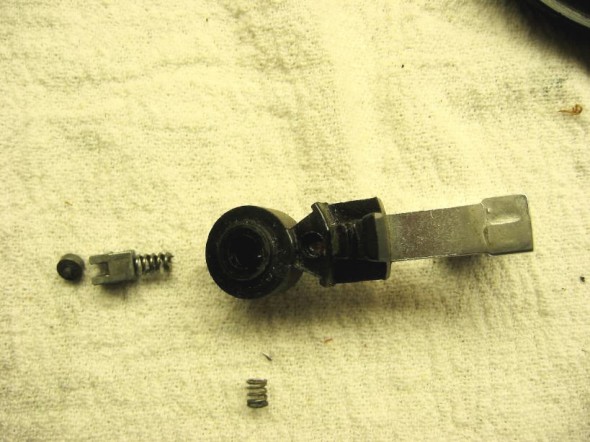
There is another little spring and ball at the bottom of the turn signal lever.

Trafficator Rebuild Image 11

Trafficator Rebuild Image 11

If you carefully remove the single screw to separate the  lever from the assembly, the springs and small parts should stay in place. Note how they should be reassembled, then take apart, clean and lubricate with a little lithium grease.

Trafficator Rebuild Image 12

Trafficator Rebuild Image 12

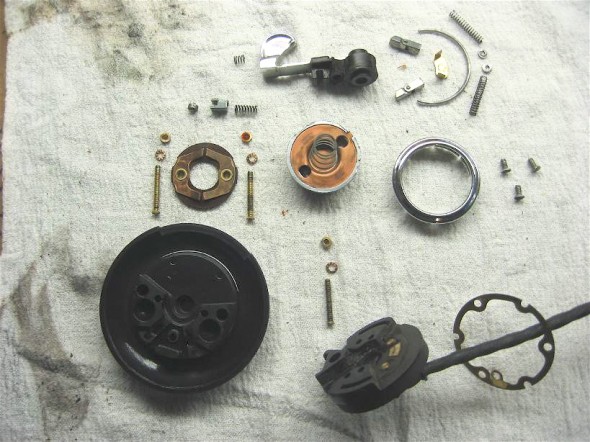
If you experience an explosion of parts, don’t be alarmed. It will all go back together! All components are identified in the photo below:

Trafficator Rebuild Image 13

Trafficator Rebuild Image 13

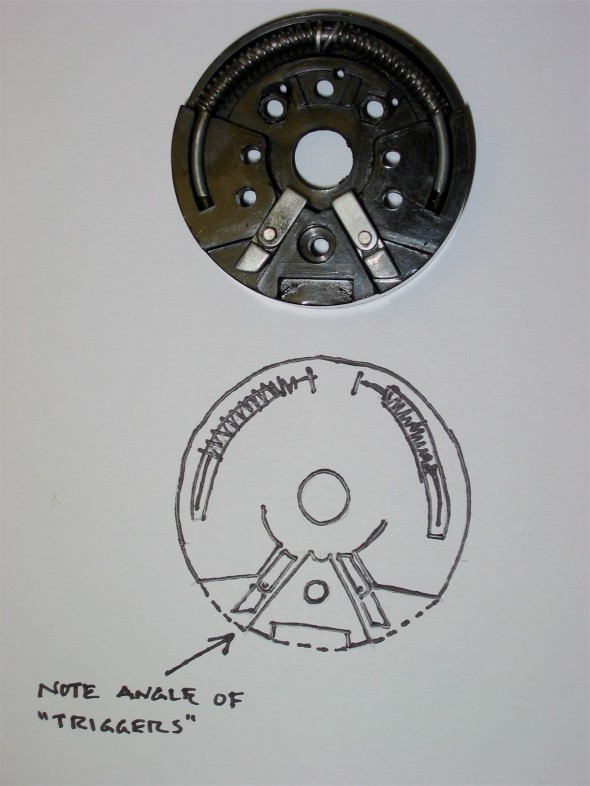
The proper positioning of the two hinges or “triggers” is important. They have angles on the end that fit opposite each other. They need to be placed as seen in the image and drawing for the canceling switch to work. Before reassembly of the complete unit, now is a good time to refinish the bakelite if it is needed.

Trafficator Rebuild Image 14

Trafficator Rebuild Image 14

Refinishing the Bakelite Head

I have lost the source of these instructions or I would give attribution, but clean the head well and wipe with a liquid cleaner like the type used before spray painting metal. Then apply black India ink. I used two coats letting the first coat dry for about an hour before applying the second. Then use black paste shoe polish rubbed in well. Polish. Reapply paste and polish again. Finally, apply a coat of carnuba wax for protection and final shine. Be very careful to not drop the bakelite head! I recommend doing all the polishing over a carpeted floor in case the head is dropped. This should result in a control head that looks brand new.

Trafficator Rebuild Image 15

Trafficator Rebuild Image 15


Assembly

Carefully place the head and the mounting plate together pushing the spring at the end of the turn signal lever into the mounting plate. Holding the two pieces together install and tighten the single screw and nut at the bottom of the unit. This screw/nut will securely hold the two pieces together while the horn switch screws and nuts are inserted and tightened.

Trafficator Rebuild Image 16

Trafficator Rebuild Image 16

I recommend, based on the comments of others and my own experience, cutting the bullet connectors off the wires, solder the wire or tie the fishing line left in the steering column, to the new wires and slowly pull the new wiring harness through the stator tube and out the end of the steering box. The fit of the harness in the tube is tight so it might be best to tape the wire ends together as they are pulled through.

Steve Byers took a slightly different approach that certainly makes taking the wiring through the stator tube easier. He commented, “although I have been able to pull the harness out of the column with the connectors installed, I have never been able to put it back in no matter how tightly I taped/wrapped the connectors together.  The last time I did this, I installed a new steering column harness as a part of a general re-wiring.  To make it easy on myself, I cut off all the bullets from the new harness (leaving about 3/4″ of the wire attached to each), fed the harness through, and then soldered the bullets back on with a piece of heat-shrink tubing over the splice.  The key is, I did not twist the wires together before soldering but soldered them together as they lay side by side.  That way, next time the harness needs removing it will be easy to remove the bullets without damaging the wire, and that can be done many times without damage to the wires.”

The short stator tube fits down and into the longer stator tube in the column. The tubes go together in only one orientation, directed by the dimples found on the side of the short tube.

If you are installing the control head into a non-stock wooden steering wheel (Moto Lita, Derrington) you may need to install a shim (I used the plastic top of a yogurt container) inside the hub between the hub and the control head to move the control head toward the driver slightly so that the turn signal lever does not contact the wheel ring. Then reinstall the three set screws to tighten the control head to the wheel hub. The job is complete! Now the control head (horn and turn signal control switch) will look and work as well as the rest of your car.

Roger Moment’s tips for installing a new steering wheel or repairing the trafficator without removing the wiring.

For those who are really bold and experienced Roger Moment has informed me that it is possible to complete a trafficator repair or replace a steering wheel without having to pull the wires up through the stator tube. I have no personal experience with this approach so I cannot comment on the degree of difficulty, but if Roger says it can be done, then it can! However, he emphasized that it should only be attempted by those who are totally familiar with the disassembly of these units.

The relevant steps are:

Unclip the end of the steering column harness so that there is about 8″ or more of slack.  This is accomplished by locating the clip that holds it to the cross brace in front of the radiator.

Back off the three retaining pointed screws in the steering wheel hub.

Pull out the head enough so that it can drop down across the front of the steering wheel.

Push up and rotate the retaining tab as seen in Image #3 and below in Image 17.

Trafficator Rebuild Image 17

Trafficator Rebuild Image 17

Remove the three screws securing the mounting to the backing plate.

Trafficator Rebuild Image 18

Trafficator Rebuild Image 18

Then separate the backing plate:

Trafficator Rebuild Image 19

Trafficator Rebuild Image 19

One can then remove the wires as described earlier in this article, using the technique with the lever to “back up” the contacts so that they don’t fall into the head.  It is very important to replace the nuts immediately after removing each wire!

Once the wiring has been removed from the switch assembly, if you are only going to repair it you can leave the wire loom in place in the short sliding part of the stator tube. However, if you are planning on removing the steering wheel to replace it, you must first draw the wires back through the short tube.   This is easily done by first folding only twoof the eyelets tightly back against the wires, leaving the other two extending straight. This creates a “package” that is compact enough to slide through the tube.  Next remove the circlip and pull the steering wheel off the shaft.

Trafficator Rebuild Image 20

Trafficator Rebuild Image 20

Roger indicates that this “in-car” method will also work on non-adjustable steering set-ups (on 100s and those few 6-cylinder cars that are equipped as such).  However, here the entire stator is drawn up after loosening the clamping nut. The steering box oil will drip out around the wires at the end during the time that the tube is partially withdrawn. As soon as the wires are freed, the tube can be re-inserted and the nut re-tightened.  You’ll only lose a bit of the oil and it still beats reinserting the entire tube.

Roger suggests that if you do draw out the tube, use a 3/8″ bolt with a good 1″ or so of smooth shank to re-insert into the nut and olive at the steering box to keep most of the oil from draining out.  This bolt is then removed when the tube and wires are put back through.

Happy Healeying and Cheers!

Lin Rose

1960 BT7

1959 Bugeye


July 7, 2005

Revised October 2, 2005

Click this link for a pdf of the trafficator rebuild: Trafficator Repairs Low Res


Chapter 8 – Disassembly

Fresh Air Intake Assembly –  Three screws, two with nuts and one welded onto the tube secure the assembly to the superstructure. Disconnected the air control cable.

Fresh Air Intake Assembly

Fresh Air Intake Assembly

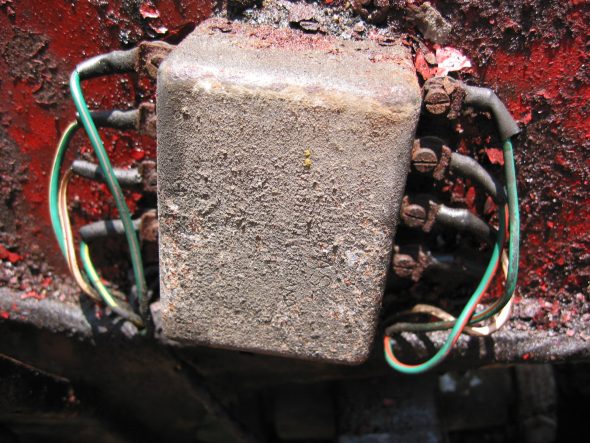
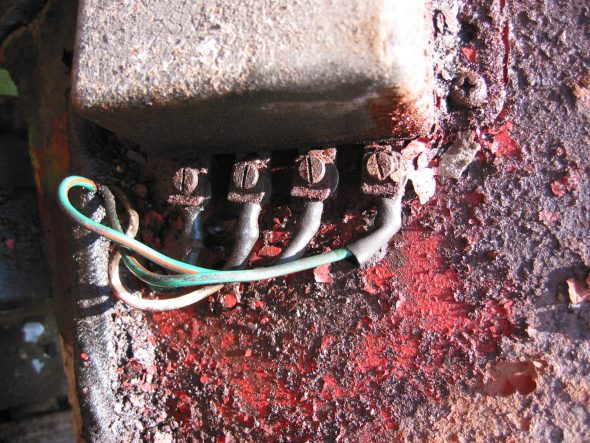
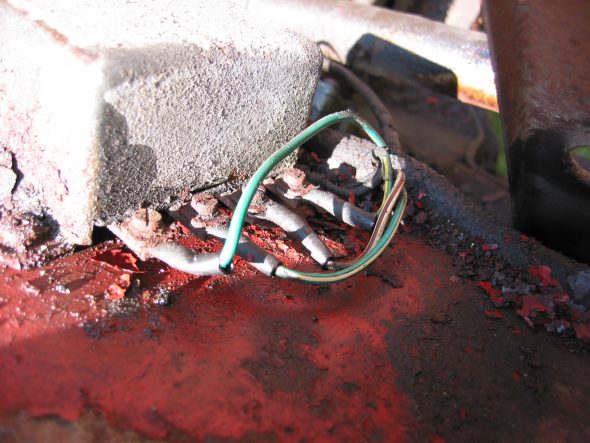
Flasher Relay –  Two cross head screws on top, one on bottom. All have nuts welded on the outside of the wheel well. The bottom screw also holds a wiring harness clamp and the ground wire. Starting from top left and going down – first wire is green with pink stripe, second is green/white stripe, third is white/brown stripe, and fourth is green/yellow stripe. Starting from the right top and going down – first wire is green/brown stripe, second is green/red stripe, third is white/purple stripe and fourth is green/? Stripe. Black ground wire is at bottom.

Flasher Relay Wiring 1

Flasher Relay Wiring 2

Flasher Relay Wiring 3

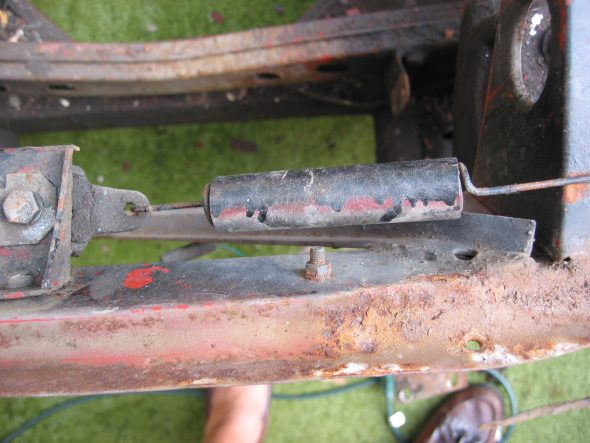
Bonnet Latch Support Bracket, Lever and Spring –  Note that the left side of center has a rubber tube over the spring and extension rod.

Bonnet Latch Return Spring

Bonnet Latch Rod

Bonnet Latch Support Bracket – The bracket is secured by two bolts and nuts.

Bonnet Latch Support Bracket

Bonnet Latch Return

Wiring harness extension for lights and horns – Two clamps located by screws and nuts at the front of the car.

Wiring Harness Clip Screws

Wiring Harness at Front of Car

August 3, 2002

Rear Axle and Related Assembly

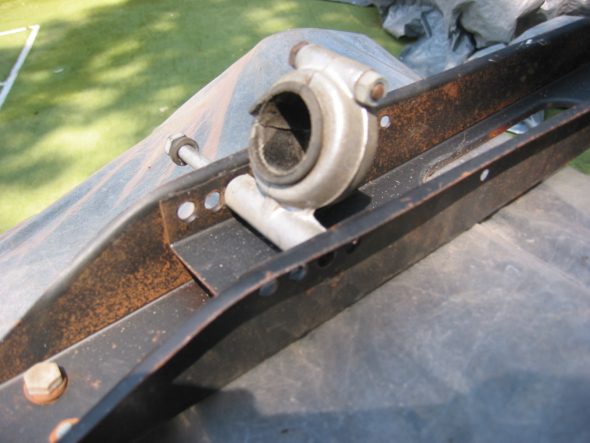
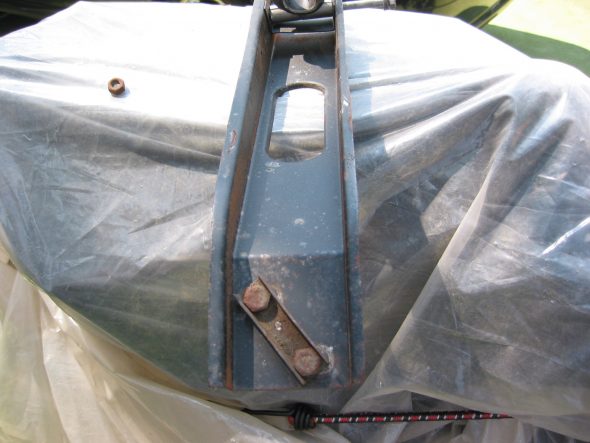
The Bump Stop Boxes –  were removed from both sides of the car. Two large pozi-drive screws with large washers and nuts located by the rear occasional seats hold the boxes. Two bolts and nuts must also be removed in the side of each box that secure clamps for wiring. In our case the bolts were all broken from wear and tear.
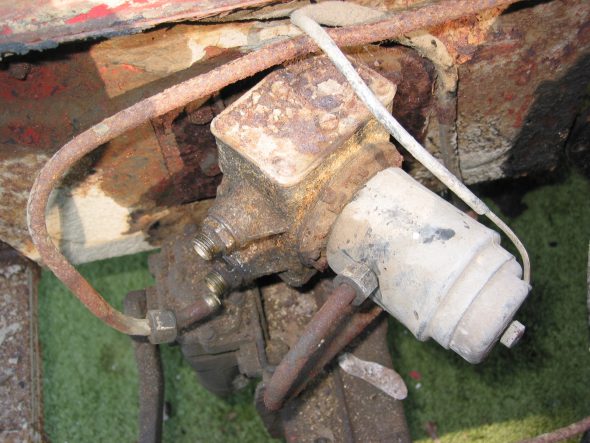
Rear Axle Bump Stop on Car

Rear Axle Bump Stop Removed

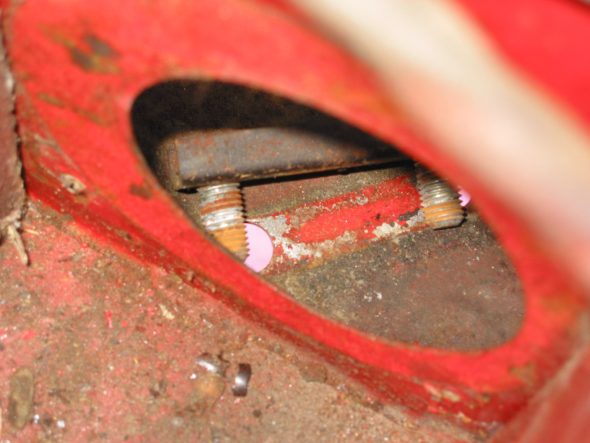
Mounting Holes
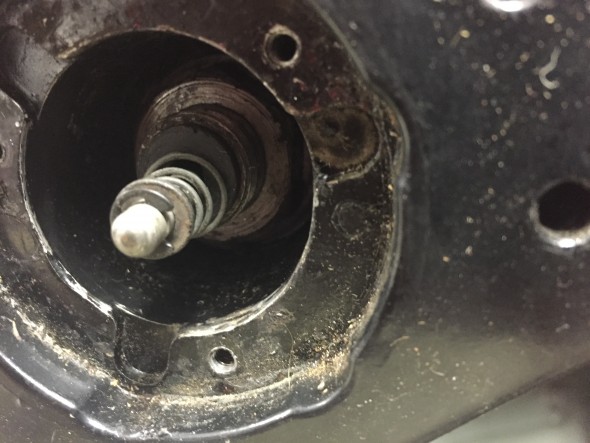
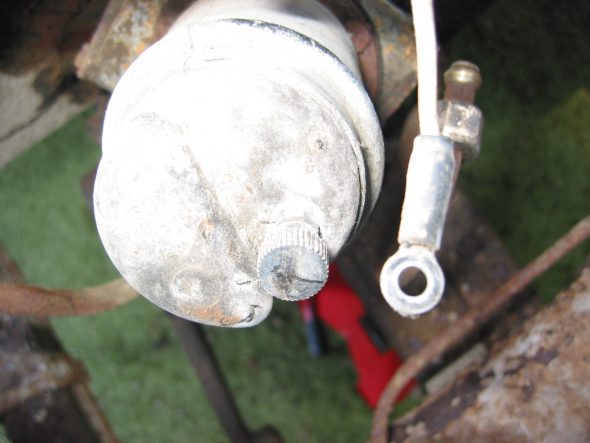
The Fuel Pump   was removed to get it out of the way of the axle. Disconnected 5/8” in and out fuel pipes to the pump. Remove 4 7/16” bolts into fixed nuts on the rear bulkhead wall. Finally, disconnected wire at knurled fixing knob.
Fuel Pump Mounted to Bracket at Rear Kick Panel

Disconnected White Wire to Fuel Pump

Fuel Pump and Bracket Removed

Boot wiring harness extension –  Wiring goes to the fuel sender and lights. We clipped the wire at the bulkhead for easy removal since we knew we would be replacing it. Two clamps with split head screws secure the wiring through the bulkhead wall. Additional connections are then made to route to the tailights.

Fuel Pipe to Pump and Wiring Harness

Wiiring Harness to Boot

Wiring Connector for Lights in Boot

Wiring Clip

Wiring and Handbrake Cable

Wiring Cable Removal

Handbrake cable –  The cable was removed from its axle attachment. To save time we just cut the flexible brake line hose to the junction.

Handbrake Components

Handbrake Components at Rear Axle

Rear Shock Absorbers – First removed nut to axle link. Then removed two nuts and bolts to rear bulkhead for each.

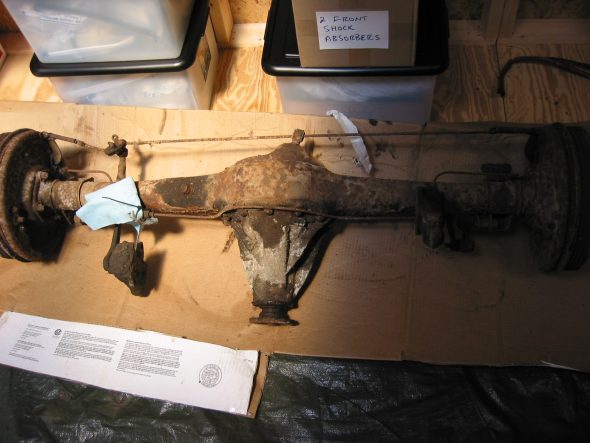
Rear Axle –  Drain differential fluid from the rear end. Place jack under differential to take pressure off springs. Loosen the four nuts on the U bolts under the mounting bracket. The nuts should be loosened gradually to avoid too much pressure on the spring. Disconnect tramp bar at mounting bracket on axle. Rotate axle and lift and slide out to the right.

Rear Axle U Bolts

Rear Axle U Bolt Mounting Plates

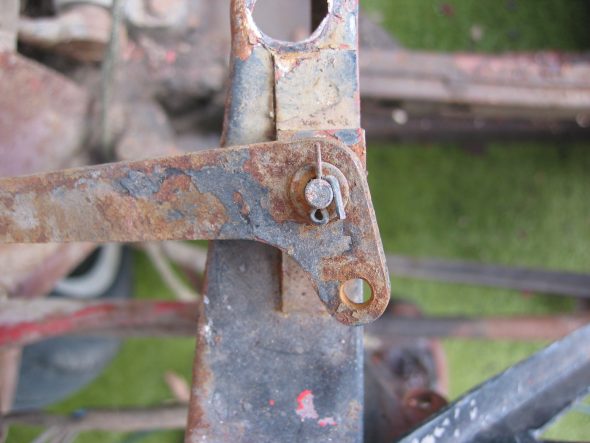
Panhard Rod Mounting

Rear Axle Removed

August 4, 2002

Steering Assembly

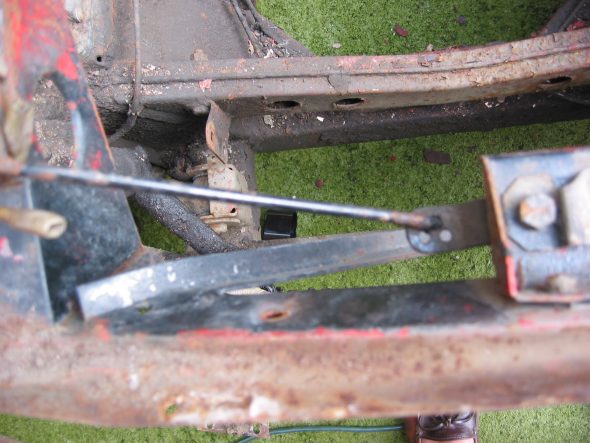
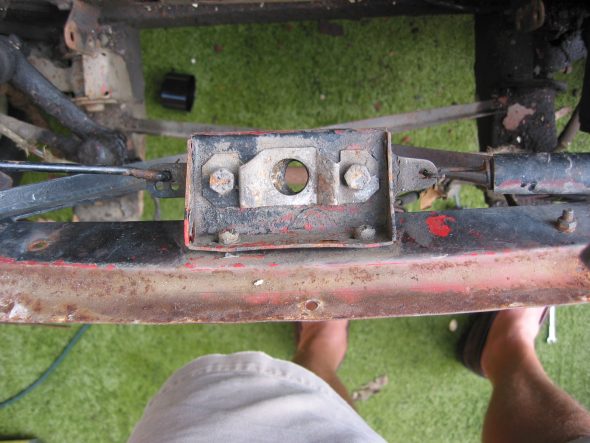
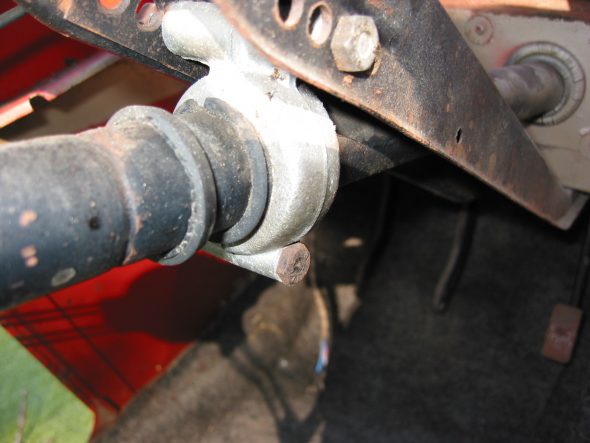
Steering Column Support Clamp – There are four holes available for the bolt and nut on the steering column bracket. The bolt was found in the 2nd hole from the firewall. Bolt heads were to the right, nut to the left.

Steering Column Mount

Steering Column Bracket Mount

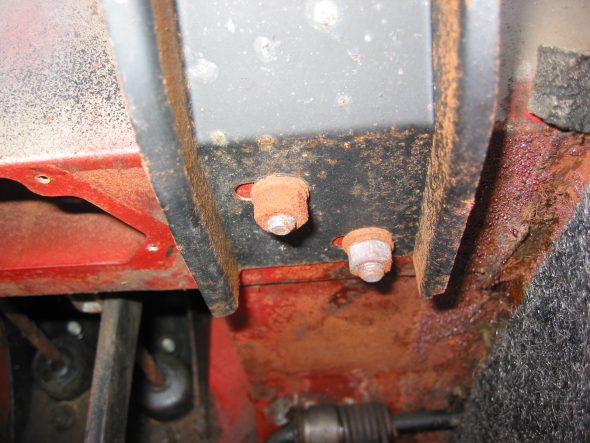
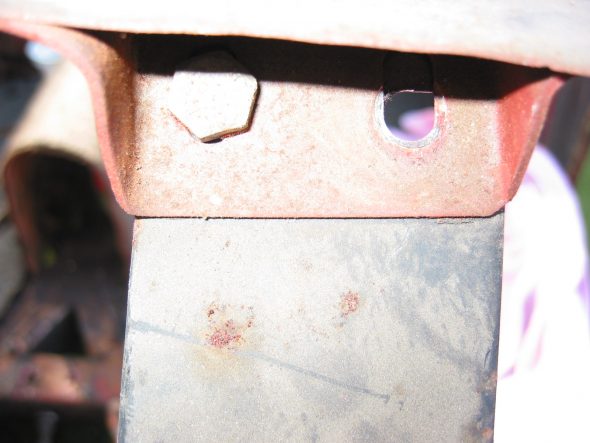
Steering column bracket –  Removed the bracket by loosening four bolts and nuts.

Steering Column Bracket Removed

Steering Column Rubber gasket

Steering Shaft Bracket to Frame Mount from below

Steering Shaft Bracket to Frame Mount from Above


Steering

The Standard Steering Unit

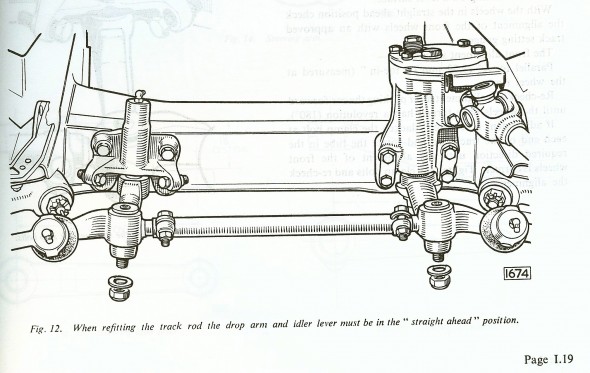
The Jaguar MK2 used a Burman F.3 steering unit as a standard fitting. In some cases the steering was power assisted, available as an option, but not on my particular car. The Burman unit is a recirculating ball type in which motion is transmitted from the inner column worm gear to the rocker shaft by means of a nut running on a continuous tram of steel balls.

The image below illustrates the mounting of the steering box and steering idler to the rear side of the front suspension cross member assembly:

Steering Schematic

Steering Schematic

Rack & Pinion Steering Modification

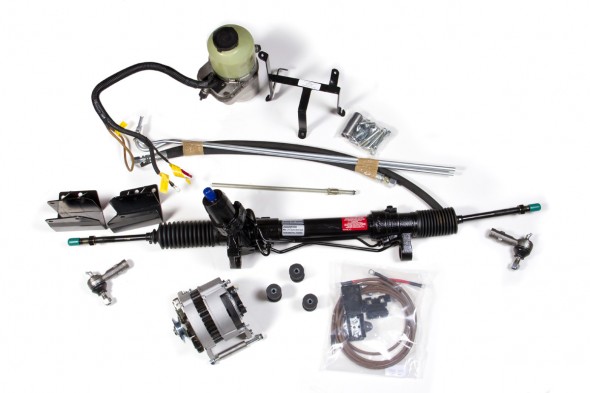
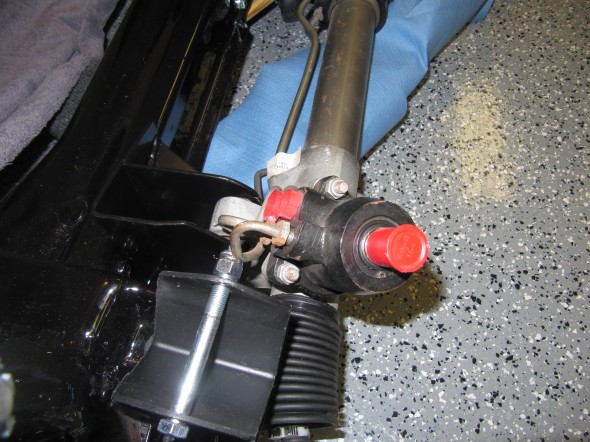
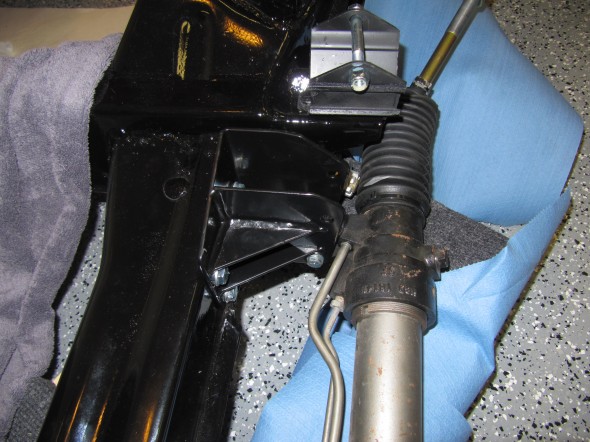
I had not done much reading about Jaguar MK2s before it became clear that many owners were modifying the steering on their cars to incorporate power assisted rack and pinion and eliminate the original recirculating ball system. A number of Jaguar parts vendors sell partial and full kits to make the conversion to rack & pinion, some power assisted, some not. After doing more research I decided to purchase an electric power assisted conversion kit sold by M & C Wilkinson in the UK.

Wilkinson states that We use a brand new short tower steering rack from a later XJ model which is then modified to fit the MK2.  The pump we use is from a modern car. The LHD rack we provide is a brand new short tower rack.  The long tower rack can not be used in the conversion.  The tie rod ends on the rack are then modified to accept imperial track rod ends as fitted in period.”

The Wilkinson conversion kit contains the following components:

Pump/reservoir, pump bracket, fixing kit, fuse box, connector blocks, wiring, connectors, alternator, pulley – single or double, fitting kit, steering rack, rack brackets, rack bushes, track rod ends, racking fitting kit, column tube, steering pipes, instructions, a cutting template and a wiring diagram.

Wilkinson R & P Kit Components

Wilkinson R & P Kit Components

The kit provides a very helpful set of PAS ELEC INSTRUCTIONS MkII compressed. To assist in my planning for a revised wiring diagram and harness I enquired about the amperage requirement of the pump motor. M&C Wilkinson responded, stating:
“The power steering pump uses approximately 40 amps at maximum draw which is slow speed/full lock.” He went on to say, “The power steering pump is pressure sensitive meaning it automatically detects the amount of assistance required at each turn of the wheel. Therefore, when parking the vehicle at low speed and with high resistance on the tyre maximum use of the pump is required therefore, it uses up to 40 amps in the particular type of instance.  When you are driving at 70 mph in a straight line the pump recognises virtually no assistance is needed and therefore, the steering wheel is stiffened by the pump so it is not moving dramatically from right to left.  This means in this instance that the pump will be drawing virtually no amps whatsoever.
We do not know how this is accomplished without a computer but this type of system has been fitted to cars for the last 15-20 years.”

As a first step in the installation process, I wanted to trial fit the rack and other components associated with the front suspension cross member assembly.

Adding the rack and pinion will also impact the ideal camber and castor settings. As Paul on the Saloon-Lovers Forum indicates:

“The factory alignment specs call for positive camber, but if  you are running modern tires, some negative camber is much better.  I try for somewhere between 0.5- 1.0 negative with 205 VR tires.  A bit more on the right side for the crown in the road makes it track straighter.  If you run more than 1 degree negative camber on the road, you will wear out the inside edge of the front tires in less than 10,000 miles.   This is the price of grip and rotating the tires a lot helps.  The factory spec for castor is also not good for a rack conversion, 2-3 degrees positive castor is closer to ideal.”

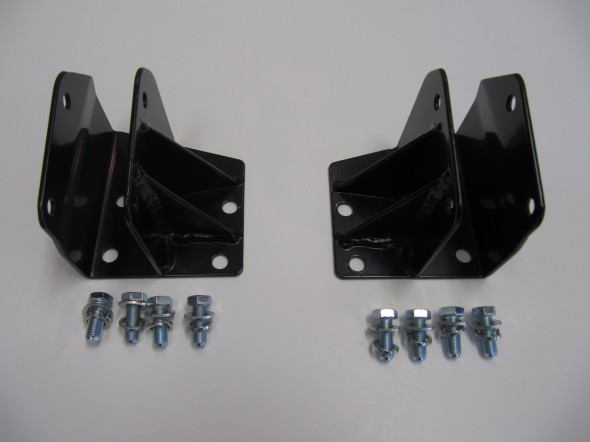
Rack Brackets

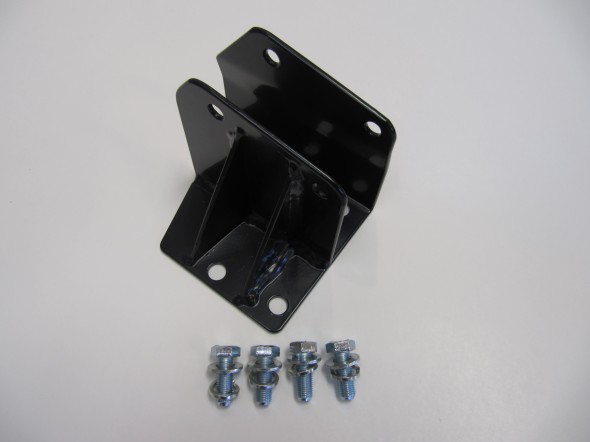
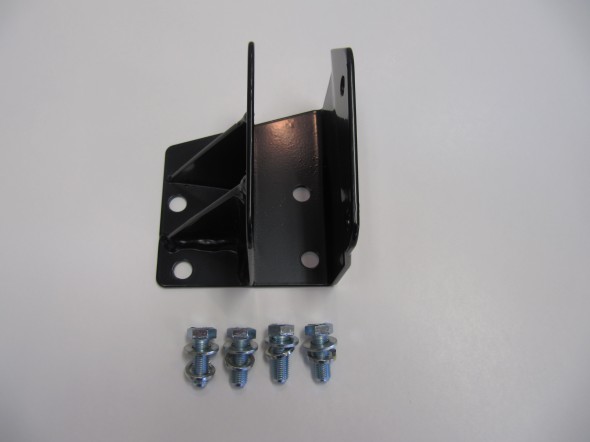
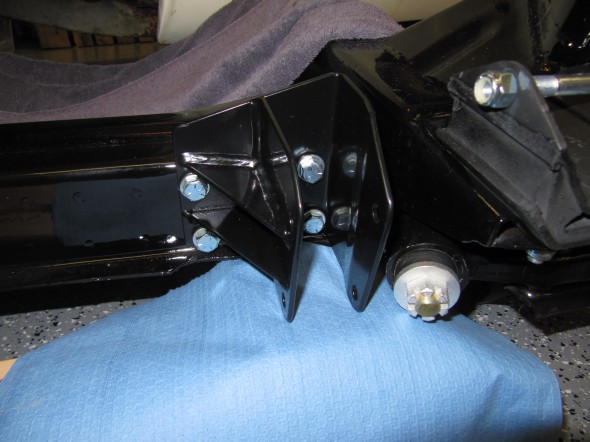
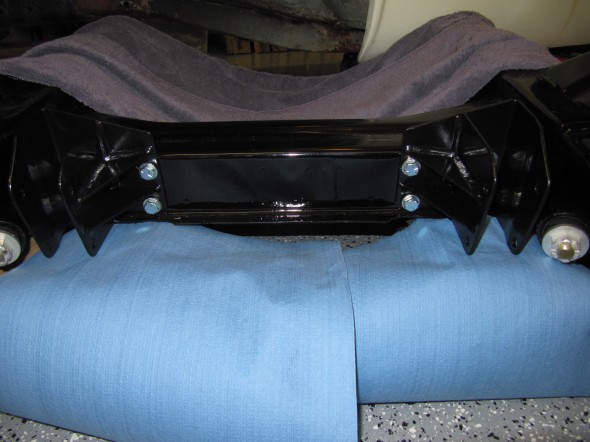
I began by bolting the supplied rack brackets to the cross member. This requires eight 3/8″ x 1″ – 24 bolts with split washers and flat washers that are supplied in the kit hardware.

R & P Bracket Pair

R & P Bracket Pair

R & P Bracket

R & P Bracket

R & P Bracket

R & P Bracket

R & P Brackets Mounted RH

R & P Brackets Mounted RH

R & P Brackets Mounted

R & P Brackets Mounted

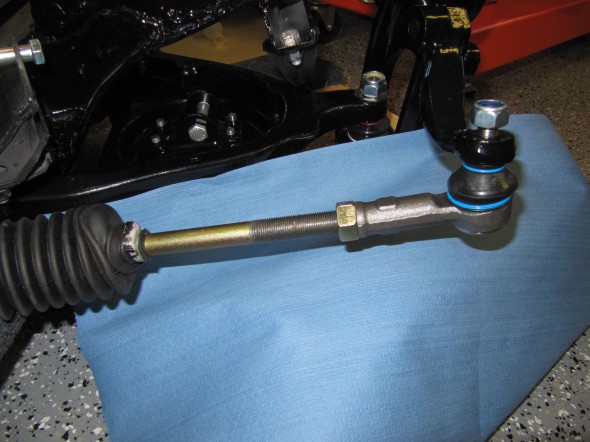
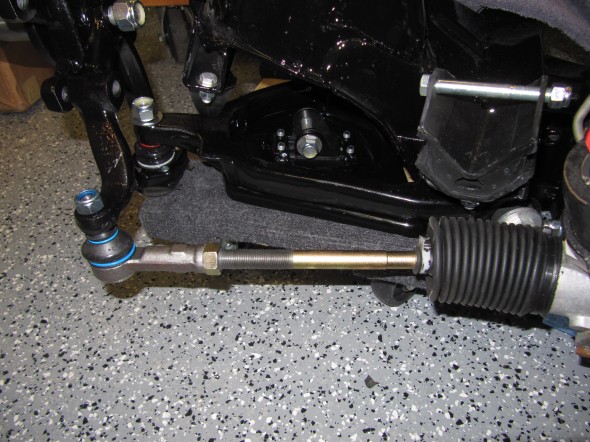
Tie Bars and Track Rod Ends

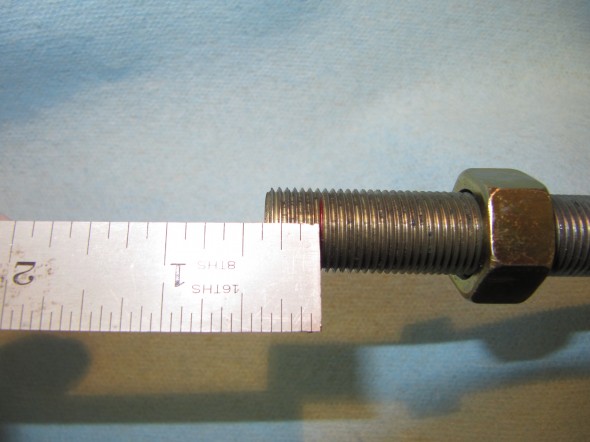
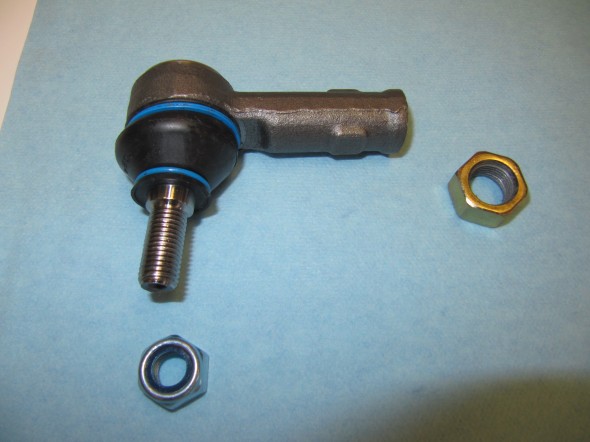
The kit’s directions call for removing 3/8″ from each end of the steering rack tie bars before fitting the track rod ends and lock nuts. I measured the 3/8″, put some masking tape around the threads, and cut off the ends with a grinding wheel. Then, again per the directions, I wound on the track rod ends fully and then backed off two full turns and tightened the locknuts by hand against the track rod end. The steering rack tie bar locknuts  are 5/8″ – 18.

Shorten Tie Bar

Shorten Tie Bar

Track Rod End

Track Rod End

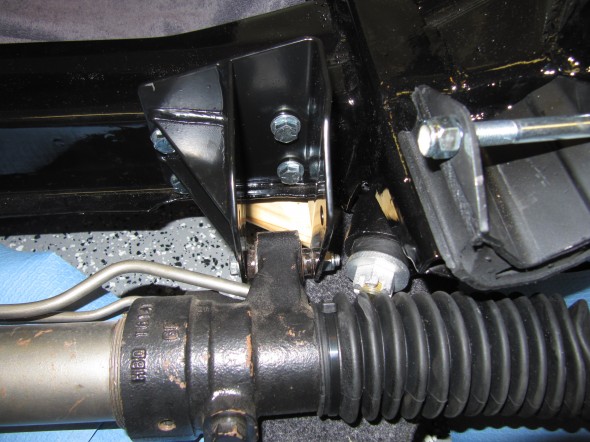
I then mounted the steering rack to the mounting brackets. On the LH side the rack is fastened to the bracket with two 5/16″ x 2 1/2″ – 24 hex head bolts with two flat washers and a 5/16″ – 24 nylock nuts. On the RH side the rack is fastened to the bracket with only one 5/16″ x 2 1/2″ – 24 hex head bolt with two flat washers and a 5/16″ -24 nylock nut.

LH Rack Mount to Bracket

LH Rack Mount to Bracket

RH Rack Mount to Bracket

RH Rack Mount to Bracket

RH Rack Mount to Bracket

RH Rack Mount to Bracket

LH Rack Mount to Bracket

LH Rack Mount to Bracket

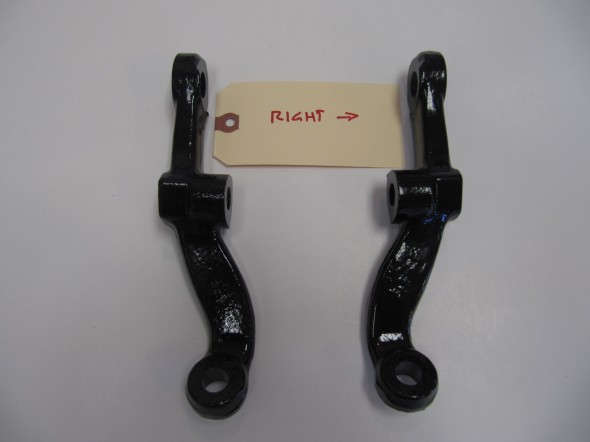
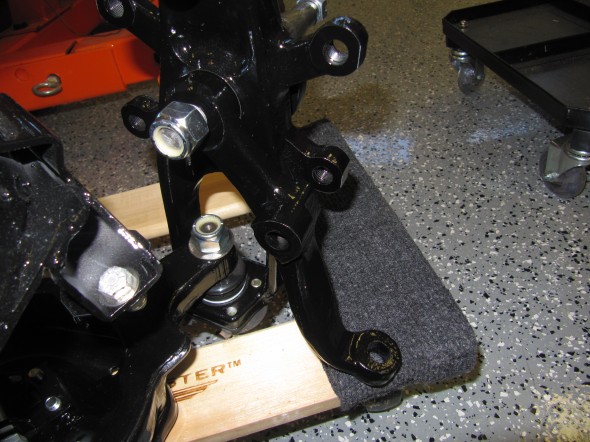
Tie Rod Levers

After connecting the track rod ball joint pins to the tie rod levers with 1/2″ nylock nuts, I tightened the locknuts on the tie bars.

Tie Rod Levers

Tie Rod Levers

Tie Rod Levers

Tie Rod Levers

RH Rod End to Lever

RH Rod End to Lever

LH Rod End to Lever

LH Rod End to Lever


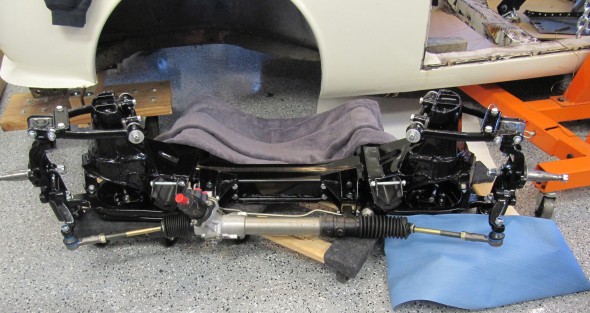
Steering Rack to Cross Member

Steering Rack to Cross Member

I then used POR-15 to paint sections of the steering rack for protection from corrosion.

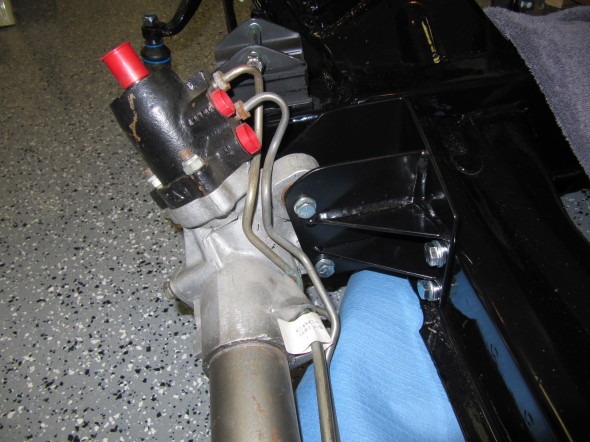
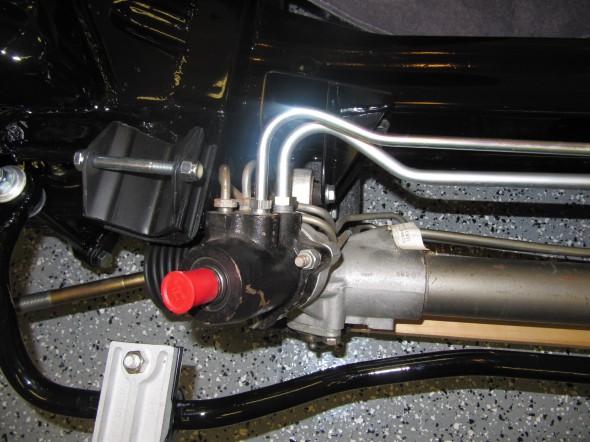
Power Steering Hydraulic Steel Pipes

The rack and supplied by M&C Wilkinson came with hard pipes. I decided to not use the pipes provided as they were extremely hard to bend. 

Power Steering Steel Lines

Power Steering Steel Lines

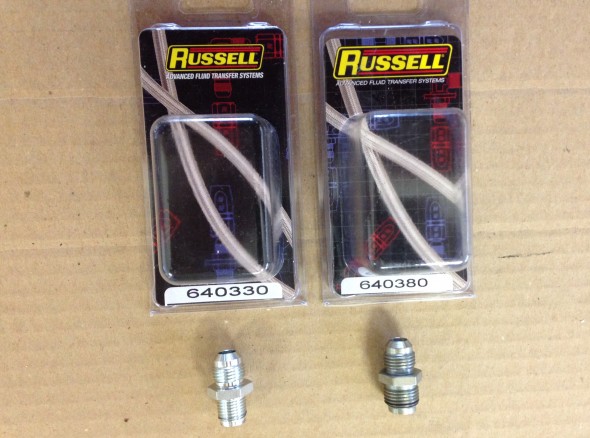
On the high pressure line/hose I used  a Russell 1/2″-20 inverted flare to -6 part number 640330. While I purchased a similar fitting for the low pressure line/hose I ended up not using it and instead purchased a hard pipe and bent it to fit. The pipes were replaced with appropriate fittings.

Steering Rack Hose Fittings

Steering Rack Hose Fittings

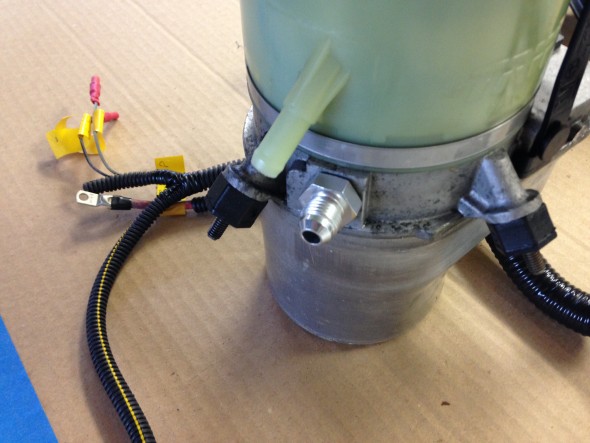
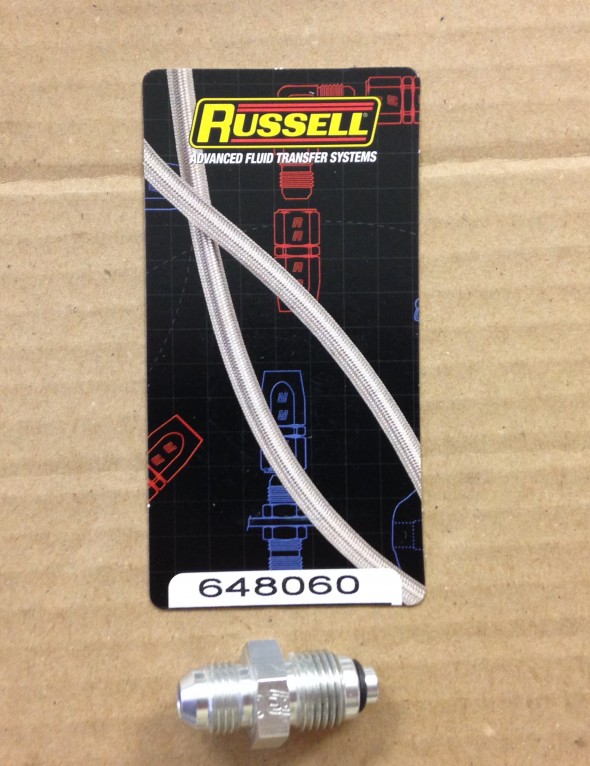
Although I am not ready to mount the hydraulic steering pump, I went ahead and ordered the hose fitting for the pump while I was ordering the other fittings. The pump pressure port is a 16mm x 1.5 O-ring Russell part#648060.

Special thanks to “GT6Steve” on the Jaguar Forums for providing this information. It saved me a lot of time!

I guess that I will try a hose clamp for the low pressure return side of the pump bottle as it is just a plastic slip fitting.

Hydraulic Pump Hose Fitting

Hydraulic Pump Hose Fitting

Hydraulic Pump Russell Hose Fitting

Hydraulic Pump Russell Hose Fitting

Rack and Pinion Steering Linkage

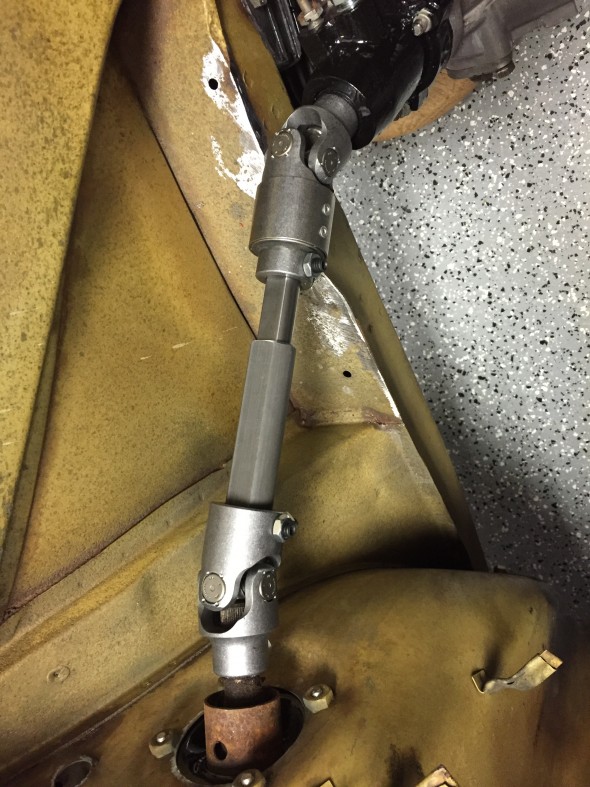
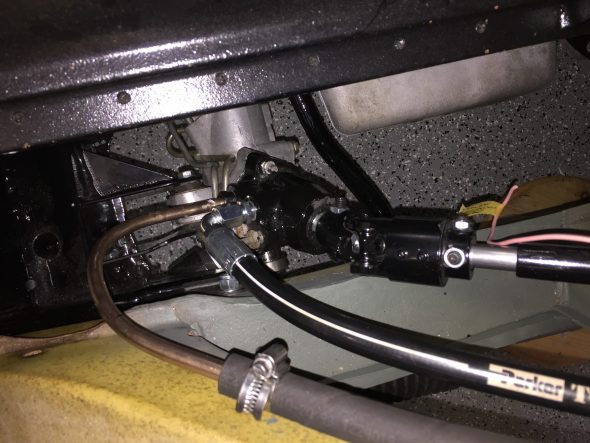
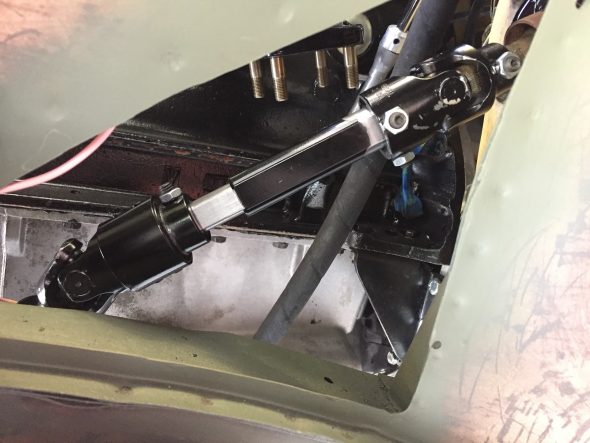
The instructions included with the M&C Wilkinson rack and pinion kit advise that a small curved section of the LH from rail should be relieved to make room for the knuckle of the new lower universal joint. After fitting the rack with the lower joint in place I was able to mark the rail and use a grinder to remove some of the surface. I will re-weld the frame joint before bodywork just to make sure that it is sufficiently closed to moisture. The cut out can be seen in the images below. It may appear that the UJ joint is making contact with the frame rail, but it does not.

My thanks to Richard Oliphant and the GT6Steve for sharing parts numbers for the components needed to assemble the new steering shaft. In my case, the spline count on the steering column and on the rack were the same at 3/4″-48. These should be checked before ordering parts.

Borgeson part numbers:

1- 409418 3/4” DD Shaft, 18” long

1- 409536 1” DD Tube, 36” long

1- 034937 Vibration U joint, Steel, 3/4”DD x 3/4”-48

1- 015237 U joint, 1” DD x 3/4”-48

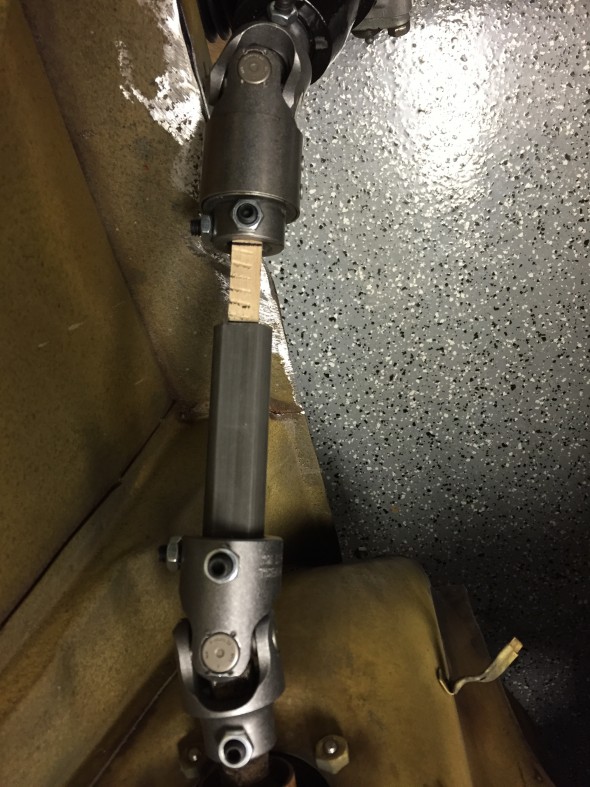
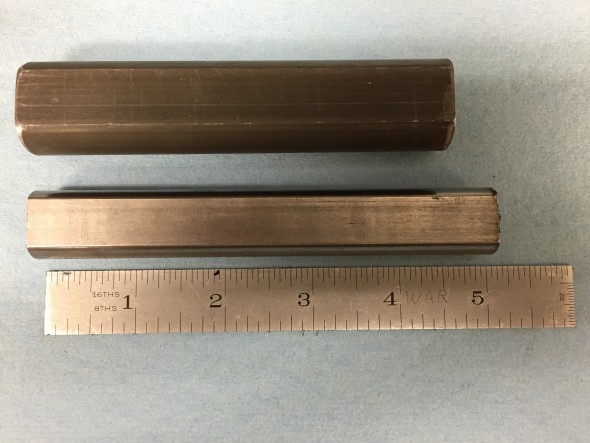
The 3/4” DD shaft slides part way into the 1” DD tube, these come long and have to be cut to fit. For my particular installation I used a 5″ tube and a 4 1/2″ shaft. I used a 1/2″ square wooden dowel to determine optimal shaft length.

Trial Fitting Steering Linkage

Trial Fitting Steering Linkage

Others undertaking this project should measure for their own circumstance.This provides some play to both remove the lower column and also some collapse or crush distance. As Richard stated, “Leave enough free play in shaft so you can slip universal joints off without having to loosen up steering column.”

Tube and Shaft Cut to Fit

Tube and Shaft Cut to Fit

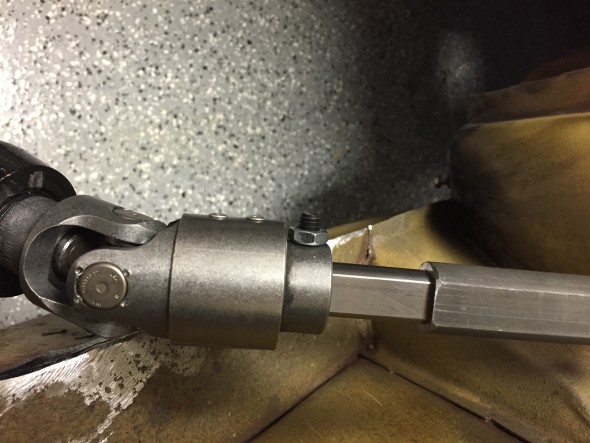
New Linkage Test Fitting

New Linkage Test Fitting

New Linkage Test Fitting

New Linkage Test Fitting

Borgeson instructions direct that in attaching the U-joint to the  1″ Double D tube the tube should be fully pushed on to the u-joint. Then tighten the short set sure to secure the joint in the tube. Mark the position of the other set screw on the tube. Remove the u-joint. Drill a 3/8″ hole at the point marked on the tube through ONE WALL OF THE TUBE ONLY. Re-install u-joint and set screws. The long set screw should pass through the drilled hole and bear against the opposite wall of the tubing. Tighten both set screws and lock nuts. Check and retighten all set screws and lock nuts.

Fitting of the Electric/Hydraulic Pump

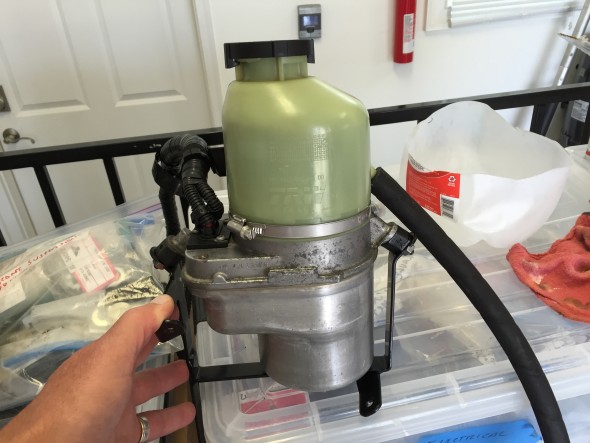
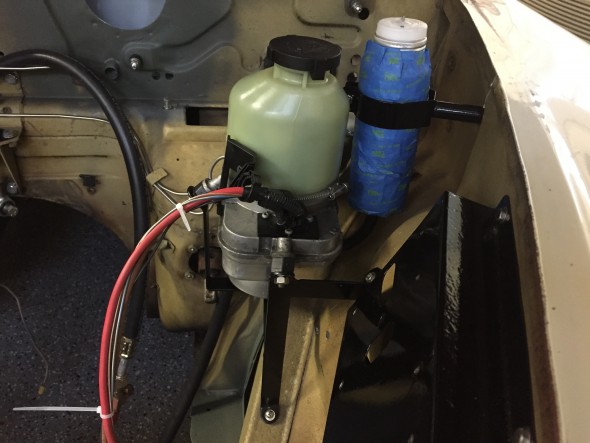
The M&C wilkinson kit provides a bespoke pump mounting bracket and a combined pump/reservoir. I am not sure of the source of the pump. The pump attaches to the bracket at three mounting points where 1/4″-28 nuts and shockproof washers are used to secure the components. The supplied instructions provide directions on the location of the bracket on the LH engine bay valance. Time should be spent on locating the bracket. There is very little available room as the brake fluid reservoir, the master cylinder, and the fuse panel all compete for space. Attention should be given to allowing sufficient space for the pumps hydraulic hose fittings.

The pump is heavy and I found that it should be fixed to the bracket before the bracket is fit to the car in order to mark the locations for the holes to be drilled for the bracket mounting to the car. With the weight of the pump the feet of the bracket spread slightly.

Fastening hardware was supplied with the kit; however, I decide to use my own stainless fasteners. The two bracket fixing points to the diagonal frame brace are secured with self-tapping sheet metal screws while the bracket leg that fastens to the valance wall is secured with a #10 -32 x 1/2″ hex head machine screw, flat washer and nylock nut.

This is the pump and its mounting bracket:

Power Steering Pump & Bracket

Power Steering Pump & Bracket

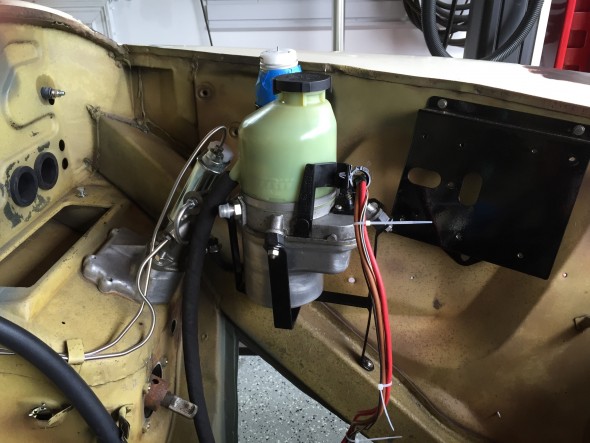
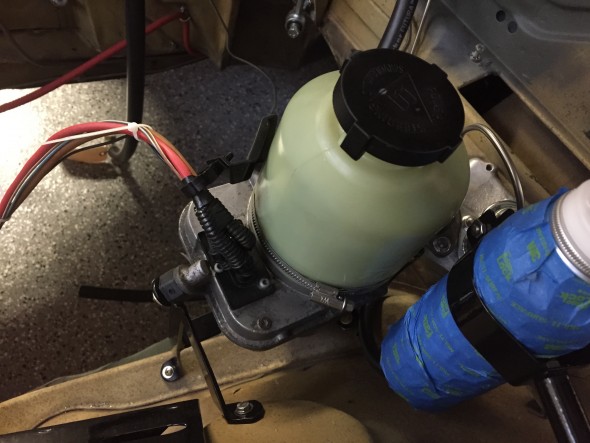
The images below show the final location and mounting of the pump/reservoir and its bracket:

Power Steering Pump & Bracket Installed

Power Steering Pump & Bracket Installed

Power Steering Pump & Bracket Installed

Power Steering Pump & Bracket Installed

Power Steering Pump & Bracket Installed

Power Steering Pump & Bracket Installed

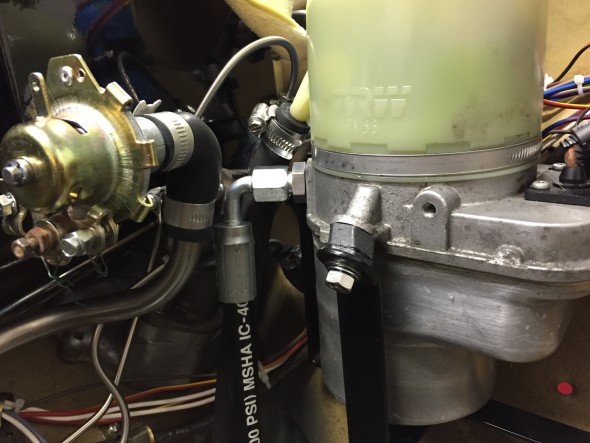
With the heater box, hydraulic fluid reservoir, considerable wiring, and the power steering pump itself, there are very tight quarters for the pumps’ two hoses and the heater hoses/pipes. After some manipulation I was able to get everything mounted without location conflicts.

Power Steering Pump Hydrualic Hoses

Power Steering Pump Hydrualic Hoses

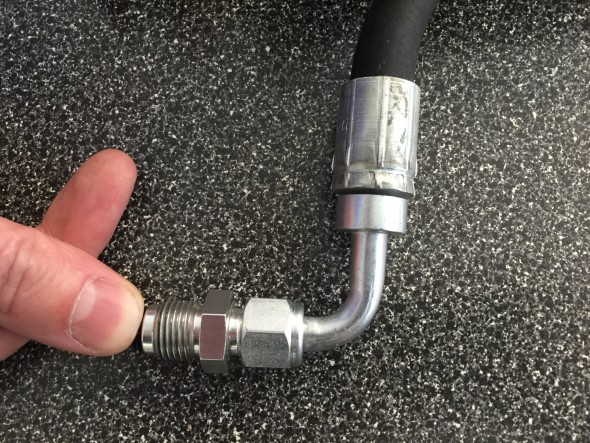
The M & C Wilkinson kit supplied the hydraulic hoses and fittings, but to save some critical room I used a different -6 ninety degree fitting for the high pressure hose and purchased a new hose that will be cut to length after the steering rack is installed in the car. I will also include thermal sleeving on the hoses to protect them from the exhaust temperatures.

-6 90 Degree Fitting on the High Pressure Hose

-6 90 Degree Fitting on the High Pressure Hose

Electrical Requirements and Wiring

The electrical wiring of the power steering pump is addressed in the “Building a New Wiring Harness” post.

Trial Fitting

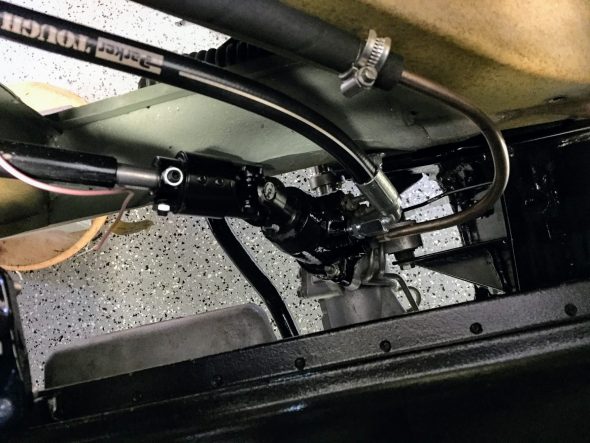
In May/June 2017 I installed the front suspension crossmember as described in the Front Suspension website entry. Once installed with the steering rack I was able to finish the hydraulic plumbing. I used another -6 90 degree fitting at the steering rack end of the high pressure hose after cutting the hose to the proper length. I had an hydraulic hose shop do the crimping for me. 

On the low pressure side of things, I decided to use a hard line with a gentle sweep (this allows more room for ease of mounting) and secured it to the low pressure hose provided in the M&C Wilkinson kit. Both ends of this hose were secured with Jubilee hose clamps.

Steering Hydraulic Lines Installed

Steering Hydraulic Lines Installed

Final adjustments were made in the steering linkage and all of the set screws and locking nuts were tightened.

Final Adjustment of the steering linkage


Steering Wheel

Steering Wheel


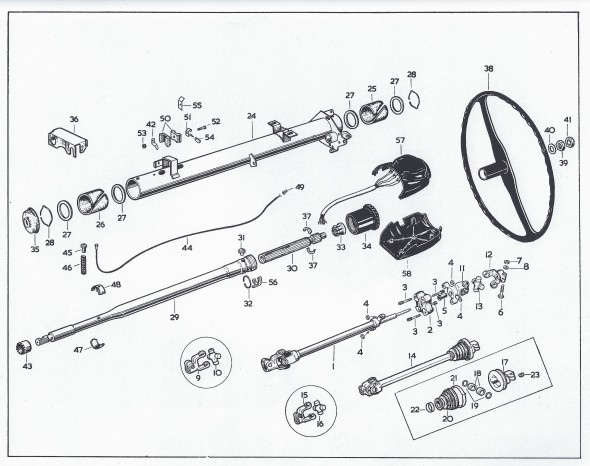
This is a diagram showing steering column components.

Steering Wheel Assembly

Steering Wheel Assembly

The disassembly procedure I followed is outlined below:

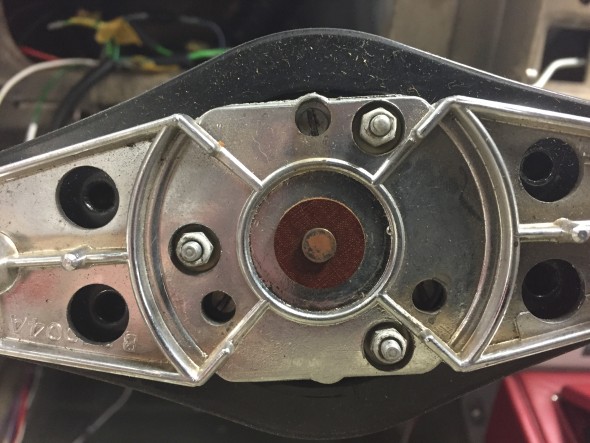
First I removed four slotted set screws from behind the steering wheel this enables the horn ring cover to be removed along with the horn push and return spring.

Horn Ring Assembly

Horn Ring Assembly

The horn ring assembly is held in place by three small nylock nuts (#6?) on studs. These nuts were removed and behind each nut was a nylon shouldered washer. The horn ring assembly is spring loaded so when the third nut is removed one needs to be careful not to lose the springs behind the assembly. After the three nuts and washers are loosened the horn ring can be lifted away.

Horn Assembly Springs on Studs

Horn Assembly Springs on Studs

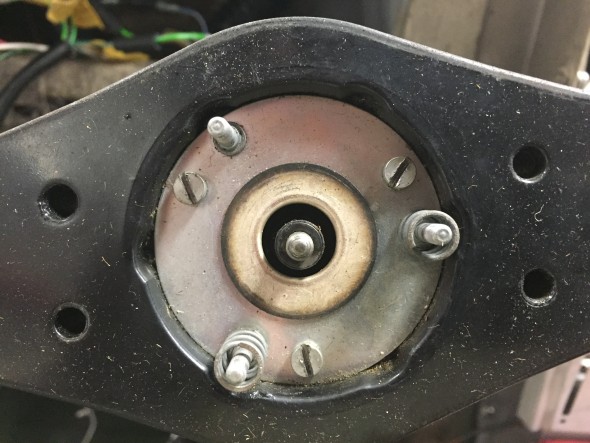
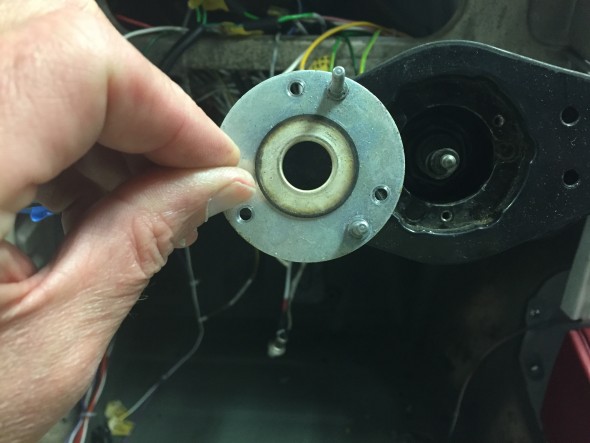
This reveals springs on two of the studs and a mounting plate held in place by three cheesehead machine screws. The springs were set aside and the three screws and slit washers were removed allowing the subsequent removal of the mounting plate with its three studs.

Horn Assembly Mounting Plate

Horn Assembly Mounting Plate

This revealed the horn button wire which contains the contact button, a spring, a small flat washer and a circlip holding the assembly together. a tubular black insulation piece is behind the wire assembly and slips into the shaft. It is NOT necessary to disassemble this horn contact wire in order to remove the steering wheel.

Horn Electrical Contact Wire, Retaining Clip, Washer and Spring

Horn Electrical Contact Wire, Retaining Clip, Washer and Spring

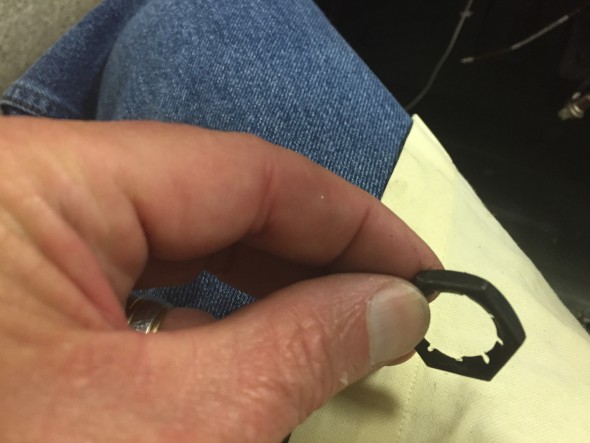
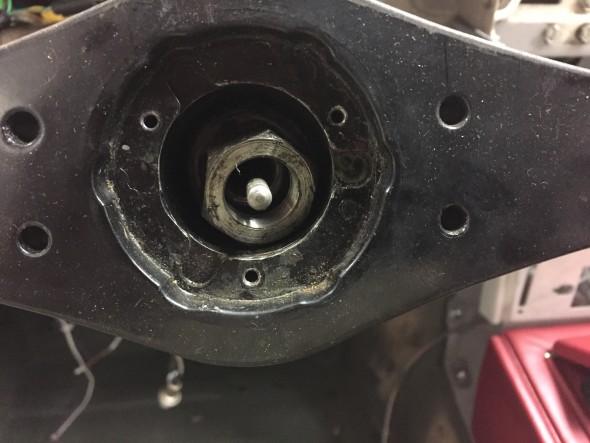
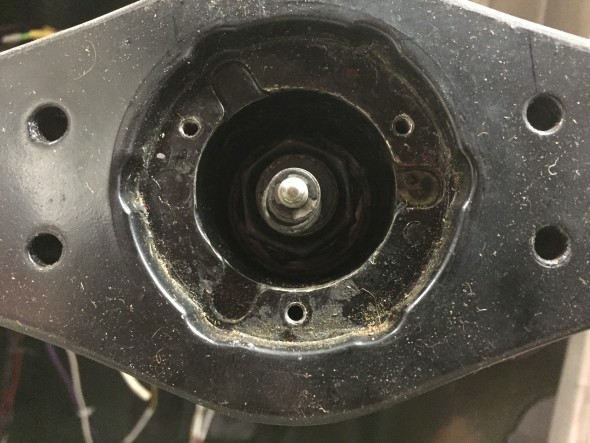
Also revealed was a locking Palnut on the steering shaft that was removed with a  15/16″ socket.

Steering Palnut on Shaft

Steering Palnut on Shaft

Steering Palnut Removed

Steering Palnut Removed

After removing the Palnut, the nut and special washer securing the steering wheel to the inner column shaft can be seen and removed. A 1  1/16″ socket was used.  The steering wheel could be then be removed from the shaft.

Steering Shaft Nut with Special flat washer

Steering Shaft Nut with Special flat washer

Steering Shaft Cone for Seating the steering wheel on the Shaft

Steering Shaft Cone for Seating the steering wheel on the Shaft

Care must be taken to not lose the two-piece split cone that seats the steering wheel on the shaft. These are revealed following removal of the steering wheel.