
Rear View Mirror
The parts manual does not provide much information on the rear view mirror. The assembly apparently came from Lucas and was installed as an assembly. Perhaps there is Lucas documentation available someplace, but I did not find it. My original mirror was pretty dirty and the height adjustment post would not tighten properly. A new mirror assembly is available from SNG Barratt, but I decided to use my original. I did purchase a new “Interior Mirror Mounting Clamp/Boss – C20697/1”, that addressed my sliding adjustment problem:

Mirror Mounting Clamp/Boss
I also had my original mirror re-silvered by Tim Inman at Inman Historic Interiors www.historicinteriors.com/Resilvering.html The resilvering costs about $65 including shipping. The finished product looked like new. Reassembly is pretty easy but it does require carefully bending four tabs that secure the tensioning spring for the mirror ball joint. The image below shows the mirror casing and the spring assembly with adjustable post.
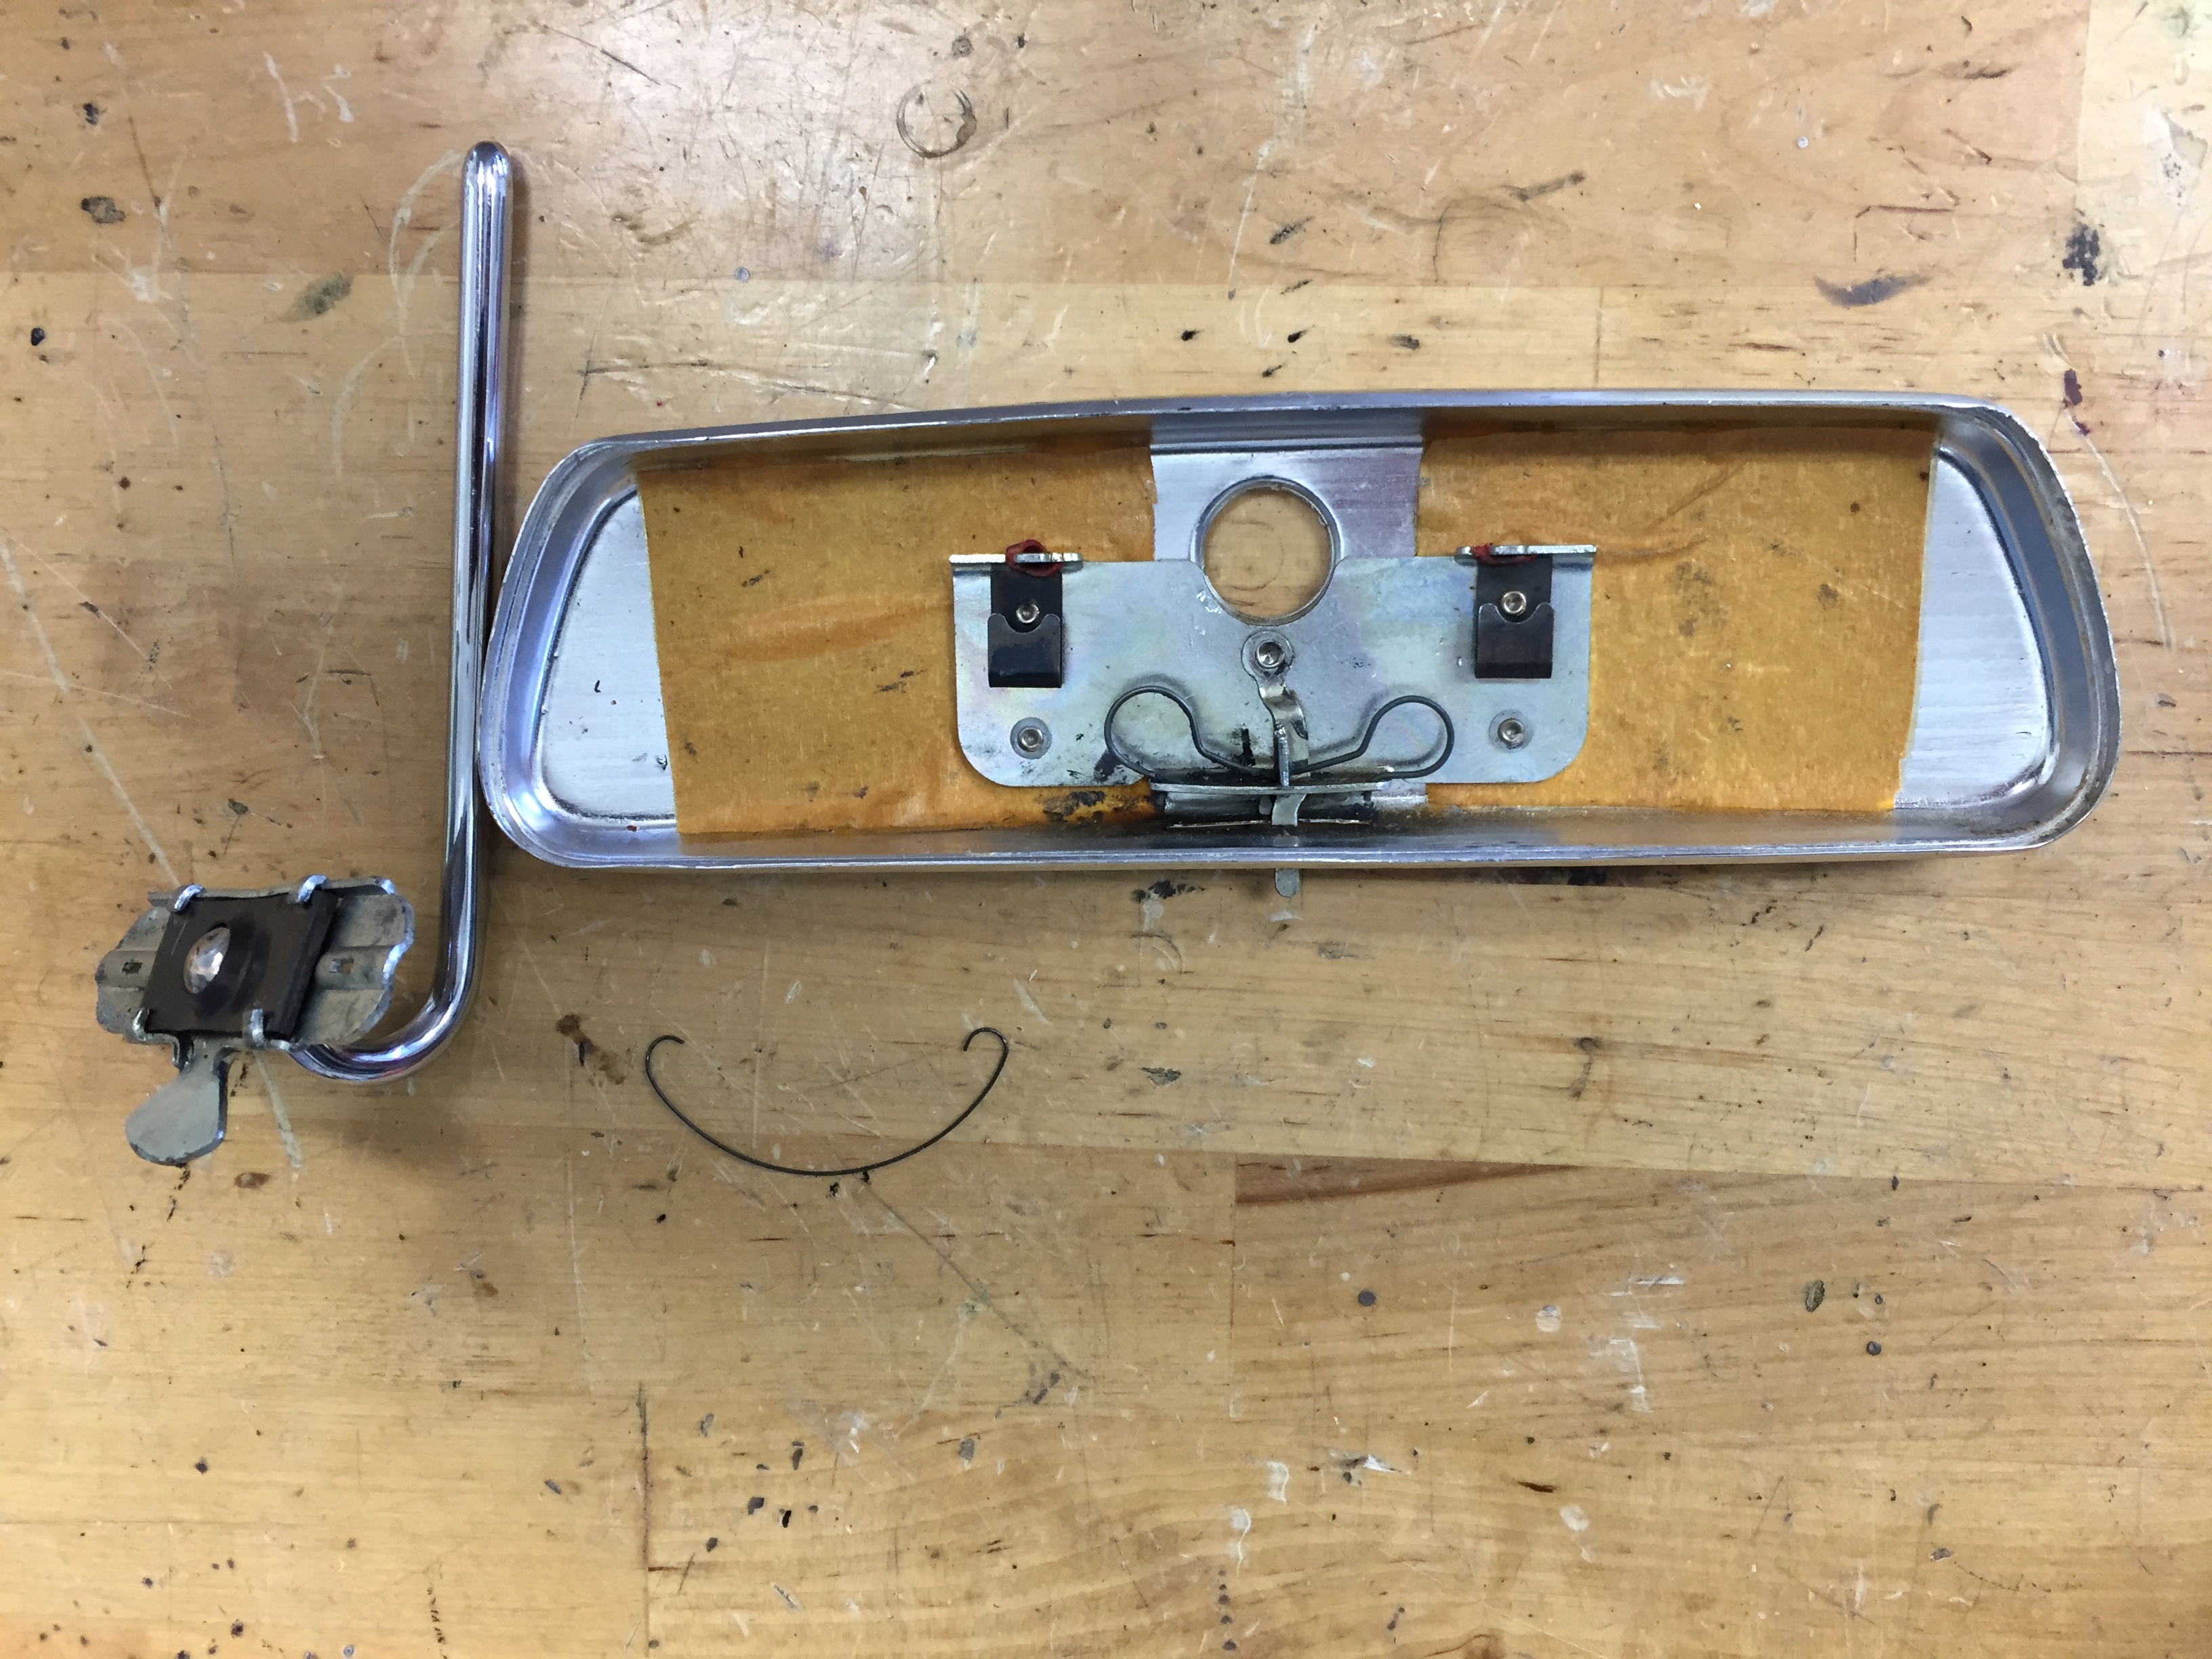
Rearview Mirror Before Assembly
The image below show the installation of the post and tensioner spring with mounting plate:
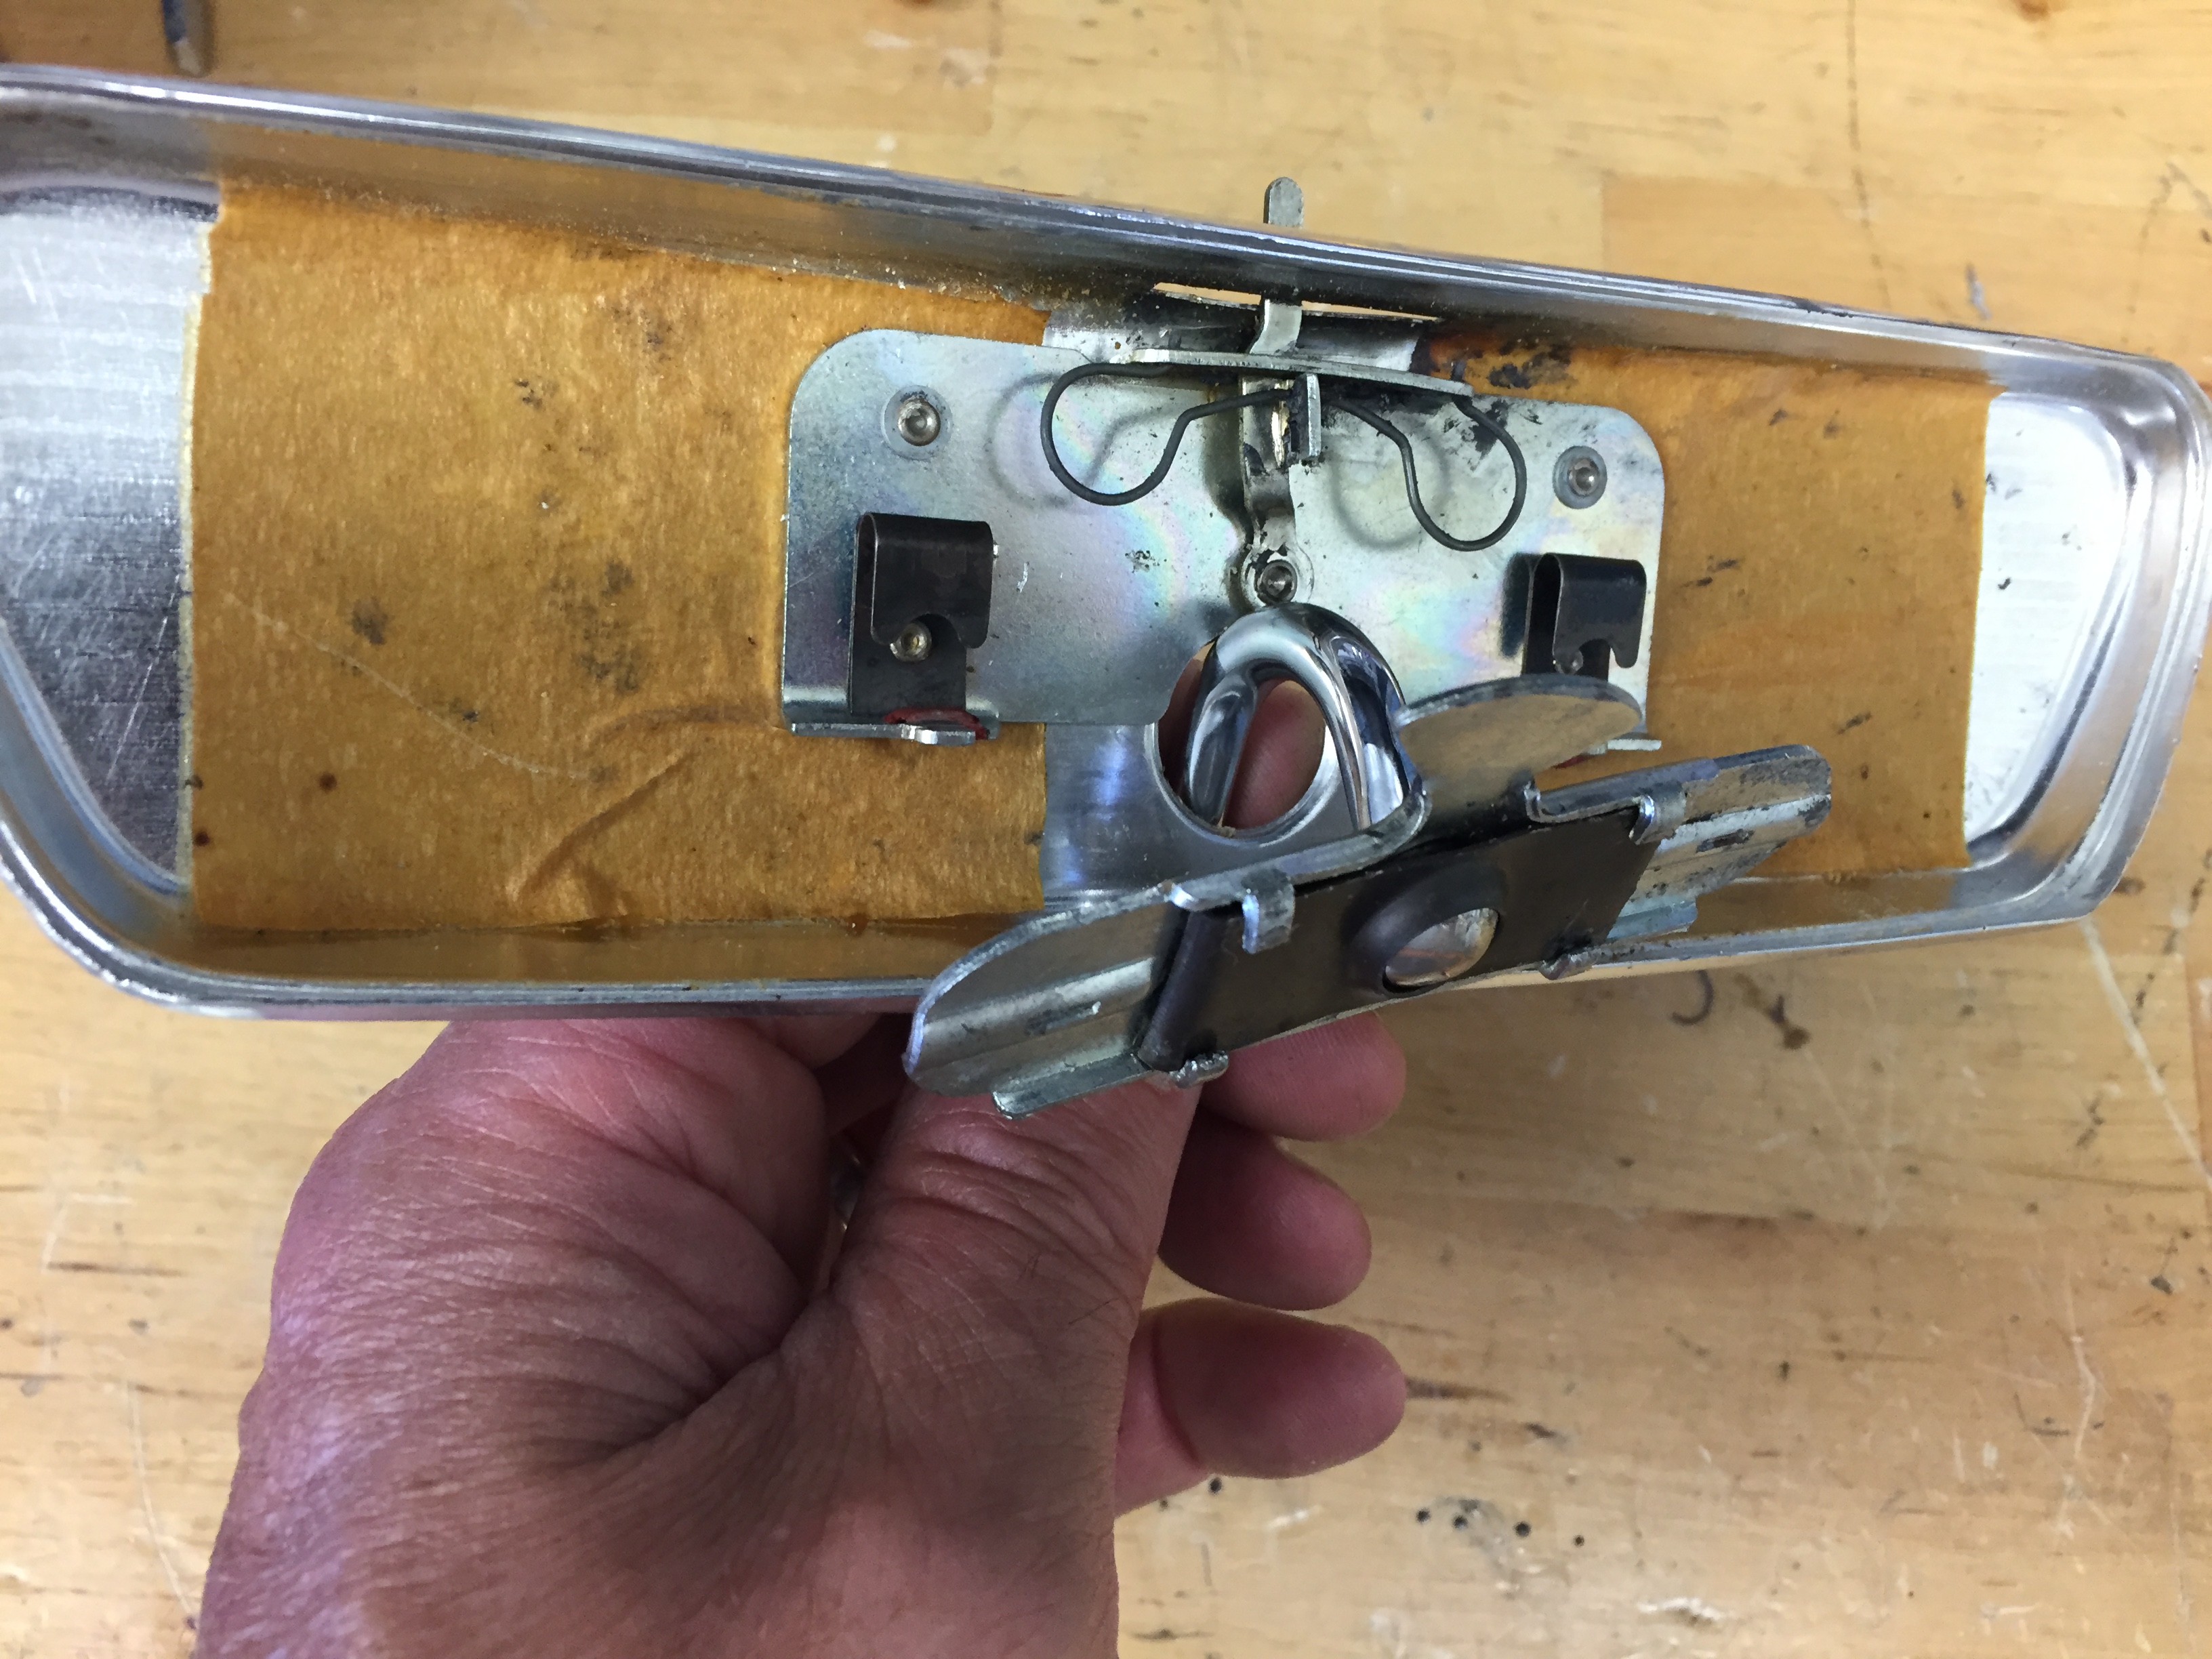
Installing Rearview Mirror Components
The image below shows the tensioner spring plate tabs bent back to secure the spring plate:
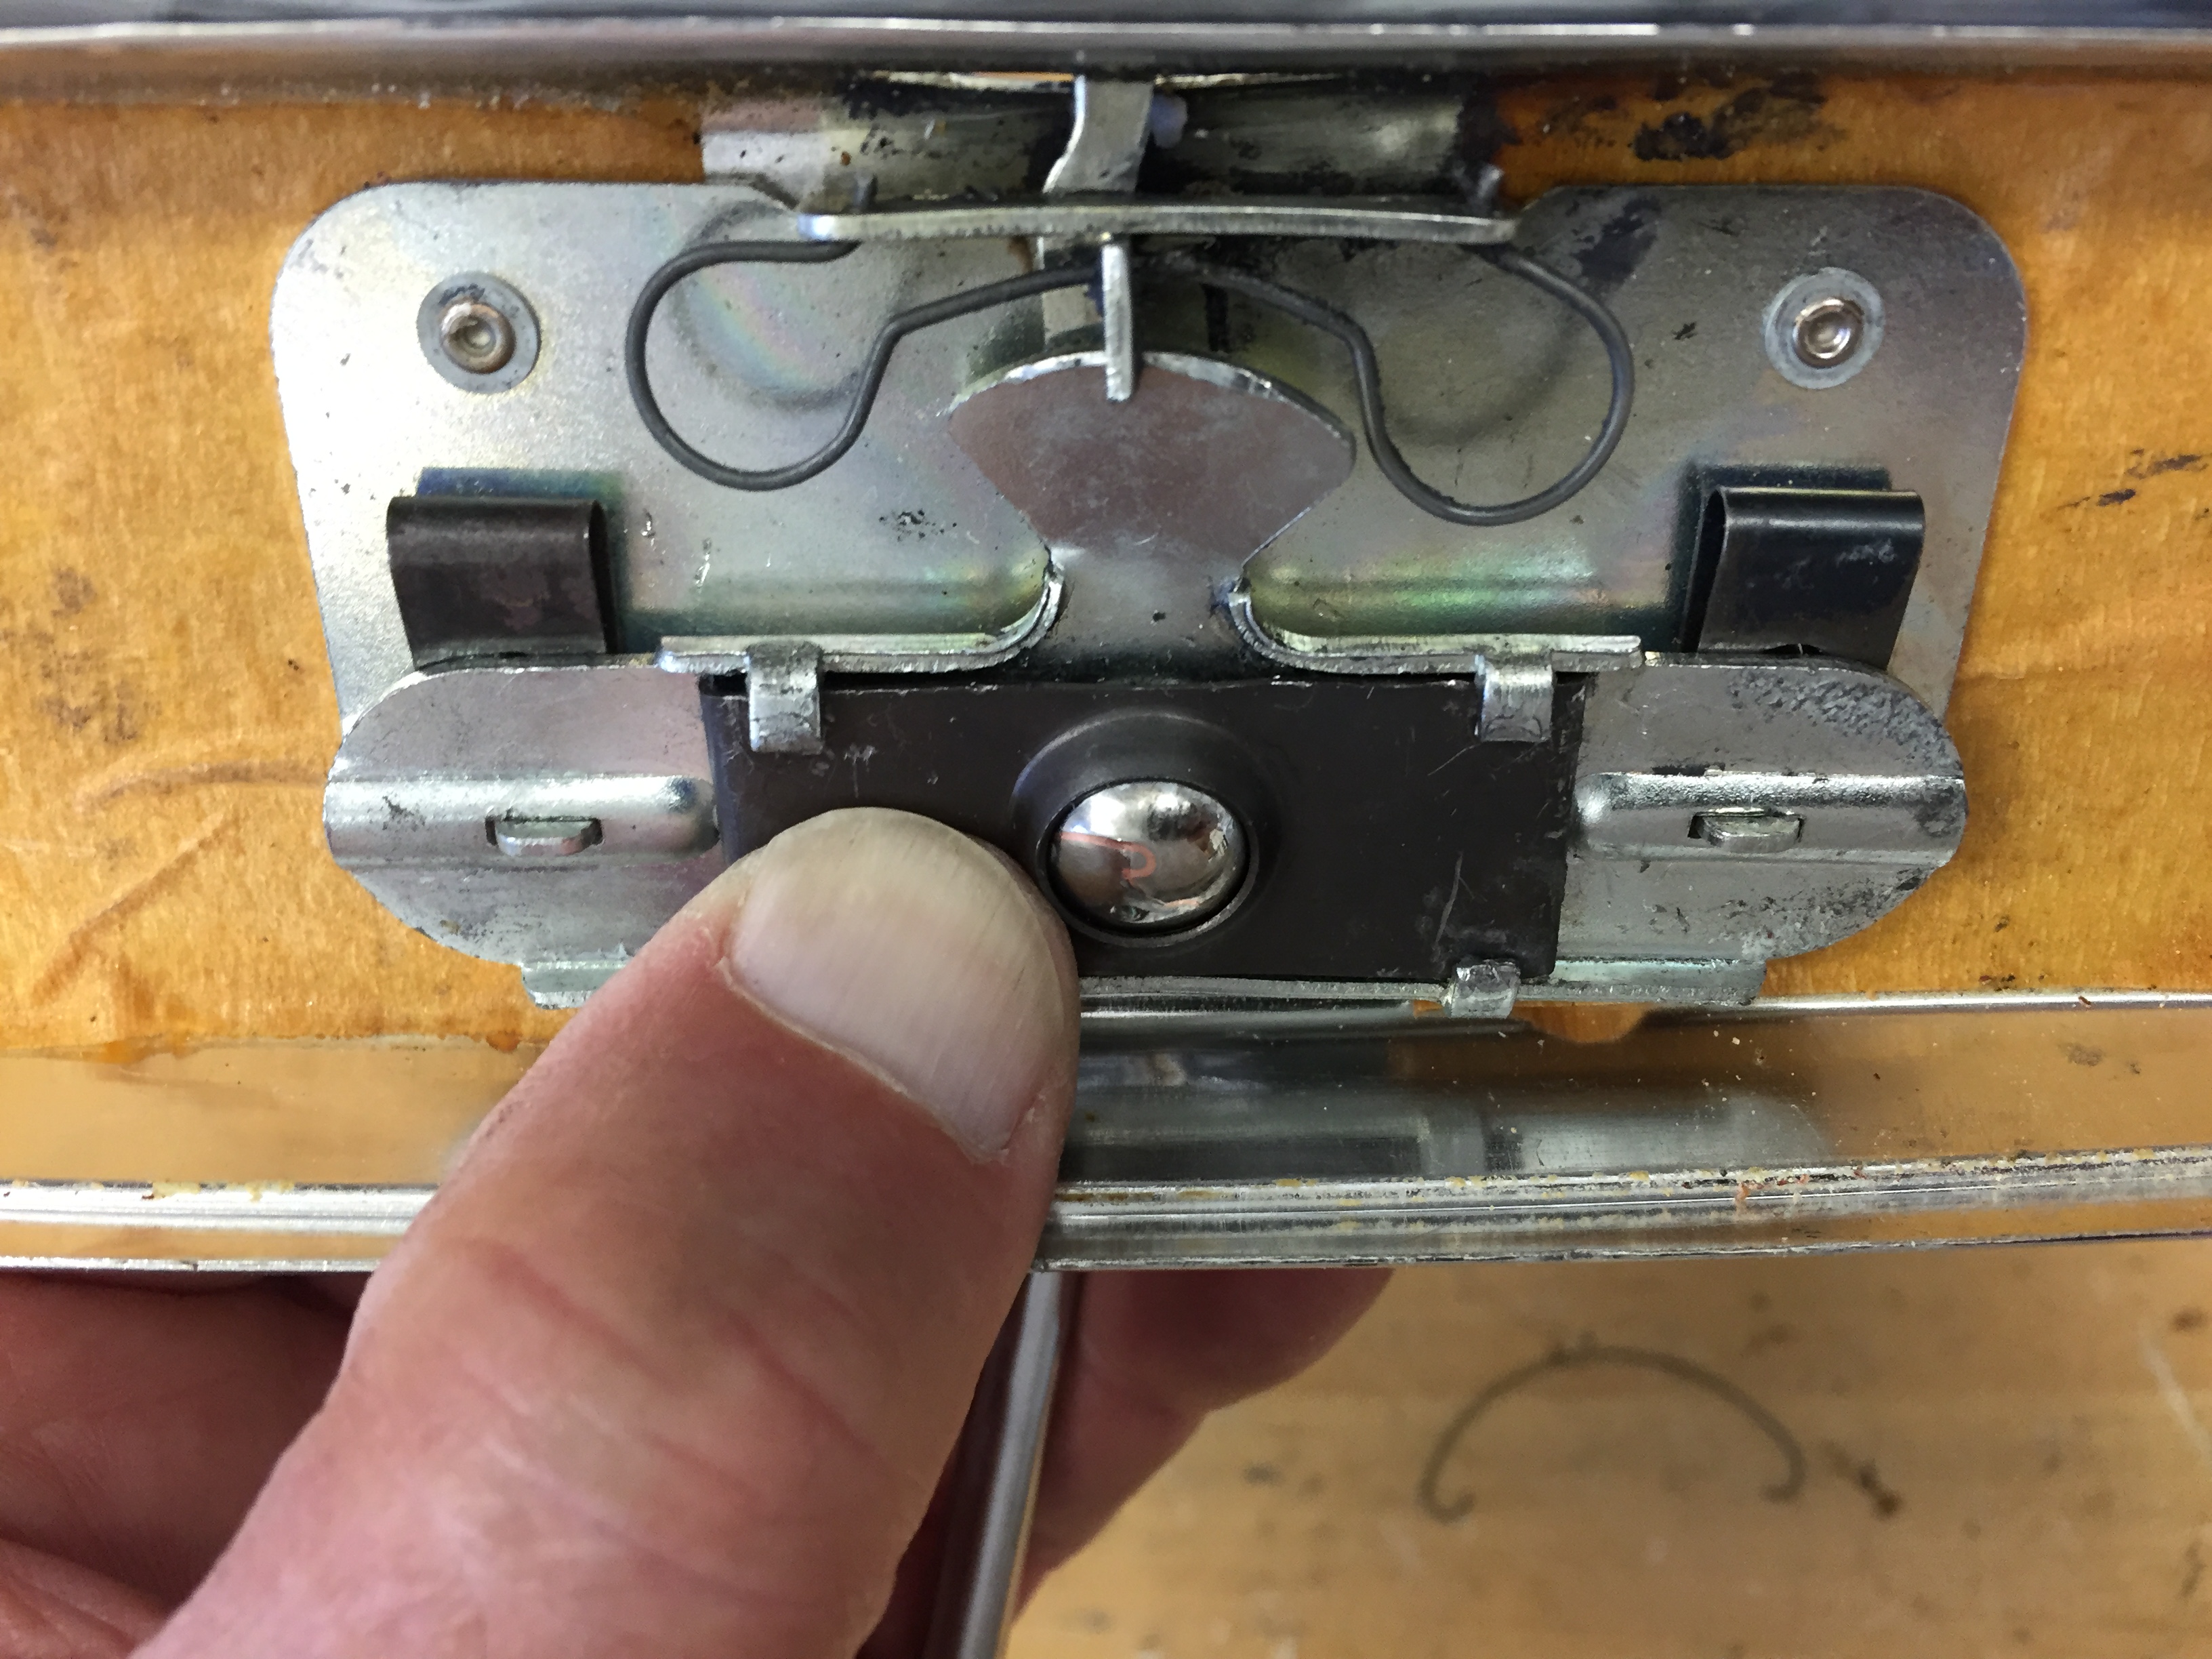
Tensioner Spring Tabs bent into Position
A very fine sprung wire holds the tensioner plate to the mirror assembly as seen in this image:
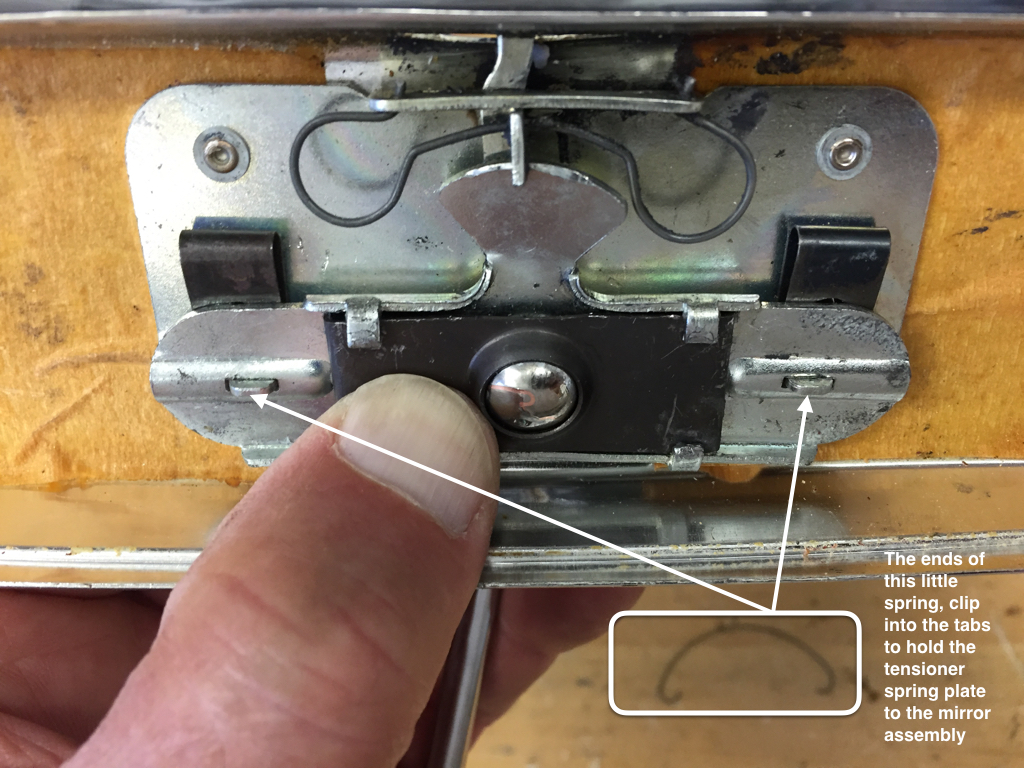
Rear View Mirror Retaining Spring
The mirror casing cleaned up with some polish and hand buffing:

Polished Mirror Casing
The final step was popping the mirror back into the casing to complete the job!

Resilvered Mirror Installed
Of course, the generous use of Walnut veneered wood and supple leather hides make a Jaguar!
Wood Trim
I will have all of the wood professionally refinished. possible vendors include:
http://www.classicdashboards.com/gallery-jaguar-restoration-photos.html
Classic Dashboards is operated by Simon Lorkin who is located in France.
British Autowood operated by Saul Chaplin is in Altamonte Springs, Florida: http://www.britishautowood.com/index.htm
Leather Trim
I have not yet decided if I will have the leather and vinyl work custom stitched or if I will go with one of the primary suppliers:
John Skinner at: http://www.jaguar-trim.co.uk
or,
BAS Ltd. at: http://www.basjaguartrim.com/mk2daimler250.htm
or,
Aldridge Trimming at: http://www.aldridge.co.uk


