Bonnet Wiring Harness – Front Lights and Horns

The wiring harness for the bonnet lighting (headlights, flashers, side lights and driving lights) was created previously. The harness utilizes Deutsch connectors where possible but also incorporates a number of bullet connectors. Once completed the harness was taped and sent to Rhode Island Wiring for cloth braiding. The creation of the harness was detailed in Bugeye Restoration Video Episode Sixty-sixhttps://vimeo.com/997550566/c57d5ae6dc?share=copy

After installing the lighting harness in the bonnet we then created the harness linking the bonnet lighting wiring to the “J” Deutsch connector on the RH chassis valance. The horns and the air duct flange were also installed. All connections were tested and functioned properly. This connector harness will be removed, taped with Tessa tape and also sent to Rhode Island Wiring to be cloth braided.

Bugeye Restoration Video Episode Ninety-three covers the final installation of the bonnet lighting harness and the creation of the connecting harness: https://vimeo.com/1042084864/5e7d7f87bf?share=copy


Bugeye Aluminum Cylinder Head

When we purchased the rebuilt 1275 engine from Rivergate Restorations about twenty years ago, we opted to go with an aluminum cylinder head. Described by Bill Perry (Rivergate owner) in this way: Improved flow and performance, Stellite valve seats, 19 pounds lighter than stock, ready for no-lead fuel, bronze valve guides – a beautiful, functional addition to Sprite/Midget – $725 price only applies to a cylinder head purchased with a rebuilt motor. 

We believe that the cylinder head is the one sold by Moss Motors. Part number 451-875. This is how Moss describes the head:

“These light-weight (9 lbs.) high strength aluminum alloy cylinder heads run cooler, allow higher compression ratios, and have a greater than 35% increase in flow rate over stock heads. Heads come with silicon-bronze valve guides and hardened valve seats. These require 1275 valves, springs, and retainers, 12mm spark plugs (our 451-890 NGK plugs are recommended), all of which must be purchased separately. These heads do not have air injection ports, and therefore should not be used for street use on cars originally fitted with air pumps.”


Compatible with: Exhaust Valve 423-335, Intake Valve 423-190, Upper Valve Spring Collars 460-556, Valve Spring Cotters 460-535, Double Valve Spring Set 423-470

Fitting the head to smaller bore engines will require machining of the block to ensure adequate valve to block clearance.


Requires coarse thread manifold studs 328-765 x 6


Note: The rocker oil feed design requires that if a Payen composite head gasket with rubber oil seal is used, the gasket must be reversed. “FRONT” should be to the back of the engine so that the original type copper oil passage seal is over the oil feed passage.

Rear Axle Hub/Brake Problems Again!

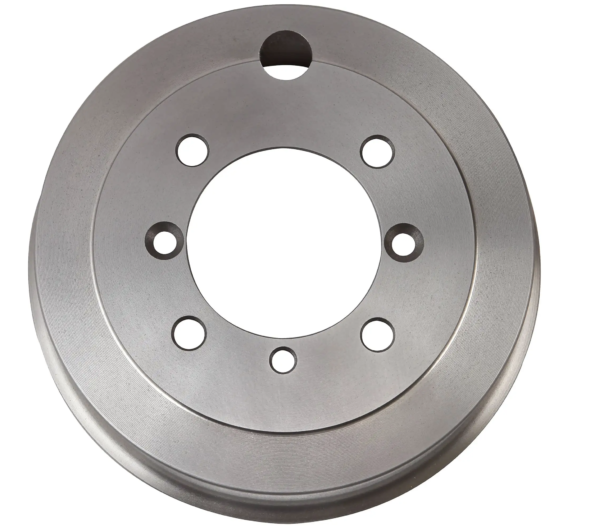
We don’t seem to be able to escape our problems with the fitment of the rear axle hubs and brake drums. A thorough accounting of the issues we faced were first documented in several videos included in an earlier post:https://valvechatter.com/?p=13569

We thought we had conquered the problems we had encountered with the hub rubbing the axle flange and with the brake drum rubbing against the brake backplate, but upon installing the road wheels and tires we discovered that all had not been corrected! 

The wheel on the left side of the car turned freely but on the right side we found that despite the hub nuts being tightened and torqued to 38 ft. lbs. as directed in the maintenance manual, the wheel and tire wobbled back and forth. It is a little hard to tell but it can be seen in the beginning of the Bugeye Restoration Video Episode Ninety-two. We then tried a pair of brand new Moss Classic Gold brake drums that we had on hand.

These allowed us to eliminate the wobble of the wheel on the axle, but the drums rubbed against the backplates just ever so slightly. All of this trial and error is shown in the Episode Ninety-two video. 

https://vimeo.com/1039806095/9a01552650?share=copy

We will now machine the edges of the drums and see if we can end up with a fully operational axle assembly. Stay tuned….


Flywheel and Clutch

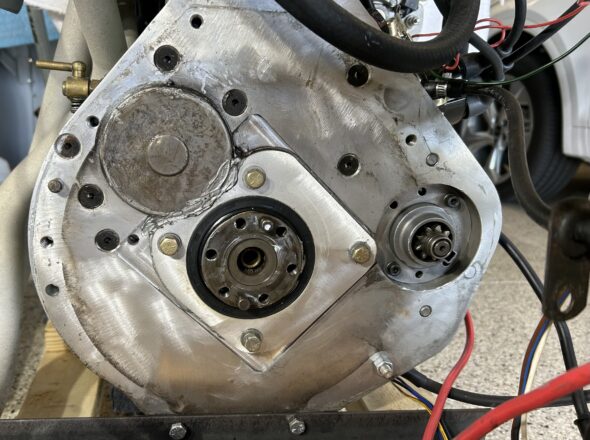
In 2022 when we pulled the engine from the car to begin the restoration, the clutch was working just fine. However, with the engine out of the car and the gearbox already separated from the engine, It seemed the perfect time to go ahead and replace the clutch disc and pressure plate (cover) with new components. We have learned on multiple occasions that just because a part is new doesn’t mean it is better, but the clutch is definitely a wear item so we decided to buy a new disc from Rivergate and a new Borg & Beck pressure plate from A.H. Spares. We had already observed that the ring gear was pretty chewed up so we ordered a new one from A.H. Spares as well.

Upon removing the clutch and flywheel from the engine we noticed that we did have wear on the flywheel surface so we decided to go ahead and have it resurfaced. That was work was done by Southwest Hydraulic, 177 Jackson Rd, Venice, FL 34292 (941) 786-8530. We then took the flywheel, new ring gear and clutch assembly to VAMI – Venice Auto Marine Engine Machine Shop 331 Camion St. Venice Fl. 34285 (941) 484-2474 to have the ring gear replaced and the complete assembly dynamically balanced.

One VERY POSITIVE by-product of removing the flywheel was the discovery that not only had the crank rear seal, installed at the time we purchased the rebuilt 1275 engine from Rivergate, not leaked at all, the entire backplate was still pristine.

No leaks – Rear Crank Seal

Bugeye Restoration Video Episode Sixty-five https://vimeo.com/952645430/164949ac19 provides documentation of the removal of the clutch and flywheel as well as the installation of the new clutch.

These are the Borg & Beck installation instructions:

Borg & Beck Clutch Installation


Engine Electrical Components

Gear Reduction Starter

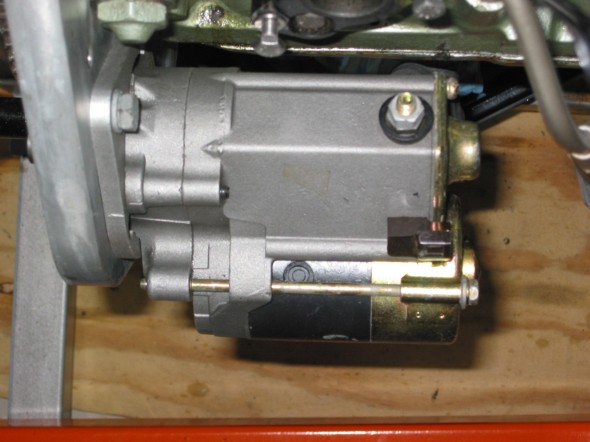
We have gone back and forth between using the Lucas starter with the Bendix that engages from the rear of the ring gear and the modern gear reduction starter that engages from the front of the flywheel.We have currently replaced the starter with a modern gear reduction starter from APT Fast. Unlike the old Lucas starter it cranks until the motor fires. Definitely more difficult to install than the original, but hopefully easier starting will make it worth it. Fastening the lower bolt was accomplished by jacking up the right front, removing the tire and wheel and reaching through the hole in the frame wall. The cranking sound is very different than the Lucas starter, but functionality is substantially improved. We chose to continue to use the old pull starter switch on the dash, but could have hooked up the starter to a modern solenoid as well.

Gear Reduction Starter

Gear Reduction Starter

Alternator 

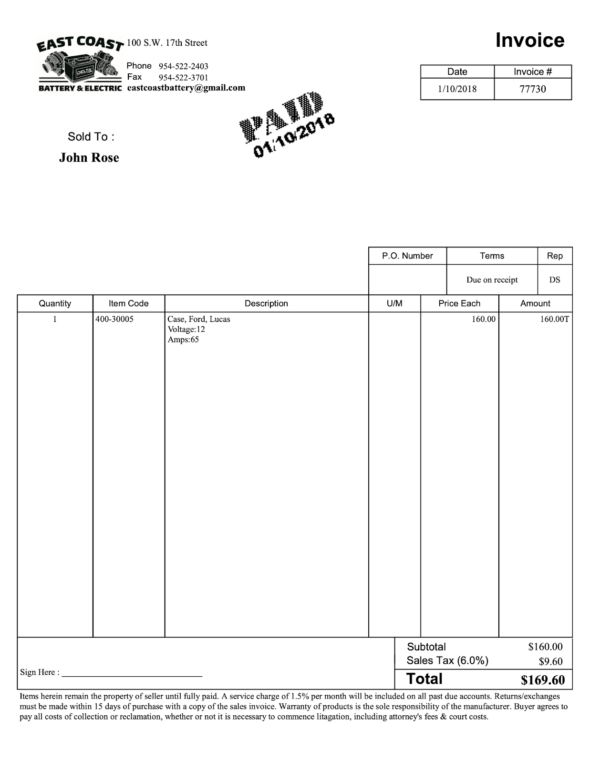
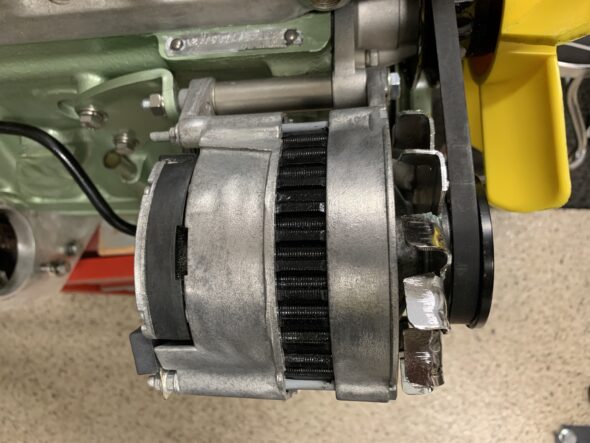
The only information we have on the alternator is that it is a rebuilt unit designed to replace the Lucas alternator that we had in the car previously. It’s rated output is 65 amps.

Alternator Invoice

Rather than having two bolts for the left and right ears of the alternator, a single long bolt and a stainless bushing have been added to enhance the stability of the mounting.

Bugeye Alternator with new Mounting Bushing


Exhaust

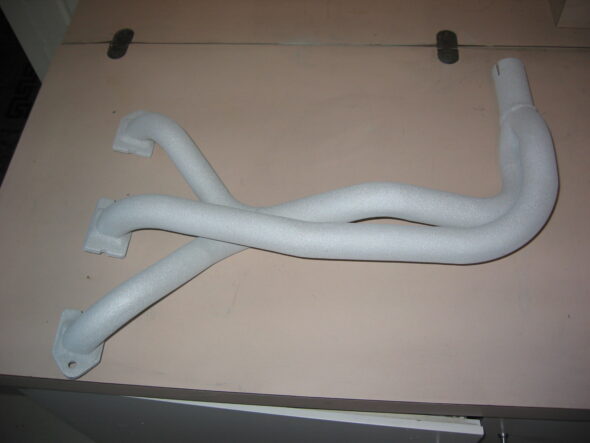
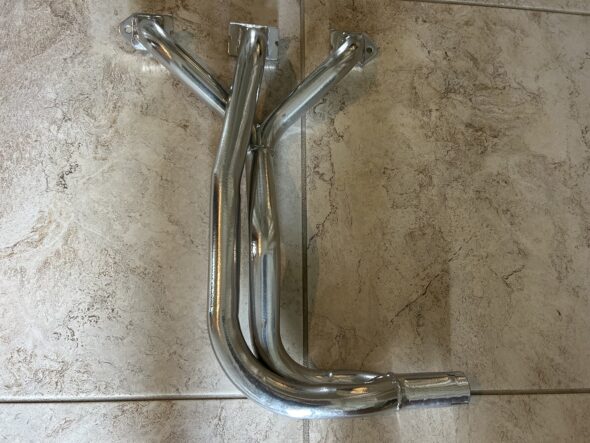
Nothing in our exhaust system is as original! From the header to the oxygen sensor in the exhaust pipe to the dual tip muffler, everything is a modification. We have had the header fitted since the early 2000s. We don’t have a record but we are pretty sure that it was sourced from Mini-Mania and produced by Maniflow in the U.K. The header is a long branch, 1 5/8.” Before we initially installed it we had it Swain-Coated for thermal insulation. While beautiful then, it looks a little tired now so we will send it off to Jet-Hot Coatings to have them refinish it so that it will match our intake manifold.

Header

The Jet-Hot coating now matches the intake manifold.

Jet-Hot coated header

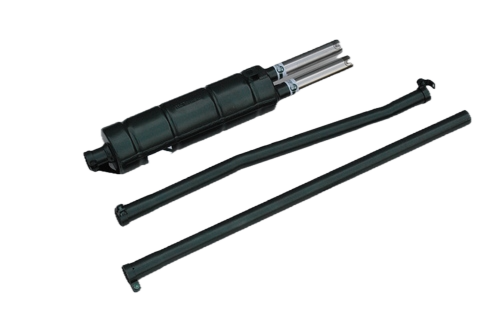
We purchased new exhaust pipes and a twin-tipped muffler from Maniflow to fit the header. The pipe comes in two sections. We will be installing a bung in the front pipe for an oxygen sensor to feed our AFR gauge. We also purchased Maniflow’s installation kit which has the hangers and clamps needed to do the job.

Maniflow Exhaust System


Modifying the Rear Leaf Springs

The rear suspension in the Bugeye is comprised of the quarter elliptical leaf springs, the shock absorbers, the radius arms and their mounting boxes, the rebound straps, the rubber bump stops, and of course, the axle. Video Episode Thirteen shows the removal of the original fifteen leaf springs: https://vimeo.com/769992972/c923375ecc

We chose to replace the original springs. The only springs readily available at this time are the 10 leaf “Rally” springs. We ordered a pair from BugeyeGuy.com along with five degree shims that will lower the car to give it a proper ride height. We disassembled these springs, removed the poor paint, cleaned them and repainted with POR-15 and installed teflon tape between each leaf to reduce friction and squeaking. That process is shown in Video Episode Fourteenhttps://vimeo.com/754389824/9ab8550b67

Most of what we have read on the various forums is that the rally spec springs are a bit stiff and don’t give the ride that the original springs provided. Tom Colby of Speedwell Engineering has suggested the removal of three of the leaves to offer an improved ride and we decided to try his suggestion. We can always back up and reinsert the leaves we take out.
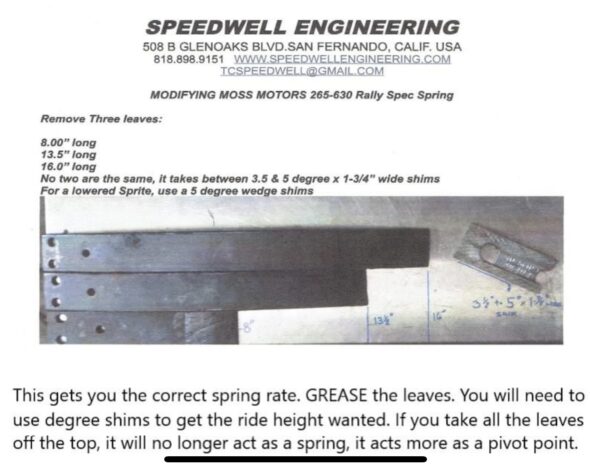
Tom Colby’s Spring Modification

Bugeye Restoration Video Episode Sixty-four shows the deconstruction of the springs.https://vimeo.com/989814778/55abef9a4c

It wasn’t quite as easy as just pulling out a few spring leaves. Because the remaining collection of seven springs isn’t as high as the ten leaves, the bolts and springs clasps need to be modified as well. The two 3/8″ hex head bolts (per spring) that are 3 1/4″ long were replaced with two bolts that are 2 1/2″ long. The 5/16″ compressing pins that are 2 1/2″ long were replaced with 5/16″ socket head screws. Socket head screws were used because the compressing pins have round heads that also serve to locate the spring in the chassis spring plate. Rather than rounding the edges off of a hex head bolt the socket head should work just fine.   

Two of the spring clips or brackets are of sufficient size to permit drilling an additional hole in the arms of the bracket to fit the new spring height. There isn’t room on the other two so we will try them as they are or modify at a later date.

The true test will be the ride and that is still months away!