
The Bugeye’s rear springs as originally configured had 15 leaves. the only commonly available leaf spring for the bugeye now is a 10 leaf “Rally Spec” spring. This spring is stiffer and causes the car body to ride higher. The solution to that issue is to use five or six degree wedges or shims under the spring at the spring perch. Tom Colby of Speedwell Engineering also recommends removing three of the leaves in the Rally Spec spring to give an improved ride. We decided to give Tom’s suggestion a try and details of the modification are included in the Bugeye Restoration Video Sixty-four below. We also installed some stainless steel dust shields at the opening of the spring perch to prevent the area from becoming a dirt trap and rust promoter. After the installation of the rear leaf springs, the rear shock brackets were mounted to the chassis.
https://vimeo.com/989814778/55abef9a4c?share=copy

Leaf Springs and Brakes
We are using Bilstein tube shocks in the rear. These were available as a kit from Udo Putzke, but are now offered by Steve Kirby. http://www.fahrspassforhealey.com The kit is fairly easy to install but one does need to be sure to get all of the required spacers in the proper place. The instructions supplied with the kit are not well detailed but they sufficed.Bugey Bilstien shock installation
We then secured the radius arms at their upper mounting point on the chassis.
Before things got crowded, we installed the exhaust hanger that bolts to the rear bulkhead. Two 5/16″ – 24 x 5/8″ hex head bolts with split washers secure the hanger.
We then moved to mounting the rear axle assembly to the chassis. The rear axle assembly was addressed in a previous post: https://valvechatter.com/?p=13569 Several videos referenced in this post describe all that was involved in restoring the axle including a switch to a 3.99 rear differential and the addition of larger rear drum brakes.

Rear Axle assembly
We placed the axle assembly on a floor jack and rolled it under the car and then carefully raised it into position. The axle is linked to the chassis by first connecting the lower mounts of the radius arms. A bushing must be used on the inside of the arm and a special bolt is used to secure the arm to the axle. An extension magnet is helpful in positioning the spacer. Once the radius arms are attached, the axle can be pushed over the eyes of the leaf springs and another special bolt is then used to attach the spring and the axle. That’s it – four bolts attach the axle to the car!
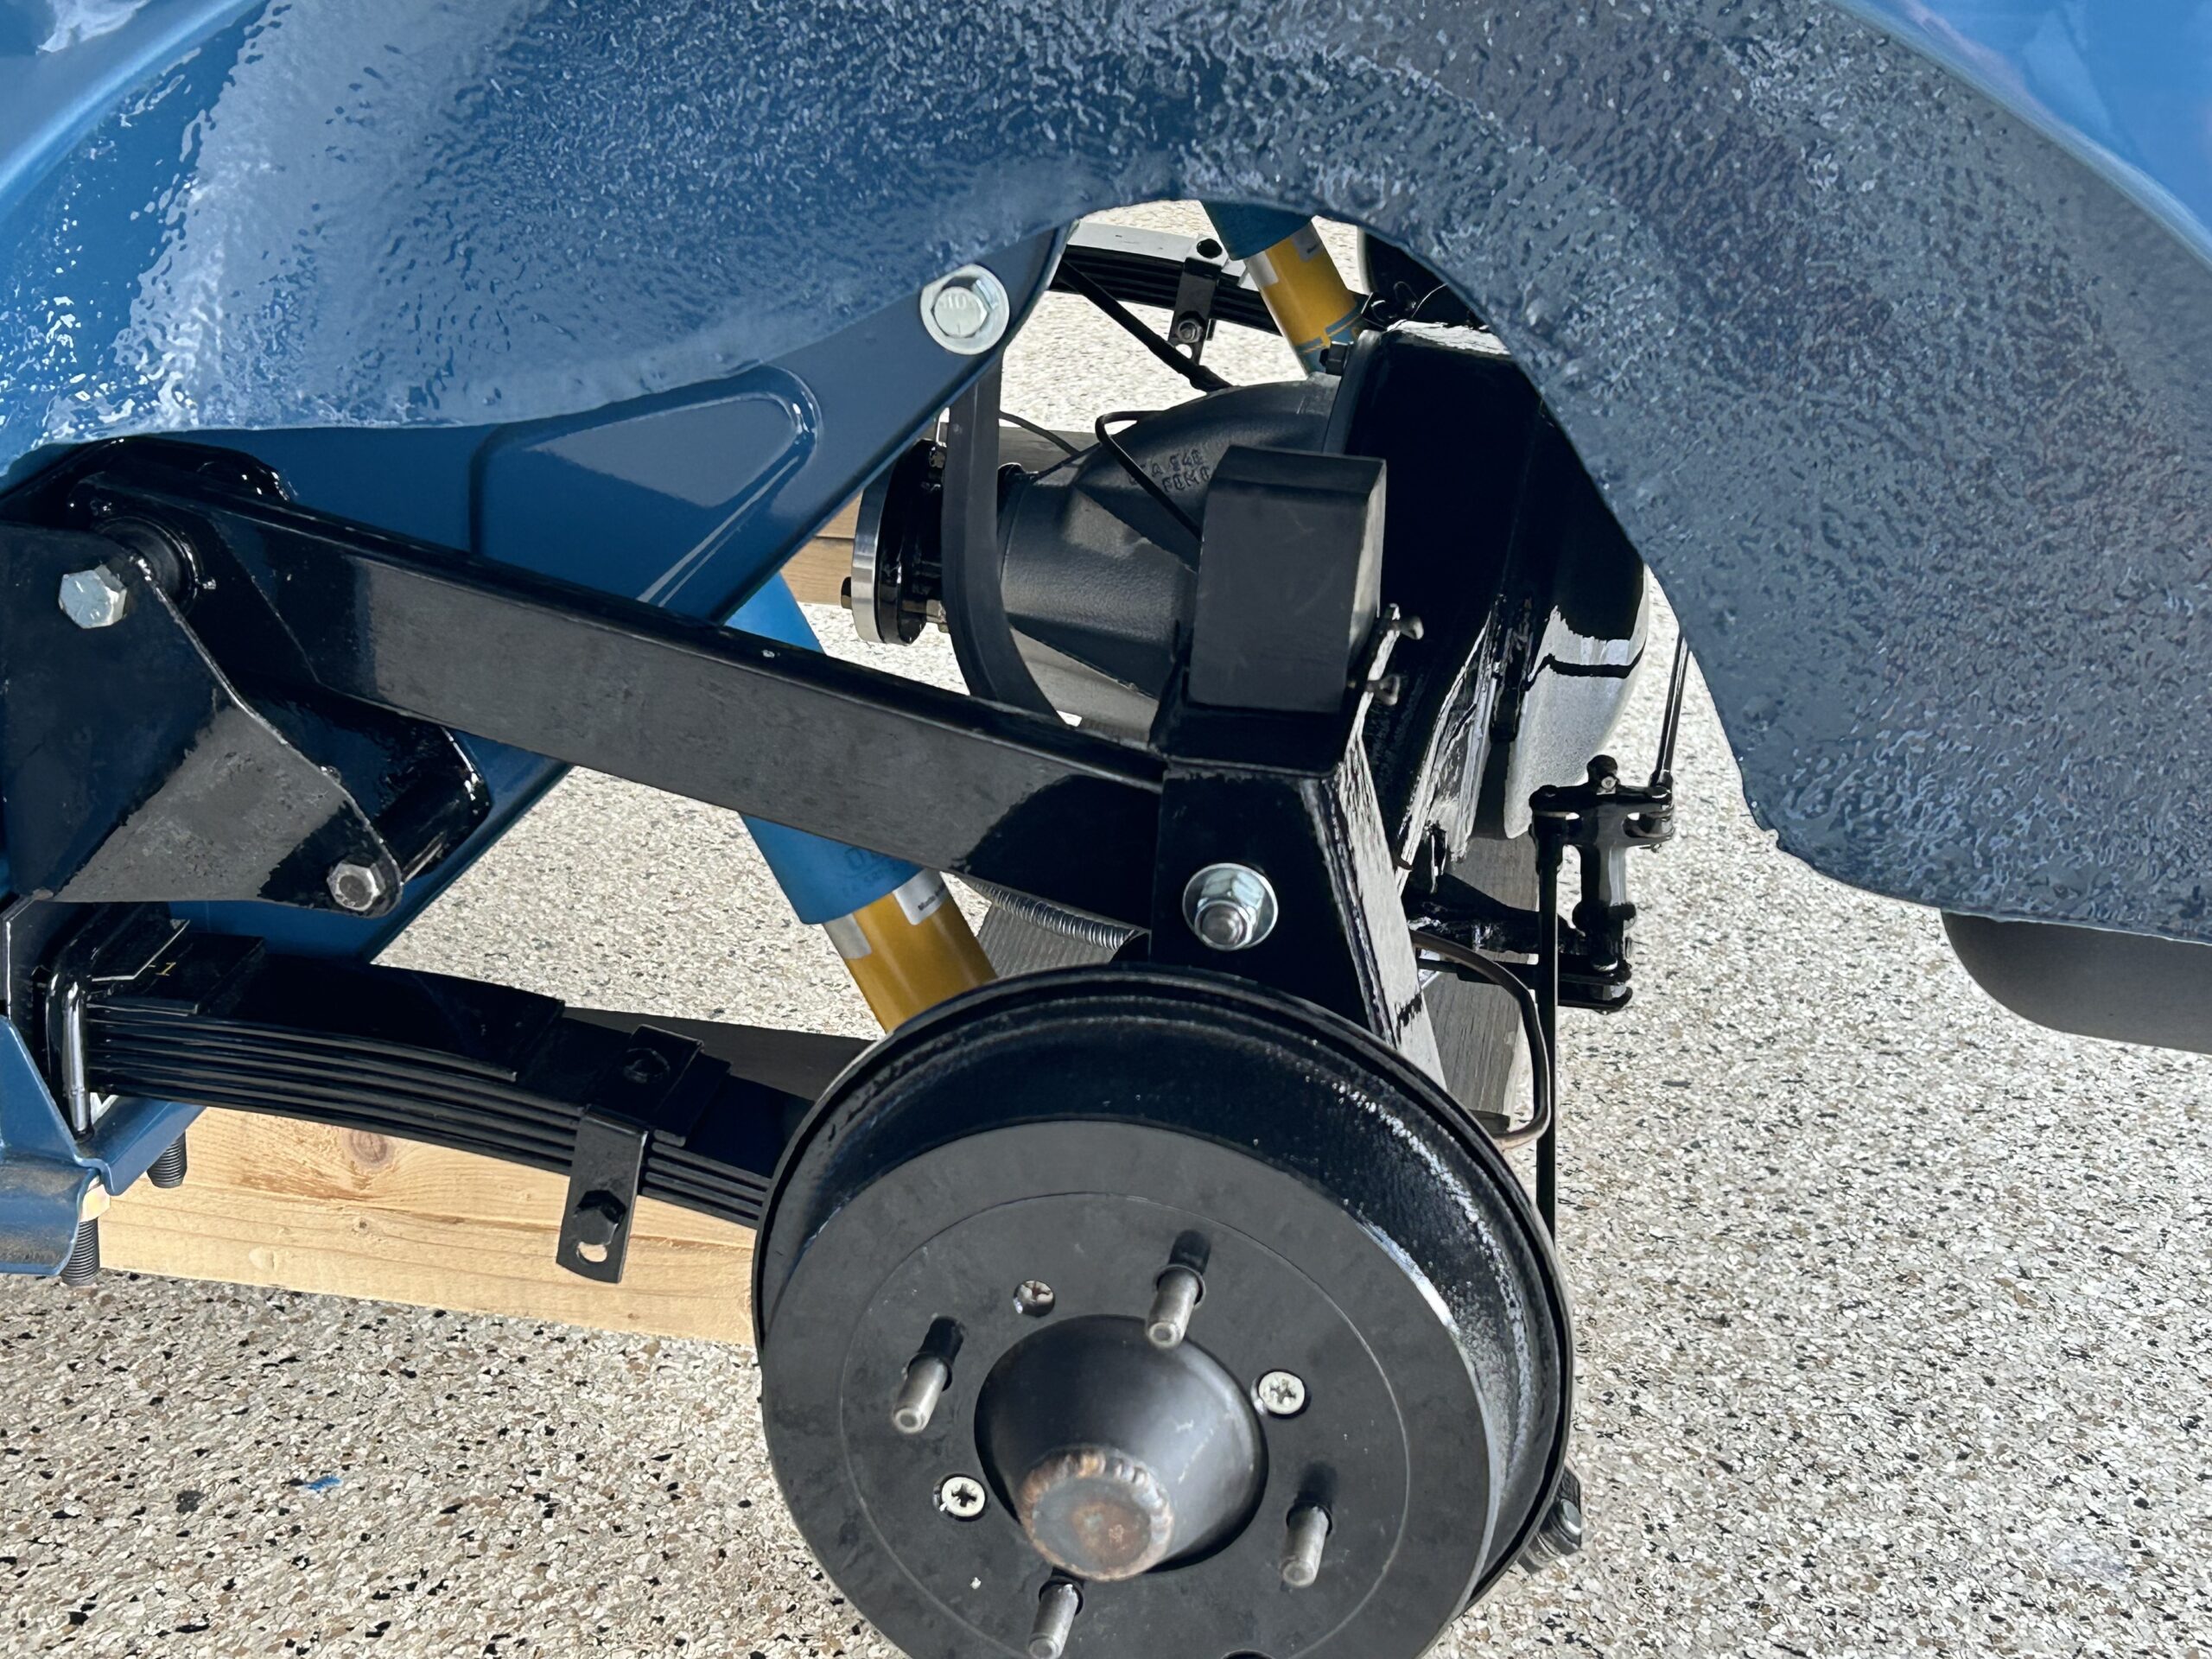
Rear Axle Installed
It will need to be adjusted later, but we went ahead an attached the handbrake cable to its fittings mounted on the axle.

Handbrake and Cable
With the axle in place we were then able to mount the fuel tank to the underside of the car. Six 5/16″-24 studs are located on the underside of the car and these line up with six holes on the tank. Once in position flat washers, split washers and hex nuts were put in place to mount the tank. Care must be taken to route the wire (with heat shrink tubing around it) that connects to the fuel tank sender, between the tank and the bottom of the car. The wire then goes through a rubber grommet in the floor to the boot where it will connect with a wire that travels to the fuel gauge. We also added as an extra precaution a black ground wire from one of the screws on the sender body to a ground connection on one of the tank mounting studs.
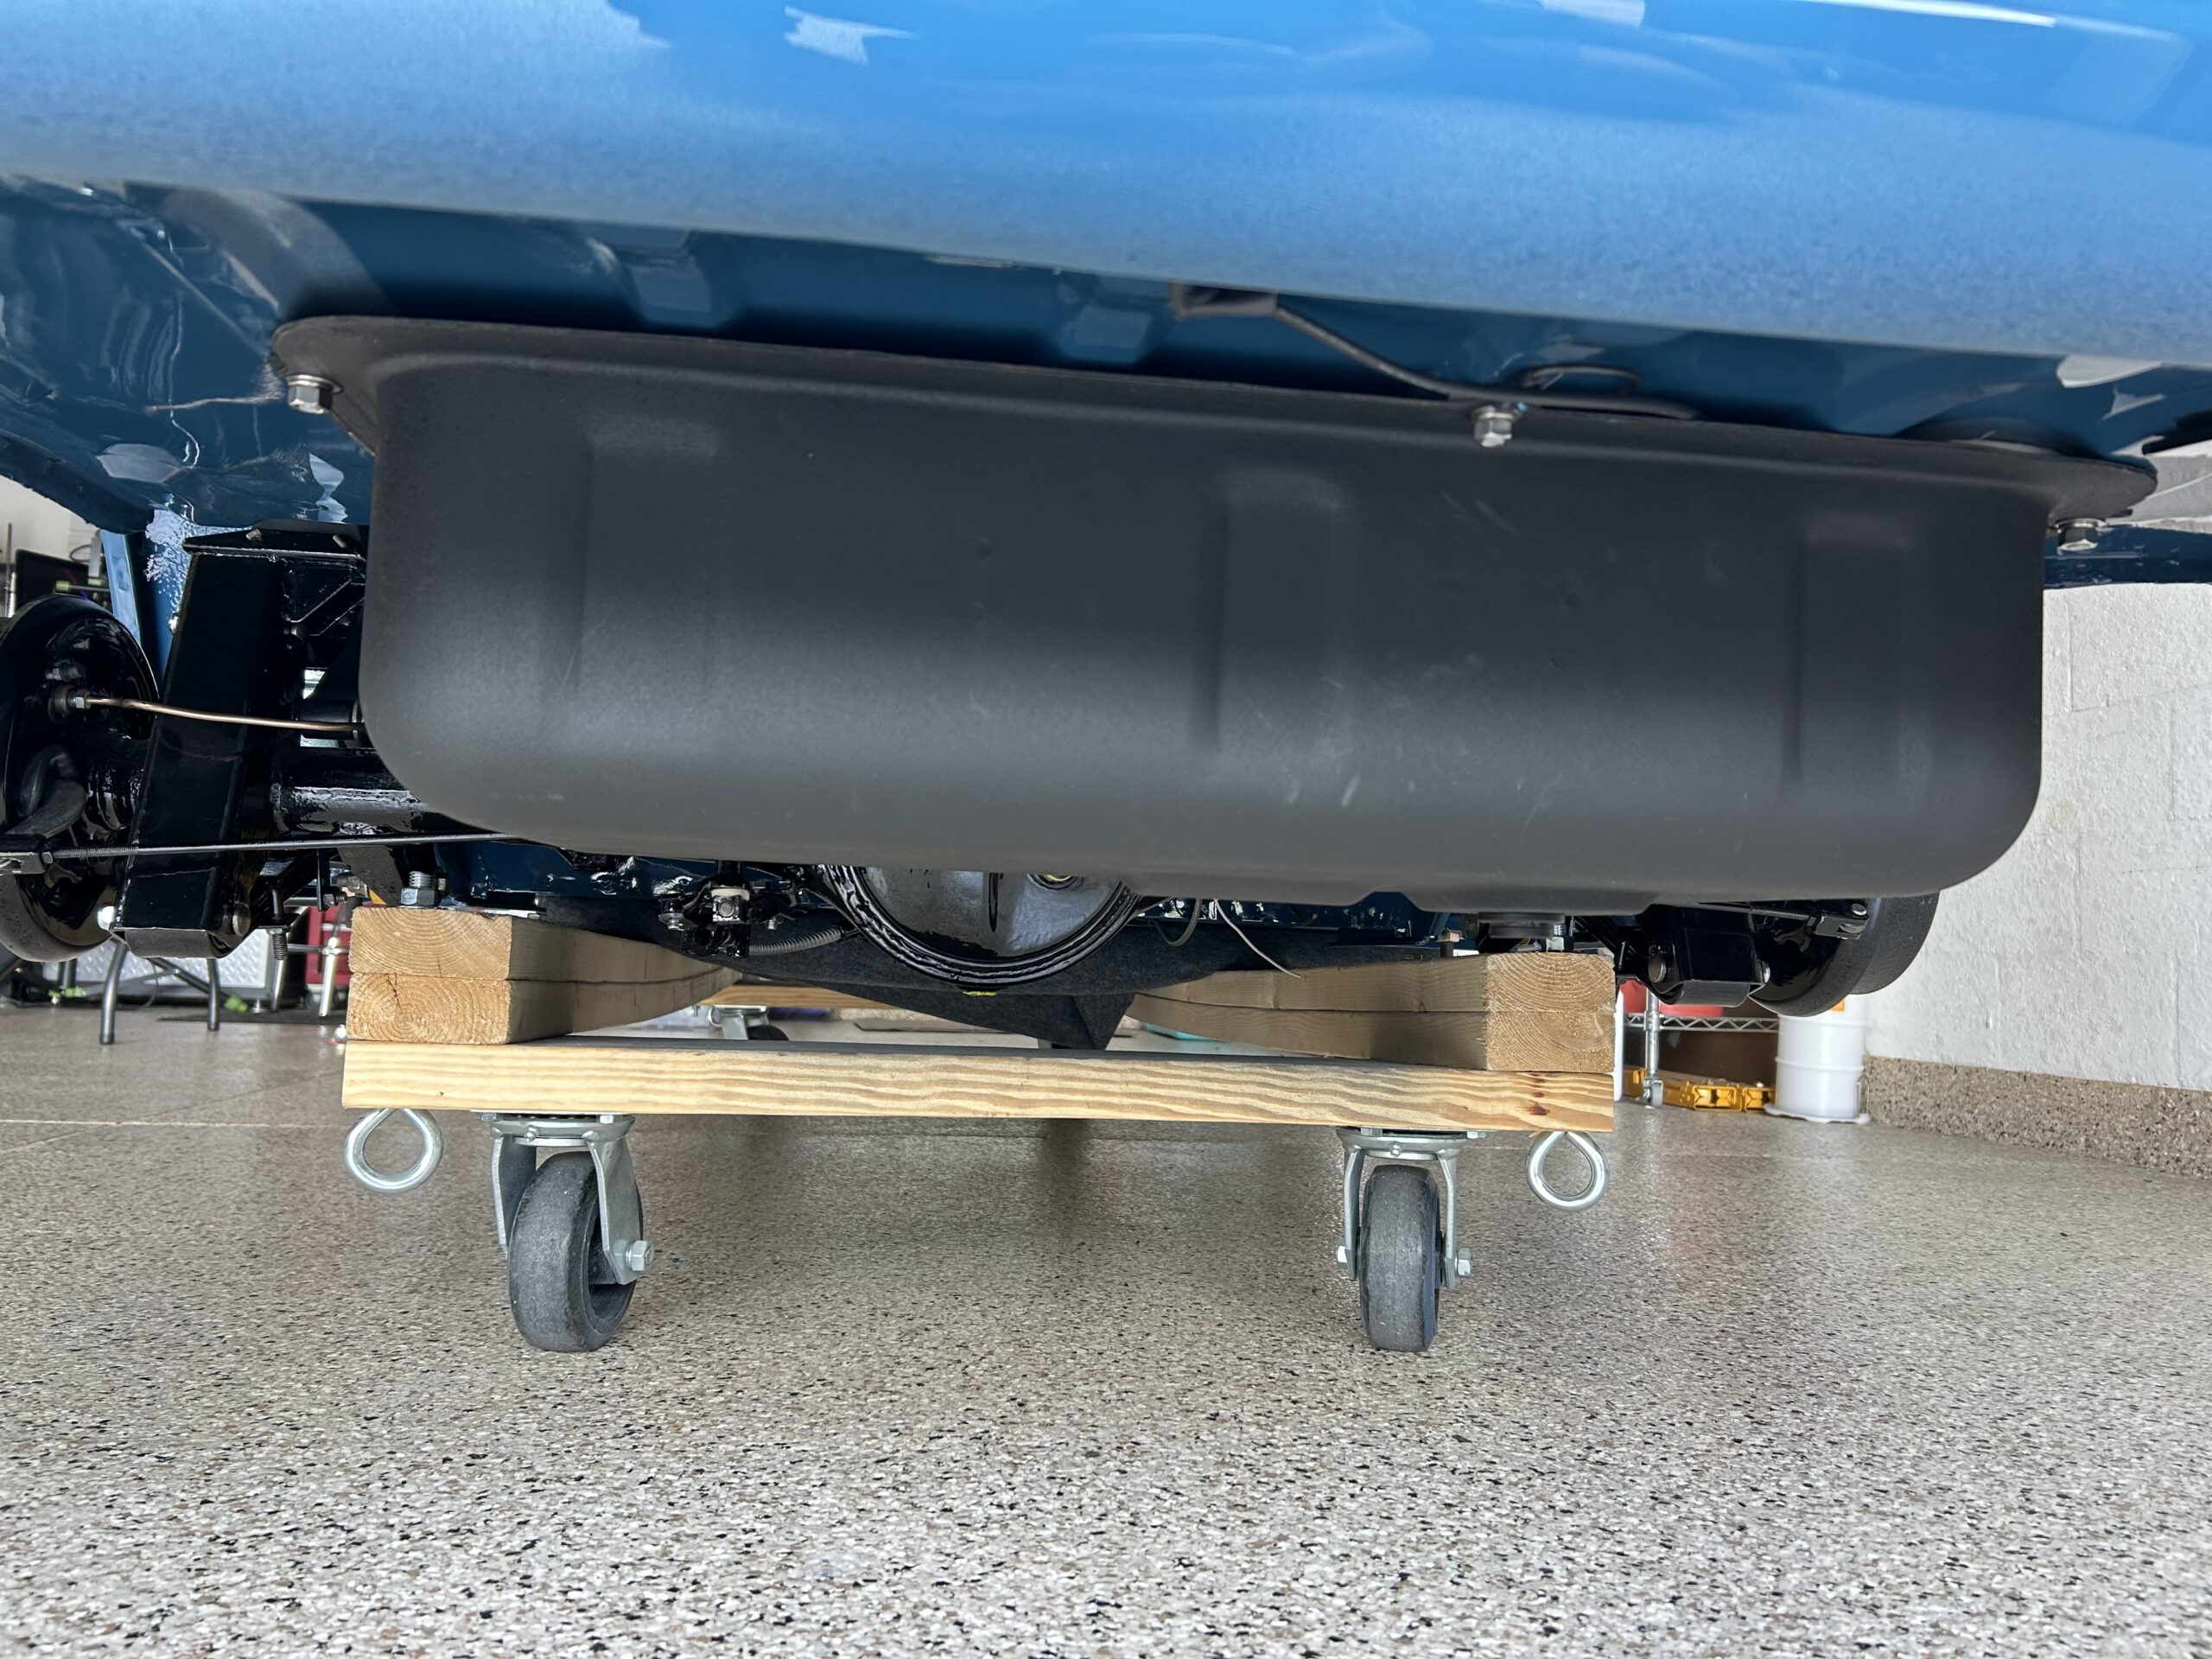
Fuel Tank Installed
Finally, we attached the fuel pipe from the fuel pump to the fuel tank at the tank, and installed the Goodridge Stainless Steel flexible brake hose linking the rear axle brake pipe union to the brake hard pipe running to the front of the car.
All of these assembly and mounting steps may be viewed in the Bugeye Restoration Video Episode Seventy-five: https://vimeo.com/989702527/e946c7dc29?share=copy
0:00 – Rear shock brackets and tube shocks are installed
1:45 – The LH rear spring dust shield and the U bolt are installed
3:00 – The rear axle is mounted under the car
4:45 – The exhaust hanger is installed
5:37 – The fuel tank is installed
6:50 – the Goodridge stainless steel brake hose is installed