
Continuing with the front suspension rebuild, we assembled the swivel pins (stub axles) to the hubs and brake rotors. New king pins were installed in the axles after new bushings were fitted and reamed. New grease zerks were fit and poly bushes were installed in the upper trunnion.
 Front Suspension
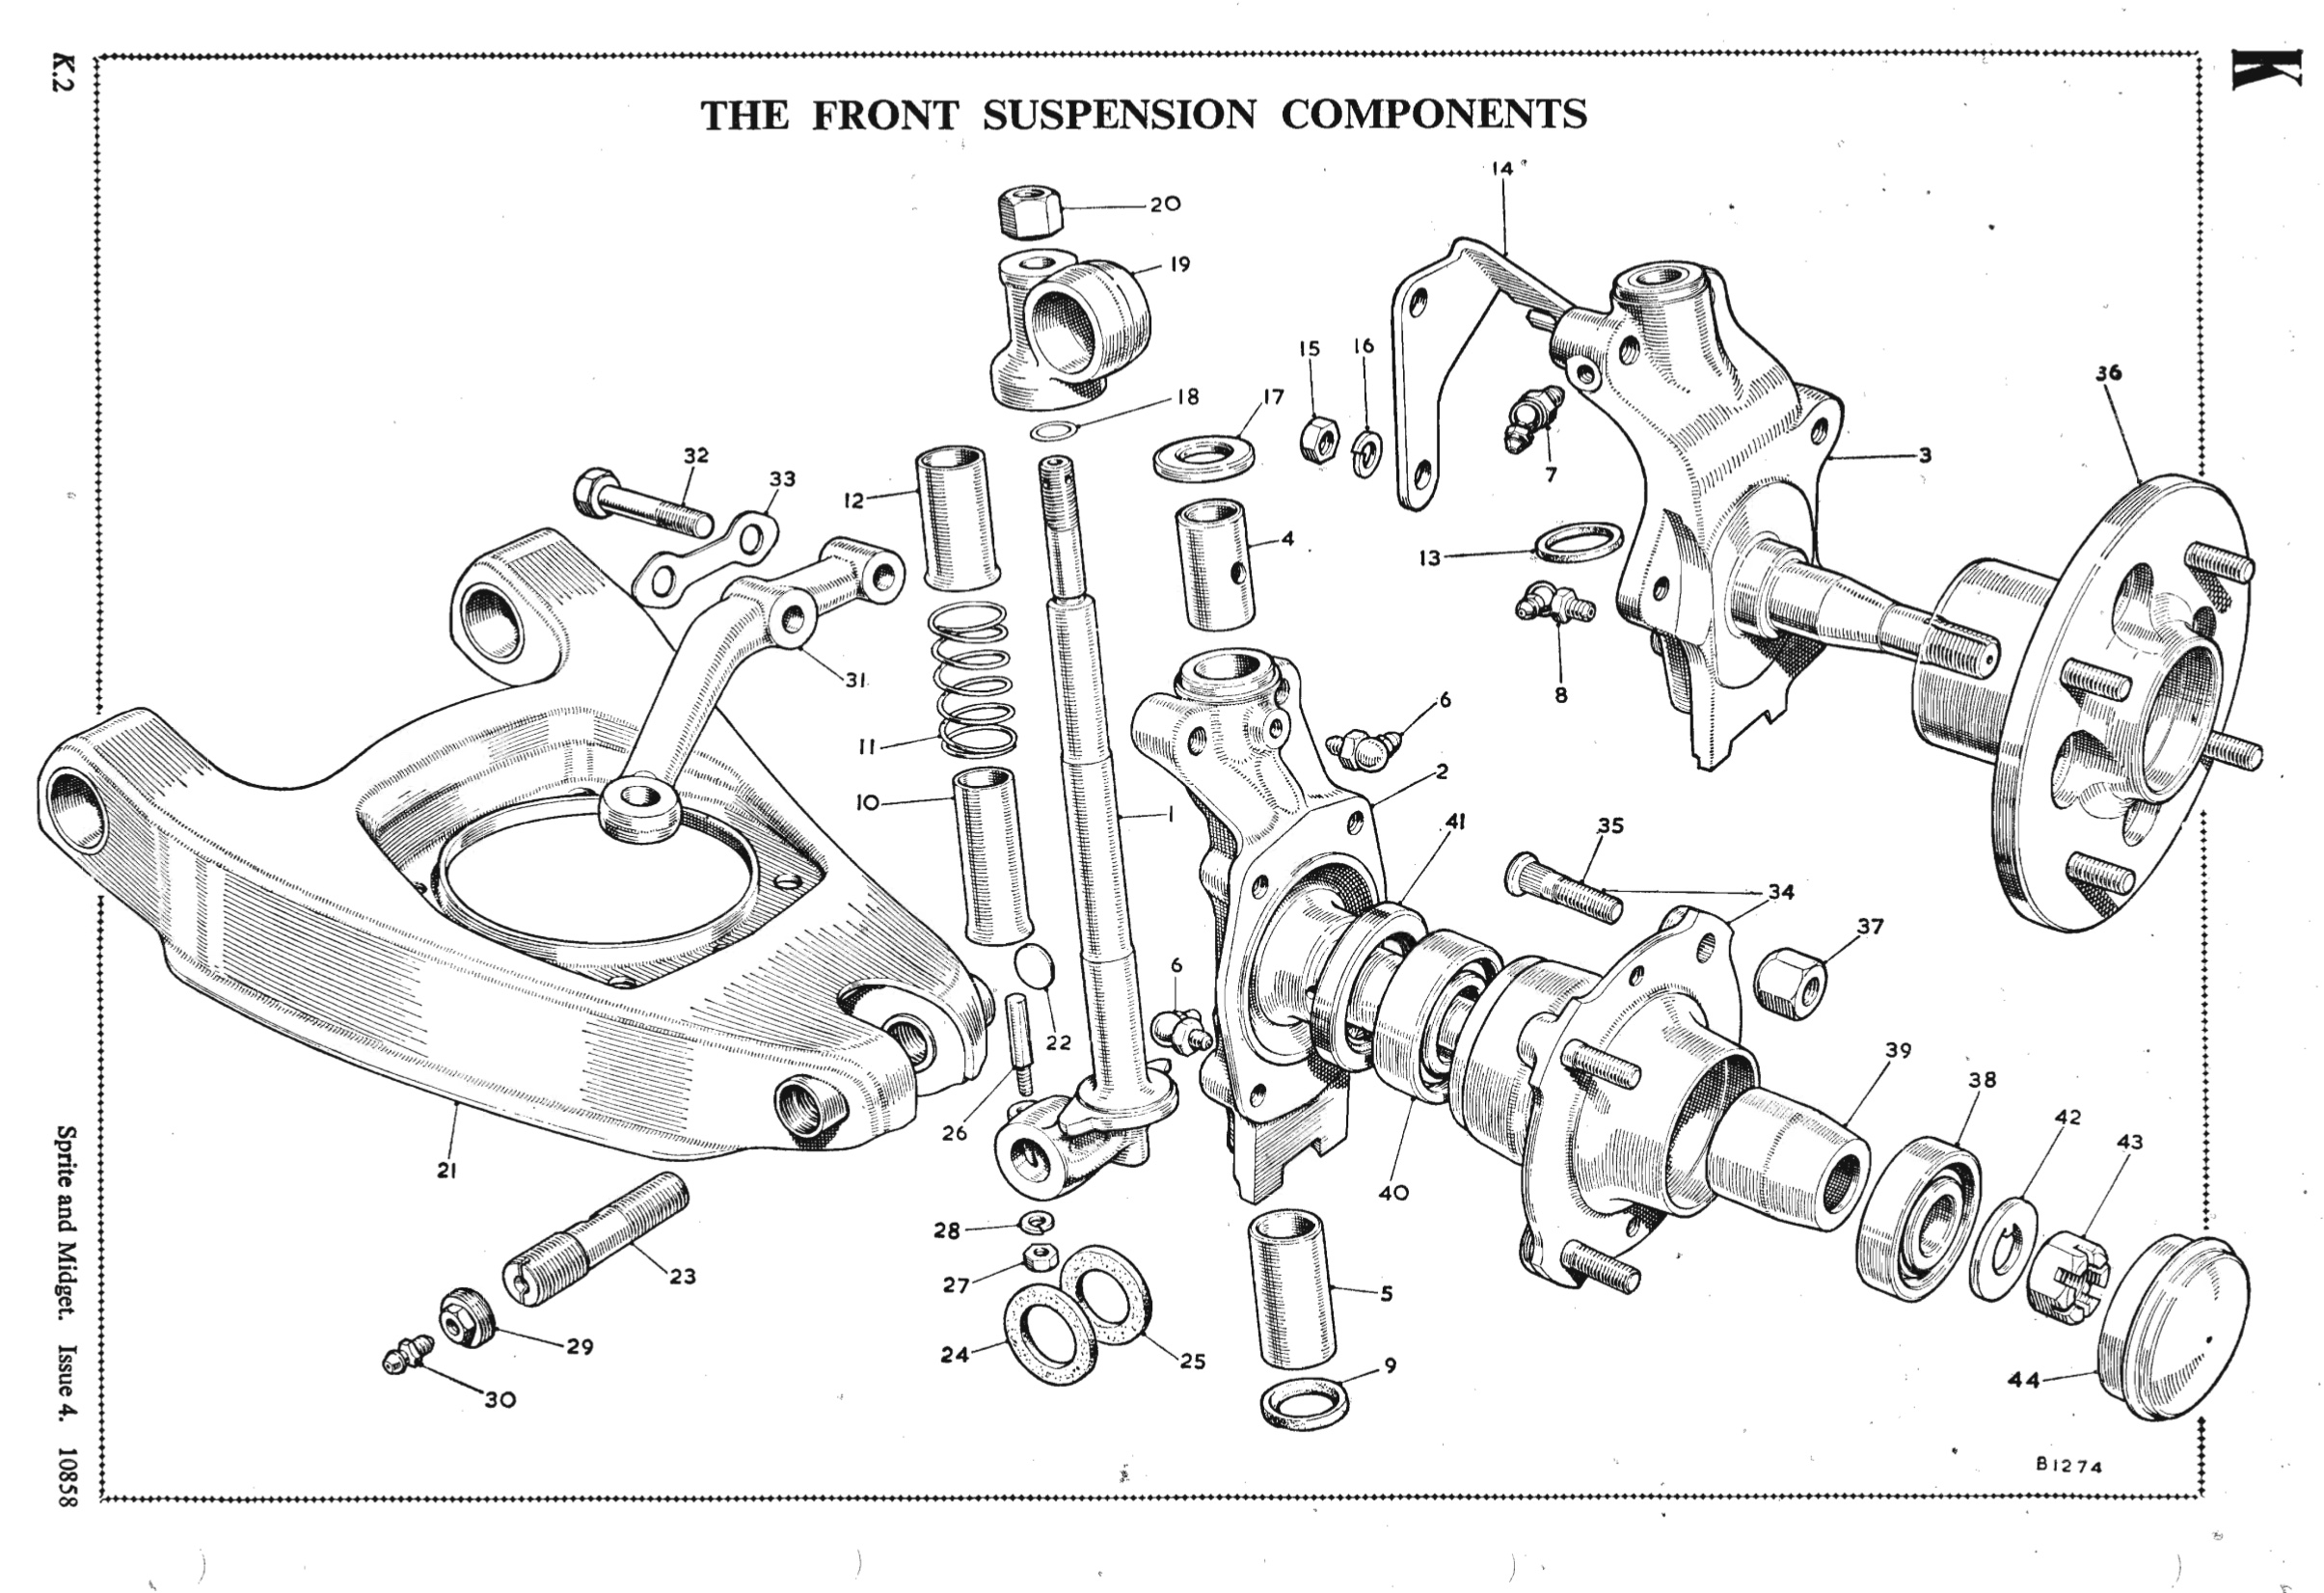
 Front suspension Components
We did a fair amount of research regarding the proper ball bearings to use for the Sprite/Midget front suspension. Bearings from the usual British parts suppliers don’t seem to completely replicate the original bearings used as manufactured. A British supplier, Ransome and Marles, https://www.ransomeandmarles.co.uk does sell the original ball bearings. They are pricey, but in this case the quality and value seem worth the price. Proper fit and tight tolerances are important! The bearings came with a new oil seal as well. We packed the bearings with high quality bearing grease and installed them in the hubs and then installed the oil seals.
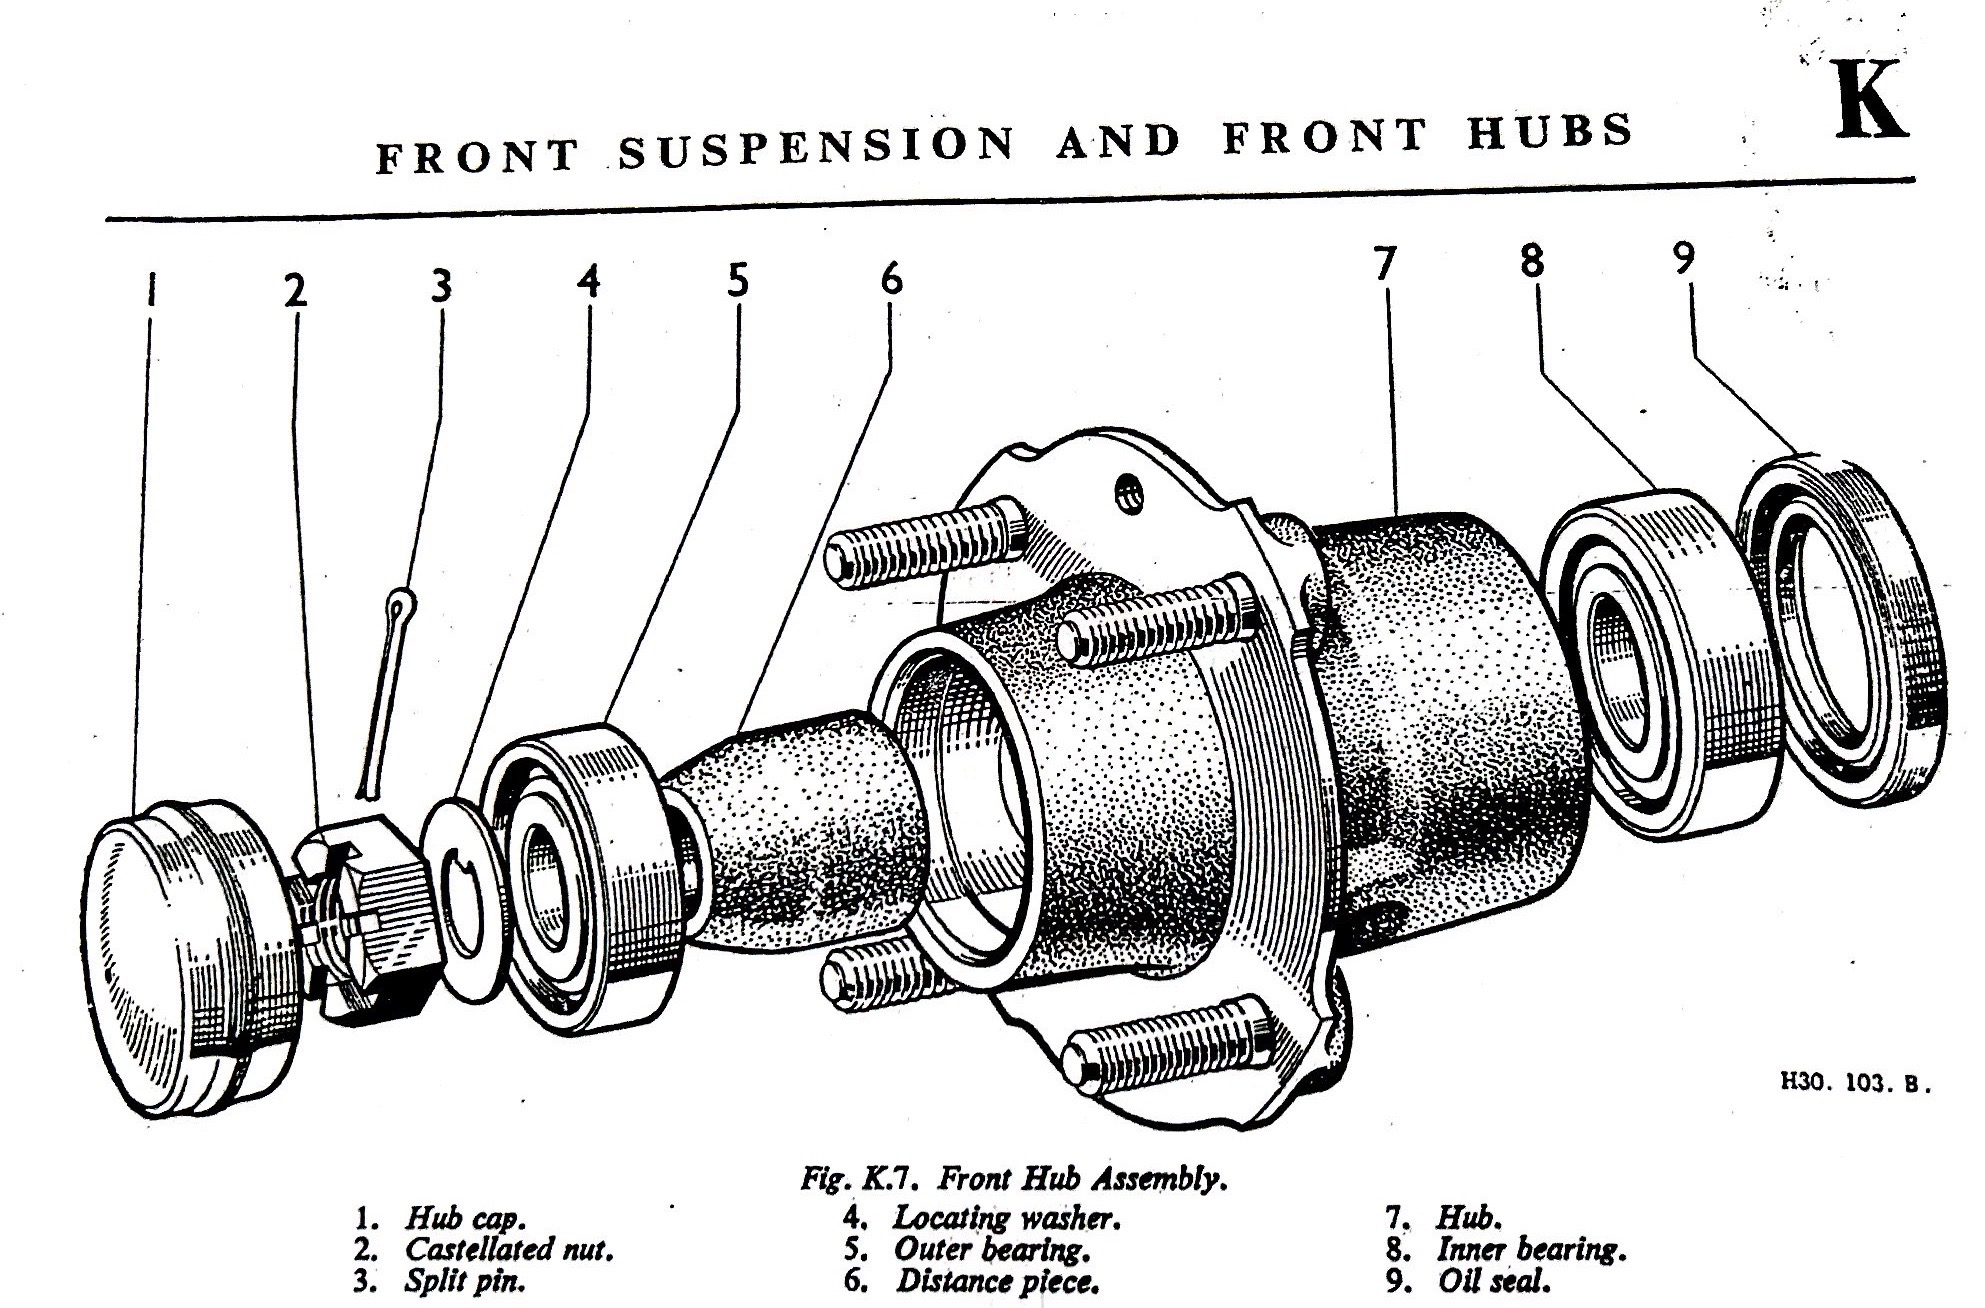 Front Hub assembly
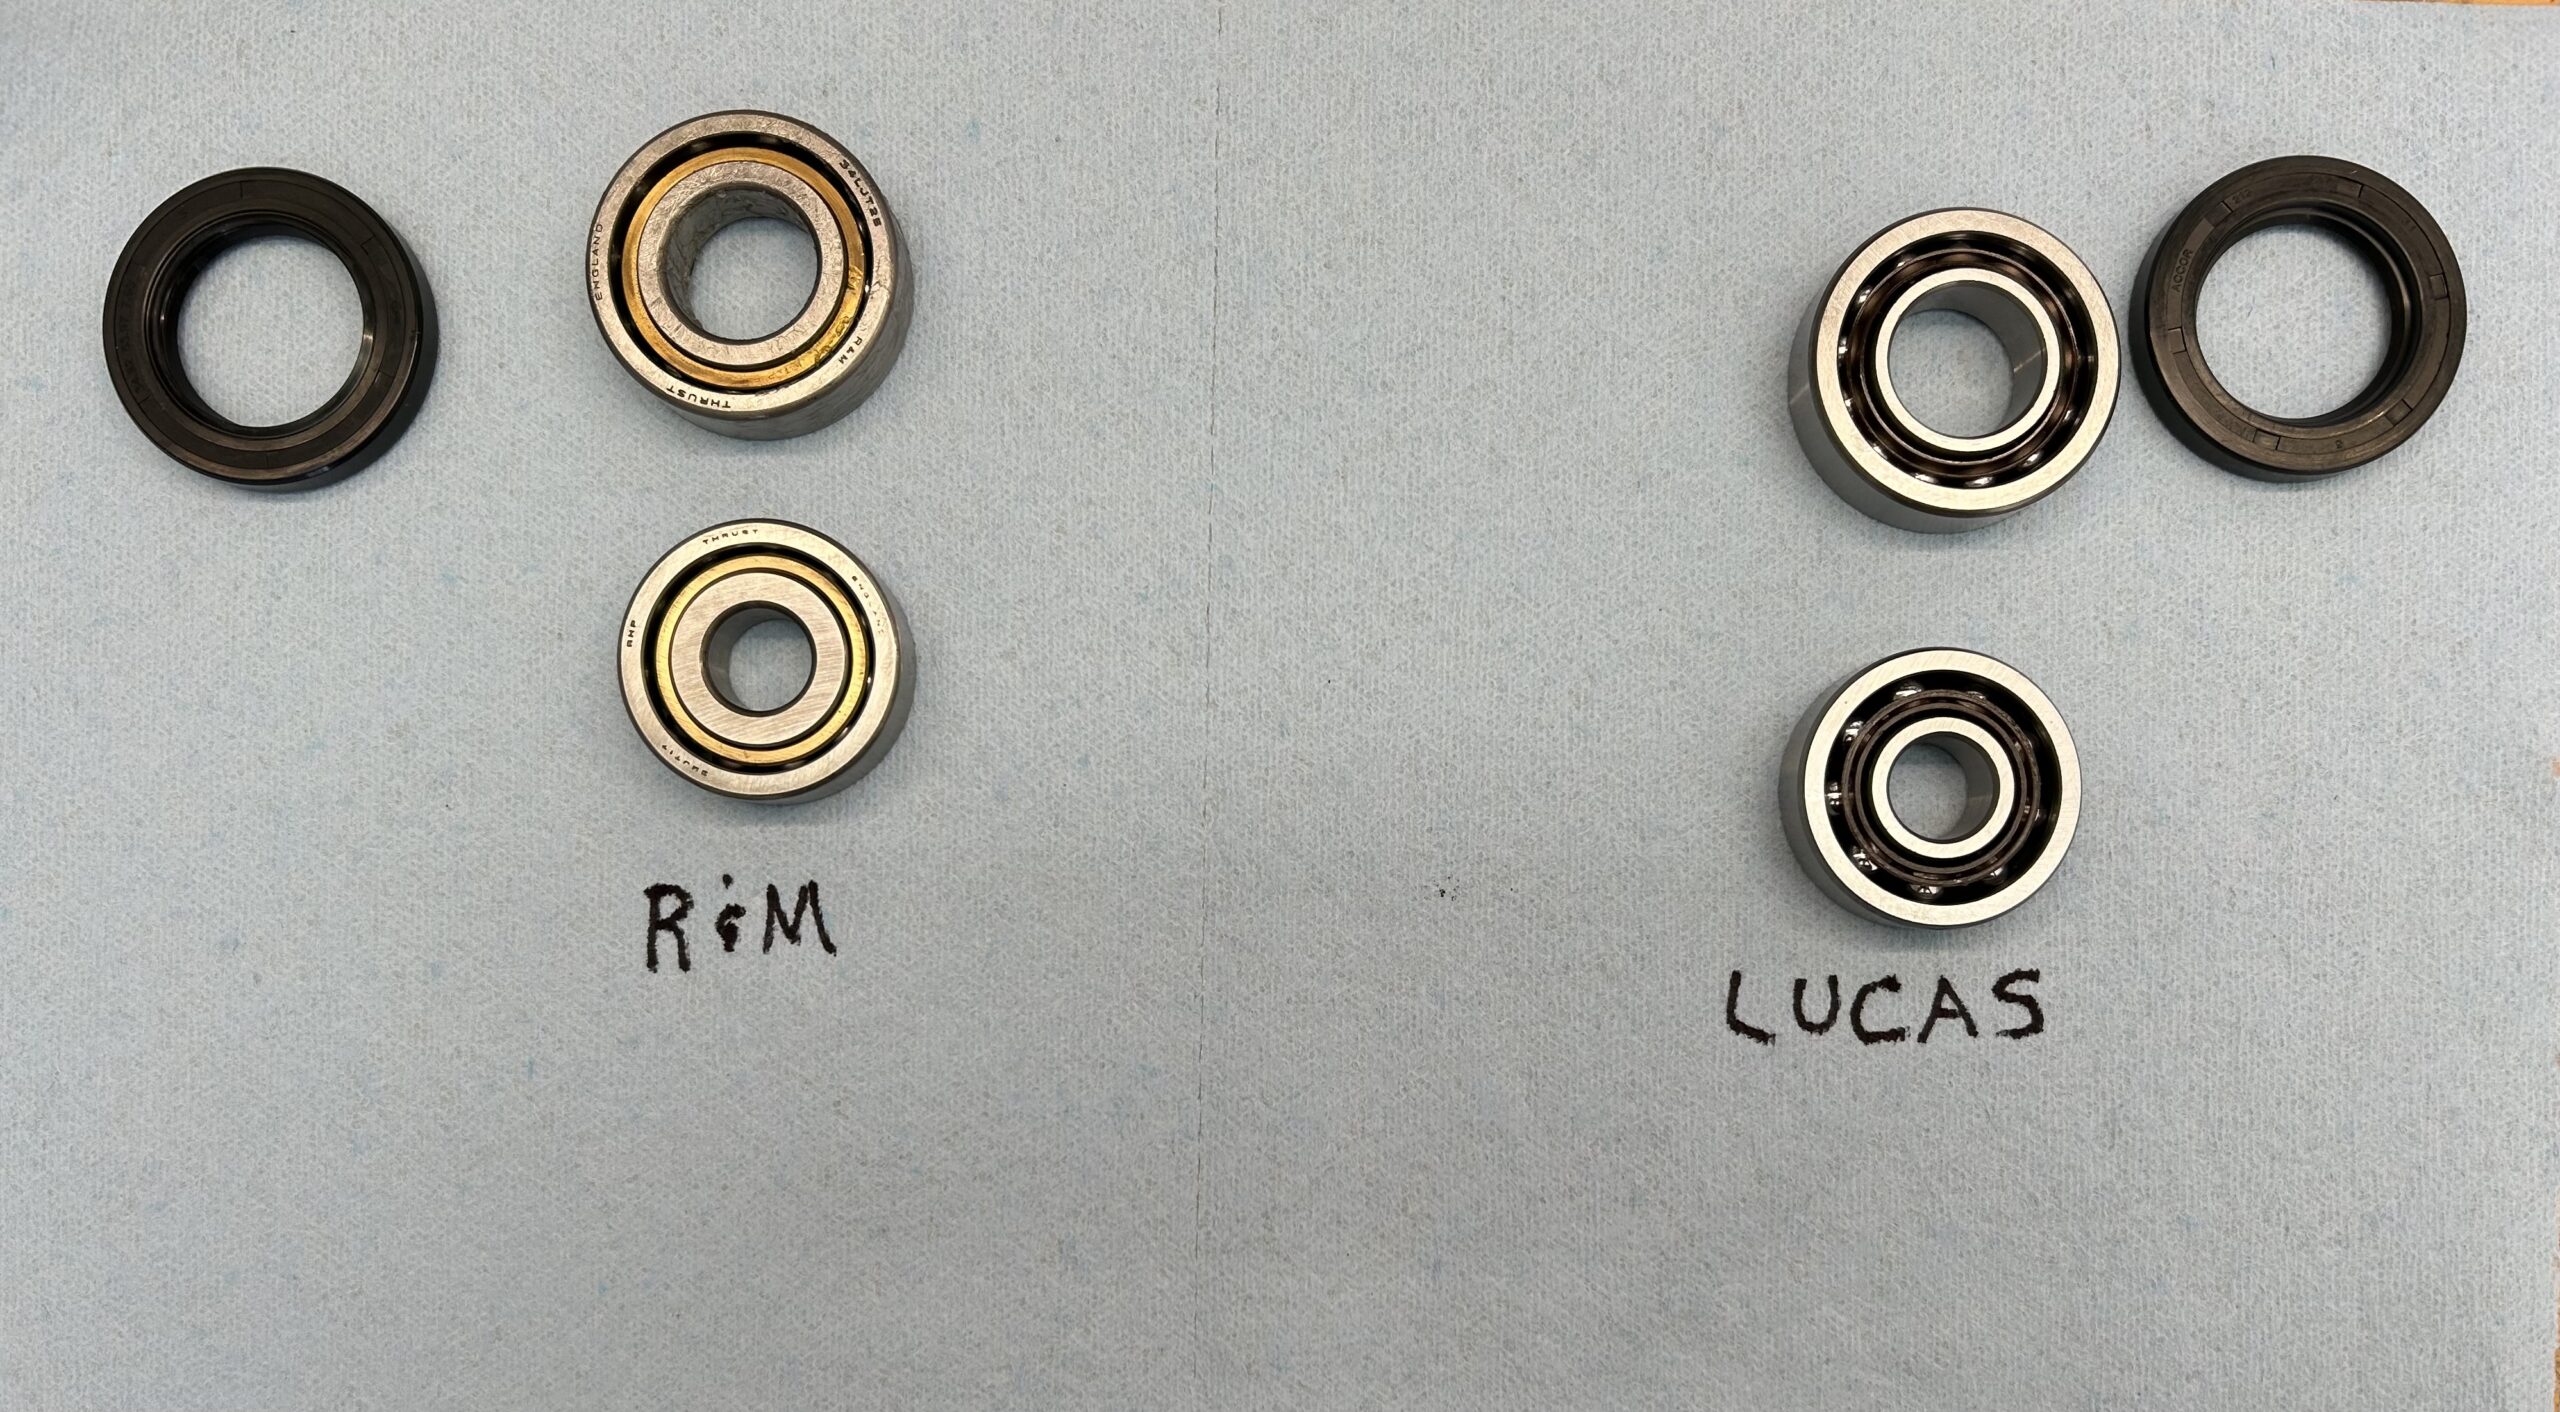 R&M Bearings and Lucas Bearings Comparison
We then secured the new brake rotors to the hubs with the original four bolts and torqued each to 40 ft. lbs. The brake dust shields must be attached to the swivel axles with the one hex bolt before the hub and rotor are slipped onto the swivel axle.
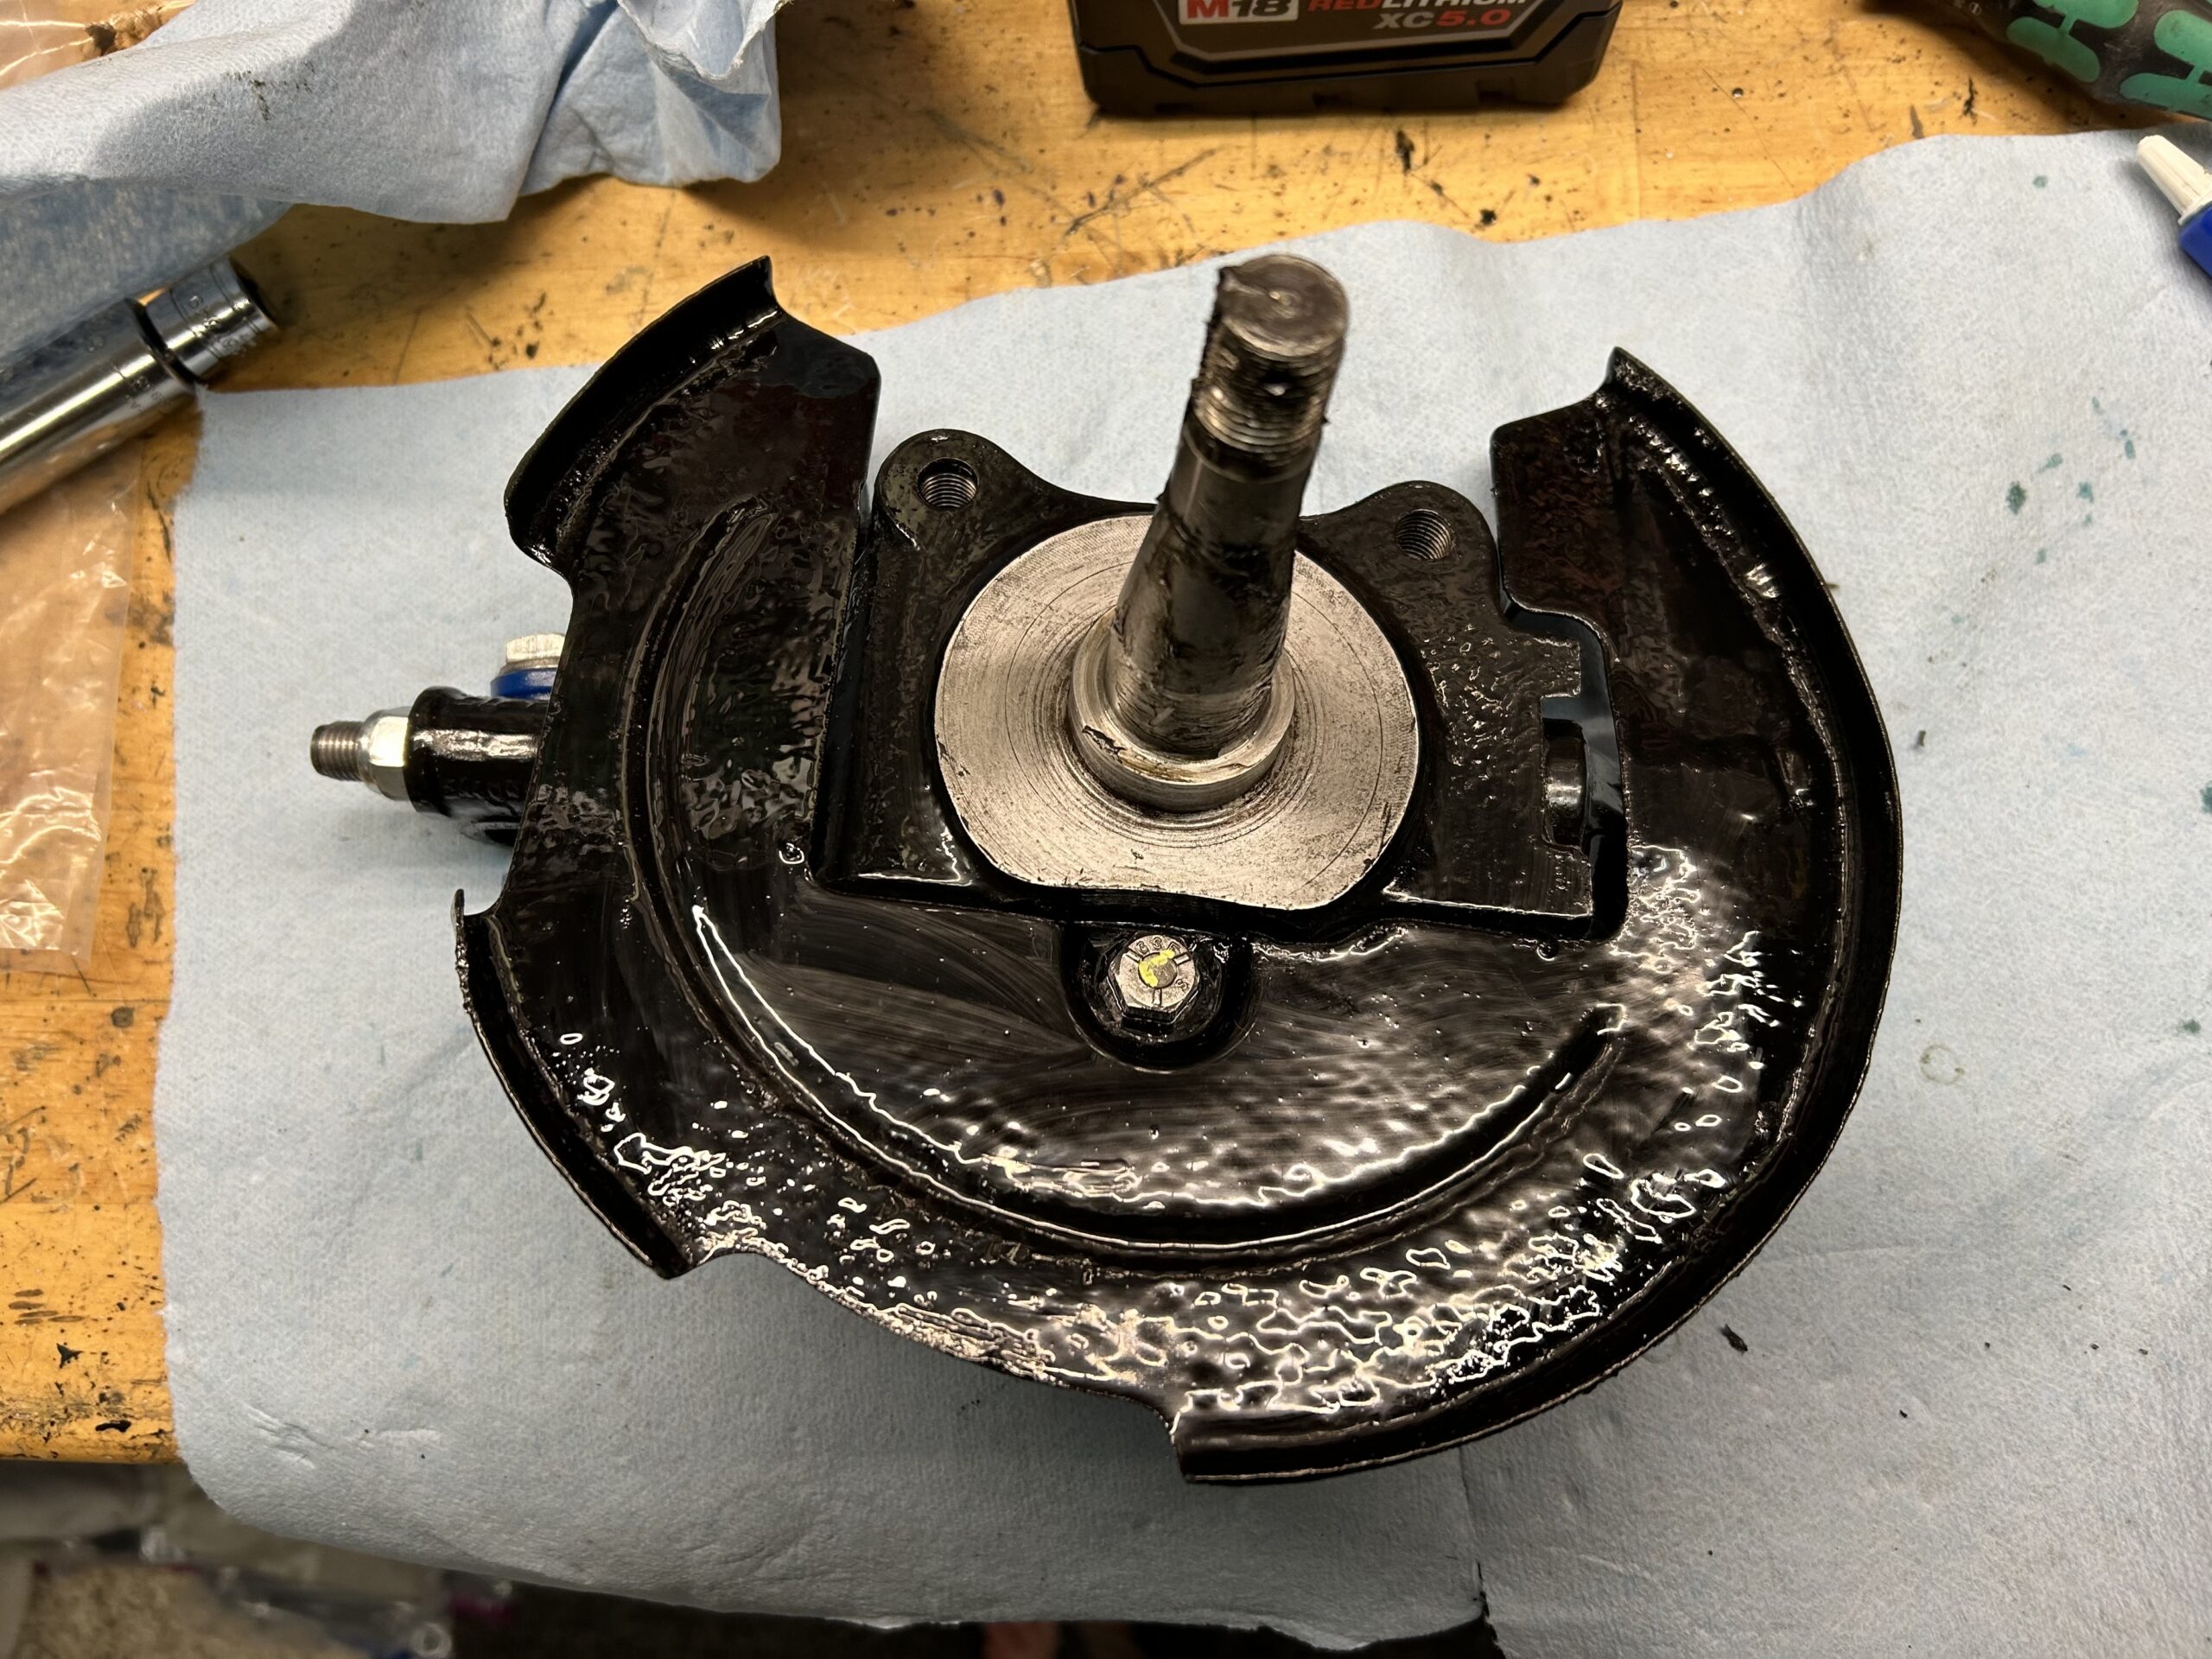 Dust Shields Installed
Once the hub and rotor and the swivel axle are mated the tab washer can be installed on the axle followed by the castle nut. The nut is then torqued to 46 ft. lbs and then rotated clockwise until the hole in the axle lines up with an opening in the castle nut. A cotter pin can then be inserted and bent back although we will wait to bend the pin until the hub assemblies are actually on the car.
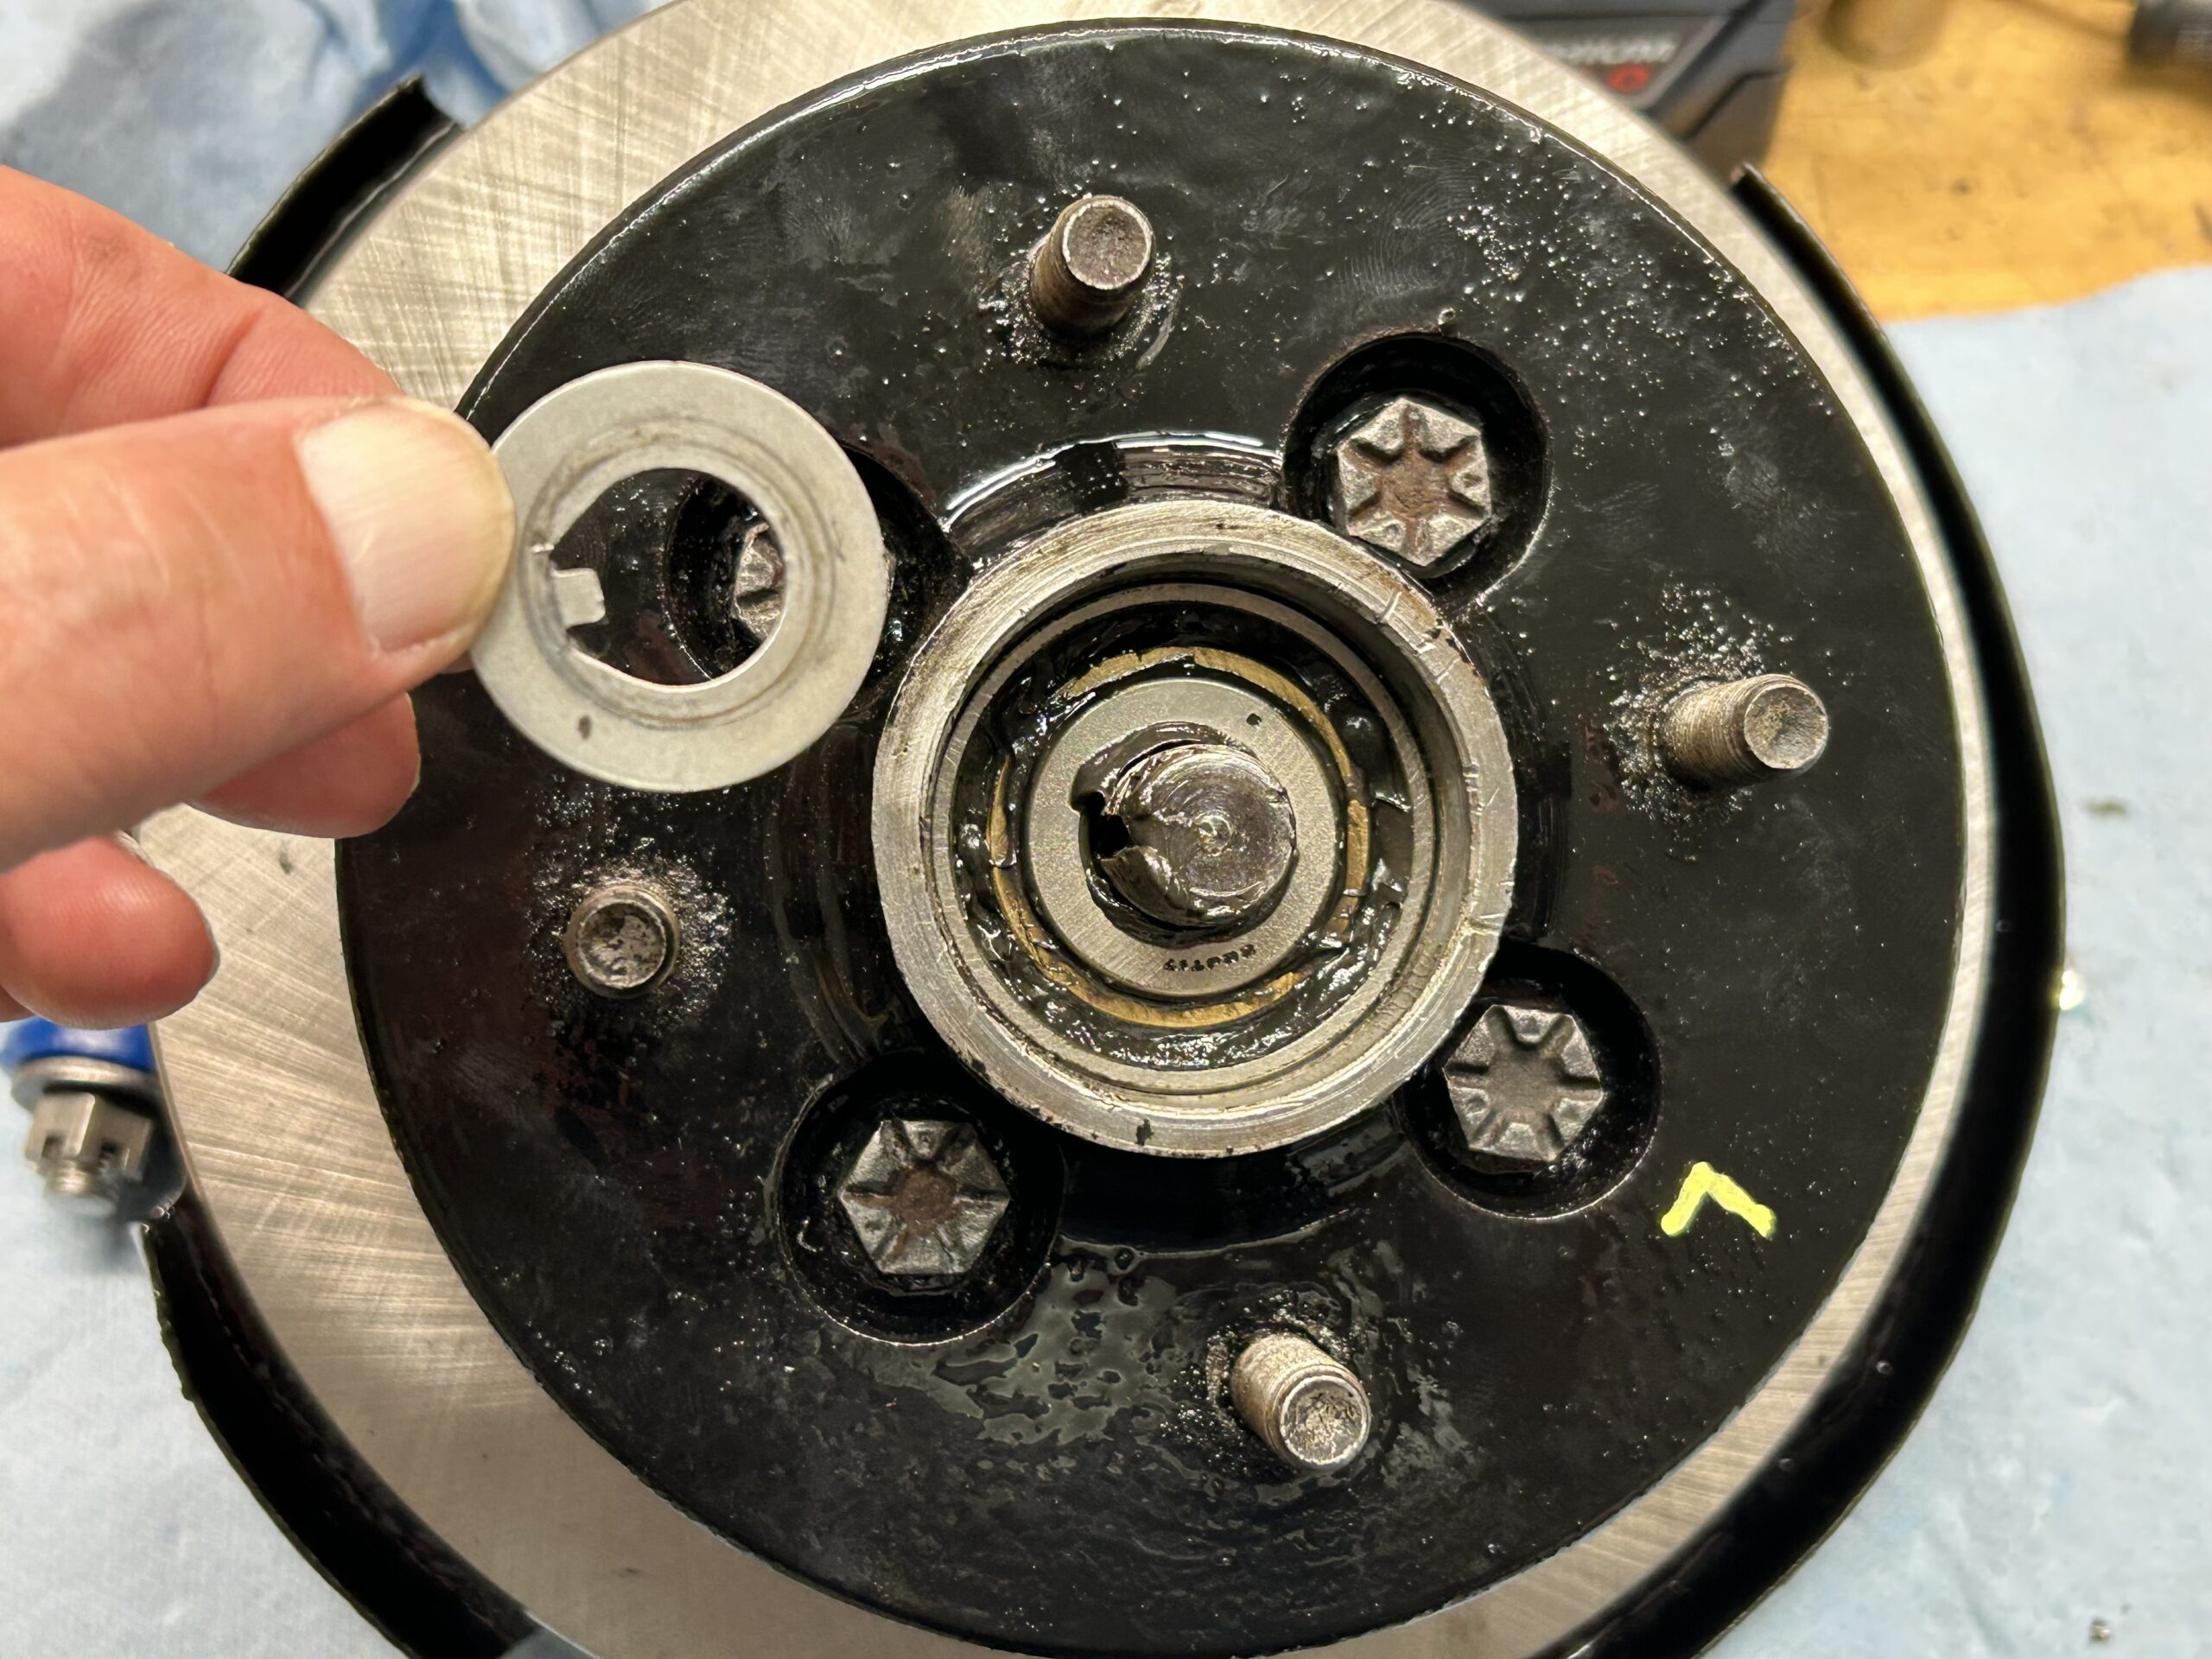 Tab washer on stub axle
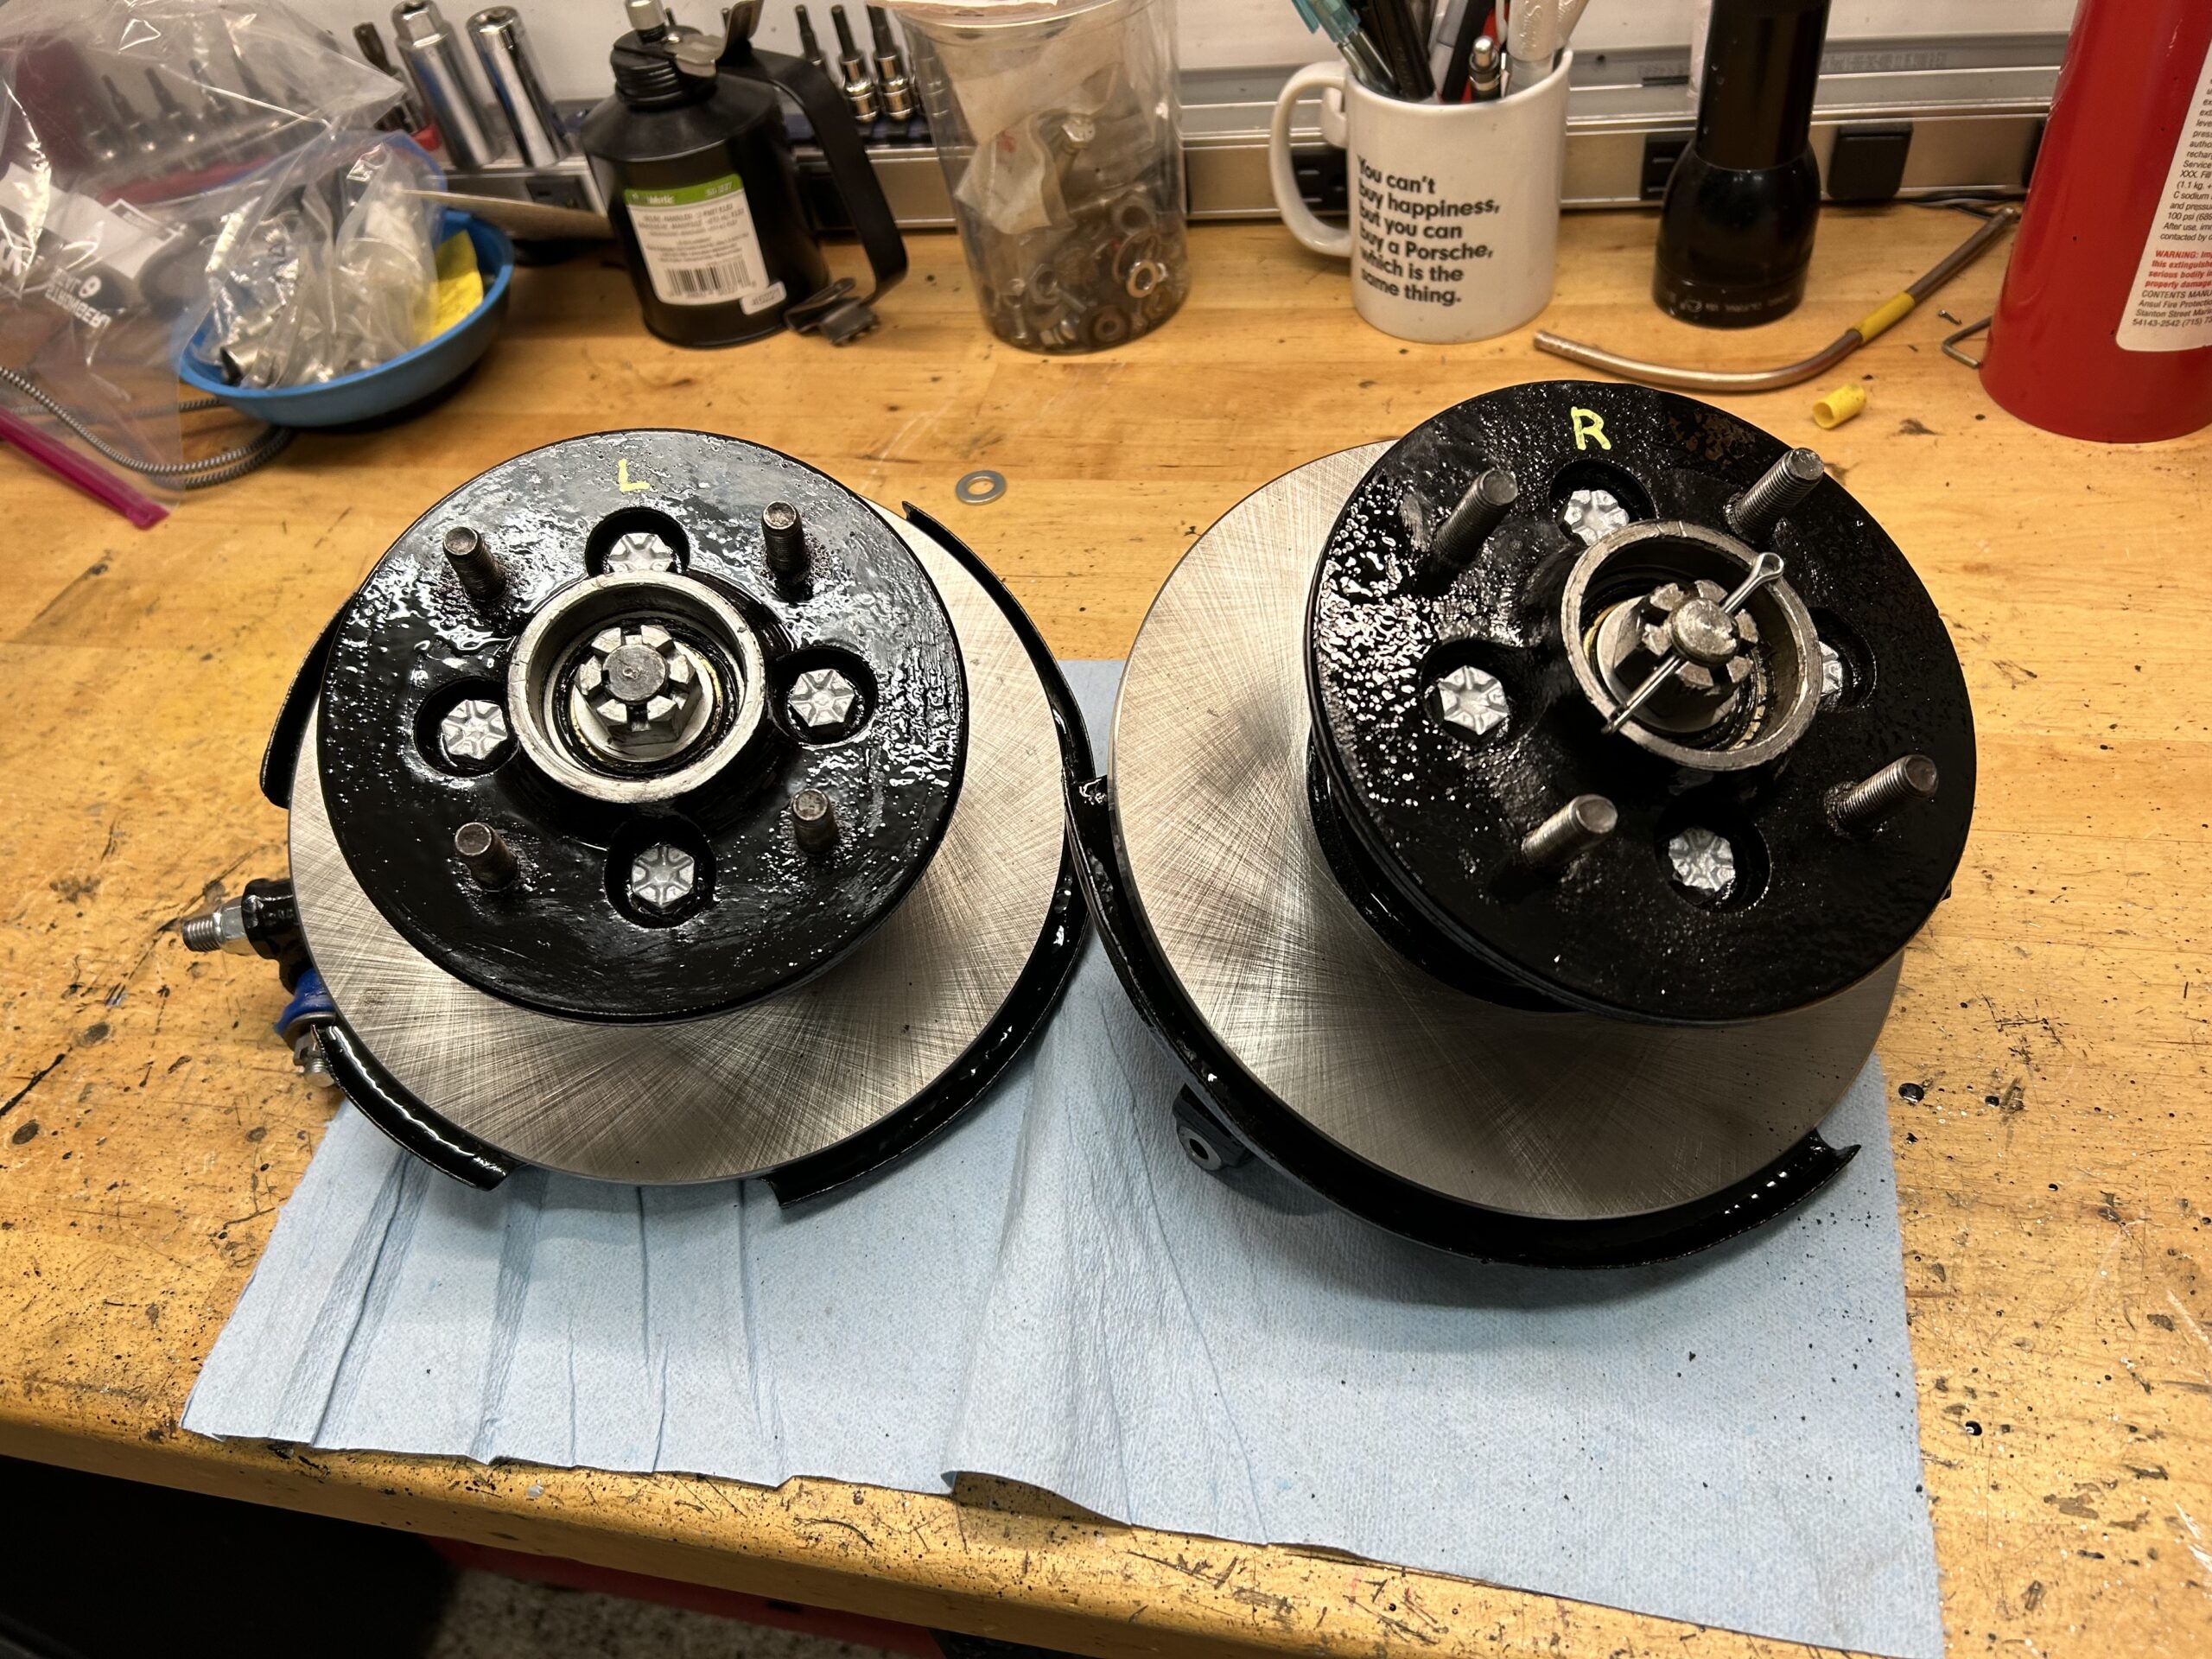 Hub Assemblies
The new brake calipers sourced from Moss Motors were then installed on the hub assembly. As the accompanying video shows, the two 7/16″ bolts that secure the calipers to the assembly pass through the locking tab washer, the brake hose locating bracket, the dust shield, the caliper and then into the swivel axle. These bolts are torqued to 50 ft. lbs. Again, we will wait to bend back the tab washer until the hub assemblies are on the car.
The proper steering arms were then fastened to the hub assembly along with a tab washer that will be bent back later.
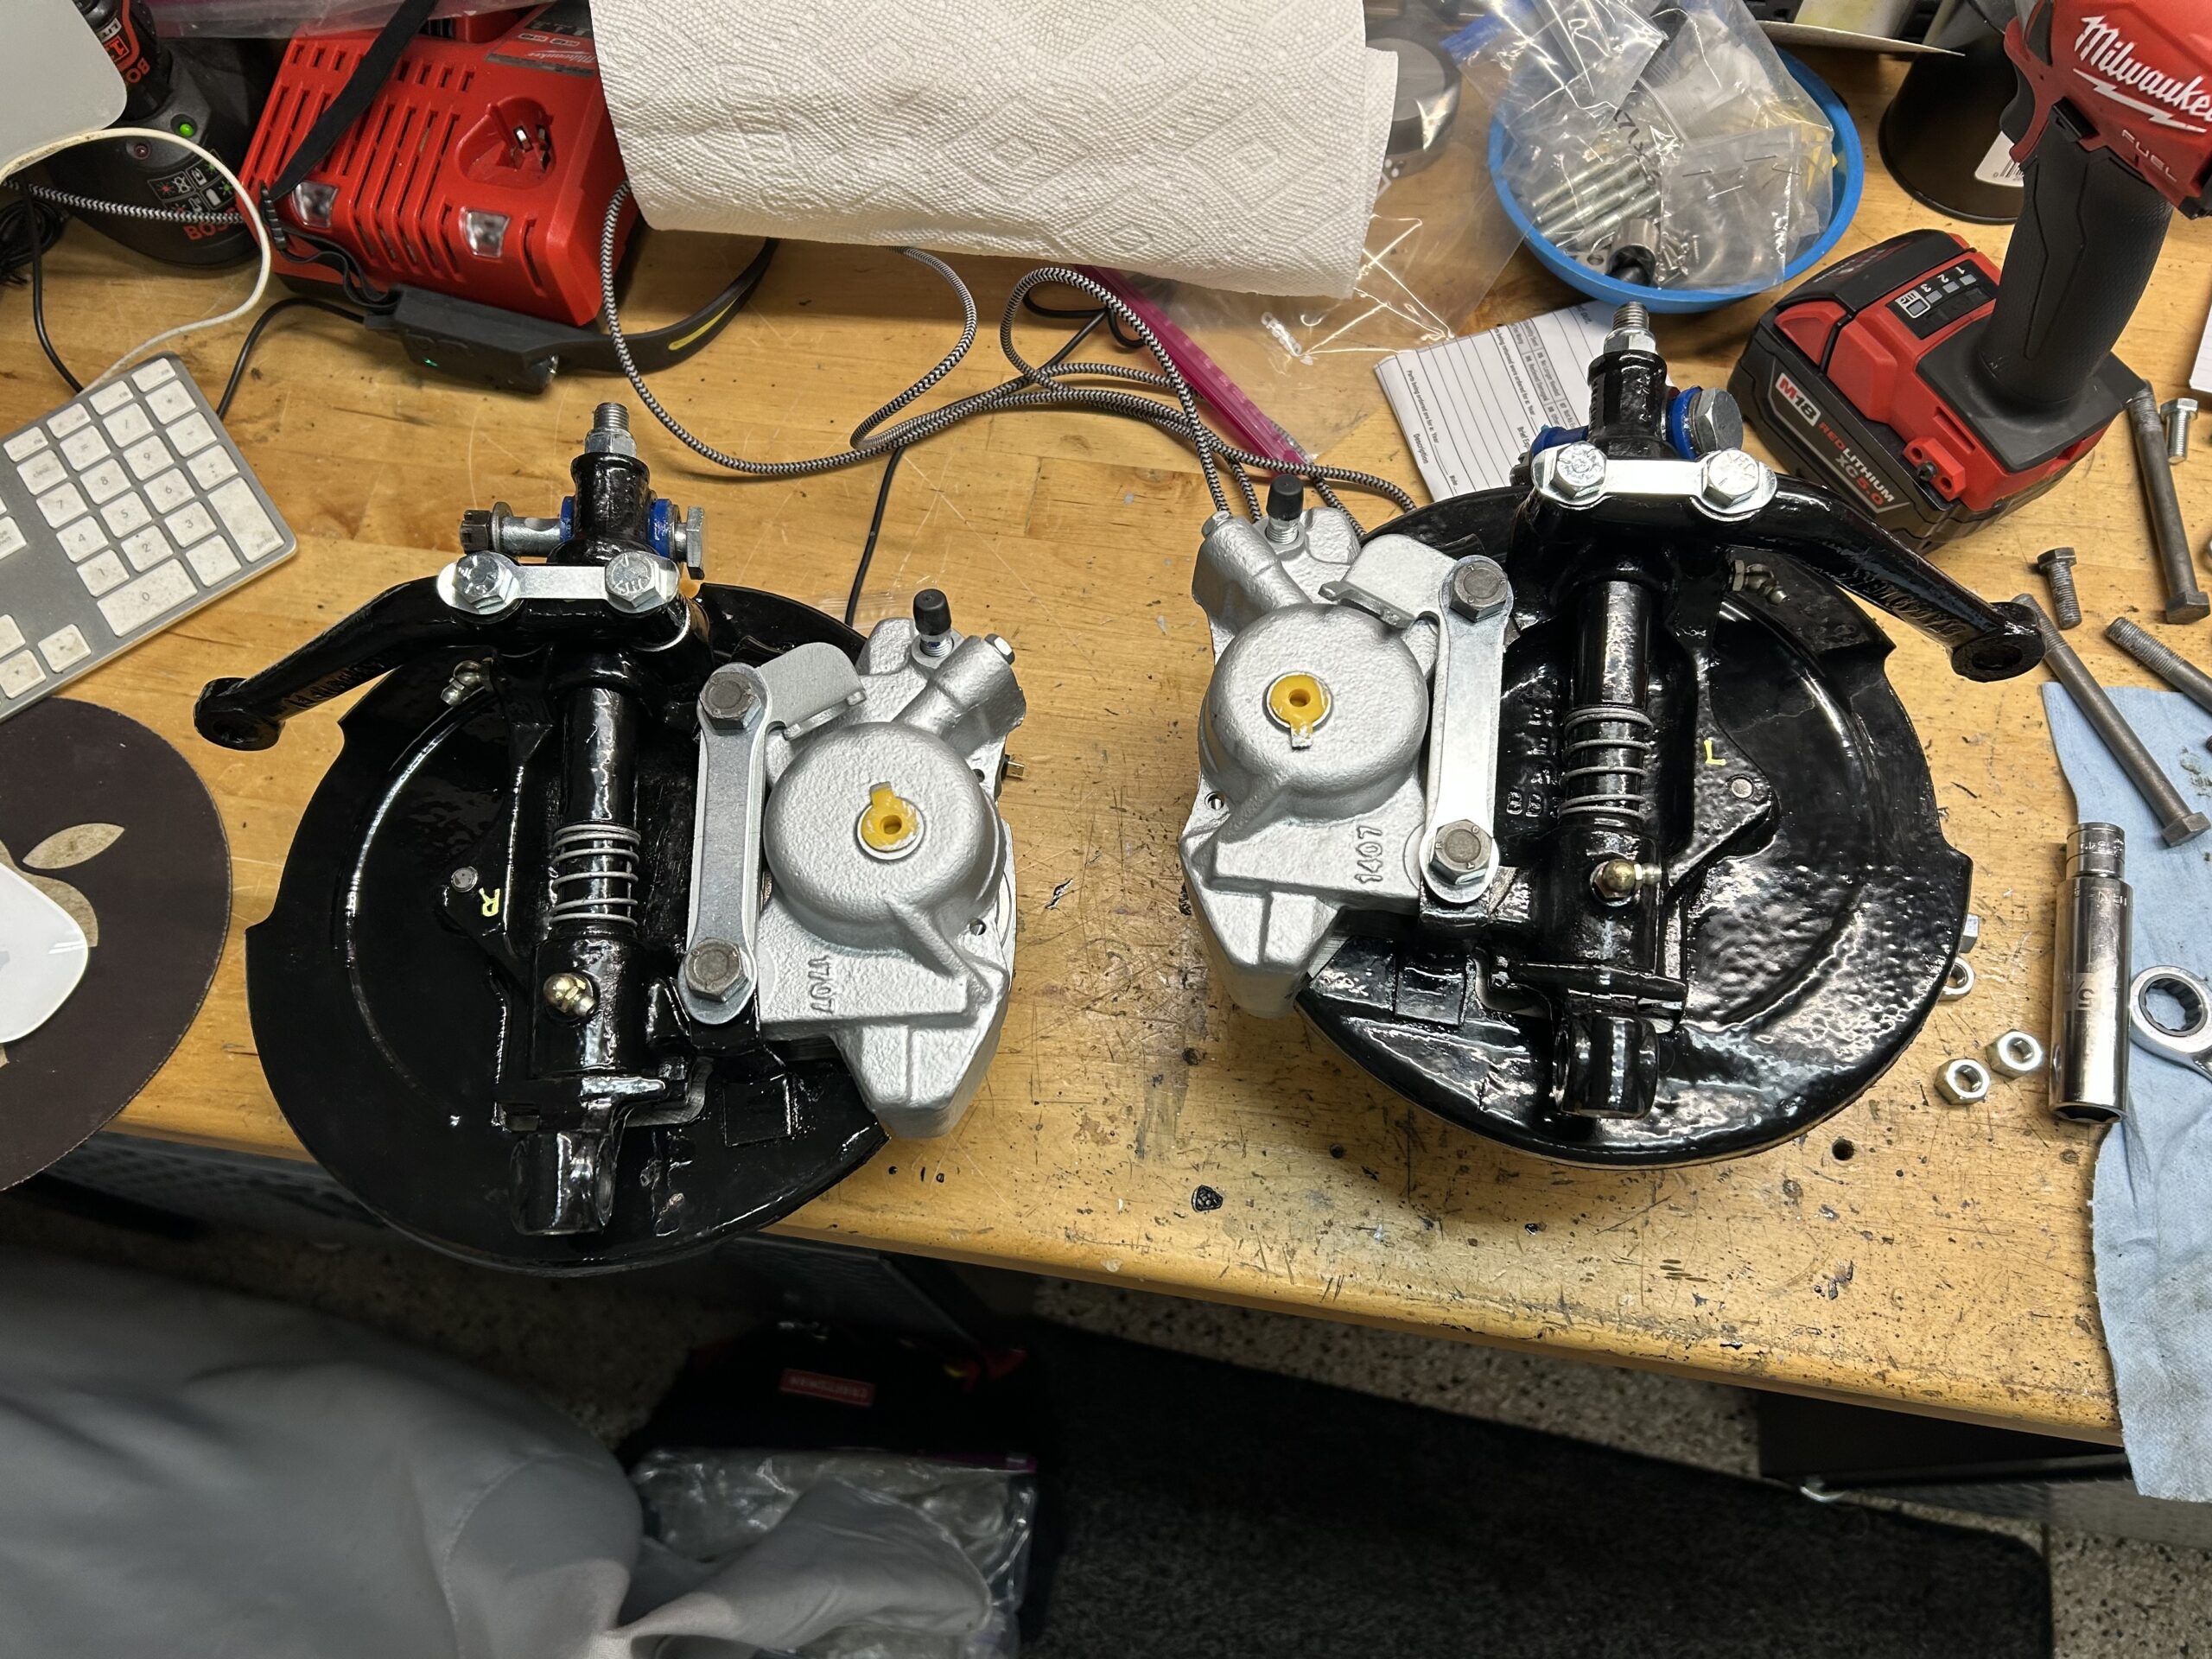 Calipers Installed on Hub assemblies
Classic Gold brake pads purchased from Moss Motors were installed into the calipers along with shims. The shims were coated with a Permatex lubricant designed for this purpose. The pads are extremely tight against the rotor. We tried releasing the bleeder valve and pushing back the pistons but this did not rectify the problem.
 Brake caliper with classic gold pads
Some EBC green pads were ordered to see if they might fit better.
The Episode 32 video shows the process of the hub and brake assembly: https://vimeo.com/797978369/33c374192a
0:00 – New king pins in swivel axles
0:25 – Axle grease zerks and poly bushes in the upper trunnion
1:10 – Ransome and Marles ball bearings on axle
2:10 – Bearings installation
2:43 – Packing bearings with grease
4:20 – Tapping bearings into the hub and installing the spacer
6:50 – Install oil seals in hub
7:05 – Brake rotors fastened to the hub
7:40 – Dust shield installation
8:20 – Tab washer installation on axle shaft
8:42 – Castle nut on axle shaft torqued to 46 ft. lbs.
9:10 – Brake calipers, brake hose brackets, tab washers installed
11:10 – Steering arms with tab washers installed
11:40 – Classic Gold brake pads and shims installed