March, 2009
I currently have brand new sidecurtains. They fit reasonably well, have new clear plexiglass that slides easily and the new aluminum frames are blemish free. In other words they look about as good as side curtains can look.
However, with a 7,000 – 8,000 mile cross country trip ahead of me, I am looking for a way to modify the sidecurtains so that they will not be so noisy. Even though they are new, they still rattle like crazy. The two plexiglass panels bang together and make a real racket.
Tim Moran and I have been working independently on a modification or redesign of the side curtains to address a couple of issues, but in my case primarily the noise.
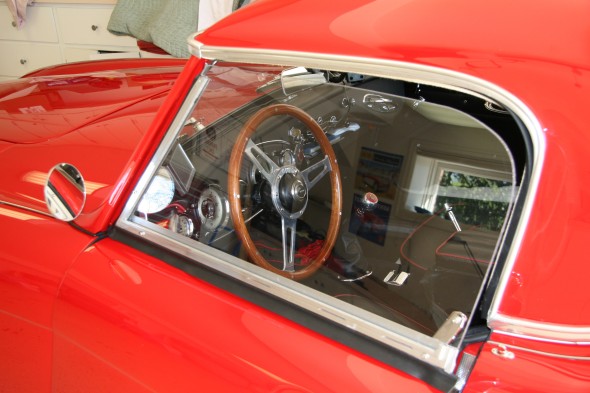
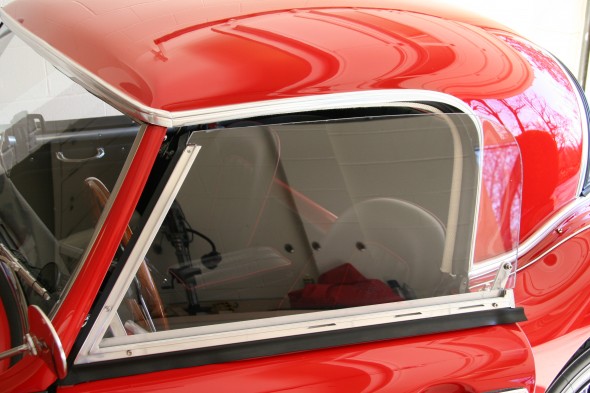
I decided to use an old set of aluminum side curtain frames as the basis of my project. I cut the top and rear upright out of the frames so that I could slide a new piece of Lexan (one piece) into the frame. The inside track of the frame is wide enough to accept the 1/4″ Lexan. I suppose that I could spend some big bucks and have a fabricator make a chromed brass channel for a frame, but I didn’t have time before my trip. The other reason for modifying the original frame is that it allowed me to just insert new rubber seals to seal the side curtain to the exterior of the door. I used Lexan because it is much stronger than plexiglass, and it can be drilled without fear of cracking.
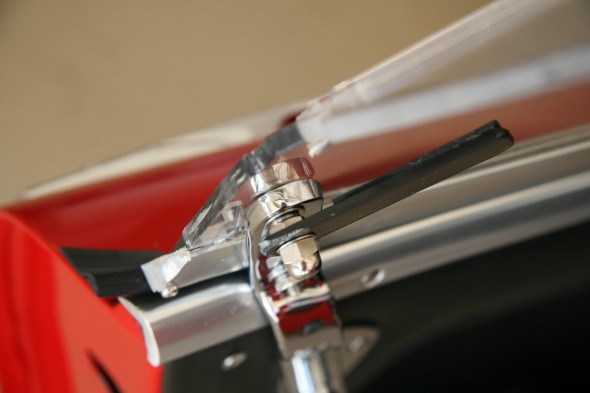
I also used the two original brackets that mount the side curtains to the inside of the door. For the rear bracket (as the photo shows) I inserted the bolt for the top fitting of the bracket through a hole I drilled in the Lexan. I then made a pattern for new glass and had a glass shop cut my Lexan. I am pretty satisfied with the one-piece side curtain glass. Of course, the big problem is no ventilation.
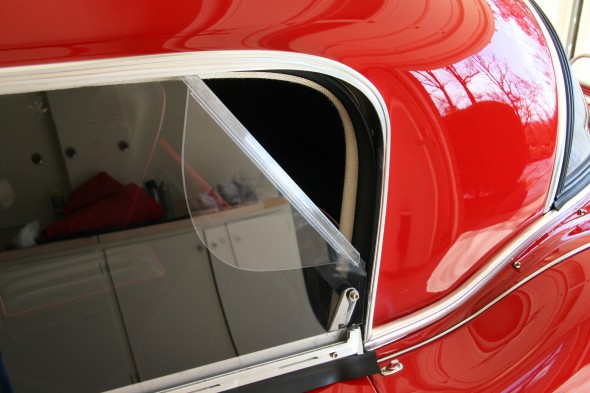
So I made an additional Lexan panel with a hinged section so that I could let in some fresh air and pay the tolls at the toll booths. I got my idea for this from Tim although our concepts are bit different. I used an acrylic hinge from McMaster-Carr. http://www.mcmaster.com/#11565a12/=1dshceThe acrylic hinge is not as flexible as the polyester that McMaster-Carr offers, but it is completely clear.
I took the car for a ride with the new glass and I can only imagine that it must be very similar to a BJ7-8 now. Absolutely no rattling or wind buffeting and actually very little wind noise – quite comfortable.
To hold down the flap, you can see in the photos that I made a little metal tab from 12 gauge steel, 3/4″ wide. I rounded the corners and glued a piece of rubber to it so there is a buffer between the lexan and the metal. When the flap is in the upright position, you cannot see the metal tab as it is hidden behind the side curtain rear bracket. When the flap is down you just rotate the metal tab upward to hold the lexan flap.
I gave the hinged lexan panel with flap a road test also. Like the one piece lexan windows, the one with the fold down flap also functioned quite well. A little fresh air and no rattling. The air intake is limited. A larger flap would bring in more air I am sure. It is all a matter of personal taste.
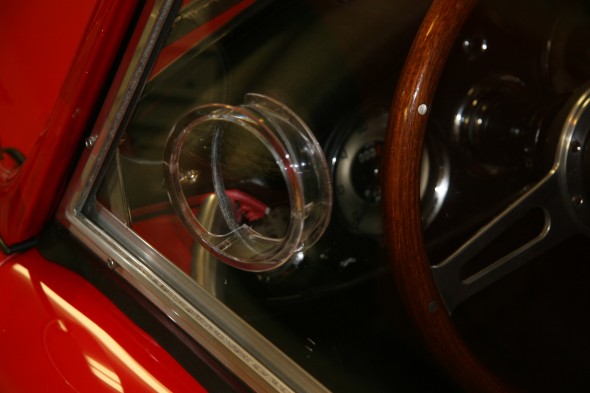
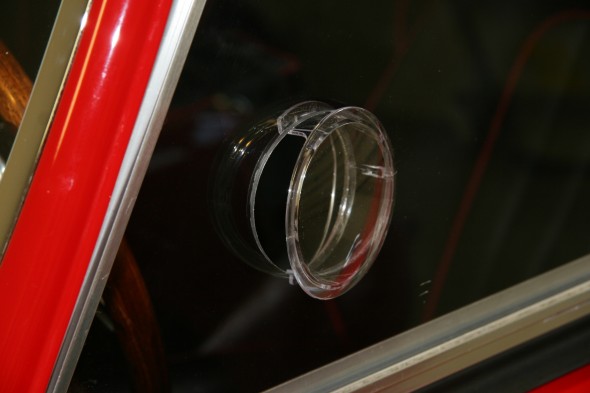
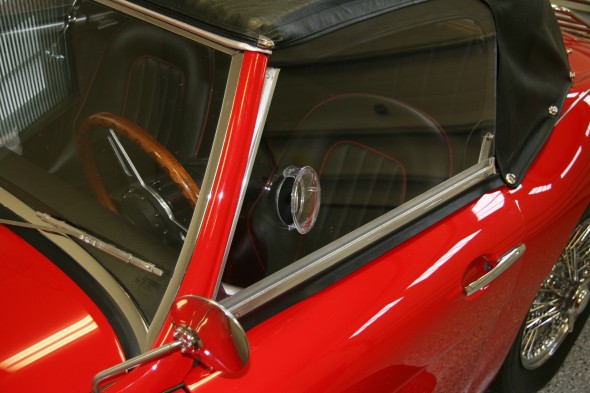
In my continuing quest to improve on the design and therefore functionality of the side curtains I have recently experimented with aviation vents. I saw this idea on a Cobra Forum posting and thought I would give it a try. The vents are made of clear acrylic and cost all of $15.00 a pair. I ordered them from Aircraft Spruce http://www.aircraftspruce.com Snap Vents, #05-01179, $14.85/pair.
Installation is literally a “snap.” I located where I wanted to the vent to be (avoid interference with wing driving mirror), and then drilled a 3 1/4” hole in the Lexan. Smooth the edges with a file and/or sandpaper and then compress the sides of the vent a bit and snap it in place. That is all there is to it. I like this option and plan to use it as my final solution (until I think of an improvement, of course!).
zz

