First a description of what was:
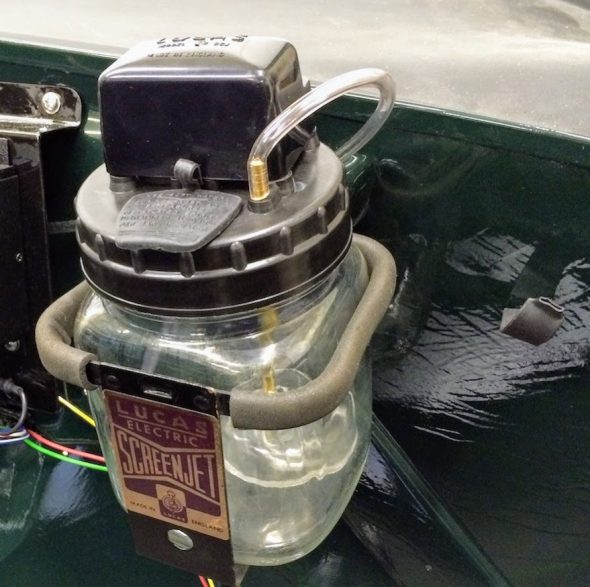
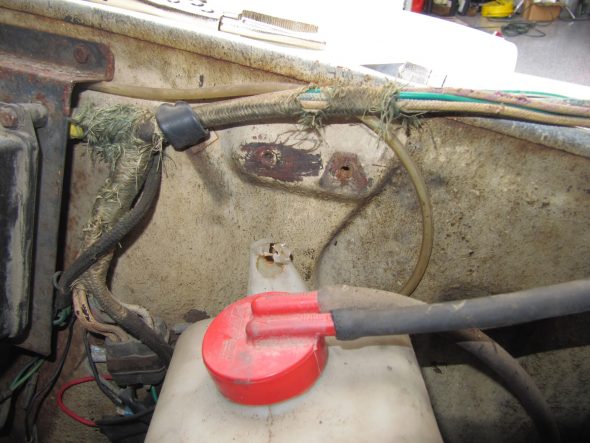
My 1964 Jaguar Mk2 did not have the original Lucas Screenjet washer bottle and pump. I don’t know why it was missing. Perhaps a pump motor failure or a broken reservoir? Lucas actually put glass reservoirs under the bonnet. This is an image from Eric Kriss’s MK2 of the original equipment that should have been in my car:
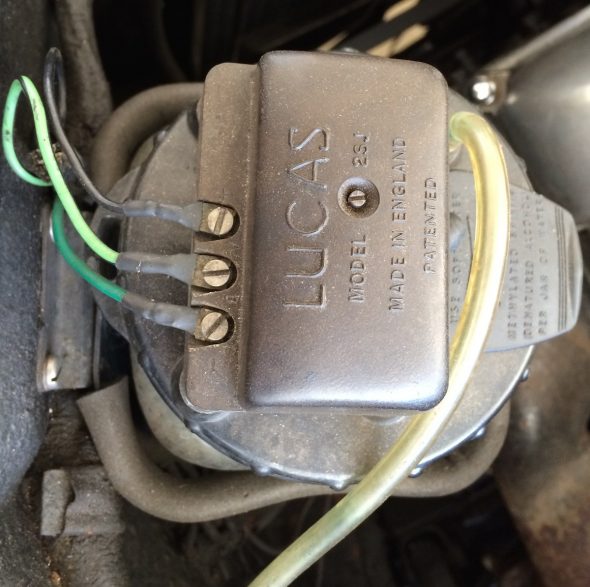
Note that on the original Lucas washers there were three electrical leads:
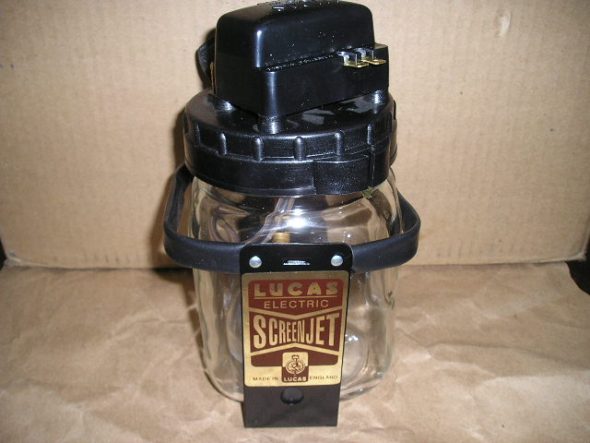
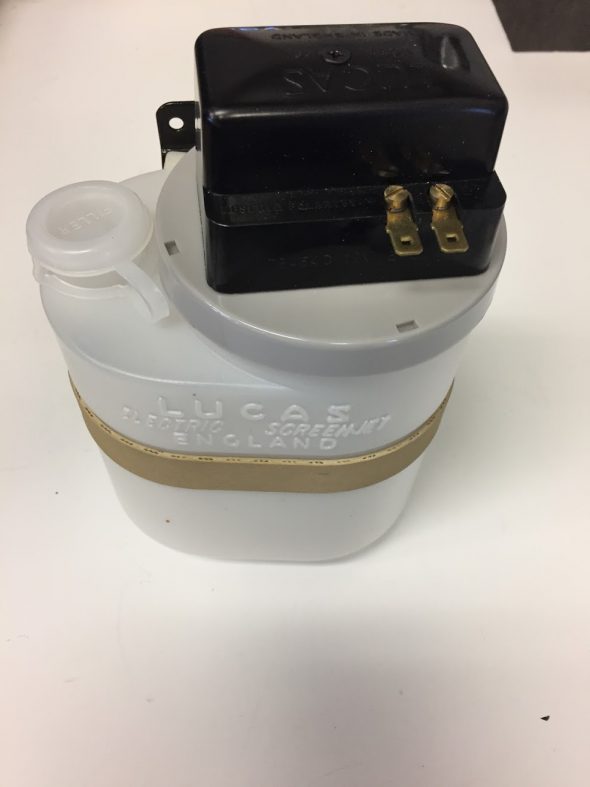
Restorer’s can purchase new replicas of the original that do look the part, but the new pumps have only two electrical terminals:
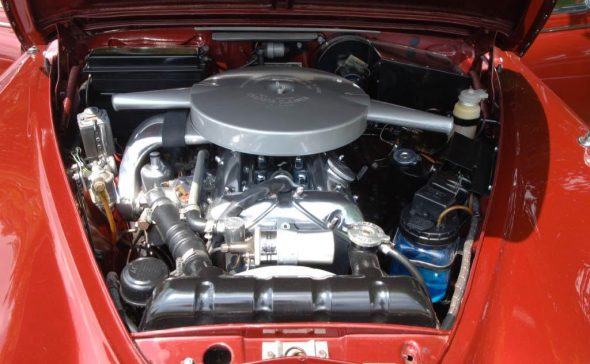
While today’s replica is not perfect, it sure beats what I found in my car: nothing! This photo illustrates the proper location of the Lucas Screenjet.
Two captive nuts are provided in the LH engine bay valance for securing the washer bracket to the car.
Now a description of what is:
I cannot locate a washer reservoir in the original position because that space is now at least partially occupied by the air conditioner compressor. I also cannot relocate the washer to the space on the valance rearward of the fuse panel because I have mounted my power steering pump at that location. So I gave up on mounting the washer reservoir/pump in the engine bay.
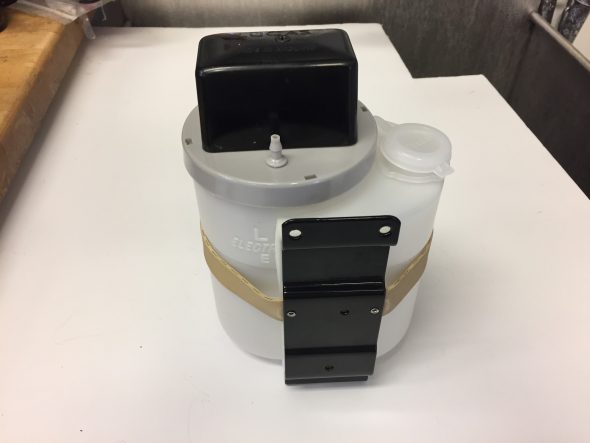
After considering several options, to keep things “Jaguar” I elected to use a later plastic reservoir and pump used on XKEs and perhaps some later MK2s – I am not sure. I sourced the pump and its mounting bracket from Welsh Enterprises.
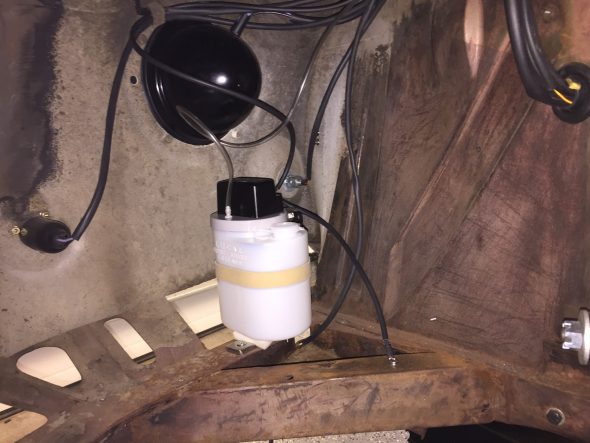
I decided to locate the pump and reservoir at the front of the LH wheel well on a chassis bracket. I mounted it to the same crossmember that is used to mount the reservac tank on the RH side of the car. Because the crossmember comes from the factory with two pre-drilled holes to mount the reservac tank for RH drive cars, I was once again able to mount a modification without having to drill new holes in the car!
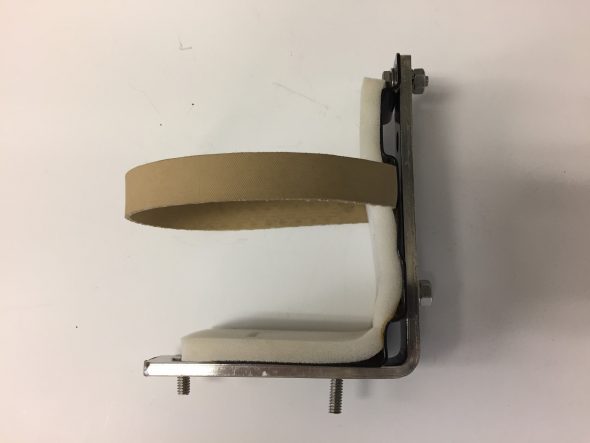
I picked up a stainless “L” bracket from my local ACE Hardware store made from 1/4″ stock and mounted it to the Lucas supplied bracket using two 1/4″ – 28 x 5/8″ stainless hex bolts with flat and split washers and nuts.
I then mounted the bracket assembly to the chassis using two stainless 1/4″ – 20 flat head screws with flat and split washers.
The clear tubing goes through a rubber grommet in the valance and is routed through the firewall to a “T” fitting where it branches to the LH and RH spray nozzles for the windscreen. A ground wire connects the pump motor to a fastener on the diagonal chassis rail and can be seen in the image above. The + wiring (light green/black) for power is encased in a rubber sleeve and also goes through a rubber grommet and is routed through the firewall to the central gauge panel switch for the washer activation.

Is this easy to refill? I once thought of putting the reservoir in the trunk, but that comes with its own can of worms.
Gerard,
Easy to fill with the LH Front tire removed. And very easy to fill from below when the car is on my lift :-). Otherwise certainly not as convenient as it could be.
Lin
Could you somehow install an inconspicuous filler hose so it could be filled with the hood up. It would be a slow fill up with a smaller hose but easier than putting on a lift. As you know; it’s always something! G
I have considered that possibility, but to date I have not found a filler neck that would fit and also look proper. Still looking.
Lin
Ahhh, the art of the compromise. Be interesting to see how it survives down there, I guess you could fit a stone guard like the vacuum reservoir has.
Yes, Phil, the location is not ideal. I simply ran out of space. I hope that being heavy plastic the container will survive the elements including road gravel.The only other place I considered was the boot, but that is a long travel and then you have to deal with getting the fluid hose either through a sill or under carpet. Neither ideal.