Removal of Rear Axle – Bigger Brakes and 3.9 Differential

In addition to a general clean-up and painting, it is our intention to replace the original Sprite MK 1 Bugeye rear brake assemblies with later rear brakes from a MG Midget. We had transitioned to disc brakes from a later Sprite or Midget in the front of the car shortly after it was purchased in 1998. The larger rear brakes should provide improved braking in concert with the front discs.

A number of owners had suggested switching out the 4.22 differential that was in the MK 1 Sprite for a later 3.99 diff. Dad was able to locate a good 3.99 in North Carolina so we purchased it. We then had Glenn’s MG in St. Petersburg go through the new diff to ensure it all looked good and we also had him install a new pinion seal and set the pinion pre-load to factory specification. 

New bearings, gaskets, “O” rings, and tab washers will be installed in the hubs. A 1 7/8″ socket is used to remove the axle nuts. One must remember that the LH wheel nut loosens by turning clockwise while the RH wheel nut loosens in a counterclockwise direction. New radius arms were recently installed so they will be removed and then re-used. Bilstein tube shocks were installed several years ago https://valvechatter.com/?p=7674 and they will also be removed and then re-used. The propshaft universal joints will be checked.

The handbrake cable must be disconnected and the connecting rods were removed as new adjustable rods are required with the later MG rear brakes. The rubber rebound straps  were removed and will be replaced with new straps. 

The half shafts were replaced a number of years ago with hardened steel shafts. They will be re-used. 

The Episode Seven video is rather long but it details the removal of the rear axle and all of its related components. https://vimeo.com/745178474/88a9f43bba


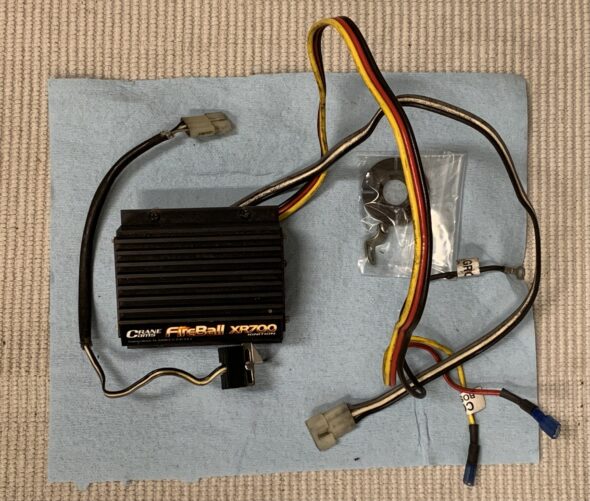
Removing the Crane XR700 Ignition Module

Having made the decision, for at least the time being, to revert to the original Lucas 25D distributor that is being rebuilt by Jeff Schlemmer at Advanced Distributors we went ahead and removed the Crane XR700 Fireball electronic ignition module from the car. The Episode Six video shows the removal of the unit and provides information on the wiring connections from the Crane module to the ignition coil and the distributor.

https://vimeo.com/744803932/e7aaba6adb

Ignition Timing Pointer

Trying to use a timing light to set ignition timing is extremely difficult on the Bugeye given that the pointer on the timing cover used for alignment with the notch on the crank pulley is at the bottom of the engine.

Tom Colby at Speedwell Engineering makes a stainless steel pointer that can be used to move the timing process to the top of the pulley. More information about the kit and its installation can be found in this post under the Personalizations posts: https://valvechatter.com/?p=13529

Datsun 210 Quick Throw Gear Shift

Frustration set in with the engine issues so a diversion was in order. The quick throw shifter kit designed and fabricated by Gerard Chateauvieux (Gerard’s Garage) was installed. The shifter and the installation process are described in this post https://valvechatter.com/?p=13520 which is located in the Personalizations category of the Bugeye site.

Condition Assessment 8/22

A “walk around” video was made for the record. The soft top and it’s mounting fasteners are highlighted at about 6:34 into the video. The soft top frame is also shown and discussed. The “stiffener” rails for the front and rear of the top are shown. 

The side curtains are also shown in some detail. Episode One is primarily the exterior of the car:

https://vimeo.com/738075416/9d2f97de20

Episode Two focuses on the Interior of the car and at about 4:30 into the video shows the failure of the engine to start.

https://vimeo.com/744768194/d735f8b765