
Front Seating
Following considerable thought I have decided to install front seats from a later model Jaguar in my MK2. At first I pursued the original tilting seats that were available from Jaguar as an option at the time. I actually found and purchased a pair. they were in rough shape, but the frames were just fine and that was all I was really after.
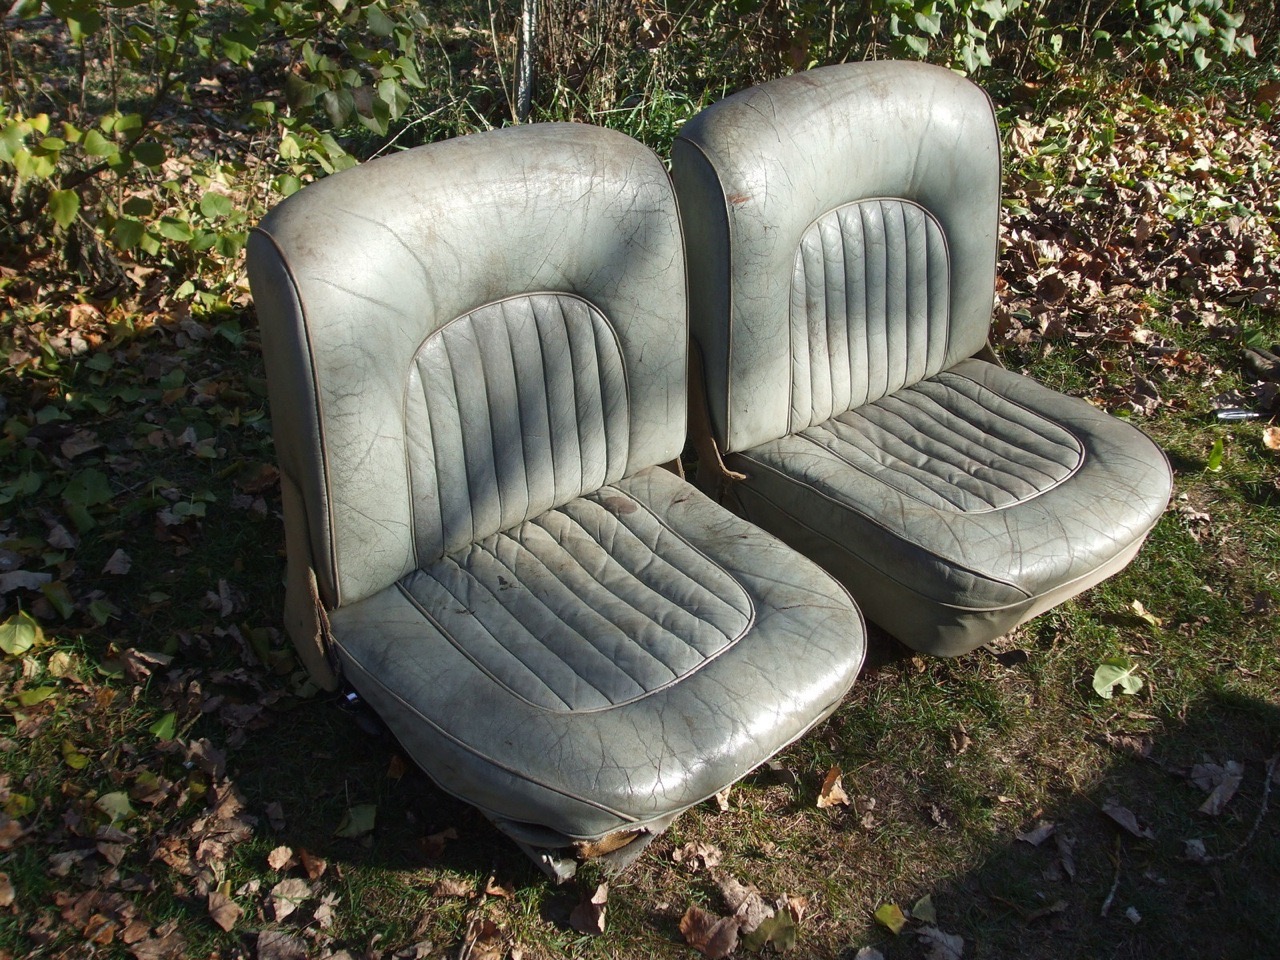
Jag MK2 Optional Tilting Seats
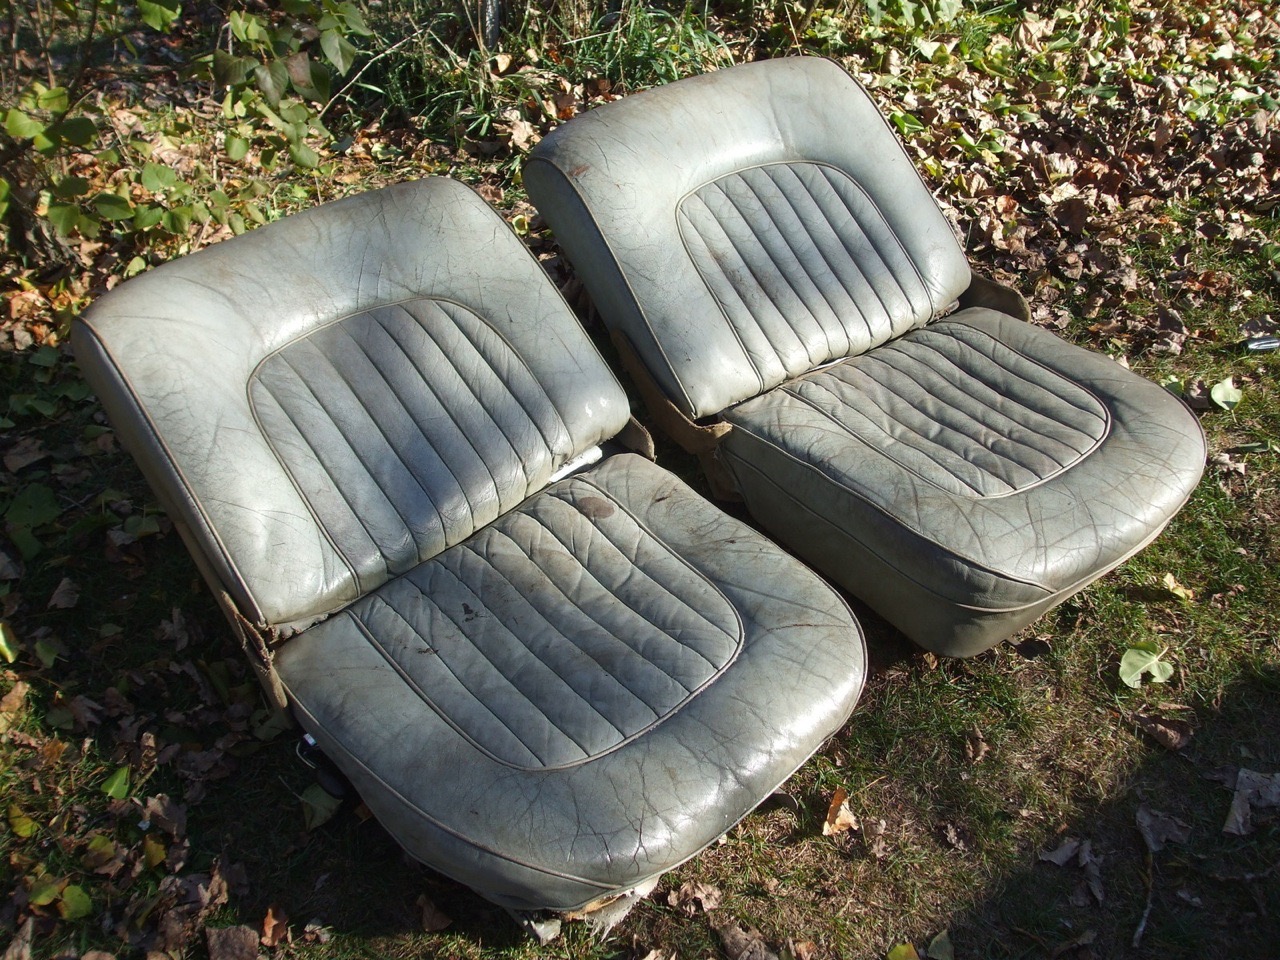
Jag MK2 Optional Tilting Seats
However, after seeing the installation of Daimler seats in Ton Tulleken’s restored Jaguar MK2, I decided that I must have the same seats for my restoration! Ton’s site is in Dutch but the photos work in all languages.
I could not locate any Daimler seats in the U.S. so I turned to Ton who is from the Netherlands and he was able to help me. Hendrikus Alkema who runs and owns New and Used Parts Jaguar Daimler in the Netherlands had a full set of 1990 Daimler seats available. I ordered the two front seats as well as all four headrests from the car. The seats came complete with the wiring harnesses and switches.
The seats arrived two days after the order was placed! DHL had them on my doorstep. On one of the seats the lumbar support knob was broken in transit, but Hendrikus sent a replacement to me right away.
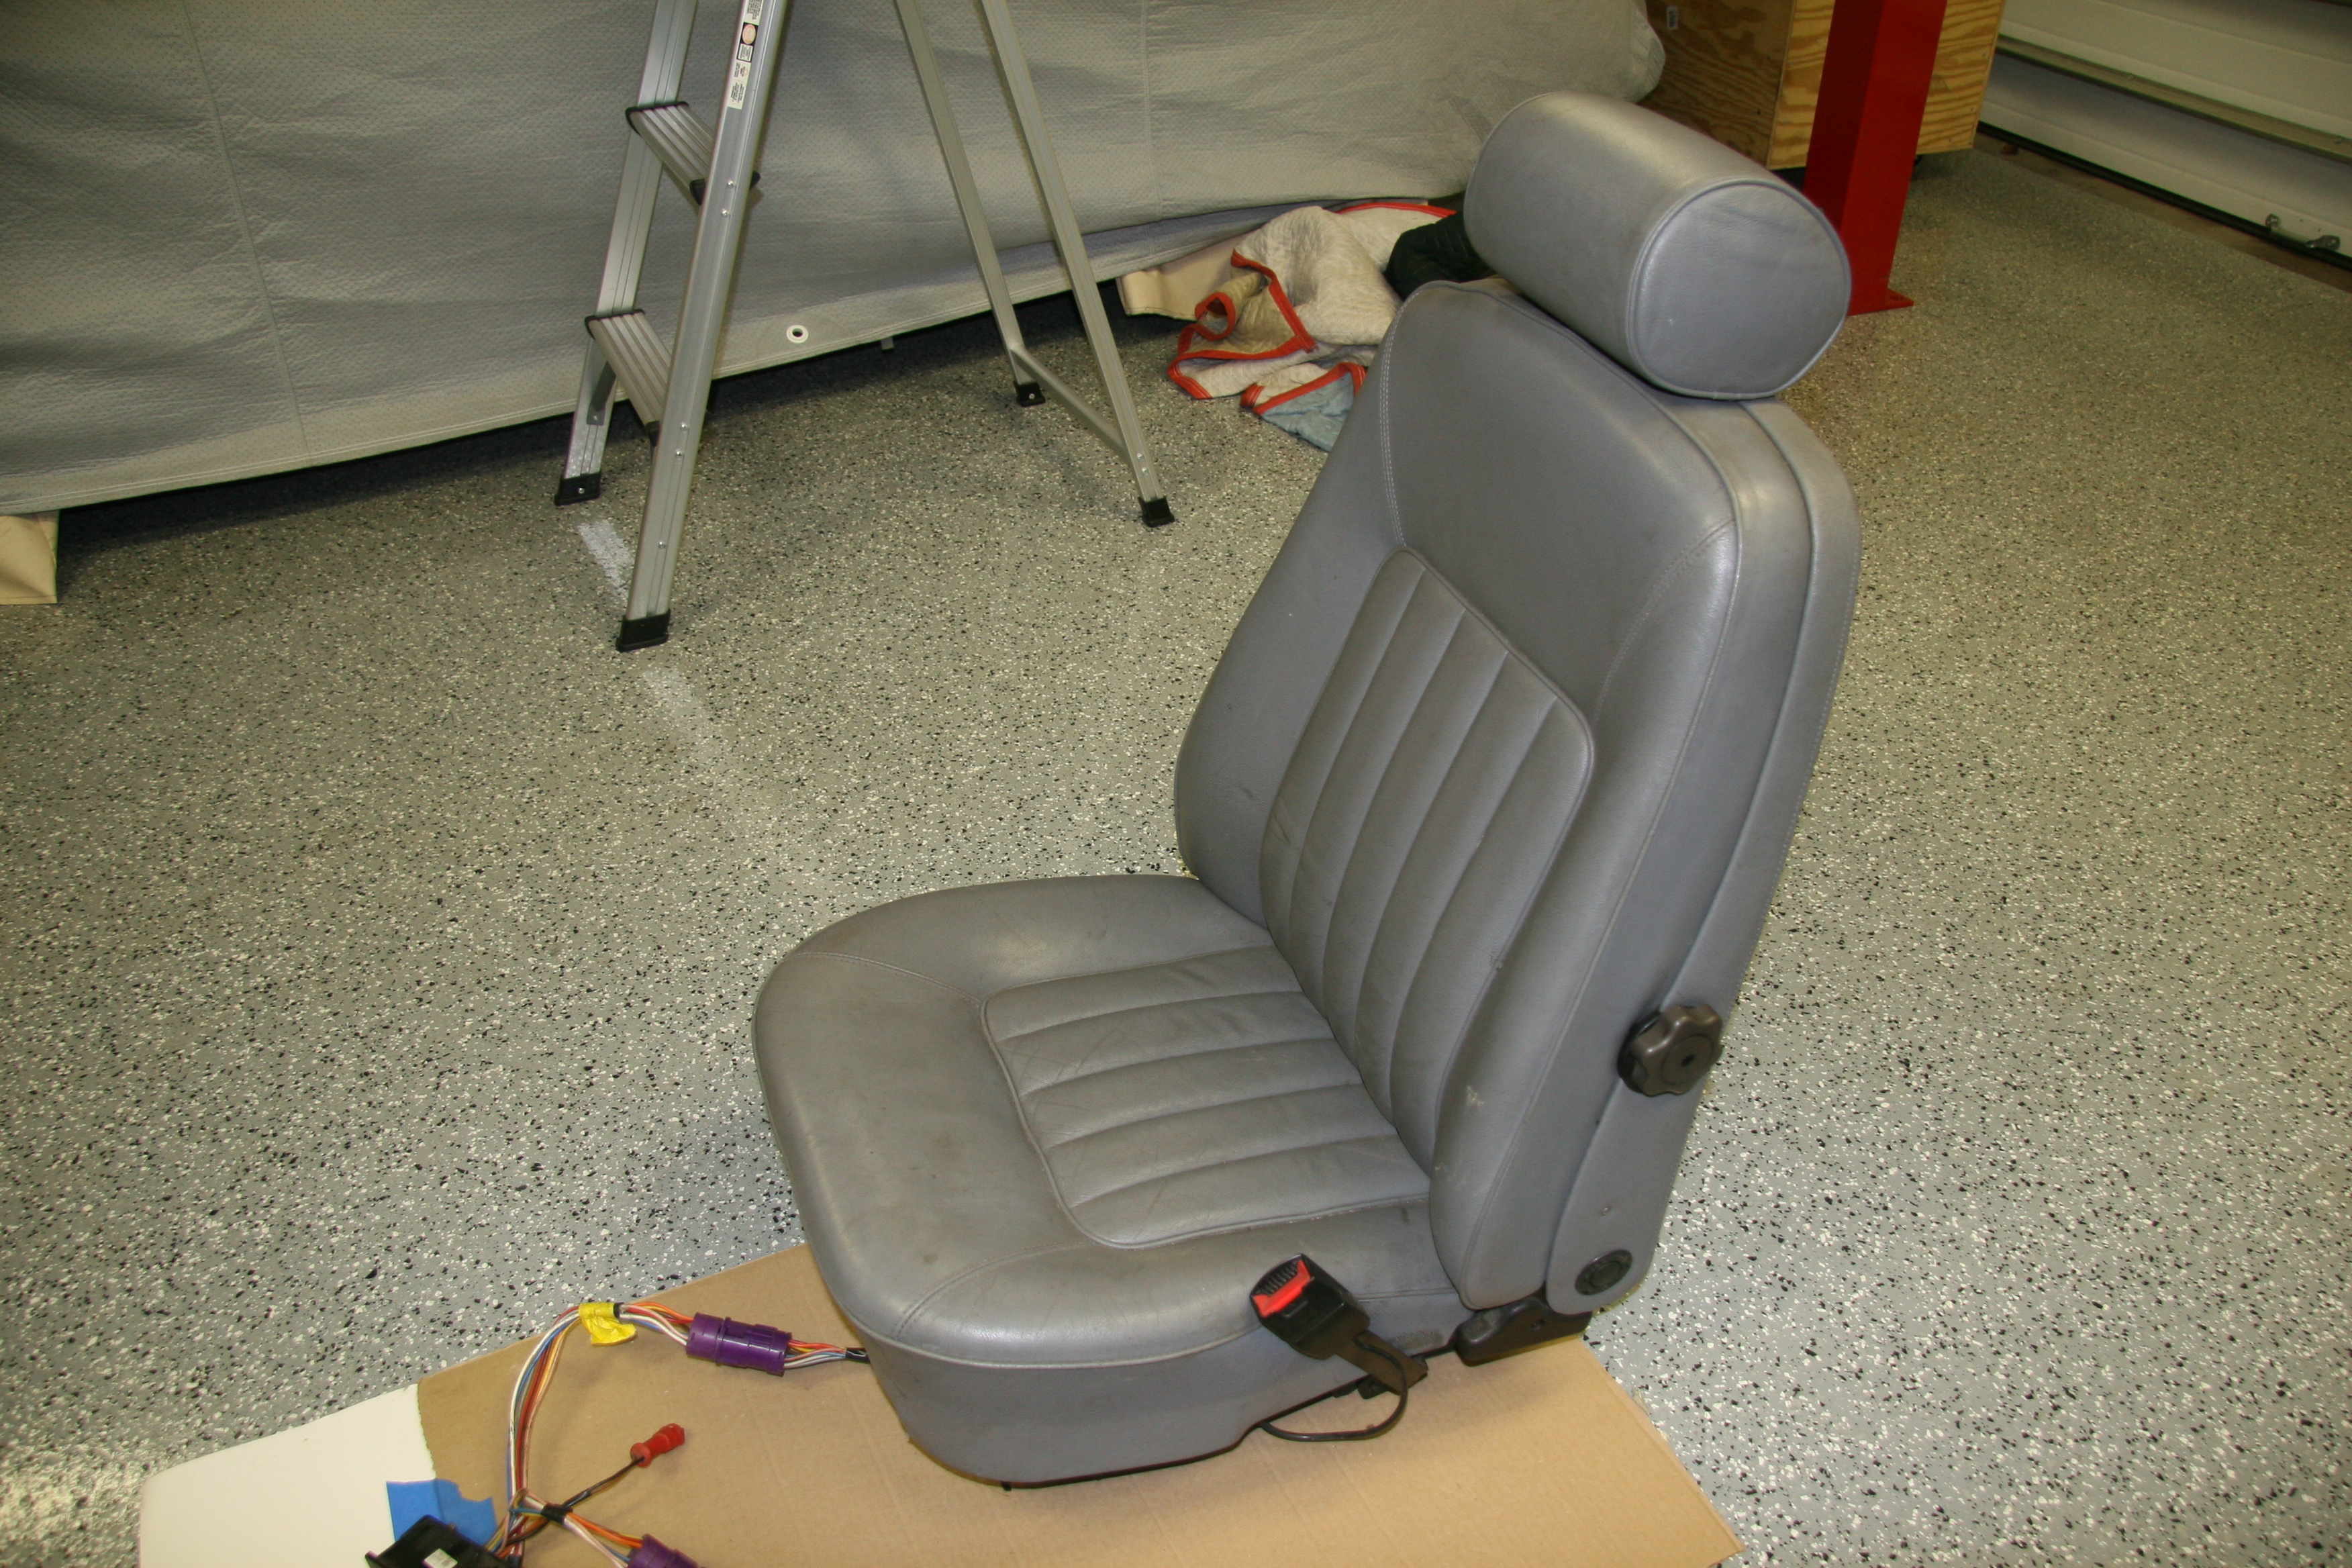
1990 Daimler Front Seats
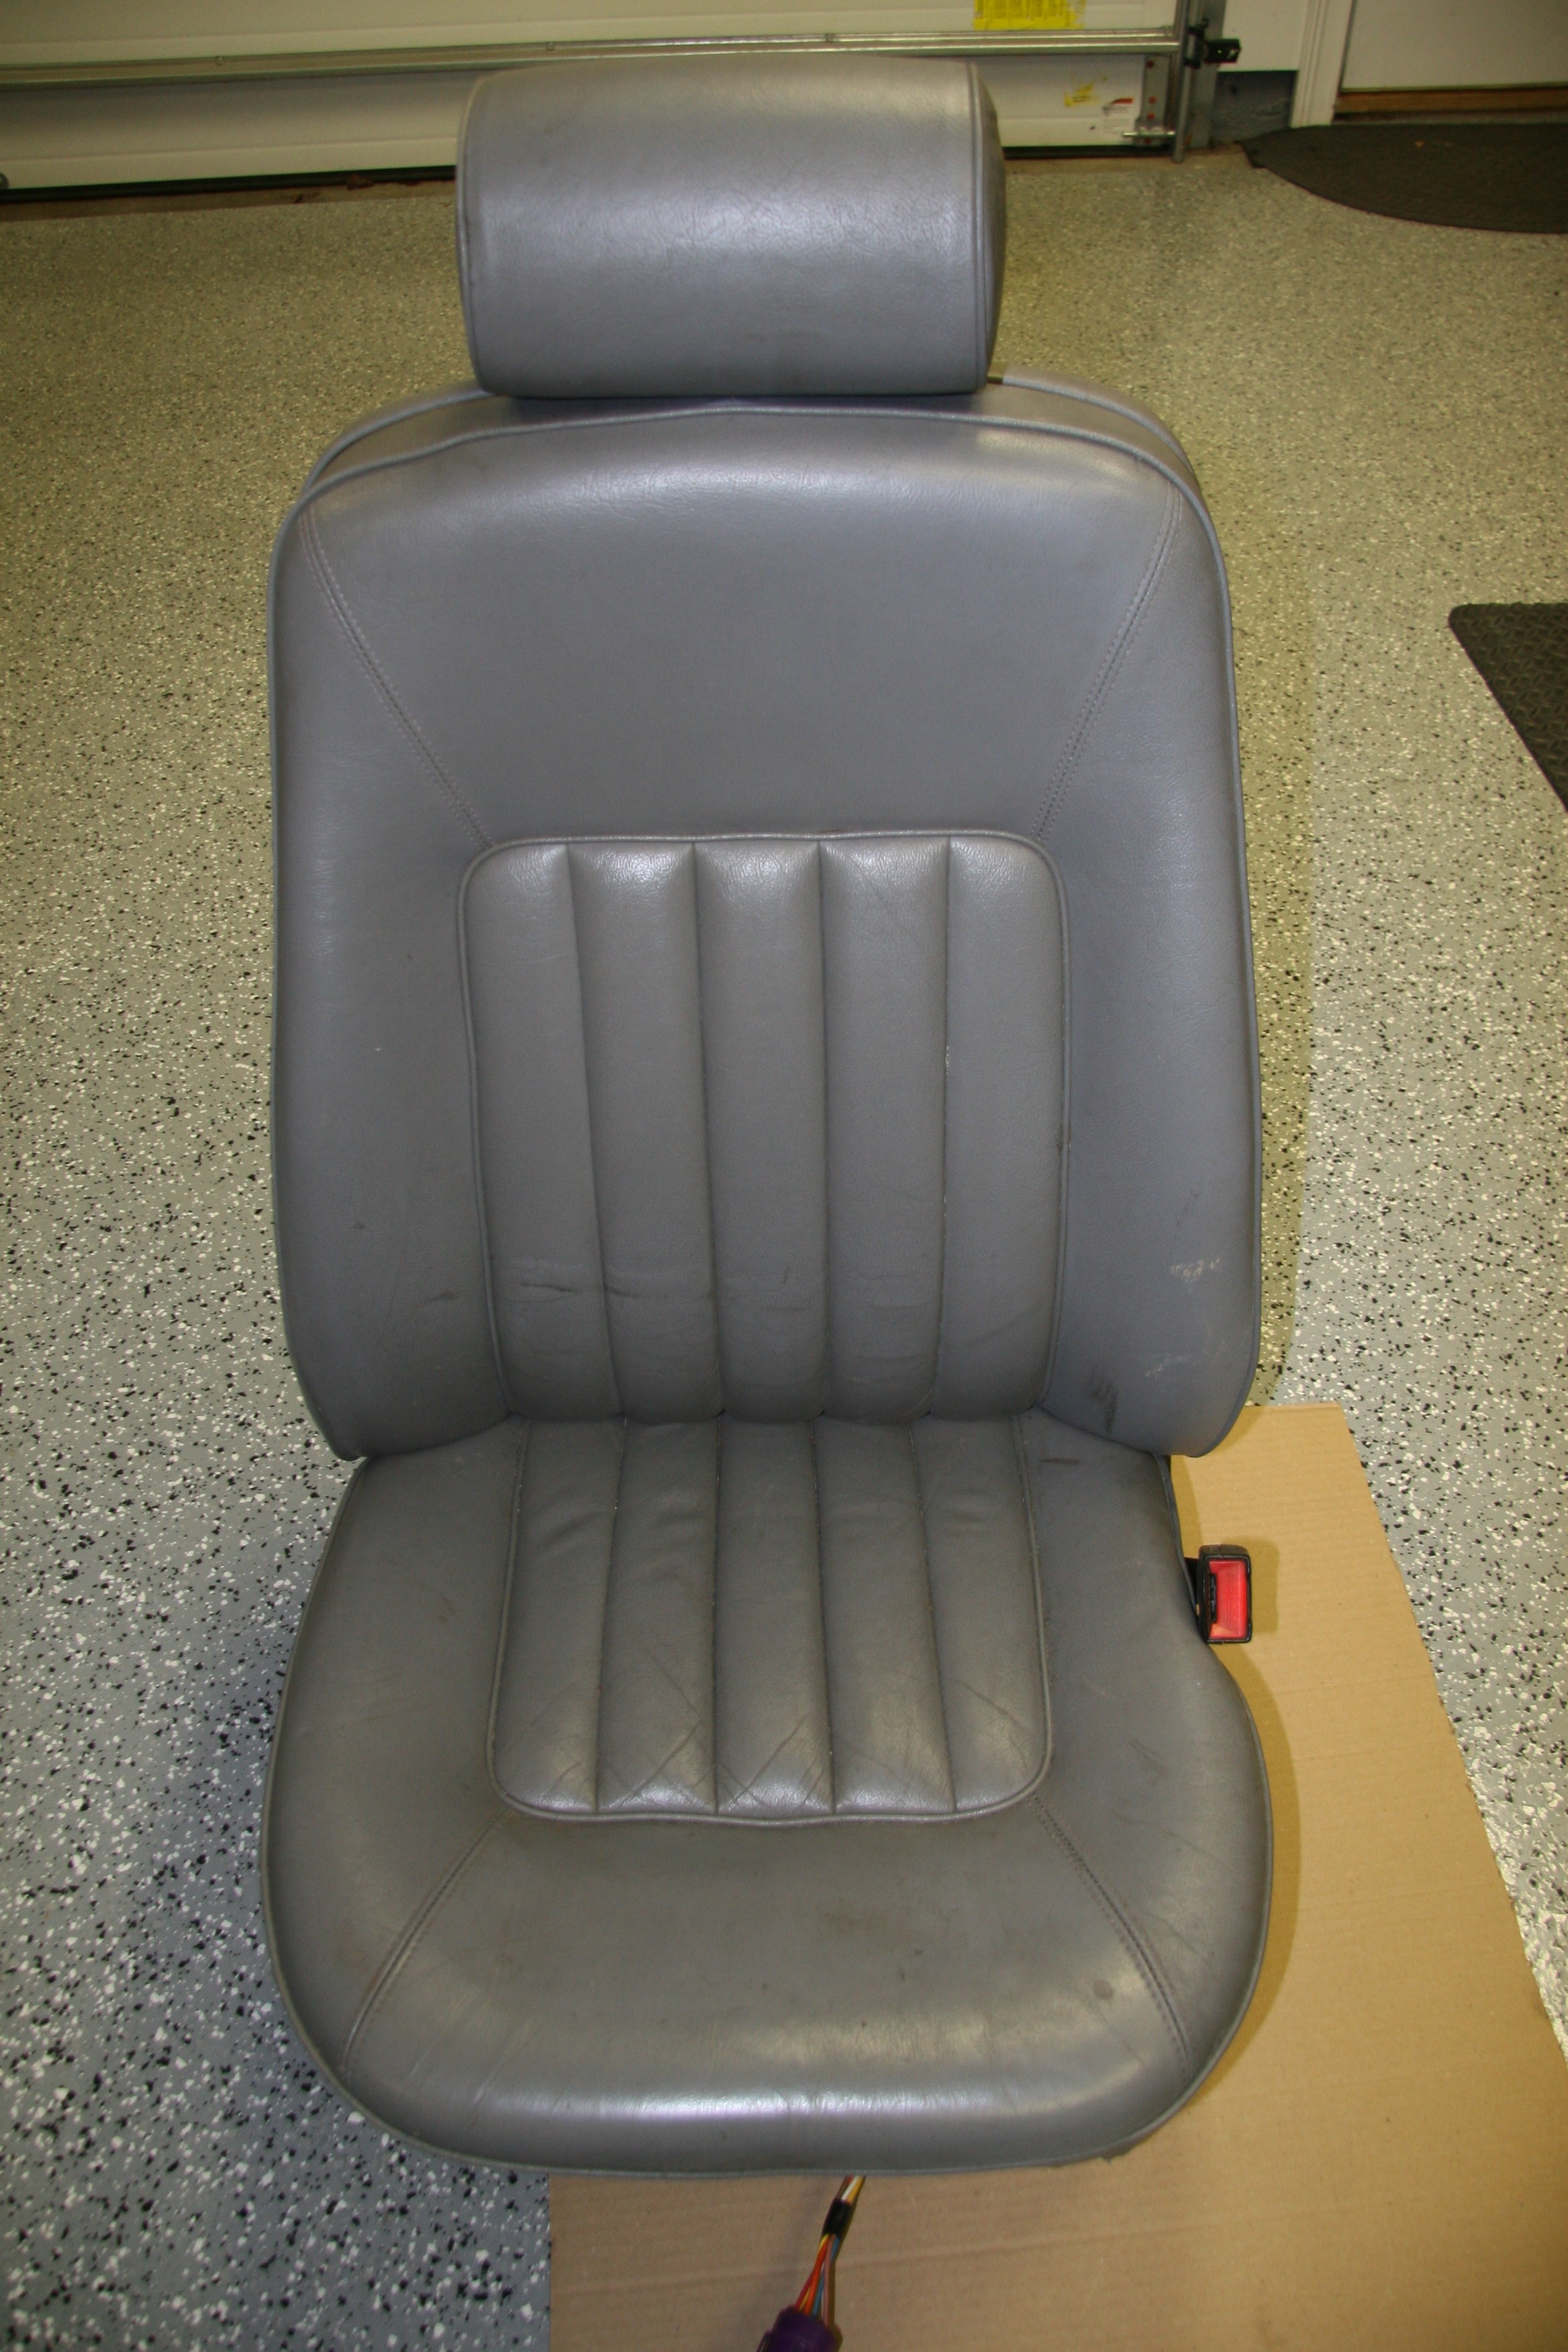
1990 Daimler Front Seats
The picnic tables on these seats are particularly nice and much more functional than the ones on the MK2 seats.

1990 Daimler Front Seat Picnic Table
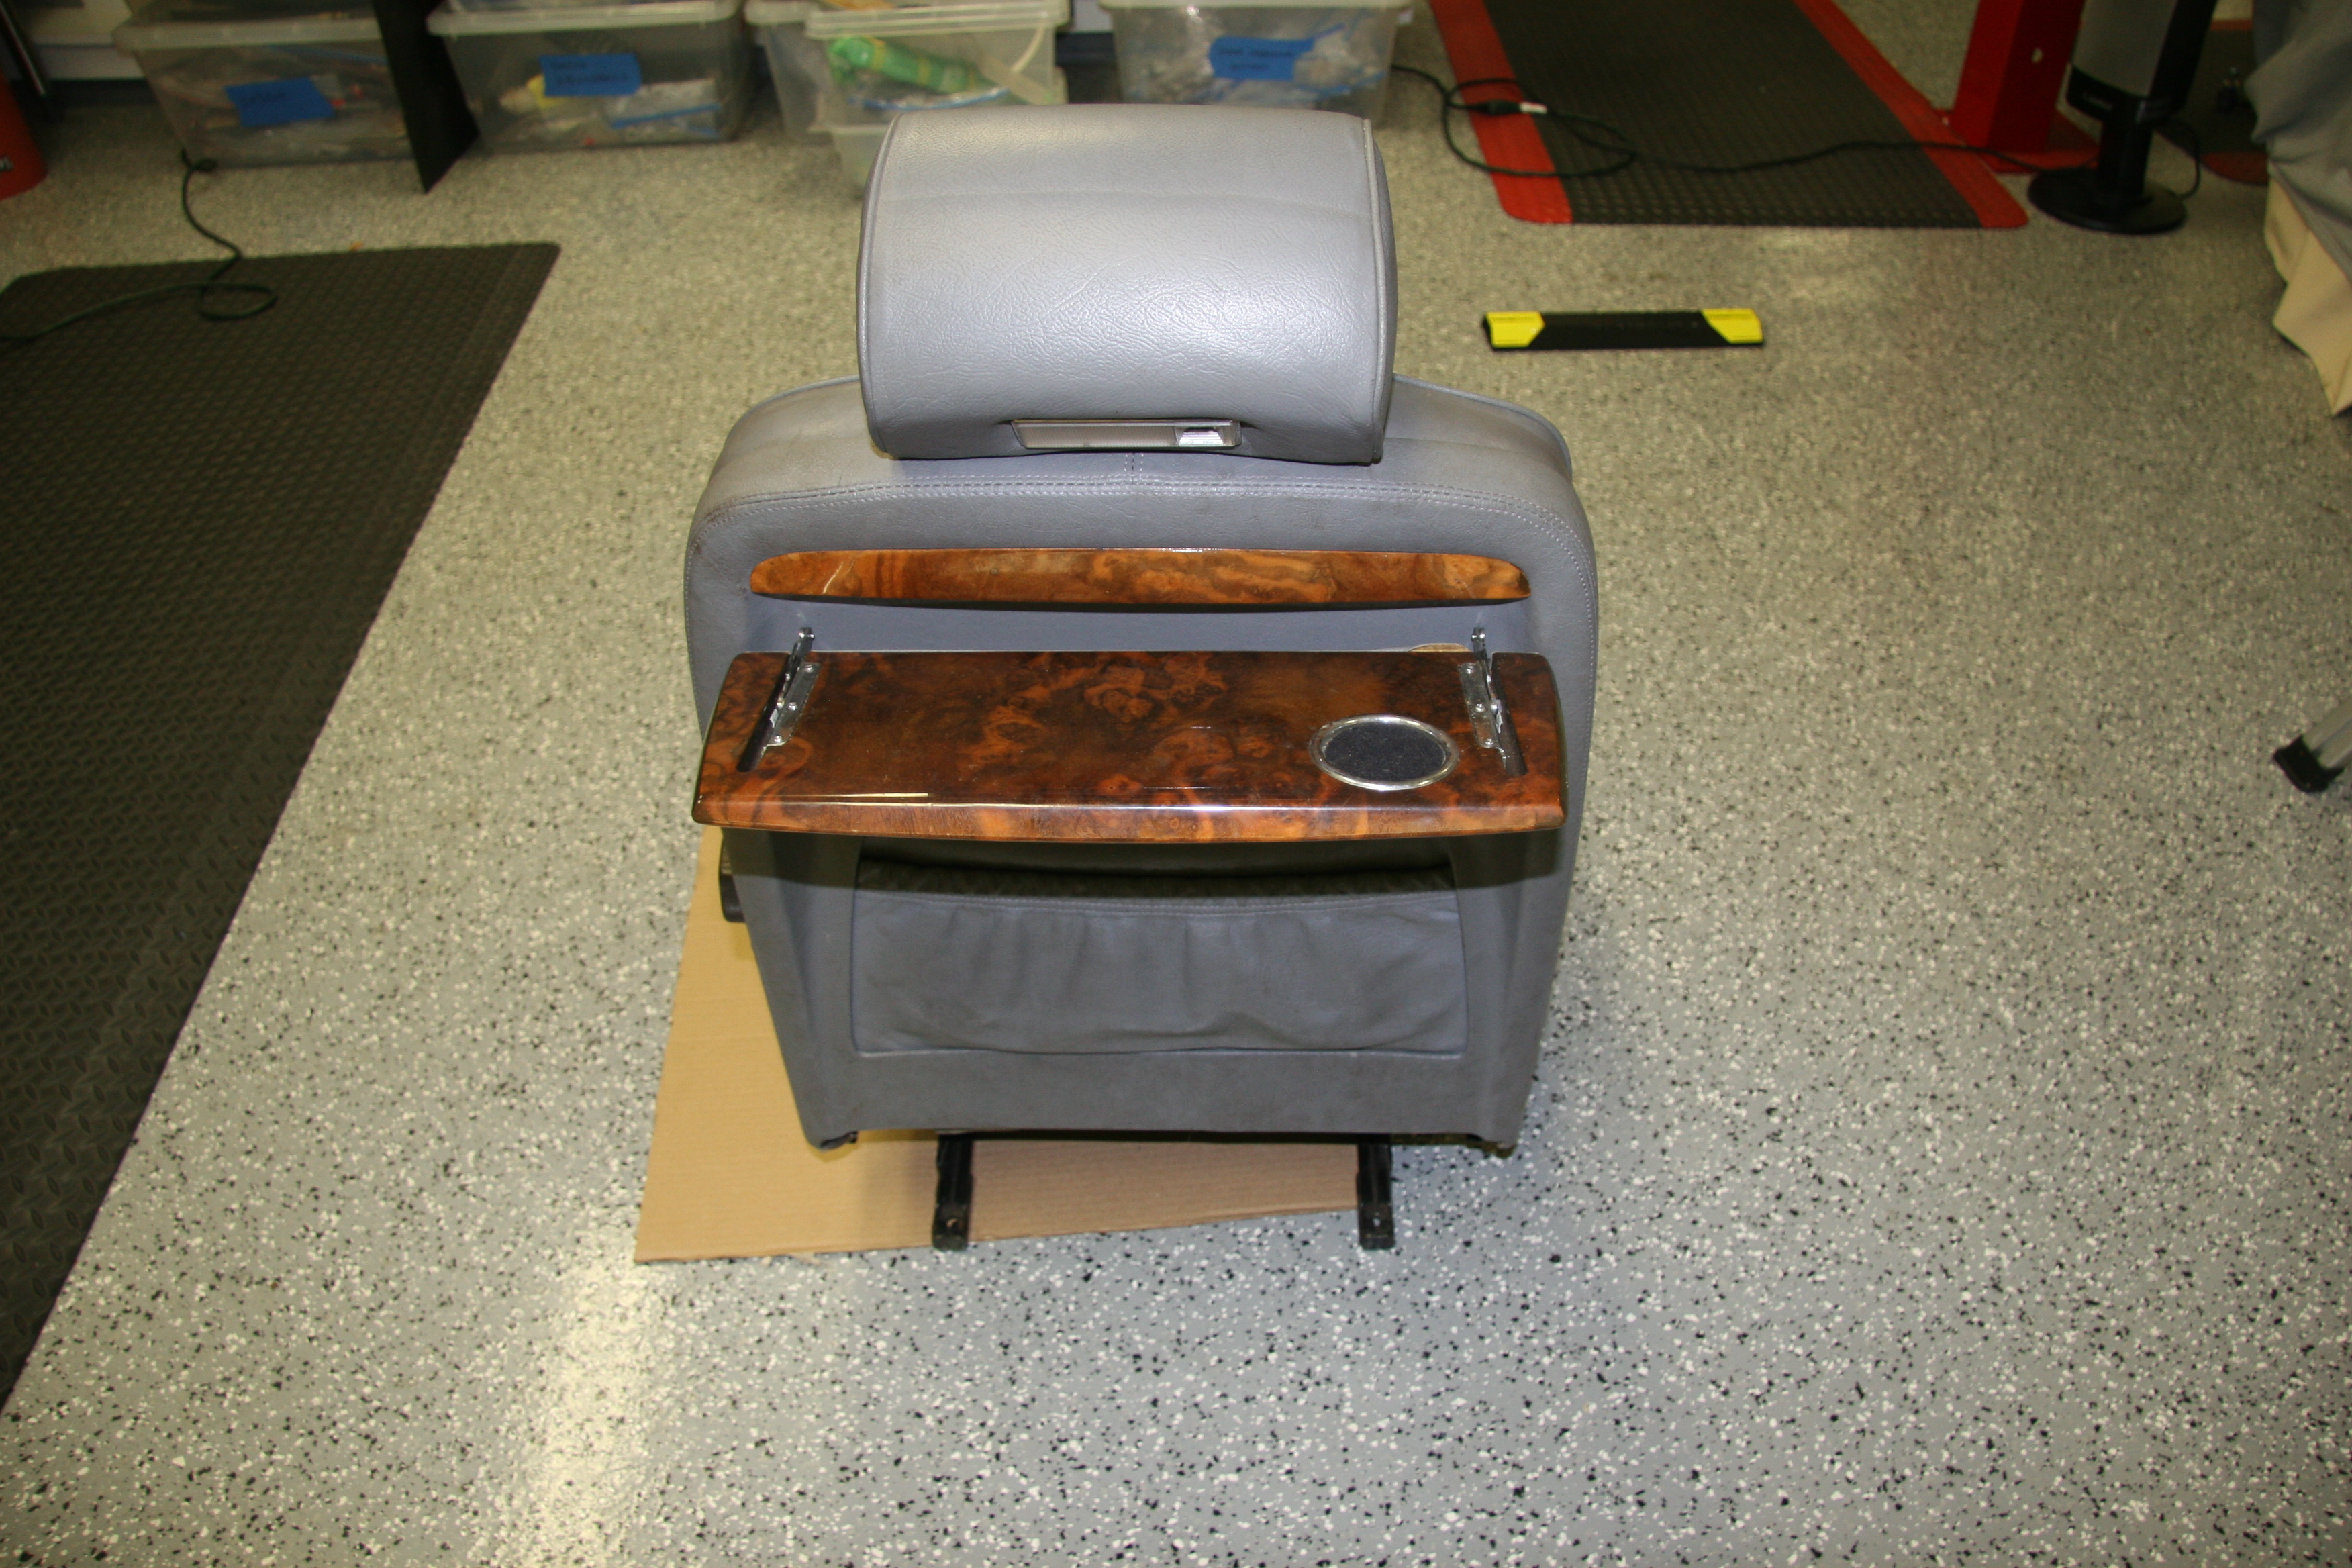
1990 Daimler Front Seat Picnic Table Open
The seats I purchased are slightly different than Ton’s as my headrests are not adjustable. I will have the seats recovered over new seat foams when the time comes.
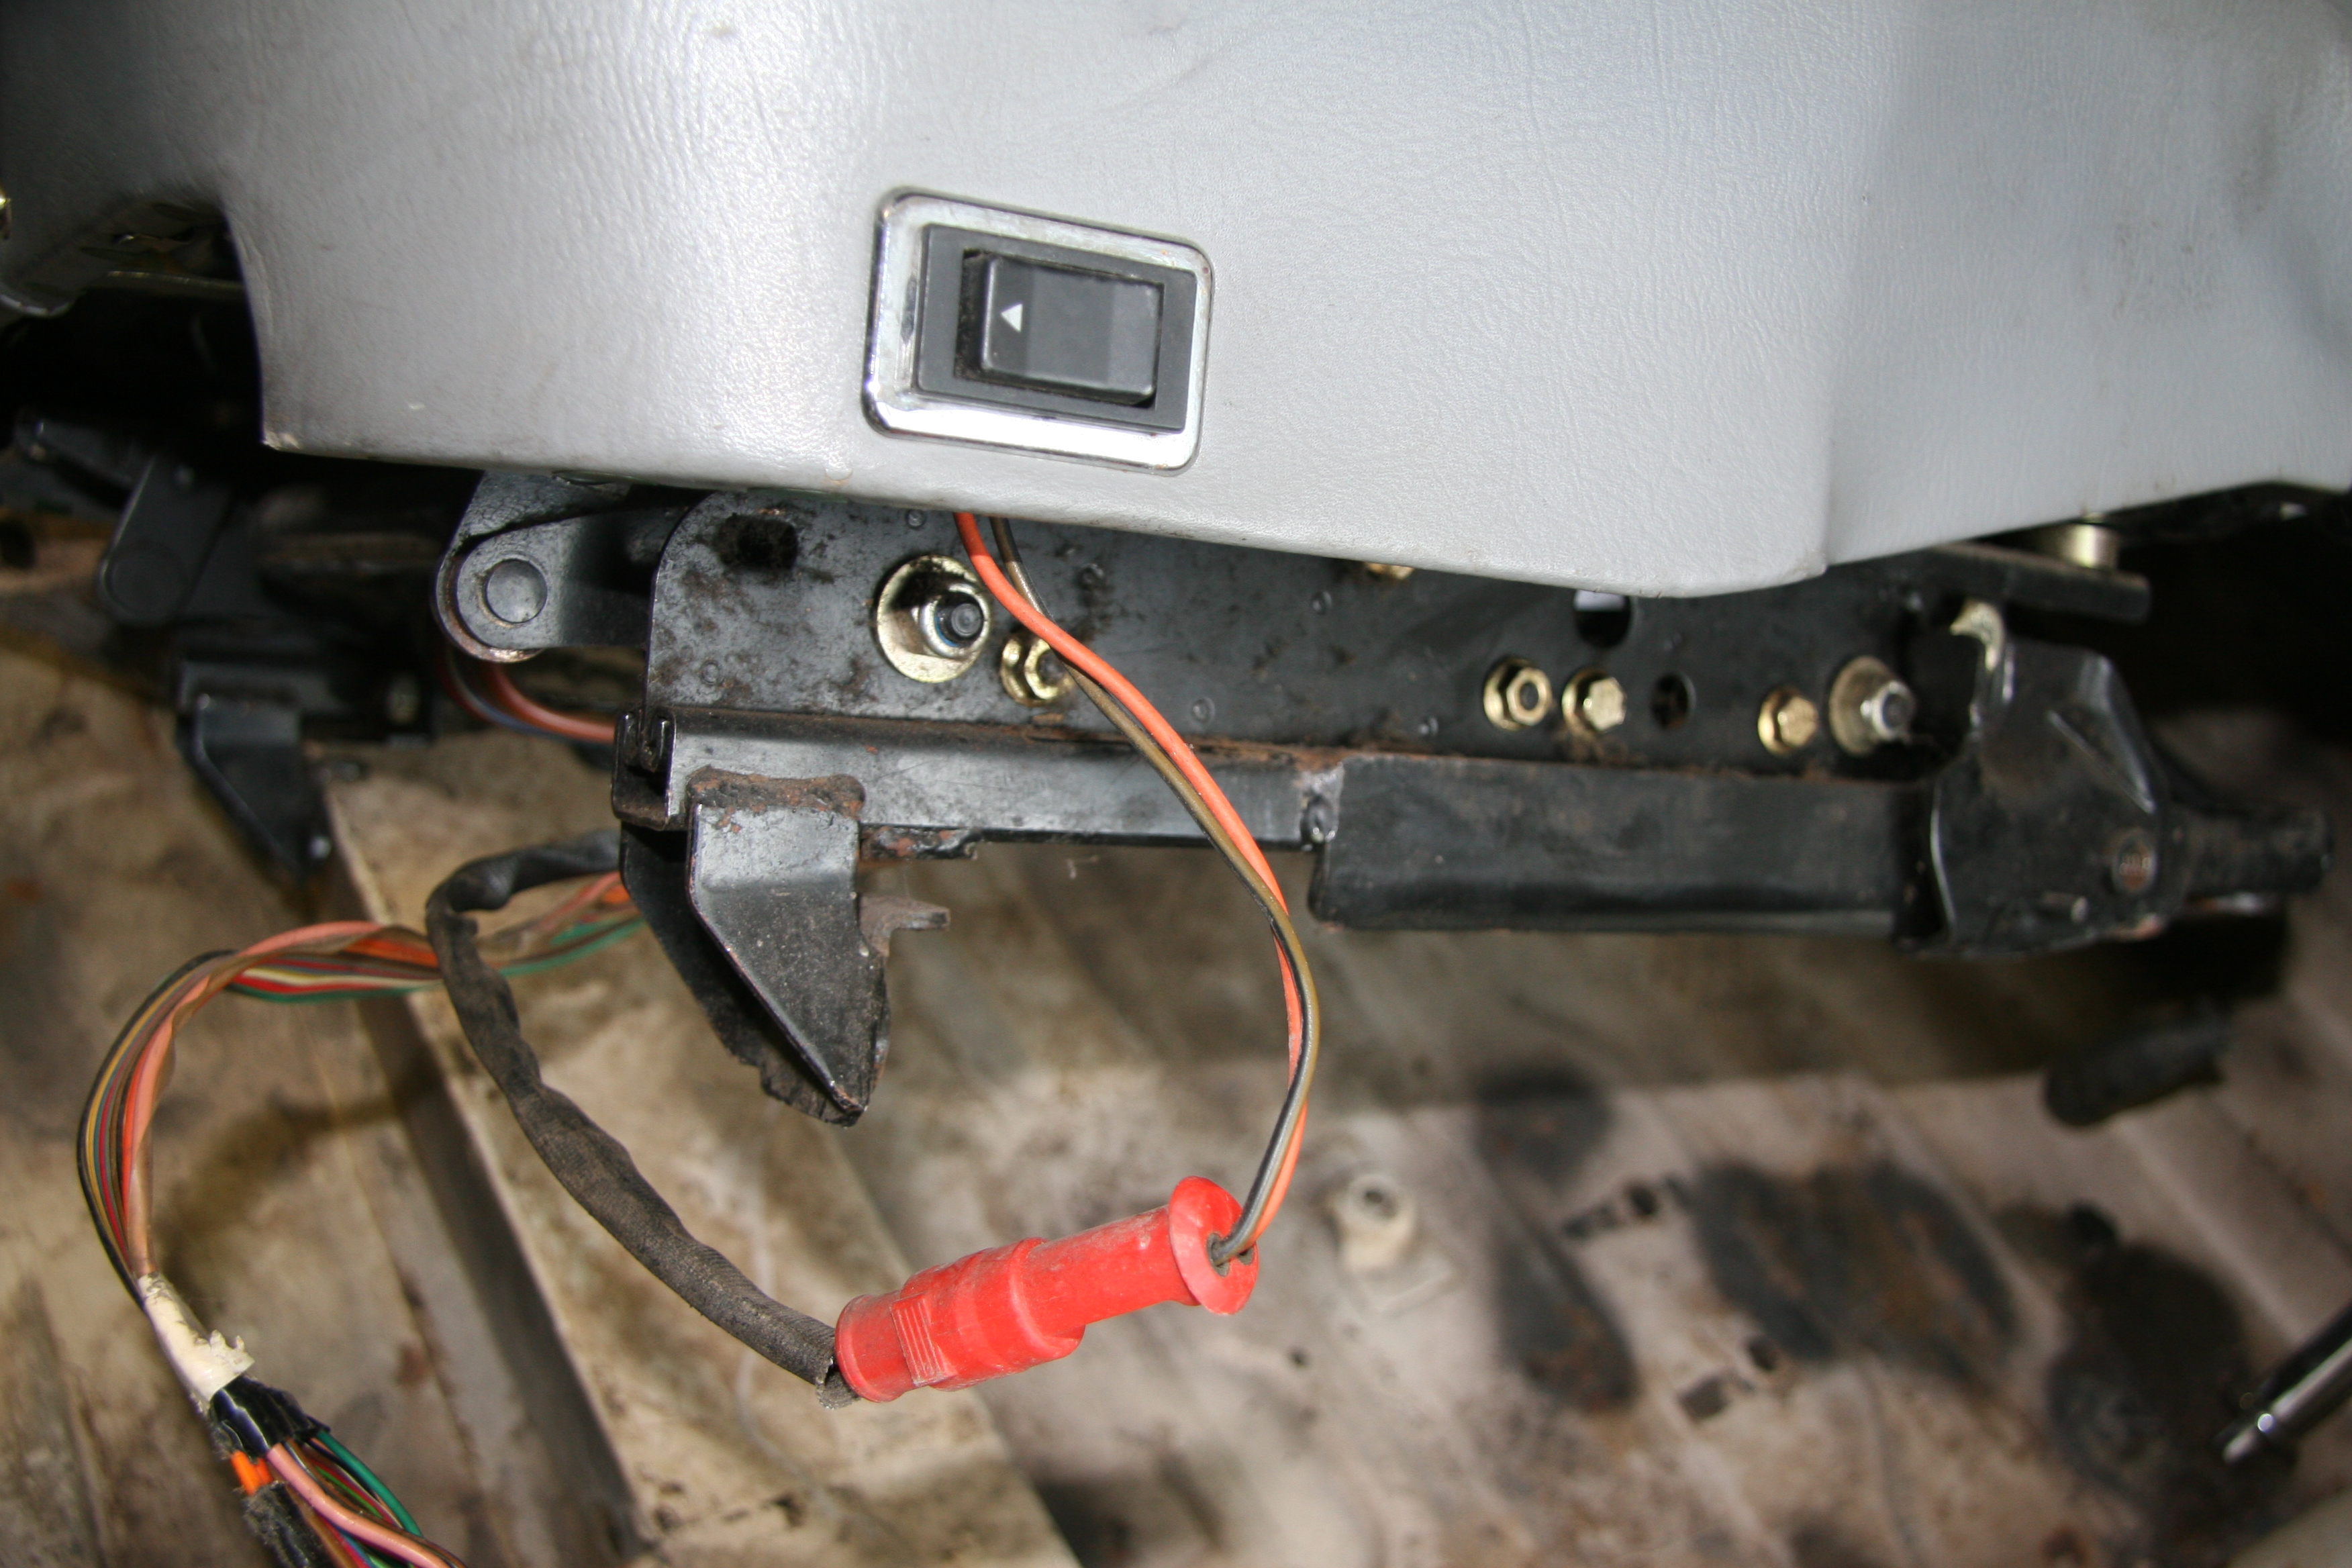
Of course, the primary advantage of these seats is their adjustability. Each seat has four motors. Two for the lower and two for the upper cushion. The seats also have seat heaters (non-functional apparently) and the driver’s seat has a memory function.
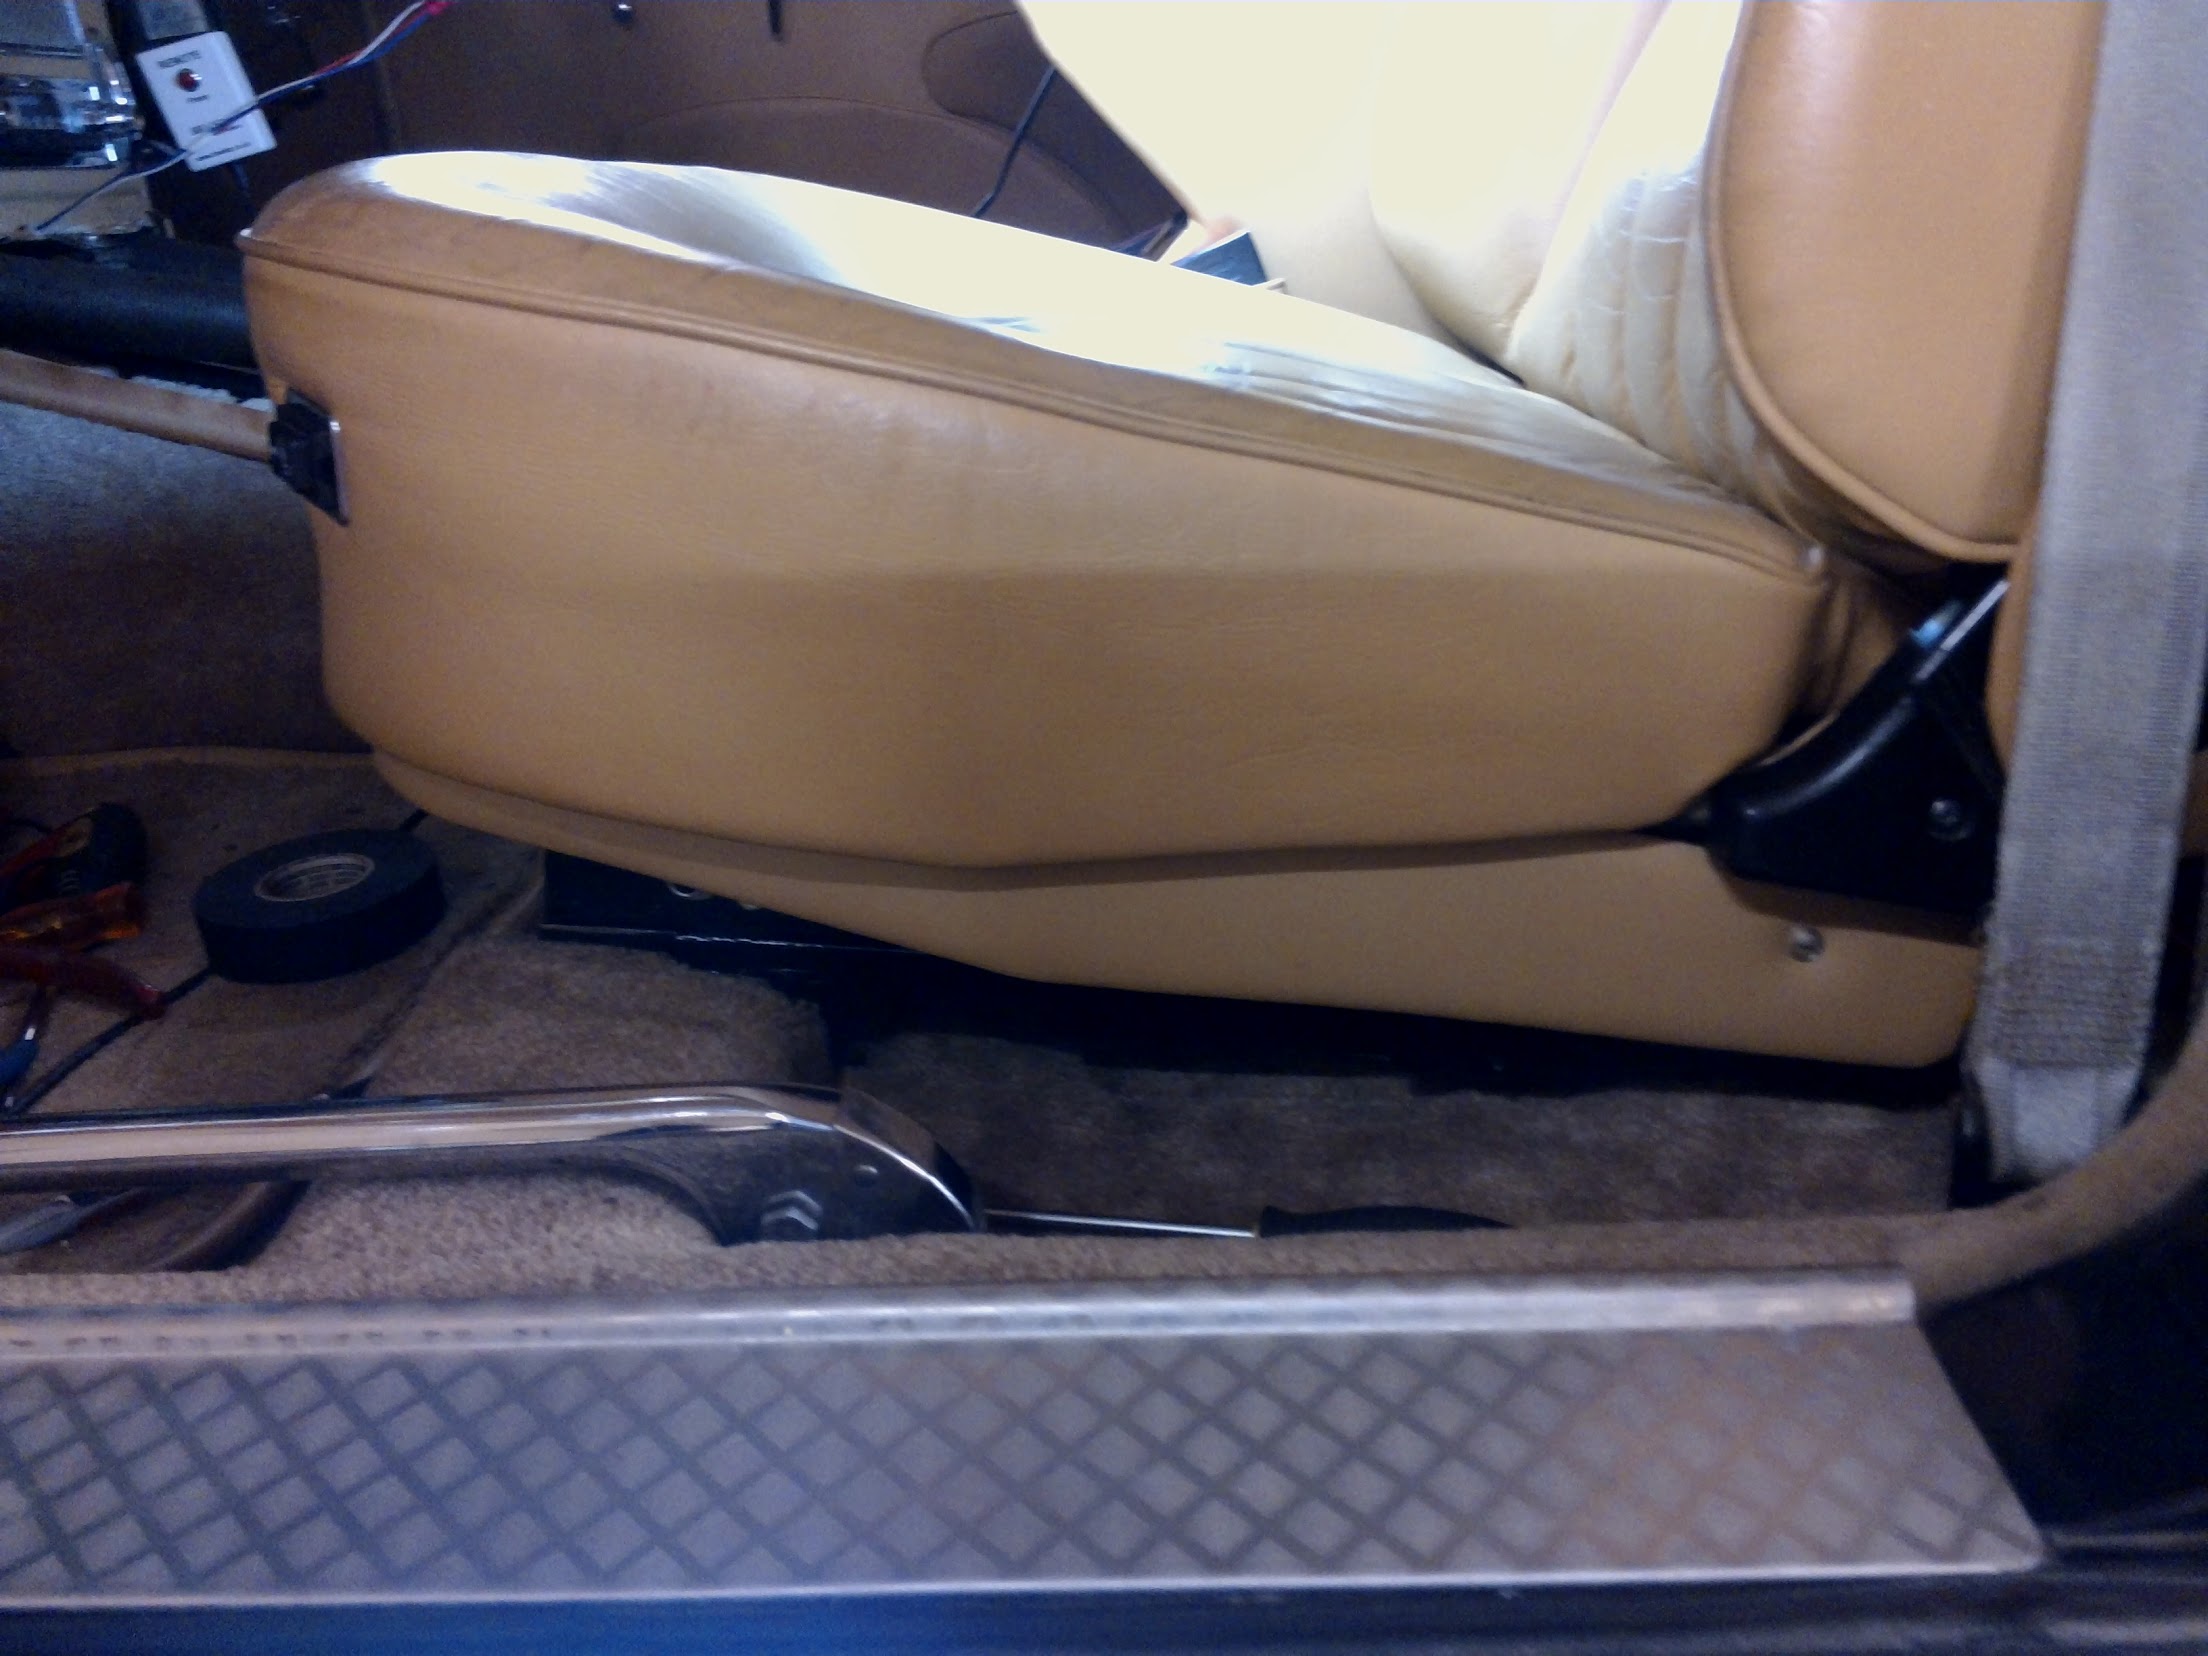
Most folks cut down the height of the floor brace in the interior to install the modern seats; however, Ton did not do that and I am going to at least try it this way before cutting them back. I like the idea of being able to go back to the original seats if I, or another owner, decided to do so in the future. As Ton did, I made a brace for the seat frames from angle iron and had them welded to the frames. I will then drill them for mounting through the original holes of the seat supports into the floor brace.
Front Foot on XJ40 seat frame
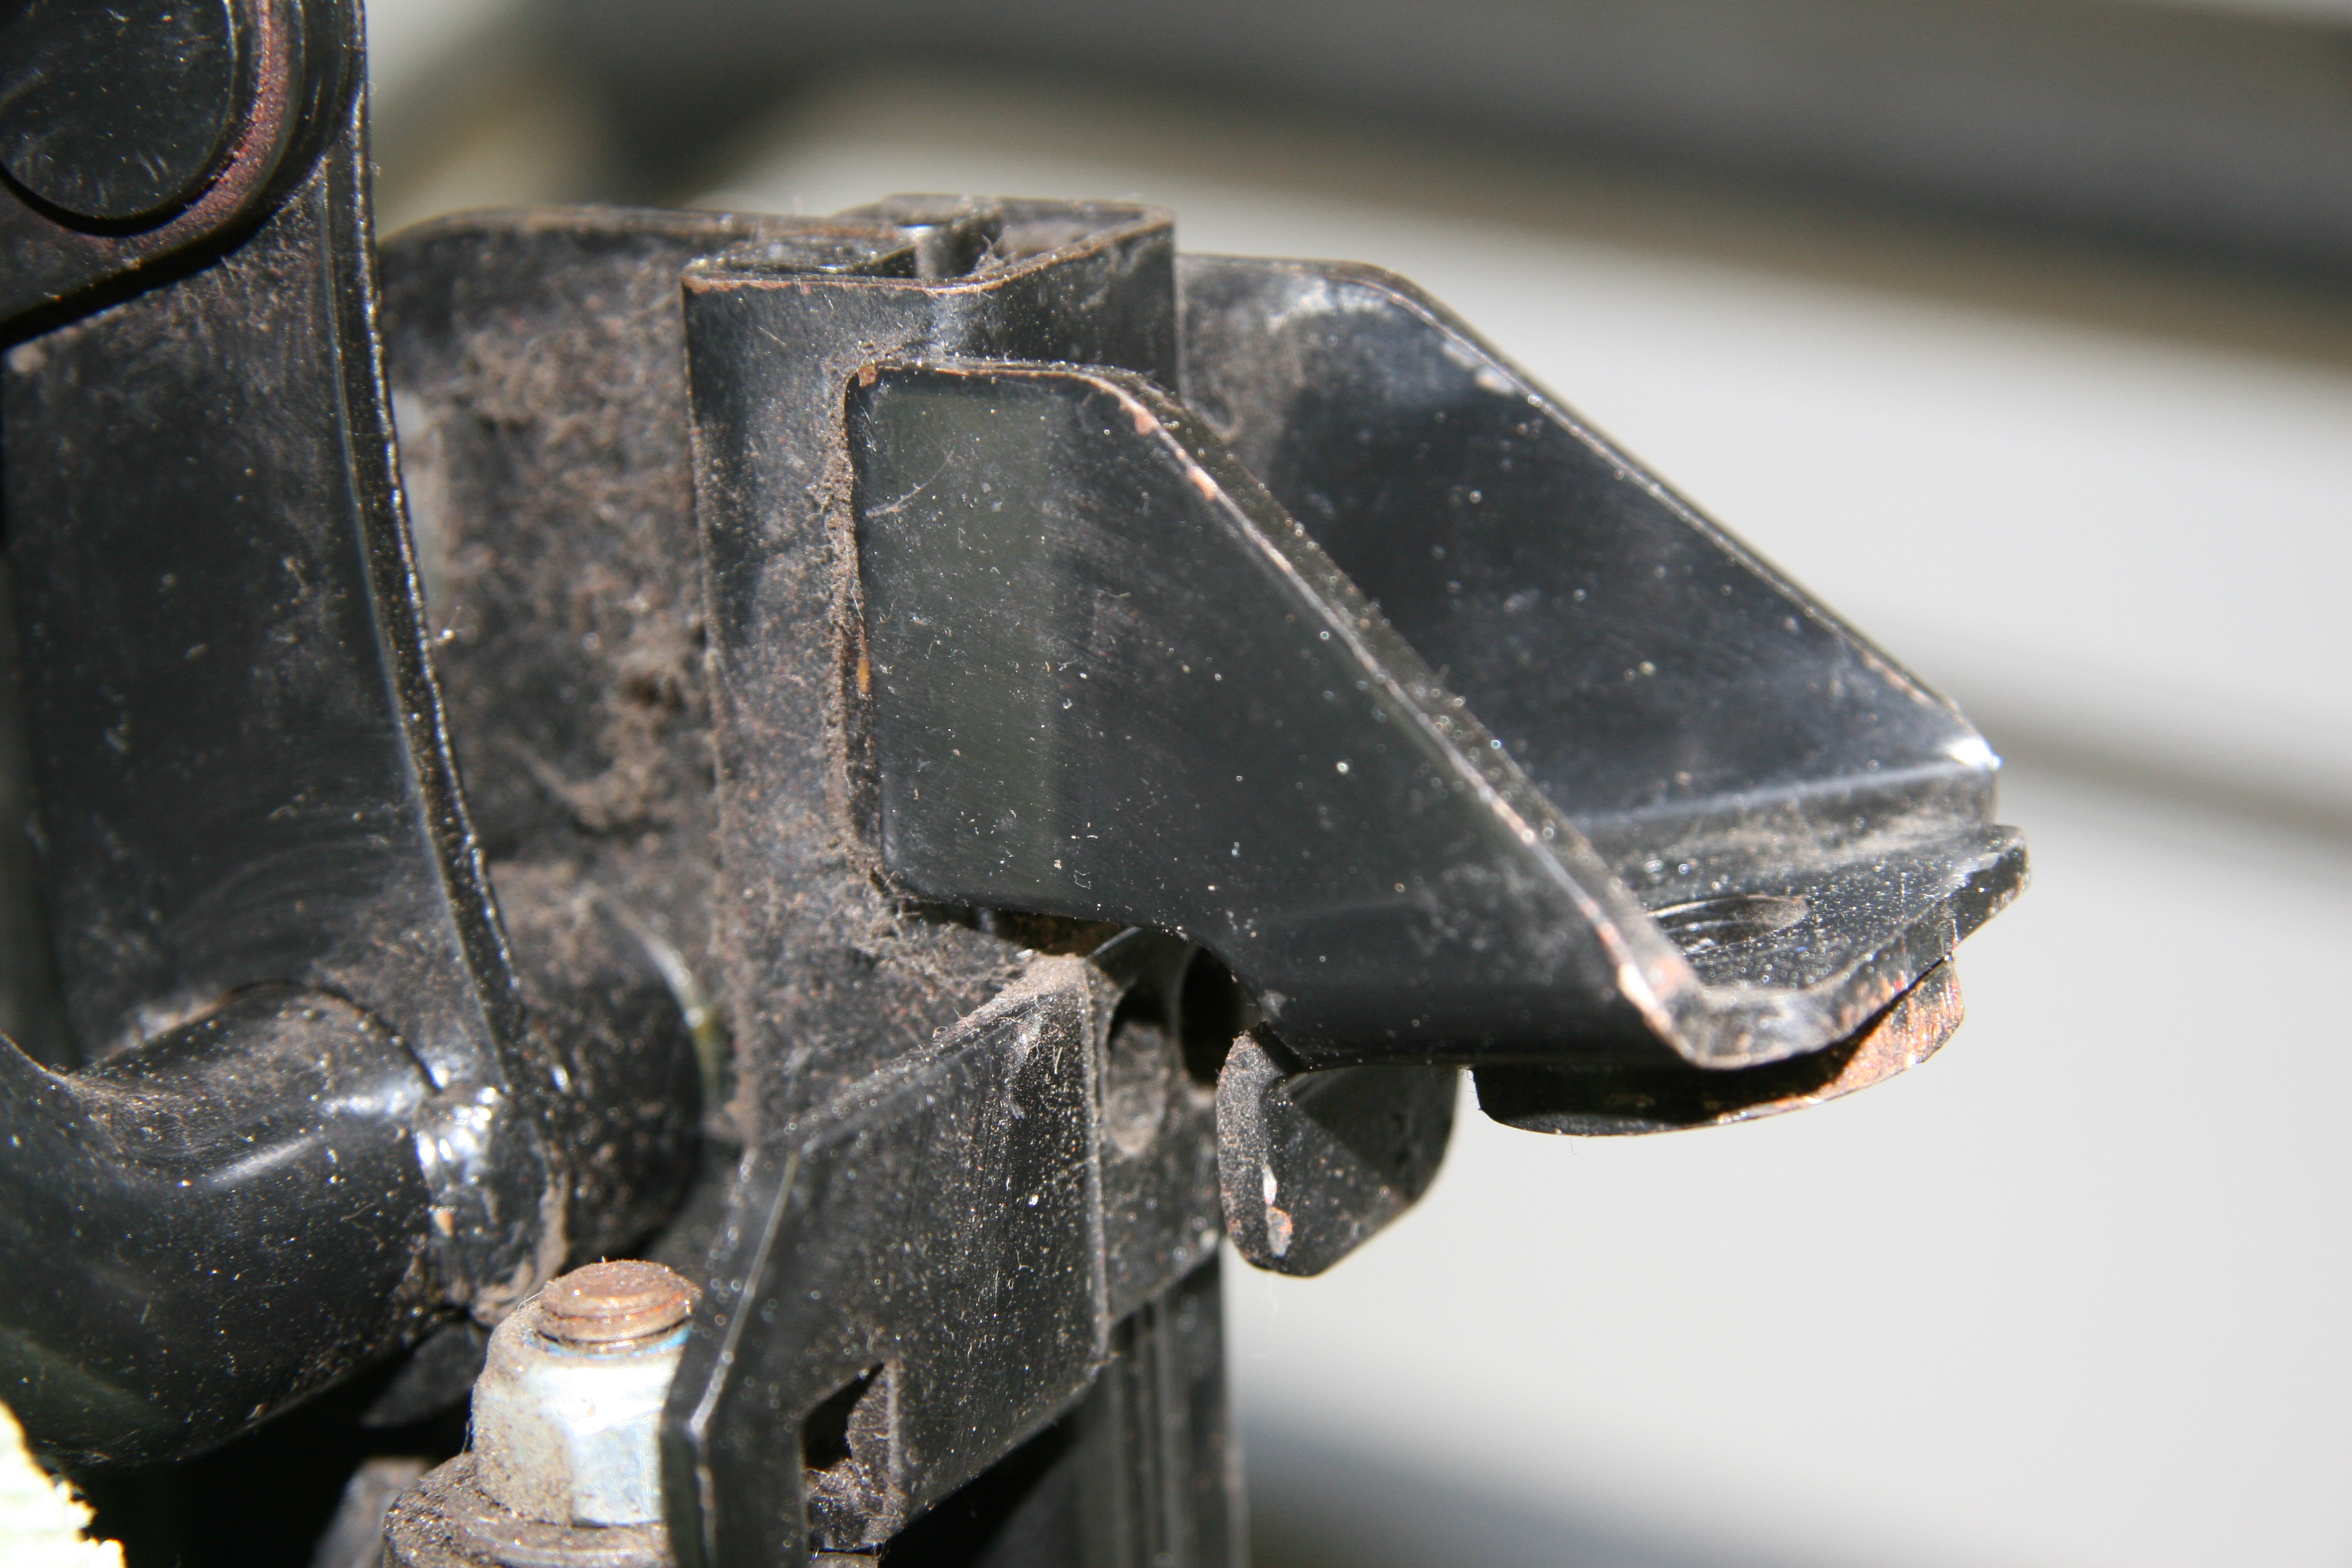
XJ40 seat frame front foot
XJ40 seat frame front foot removed
The front foot shown in the image above must first be removed.
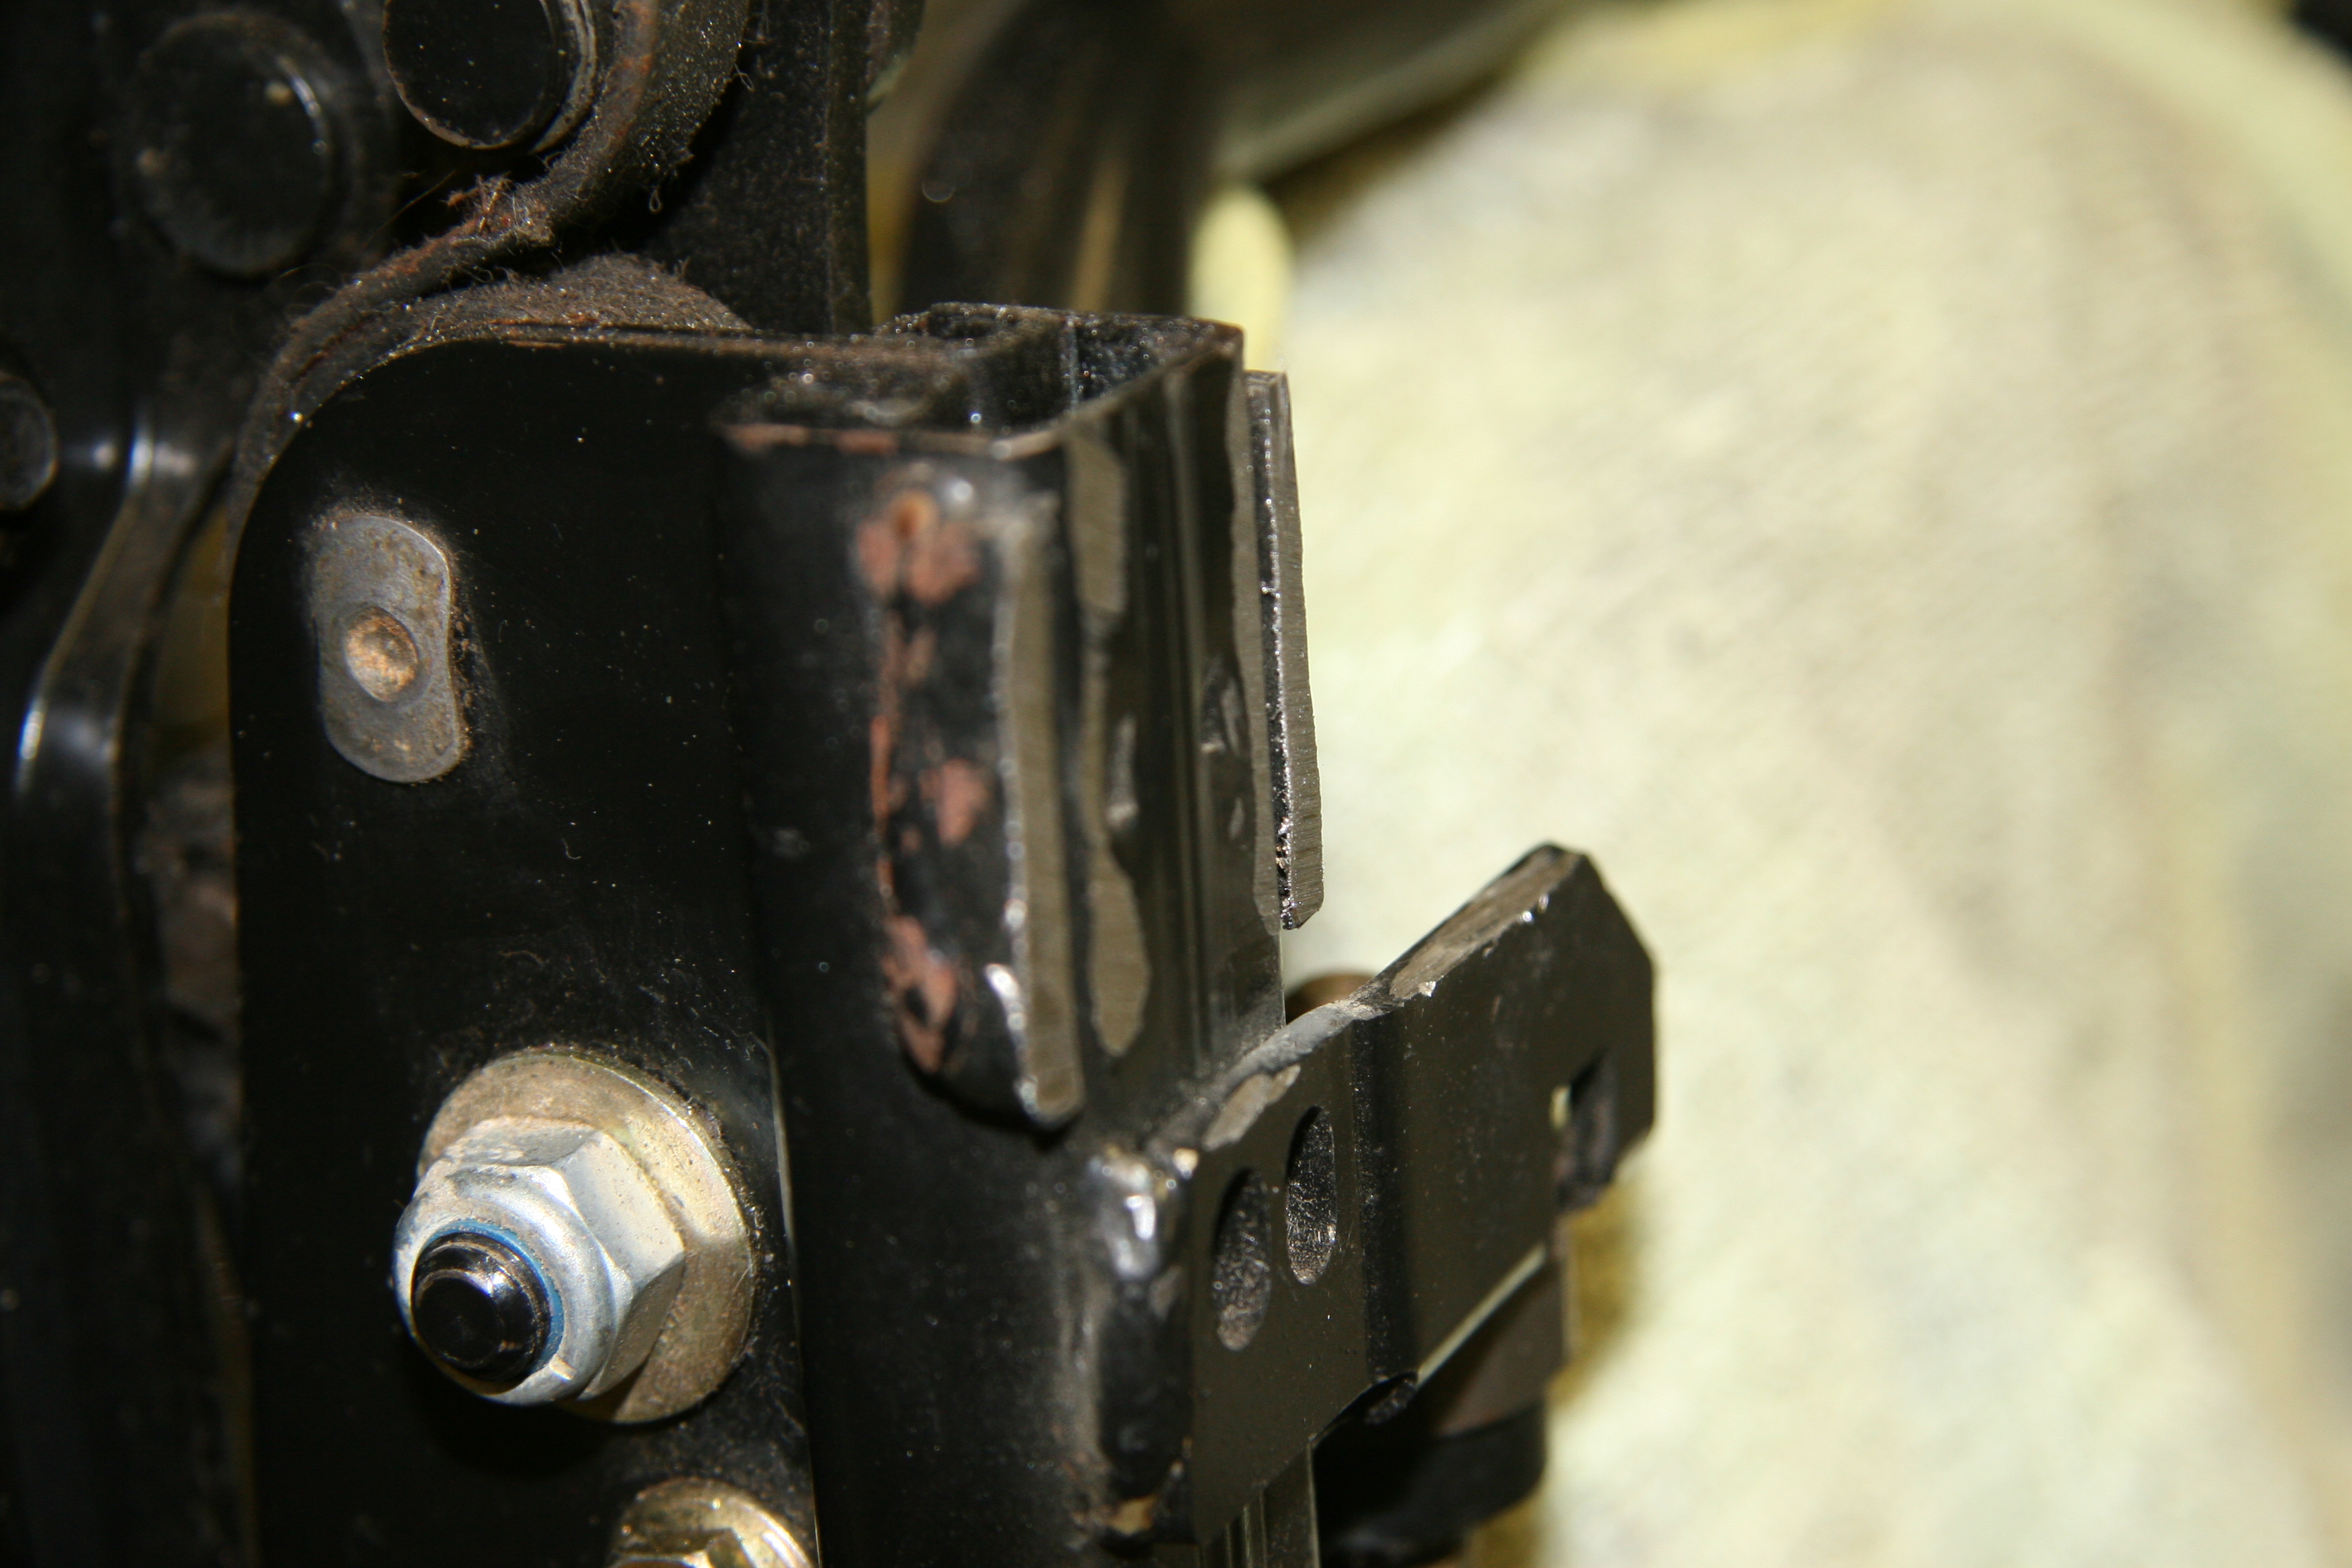
New front mounting bracket in place with front foot removed
The image above shows the new bracket in place prior to welding to the seat frame.
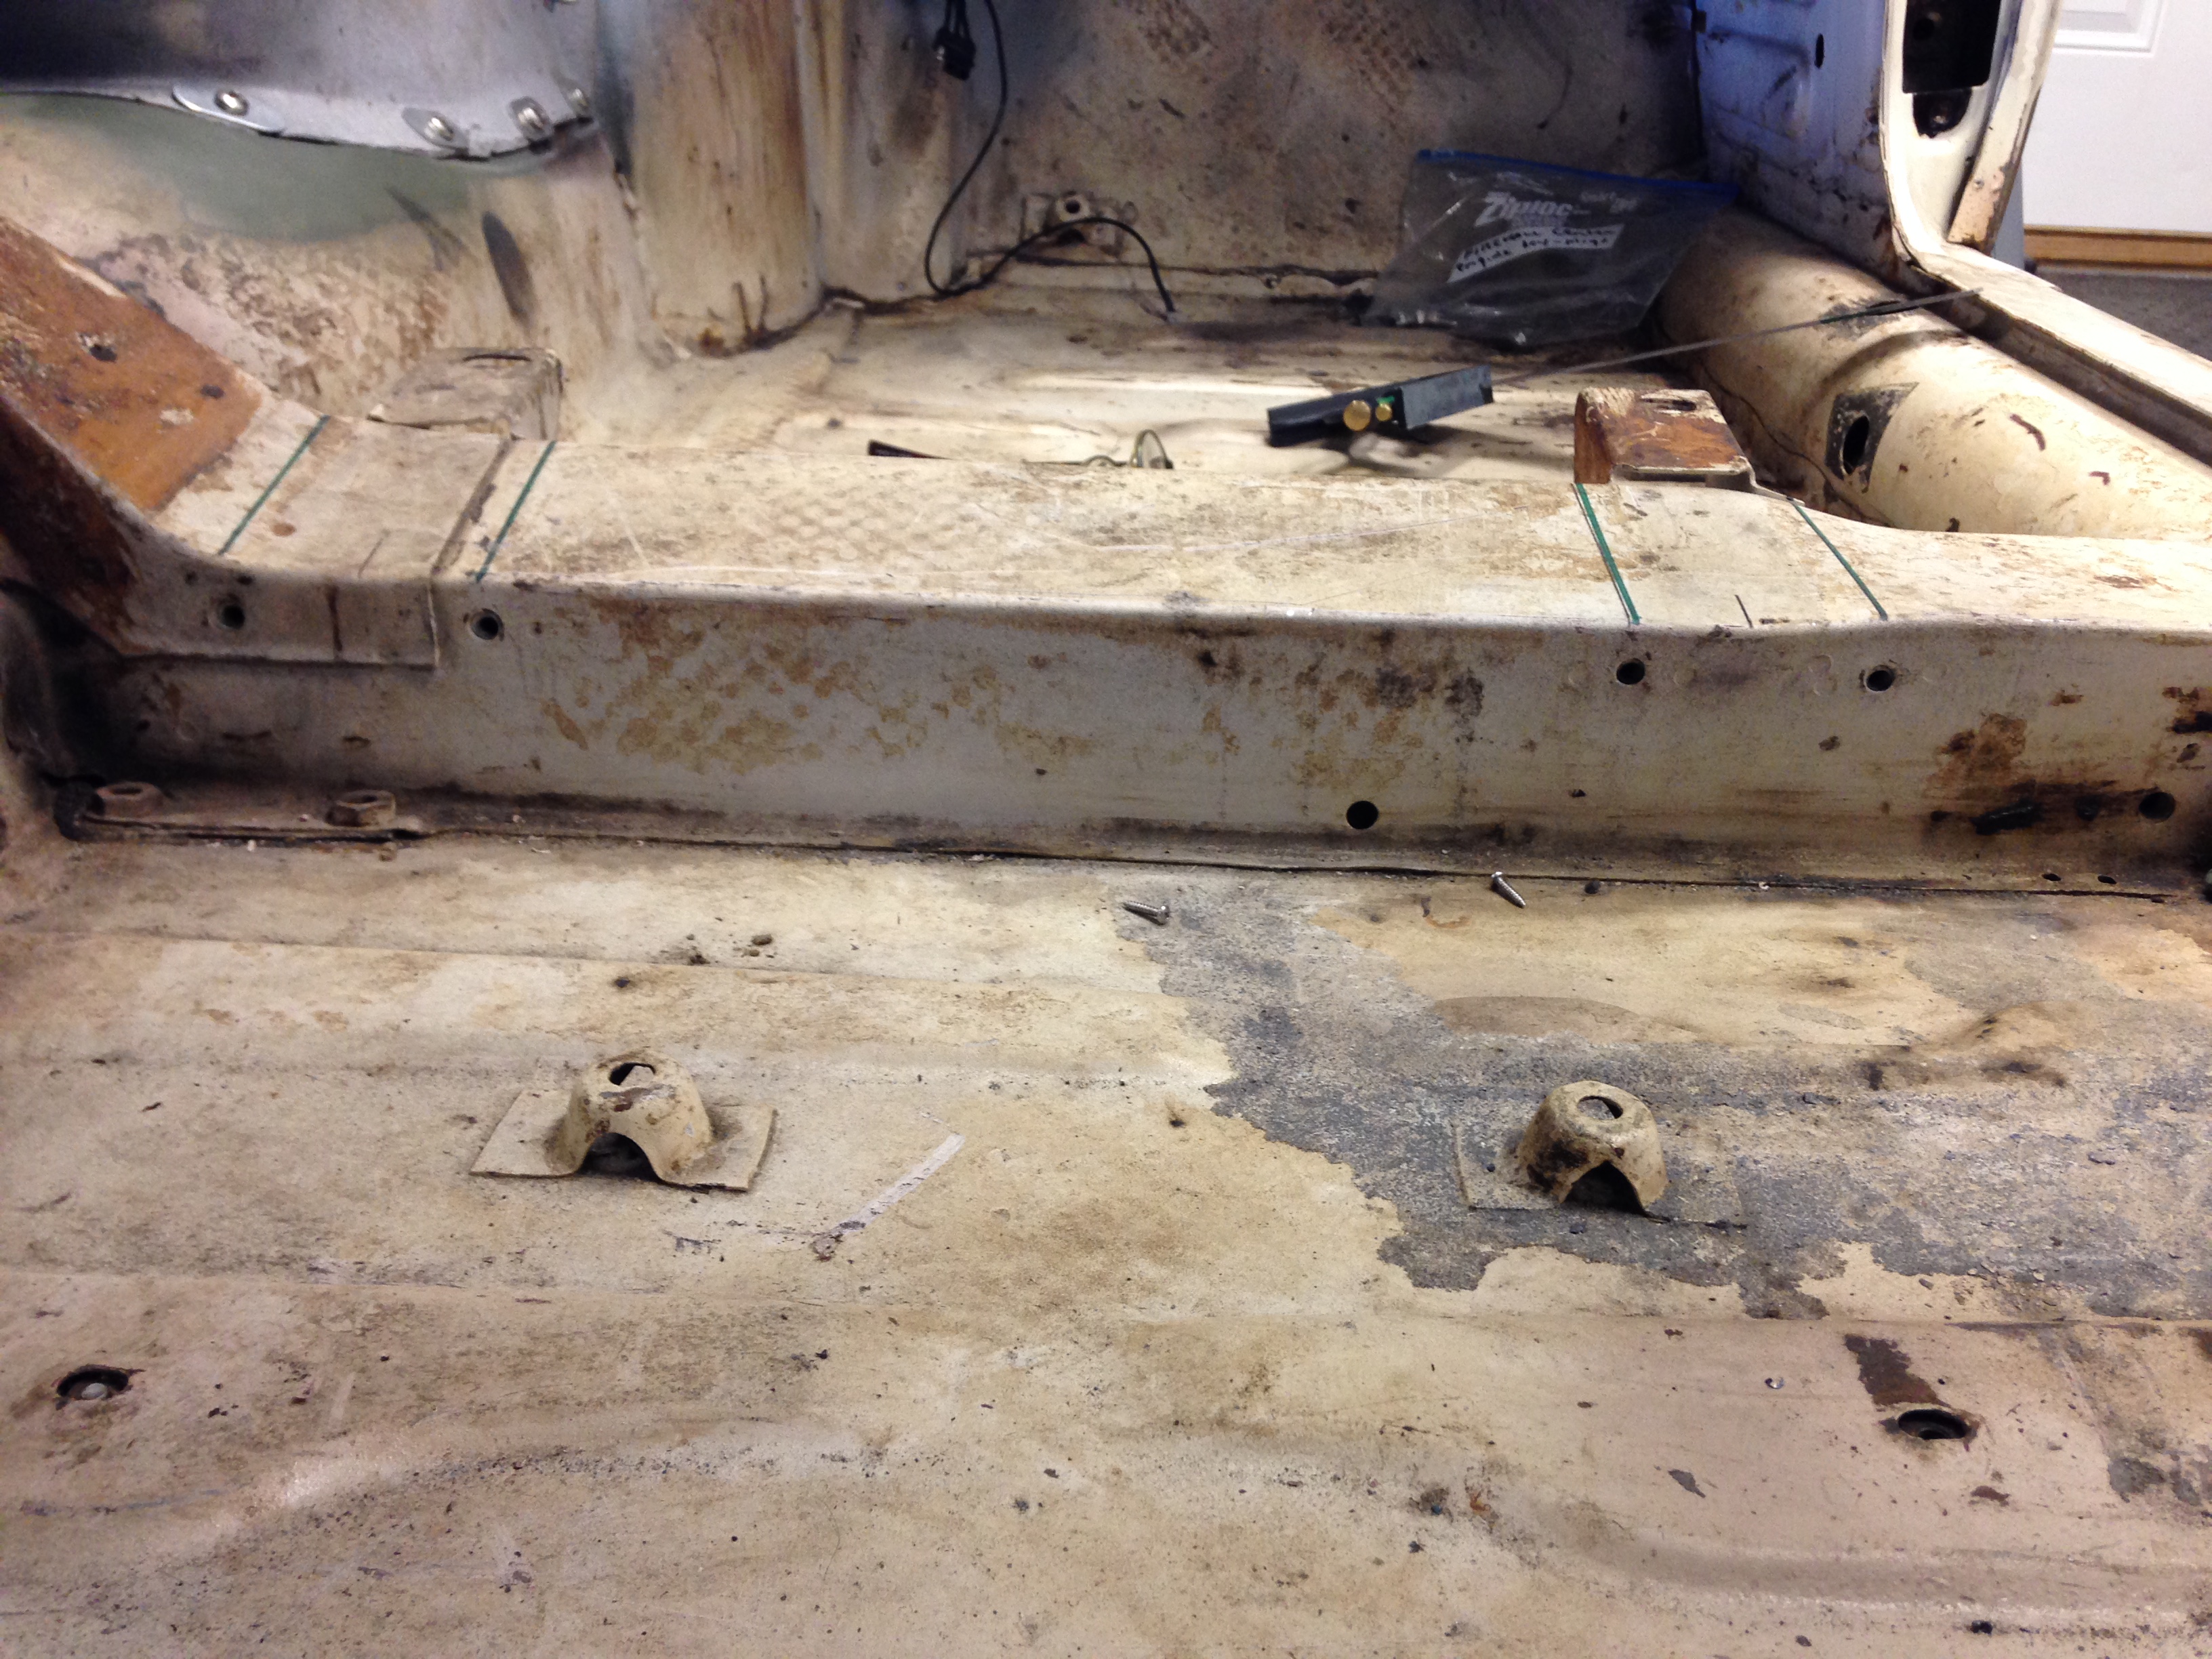
Floor Brace and seat mounting captured nuts
The image above shows the four holes with captive nuts in the floor brace that are used to mount the new seat frame to the floor.
The wiring had its own set of challenges. Details about the wing may be found in the “Building a Wiring Harness” post.
Ton suggested making “skirts” for the lower portion of the seats so that the seat mounting frames would not be visible when the door is opened. I followed suit. Brandon Tyree, metal welder/fabricator at Gassman Automotive, made the skirts from sheet metal for me. These will be covered with leather/vinyl when the interior upholstery is finished.
Brandon welded metal tabs to the seat frames so that the sheet metal skirts can be screwed to the tabs to mount them to the seats. These are designed so that the skirts will move with the seats when the power functions of the seats are used.
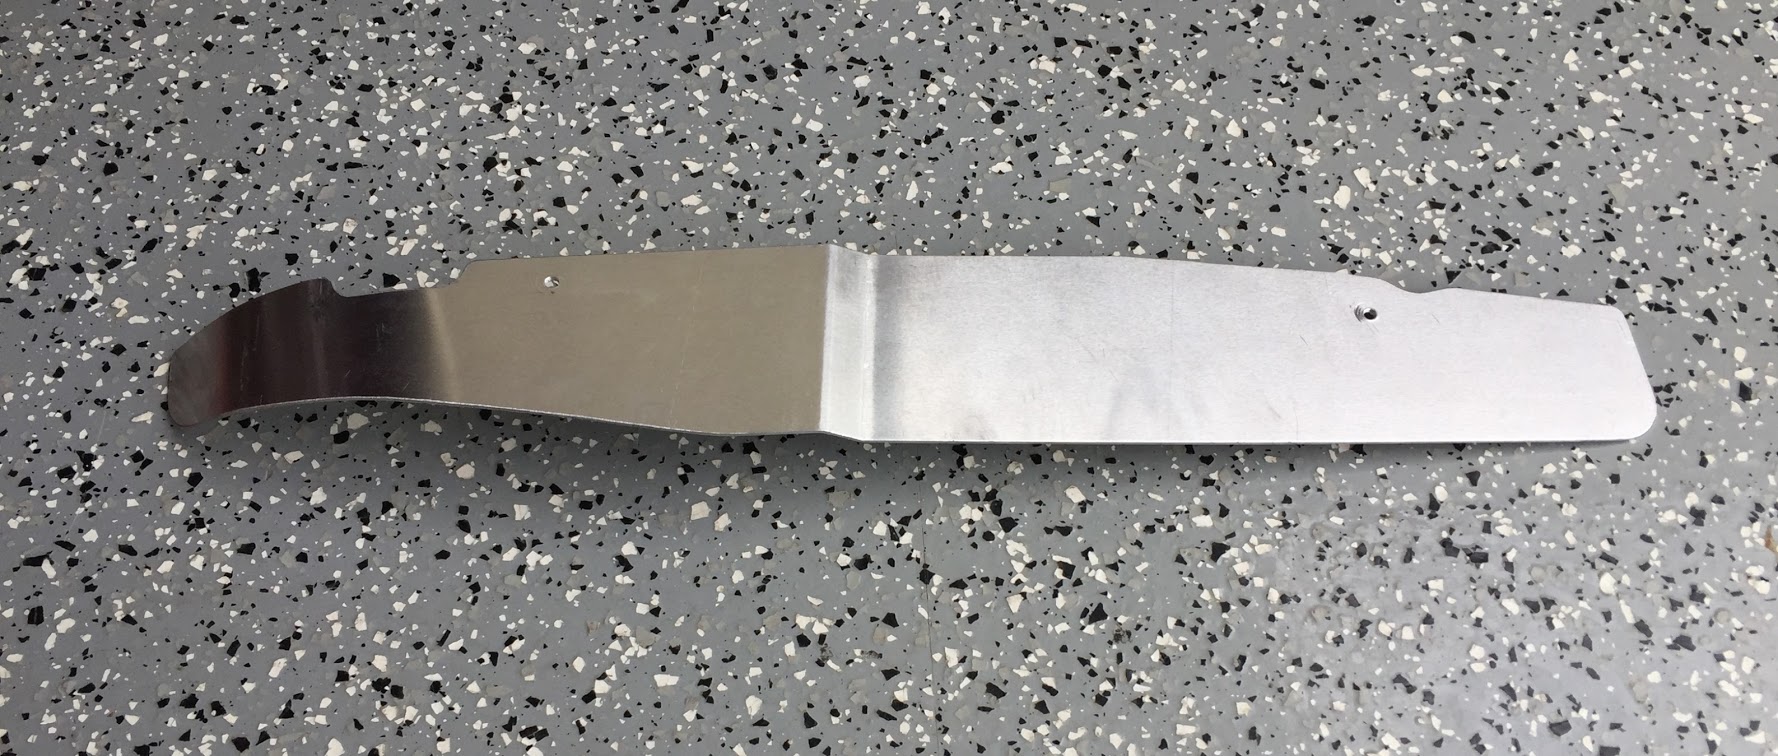
LH Side Front Seat Skirt

Locating Tabs for LH Side Front Seat Skirt
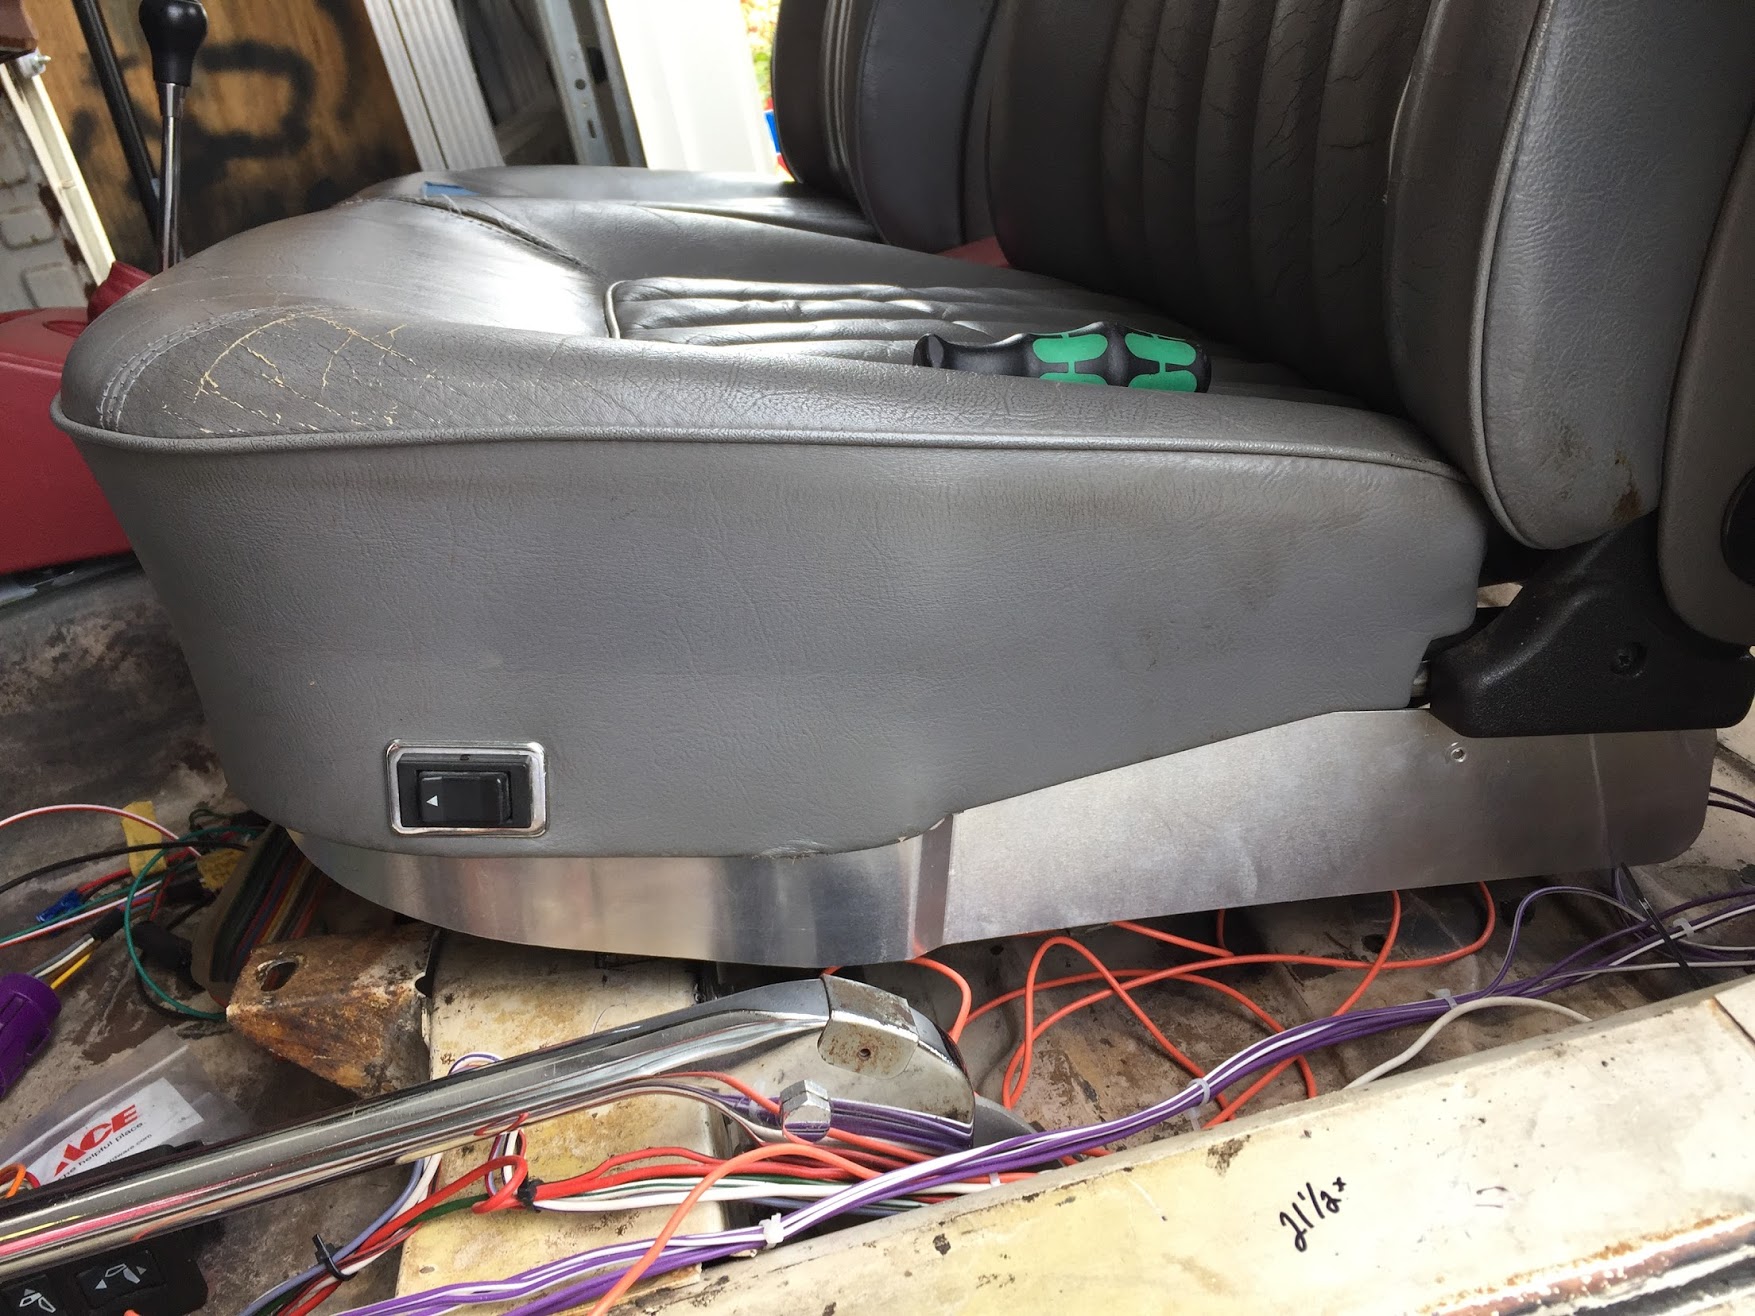
LH Side Front Seat Skirt Installed
This is an image of his finished product:
Ton Tulken’s Front Seat Skirts
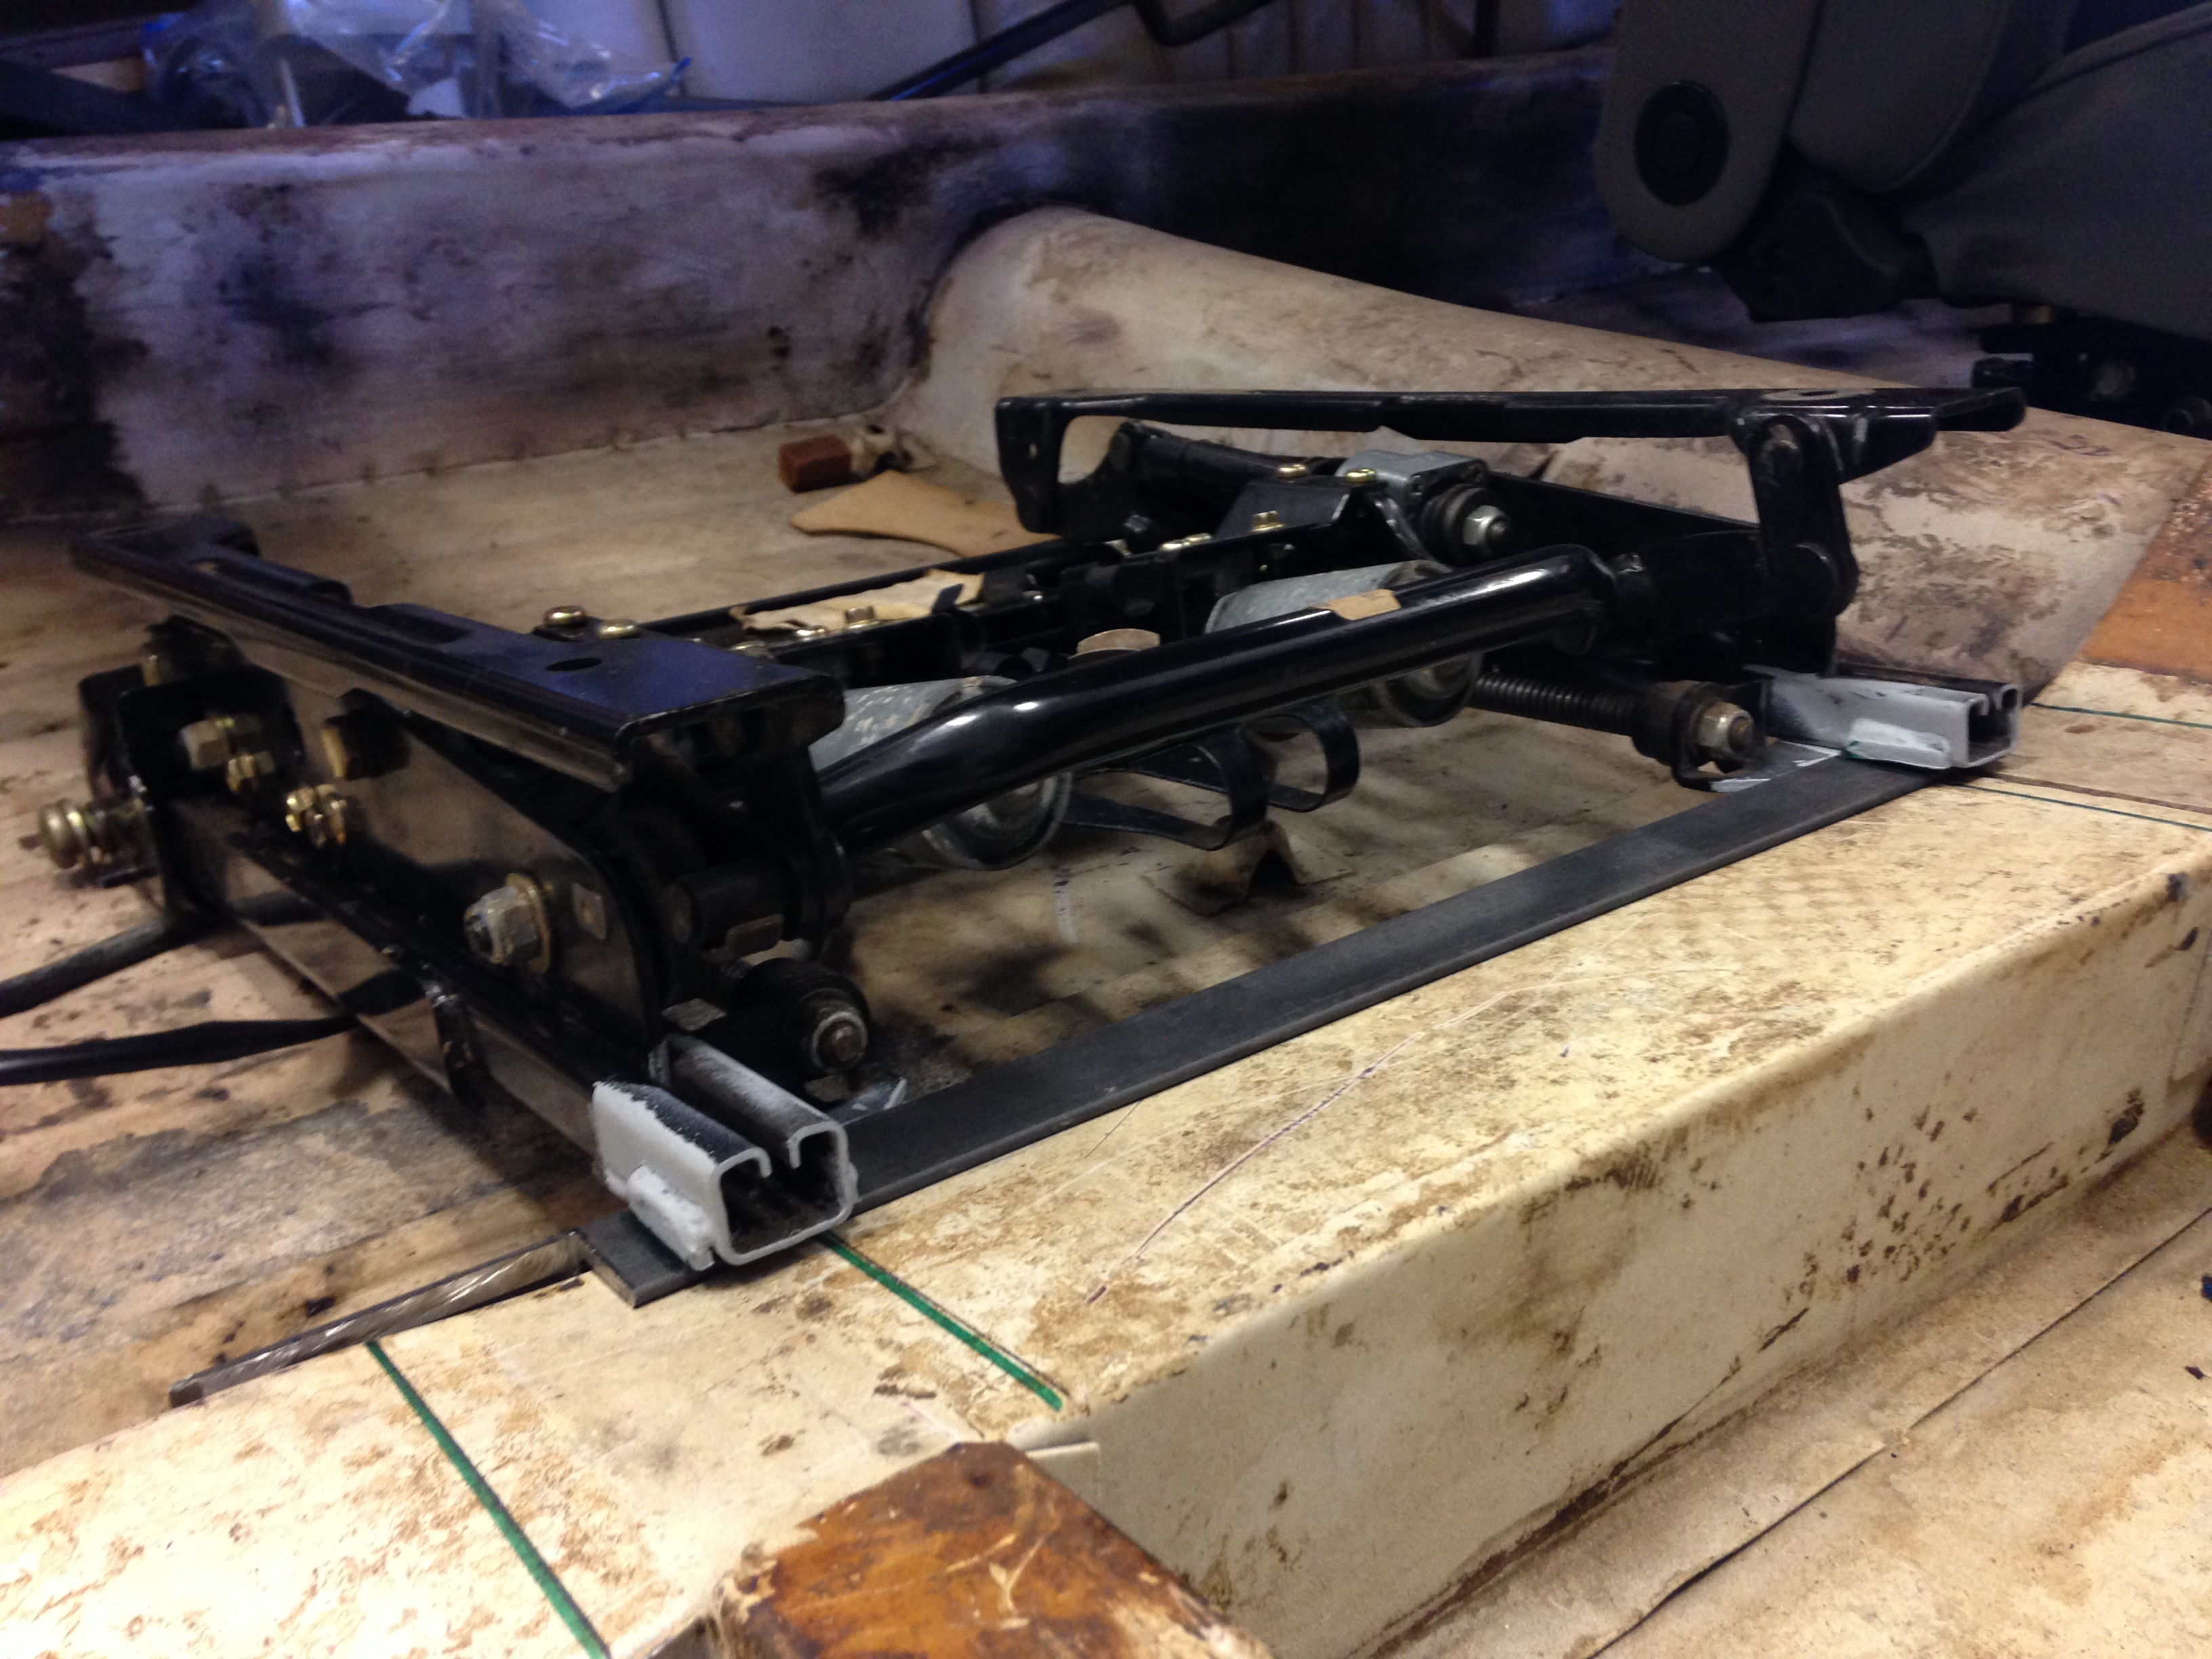
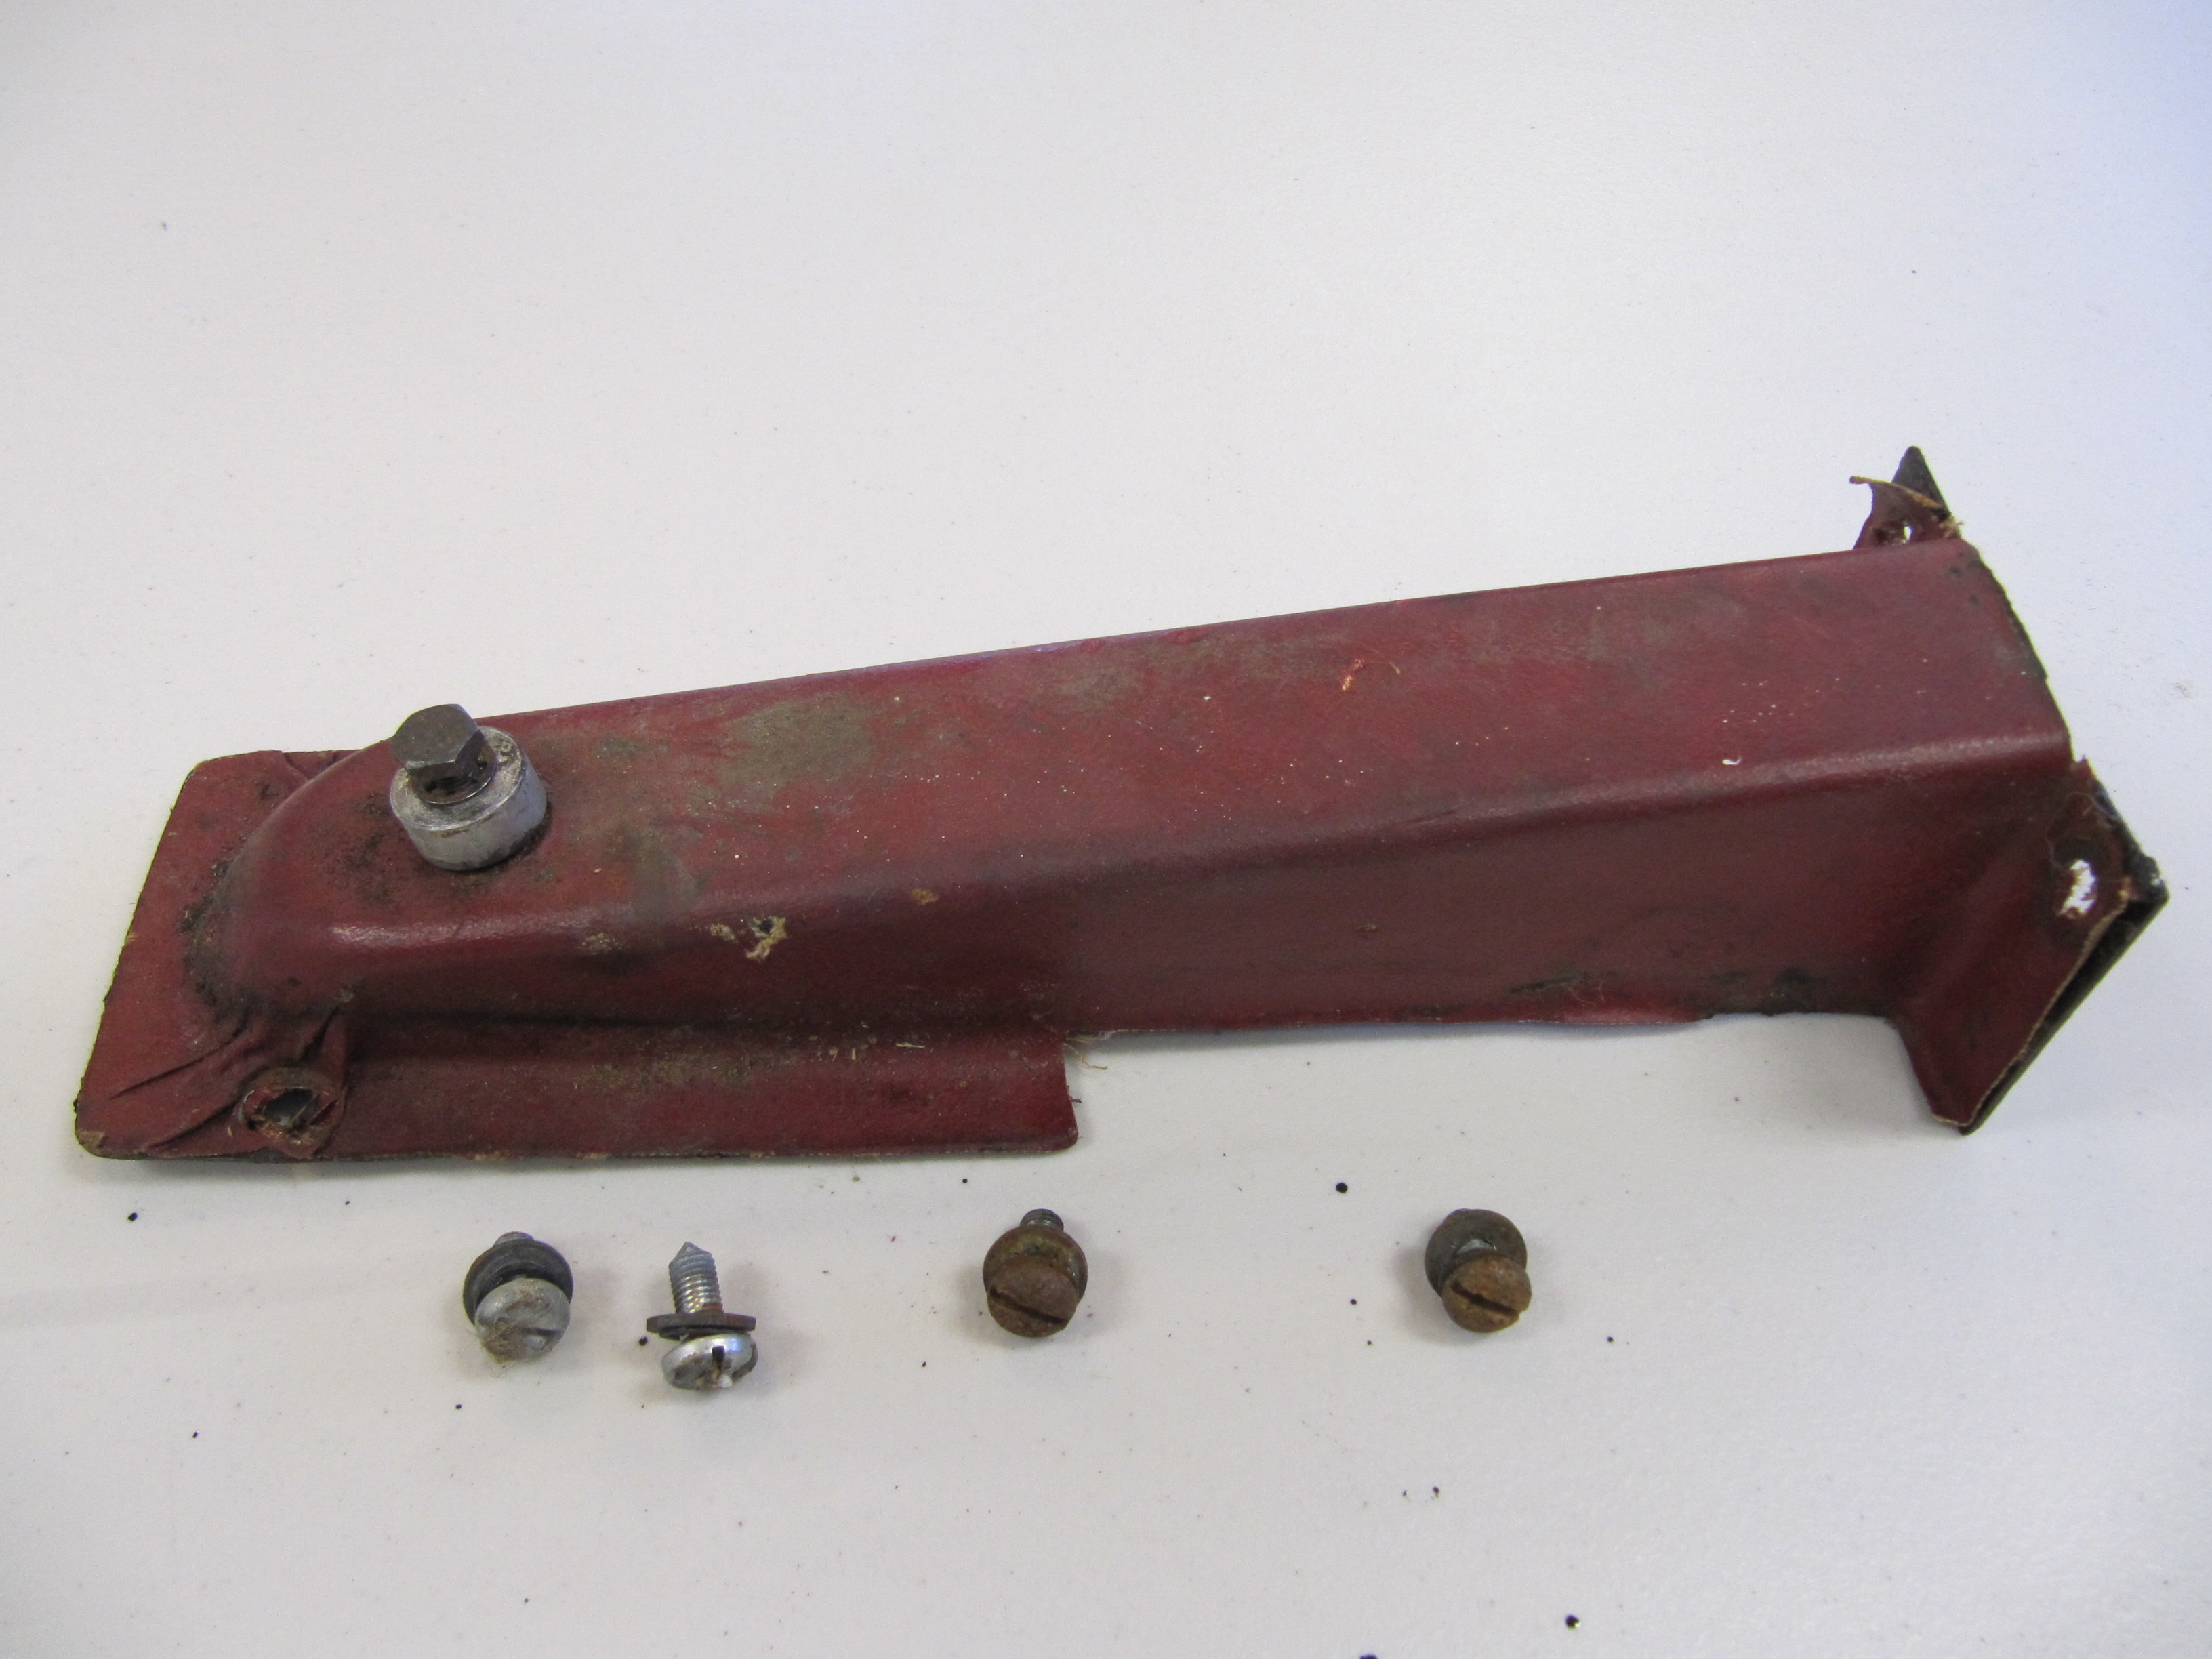
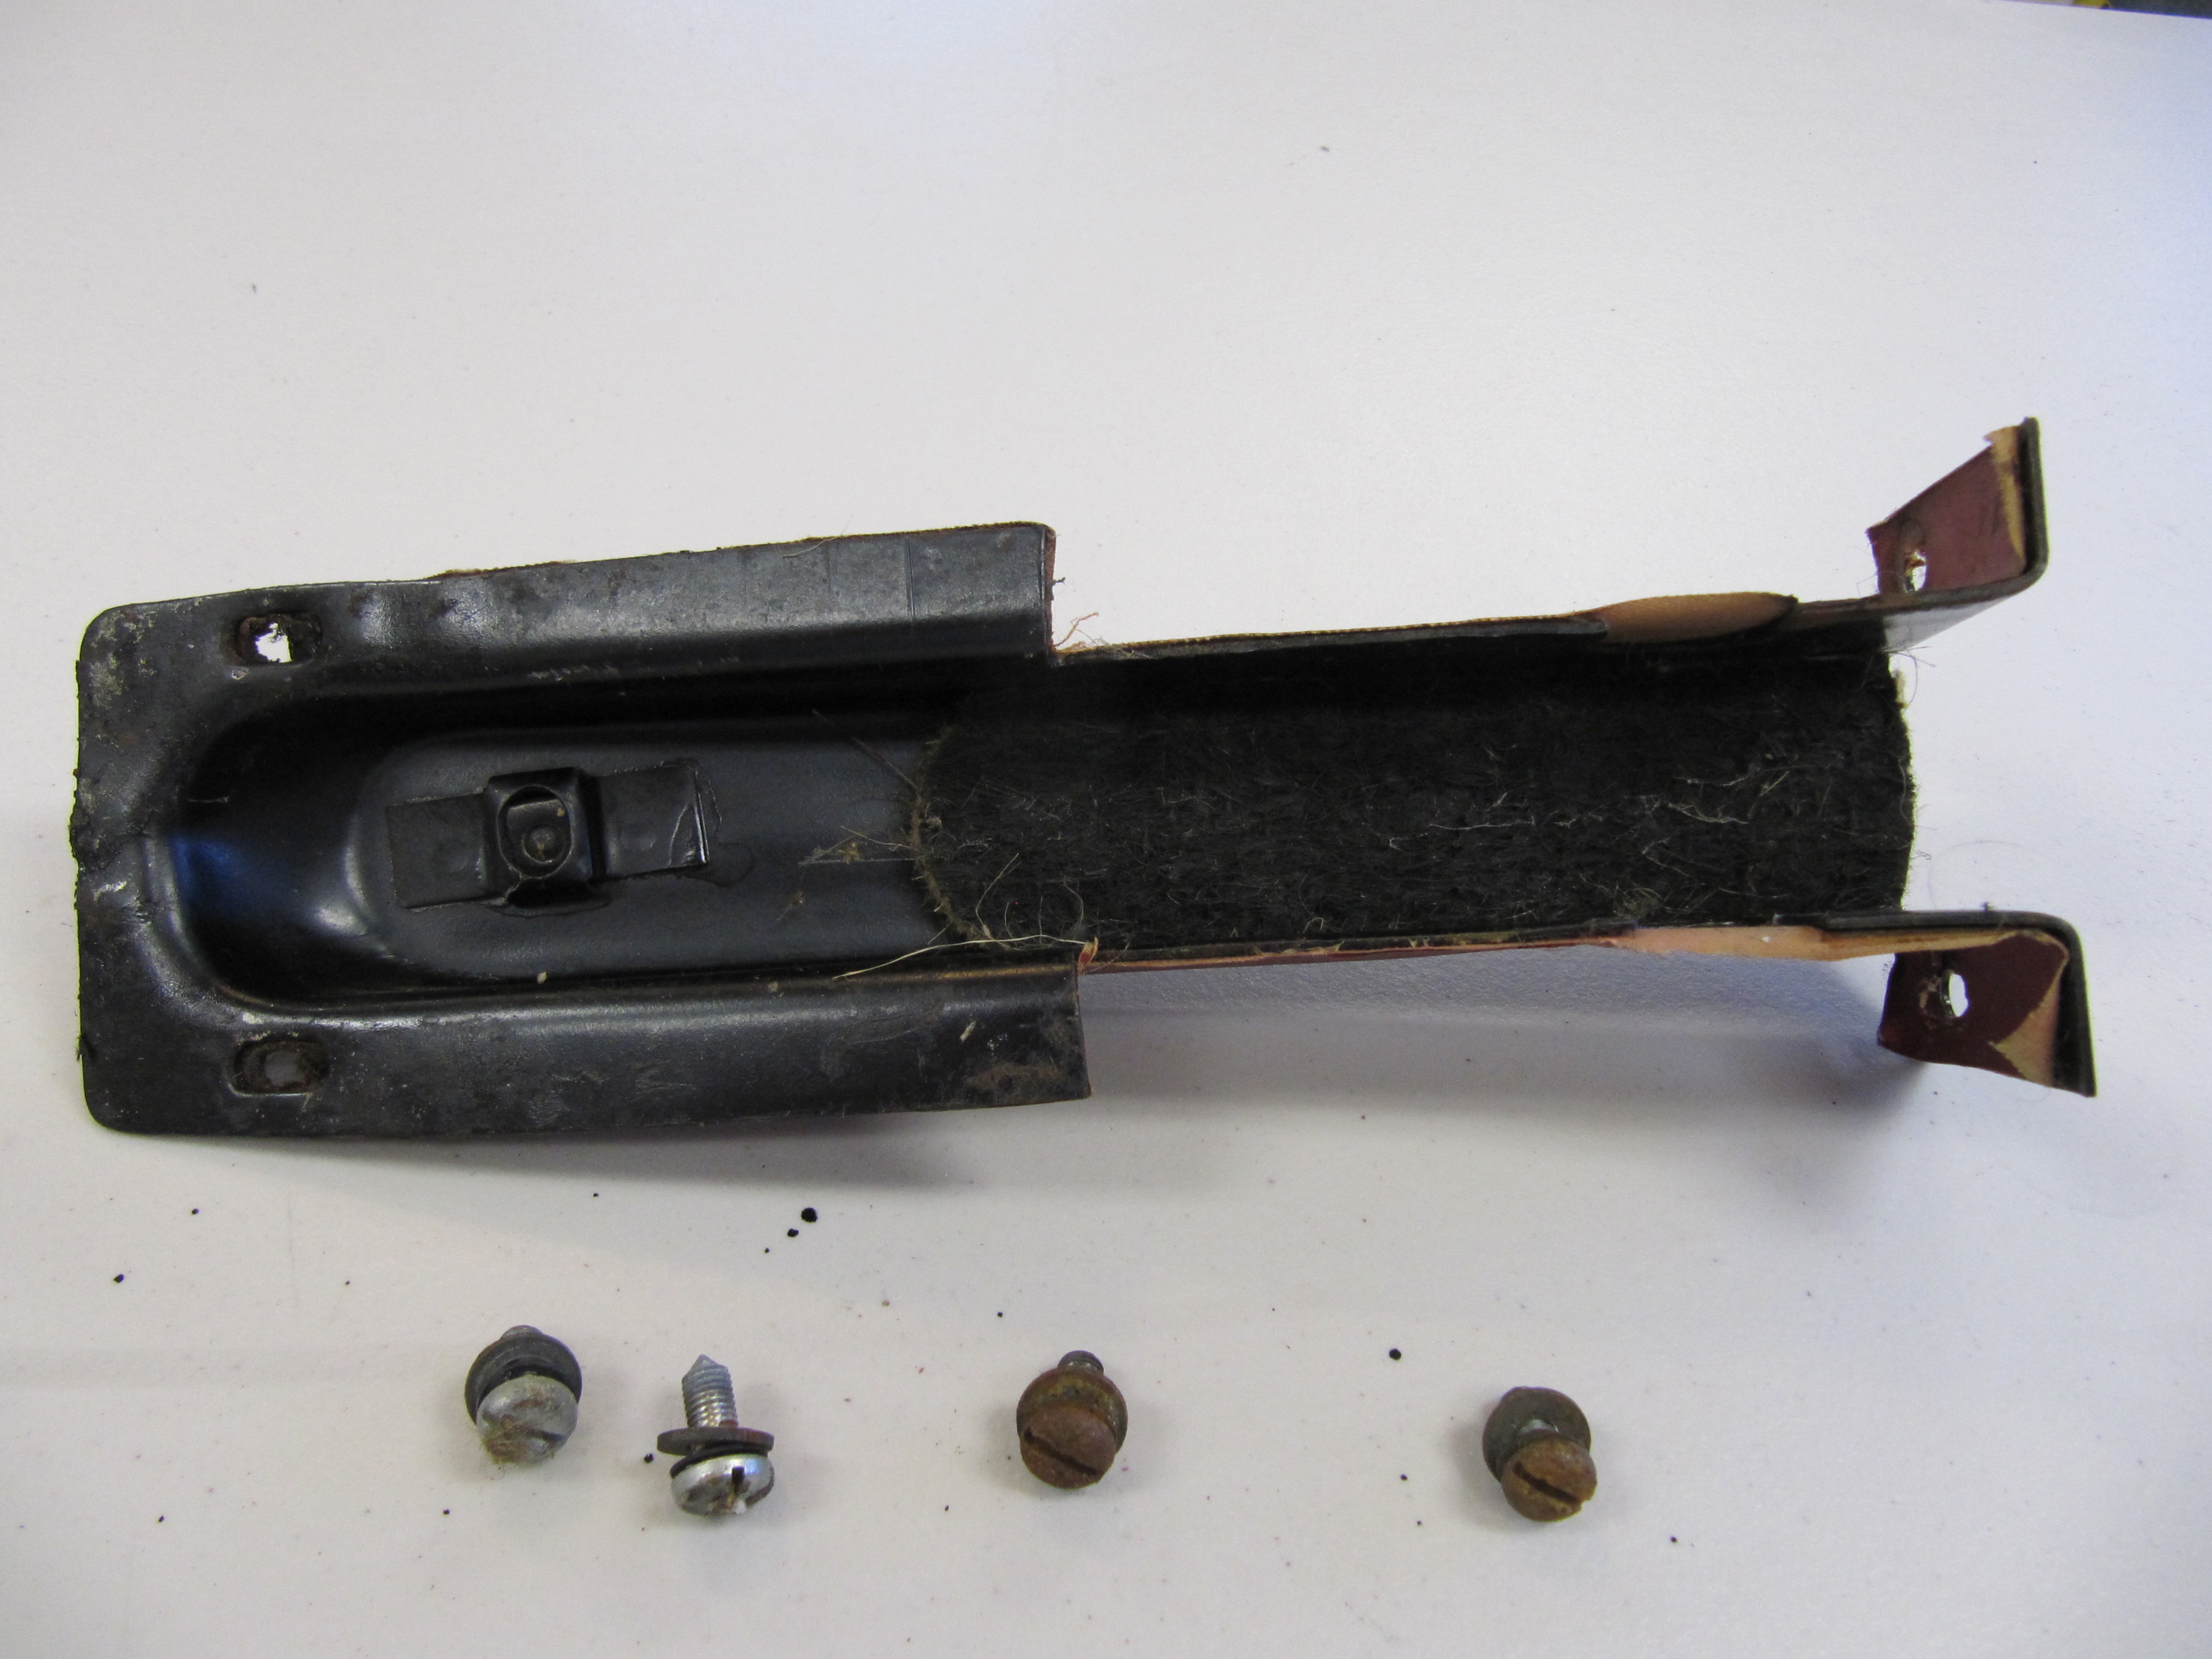
Original Seat Mounting
Seat Supports
Details on the removal of the seat runner assemblies or seat supports may be found in the disassembly note, entry 45 https://valvechatter.com/?p=1803, and entry 6 https://valvechatter.com/?p=297.
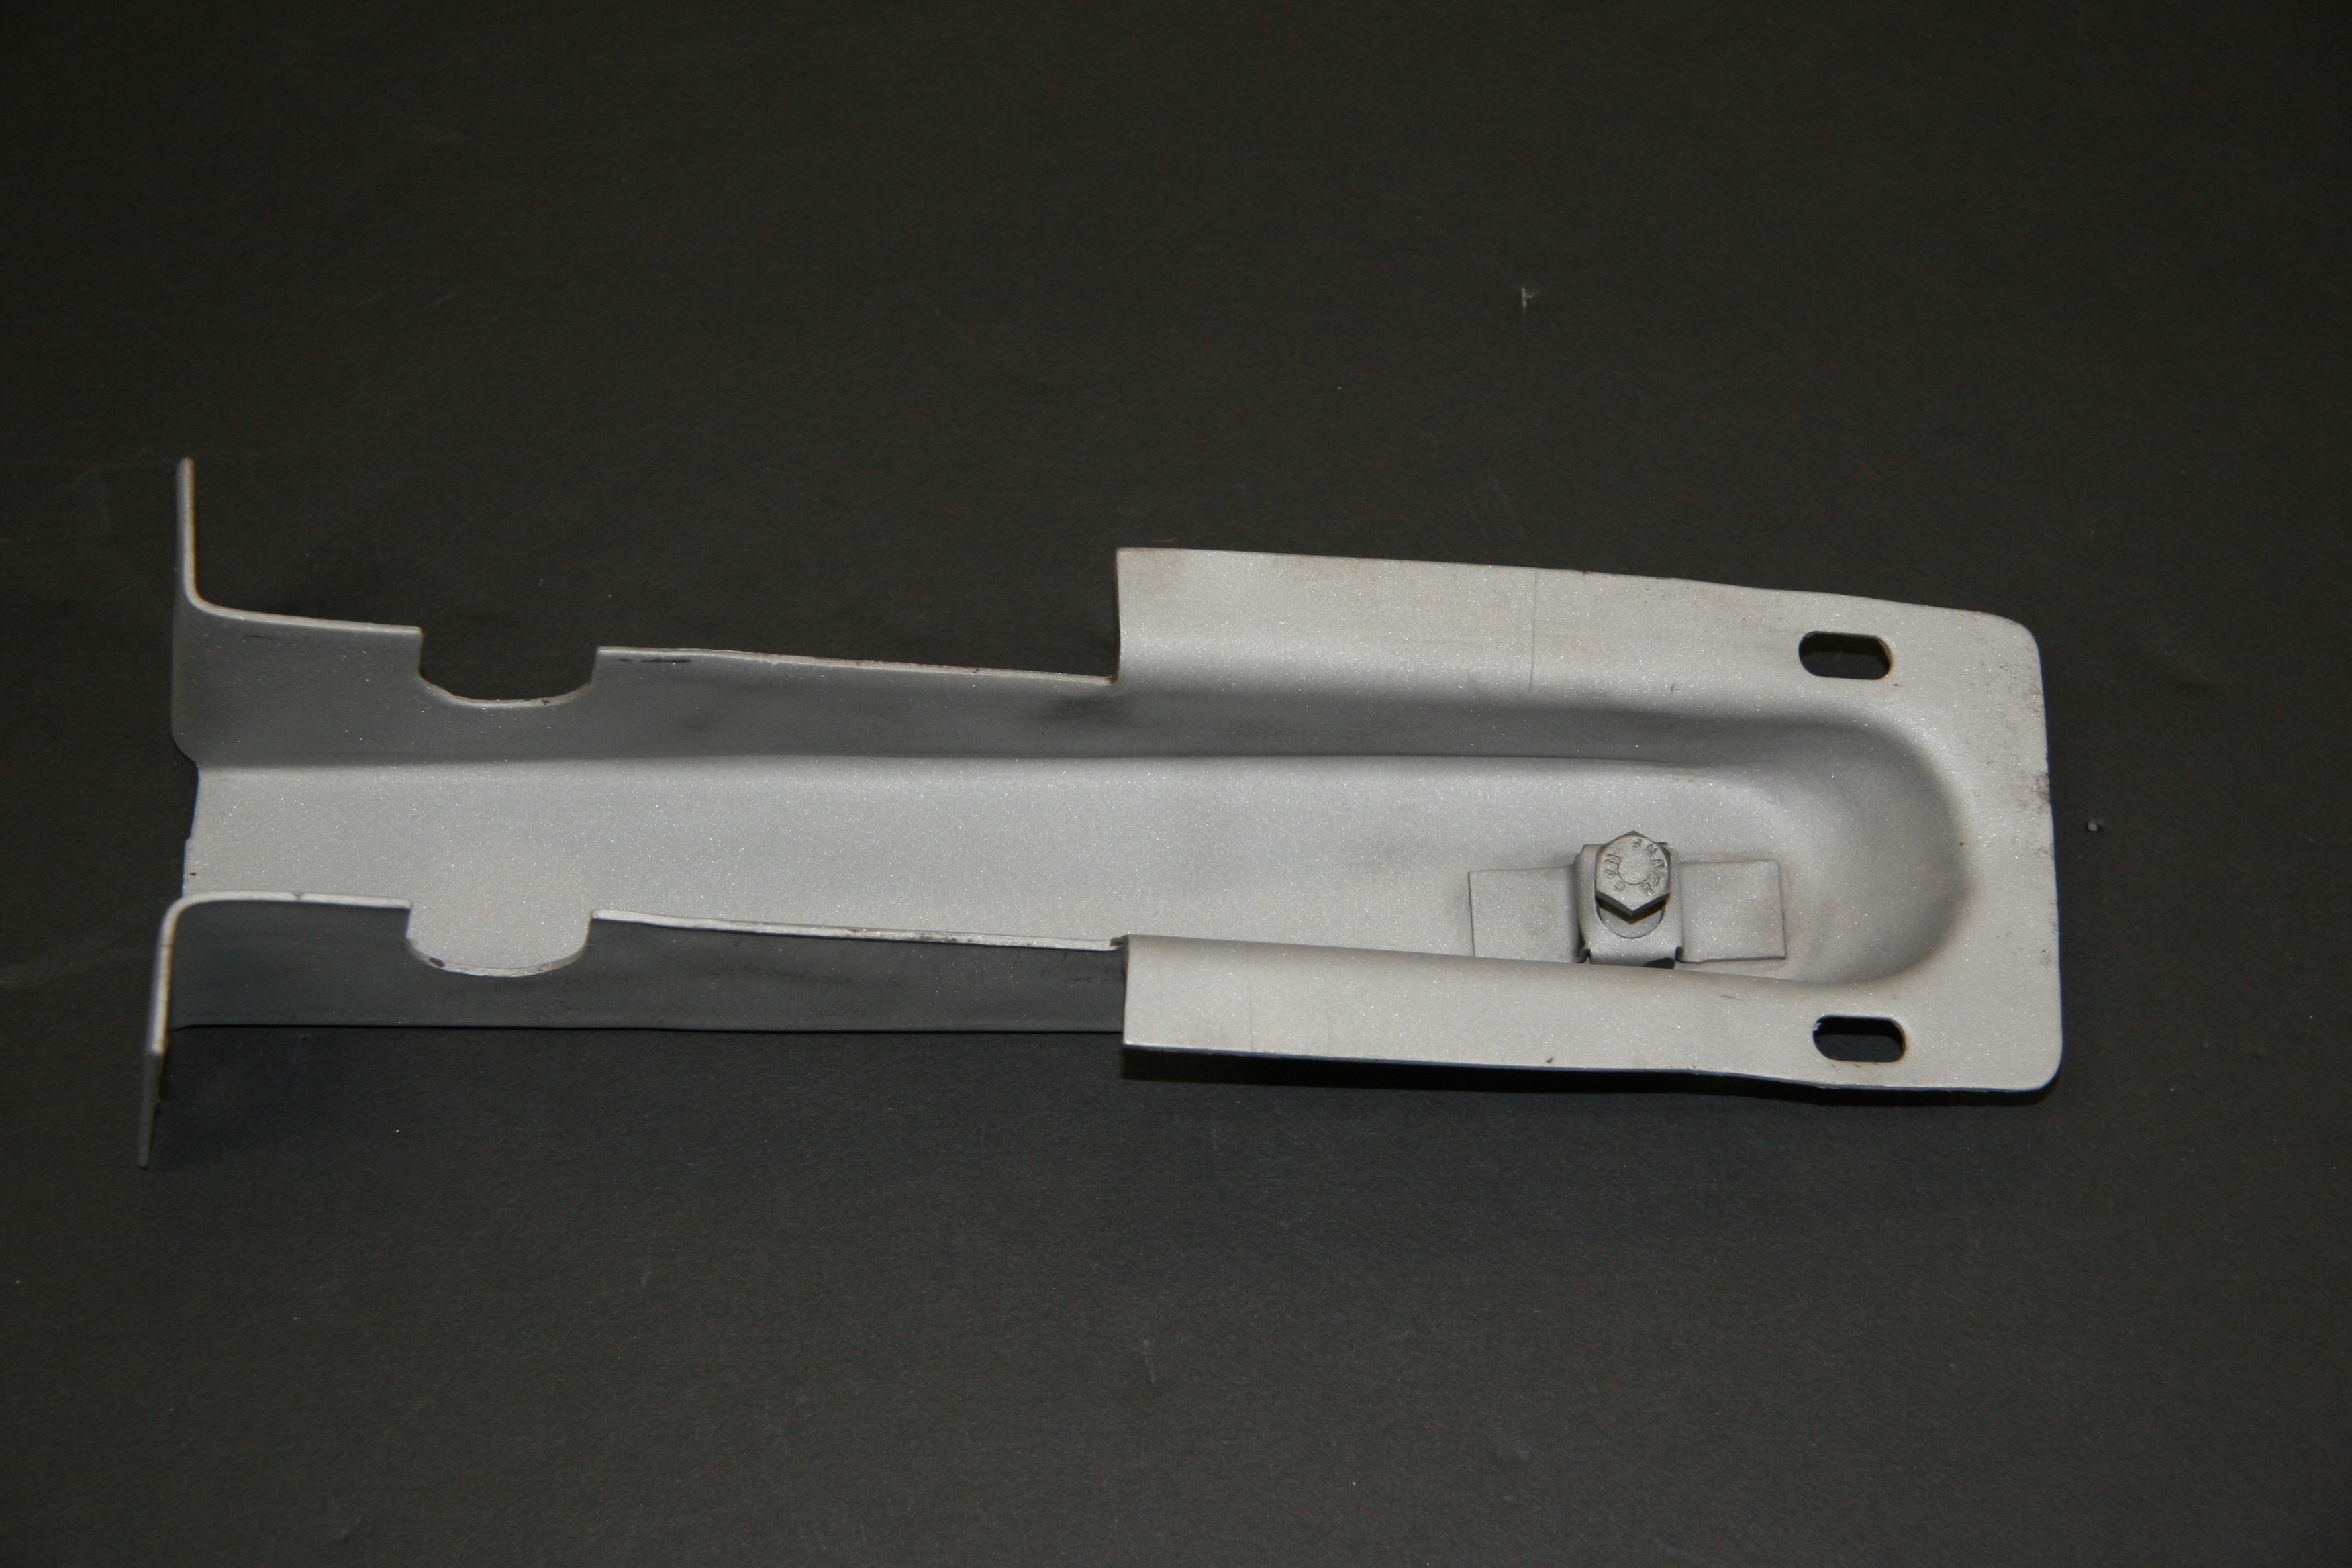
Each support is mounted to the floor brace with four 1/4″ – 28 x 5/8″ pointed tip, slotted machine screws with flat and shakeproof washers. The rear mount for the seat to the seat support is a 1/4″ – 28 x 1″ hex head bolt with shakeproof washers. An insulation pad was found cut to fit under each seat support.
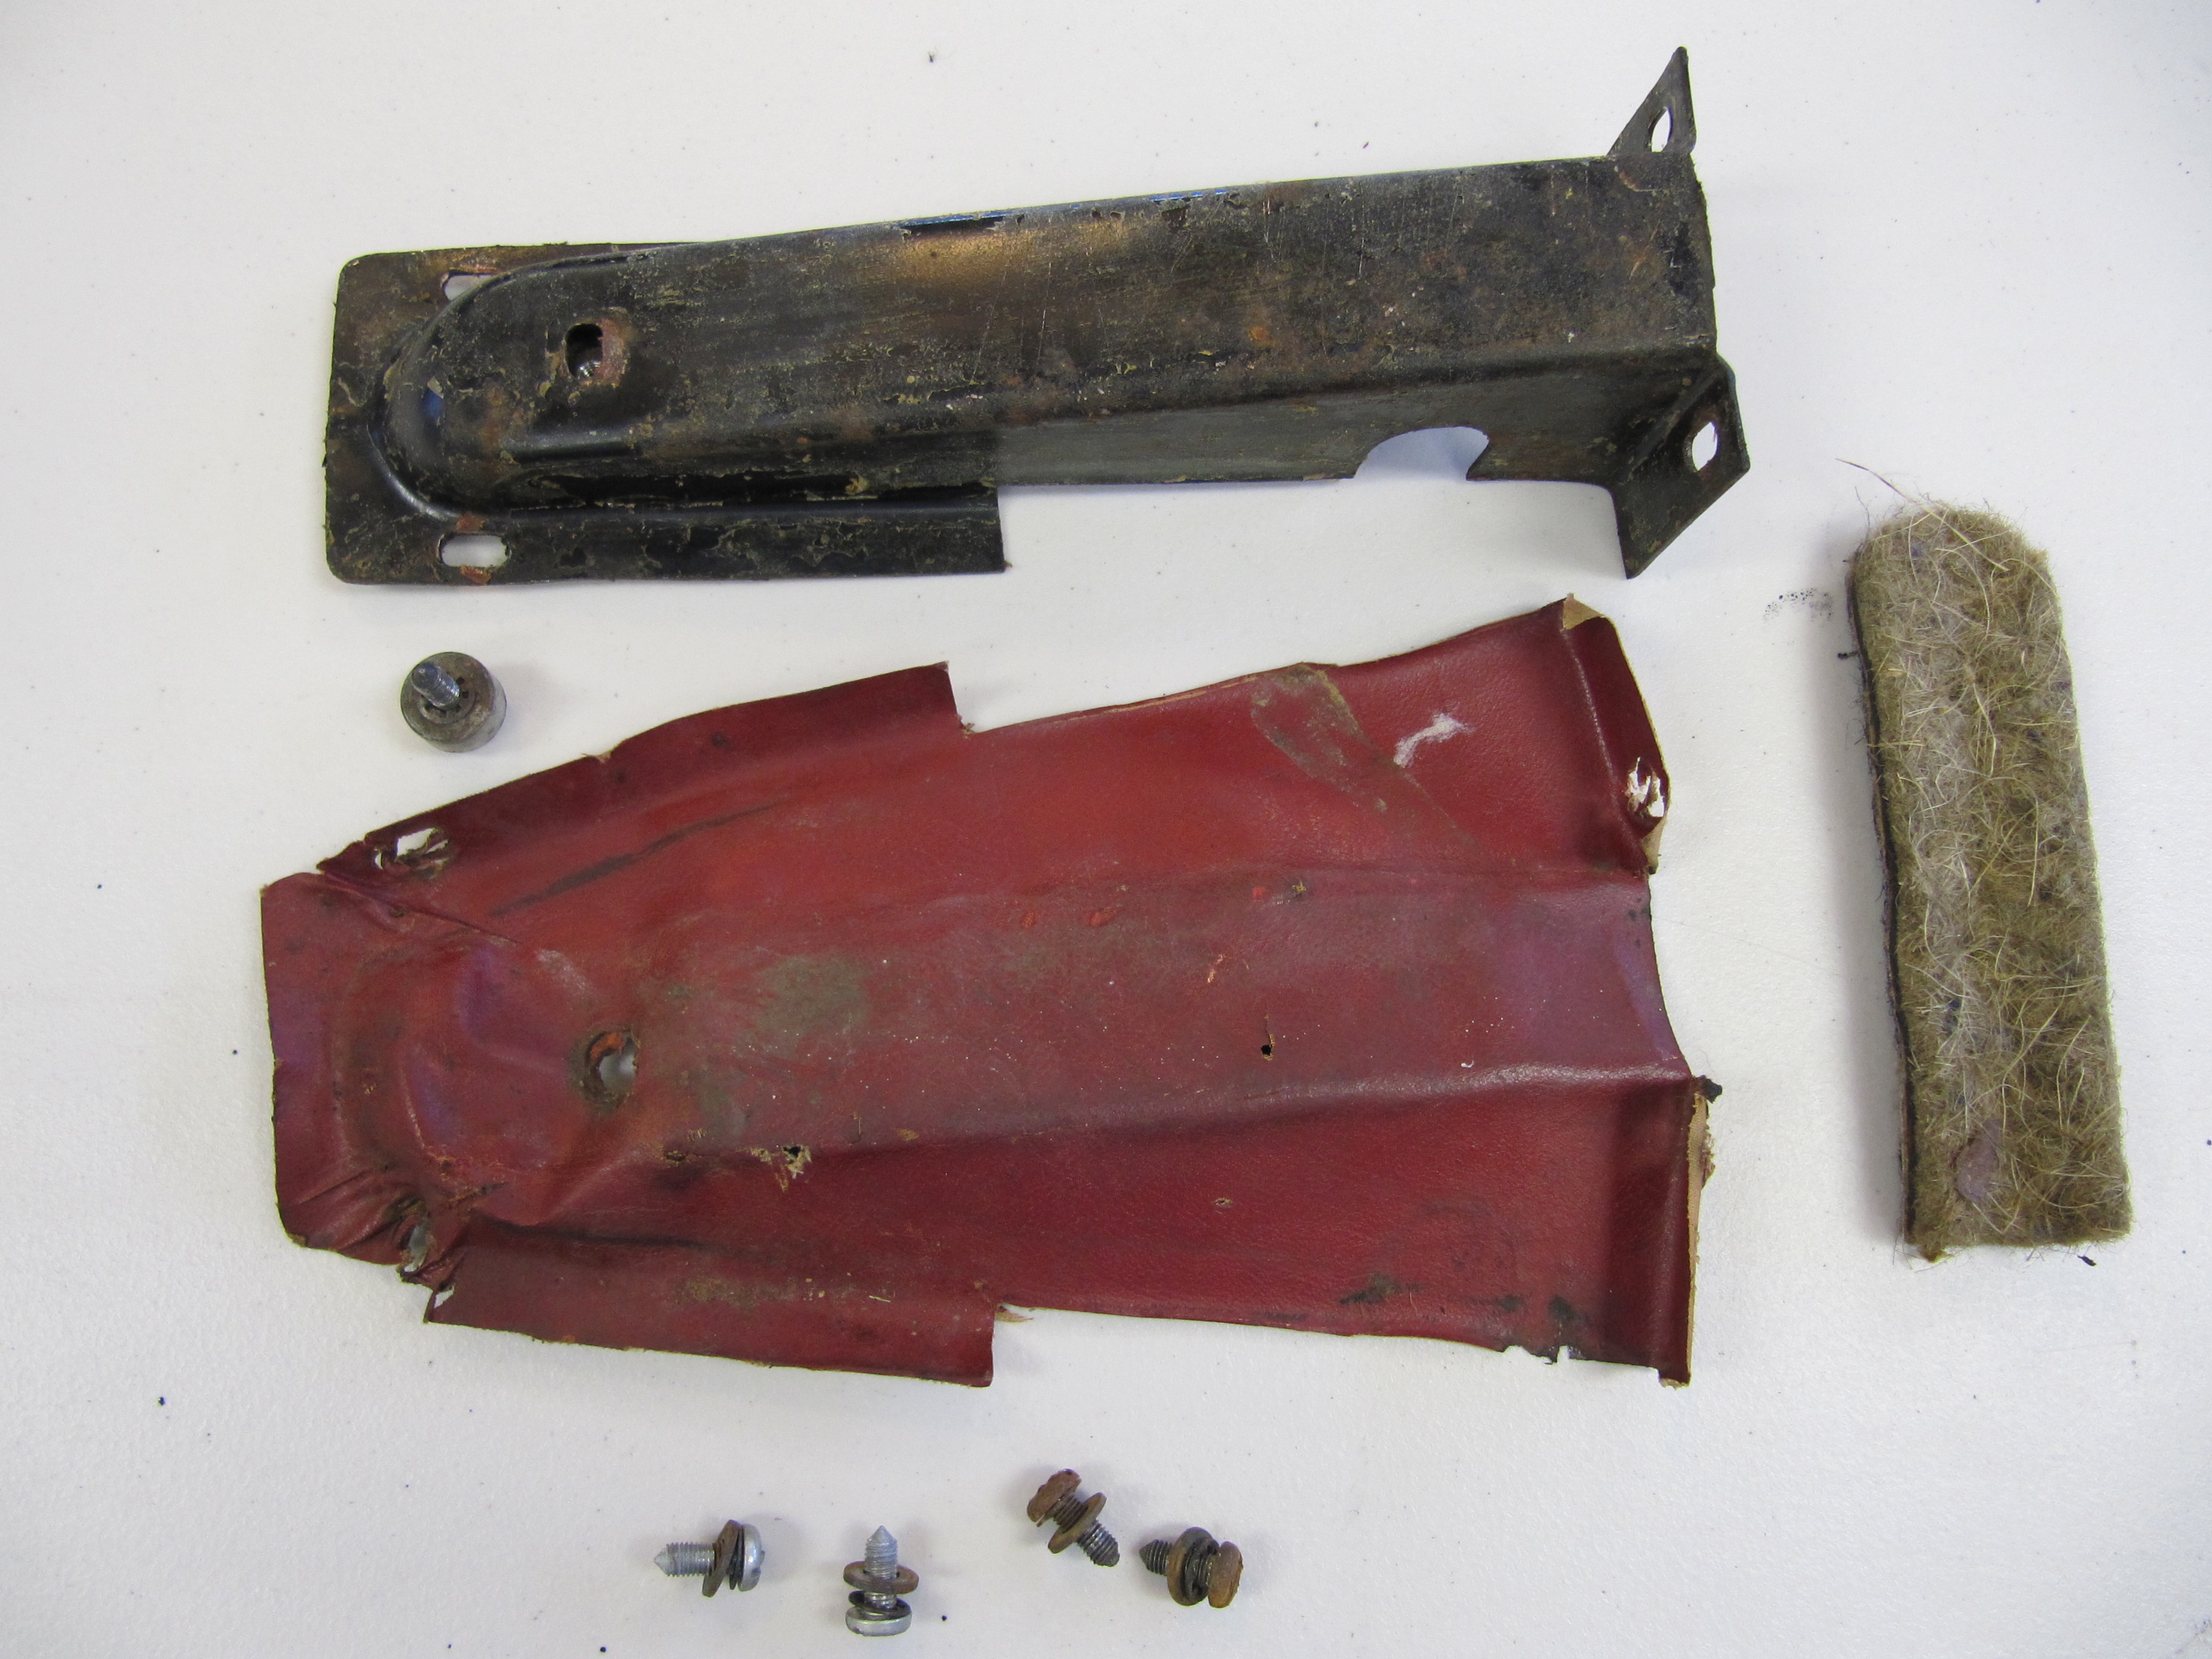
I removed the vinyl from each of the four supports, media blasted them and painted with POR-15 to be covered with new vinyl later.
Seat Supports
Seat Supports
Seat Supports

Seat Supports
I media blasted the four seat supports and prepared them for painting:
Front Seat Support
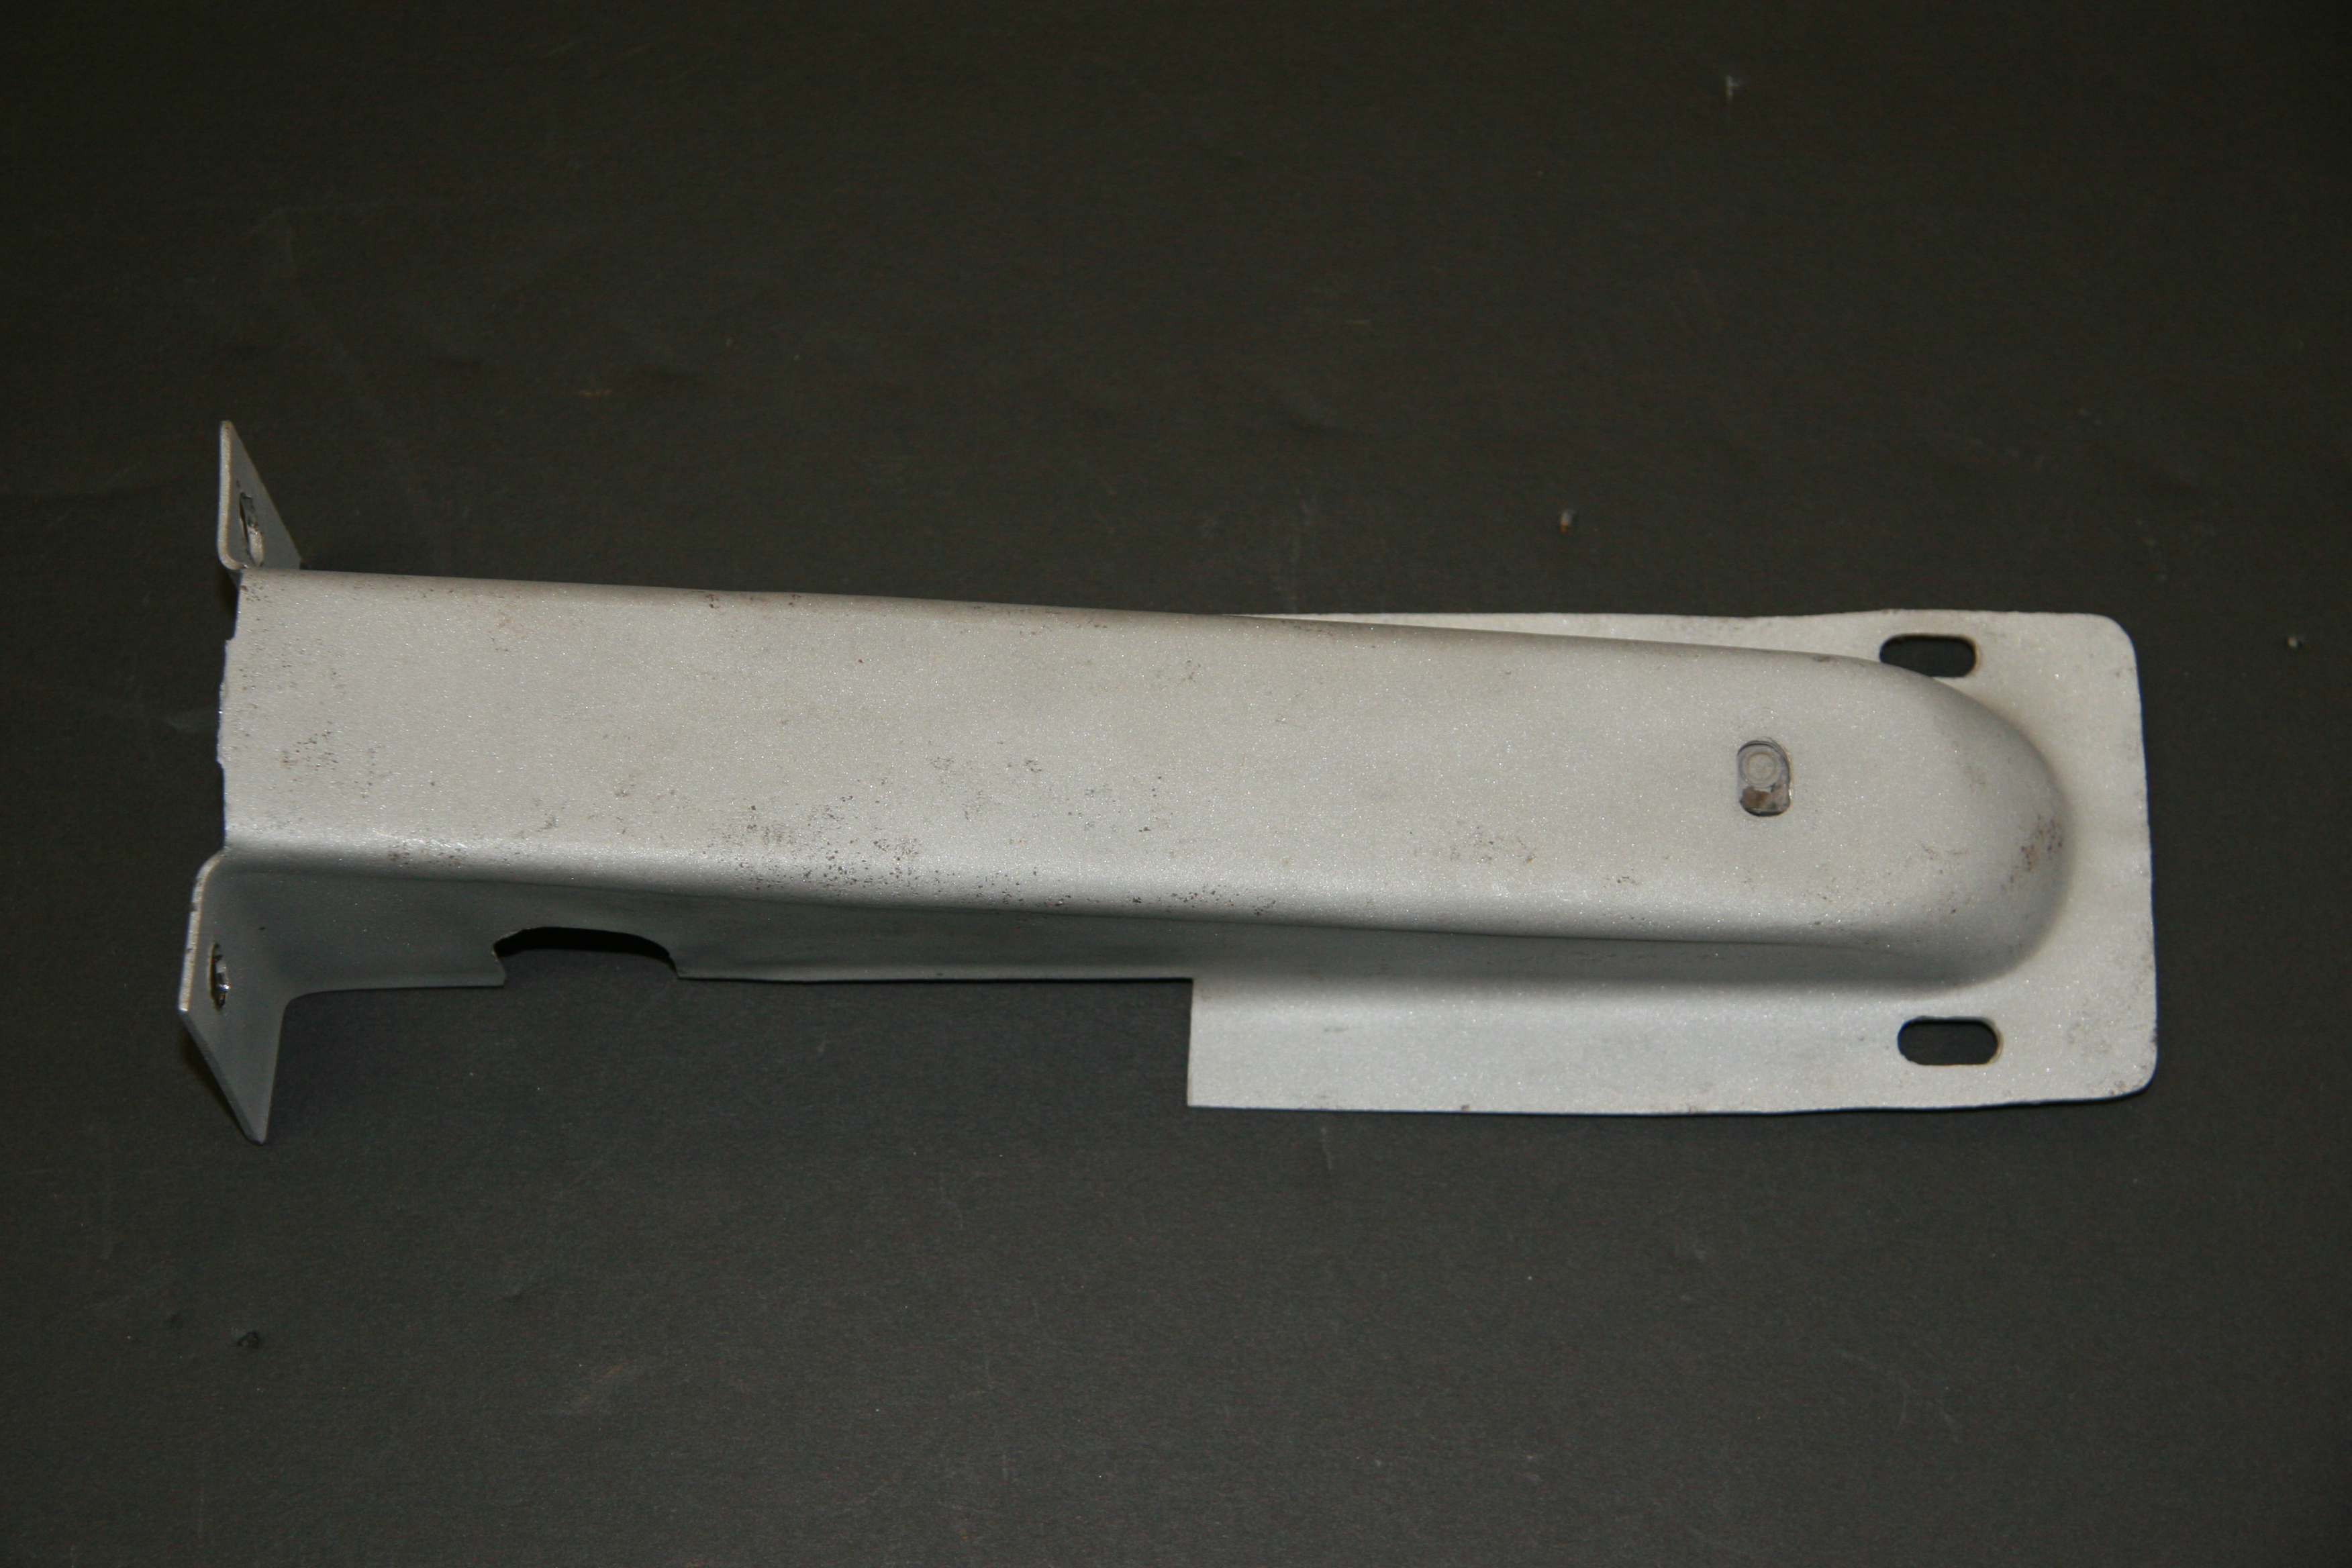
Front Seat Support
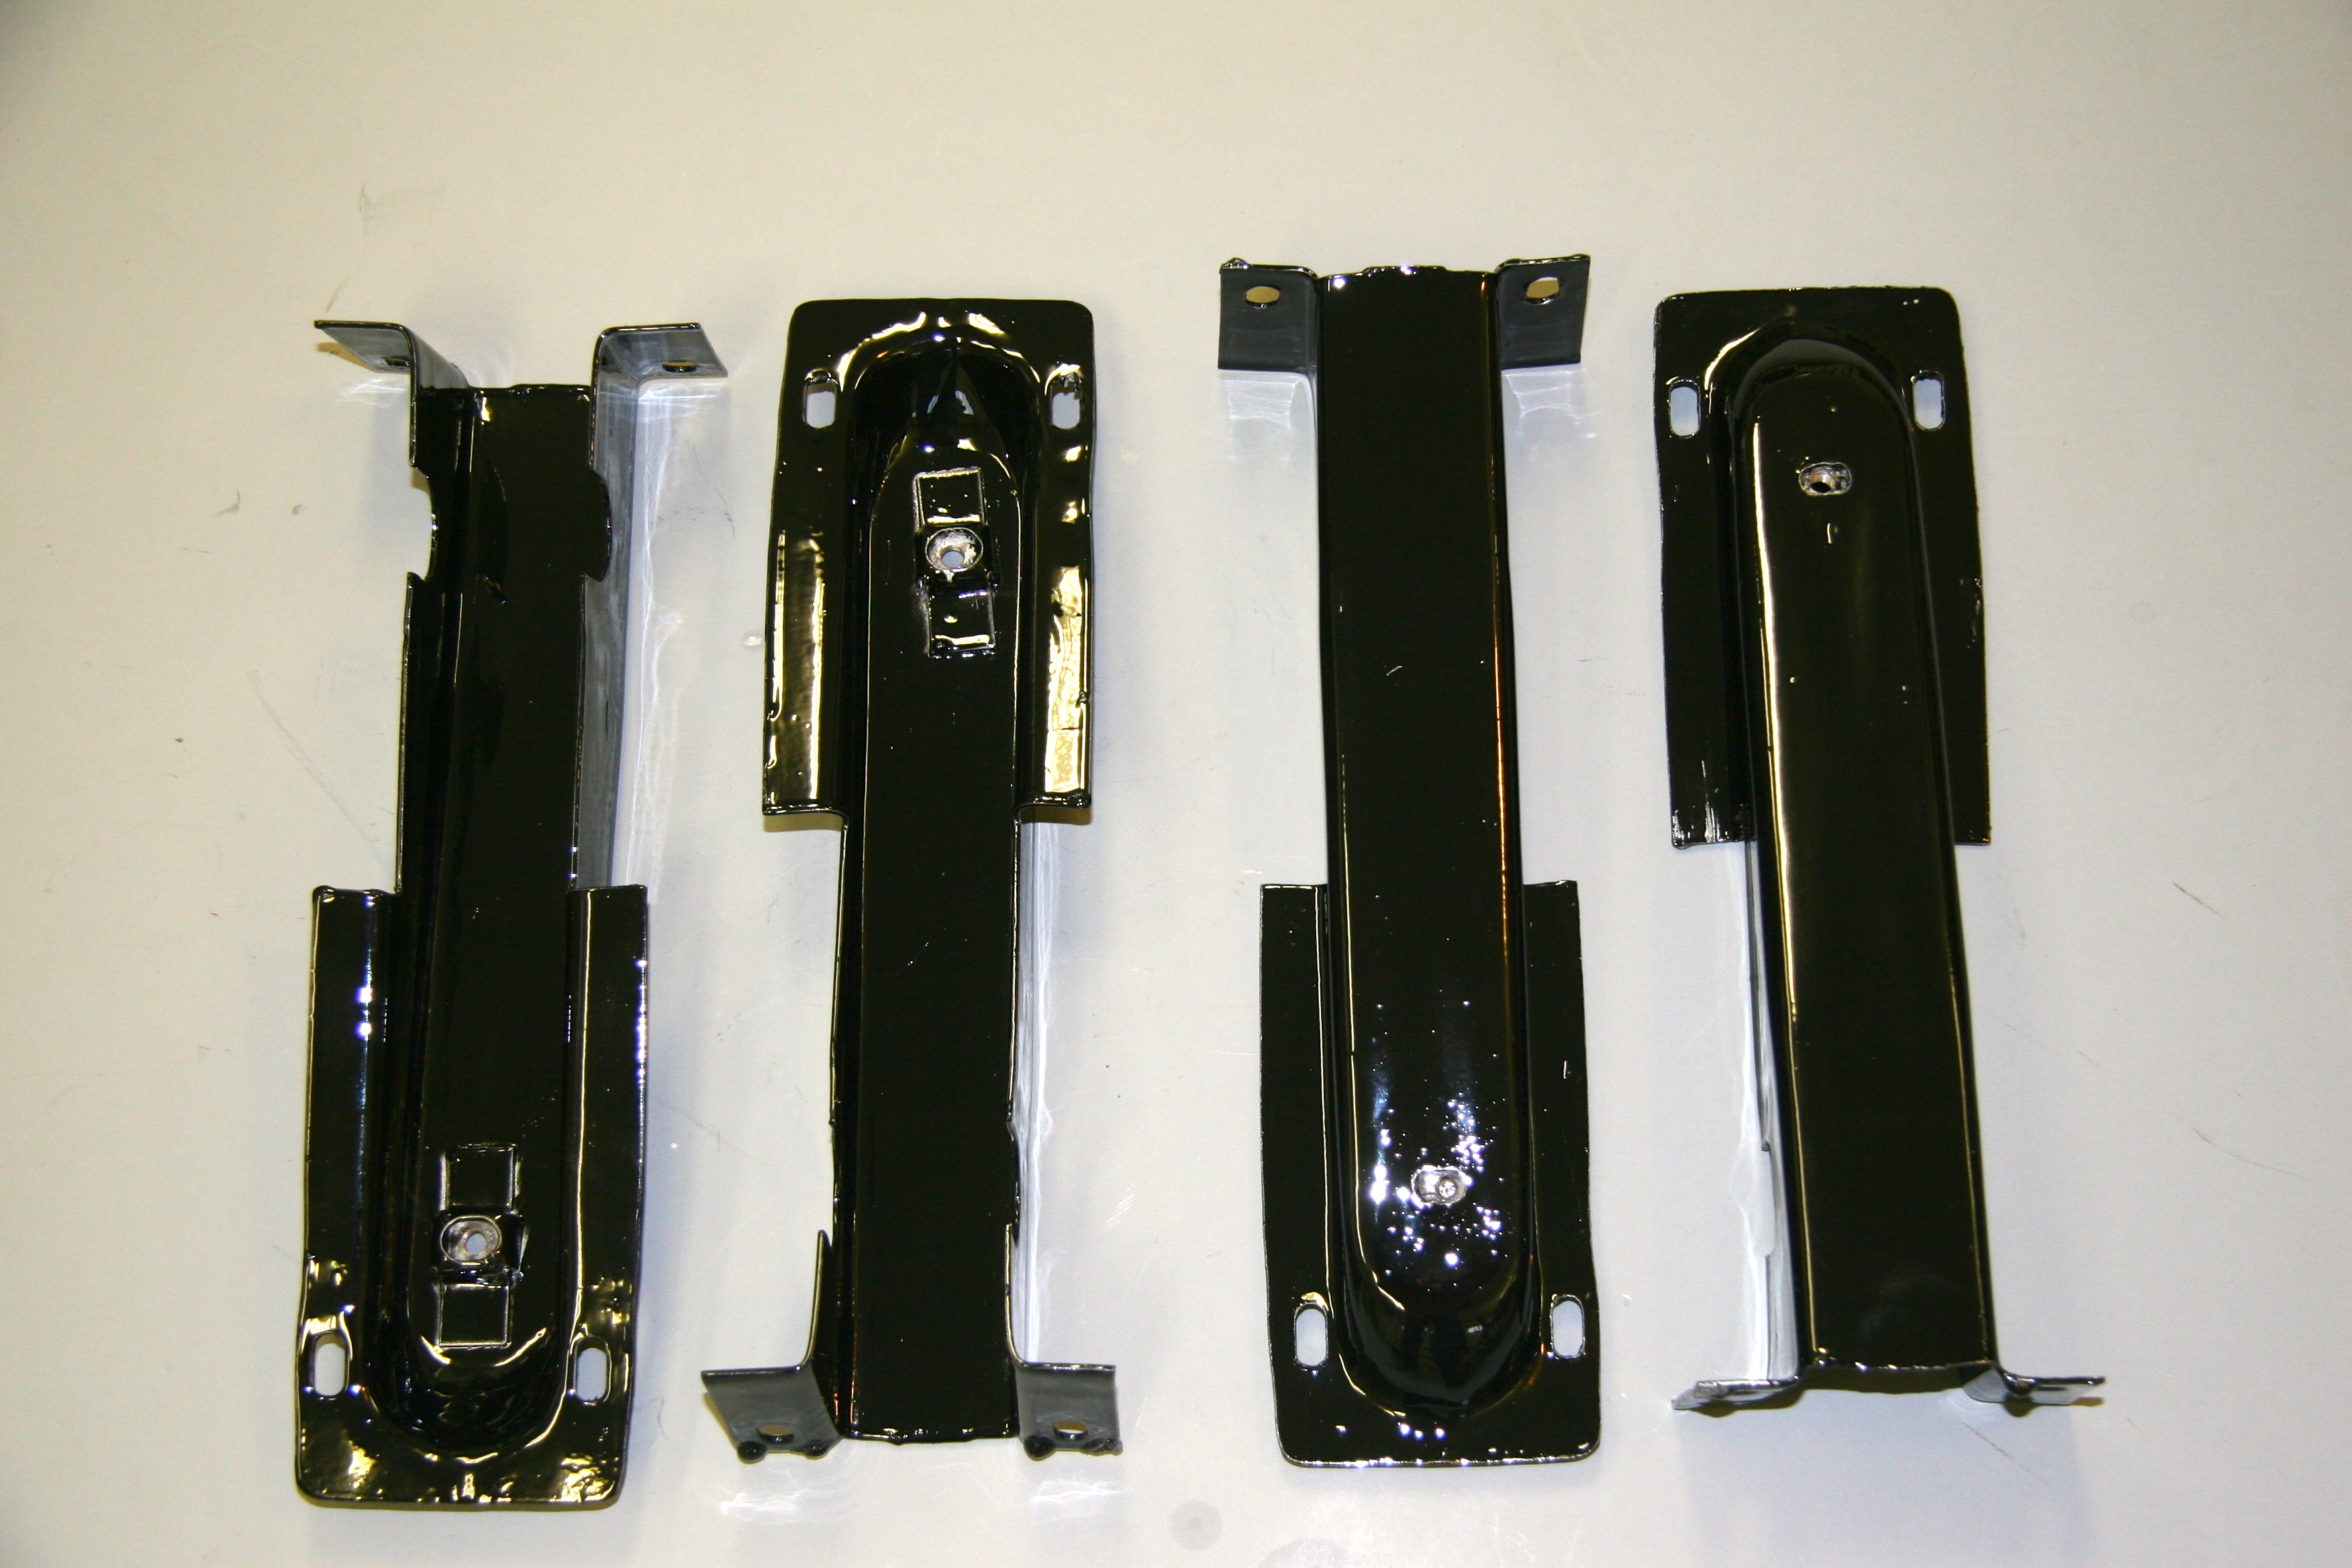
Seat Supports Painted