Wiper Motor Refurbishment & Intermittent Controller

Wiper Motor


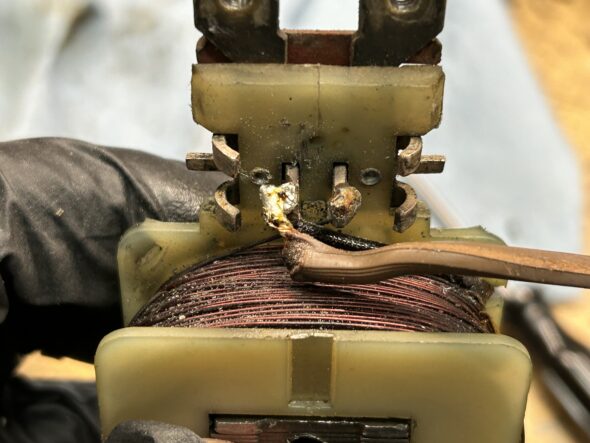
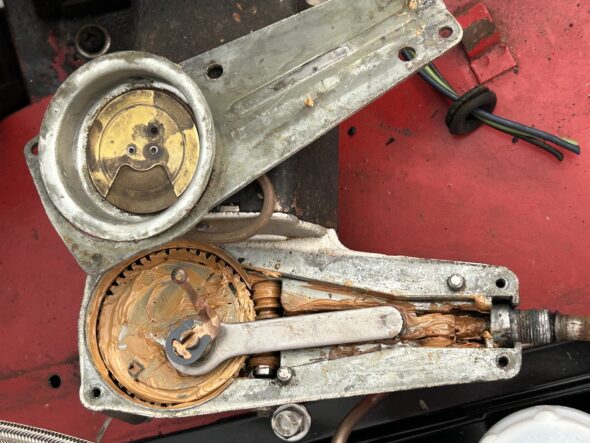
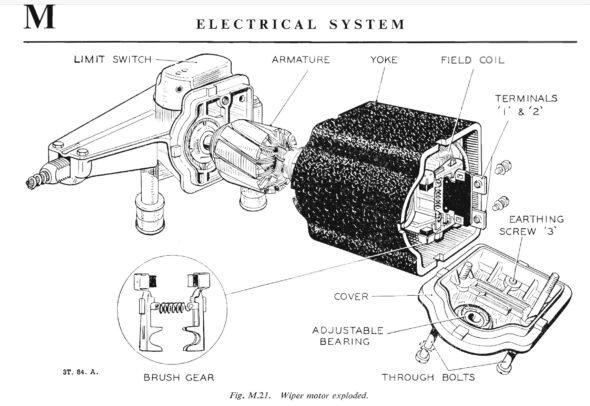
The wiper motor, as taken from the car, turned out to be pretty dirty and it did not operate.

Wiper Motor

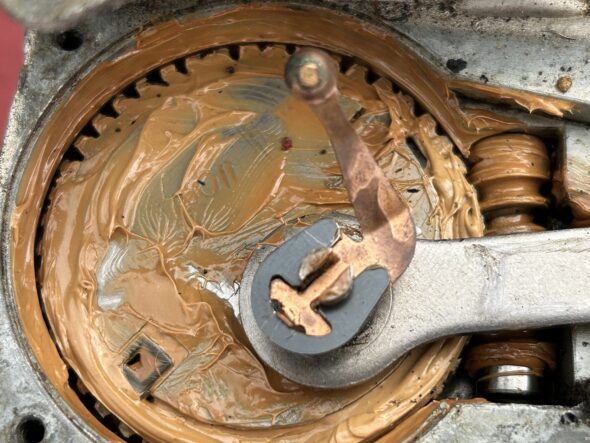
Rotating Arm & Gear

Time for a clean-up

It appears to be the original motor as the casing has a stamped production date of 12/1958, so just before the car came off the assembly line. We disassembled the motor, gave it a good cleaning, lubricating and painting and after hooking it up to a power source we judged it to be operational and good for continued use in the Bugeye!

Video Episode Forty-one details the motor refurbishment process:

https://vimeo.com/822229818/8c4114ef7f?share=copy

The motor is only one speed – slow. The same wiper motor was used in the Big Healey and we decided to add the same intermittent speed controller that my Dad incorporated in  the 3000. It doesn’t make the motor any faster, but it does greatly improve the operation of the wipers in misty conditions.

Intermittent Wiper Control

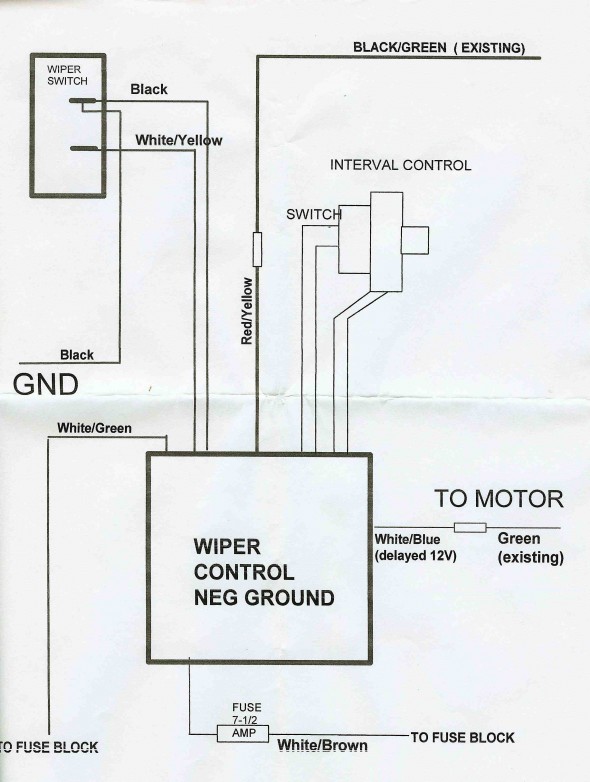
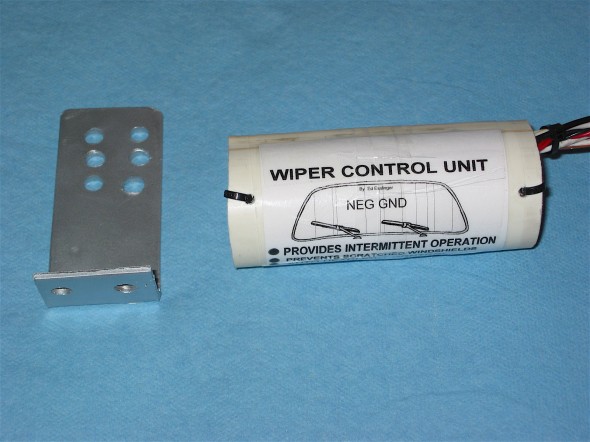
Ed Esslinger authored an article on a Sunbeam Tiger web site about a kit he put together to provide unlimited variable control of the speed of the Lucas wiper motor. We will probably install the control knob for the variable speed rheostat on the vertical panel that will be created later to fit between the dash and the gearbox tunnel.  The controller electronics will be hid behind the panel. The kit can even be wired to accommodate most state laws that now require your lights to be on when the wipers are functioning! The lights come on automatically. This is the instruction sheet: Wiper Control and a wiring diagram:

Wiper Control Diagram

Wiper Control Diagram

Intermittent Wiper Kit

Intermittent Wiper Kit

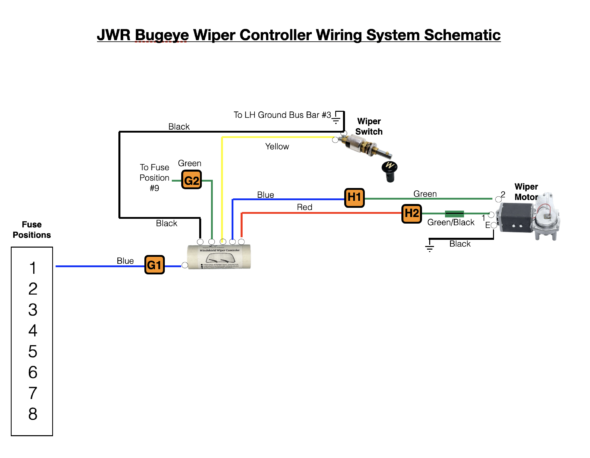
The following image illustrates the actual wiring in the Bugeye using the Classic Technologies Relay/Fuse Box:

 

Exterior Lighting

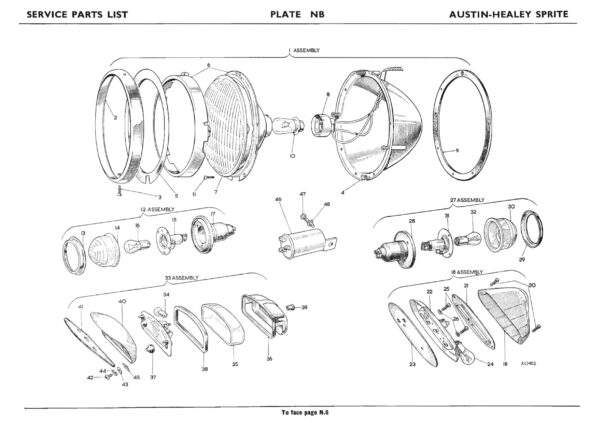
This post covers the restoration and/or replacement of the lighting fixtures of the Bugeye Sprite. The image below taken from the Sprite Service Parts List illustrates the components of the car’s lighting system:

Bugeye Lighting

The Bugeye Restoration Video Episode Forty (link below) covers our restoration efforts. Where parts were perished, such as rubber seals, they were replaced with new items. However, some original parts were cleaned and repainted to continue their service.

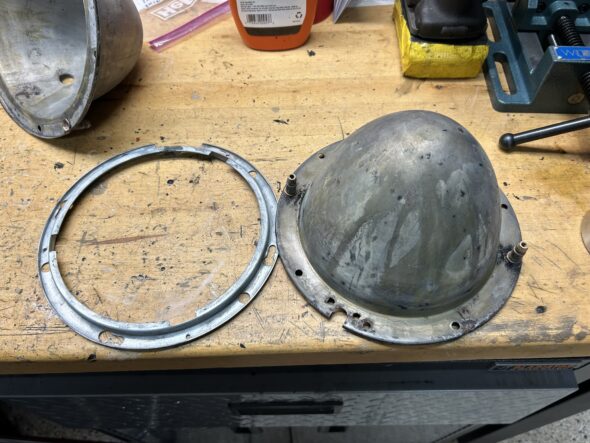
Headlight bowl and mounting ring

Light bulbs in the flashers (turn signals) were replaced with LED units. These are much brighter, consume lower amperage, and produce less heat. This requires replacing the flasher relay can with a substitute suited for LEDs. 

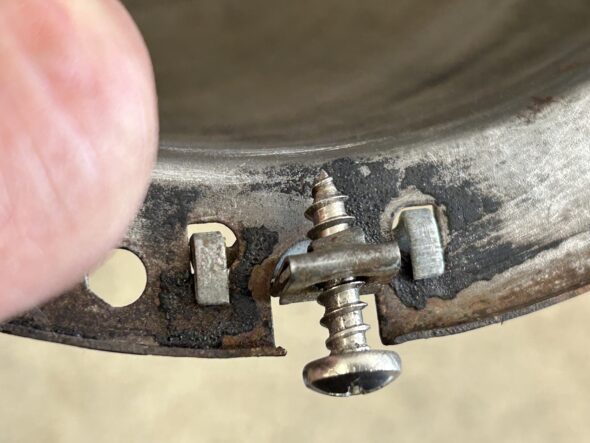
The headlight chrome rims are secured to the headlight bowl with a clip and screw as seen below:

Headlight Trim ring securing screw clip

These screws can be a challenge to mount. MGBs used a spring clip instead of the screw clip. We substituted these spring tension clips and hopefully they will work well. We can always go back to the original approach.

With all of the parts refurbished and accumulated we are now ready for installation at a later date.

Restoration Video Episode Forty:

https://vimeo.com/821030670/8c6841c388?share=copy

Episode Forty includes the following content:

0:00 – Headlight assembly

2:50 – Front sidelights/flashers

3:04 – Rear flashers

3:13 – Number plate lamp

3:31 – Rear tail lights

3:46 – New rubber seals, headlight pigtails, plinth seal, dust seals, spire nuts

5:20 – Trim ring spring clips

Bonnet Wiring Harness and Lights Removal

My car has been modified to convert the bonnet from the original hinge at the rear, opening from the front, to a front hinge opening at the rear. This is a common modification and it does offer much greater and easier access to the engine and other under-bonnet components. I want to be able to quickly and completely remove the bonnet from the car if the need arises and this means that the wiring harness that services the electrical needs of the front of the car must provide for an electrical connector joining the primary system to the bonnet.

The bonnet includes the LH and RH combined side and flasher lights, the LH and RH main beam headlight, and the LH and RH high beam headlight. 

Video Episode Thirty-nine details the removal of the wiring harness and the lights:

https://vimeo.com/817788749/594dff6323

Episode Thirty-nine includes the following content:

0:00 – Removing the bonnet electrics

0:40 – Wiring harness splice with connector

0:50 – Harness routing in the bonnet

1:27 – RH sidelight/flasher removal

2:00 – Headlight components and trim ring fixing

3:00 – Headlight plug to bulb

3:37 – Headlight bucket and seal removal

3:59 – Headlight alignment adjusters

4:58 – Harness routing

5:07 – LH side light and flasher

5:32 – Wiring harness removed


Electrical System Deconstruction

We will be completely replacing the wiring in the Bugeye with new materials including a new relay/fuse panel sourced from Classic Technologies. Before we can give attention to the “new” going in, the “old” must come out. Just to help with resolving any wiring issues later, we will be disciplined in the removal with video and written documentation of how things are installed. What is coming out of the car is not original, in fact, it is not even a professionally produced harness. The previous owner built his own harness which while not very elegant did seem to function effectively.

There is quite a lot of work involved in removing and documenting and the process took several days. The links for a three-part video series are provided below along with a sequential index of video content for each.

Bugeye Restoration Video Episode Thirty-six may be found here: https://vimeo.com/814019363/4c3a30ee20

Episode Thirty-six includes the following content:

0:00 – Heater blower switch

1:29 – Windscreen washer

2:12 – Dash Steady bracket

2:40 – Wiper switch

2:52 – Wiper motor

2:56 – Rheostat knob for tachometer and speedometer lamps

3:04 – LH forward kick panel removal

4:30 – Dipper switch

4:57 – Panel lamp switch

5:10 – Flasher warning lamp

5:40 – Tach wiring to ignition coil

5:50 – Radiator fan toggle switch

5:57 – Ignition/Lighting switch

6:27 – Start pull knob to solenoid

6:42 – Choke cable

7:05 – Water tem/oil pressure gauge

7:35 – Water temp gauge capillary tube

8:28 – Horn push button wire

9:24 – Starter cable and grab handle

9:45 – Choke cable removal

9:49 – Steering column dash collar removal

10:19 – Bare dash fascia

Bugeye Restoration Video Episode Thirty-seven may be found here:

https://vimeo.com/814045832/a23ed5228f

Episode Thirty-seven includes the following content:

0:00 – Wiring harness to dipper switch

1:18 – Ignition/Lighting Switch red wiring to front, rear and panel lights

1:46 – Wiring harness to the rear of the car

2:18 – Dipper switch wiring connections

2:26 – Wiper Switch

3:34 – Speedometer high beam warning lamp

5:00 – Gauge lamps ground wires

5:10 – High beams headlight wires

5:42 – Ground wire for gauges and front lights

6:57 – Windscreen washer wiring assembly

7:08 – Modification of dipper switch bracket

8:25 – Panel lamp switch wiring

10:20 – “A” terminal of Ignition/Lighting switch wiring to starter solenoid and fuse panel

Bugeye Restoration Video Episode Thirty-eight may be found here:

https://vimeo.com/814076642/7844f4f2b5

Episode Thirty-eight includes the following content:

0:00 – Boot side panel removal

0:19 – Electrical fixtures at the rear of the car

0:42 – RH tail light

1:20 – RH tail light wires

1:40 – LH tail light wires

1:50 – Flasher lights

2:39 – Number plate light

3:10 – Number plate plinth and light

3:40 – Number plate light wiring

4:25 – Wiring harness to the rear of the car

5:45 – Fuel gauge wiring

6:42 – Flasher warning indicator

7:00 – Flasher canister

7:18 – Flasher audible alarm wiring

8:20 – Flasher switch

8:42 – Flasher canister wiring (again)

9:28 – Horn relay

9:58 – Coil wiring

10:08 – Alternator wiring

10:50 -Battery cable to starter solenoid

11:02 – Wiper motor wire